This post is a complete guide, including all markdown commands that you may need to craft an appealing post on steemit.
I remember struggling to find information about how to do certain things on steemit posts. Every time I needed to google about how to center text or how to align an image at steemit
I hope this will be helpful to you and I am also including it at the below link here
Click to jump on a specific theme or scroll down

Headlines
Headlines and sub-headlines are important elements as they show the structure of your post and guide the eye of the reader.
There are two ways to create a headline.
(a) You insert at the start of the row a # symbol. As the number of the hashtag symbol # increases, the headline size decreases.
For instance:
Headline 1
Headline 2
Headline 3
Headline 4
Headline 5
Headline 6
The above are created with this code:
# Headline 1
## Headline 2
### Headline 3
#### Headline 4
##### Headline 5
###### Headline 6
Tips for Headlines (only for H1 & H2)
Instead of adding the #, you can add your title and underneath three dashes or three times the equal sign.
This will be a headline 2
---
This will be a headline 1
===
Tip You can make the headline centered, italic, strikethrough as follows
- centered headline
# <center> Headline here</center>center> - italics headline
#Headline` - Strike through
#Headline& Headline

Text
You can do a number of things with text. One thing you can do when writing an essay on steemit, is justify your text.
Justify Text
<div class="text-justify">
Lorem ipsum dolor sit amet, consectetur adipiscing elit. Nunc eget purus a tortor egestas placerat sit amet vitae sem. Nullam sit amet finibus justo. Donec volutpat ipsum leo. Pellentesque habitant morbi tristique senectus et netus et malesuada fames ac turpis egestas. Suspendisse sit amet dignissim ante.
</div>
The Output will be
(without the justify command > )
Lorem ipsum dolor sit amet, consectetur adipiscing elit. Nunc eget purus a tortor egestas placerat sit amet vitae sem. Nullam sit amet finibus justo. Donec volutpat ipsum leo. Pellentesque habitant morbi tristique senectus et netus et malesuada fames ac turpis egestas.
Align text into two cells
Sometimes you may need to write something in two languages or input it in two different columns.
<div class="pull-right">
TEXT RIGHT Cras pellentesque, diam ut fringilla luctus, massa mauris fringilla magna, sed consequat mi odio in ante.
</div>
TEXT LEFT Cras pellentesque, diam ut fringilla luctus, massa mauris fringilla magna, sed consequat mi odio in ante.
How to center text
You will need to add the <center> text here </center> to align text
How to add Subscript
You can use the <sub> text or number here </sub> to make a text or number appear below the baseline.
H<sub>2</sub>O has as output the H2O
You can also use subscript to write a note in between a text or under a photo / video
How to add SuperScript
You can use the <sup> command for a text to appar above the baseline
A reference goes here<sup>1</sup> has as output >> A reference goes here1
Tip: You can add a clickable link
A reference goes here<sup>[1](https://steemd.com)</sup> has as output >> A reference goes here1

Links
Adding links in our posts is very useful and we often need to do it numerous times.
- When we add a steemit username, along with its
@, the name becomes clickable (leading to the steemit blog page) i.e. @katerinaramm - When we add a link, it is automatically recognized and is clickable i.e.
https://steemit.com/@katerinaramm> > https://steemit.com/@katerinaramm - We can hide a link in a word or phrase, using the below syntax
[this will be an inline link](https://steemit.com/@katerinaramm)transforms to >>
This will be an inline link

Tables
You can create a table in two ways
Easy way to create a table
Copy and paste the below and add as many headers and cells you need.
Header 1 | Header 2
--------- | ----------
Cell 1 | Cell 2
Will have the output >>
| Header 1 | Header 2 |
|---|---|
| Cell 1 | Cell 2 |
Create a table using html
An HTML table is defined with the <table> tag.
Each table row is defined with the <tr> tag. A table header is defined with the <th> tag. By default, table headings are bold and centered. A table data/cell is defined with the <td> tag. source
<table>
<tr>
<th> header 1 </th> <th> header 2 </th>
<tr>
<td> cell 1 </td> <td> cell 2 </td>
</tr>
<tr>
<td> cell 3 </td> <td> cell 4</td>
</tr>
</table>
The output of the above code will be
| header 1 | header 2 |
|---|---|
| cell 1 | cell 2 |
| cell 3 | cell 4 |
Tips
- You can add cells by adding
<td>and</td>and the in between syntax - You can add extra rows by adding
<tr>&</tr> - If you wish to add an inline link you need to use the
<a href="link">title</a> - If you use inline images, make sure that they have correct and similar dimensions, so that they can look orderly put.
- You can use inline commands such as center, headlines, etc.
Code
Adding Code in a post is sometimes necessary, it works in the below two ways:
a. Adding one back-tick (`) before and one after the markdown syntax
**using bold syntax** >> using bold syntax
or b. you can use <code> before and after the command </code> at the end of the word/sentence
<code> *hello* </code> output will be >> hello
You can read more info here
Quotes - Blockquotes
We often need to write a quote, a phrase that someone said or wrote.
That is when we use the > in front of the sentence
Blockquotes with > for something that someone has written/said
> “Any fool can know. The point is to understand.”
― Albert Einstein
“Any fool can know. The point is to understand.”
― Albert Einstein
Line Break
There are sometimes that we need an extra line break between text.
We can use the <br> to include an extra line space

Videos
We often need to insert videos or gifs in our posts.
YouTube videos are instantly embedded, so if you put a link it appear in text. If in any way it interferes with text or images, you can put ruler before and after it.
Gifs are also embeddable, just put the link and you can even center them with the <center> command
https://media.tenor.com/images/917de53340b903bb7c142031b411593e/tenor.gif

Tip: You need to find the url that finishes in .gif
DTube can be embedded but requires some more time than YouTube.
Scenario a: When you upload a dtube video, it automatically is embedded in your steemit post.
It also shows the link to the youtube video and to the screenshot.
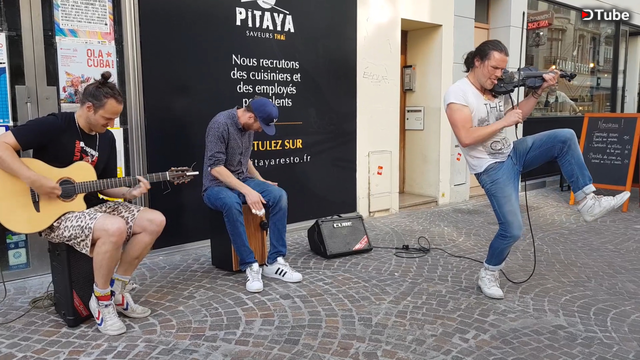
For instance: https://steemit.com/music/@thetroublenotes/ap0ofmc6

These are both the links we will need + use (the dtube link and screenshot used)
If you already have the above information, you can upload the video using this code:
<center><a href='https://d.tube/#!/v/thetroublenotes/ap0ofmc6'><img src='https://ipfs.io/ipfs/QmNnrP6KnhTHqFAfwt8CnB6XeRHfMZ5Qj2ngyT7dgt2UwP'></a></center>
(output)
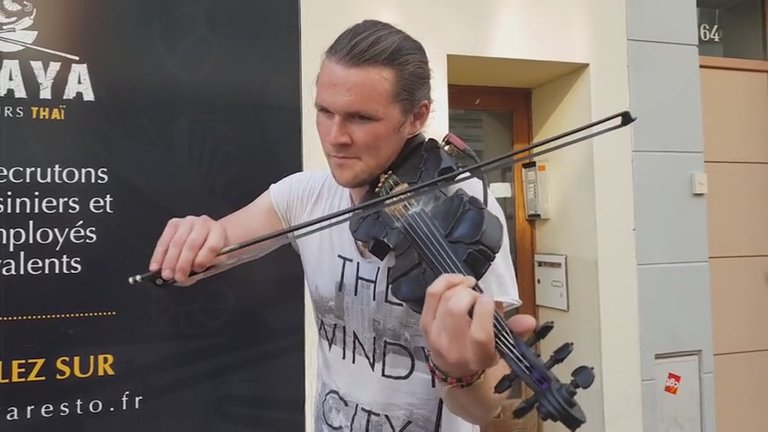
Scenario B You do not have a steemit link where the dtube video is located, but you do have the dtube link. (i.e.
)You right click on the video and click on 'save snapshot' After you select folder, you upload it as a normal photo on steemit and you insert the following code (similar as above)
<center><a href='https://d.tube/#!/v/thetroublenotes/ap0ofmc6'><img src='https://cdn.steemitimages.com/DQmYc7f5HaZhZC1tnofBByafrCrq7dC2x4CbjskYkJvWguC/QmdkNq6R6yvrxN6kvQDVnCHqqqHyoWHtbzysNGdVyitLob.jpg'></a></center>
the output will be
ps The positive with this way is that you can select your own favorite shot!
Ruler
If you wish to separate a theme you can upload a ruler or you can use at the beginning of the line 3 dashes, 3 stars or 3 equal signs
--- or *** or ===
Images
How to align images
You can align your images at the center, at the left or right side.
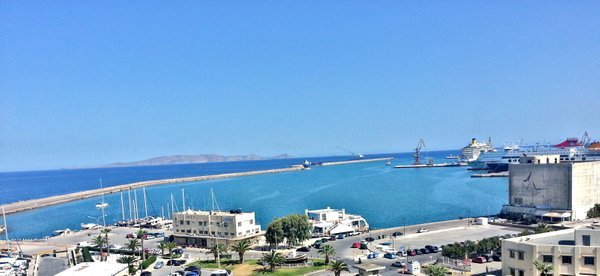
Align left
<div class="pull-left">
https://cdn.steemitimages.com/DQmbFjWmi4mxw5AXo9BjVNvobWGc5fmAQyxvhR8S3s4QMtf/20180312_114323.jpg
</div>
text below
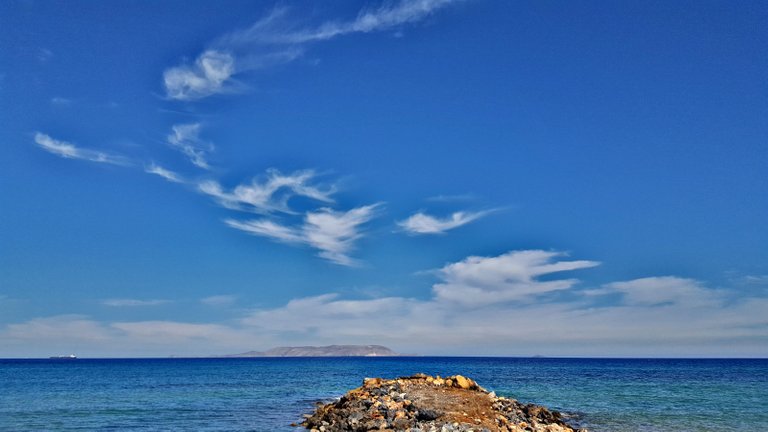
If you align the image to the left, the text will go to the right
This will also reduce the image's dimensions by 1/2
More text can go here
And more
And more...
Align right
<div class="pull-right">
https://cdn.steemitimages.com/DQmbFjWmi4mxw5AXo9BjVNvobWGc5fmAQyxvhR8S3s4QMtf/20180312_114323.jpg
</div>
text below
If you align the image to the right, the text will go to the left
This will also reduce the image's dimensions by 1/2
More text can go here
And more
And more... ----
Align center
<center>https://cdn.steemitimages.com/DQmbFjWmi4mxw5AXo9BjVNvobWGc5fmAQyxvhR8S3s4QMtf/20180312_114323.jpg</center>
A simple and elegant way to insert link + caption under the aligned image
(with the help of @mobbs & @noble-noah)
<div class="pull-left"><center>https://cdn.steemitimages.com/DQmbFjWmi4mxw5AXo9BjVNvobWGc5fmAQyxvhR8S3s4QMtf/20180312_114323.jpg<sub><a href="https://www.steemit.com">LINK NAME</a></sub></center></div>
OUTPUT
and some text goes here
and some more
How can I make my image clickable (to open into a new, bigger version of my image?)
STEP 1. You upload both images (big + small dimension)


STEP 2. You remove the 
STEP 3. You add the code as:
<center><a href="https://cdn.steemitimages.com/DQmXMrYxPPVCRN4SMyHzd3KFrNjmzdURQnLoh6yoscrN8Fx/500500.jpg"><img src="https://cdn.steemitimages.com/DQmYHaS3cTTweaGZNvyeLksCjZ1oXHE3uc7ziBDeBLWBs2P/244.jpg"></a></center>

How to scale down an image on steemit
It is usually best if you have resized your image before you upload it on stemit. However sometimes we have no time or it is not possible. That is when you can resize it directly on steemit.
STEP 1. You upload the image
The code will look like this

STEP 2. You leave only the main image (without the alt text and the parenthesis)
https://cdn.steemitimages.com/DQmeNf3mCmKEGR2mmF2jRxS55oExBc398GSgLEzsg6ex7eK/20180127_094041.jpg
STEP 3: You copy the https://steemitimages.com and add to it /0x0/ so it will become https://steemitimages.com/0x0/
STEP 4. You paste it on the start point of your photo so that it will look like this
https://steemitimages.com/0x0/https://cdn.steemitimages.com/DQmeNf3mCmKEGR2mmF2jRxS55oExBc398GSgLEzsg6ex7eK/20180127_094041.jpg
STEP 5. You are ready to reduce your image! Input the number of pixels you want in the first or the second 0 place holder. This will result to a scale down of the image in the desired dimensions.
EXAMPLE

https://cdn.steemitimages.com/DQmeNf3mCmKEGR2mmF2jRxS55oExBc398GSgLEzsg6ex7eK/20180127_094041.jpg
This image has a height of 600
https://steemitimages.com/600x0/https://cdn.steemitimages.com/DQmeNf3mCmKEGR2mmF2jRxS55oExBc398GSgLEzsg6ex7eK/20180127_094041.jpg
https://steemitimages.com/0x100/https://cdn.steemitimages.com/DQmeNf3mCmKEGR2mmF2jRxS55oExBc398GSgLEzsg6ex7eK/20180127_094041.jpgNote Copyright is very important when it comes to images. If you are unsure about which images to use and how to find the best ones, click here
Bonus
Sometimes we see something on a post and we wonder .. How did he do it!?
It is possible to see the code in every steemit post, all we need to do is replace the (it) with (d) in the url.
For instance my post: https://steemit.com/steemit/@katerinaramm/make-the-most-out-of-steemit-a-personal-approach-by-katerinaramm
would become https://steemd.com/steemit/@katerinaramm/make-the-most-out-of-steemit-a-personal-approach-by-katerinaramm
If you replace it with d you see this image:
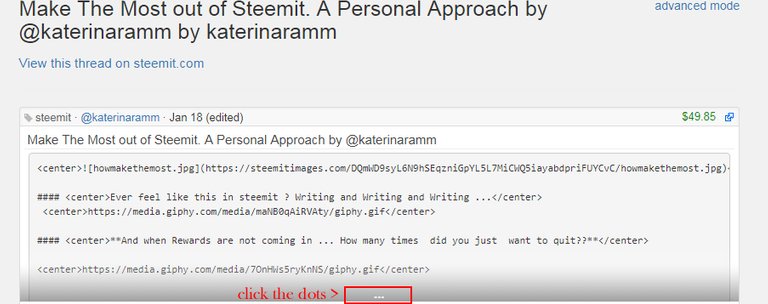
You can click the three dots to open the whole text and see the code.
Addition by @mathowl (thanks!)
If you see some kind of layout in a post and have no idea how to replicate it then you can just access the webpage source in your browser (right mouse click on webpage -> view page source or inspect element) and copy paste what you need :)

Very interesting - I will try to learn what you explain!
See @mobbs is not the only one that can write red :)
That's fishy ;)
or phishy :)
most will never know.
Hmmmm, how do I write in red?
hehe, why would you do that? It was supposed to be a top secret!
Woow amazing article that could have taken you days to finish it. You're among people who are helping a lot to improve the quality on steemit. I really thank you @katerinaramm, your articles have answered almost all my questions about Markdowns!
Nice post. Maybe as a tiny addition.
Thanks @mathowl!
Actually I have added a bonus section at the end, where the user can see a post's source via steemd.com but I will add your comments as a little extra : )
That is cool, definitely 100% upvote and re Steem on this one:-)
κατερινα....τι αρθραρα ειναι αυτη φιλεναδα???....μπραβο μεσααπ'την καρδια μου σε ευχαριστω πολυ...δε ξερεις απο ποσες δυσκολιες με βγαζεις....ευχαριστωωω
bravo. pragmatika xrisimo
Μου έλειψαν αυτά τα υπέροχα ποστ σου!
Epic post! Great to have all the information condensed here.
You did a very comprehensive work Katerina. I'll save this for future use ☺
Thanks for doing this! Got this one bookmarked :)
wow kate! nice put up. very helpful for everyone.
Thanks for the useful information @katerinaramm!
Very useful!
Thank you!
Thanks for sharing! A link to your post was included in the Steem.center wiki article Tips for formatting your post. Thanks and good luck again!
This thing is super useful, katerina. I'm adding it to bookmark. Thanks for sharing everything under a single post.
Cheers!
Oh wow thank you I need to book mark this post
Wow, lovely, ive been looking forward to sharing this too with friends, im happy you just did.all I have to do now is to resteem it so they can all see.
Resteemed -
This is indeed a very efficient guide. I am definately resteeming it and keeping it to myself for any time I need it. Thanks!
Thank you for this education @katerinaramm.
thanks for the tips. Great job.
Thank you, thank you, thank you! It's awesome having all of this information in one article! Did I mention thank you?
Very useful, thank you for sharing your knowledge.. For sure i will try everything youve shared
Thank you! Going to bookmark this one.
This is quite informative to me @katarinaramm. Thanks for the better enlightment.
Ohhh, this is a great guide, there are some things I didn't know and I'll definitely use on my posts :D
I'll save this post in my favorites list and look for these codes whenever I need them, Thank youu! <3
THIS is AWESOME, really! thanks for sharing it, really! following you right now!
Hi @katerinaramm! Simply, just Wow. :)
Thanks for bringing up this detailed customized article writing code! :)
I have learnt here a lot. It is really a very educative post both for new as well as old Steemians! By the help of these code one can be benefitted by putting extra eye catching presentation! Loved it.. 😊❤
You're a superstar @katerinaramm, well done, following and resteemed. :-D
Thanks a lot! This will help us in beautifying our blog. ^^
Thank you! I am happy it will be useful
You may find this older post interesting too >> Synthesis of a blog post
thanks again, I resteemed this for my reference...^^
Thank you for your wonderful sharing. However, why the ruler does not work? I have tried ===/***/--- Please help :)
Hi, thank you so much for visiting!
Well, the ruler becomes very 'light' so it barely shows. Could it be that you do not notice it?
Please check it below and maybe you would consider creating one to use it?
[1.]Ruler using
---[2.] Ruler using
***[3.] Ruler using
======
(These do not seem to work now)
Please let me know if you have any questions!
aw Thank you. Ok I will try again. I guess I could not use this function next to my text.
What if I want to underline my text?
I believe that underlining is not possible, but I will check it and let you know :)
Thank you. You are very attentive and supportive to me:)!
Posted using Partiko Android
Excelente aporte. Gracias
Thanks for this great post. It's really helpful.
@doraemon526joice :) For your reference
STOPkeep posting quality content!
Thank you for that post. Resteemed. Obama lucky, because I know html do most of things I can make without that shortcuts, but there are some of tham that are smart :)
This really helps me.
Thanks a lot @katerinaramm,
you are so kind.
Great article, really helpful for new users. Thanks.
thank you