There is a lot to find on Steemit about using styles and layout code to make your post look more like a PRO, some are very complete (with a lot of ideas) some only cover one subject. Sometimes it is hard to find on Steemit, so I thought gathering them all into one (for now) complete guide.
The advantages of using a professional looking layout for your posts is that people notice that you are really paying attention to your posts and the ‘look and feel’ of your posts are of good quality what makes it more nice and easy to read.
Different styles and code’s to use
Steemit supports several markup languages (in one or the other way) like HTML tags, Markdown code and (in some cases) Cascading Style Sheets (CSS). Now I am not sure it there is any guide of document which describes which CSS classes (and with which settings) are supported, but I am trying to find out as we speak.
They all have their advantages and disadvantages in options and usability. In some situations you have to use a mix of them to get to the desired result. I will try to point that out in this post for the particular situations.
Text markups
Most posts (of course) consist of different kind of texts, for instance:
- Explanations
- Stories
- Lines of code
Each and every one of them could ask different requirements in presentation. So there are some possibilities to change this to your needs.
Headers
You can make or use headers to divide your post into blocks or chapters. There are several formats you can use, depending on your needs or goals. You can use the default HTML tag or the markdown tag.
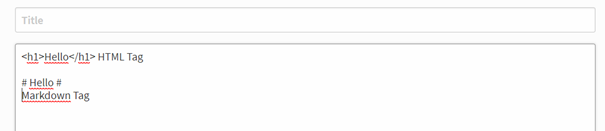
As you see there is a difference in notation and in result. Because with the HTML tag you really close the tag ( ) and start writing right after the tag, with the markdown tag you can’t , if you do so the text will stay in header format, look what in mean in the next example:
As you can see is the text “Markdown Tag” also in header layout.
When you use the HTML tag you can adjust the size of the header text by changing the number for it:

When you use the Markdown tag you can adjust the size of the header text by changing the amount of #.

Bold and italic
Sometimes it comes in handy to make an accent on a word or a line of text. You can achieve this by putting the word in italic, bold, or in bold-italic. This can be done in the editor
When you use HTML tags to put the text in bold, italic or both you use:

When you use Markdown tags to put the text in bold, italic or both you use:

Justify text
Sometimes it can be more cosmetic better to justify the text across the textarea, to fill the space all with the text. You can use a DIV to accomplish this, use the next code:

Code line
Often , especially on programmer sites, you see code examples written down in a different textbox. In that way you see that it is about code and you are able to copy from the textbox.
To achieve this all you have to do is put the text you want to show in code view between the code tags:

This text is put between the code line
Centering images and text
In some occasions it is desirable to have the text or images aligned in the center of the post. With lyrics, a poem or quotes for instance. This is easily done by using the center tag.

Bulleting text
When you want to format lists for a certain purpose, a list of items for instance, you can make a bulleted list. You can make a list with bullets or with numbers, when you want to publish a top ten of some kind.
For bullets you can use the “-“ sign, for numbers you can just use a number.
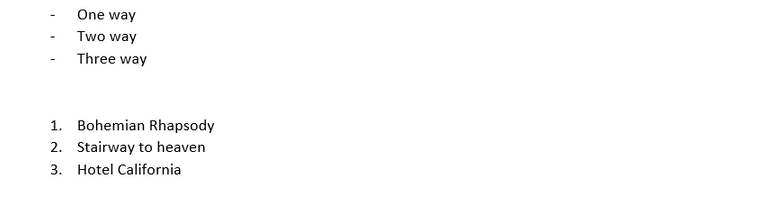
- One way
- Two way
- Three way
- Bohemian Rhapsody
- Stairway to heaven
- Hotel California
Using blockquotes
When you want to show a separate quote you can use a blockquote to remark the text with a vertical line on the left.

a quote of the day for instance, you can perfectly put this in a quote block.
Horizontal line
A horizontal line can divide your post in a nice and clean manner, this is easily done by using three underscores “___”
Images sizes
A lot of people use nice images in their posts. The default of Steemit only shows the images in the original size. In some occasions you perhaps want to show them a bit smaller or bigger.
When you upload a picture in Steemit you get an URL like this

First of all you have to remove the ‘slack’ from the URL

After that copy the piece of the URL “https://steemitimages.com and paste it in front of the existing URL.


Now you can add the format that you want the image to have at the end of the first URL like:
https://steemitimages.com/300X0
The /300x0 are the dimensions for the image (heightXwidth) only I have noticed that that doesn’t work correct with both at the same time, so I use only one of both. It does adjust the image, but take a look for yourself if it’s works for you. You can of course experiment with it.
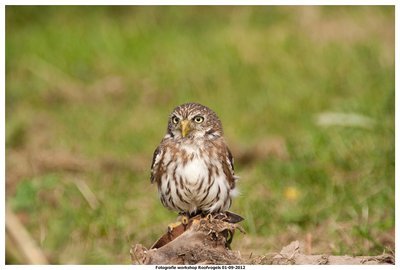
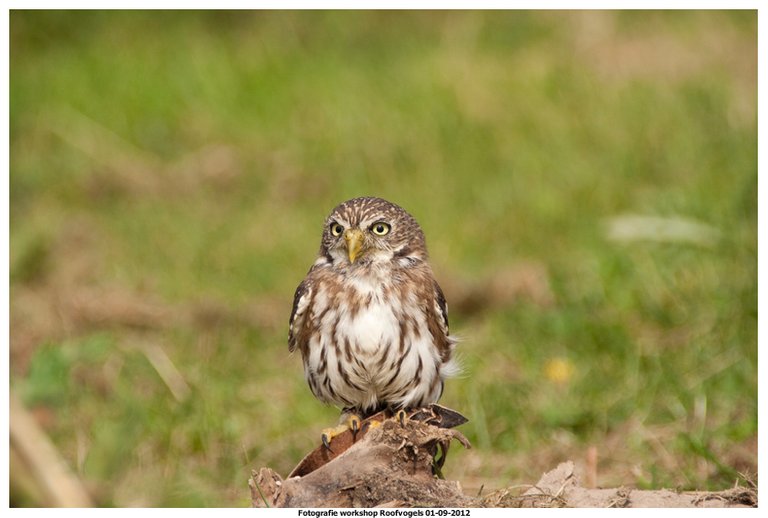
In the next example you see the extra added dimensions in the first URL and you see the result of it. That’s all that is to it… So try it, enjoy it and use it where you need is. At the bottom of this post you see one picture in different sizes….


Floating page layout
For an example of what I mean see the next picture:
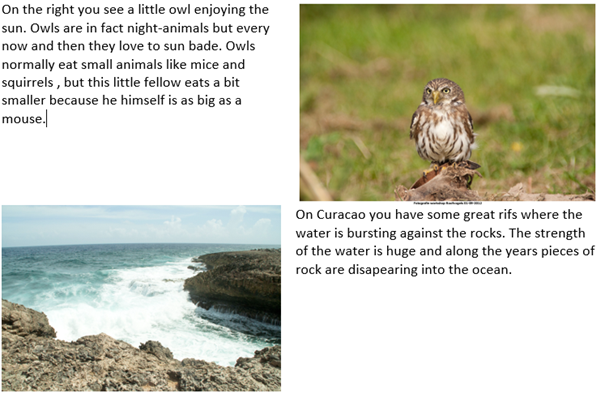
I thought it would be much cooler if you could format your Steemit post a bit more to really look like a professional writer 😊 So I started to look and test if this was possible. I found and old post on Steemit from @primus where he (2 years ago) explained how you can make content floating posts like the one above. Of course Steemit has developed itself very rapidly so I didn’t knew if the proposed solution still works, so I tried it, and indeed it still works. You have to use an predefined DIV tag for it.
A DIV defines a division or a section in an HTML document and is often used with CSS. I don’t want to go to much in detail (because it must stay easy to use and understand) but a DIV can be used to group a set of display settings for a website like background color, hight of a page and the used font.|
The next line of code is used to achieve the desired result.

The only thing that has to be put in another way, is the link for the image. Normally I just copy an image and paste it into the Steemit editor and voila there is the image, you then get a link in the editor like:

But to use this properly you have to use the IMG tag:

You have to reformat the link also before you put it in the IMG tag.

You have to remove everything before the HTTPS and the last bracket, and what is left :

You put between the src tag:

Now you have the right formatting to show the image.
If you then format the text as:

The result would be:
And to put it the opposite (image right, text left) the code is:

If there are layout challenges you want to see solved, you can leave them in the comments and I will have a look if I can come up with a solution to it. Of course resteem this post to all your followers who perhaps can have a advantage from it... I will appreciate it of course. Thanks for reading, it was all my pleasure.
I was searching for the floating image layout for like 2 weeks and finally I am in the right place. Thank you for sharing this styling guide. Post layout style plays a big role to get the attention of the readers.
It's my pleasure. Visualisation of posts can indeed be important. So I am glad I could help, we are here to help on and another aren't we :) Have a great day !!
Finally, I can write my post like a Pro. Thanks @verhp11. I can't wait to show my newbie friends this post.
All my pleasure !! Thank you for your reply !
Resteemed this post for future reference. You just summarized some of the most important formatting concepts that I need for a 'dapper' looking post.
Thank you very much !! Much appreciated
Thank you sooooo much! Your post is very useful to me! (I’m sure for the community too)
I tried to write the right command for a “flyer style” two weeks ago in a post. I think i could done but i don’t Know how i did it. XD
I will copy this post in my websites marks to have it when i need it again.
I've done it with pleasure, I am glad it's helpfull , have a great day !!
https://steemit.com/morocco/@redotj/how-do-you-know-brain-we-drank-kyf-yarf-dmagh-anna-shrbna
My post
Thank you very much !!