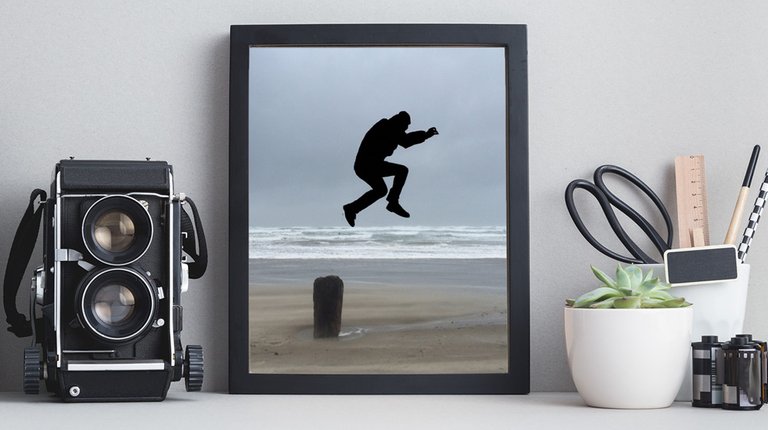
Silhouettes add an artistic effect to photos. You can turn a photo into a graphic silhouette to add drama, or simply make up for poor lighting in a fun and creative way. For this tutorial, we’ll use the Brush tool in Adobe Photoshop Lightroom CC to adjust the subject of a photo so it is in silhouette. Feel free to experiment with the photo provided with this tutorial, or use your own.
WHAT YOU'LL NEED
https://learndownload.adobe.com/pub/learn/lightroom-cc/photograph-silhouette-graphics.zip
Sample file to practice with (ZIP, 988 KB)
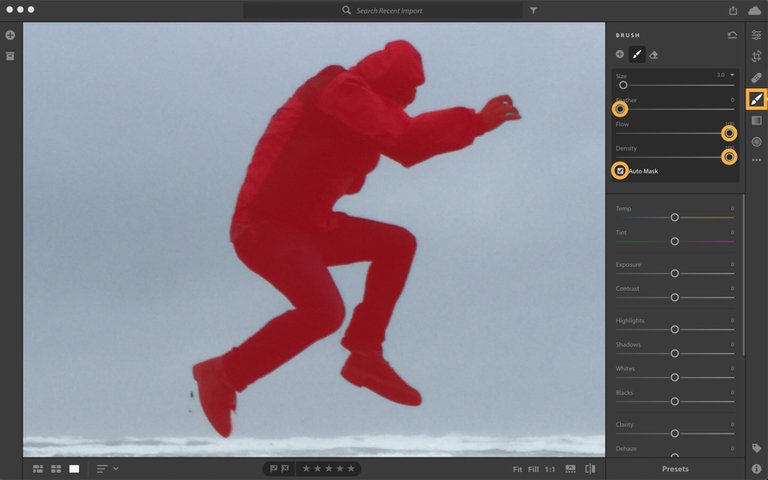
Isolate the subject with Auto Mask
Highlight the person in the photo using the Brush tool with Auto Mask enabled. Auto Mask detects the edges of an object in an image by sampling the colors and tones where you start brushing. This will help you brush over the person without including unintended areas.
Choose the Brush tool and adjust the brush size using the Size slider in the Brush panel. Or, use the shortcut keys — the left bracket key on your keyboard ([) to decrease brush size, or the right bracket key (]) to increase it. In the Brush panel, click the triangle to the right of the Brush slider to view additional brush settings. Check Auto Mask, then press O on your keyboard a few times until the red mask overlay appears and stays enabled, showing where you have brushed. Set Feather to 0 to create a sharper brush for crisper edges. Increase the Flow to apply the brush effect more quickly. Increase the Density to limit the transparency of the effect. Then, brush to paint a mask over the person.
Tip: Hold the spacebar as you move the mouse to pan to different parts of a zoomed-in image.
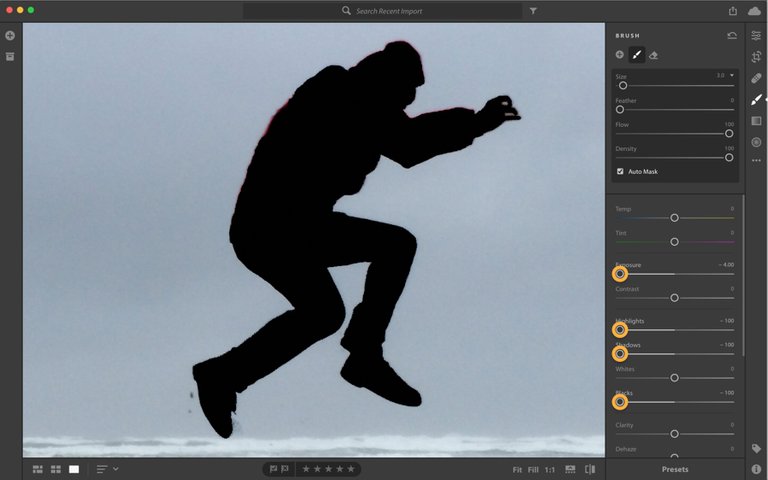
Darken the shape
Use the edit sliders to darken the subject and create a silhouette.
Press O to turn off the red mask overlay so you can see the effects your adjustments have. Adjust sliders to lower the Exposure, Highlights, Shadows, and Blacks.
Sample settings: Exposure: -4.00; Highlights: -100; Shadows: -100; Blacks: -100
Apply the finishing touches
You may need to adjust your silhouette if any areas you wanted brushed were not included with Auto Mask enabled. Click the blue pin where you started the adjustment. Uncheck Auto Mask in the brush settings, and then brush the areas that need refining.
Tip: Mouse over the image and press O to display the blue pin.

You may also need to erase effects of the brush that were accidentally included with Auto Mask enabled. Select the Eraser tool, with Auto Mask enabled, to brush over unintended adjustments.

To edit a previous enhancement, click the blue pin related to the specific edit, and then adjust the sliders as needed. Click the Show/Hide Original toggle at the bottom of the screen. Or, use the shortcut key (/) on your keyboard at any point to switch between the before and after views of the photo...
Source
Plagiarism is the copying & pasting of others work without giving credit to the original author or artist. Plagiarized posts are considered spam.
Spam is discouraged by the community, and may result in action from the cheetah bot.
More information and tips on sharing content.
If you believe this comment is in error, please contact us in #disputes on Discord
Upvoted.
DISCLAIMER: Your post is upvoted based on curation algorithm configured to find good articles e.g. stories, arts, photography, health, etc. This is to reward you (authors) for sharing good content using the Steem platform especially newbies.
If you're a dolphin or whales, and wish not to be included in future selection, please let me know so I can exclude your account. And if you find the upvoted post is inappropriate, FLAG if you must. This will help a better selection of post.
Keep steeming good content.
@Yehey
Posted using https://Steeming.com condenser site.
Hi! I am a robot. I just upvoted you! I found similar content that readers might be interested in:
https://helpx.adobe.com/lightroom-cc/how-to/photograph-silhouette-graphics.html