This tutorial is about Making a basic Arduino experiment on how to make 10 led chaser using Bar graph light display in Arduino, This is a LED Chaser with the simplest code. we can have different LED glowing arrangements, like Knight Rider is kinda famous, you can make it by simply putting the same loop but with descending outputs to try it. so what you can learn on this post is, you can actually make your own Christmas lights:) on your own desired blink in sequence.
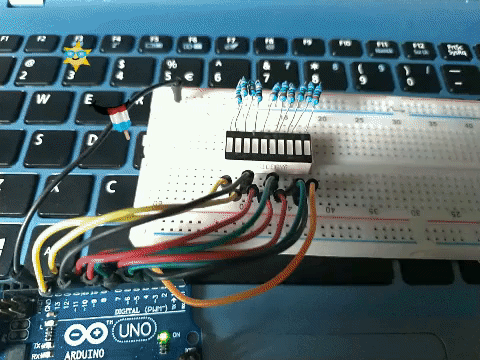
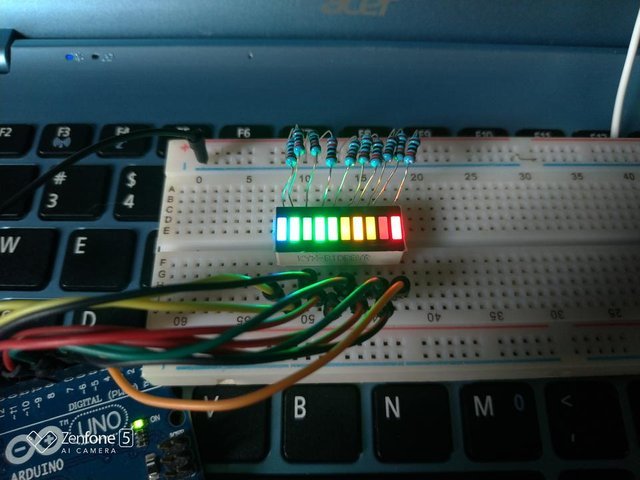
The connection Diagram
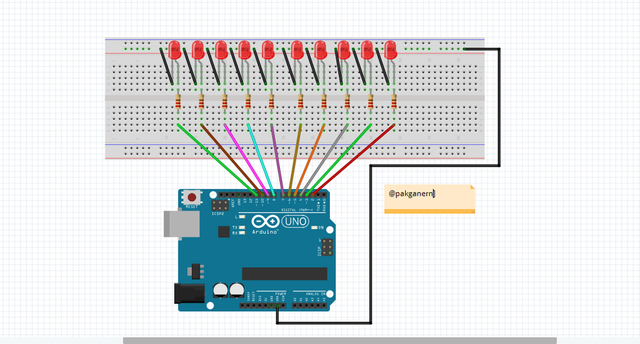
The Bargraph light display uses 10 different colour of LED. each LED has 2 legs the common anode which means its a possitive and the cathode which is the GND or the negative leg. we need to use resistor to limit or we can say it regulates the amount of power that flows into the led, resistor is made from winding Nichrome or similar wire on an insulating form. This component, called a wirewound resistor and it can be able to handle higher currents.
Sketch code
Set /Define Output pins of the LED
void setup(){ // The setup() is called once, or the first booth when the sketch starts.
pinMode(2, OUTPUT); // configured pin as an OUTPUT with pinMode() its voltage will be set to the corresponding value: 5V (or 3.3V on 3.3V boards) for HIGH, 0V (ground) for LOW.
pinMode(3, OUTPUT);
pinMode(4, OUTPUT);
pinMode(5, OUTPUT);
pinMode(6, OUTPUT);
pinMode(7, OUTPUT);
pinMode(8, OUTPUT);
pinMode(9, OUTPUT);
pinMode(10, OUTPUT);
pinMode(11, OUTPUT);
} //  { and } is called the body of setup the function
comment your email below so I will send the loop part of the code
I hope you enjoy this helpful activity if wan to learn how arduino works, and how to make a sketch, then maybe this blog might help you. so thats it, if you want to know and see my future activity follow me! thank you.
nice 👍
thank you po :)