How To Create A Code Layered 3D Desktop Background Using GIMP
A large portion of this video tutorial is typing actual code into the layers of the background. You can skip through this part.
Preparation
Make sure you have the latest version of GIMP open-source image editor. You also want to have an idea of the color scheme you are going for.
Check your desktop background dimensions before beginning your project. Right-Click anywhere on the desktop, select Resolution or Personalize from the drop-down menu. Your screen resolution will be selected already. Your image should match this size ideally.
The Process
Create a new image with your resolution as the dimensions with a white background. Select your desired colors for foreground and background. Using the Gradient tool, choose the shape of your grade and drag your background blend onto the canvas.
For the second layer, create some fog (Filters > Render > Clouds > Fog); select your color and lower the opacity.
Each additional layer will be your text layers and text layer duplicates. Using the Text tool, create some code/psuedocode/anything and shrink the text down. Duplicate each text layer, offsetting the duplicates. Create a darker shade for your duplicate text using Foreground Color box, then Filters > Blur > Blur to give it a distant look.
Now tweak as desired and sign your background. You're done. Save as... to save your project. Export as... to save your image.
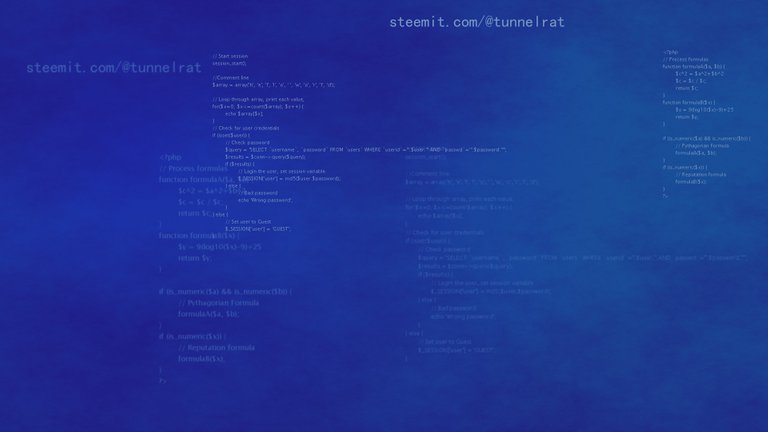 The finished background, you can use it if you want.
P.S. Can you pick out typos in the code? Hint: SQL query. I have rewritten several lines of code after overlooking a typo many times before.

Great report, a fantastic help, thanks @tunnelrat
You're welcome. Working on some more complicated tutorials next. Thanks for the feedback, @oscarps.
This post was resteemed by @resteembot!
Good Luck!
Learn more about the @resteembot project in the introduction post.
Also - check out @reblogger, by reading this post.
Check out the other content resteemed by @resteembot.
Some of it is really cool!
This post has received a 3.06 % upvote from thanks to: @tunnelrat.
For more information, click here!
Congratulations @tunnelrat! You have completed some achievement on Steemit and have been rewarded with new badge(s) :
Click on any badge to view your own Board of Honor on SteemitBoard.
For more information about SteemitBoard, click here
If you no longer want to receive notifications, reply to this comment with the word
STOP