
Hi friends, I have always been here, only in other areas as you have seen, Today we will begin together and little by little to assimilate the learning of the PHP 7 web programming language.
With this PHP 7 publication step by step, I try to facilitate learning for the really new ones in the field, I know that there are many with a very broad knowledge on the subject and the idea is to receive help from them too, in this way to achieve a group of exchange between very novice, novice, intermediate, advanced and master, always in favor of all good always in a framework of respect and patience.
Do not be afraid of the new, everything that adds up is good. We'll start with a little introduction about language, do you think? Now we go to the point.
The programming language was created by Rasmus Lerdorf in 1994, for personal use.
This meets a large number of advantages, placing the language within the first requested for web development, among its qualities we find the powerful, easy to learn, free distribution, allows links to databases and features oriented to networks .
The meaning of PHP is "Hypertext Pre-processor", It was developed punctually for the design of dynamic web pages creating scripts "order file, batch processing file" on the side of the web server. PHP scripts are always inside an HTML document "HyperText Markup Language" where the server interprets and executes them to take the results to the pages seen by the client. This makes the client absent from the process, only the result will be obtained.
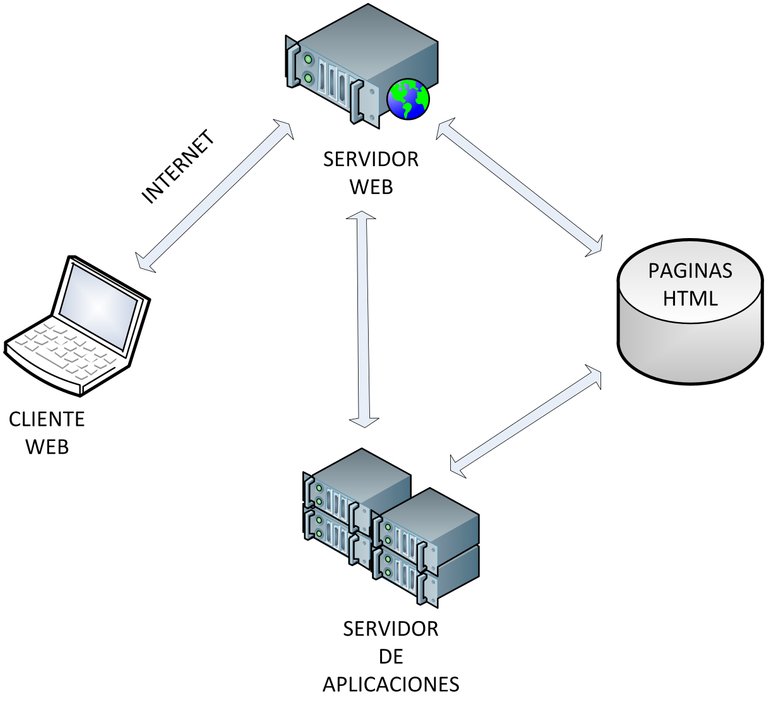 Behavior of the information in the intercommunication between client, web server, application server and HTML page
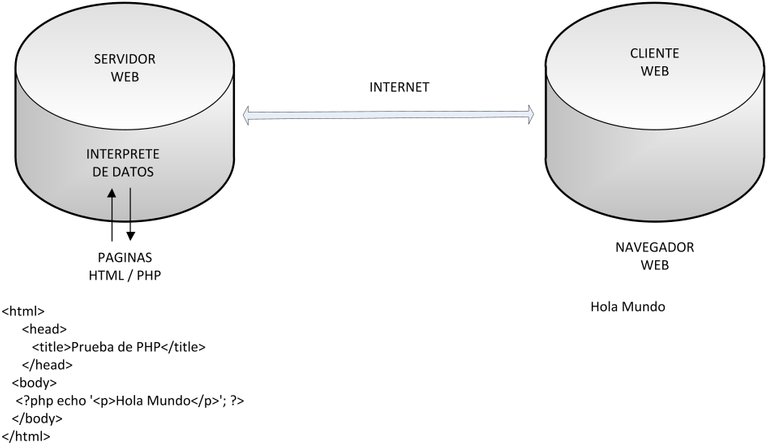 Development at the server level and what the client sees in his browser
In order to work with PHP7 we must first prepare the equipment, for that we will need to install an indispensable component for that.
XAMPP
Version 7.2.8 for Windows
We will also need an editor that facilitates the writing of the language, although there are several of us we will use "Sublime Text 3.0" they are free to use another one with which they can feel comfortable.
 Sublime Text 3.0
SUBLIME TEXT 3.0
Version for Windows
Once the applications that correspond to our operating system have been downloaded, we will proceed to explain the installation process.
 XAMPP Apache + MariaDB + PHP + Perl
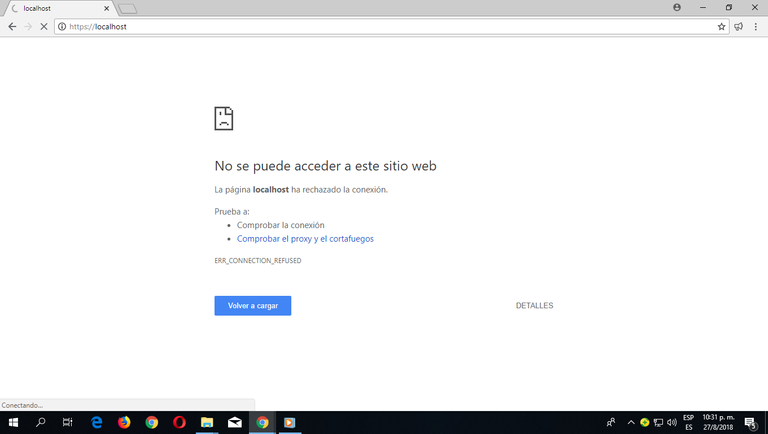
1. We will proceed to verify that no web server is installed or running, for that we will open the browser and write http: // localhost if it is not running, an error page will appear, that is good news and we move on.
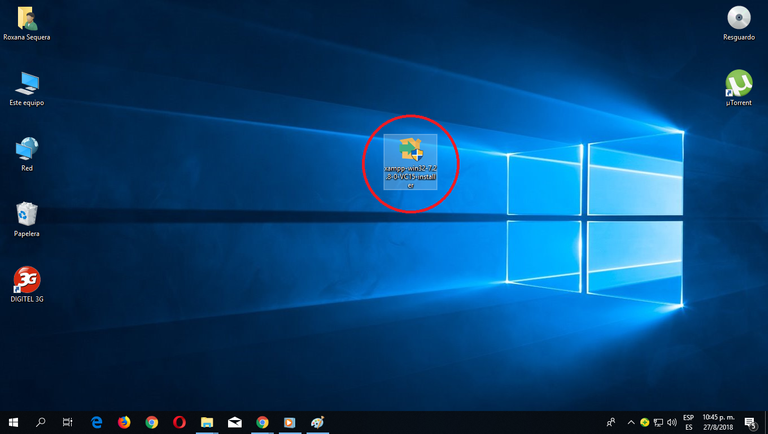
2. we look for the icon of the program that we download in our computer, you can find it in the folder where you asked to be downloaded from the web.
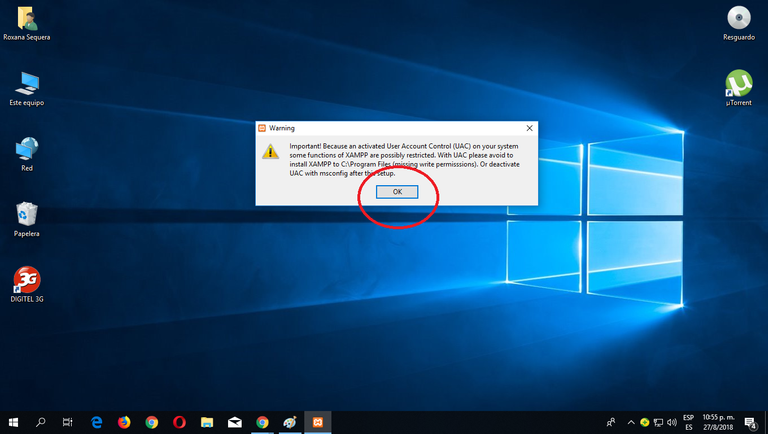
3. The XAMPP installer shows an alert warning that appears if the User Account Control is activated, we give it OK.
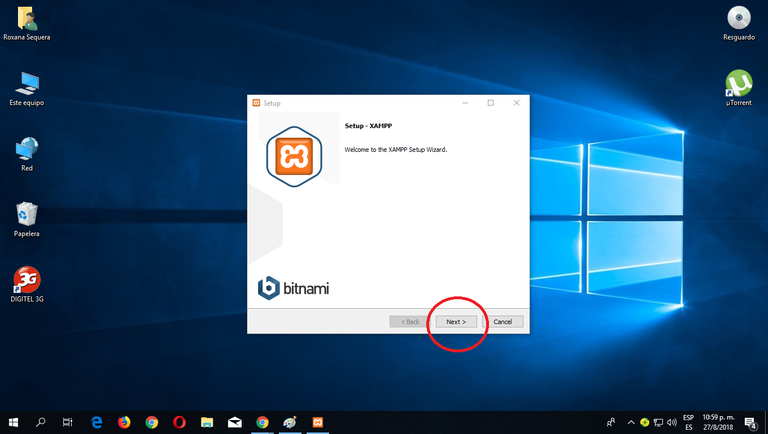
4. Start the installation wizard, click on the "Next" button and start the installation of the web server.
5. The minimum that XAMPP installs are the Apache server and the PHP language, although XAMPP also installs other elements. On the screen you can select other components you can install or not. But to follow this tutorial you need at least to install MySQL and phpMyAdmin.

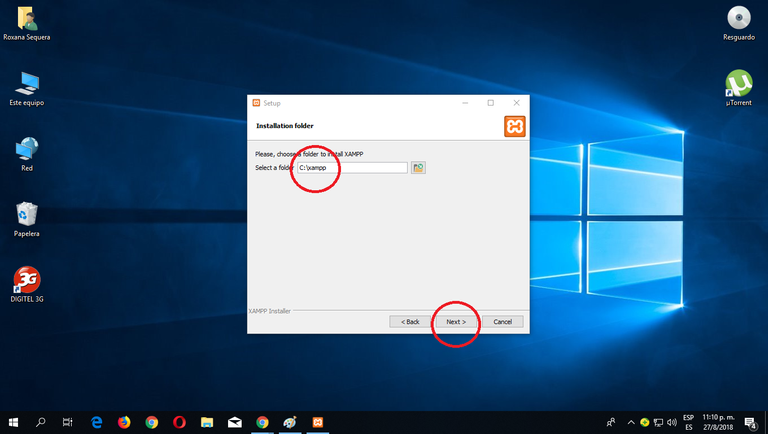
6. Then you will choose the XAMPP installation folder. The default installation folder is C: \ xampp. To change it, click on the folder icon and select the folder where you want to install XAMPP. and click on the "Next" button to continue.
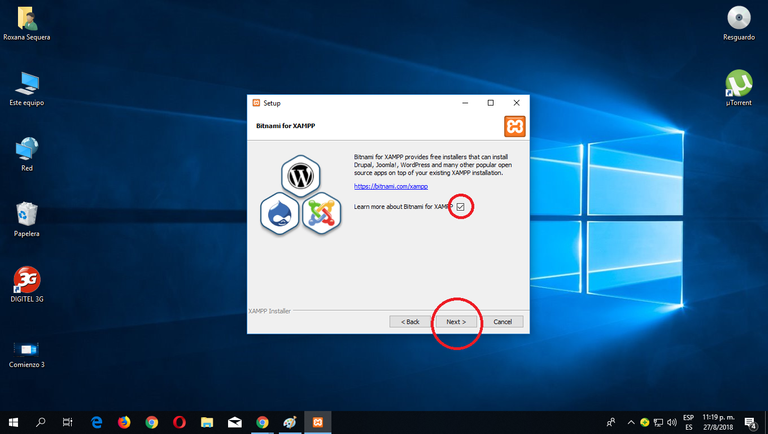
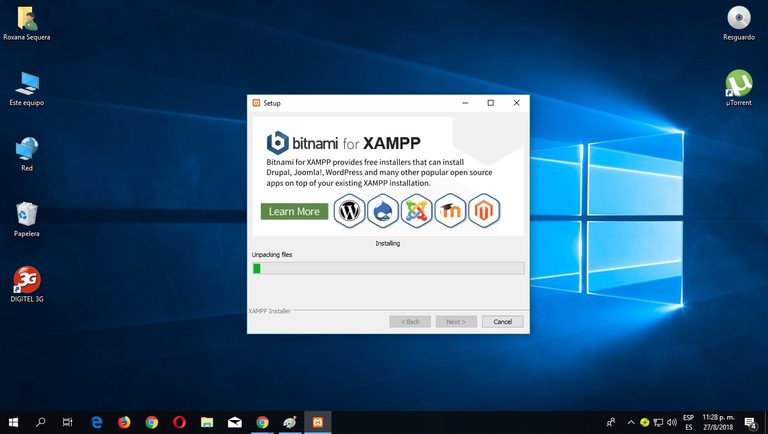
7. While installing the application will give us information about installers of applications for XAMPP created by Bitnami. We click on the "Next" button to continue. If you leave the box checked, a Bitnami web page will open in the browser, you can uncheck it if you wish.
8. I will request a confirmation of the installation. Click on the "Next" button to begin the installation on your computer.

9. We begin the process of copying files this may take a few minutes just wait until it finishes.
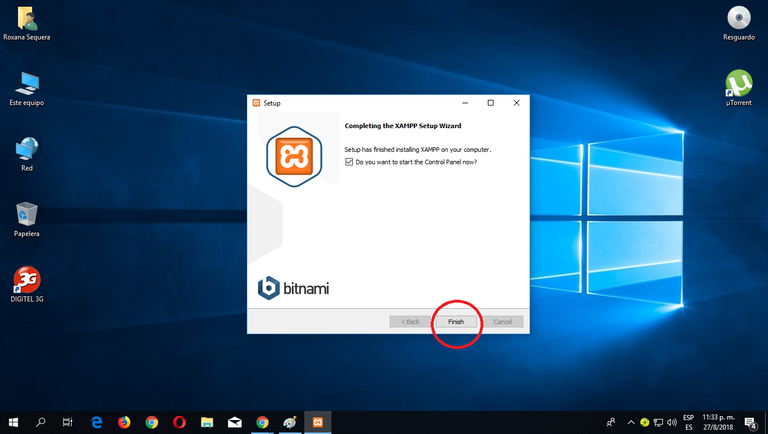
10. Once the copy of files in our computer is finished, the application confirms the end of the installation of XAMPP. If the box is left checked, the XAMPP control panel will open. To close the installation program, click on the "Finish" button.
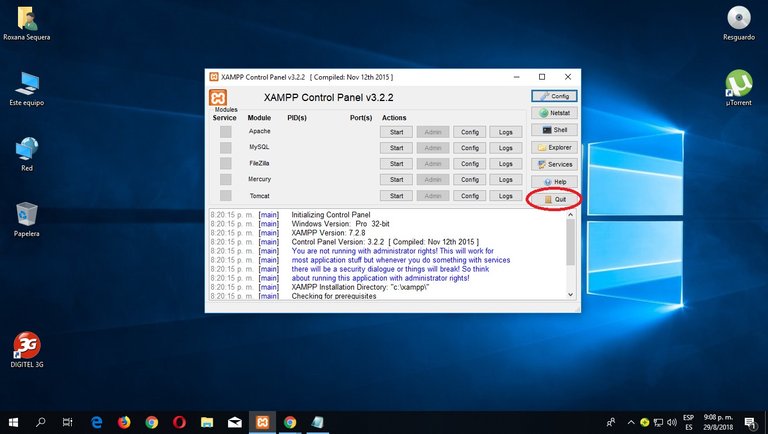
11. Two things the XAMPP control panel can be opened through the start menu (All programs> XAMPP> XAMPP Control Panel) if it is already started, by means of the icon in the notification area.
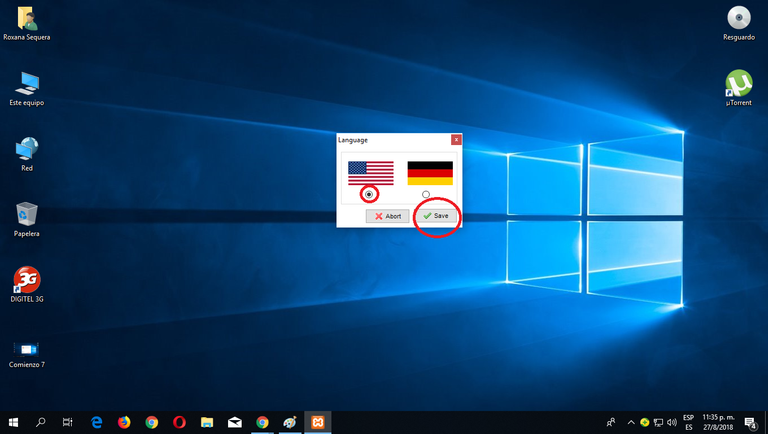
The first time the XAMPP control panel is opened, a language selection window is displayed allowing you to choose between English and German
12
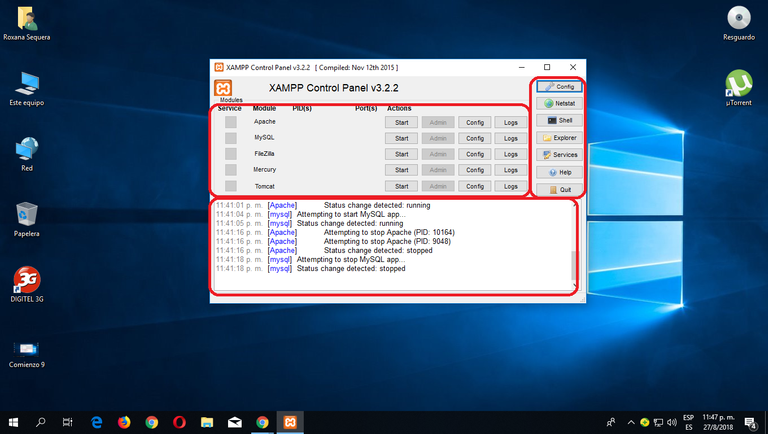
The XAMPP control panel is divided into three zones:
* the module zone, which indicates each of the XAMPP modules:
* In this area we are notified of the name and status of the service installed
* The port used
* Buttons to start and stop processes, among others.
The notification area, in which XAMPP will give us information about the success or failure of the actions carried out
The area of utilities, to access quickly
13. Close the XAMPP control panel Just click on the Quit button (closing the control panel does not stop the servers)
14. The Close button on the top right, will not really close the control panel, only minimizes it.
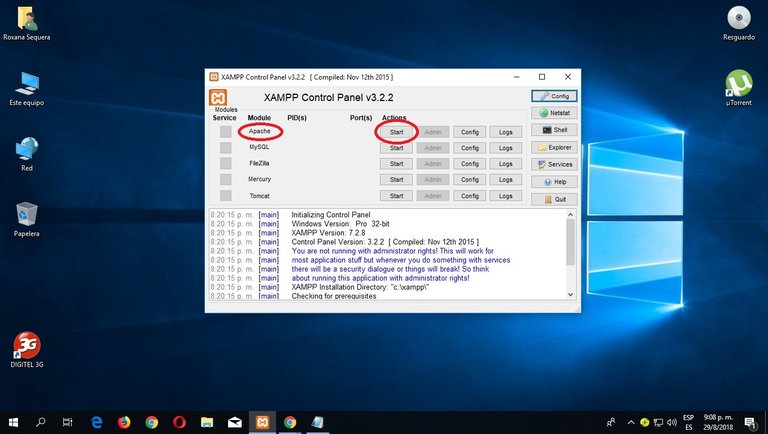
15. To raise the Apache service (or any other service), you have to click on the corresponding "Start" button

16. If the Apache boot or any other service is successful, the control panel will display the name with a green background, the open ports (http and https), the "Start" button will become a "Stop" button and in the notification area you will see the result of the process performed.
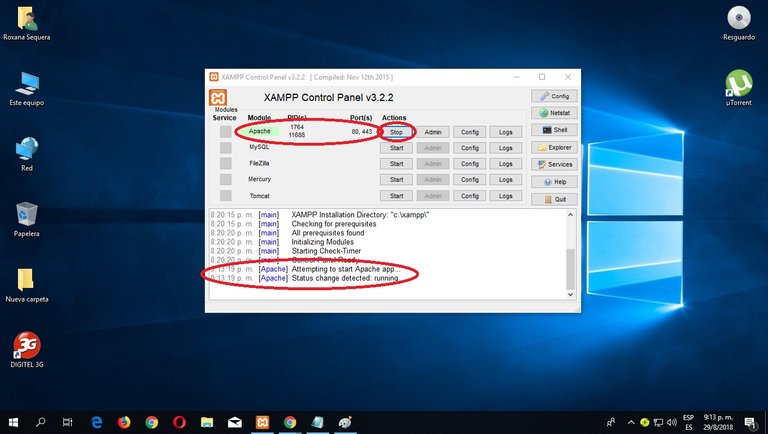
17. To stop Apache (or another server), click on the "Stop" button corresponding to Apache

18. If you decide to stop the Apache service and it is successful, the control panel will show the name of the module with gray background, it will not show any open ports (http and https), the "Stop" button will become a "Start" button and in the notification area you will see the result of the process.

With this step we will have the basics in our computers to start programming PHP 7. Congratulations friends.
Today we'll leave it here, for the next post we'll start with what everyone already wants PHP 7 code.
I hope your opinions and comments friends, as always will be channeled always towards the positive and ascending, about learning something new for many and not so much for others.
Greetings.
Thank you for the tutorial, I'll wait for your next articles :)
I've always wanted to program in PHP, but by the moment I just program on Python.
Regards
Thanks friend @cristogd I will be publishing soon I am preparing it, how good that programs in Python. because it is the next after PHP, I would appreciate your support for that moment. regards
Congratulations @a1000carv! You received a personal award!
Click here to view your Board of Honor
@orinoco
Hi. We are SteemBet platform and welcome to invite you to join our first dice game. In future, we have different kind of currency digital game in our platform. We will build up a wonderful blockchain gaming platform. it's excited to invite you to join our development. SteemBet is going to release white paper to everyone so that you understand our plan and mission.
SteemBet:http://steem-bet.com
SteemBet discord:https://discord.gg/8JGzbKb
Posted using Partiko Messaging
Congratulations @a1000carv! You received a personal award!
You can view your badges on your Steem Board and compare to others on the Steem Ranking
Vote for @Steemitboard as a witness to get one more award and increased upvotes!
Congratulations @a1000carv! You have completed the following achievement on the Hive blockchain and have been rewarded with new badge(s) :
You can view your badges on your board And compare to others on the Ranking
If you no longer want to receive notifications, reply to this comment with the word
STOPDo not miss the last post from @hivebuzz: