
What is Google Map?
Google Map is a service that made by google to help users interact with map such as location, places, addresses, directions, etc. We can use this service to help the developers easily integrate their app within the map features. And we need the Google API key to make our service with google map run properly. The most common use library to make an android app is the google maps. We can also custom our view with the map to display amazing map view
Getting Google API key
Before you implement the google map in the Android, you must have a google account . You can visit this link to signup first or login if you already have one. https://developers.google.com/maps/documentation/android-api/signup
Once you're signed up, you can go to the console with this link
https://console.developers.google.com/flows/enableapi?apiid=maps_android_backend&reusekey=true
Then follow these steps:
- Create the project you want to integrate in the console like the picture below or choose existing project that you have created.

- Click Continue and you will be redirected to this page.

- Get your credential there and then you will go to below screen.

- Click the credential and you can see the API key there

Put the Google API key
We need the key to put it at our AndroidManifest.xml. The key function is to be able run the google map in our app that we want to integrate.
<?xml version="1.0" encoding="utf-8"?>
<manifest xmlns:android="http://schemas.android.com/apk/res/android"
    package="com.professional.andri.mapapp">

    <uses-permission android:name="android.permission.ACCESS_NETWORK_STATE" />
    <uses-permission android:name="android.permission.INTERNET" />
    <uses-permission android:name="android.permission.WRITE_EXTERNAL_STORAGE" />
    <uses-permission android:name="android.permission.READ_EXTERNAL_STORAGE" />

    <application
        android:allowBackup="true"
        android:icon="@mipmap/ic_launcher"
        android:label="@string/app_name"
        android:roundIcon="@mipmap/ic_launcher_round"
        android:supportsRtl="true"
        android:theme="@style/AppTheme">

        (html comment removed: Google MAP API key)

        <meta-data
            android:name="com.google.android.geo.API_KEY"
            android:value="Replace with your key from the console" />


        <activity android:name=".MainActivity">
            <intent-filter>
                <action android:name="android.intent.action.MAIN" />

                <category android:name="android.intent.category.LAUNCHER" />
            </intent-filter>
        </activity>
    </application>
</manifest>
Add Google Map Dependency
You need to go to app/build.gradle and include this library :
implementation 'com.google.android.gms:play-services-maps:11.8.0'
dependencies {
    implementation fileTree(dir: 'libs', include: ['*.jar'])
    implementation 'com.android.support:appcompat-v7:26.0.0-alpha1'
    implementation 'com.android.support.constraint:constraint-layout:1.0.2'
    implementation 'com.google.android.gms:play-services-maps:11.8.0'
    testImplementation 'junit:junit:4.12'
    androidTestImplementation 'com.android.support.test:runner:1.0.1'
    androidTestImplementation 'com.android.support.test.espresso:espresso-core:3.0.1'
}
Add Google Play Services SDK
Google Play Services SDK is a SDK that you must install within the SDK manager to make other services including map works well. So, we can use the kit and integrated with our codes.

Check and click apply to install and wait till installation finish and then let's go to the next step :).
Creating the Layout in the xml
Layout is the UI design that interact with the user. The next step is you need to go to your layout xml to make an element of fragment so that we can use the Map provided by Google. So we provide name property to the fragment which point to google gms map fragment
android:name="com.google.android.gms.maps.MapFragment"
and the entire layout code.
<?xml version="1.0" encoding="utf-8"?>
<android.support.constraint.ConstraintLayout xmlns:android="http://schemas.android.com/apk/res/android"
    xmlns:app="http://schemas.android.com/apk/res-auto"
    xmlns:tools="http://schemas.android.com/tools"
    android:layout_width="match_parent"
    android:layout_height="match_parent"
    tools:context="com.professional.andri.mapapp.MainActivity">

    <fragment
        android:id="@+id/map"
        android:name="com.google.android.gms.maps.MapFragment"
        android:layout_width="match_parent"
        android:layout_height="match_parent"/>

</android.support.constraint.ConstraintLayout>
Assign Google Map and Displaying the map
It's important to remember we need an assigment so the map can be ready after the callback ready. To be able to display the map we must use the google map variable. When the layout is done, go to your Java class and there are some explanations on the following code about we must know about implementing map below.
package com.professional.andri.mapapp;

import android.support.v7.app.AppCompatActivity;
import android.os.Bundle;
import android.util.Log;

import com.google.android.gms.maps.CameraUpdateFactory;
import com.google.android.gms.maps.GoogleMap;
import com.google.android.gms.maps.MapsInitializer;
import com.google.android.gms.maps.OnMapReadyCallback;
import com.google.android.gms.maps.SupportMapFragment;
import com.google.android.gms.maps.model.LatLng;
import com.google.android.gms.maps.model.MarkerOptions;

public class MainActivity extends AppCompatActivity implements OnMapReadyCallback{ //we must implement this OnMapReadyCallback interface to the map works well.
    private GoogleMap mMap; //Declare the  Google Map variable

    @Override
    protected void onCreate(Bundle savedInstanceState) {
        super.onCreate(savedInstanceState);
        setContentView(R.layout.activity_main);

        SupportMapFragment mapFragment = (SupportMapFragment) getSupportFragmentManager()
                .findFragmentById(R.id.map); //we are using support map fragment to support backward compatibility and get the map id from our layout, then assigned to mapFragment variable
        if (mapFragment == null) {
            mapFragment = SupportMapFragment.newInstance(); // check if the mapFragment is null then we create the SupportMapFragment using static instance
        }
        mapFragment.getMapAsync(this); //we set the method to this "Activity" in our context.
    }

    @Override
    public void onMapReady(GoogleMap googleMap) { //this method must be written because we have already implement onMapReadyCallback above
        mMap = googleMap; //sign our global variable mMap with the googleMap when the callback is ready
        LatLng medanLatLng = new LatLng(3.597031, 98.678513);//just tested some latitude and longitude
        mMap.addMarker(new
                MarkerOptions().position(medanLatLng).title("Map App Demo")); // Adding a marker and set title
        mMap.moveCamera(CameraUpdateFactory.newLatLng(medanLatLng));// Move the camera on the map with the given latitude and longitude

    }
}
Look at the following code
SupportMapFragment mapFragment = (SupportMapFragment) getSupportFragmentManager()
                .findFragmentById(R.id.map);
        if (mapFragment == null) {
            mapFragment = SupportMapFragment.newInstance();create the SupportMapFragment using static instance
           mapFragment.getMapAsync(this)
        }
The SupportMapFragment mapFragment = (SupportMapFragment) getSupportFragmentManager() .findFragmentById(R.id.map);
That means we are getting the reference from the id in the xml and assign it to mapFragment. We use SupportMapFragment to support backward compability for API 11 and lower can work properly too.
Then, notice this snippet
 if (mapFragment == null) {
            mapFragment = SupportMapFragment.newInstance();
        }
        mapFragment.getMapAsync(this)
We first check if the mapFragment is null then we create the SupportMapFragment using static instance. Then, we call getMapAsync method to asynchronously display the map when the google map is ready. Once you've write above code and understand, you can run and see the results. You can also modify as you want too. Thanks for reading this tutorial.
Posted on Utopian.io - Rewarding Open Source Contributors
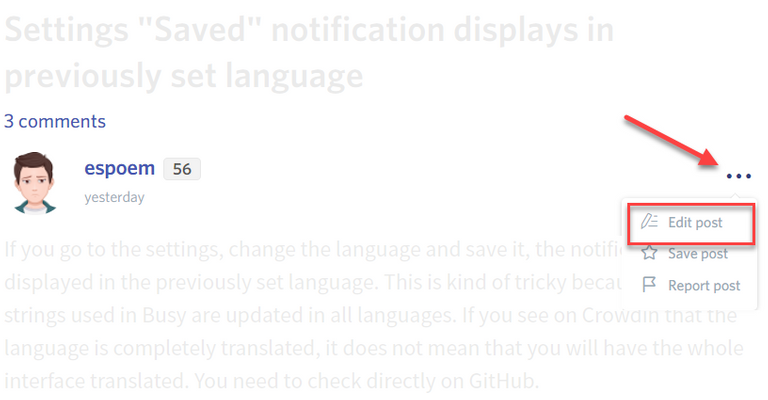
Your contribution cannot be approved yet because it is not as informative as other contributions. See the Utopian Rules. Please edit your contribution and add try to improve the length and detail of your contribution (or add more images/mockups/screenshots), to reapply for approval.
You may edit your post here, as shown below:
You can contact us on Discord.
[utopian-moderator]
Thank you for the contribution. It has been approved.
You can contact us on Discord.
[utopian-moderator]
Thank you.
Hey @andrixyz I am @utopian-io. I have just upvoted you!
Achievements
Suggestions
Get Noticed!
Community-Driven Witness!
I am the first and only Steem Community-Driven Witness. Participate on Discord. Lets GROW TOGETHER!
Up-vote this comment to grow my power and help Open Source contributions like this one. Want to chat? Join me on Discord https://discord.gg/Pc8HG9x