Repository
What Will I Learn?
- You will learn How to make a mobile application for Android/Ios Platform with Ionic Creator
- You will learn How To Create New Project with Ionic Creator
- You will learn How To Drag & Drop Components and How To Design Components.
- You will learn How to set up this project to local project & How to test it.
Requirements
- NodeJS & npm (This is package manager for Javascript) Download
- Ionic CLI (the tool to create a project, build native apps, and handle bundling your app’s resources) [Download Ionic Version 3]
- Browser (Firefox Mozilla or Chrome or Other)
Difficulty
- Basic
Tutorial Contents
Assalammu'alaikum, hei friends ... today I will show to you how to make a mobile application with Ionic Creator. Ionic Framework using web technologies like HTML, CSS, and JavaScript. To start with Ionic Framework, the only requirement is a Node & npm environment. Why you must know about Ionic ? because with ionic you can build a mobile application to be so fastly and easily, like as ionic creator. Ionic creator running via the browser. You can design basically of application with drag & drop, wow so easy right? After that, you can export that's the project to zip then extract and finally set to a local project on your directory to modification again to complete your mobile application. Oke lets start...
Step by Step :
Open Your browser and type on search bar Ionic Creator
Firstly you must register with your email. I use ionic Creator Basic ($0/mont). After that, you can create a new ionic project.
To start your first project --> click New Project --> Put your project's name. Then choose one of 4 templates there then click create a project. I choose Side Menu template and Ionic Version 3.
Now This is our mobile application with side menu template. Now you add components with drag & drop it.
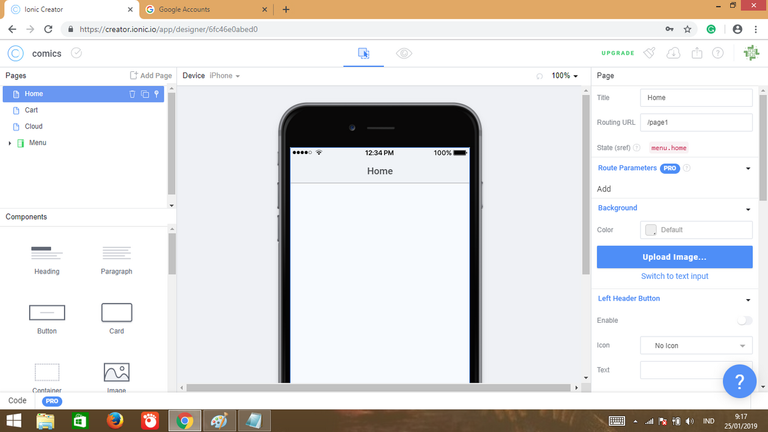
Description of ionic creator:
You can see there are you App.
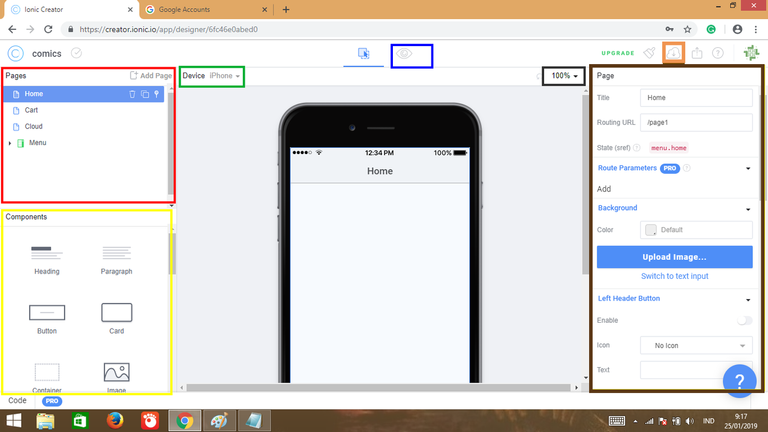
[Red-area] at there you can select and move a - component, delete, duplicate and add a page too.
[yellow-area] there is all component for to drag & drop on your page.
[brown-area] there are to theming your component.
[black-area] To Zoom Your App
[orange-area] To Export your App
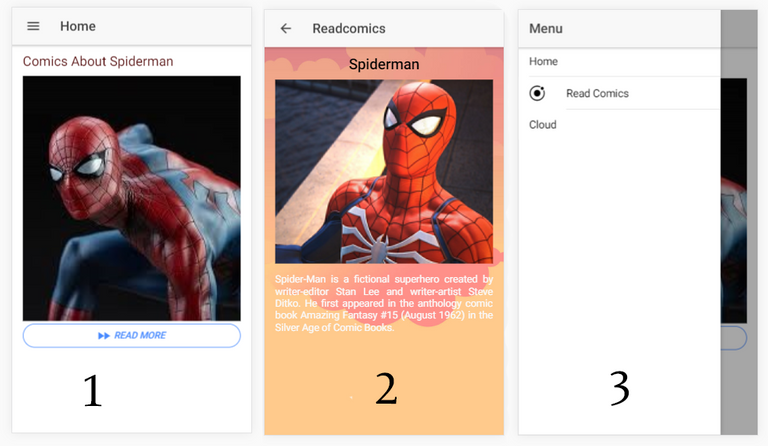
[Green-area] To Choose Device (ANDROID OR IOS)Ok first I will design home page, I want to add the heading, image and paragraph component. So select Home then drag&drop heading component to page.
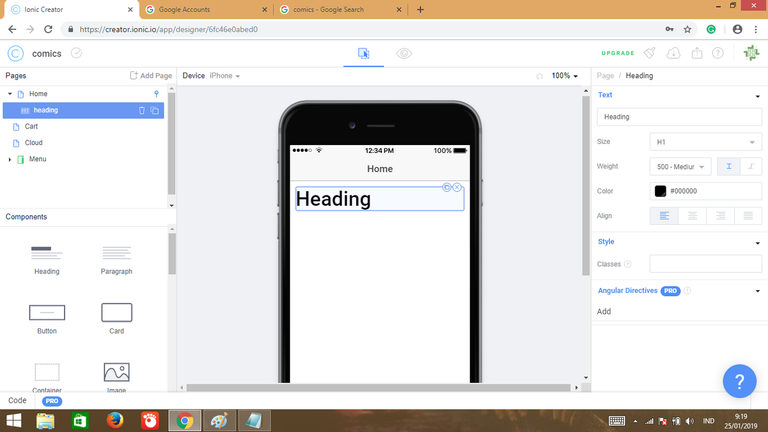
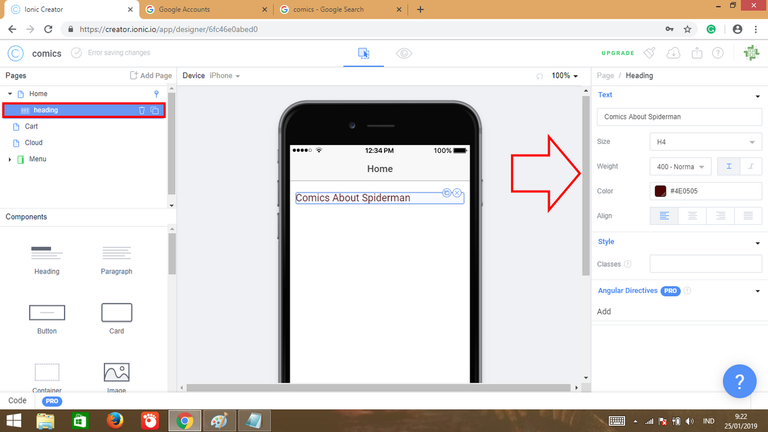
Next theming/styling your component, first select your Heading component then change Text, Size, Wight, Color, Align your Heading.
After that theming your Image component with upload our image because i use Source Image Type. Then set the size & position of our image. My result now.

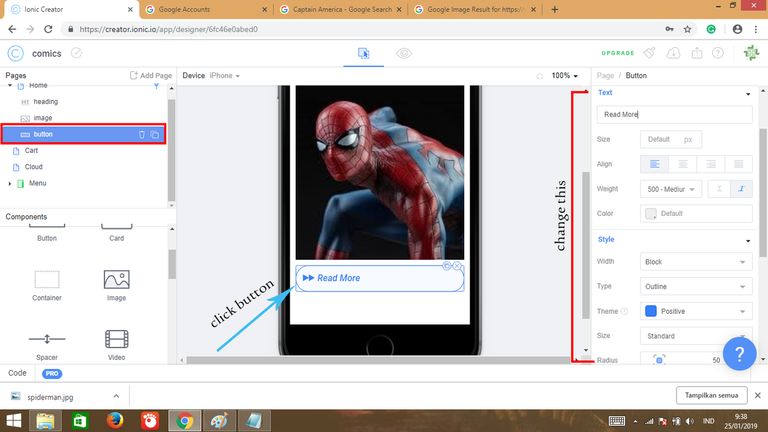
Next step I will add button component, so drag & drog it to home page and theming it with set a text, size, align, weight & color (styling text of button), change type & size, color theme and radius of button (styling button).
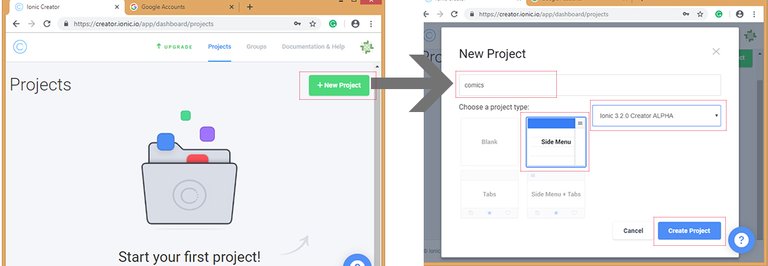
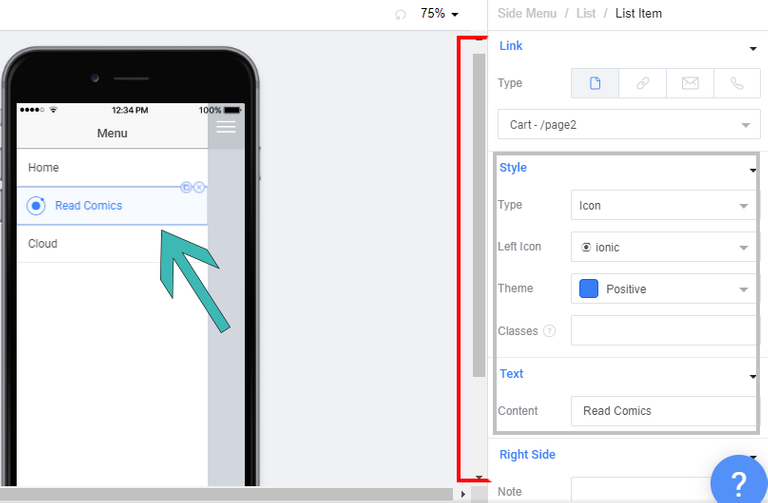
Now I will open menu page, I want to change list item of list of side menu ( i want to change chart list). Ok, click chart list. I will set list item with an icon. So choose an icon (left icon), set theme (positive theme) & don't forget put text on your list item.
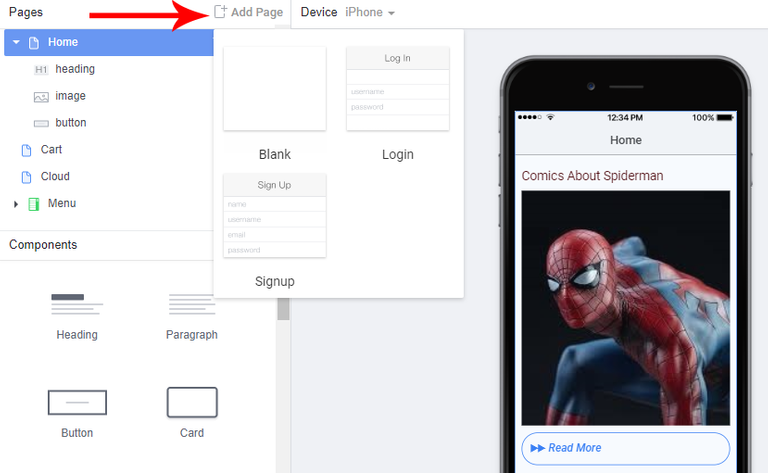
By the way, how add a new page? well, you can add a page just click add page. Like this...
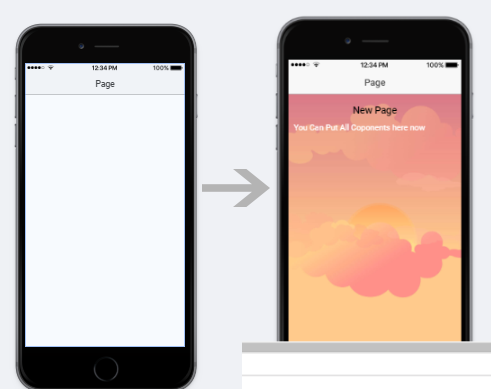
After Finish to add some components to your page.
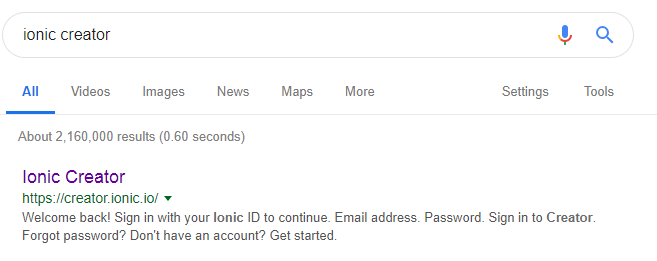
now I will show you how to make navigation of a page. That's so easily friends... You just click that component and choose link ( choose your page you want). An example I want to page Readcomics/page3 when I click button "Read More". Like these friends...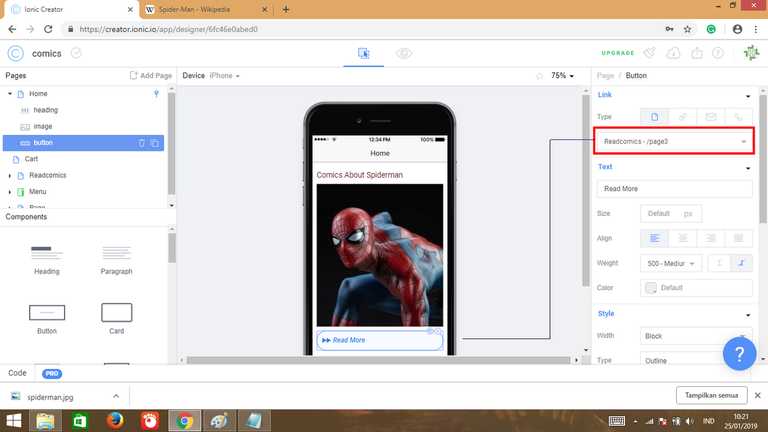
Now see the preview of your mobile application with click eyes icon. [Ios Device]
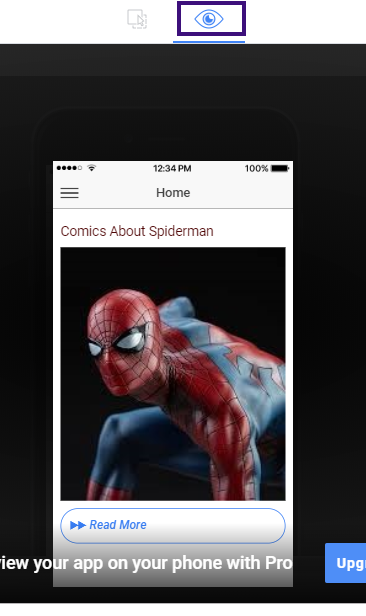
Tips: You can choose android or ios deviceOk, export our project to set at our local directory. Click "Export your app" and then click "download zip project"
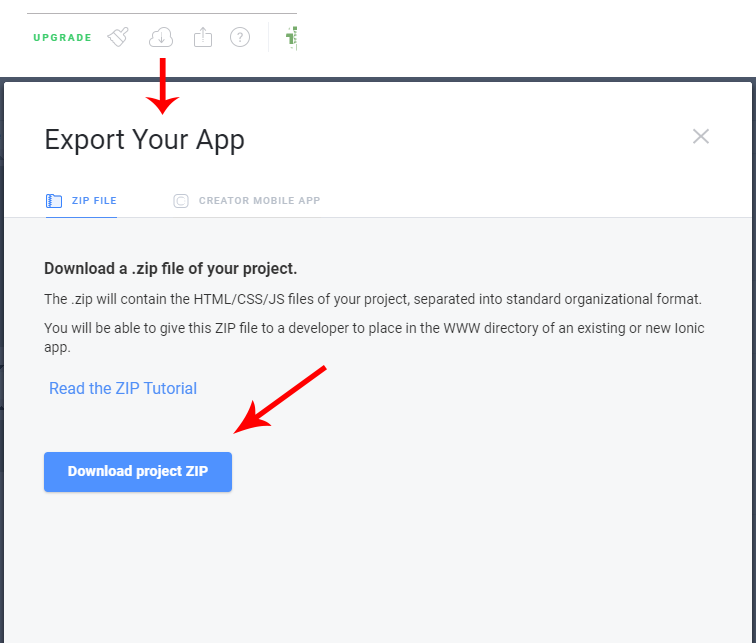
After that extract it. Now we must create a blank project after that copy paste the file "src" (the result of zip project from ionic creator after we extract it). Ok now open your command prompt (CMD), and type this code :
ionic start comics
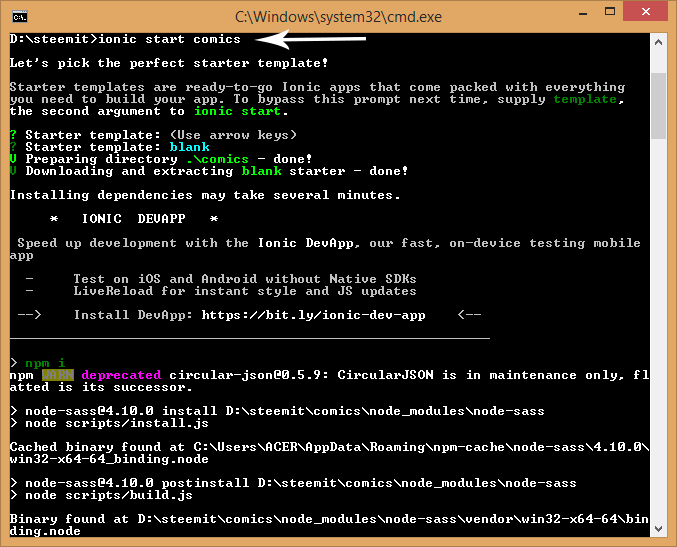
Why we must do it (create a new ionic project)? because we only have the src file from ionic creator so we must create a new project to run it in our local project directory.
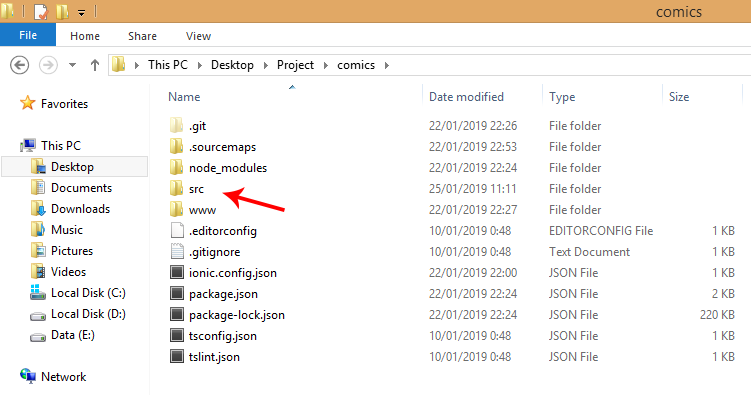
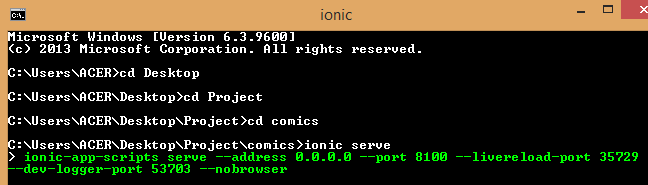
Now copy paste the "src" file to your comics project directory. For test it writes this code :
ionic serve
(to run app via browser).
Tips: On Your browser (Mozilla) Press F12 To See tool Developer Console.
This is My complete result:
Video My Result :
Finally, friends... you can use this project to make another amazing project this's just to start a mobile project. I think you will build an amazing project from this simple project with your creation...
Curriculum
You can read and follow this tutorial about Ionic Framework
Proof of Work Done
You can get this Project on my github : amobileapp-with-ionic-creator
Thank you friends to Following my tutorial about ionic framework if you have a problem about following this tutorial please contact me or comment here.
Thank you for your contribution.
Your contribution has been evaluated according to Utopian policies and guidelines, as well as a predefined set of questions pertaining to the category.
To view those questions and the relevant answers related to your post, click here.
Need help? Chat with us on Discord.
[utopian-moderator]
Thank you mod... I will try to improve it
Thank you for your review, @mcfarhat! Keep up the good work!
Congratulations @anitatmj! You have completed the following achievement on the Steem blockchain and have been rewarded with new badge(s) :
Click here to view your Board
If you no longer want to receive notifications, reply to this comment with the word
STOP