Coffeesource is an open source project to create tools based on Steem's blockchain useful to the entire steemit community, and which seeks to encourage the growing community of Python developers and the development community in general to take an interest in Blockchain technology and contribute in open source projects using Utopian.io.
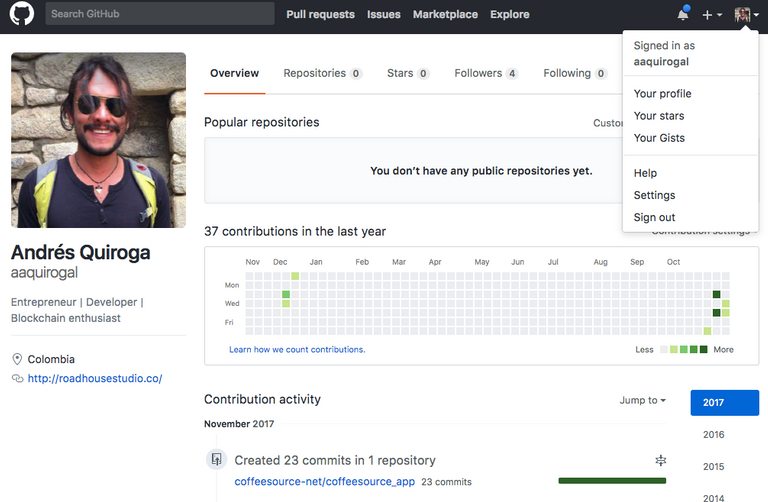
( @coffeesource.net is a creation of @kit.andres and @ecoinstant, who are building out new tools upon the Steem Blockchain)
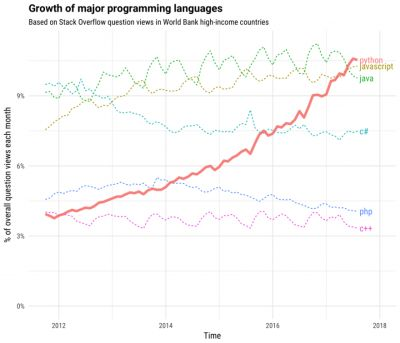
coffeesource.net has been developed utilizing Django, framework web developed in Python, which allows the development of highly transactional and scalable web applications, in order to ensure a robust architecture to meet the demand of needs that arise when developing solutions for Steemit users.
“Django is a high-level Python Web framework that encourages rapid development and clean, pragmatic design. Built by experienced developers, it takes care of much of the hassle of Web development, so you can focus on writing your app without needing to reinvent the wheel. It’s free and open source.”
Source.

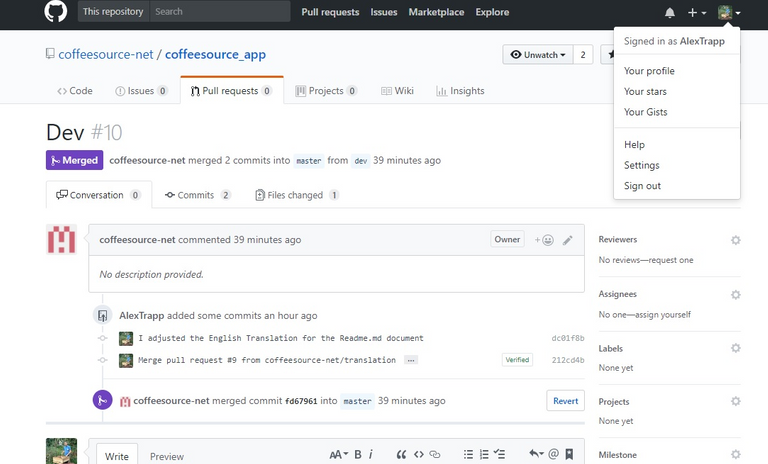
The repository of the project is hosted on Github.
How was coffeesource.net built?
The first step was to create the repository on Github. This is a simple guide on how to create and download a repository.

Once the repository is created and downloaded, we move to its root and proceed to configure an image of an Ubuntu server using Docker. Docker allows us to create light and portable containers that can be used on any machine with Docker installed, independently of the operating system, to execute Software applications.

In the official Docker documentation you can find the tutorial Quickstart: Compose and Django, with a simple explanation on how to start a simple application with Django and PostgreSQL. In the case of coffeesource.net, PostgreSQL is not being used yet, nor is any database engine.
The following is the content of the Dockerfile file, which states that the container will have installed Python 3.6.0 and will be an image of ubuntu 14.04:
Dockerfile
FROM python:3.6.0

RUN wget http://rubies.travis-ci.org/ubuntu/14.04/x86_64/ruby-2.3.1.tar.bz2 \
    && tar xvjf ruby-2.3.1.tar.bz2 \
    && cp -rp ruby-2.3.1/* /usr/local/ \
    && rm -rf ruby-2.3.1.tar.bz2 ruby-2.3.1/

RUN mkdir /code
WORKDIR /code

RUN easy_install -U pip
RUN pip install -U pip setuptools

ADD requirements.txt /code/requirements.txt
RUN pip install -r requirements.txt
Then we create the file requirements.txt, where we specify the Python libraries that we want to include in the project. This is where we precede to install the most current version of Django and steem-python, a library developed to access Steem's blockchain using Python.
requirements.txt
Django==1.11.7

# Libs
steem==0.18.103
Now we proceed to create the file docker-compose.yml, which specifies the services that need to be enabled in the application. In this case only the web server is needed.
version: '2'
services:
  web:
    build: .
    image: coffeesource
    command: python manage.py runserver 0.0.0.0:8000
    ports:
      - "3000:3000"
      - "8000:8000"
    volumes:
      - .:/code
Now we proceed to build the image by executing the following command using a terminal, located at the root of the project:
docker-compose build
By means of this command the image of Ubuntu is created and the liberies specified in the file requirements.txt are installed. This process may take awhile.
With Django installed, we proceed to create the django project using the command:
docker-compose run web django-admin.py startproject app .
This will create the file manage.py and the folder app/, in which we will find the files init.py, settings.py, urls.py y wsgi.py. The following is the structure that the project should have at this point.
coffeesource_app/
│
│──  app/
│   └── __init__.py
│   └── settings.py
│   └── urls.py
│   └── wsgi.py
│
└── docker-compose.yml
└── Dockerfile
└── manage.py
└── requirements.txt
At this point we can now run the web server to verify that our django application is properly configured by using the following command:
docker-compose up
If everything is configured correctly, we should see in the terminal a similar response to that shown in the following image:
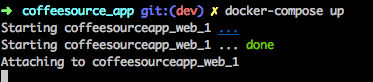
This indicates that the web server is running. To stop the web server, we use the ctrl + c keys. With the web server running, we go to a browser and visit the address localhost: 8000. We should see the following message from Django:

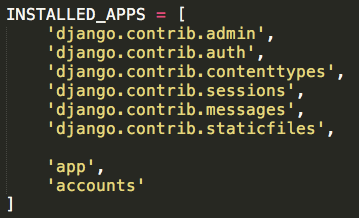
Now we proceed to edit the file settings.py. In the section INSTALLED_APP, we add app, and eliminate the database configuration.

First functionality of coffeesource.net.
In order to implement an easy-backlink system, in which it is easy to search the publications of a specific user and see the links of each of their entries, we developed a system that allows us to search for a username of a user of Steem and get the information from their posts using the steem-python library. For this purpose, a form has been designed that receives the username and, when submitting, redirects to a list of the entries of said user with the link to easily copy.
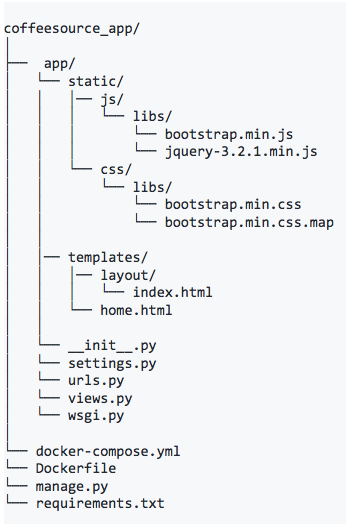
To finish configuring the general structure of the project, we created the folder templates/ en la carpeta app/. Inside the folder templates/ we create the folder layout/ and inside that one, we create the file index.html. This file will be the base of the .html of the application, where the common contents of all the pages are defined as the header and the footer, and from which the other .html files will inherit their structure. We also create the static/ folder inside the app/ folder. In this folder we will store all the static resources such as javascript and external css libraries and our own javascript, css and image files.
We are using Bootstrap 4 in order to facilitate the construction of the website with responsive design included. We proceed to download the library from the official site. Of the contents in the downloaded folder, we will only need to use the following files: bootstrap.min.js, bootstrap.min.css y bootstrap.min.css.map.
Inside the static/, folder we create the folder js/libs/, and we copy inside this the file bootstrap.min.js, and we create the folder css/libs/, and we copy inside this the following files: bootstrap.min.css y bootstrap.min.css.map

It is also necessary to include JQuery within the project, which simplifies Javascript coding, and which is required for the proper functioning of Bootstrap. We can download the latest version from the official site and proceed to copy the file jquery-3.2.1.min.js inside the folder js/libs/.

In order to implement the landing page of the application, we create a file called views.py inside the folder app/, and we create the file home.html inside the folder app/templates/.
Thus, we already have the general structure of the project that should look like the following:
As we said, the file app/templates/layout/index.html will be the foundation of all the .html files for the application. In this link we can find the content of the file, in which are defined all the sections such as the header, the footer y se importan las librerías css y javascript que definimos previamente (*Bootstrap y JQuery *).
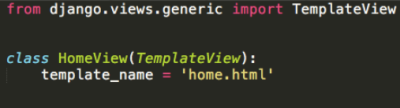
We go to the app/views.py file and create the HomeView class, inheriting the generic view from Django TemplateView. This view will enable us for us the application home. We define that the template it will use will be home.html
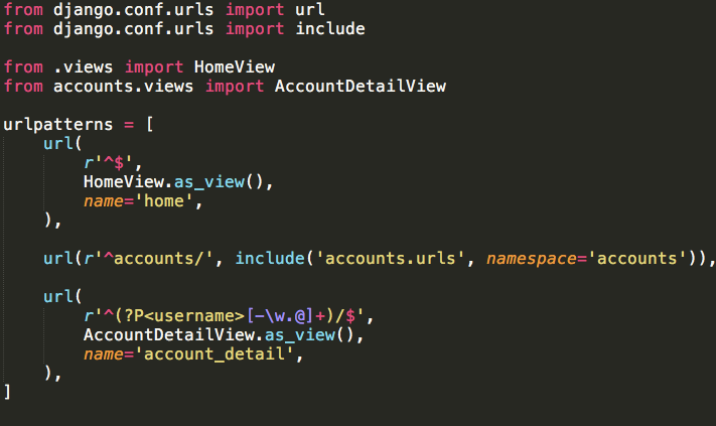
Then, we go to the file app/urls.py, and define the url corresponding to the home in the following way:

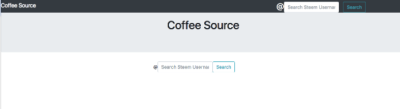
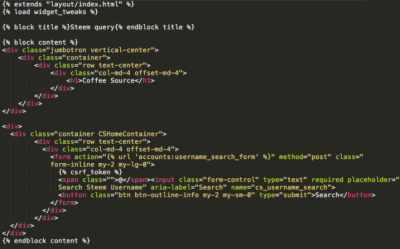
Finally, we edit the file app / templates / home.html in the following way:
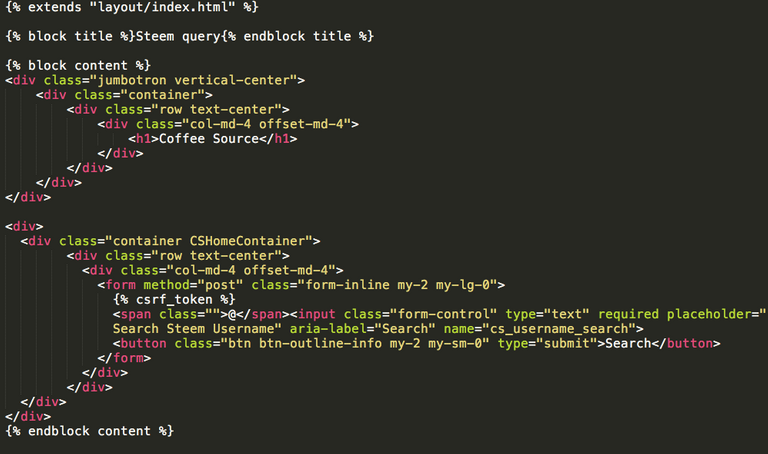
Now when going back to the browser and visiting the url localhost: 8000, we should see the home of coffeesource.net, in which the navigation bar and a form field used to enter a steemit username will be displayed.
The next step is to implement the form's functionality. The idea is that by entering a username of the Steemit network, the user is redirected to a page where he can see the user's latest posts and the corresponding link to easily copy. In order to design a scalable and ordered application from the beginning, we created the application accounts, in which we will define all the views corresponding to the information of Steemit users, such as profile detail, publications, rewards, etc. To create a new application, we execute the following command in the terminal:
docker exec -it coffeesourceapp_web_1 python manage.py startapp accounts
We proceed to include the new application in the INSTALLED_APPS in the file app/settings.py.
Now we are going to create a new view called AccountDetailView, in which we will show the latest publications of the user that was entered in the home form. Therefore, when someone enters a Steemit username in the home form, they will be redirected to this new view, in which we will make a request to the Steem blockchain through the steem-python library to obtain the information of the latest posts published by said user. To create this new view, we edit the file accounts / views.py. The content of this file is available at this link.
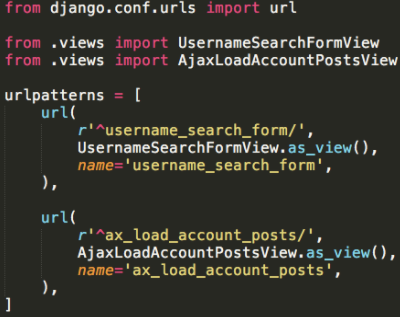
Then we edit the file accounts/urls.py, adding the following code:
We create the folder templates/accounts/ inside of the folder accounts/, and we create the file account_detail.html in the folder accounts/templates/accounts/. The contents of this file are available by following this link.
Finally, as our wish is that the url of a user's detail page has the format www.coffeesource.net/username, and not www.coffeesource.net/accounts/username we define in the main urls file, that is, app/urls.py the url that will redirect to the view AccountDetailView, defined in accounts/views.py, in the following way:
We modify the app / templates / home.html file, adding the action attribute to the form pointing to the url accounts: username_search_form, as follows:
Now, when entering the Steemit username in the form and submitting, the user will be redirected to the detail view with the list of latest publications and links.
Access to the Steem Blockchain using steem-python
In the application for now we are accessing Steemit's blockchain to get the posts published by a user. To do this, we are using the library steem-python , which we use in the following way:
from steem import Steem
s = Steem()
blog_entries = s.get_blog(account=”coffeesource.net”, entry_id=0, limit=30,)print(blog_entries)
This will show us a list of the last 30 posts published by the account @coffeesource.net. The documentation of the library is available at the following link.
To run coffeesource.net locally with Docker installed, we can clone the repository directly from Github, and execute the following commands:
docker-compose build
docker-compose up
And visit localhost:8000 in our browser.
Thank you so much for reading this article, it is just the first step for us in a process of learning to develop tools on the blockchain. We are thrilled to be working with Utopian.io and all groups on the steem blockchain for a fuller, more enriching future full of transparency and community.
We will continue to develop the public functionality of the coffeesource.net tool.
Love and Light to All!
Link to master branch.
Link to dev branch.
Posted on Utopian.io - Rewarding Open Source Contributors
Hey @coffeesource.net I am @utopian-io. I have just upvoted you at 3% Power!
Achievements
Suggestions
Community-Driven Witness!
I am the first and only Steem Community-Driven Witness. Vote for my Witness. Lets GROW TOGETHER!
Up-vote this comment to grow my power and help Open Source contributions like this one. Want to chat? Join me on Discord https://discord.gg/Pc8HG9x
Thank you for the contribution. It has been approved.
[utopian-moderator]
A question for you - we're we wrong to give this project a dedicated account?
We thought it to be more responsible to our current followers to build this project seperately, although now I see the bot has been updated and appears to include considerations of account age and number of followers.
@coffeesource.net this is a great article on the process used to build the coffeesource code you've created! It is also a good primer for programmers interested in implementing their own branch of the main code. I have to admit - even being a programmer - you lost me at one point, and I started to go cross eyed. But - I am still learning more, and more about Blockchain everyday. And I am not completely familiar with many of the recent programming languages, or their syntax.
However - I quickly used the frontend of the Coffee Source website - and I have to say it was one of the EASIEST WAYS SO FAR for finding content by a single author, and seeing their Steemit Value at a glance which I have experienced with the Steemit community thus far! Wow!
Keep up the incredible work - and please keep updating the community on your progress and developments!
Thank you for this feedback! We will continue to update with increased functionality as we develop it.
Congratulations @coffeesource.net! You have completed some achievement on Steemit and have been rewarded with new badge(s) :
Click on any badge to view your own Board of Honor on SteemitBoard.
For more information about SteemitBoard, click here
If you no longer want to receive notifications, reply to this comment with the word
STOP