@coffeesource.net is a creation of @kit.andres and @ecoinstant, who are building out new tools upon the Steem Blockchain and incentivizing development through utopian.io.
Over the past several days we have created an open source repository to quickly build a new Django application. Django is our favorite framework for creating robust and scalable web applications, and it is also made in Python, a very powerful and easy-to-learn programming language. Personally, we think that Python is one of the most promising programming languages to teach to new generations and to give them the tools to take their place in the growing software development industry.
In this blog, we will review the steps we followed to create the template for Django projects with Docker, PostgreSQL, Bootstrap and JQuery. The main intention of this article is to share the structure and the process of the build out of this project to motivate Python and Django developers to contribute in the development of the different open source projects through utopian. This is a manual on how to start a Django application from scratch. Although if we are constantly creating new Django applications, the best option is to download the repository and save all the time required for the initial configuration.
This repository has now become our base to quickly startup a Django project. The steps to create this project were as follows:
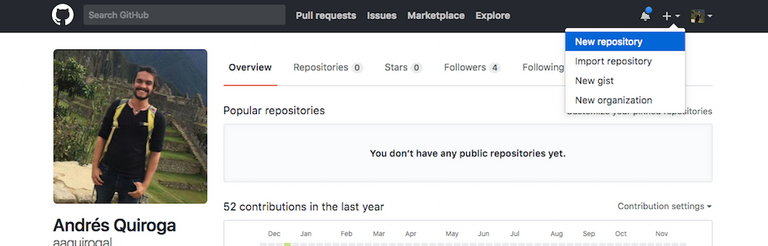
1. Create new repository
Once we are logged into our github account, we click on "New repository".
In the "Create new repository" form, we select the name of the repository and add a description. We mark the Public checkbox to establish our repository as an open source project, and we mark the checkbox Initialize this repository with a README. This will create the README.md file in the repository, in which we will later add general information about the project. This information will then be available to github users on the main project page.
In the Add .gitignore field, select Python, in the Add a license field, select MIT license, and click on "Create repository".

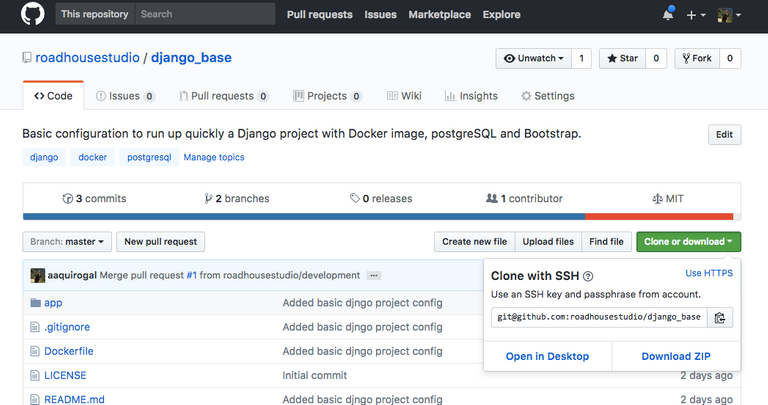
2. Clone repository
Proceed to clone the repository by clicking on the "Clone or download" button, select Use SSH and click on the "copy to clipboard" button.
In the terminal, we move to the folder into which we want to clone the project and run the following command (where [email protected]:roadhousestudio/django_base.git is the parameter stored by clicking on "copy to clipboard"):
git clone [email protected]: roadhousestudio / django_base.git
3. Configure Docker files and create container

Once the repository is cloned, we locate ourselves at the root of the project, and proceed to create the Docker configuration files.
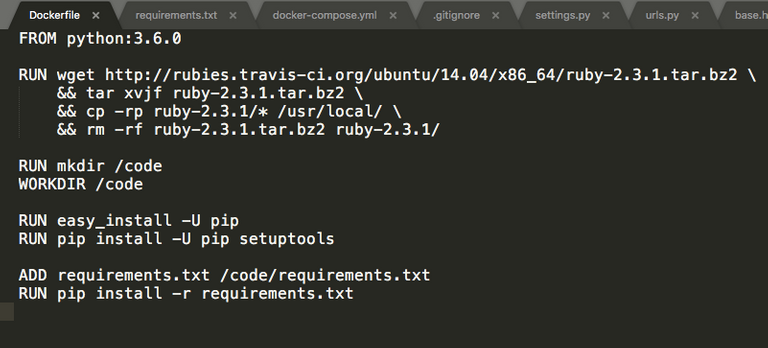
First we create the file Dockerfile, with the following content, where we indicate that we are going to use Python 3.6.0 and an image of ubuntu 14.04.
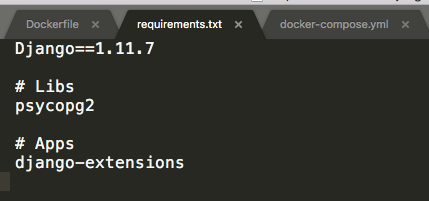
Then we create the requirements.txt file with the following content, and we indicate the Python libraries that we are going to use in the project.
.
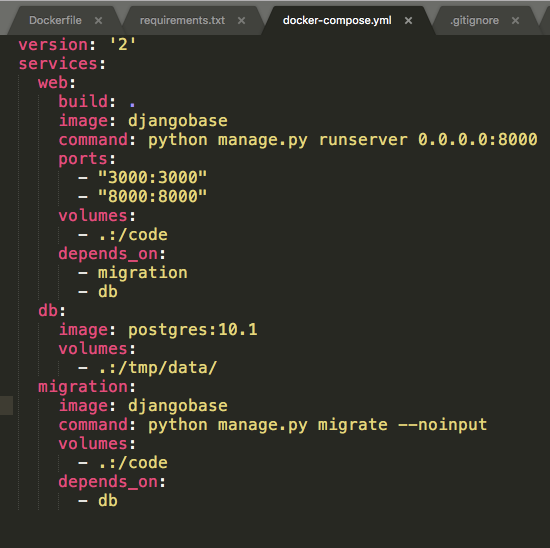
Finally we create the file docker-compose.yml, in which we indicate the services that we will need to enable to run our Django application. In this case, we must enable a web server and a container for our PostgreSQL database.
compose.png
Once these files are created, we execute the following command in the terminal:
docker-compose build
With this command, the image of ubuntu indicated in the file Dockerfile is created and the libraries indicated in requirements.txt are installed, among them Django.
4. Create Django project
To create a new Django project, we run the following command.
docker-compose run web django-admin.py startproject app.
This will create the manage.py file and the app/folder.
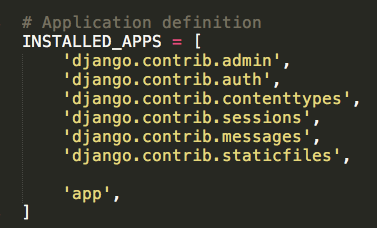
We go to the app/settings.py file and add 'app' to the INSTALLED_APPS of the application:
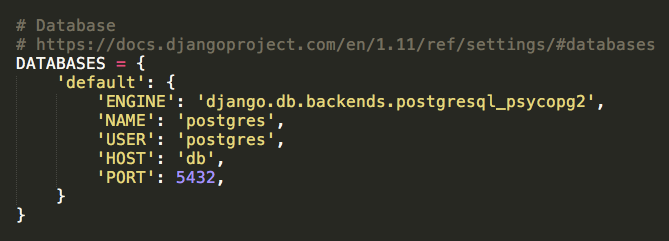
We configure PostgreSQL as the database engine that we are going to use:
- Create application home page
To create the application's home page, first we create the views.py file in the app/ folder, with the following content.

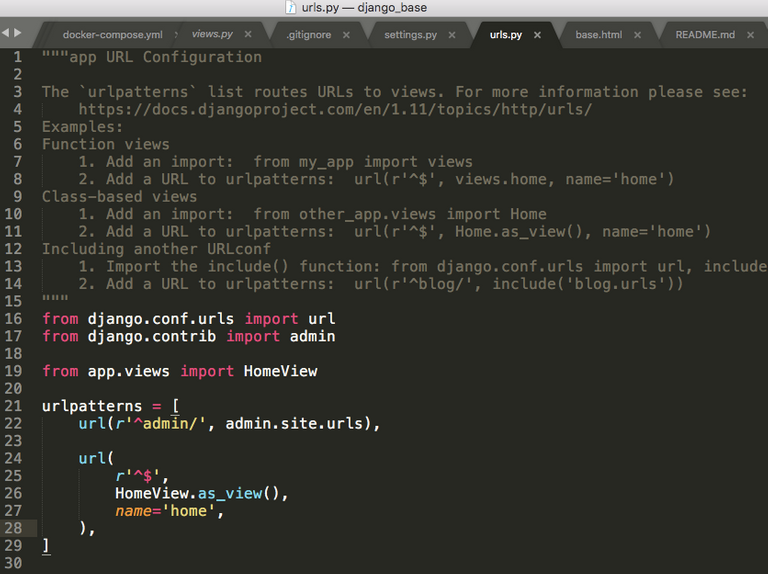
Then we proceed to define the url of the home page by editing the app/urls.py file as follows:
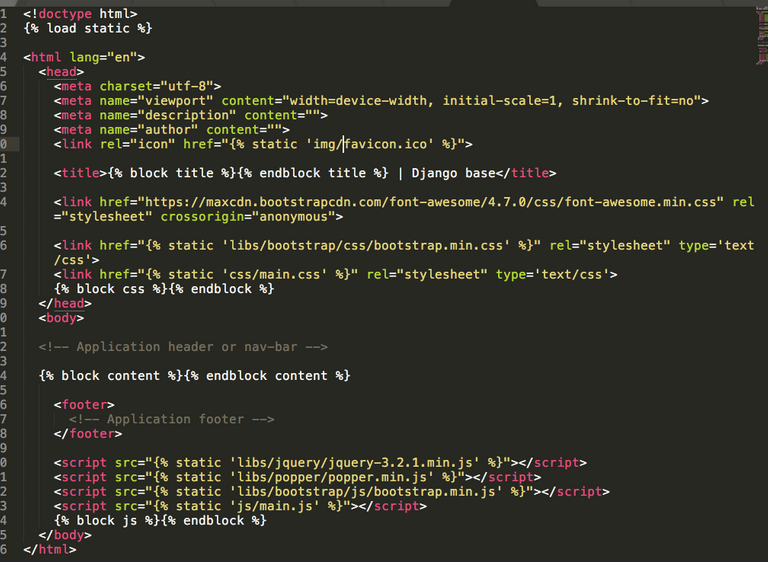
We create the folder app/templates/, and within this we create the folder layout/. In the layout/ folder we create the base.html file. This file will be the basis of all the .html files of the application, in which common contents such as the header and footer will be defined. The content of the app/templates/layout/base.html file is as follows:
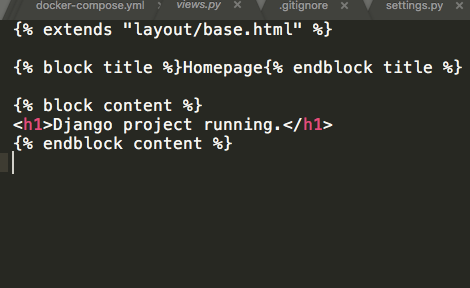
And finally we create the file home.html inside the folder app/templates/ with the following content:
6. Integrate Bootstrap and JQuery to the project.
We are going to integrate Bootstrap 4 and JQuery libraries into the project.
Inside app/, we create the folder static/. The folder static/ will be used to store .js files, .css files and images. Inside static/ we create the folder libs/. This folder will be used to store the external css and js libraries required by the project, such as Bootstrap and JQuery.
Download Bootstrap 4. Inside the downloaded libary we will find the css/ and js/ folders.
In the folder app/static/libs/ we create a folder called bootstrap/ and copy and paste the css/ and js/ folders previously downloaded from the Bootstrap page.
Subsequently, we create the jquery folder in app/static/libs/, downloaded the library and copy/paste the file jquery-3.2.1.min.js into app static/libs/jquery/.
To store the .js and .css files written by us, we create the css/ and js/ folders inside the app/static/folder. Inside the folder app/static/css/ we create the file main.css. In this file we will write the general styles of the application. Inside the folder app/static/js/ we create the file main.js. In this file we will write the general Javascript functions of the application.
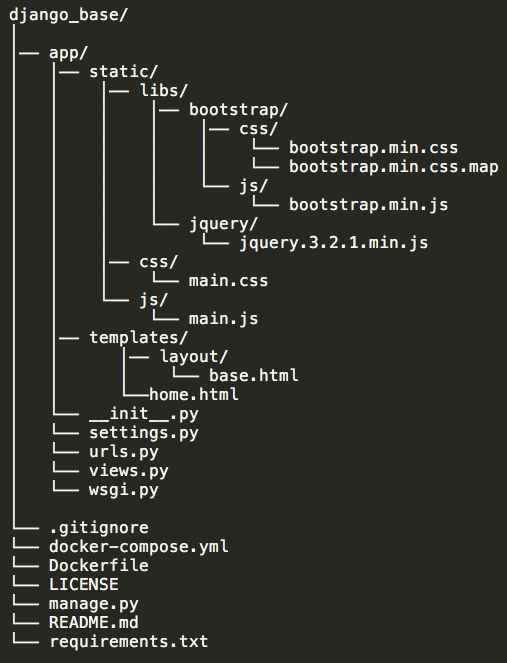
The final structure of the project is the following:
After finishing the configuration of the project, we execute the following command in the terminal:
docker-compose up
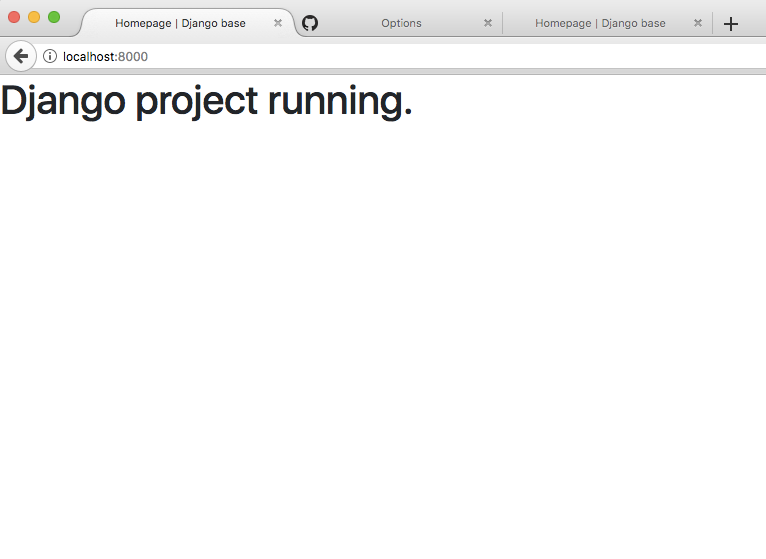
This command will run the initial migrations of the PostgreSQL database and will raise the local web server. Now we can go to our web browser and navigate the url localhost:8000. This should now show us something very similar to the following screenshot:
7. Update repository
We must update the repository with any changes we make. To do so, we run the following commands:
git add . - Prepare files for the commit, don't forget the period.
git commit --m = "Created basic Django project configuration files" - Create commit
git push - Upload changes to the repository.
Thus our work will be available for the free use of the community from within its github repository.
8. Inform the community about such a contribution in utopian.io
Then we create a post on utopian.io with which we inform the community about the contribution. Utopian is a platform that encourages contributions to open source projects, and is built on top of the steem blockchain.
This has been the process of creating the django_base project, a repository that allows you to start a Django project in less than 5 minutes. To start a new Django project, you only need to clone the repository and run the following commands:
docker-compose build
and then:
docker-compose up
I want to end with an invitation to the community of programmers to add their contributions to the development of open source projects, to use utopian, and to contribute to the creation of documentation in all languages to encourage the growth of the promising software development industry and its applications in all of our communities.
Love and Light to All!
Posted on Utopian.io - Rewarding Open Source Contributors
This has been so helpful for our Django web app building.
Hopefully this will help many other people as well.
Thank you for the contribution. It has been approved.
You can contact us on Discord.
[utopian-moderator]
Thank you very much for your approval!
Hey @coffeesource.net I am @utopian-io. I have just upvoted you!
Achievements
Suggestions
Get Noticed!
Community-Driven Witness!
I am the first and only Steem Community-Driven Witness. Participate on Discord. Lets GROW TOGETHER!
Up-vote this comment to grow my power and help Open Source contributions like this one. Want to chat? Join me on Discord https://discord.gg/Pc8HG9x