Repository
What Will I Learn?
- Preparation and introduction of GraphQL
- Creating API server nodes
Requirements
- Basic Javascript
- Install Node
- Install Express
- Install GraphQL
Resources
- Node.js https://nodejs.org
- GraphQL https://github.com/graphql
- Express https://expressjs.com/
Difficulty
Basic
Tutorial Content
Hi everyone, this tutorial we will make a new tutorial about something that is busy being discussed. this is a new thing and something that is quite popular among developers. we will discuss GraphQL, here we will discuss from the beginning about GraphQL and little by little our goal is to create an API using GraphQL, GraphQL this is a new thing I learned. So I suggest that for those of you who are new to GraphQL you can get to know the Rest API that is widely used in Google products. For that, we just start this interesting topic.
What is GraphQL?
Maybe for those of you who are not developers. they might sound strange about GraphQL?. GraphQL is the query language for your API. This is the tag line that we can see on the official website https://graphql.org/. So GraphQL is a new way for us to interact with the API. maybe before you know the REST API, GraphQL is something like that. In the REST API we can access it with a URL such as forum/1and then at the URL we can get Response.
- Difference between REST API and GraphQL
We can access the REST API through an endpoint and at the endpoint we will get a response with the data we want. In the GraphQL method and how it works is different. In GraphQL we will use a new language, but take it easy. This language is easy to understand for those of you who are just using GraphQL. For more details, we can see the difference below:
REST API
--------
/user/1
/user/millea

GRAPHQL
-------
type Project {
  name: String
  tagline: String
  contributors: [User]
}
If in the REST API we need an endpoint to access the data we want and provide the functions to be used and the parameters needed.
If in GraphQL we don't need endpoints or functions that are specifically created for access. we use this method:
type Project {
  name: String
  tagline: String
  contributors: [User]
}
Maybe it's still a little confusing, we'll see an example of its use in the next section. GraphQL is not limited to just one programming language you can visit the website there are many languages supported by GraphQL, one of which we will use is Javascript as a server. I will give an overview through the picture below how GraphQL works:
.gif)
We can see in the picture above, we can compare a hero to a table in the database and inside it has data such as objects with each key and value. If we look at the description above, the advantages that we can get is what we need. we often use the REST API and when getting excessive data responses.
Preparation for server nodes
Well in this section we will start using the server that we will use as a server from GraphQL. As we discussed above, we will use Javascript as the server language we use. so for that, I hope you have installed the node first, to install the node you can visit the official website here https://nodejs.org/. After you install the node you can continue to install GraphQL.
- GraphQL settings
Before we build a server for GraphQL we have to install it first, we can make npm init in the project folder we will use, here I will use the GraphQL folder.
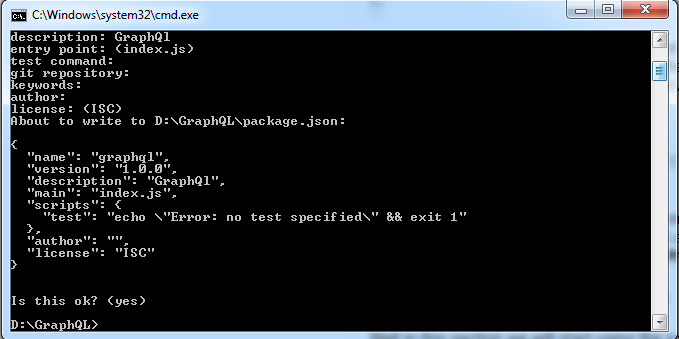
Well after we use npm init on our project we can install express, express-graphql, and graphql. We can install it by one line. We can see in the picture below:
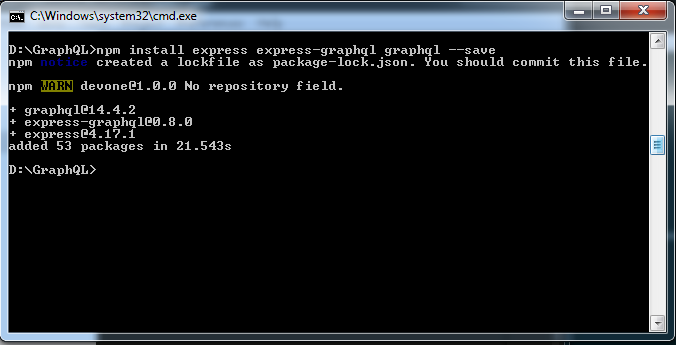
We can see above we can install it like the following npm install express --express-graphql graphql --save we can directly install 3 packages at once. "name" in package.json does not contain the word graphql to make it easier for you in the installation process.
package.json
{
  "name": "devone", // This name of package.json
  "version": "1.0.0",
  "description": "GraphQl",
  "main": "index.js",
  "scripts": {
    "test": "echo \"Error: no test specified\" && exit 1"
  },
  "author": "",
  "license": "ISC",
  "dependencies": {
    "express": "^4.17.1",
    "express-graphql": "^0.8.0",
    "graphql": "^14.4.2"
  }
}
- Npm install nodemon
Well, we can see in the picture above we have to installed GraphQL in our project folder. To make it easier for us to use nodes as servers, we can install tools that can help us, we can install npm i nodemon -g. We can install it like the following:

We can see in the picture above we managed to install nodemon. After installing nodemon we can use it like this nodemon server, The advantage of using nodemon is that when there are changes to the project file, we don't need to restart the server of the application we're working on.
Create a server node
The next step we will work on is creating a server for the API that we are creating. Here I will create an app.js file as the main server that we will use. In this file we will import the 3 tools that we have installed before, namely express express-graphql and graphql. For more details, we can see the sample code directly below:
app.js
const express = require('express');
const graphqlHTTP = require('express-graphql');
const { buildSchema } = require('graphql');
Because we have installed express we can import and define it on express variables like the following const express = require('express');. So does library express-graphql. We can import and define it into variables like the following const graphqlHTTP = require('express-graphql');.
It's different than when we import graph we will import it in this way const { buildSchema } = require('graphql');. This method is the way to write javascript ES6, This method of writing means that we will specifically import or import only the buildSchema function in the graphql library.
- Create a server
Well, here I am we will start making the server, to make our server need help from express to make it easier. To make server we can use the express () function like the example below:
app.js
const express = require('express');
const graphqlHTTP = require('express-graphql');
const { buildSchema } = require('graphql');

var app = express();

app.listen(4000, ()=> console.log("Running on port 4000..."));
We define an instance of the express () function to the app variable and then through the app variable we can call the app.listen() function to create a server. the listen function has a parameter, the first parameter is the port we will use for the server and the second is a function to return something. In this case, I will restore console.log ("Running on port 4000...") as a sign that the server has been successful executed then to run the server we can use nodemon filename. For more details, we can see the example below:
we can see in the picture above we have succeeded in creating a server from express to run the GraphQL API that we will use.
Create a routing GUI
We need to know, that what we are going to build is an API from the server side, so when we develop we have to have a GUI (Graphical user interface) to make it easier for us to do testing as clients who will consume the GraphQL API. so here we will learn how to make that interface. To make it we have to make a routing. more clearly we can see the sample code below:
app.js
const express = require('express');
const graphqlHTTP = require('express-graphql');
const { buildSchema } = require('graphql');

const app = express()

app.use('/graphql', graphqlHTTP({
    graphiql : true // To set GUI For testing
}))

app.listen(4000, ()=> console.log("Running on port 4000..."));
We use express as a server so we can use the use() function to create routing. In the use function, there are two parameters, the first is the Path /graphql and the second we can use the library from express-graphql to make an HTTP request to graphql.
We can use it with the graphqlHTTP variable that we have defined above. In the graphqlHTTP() function, we can set it in the form of an object. the following is the setting:
{
    graphiql : true // To set GUI For testing
}
The key that we will use to build the interface is graphiql. by default graphiql is false. but because here we need an interface for developing we will set it to true.
Now we can try to access route '/ graphql', if there is no error then we can open the routing, as shown below:
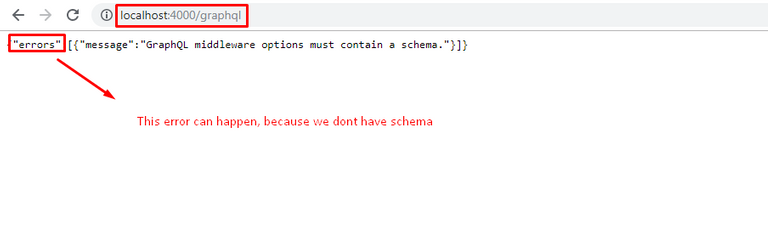
We can see in the picture above we have succeeded to access routing /graphql but we get an error. This error occurs because we don't have a schema to access, what is a schema? we will learn it in the next tutorial. For now, I will end this tutorial. I hope you get an idea of how GraphQL works?. I hope this tutorial will help you. next tutorial we will discuss the schema on GraphQL. thank you.
Thank you for your contribution @duski.harahap.
After reviewing your contribution, we suggest you following points:
Again a very interesting and well explained tutorial.
Using GIFs to show results is definitely better than standard still images.
Thanks for following some of our suggestions in your previous tutorials.
Thank you for your work in developing this tutorial.
Looking forward to your upcoming tutorials.
Your contribution has been evaluated according to Utopian policies and guidelines, as well as a predefined set of questions pertaining to the category.
To view those questions and the relevant answers related to your post, click here.
Need help? Chat with us on Discord.
[utopian-moderator]
Thank you for your review, @portugalcoin! Keep up the good work!
Hi @duski.harahap!
Your post was upvoted by @steem-ua, new Steem dApp, using UserAuthority for algorithmic post curation!
Your post is eligible for our upvote, thanks to our collaboration with @utopian-io!
Feel free to join our @steem-ua Discord server
Hey, @duski.harahap!
Thanks for contributing on Utopian.
We’re already looking forward to your next contribution!
Get higher incentives and support Utopian.io!
Simply set @utopian.pay as a 5% (or higher) payout beneficiary on your contribution post (via SteemPlus or Steeditor).
Want to chat? Join us on Discord https://discord.gg/h52nFrV.
Vote for Utopian Witness!