You can use Trip.js to make new feature introduction to your website. Tripjs can use to teach new comers how to use your website. So, in this tutorial I'll show you how to use this library.
What Will I Learn?
- Installing Bootstrap from CDN
- Installing jQuery from CDN
- Installing Trip.js from CDN
- Using trip.js to make website introduction
Requirements
- Knowledge of HTML and CSS
- Knowledge of Bootstrap (Framework CSS)
- Knowledge of jQuery
Difficulty
Either choose between the following options:
- Basic
Tutorial Contents
Intalling
So, the first thing to using this library we need a project file. In this tutorial I make a simple project called index.html. in this file we write the code to make website introduction.
We must declare html tag on index.html and then import bootstrap, jquery and trip.js from CDN.
first we install css framework bootstrap css and trip css file and we must put before end of head tag. then we must put jquery and trip.js before end of body tag.
<html>
  <head>
    <title>Tripjs</title>
    <link rel="stylesheet" href="https://maxcdn.bootstrapcdn.com/bootstrap/3.3.7/css/bootstrap.min.css">
    <link rel="stylesheet" type="text/css" href="https://cdnjs.cloudflare.com/ajax/libs/Trip.js/3.3.3/trip.min.css"/>
  </head>
  <body>
    <script src="https://cdnjs.cloudflare.com/ajax/libs/jquery/3.3.1/jquery.min.js"></script>
    <script src="https://cdnjs.cloudflare.com/ajax/libs/Trip.js/3.3.3/trip.min.js"></script>
  </body>
</html>
Usage
Well, bootstrap, jquery and tripjs has been installed. But, before we using tripjs we must have a web design. So, in this tutorial I have simple design using bootstrap. And each tag to show the feature we must declare data-trip. data-trip is function from tripjs to initialize the data then tripjs automatically render the data and show feature introduction. Here are the codes:
<html>
<head>
<title>Tripjs</title>
<link rel="stylesheet" href="https://maxcdn.bootstrapcdn.com/bootstrap/3.3.7/css/bootstrap.min.css">
<link rel="stylesheet" type="text/css" href="https://cdnjs.cloudflare.com/ajax/libs/Trip.js/3.3.3/trip.min.css"/>
</head>
<body>
<div class="container text-center tripjs" data-trip-index="1" data-trip-content="<h1>This is the title</h1>" data-trip-position="screen-center" data-trip-delay="-1" data-trip-expose="true">
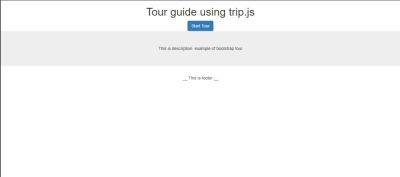
<h1>Tour guide using Trip.js</h1>
<button class="btn btn-primary" id="start">Start Tour</button>
</div>
<div class="jumbotron text-center tripjs" data-trip-index="2" data-trip-content="<h1>This is the content of website</h1>" data-trip-position="screen-se" data-trip-delay="-1" data-trip-expose="true">
<div class="container">This is description. example of bootstrap tour</div>
</div>
<div class="container text-center tripjs" data-trip-index="3" data-trip-content="<h1>The last tour</h1>" data-trip-position="screen-ne" data-trip-delay="-1" data-trip-expose="true">
<footer>__ This is footer __</footer>
</div>
<script src="https://cdnjs.cloudflare.com/ajax/libs/jquery/3.3.1/jquery.min.js"></script>
<script src="https://cdnjs.cloudflare.com/ajax/libs/Trip.js/3.3.3/trip.min.js"></script>
</body>
</html>
Now, we have a design and data-trip ready to rendering. Short, that's code show you a simple design using bootstrap css framework. Then to triggering all data-trip we use class in this case called tripjs. Then each tripjs class declare the data-trip. data-trip-index to initialize the index step of tour guide. the data-trip-content to declare the text to show information or guide the user about the website feature. data-trip-position to initialize position each feature introduction. and data-trip-expose to show the information each feature introduction. It's look like:
That is just simple design, we can see the feature introduction. Then we must declare some code to rendering the data-trip to show feature introduction. In this tutorial I using the button to start the tour guide. In the button I declare id called start to triggering the tripjs.
Then to finish it we declare code to make tripjs on javascript tag. In button function we declare some options to compiled the tripjs. Here arre the codes:
<html>
  <head>
    <title>Tripjs</title>
    <link rel="stylesheet" href="https://maxcdn.bootstrapcdn.com/bootstrap/3.3.7/css/bootstrap.min.css">
    <link rel="stylesheet" type="text/css" href="https://cdnjs.cloudflare.com/ajax/libs/Trip.js/3.3.3/trip.min.css"/>
  </head>
  <body>
    <div class="container text-center tripjs" data-trip-index="1" data-trip-content="<h1>This is the title</h1>" data-trip-position="screen-center" data-trip-delay="-1" data-trip-expose="true">
      <h1>Tour guide using Trip.js</h1>
      <button class="btn btn-primary" id="start">Start Tour</button>
    </div>
    <div class="jumbotron text-center tripjs" data-trip-index="2" data-trip-content="<h1>This is the content of website</h1>" data-trip-position="screen-se" data-trip-delay="-1" data-trip-expose="true">
      <div class="container">This is description. example of bootstrap tour</div>
    </div>
    <div class="container text-center tripjs" data-trip-index="3" data-trip-content="<h1>The last tour</h1>" data-trip-position="screen-ne" data-trip-delay="-1" data-trip-expose="true">
      <footer>__ This is footer __</footer>
    </div>
    <script src="https://cdnjs.cloudflare.com/ajax/libs/jquery/3.3.1/jquery.min.js"></script>
    <script src="https://cdnjs.cloudflare.com/ajax/libs/Trip.js/3.3.3/trip.min.js"></script>
    <script>
      $('#start').click(function(e){
        var options = {
          showSteps: true,
          showNavigation: true,
          tripTheme: "yeti"
        }
        var trip = new Trip('.tripjs', options);
        // Start the tour
        trip.start();
      })
    </script>
  </body>
</html>
That's code explain declare the optionswith some value. showSteps to showing the tour step. showNavigation to show the navigation each step. Then tripTheme to rendering the tour guide theme. The last we just call the class with data-trip and we declare it with option. Now we can see the feature introduction. It's look like:
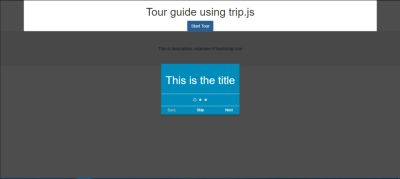
This is the first step of feature introduction.
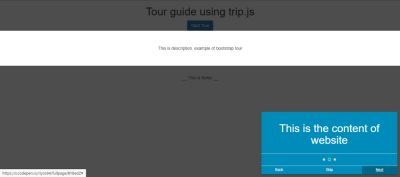
This is the second step explain about the content.
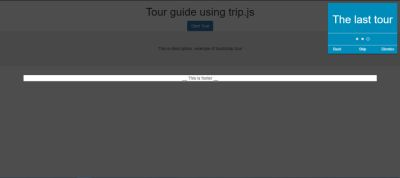
And the last feature is the footer.
Conclusion
This tutorial is just to show about the website feature and can help new users how to use and interact with your website. I have this tutorial can help you to develop your website project to make tour guide on your website. You can explore trip.js to modify tour guide like you prefer. Just play around the Trip.js library.
For more option and documentation about intro.js you can find on the official site Here
If you want see the demo and fully code of this tutorial you can check here:
See the Pen Trip.js by Rio Dwi Prabowo (@riyos94) on CodePen.
Thank you
Posted on Utopian.io - Rewarding Open Source Contributors
Your contribution cannot be approved because it does not follow the Utopian Rules.
You can contact us on Discord.
[utopian-moderator]
@riyo.s94, Upvote for supporting you.
Hi @steemitstats, Thank you