
This tutorial is part of a series where different aspects of quickly creating and deploying STEEM web applications by using the Django framework as well as Beem are discussed. Knowledge of programming with Python is advised, as well as HTML and CSS.
Repository
https://github.com/holgern/beem
https://github.com/django/django
What will I learn
- Importing a bootstrap theme
- Extracting urls from text
- Parsing STEEM posts into a template
Requirements
- Python 3.7
- Django 2.1.5
- Beem 0.20.17
- Gunicorn 19.9.0
- Git
- Heroku
- Pipenv
Difficulty
- basic
Tutorial
Preface
Django allows for quick development of web applications and since it uses Python as it's main programming language it also allows for easy combition with the steem-python library to develop STEEM web applications. This part builds on the previous part Part 0 and continues with the code: Github. A bootstrap template will be imported and changed to display STEEM posts.
Setup
Create a new folder for the project and set up a virtual environment with all the required packages.
$ cd ~/
$ mkdir steem_blog
$ cd steem_blog
$ pipenv install django==2.1.5
$ pipenv shell
(steem_blog) $ pip install beem==0.20.17
(steem_blog) $ pip install gunicorn==19.9.0
Importing a bootstrap theme
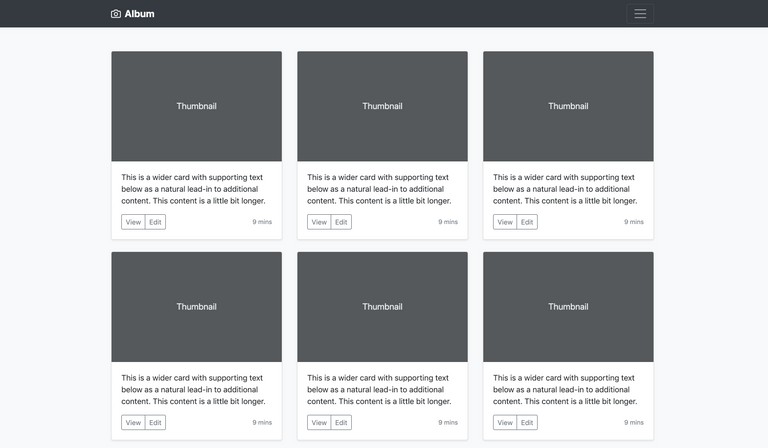
Bootstrap is like lego for html and offers many prebuild sets of html/css code. Including themes where multiple sets are combined for some generic use cases. In this tutorial the example theme Album will be used to parse blog posts from a STEEM account that is retrieved from the url.
To be able to run bootstrap code a start template is required to meet all required .css and .js requirements. In addition each theme may come with some addition .css and .js which has to be installed manually. All the files can be found inside the bootstrap source code. These files are called static files and are held in their separate folder static, which has to be registered in settings.py. Create the required folders
(steem_blog) $ mkdir static
(steem_blog) $ cd static
(steem_blog) $ mkdir css
(steem_blog) $ mkdir img #images are also held here
# steem_account/settings.py

STATIC_URL = '/static/'

STATIC_ROOT = os.path.join(BASE_DIR, 'staticfiles')

STATICFILES_DIRS = [
    os.path.join(BASE_DIR, 'static')
]
As every page in the web app will require the starter template it can be kept inside it's own file base.html that is then extended to from other html files. In this case album.html extends to base.html.
(steem_blog) $ cd ../
(steem_blog) $ touch templates/base.html
(steem_blog) $ touch templates/album.html
Remove the old home.html and set the view in posts/view.py to album.html.
(steem_blog) $ rm templates/home.html

# posts/view.py

class HomePageView(ListView):
    template_name = 'album.html'
Inside base.html several things are happening. load static loads the path to the static folder for any calls to those files. spaceless removes all whitespace between tags >< from the html file for faster loading and block content refers to a block of html that is pulled from a different html file where this block is defined.
# templates/base.html

{% load static %}

{% spaceless %}
{% endspaceless %}

{% block content %}
{% endblock content %}
Copy album.css from the bootstrap source code into static/css and add it into base.html. And _includes/icons/placeholder.svg into static/img.
# templates/base.html

(html comment removed:  Bootstrap CSS )
<link rel="stylesheet" href="https://stackpath.bootstrapcdn.com/bootstrap/4.2.1/css/bootstrap.min.css" integrity="sha384-GJzZqFGwb1QTTN6wy59ffF1BuGJpLSa9DkKMp0DgiMDm4iYMj70gZWKYbI706tWS" crossorigin="anonymous">
<link rel="stylesheet" href="{% static 'css/album.css' %}"> # new
Inside album.html that is taken from the bootstrap source code four changes are made. The file is set to extend to base.html. The block content is defined, this is the part that will be parsed into base.html. A for loop is created to generate the html for each blog post and code that is not required from the bootstrap theme is removed.
# templates/album.html

{% extends 'base.html' %}

{% block content %}
{% endblock content %}

{% for post in all_posts_list %}
{% endfor %}
Remove the following div code block.
<section class="jumbotron text-center">
...
</section>
Also remove the repeated card html block, put only one between {% for post in all_posts_list %} -{% endfor %}.
Running the server at this point generates the following. As shown layout is there, however there are some important things missing.
Extracting urls from text
The previous tutorial showed how a STEEM username can be extracted from the url to retrieve their blog post history via Beem. This returned a generator object which contained a Comment() object for each blog post. The Comment() class from Beem contains many properties and functioned that can be called upon. One of those is the body, which is the text part of the post. The body post also contains the urls to any images contained inside the post. findall() allows to search for strings that match a regular expression like http urls, this example regular expression works quite well but not on 100% of the urls.
# retrieve account blog history
def account_history(username):
    stm = Steem("https://steemd.minnowsupportproject.org")
    account = Account(username, steem_instance=stm)

    data = account.blog_history(limit=9, reblogs=False)
    return_data = []

    # try to find the first url for the thumbnail image
    for blog in data:
        url = re.findall('http[s]?://(?:[a-zA-Z]|[0-9]|[./\-%]|[!*,]|(?:%[0-9a-fA-F][0-9a-fA-F]))+', blog.body)
        return_data.append([blog, ('https://steemitimages.com/640x480/' + url[0])])

    return return_data
The image for the thumbnail is always located at the first index. steemitimages.com has a feature to produce thumbnail images by adding a url in front of the image url. Thumbnail image locations are not stored inside the post. The thumbnail and blog object are stored together into a list of lists to be parsed into the html template.
Parsing STEEM posts into a template
Change the first div class to col-sm-4 d-flex pb-3 so that all cards remain equal in height. Now replace the svg placeholder with the thumbnail image and set the standard heigh and width. To access the second index of the list, instead of list[1] use list.1. Also extract the title, authorperm and reward from the comment object and set them in the appropriate places.
{% for post in all_posts_list %}

    <div class="col-sm-4 d-flex pb-3"> # changed
      <div class="card mb-4 shadow-sm">
        <img src="{{ post.1 }}" class="card-img-top" alt="" height="220" width="512"> # changed
        <div class="card-body  h-100">
          <p class="card-text"><b>{{ post.0.title }}</b></p> # changed
          <div class="d-flex justify-content-between align-items-center">
            <div class="btn-group">
                <a href="https://www.steemit.com/{{ post.0.authorperm }}"> # changed
                    <button type="button" class="btn btn-sm btn-outline-secondary">View</button>
                </a>
            </div>
            <small class="text-muted">${{ post.0.reward }}</small> # changed
          </div>
        </div>
      </div>
    </div>
{% endfor %}
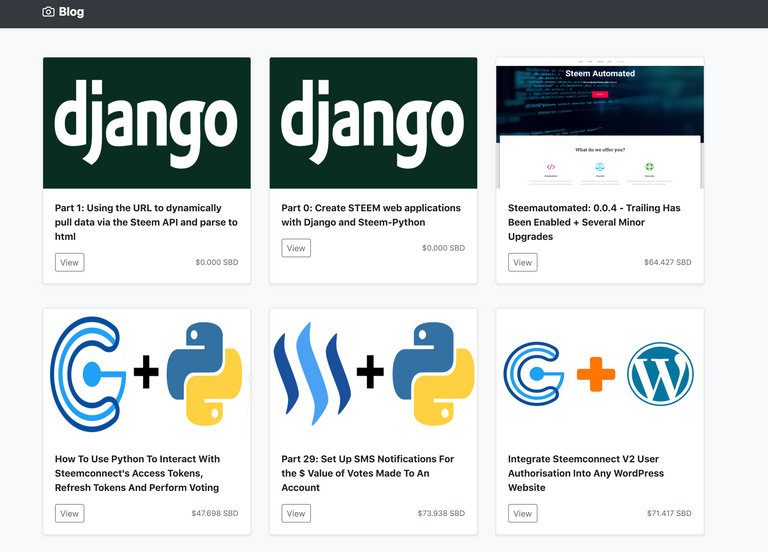
End result
Desktop
Mobile
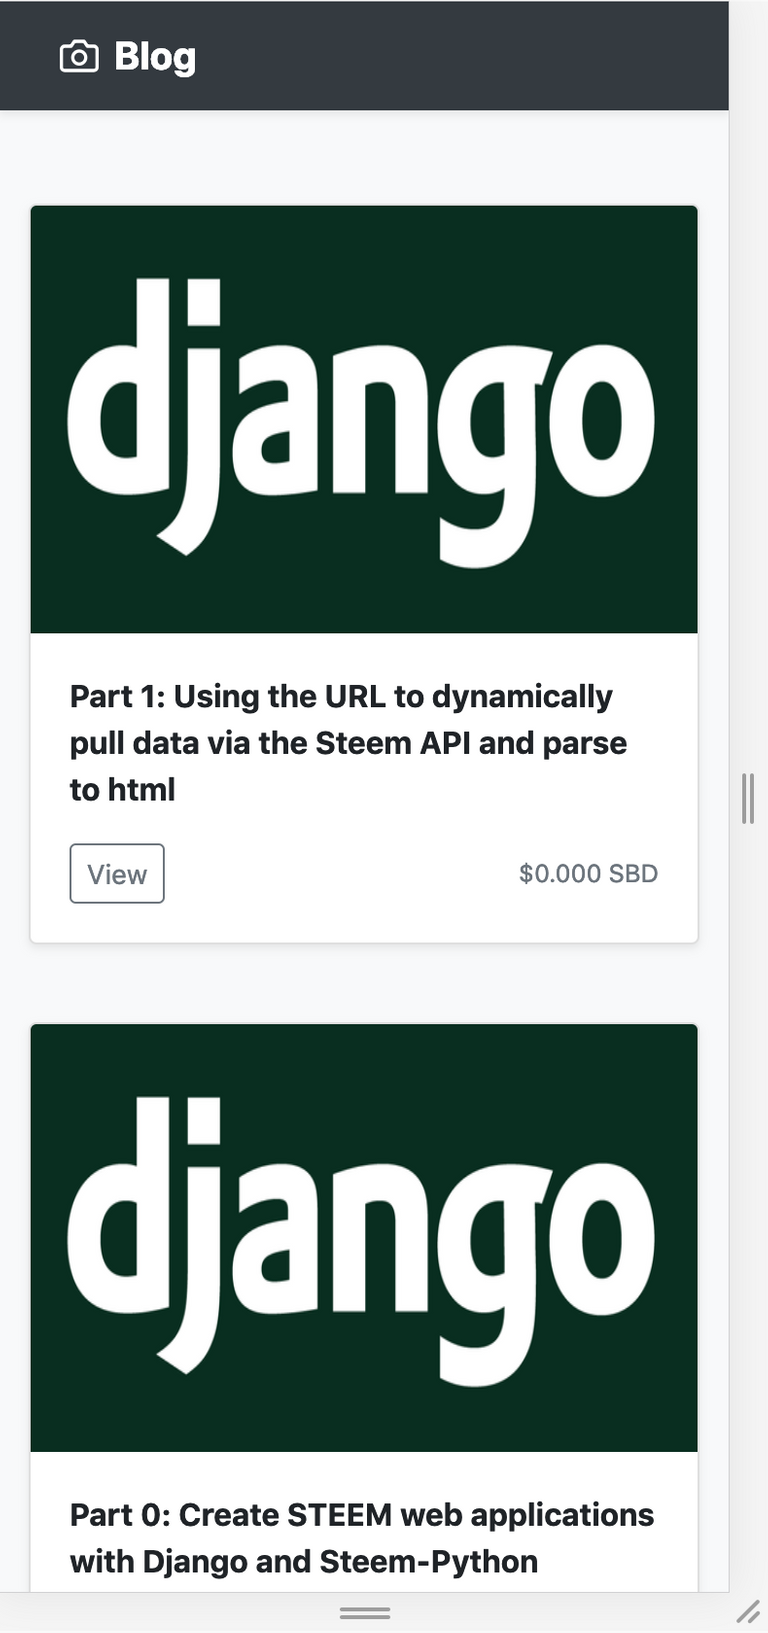
Due to Bootstrap the website is responsible and automatically adjusts for desktop and mobile users. Also the reward in $ for pending posts does not appear to be working yet.
Version control and deployment
Make sure that the pipfile has the following packages and lock the file.
[packages]
django = "==2.1.5"
beem = "==0.20.17"
gunicorn = "==19.9.0"
pyyaml = "==4.2b4"
(steem_blog) $ pipenv lock
Heroku requires a Procfile, create it and add the following line.
(steem_blog) $ touch Procfile


# ./Procfile
web: gunicorn steem_blog.wsgi --log-file -
Now set the ALLOWED_HOSTS in settings.py so the website can run from any ip.
# steem_blog/settings.py
ALLOWED_HOSTS = ['*']
Create a git repository online. Now initiate git in the folder, add all the files, commit and push.
(steem_blog) $ git init
(steem_blog) $ git add -A
(steem_blog) $ git commit -m 'initial commit'
(steem_blog) $ git remote add origin https://github.com/Juless89/django-steem-blog.git
(steem_blog) $ git push -u origin master
When using git for the first time it is recommend to set the following variables.
$ git config --global user.name "Your Name"
$ git config --global user.email "[email protected]"
Create an Heroku app and link it.
(steem_blog) $ heroku login
(steem_blog) $ heroku create
Creating app... done, ⬢ enigmatic-meadow-62592
https://enigmatic-meadow-62592.herokuapp.com/ | https://git.heroku.com/enigmatic-meadow-62592.git

(steem_blog) $ heroku git:remote -a enigmatic-meadow-62592
set git remote heroku to https://git.heroku.com/enigmatic-meadow-62592
Push the code to heroku.
(steem_blog) $ git push heroku master
Activate the Henroku app, set it to level 1. Level 1 is free to use. Then open the app to see it live. As this is a free service the apps get put to sleep when not used for 30 min.
(steem_blog) $ heroku ps:scale web=1
(steem_blog) $ heroku open
https://enigmatic-meadow-62592.herokuapp.com/@steempytutorials
Curriculum
- Part 0: Create STEEM web applications with Django and Steem-Python
- Part 1: Using the URL to dynamically pull data via the Steem API and parse to html
The code for this tutorial can be found on Github!
This tutorial was written by @juliank.
Thank you for your contribution @steempytutorials.
After analyzing your tutorial we suggest the following:
Your tutorial is very well structured and well explained. Good work on developing this tutorial.
Your contribution has been evaluated according to Utopian policies and guidelines, as well as a predefined set of questions pertaining to the category.
To view those questions and the relevant answers related to your post, click here.
Need help? Chat with us on Discord.
[utopian-moderator]
Thank you for your review, @portugalcoin! Keep up the good work!
I'm not a big fan of Django, because years ago it was a pretty big pain in the ass, and quite bloated. Not sure if it's a bit easier to use now days.
But good job puttin out a tutorial.
Thanks, I am not too familiar with Django yet myself. Doing these tutorials allows me to learn more. I would also like to learn more about Flask after I have played around for a bit in Django.
I like Flask. It's very lightweight and easy to use.
Hey, @steempytutorials!
Thanks for contributing on Utopian.
We’re already looking forward to your next contribution!
Get higher incentives and support Utopian.io!
Simply set @utopian.pay as a 5% (or higher) payout beneficiary on your contribution post (via SteemPlus or Steeditor).
Want to chat? Join us on Discord https://discord.gg/h52nFrV.
Vote for Utopian Witness!