What Will I Learn?
- The user will learn the concept of JRadioButton.
- The user will learn how to create a Radio Button.
- The user will also learn functions of a radio button by using it to change font name of a text.
- The user will learn about ItemListeners.
Requirements
- A computer System is required for this tutorial.
- Java Software Development Kit(JDK) must be installed on your computer.
- An Integrated Development Environment(IDE) such as Eclipse or NetBeans is required to be installed on your computer.
Get JDK here
Get Eclipse here
Get NetBeans here
Difficulty
The codes in this tutorial are around the same level as other tutorials so difficulty level will be same as others - Intermediate.
Tutorial Contents
In the previous tutorials, we have learnt various Swing Components like JFrame, JLabel, JTextField, JPasswordField and JButton. Today, we will look at another interesting Swing Component and the subject of this tutorial:
JRADIOBUTTON AND ITEMLISTENER
JRADIOBUTTON
JRadioButton is a Swing component that represents an item with a state selected or unselected. Usually a group of radio buttons is created to provide options to the user, but only one option can be selected at a time.
It is an implementation of a radio button that can be selected or deselected. Used with a ButtonGroup object to create a group of buttons in which only one button at a time can be selected. Buttons can be configured, and to some degree controlled, by actions. Using an action with a button has many benefits beyond directly configuring a button.
ITEMLISTENER
The Java ItemListener is notified whenever you click on the checkbox. It is notified against ItemEvent. The ItemListener interface is found in java.awt.event package. It has only one method: itemStateChanged().
The class which processes the ItemEvent should implement this interface.The object of that class must be registered with a component. The object can be registered using the addItemListener() method. When the action event occurs,
that object's itemStateChanged method is invoked.
itemStateChanged()
The itemStateChanged() method is invoked automatically whenever you click or unclick on the registered checkbox component.
In this tutorial, we will create four JRadioButton objects and a JTextField object associate them with actions using ItemListener.
Each Radio Button will represent a Font name. A font will be selected by default.
The user can change the font of the text by clicking on the radio button the font represents. The user can select any of the fonts by clicking the required radio button.

CODE BLOCK
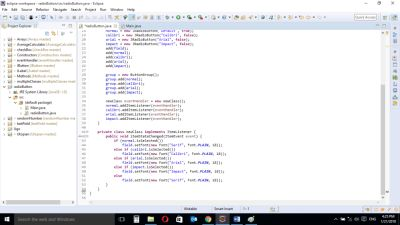
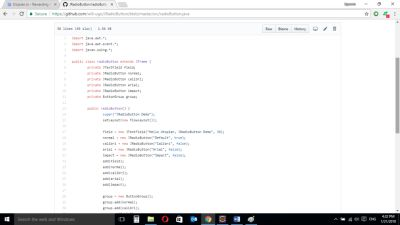
RADIOBUTTON CLASS
import java.awt.*;
import java.awt.event.*;
import javax.swing.*;
public class radioButton extends JFrame {
    private JTextField field;
    private JRadioButton normal;
    private JRadioButton calibri;
    private JRadioButton arial;
    private JRadioButton impact;
    private ButtonGroup group;
    public radioButton() {
        super("JRadioButton Demo");
        setLayout(new FlowLayout());
        field = new JTextField("Hello Utopian, JRadioButton Demo", 30);
        normal = new JRadioButton("Default", true);
        calibri = new JRadioButton("Calibri", false);
        arial = new JRadioButton("Arial", false);
        impact = new JRadioButton("Impact", false);
        add(field);
        add(normal);
        add(calibri);
        add(arial);
        add(impact);
        group = new ButtonGroup();
        group.add(normal);
        group.add(calibri);
        group.add(arial);
        group.add(impact);
        newClass eventHandler = new newClass();
        normal.addItemListener(eventHandler);
        calibri.addItemListener(eventHandler);
        arial.addItemListener(eventHandler);
        impact.addItemListener(eventHandler);
    }
private class newClass implements ItemListener {
public void itemStateChanged(ItemEvent event) {
            if (normal.isSelected())
                field.setFont(new Font("Serif", Font.PLAIN, 18));
            else if (calibri.isSelected())
                field.setFont(new Font("Calibri", Font.PLAIN, 18));
            else if (arial.isSelected())
                field.setFont(new Font("Arial", Font.PLAIN, 18));
            else if (impact.isSelected())
                field.setFont(new Font("Impact", Font.PLAIN, 18));
            else
                field.setFont(new Font("Serif", Font.PLAIN, 18));
        }
    }
}
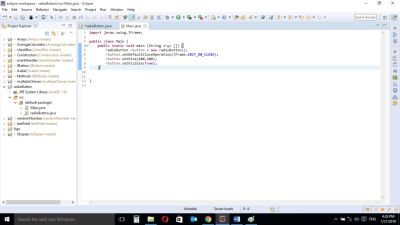
MAIN CLASS
import javax.swing.JFrame;
public class Main {
public static void main (String args []) {
        radioButton rbutton = new radioButton();
        rbutton.setDefaultCloseOperation(JFrame.EXIT_ON_CLOSE);
        rbutton.setSize(400,200);
        rbutton.setVisible(true);
    }
}
RADIOBUTTON CLASS
import java.awt.*;
import java.awt.event.*;
import javax.swing.*;
These are Import Statements. Import Statements are used to reference methods that are in other packages. Java comes with a bunch of in built methods and these methods are in different packages. When the user imports a class, the user has access to all methods in the class because they are automatically imported.
public class radioButton extends JFrame {
This is the name of the current class. When you start a new class, it must be saved with a name. This class extends JFrame. In Java, it is possible for classes to inherit properties of another class. Here, this class inherits basic Frame properties like a window with close, maximize and minimize buttons from the JFrame class. The extends keyword is used to achieve this.
private JTextField field;
private JRadioButton normal;
private JRadioButton calibri;
private JRadioButton arial;
private JRadioButton impact;
private ButtonGroup group;
These are variable declarations of JTextField and JRadioButton type. We need a JTextField object to hold the single line of text and we will use four JRadioButton objects because we will create four radio buttons to hold the names of the Fonts.
A relationship between the radio buttons must exist between them so that two buttons do not remain clicked at the same time. If a new button is clicked, the previously clicked button unclicks.
The ButtonGroup object “group” will hold the four radio button objects to form a relationship between them.
public radioButton() {
A Constructor is a block of code that lets you initialize variables immediately an object is created. Methods can be created and called later but with constructors, initialization is done immediately. Constructors have the same name as the class name and is called when an object of the class in created.
The above constructor does not carry any arguments and is created to hold the JRadioButton components.
super("JRadioButton Demo");
The super keyword is used here to refer to properties of a superclass; in this case the JFrame class.
In this context, it is used to set the title of the newly created window. The title of the window is “JRadioButton Demo”
setLayout(new FlowLayout());
The FlowLayout class. This provides a simple layout that is used by JFrame components.
field = new JRadioButton("Hello Utopian, JRadioButton Demo", 30);
Here, the user is allowed to enter a single line of text. The user can edit the text if the user wishes. The newly entered text is then assigned to the object field. The maximum number of characters allowed for this text is 30.
normal = new JRadioButton("Default", true);
calibri = new JRadioButton("Calibri", false);
arial = new JRadioButton("Arial", false);
impact = new JRadioButton("Impact", false);
We need four JRadioButton objects for the fonts. Each Radio Button will change the font of the text.
The code above will create four RadioButton objects.
add(field);
add(normal);
add(calibri);
add(arial);
add(impact);
These will add the created JRadioButton and JTextField objects to the screen.
group = new ButtonGroup();
group.add(normal);
group.add(calibri);
group.add(arial);
group.add(impact);
The “group” object creates a relationship between the radio buttons such that when a new radio button is created, the previously clicked button unclicks.
The .add() method is then used to add the objects to the button group.
newClass eventHandler = new newClass();
normal.addItemListener(eventHandler);
calibri.addItemListener(eventHandler);
arial.addItemListener(eventHandler);
impact.addItemListener(eventHandler);
When the new class which implements the ItemListener interface is created, an object of the new class is also created. The
.addItemListerer[]
method is then used to pass execution instructions to the JRadioButton component.
ITEMLISTENER CLASS
private class newClass implements ItemListener {
ItemListener is an interface (not a class) that contains a single method.
A class that implements the interface must contain an itemStateChanged() method. The ItemEvent parameter is an Event object that represents an event.
public void itemStateChanged(ItemEvent event) {
This is the single method for the listener interface for receiving action events. The ItemEvent is a class and event is an instance of that class. event can be used to call it’s properties.
if (normal.isSelected())
The java built in .isSelected() method is used in association with the radio buttons.
This means if the indicated radio button is clicked (selected).
field.setFont(new Font("Serif", Font.PLAIN, 18));
This statement will be executed if the condition in the if statement is true. This statement sets the font name to “Serif”, font to Plain and font size to 18.
else if (calibri.isSelected())
field.setFont(new Font("Calibri", Font.PLAIN, 18));
else if (arial.isSelected())
field.setFont(new Font("Arial", Font.PLAIN, 18));
else if (impact.isSelected())
field.setFont(new Font("Impact", Font.PLAIN, 18));
else
field.setFont(new Font("Serif", Font.PLAIN, 18));
A block of nested if statements with conditions similar to the previous one, and statements to execute if the conditions are true.
The statements end with an “else” statement with a line of code to execute if none of the conditions above are true.
MAIN CLASS
import javax.swing.JFrame;
This is an import statement. This statement is used specifically to import the JFrame class from Application Program Interface (API). This allows the user to use all methods contained in it.
public class Main {
This is just like creating a new file or document and saving it with a name. This is the name of the new class created.
public static void main (String args []) {
The Java main method. Every program must contain this method in order to execute. It is the point from which the program begins execution.
A program without this method will not execute.
radioButton rbutton = new radioButton();
An Object of the radioButton class is created. This enables the user to call in built GUI methods that will help to properly display the JRadioButton component to the screen.
rbutton.setDefaultCloseOperation(JFrame.EXIT_ON_CLOSE);
This inbuilt method needs to be called before the program is run . This method states the default behavior of the windows when the “close”(x) button is clicked.
Here, it tells the window to close.
rbutton.setSize(400,200);
This is to set the size of the object to the specified width and height. In this case, the specified dimensions are (400,200).
Values of width and height are non-negative integers. The constructors that allow you to create a dimension do not prevent you from setting a negative value for these properties. If the value of width or height is negative, the behavior of some methods defined by other objects is undefined.
rbutton.setVisible(true);
This simply determines whether a component is displayed on the screen. It has two states. True and false.
With setVisible( false ), if the Component is not already marked invisible, setVisible calls invalidate() which invalidates the Container’s layout and the chain of parents since there is now more screen real estate in the Container and the positions of the siblings must be adjusted to flow into the freed space.
With setVisible( true ), if the Component is not already marked visible,setVisible calls invalidate() which invalidates the Container’s layout and the chain of parents since there is now less screen real estate in the Container and the positions of the siblings must be adjusted to squeeze in this new Component.

When the program is run, the default radio button is clicked by default.
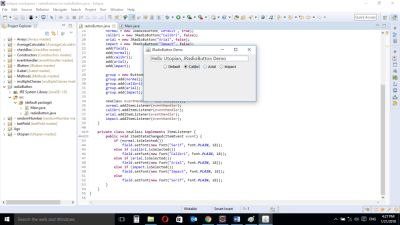
When “Calibri” button is clicked, the font of the text changes to Calibri Font.

When “Arial” button is clicked, the font of the text changes to Arial Font.
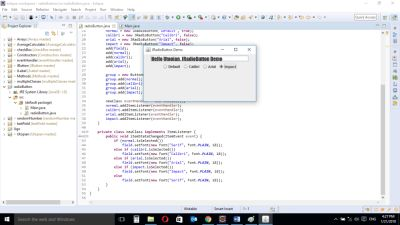
When “Impact” button is clicked, the font of the text changes to Impact Font.

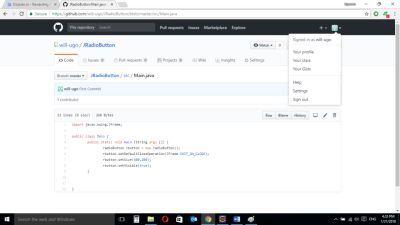
Source Codes from GitHub Account.
You can get the codes here if you want to try it on your own.
REFERENCES
Curriculum
Similar posts already posted on Utopian are:
- Java Graphical User Interface(GUI): JButton Functions
- Event Handling: Event and Listener (Actionlistener)
- Java Graphical User Interface(GUI): JTextField and JPasswordField functions Using Eclipse IDE
- Java Graphical User Interface(GUI): JFrame and JLabel functions Using Eclipse IDE
Posted on Utopian.io - Rewarding Open Source Contributors
Hey @will-ugo I am @utopian-io. I have just upvoted you!
Achievements
Suggestions
Get Noticed!
Community-Driven Witness!
I am the first and only Steem Community-Driven Witness. Participate on Discord. Lets GROW TOGETHER!
Up-vote this comment to grow my power and help Open Source contributions like this one. Want to chat? Join me on Discord https://discord.gg/Pc8HG9x
Thank you for the contribution. It has been approved.
You can contact us on Discord.
[utopian-moderator]
Congratulations! This post has been upvoted from the communal account, @minnowsupport, by will-ugo from the Minnow Support Project. It's a witness project run by aggroed, ausbitbank, teamsteem, theprophet0, someguy123, neoxian, followbtcnews, and netuoso. The goal is to help Steemit grow by supporting Minnows. Please find us at the Peace, Abundance, and Liberty Network (PALnet) Discord Channel. It's a completely public and open space to all members of the Steemit community who voluntarily choose to be there.
If you would like to delegate to the Minnow Support Project you can do so by clicking on the following links: 50SP, 100SP, 250SP, 500SP, 1000SP, 5000SP.
Be sure to leave at least 50SP undelegated on your account.