The rise of NFTs hasn’t left EOS untouched — with the recent long-awaited launch of two booming projects, .gems and Crypto Finney, the network has seen its NFT breakthrough. With the rising critique of Ethereum NFTs as not eco-friendly and expensive for both issuers and buyers, EOS offers a lucrative alternative. So if you dream about becoming an NFT artist or want to create your own indestructible collection of personal memorabilia, keep reading this guide!
If you’re not deeply familiar with NFTs, we highly recommend checking out that piece first.
What you need
Creating NFTs for sale can be as simple, as it is difficult. In order to stand out, you really need to pour all your creativity into it and think a bit ahead. Is it going to be a recurring series? If yes, do you want to add some different bits and pieces to it? Luckily, those are all nuances that you can change and shift around as you please later on. To start, you will only need a couple of things:
- An EOS account in Wombat
- Atomic Hub
- Your designs
- Some extra RAM. For every single NFT release, please get at least 300 bytes.
Did you check all three? Let’s make some NFTs then!
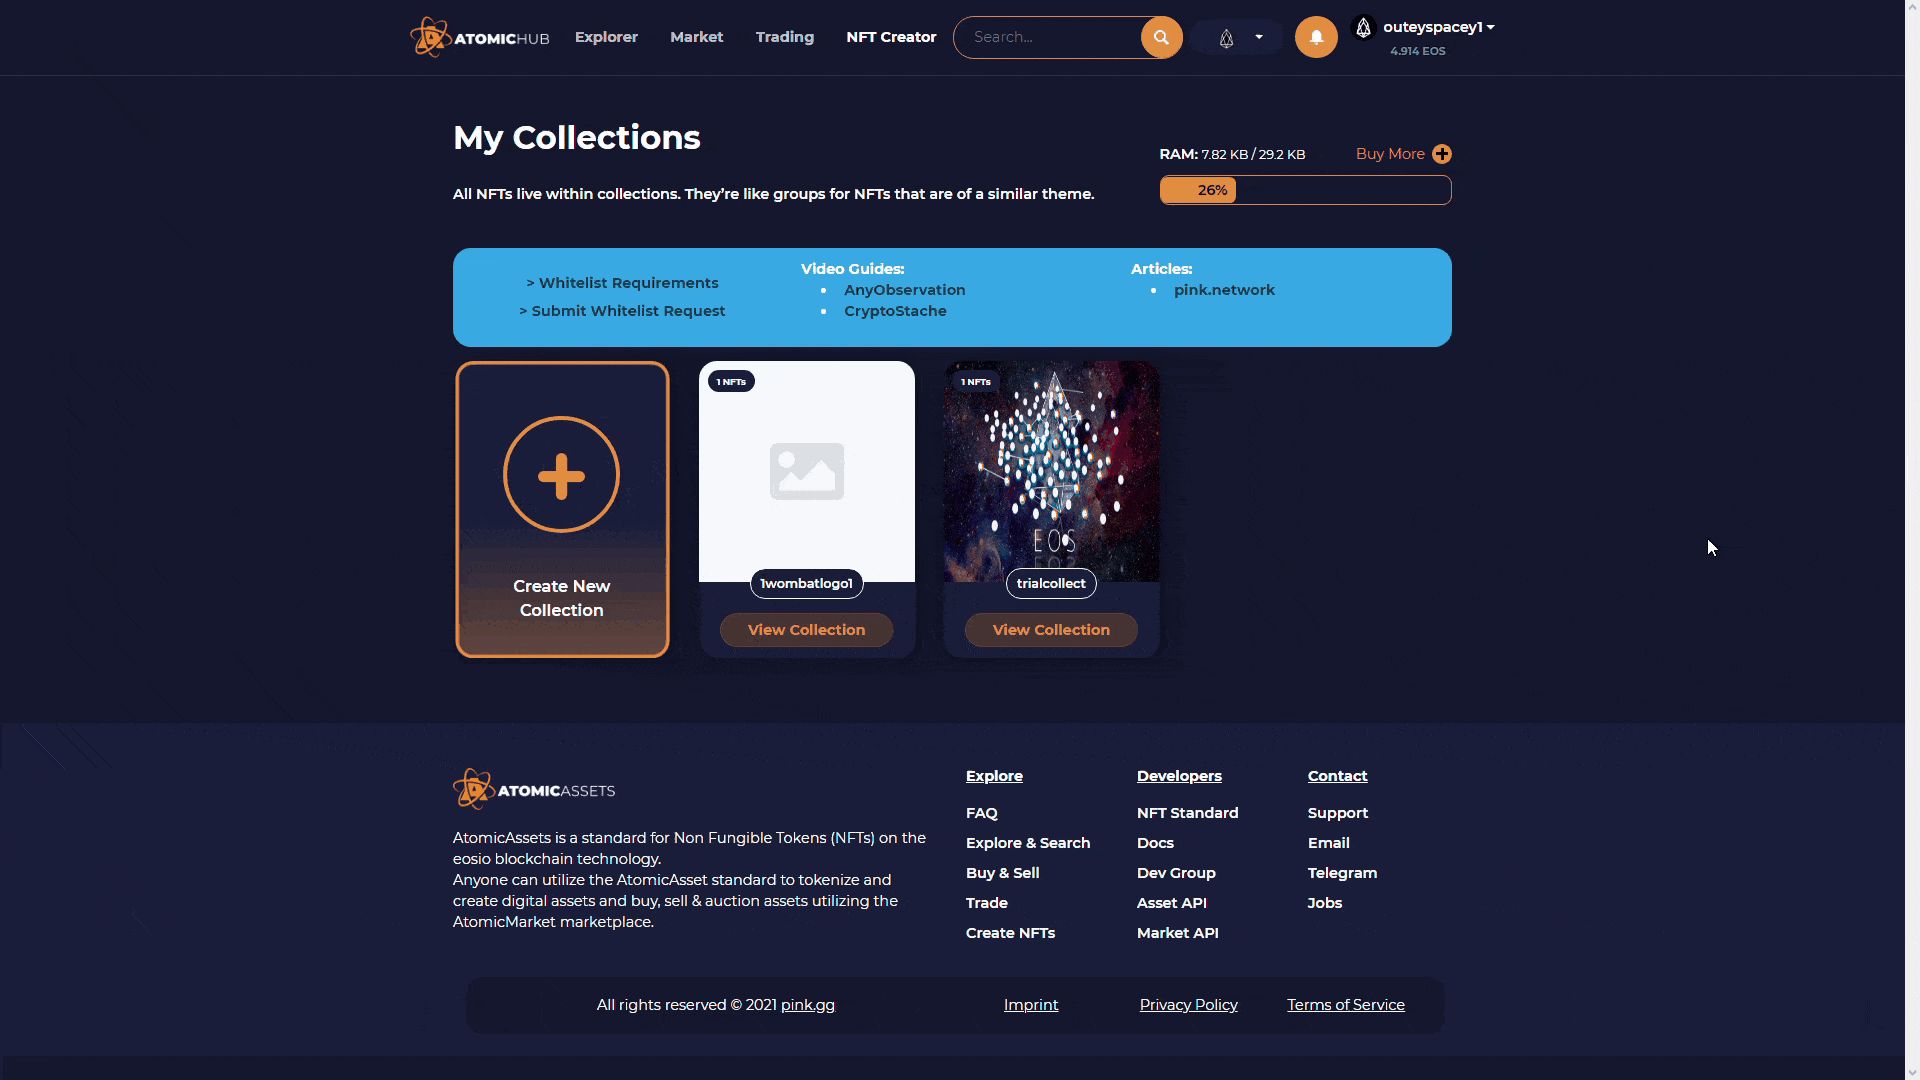
Step 1. Creating a collection
A collection on Atomic is, essentially, a group of NFTs united by a core concept. It doesn’t necessarily have to be some kind of a central theme — you can use collections to sort your NFTs by the month of creation or still vs. animated images — sky’s the limit!
To create your first collection, go to Atomic and log in with Wombat. We recommend using a computer for this process. But if you prefer the mobile app, please make sure to open Atomic within it. You can find it on top of the ‘Other’ section in the Explorer.
Once you’re there, navigate to the NFT Creator. Before you proceed — especially if you’re planning to exhibit and sell your digital art there — please read the Whitelist Requirements.

Now, let’s hit that ‘Create Collection’ button! Remember, your collection needs to have an easily identifiable name of 12 characters and/or numbers 1-5, as required by eosio naming standards. You can be far more liberal with the display name.
You can also set up a market fee for your collection. A market fee ensures that every time an NFT from your collection is traded on Atomic, you will receive up to 15% of that purchase price. For example, if you set a market fee of 7% and your NFT is sold for 100 EOS, you will receive a commission of 7 EOS. This applies both to direct sales and auctions.
Finally, if you’re an artist or you have an NFT-powered project, boast and flaunt! Add your website and a nice description to it so that others can easily discover more about your work. Once you’re satisfied with the result, hit the ‘Create Collection’ button and confirm the transaction.
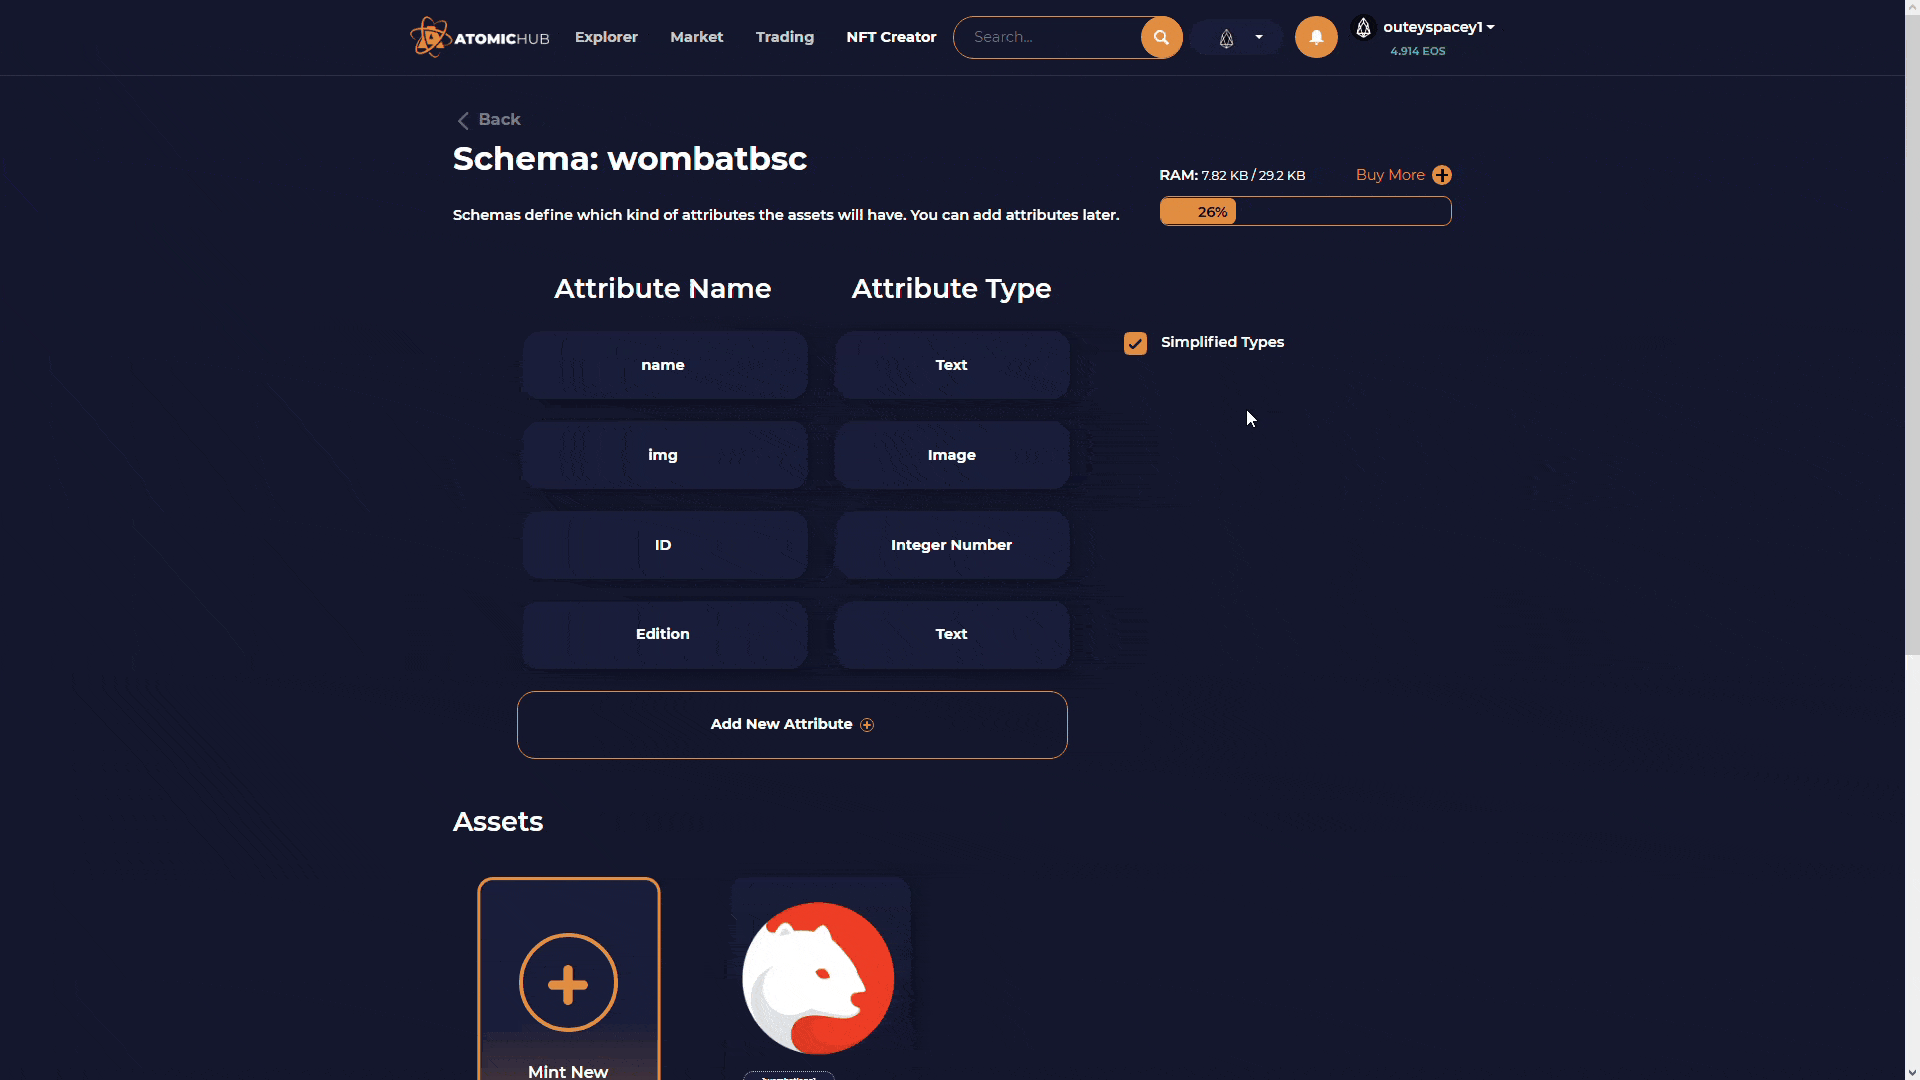
Step 2. Creating a schema
A schema is basically a sub-group in the collection. Imagine a furniture shop: there can be many types of sofas in there, and each sofa can be upholstered with different colors and fabrics. With this analogy in mind, ‘sofa’ would be a collection, and a specific design — a schema.

A schema is particularly important for proving an NFT’s uniqueness — thanks to a name and customizable attributes. Enter a name and take some time to think about what exactly do you want to be seen along with your token, besides the name and its visual representation. For example, if you want every single item in this schema to have a unique ID, you can add that as a visible attribute.
Once you’re sure you’re done, hit the ‘Create Schema’ button.
Finally, we’re getting to the most exciting part — actually minting your first NFT! Let’s punch on that ‘Mint Asset’ button.
Step 3. Minting your first NFT
Time to do some filling in! Choose an image (it can be different from the one you set for the Collection) and a number of NFTs you want to mint. And don’t forget about all the attributes you set for this schema!
Once you’re satisfied with the set-up, start minting by clicking on the ‘Create Asset’ button.
Congratulations — you now have your first NFT! The question you might ask yourself — now what?
What can you do now?
Depending on what’s your goal with NFTs, you can go about it several different ways. If it’s for personal use or if you’d like to share it with someone else to manage and add to this collection — i.e., family, a group of friends or maybe your department at work that is in charge of dApp content — you can do it in the NFT Creator.
Find your collection and go to ‘Edit’ -> ‘Advanced options’. You can add extra Authorized accounts there to help you manage the collection or, if you simply want them to know of changes to the collection without manipulating it, add them to Notify accounts.
You can also transfer them directly or — which is a great option for giveaways! — create a claim link. To do, navigate to your Inventory as shown in the gif below and find one of your NFTs. Click on ‘More’ and choose either ‘Transfer’ or ‘Create link’.
Now, if you’re all about making some crypto with those, you can also put those out in the market from the same inventory menu. Click on the ‘List on Market’ button. You will see two options: sale and action. If you’re comfortable with a particular price, no matter how long it takes, go for the former. If you want to test the waters first and see how high the demand would be for your work, try the auction first. That way, you test for the optimal time and price to set for your creations.

If you plan on making a series, we highly recommend creating a template — or several of those — within one schema. This particularly helps if you want to produce NFTs in bulk and sort them according to rarity or different image assets they’re using. To create new templates, head over to the NFT Creator and choose the collection and the schema you want those templates to belong to. Enter all the necessary information and confirm the operation. Later on, whenever you mint new NFTs within this schema, you will be able to choose a suitable template from a drop-down menu instead of filling everything in manually.
Finally, there are some other settings you could play around with. For example, if your average NFT price seems a bit too low for you, you can burn some of the extras in the same Inventory menu to increase their rarity — which might lead to an upswing in value. Finally, if you only want one specific person to ever own your NFT — perhaps, your significant other? — you can make them non-transferable. Consider these things when creating new schemas and templates!
Wrapping it up
NFTs can be a versatile tool — but it can be a bit overwhelming considering all the possibilities. Luckily, Atomic offers a straightforward toolkit that will make you a master of non-fungibles in no time.
By the way, did you know that many games like Upland and Splinterlands use NFTs as well? Check out our game guides for those and dive into blockchain-powered gaming at its best!
Join The Wombat Family!
Our team and other community members will be happy to discuss all things blockchain gaming, EOS and Telos. Come say hi on:
Now checking it against my database of known compromised or unsafe domains.. you'll see another reply if it's in there. If not, it's likely safe to open.
For more information about risks involved in shortened URLs, read this article by Forbes.
This auto-reply (on posts) is throttled 1/10 to reduce spam but if it still bothers you reply "OFF FURL" (I'll still check previews against my database). In alternative reply REVIEW for manual review and whitelisting.