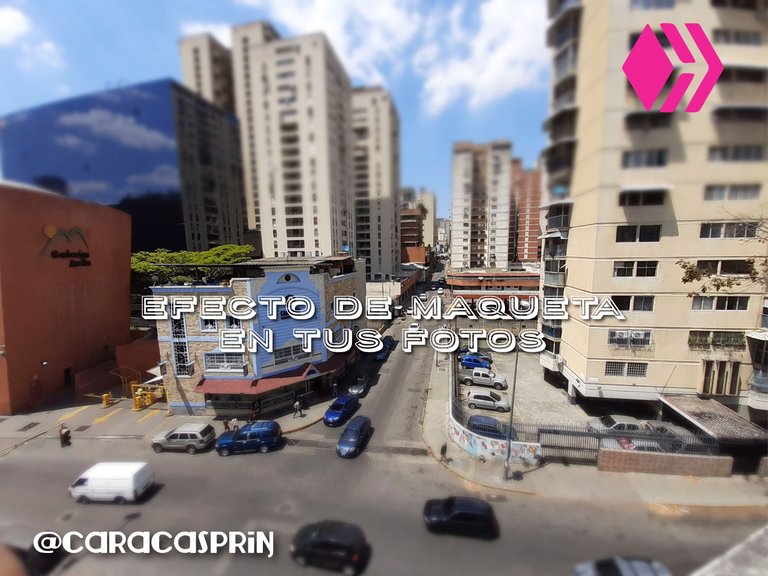
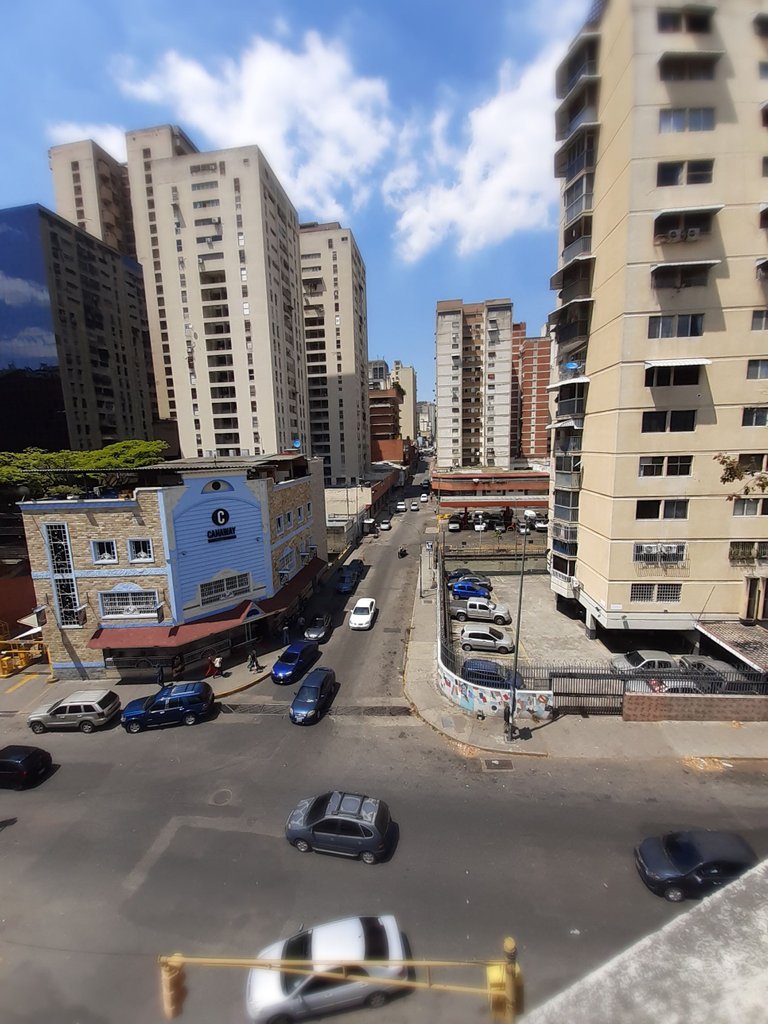
Florecido día tengan todos los creadores de maravillas! Hoy les presento un tutorial para darle a nuestras fotos de la ciudad un aspecto de maqueta, si, de esas de arquitectura. Cuando tomamos fotos a las maquetas no tenemos suficiente profundidad de campo para capturar cada detalle de las fotos, al tener que acercar mucho el objetivo para lograr la fotografía.
Dependiendo de nuestros deseos, ese efecto lo podemos aplicar fácilmente con Photoshop y acá les traigo los secretos para hacerlo rápidamente.
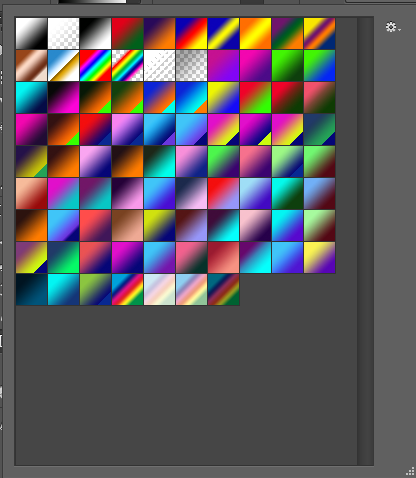
Lo primero que necesitamos es conocer las herramientas que usaremos La máscara rápida, que nos permite congelar algunas zonas de la imagen para que no se apliquen los efectos que usaremos en la zona congelada, y el degradado con el que seleccionaremos la zona a congelar. También aplicaremos un filtro como veremos más adelante.
Happy day to all the creators of wonders! Today I present a tutorial on how to give our city photos a model look, yes, the architectural kind. When we take pictures of models we don't have enough depth of field to capture every detail of the photos, as we have to zoom in too much to get the shot.
Depending on our desires, we can easily apply this effect with Photoshop and here I bring you the secrets to do it quickly.
The first thing we need is to know the tools we will use The quick mask, which allows us to freeze some areas of the image so that the effects we will use on the frozen area are not applied, and the gradient with which we will select the area to freeze. We will also apply a filter as we will see later.
 |  |
|---|
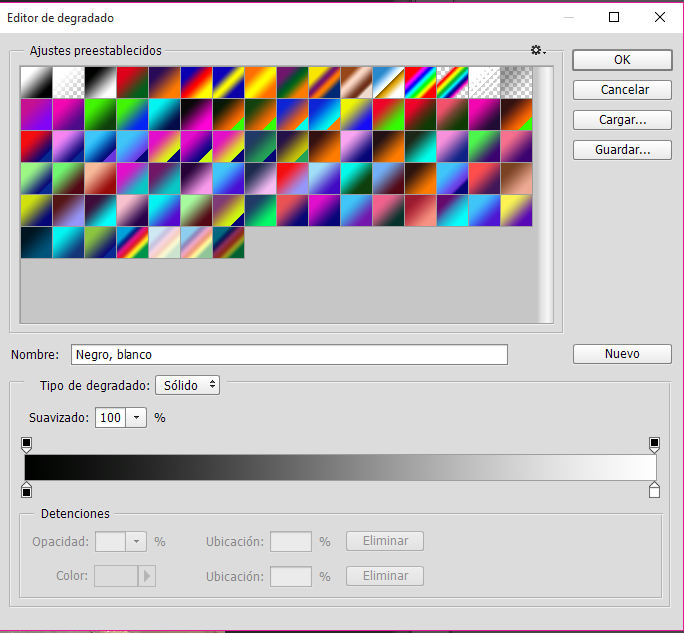
Dependiendo de los degradados que tengamos a nuestra disposición en el programa, podemos adelantar o no el trabajo, si no lo tenemos disponible podemos crear nuestro propio degradado y aquí te explico como:
Depending on the gradients that we have available in the program, we can advance or not the work, if we do not have it available we can create our own gradient and here I explain how:
 |  |  |
|---|
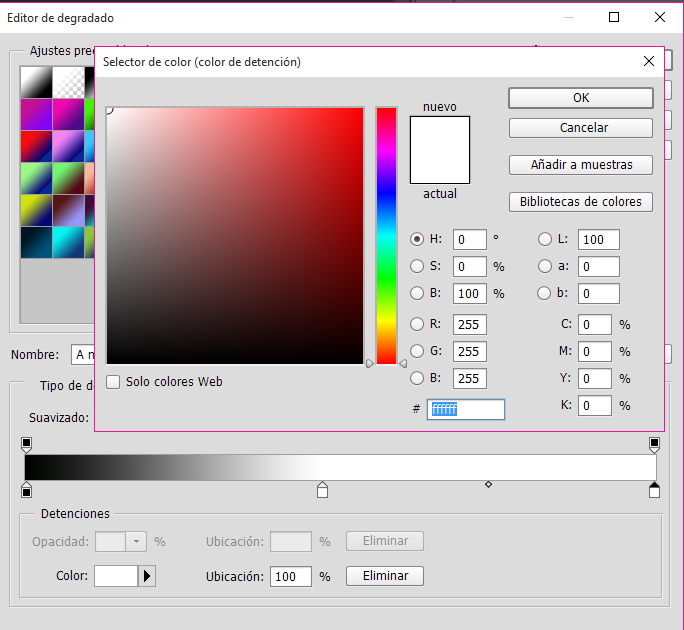
Debemos saber que al crear un degradado podemos determinar la opacidad, el color y la ubicación de cada color, con solo seleccionar alguno de los manejadores logramos fijar cada parámetro. Recomiendo, para éste efecto, que la zona que va a quedar sin color sea lo más pequeña posible, para poder aplicar el filtro en más espacio de nuestra image. El modo de degradado va a ser el reflejado, como lo indico en el gif a continuación. Recuerda, con los manejadores inferiores controlamos el color y la ubicación, con los superiores la opacidad.
We must know that when creating a gradient we can determine the opacity, the color and the location of each color, just by selecting one of the handles we can set each parameter. I recommend, for this effect, that the area that will be without color is as small as possible, to be able to apply the filter in more space of our image. The gradient mode will be mirrored, as shown in the gif below. Remember, with the lower handles we control the color and the location, with the upper handles the opacity.
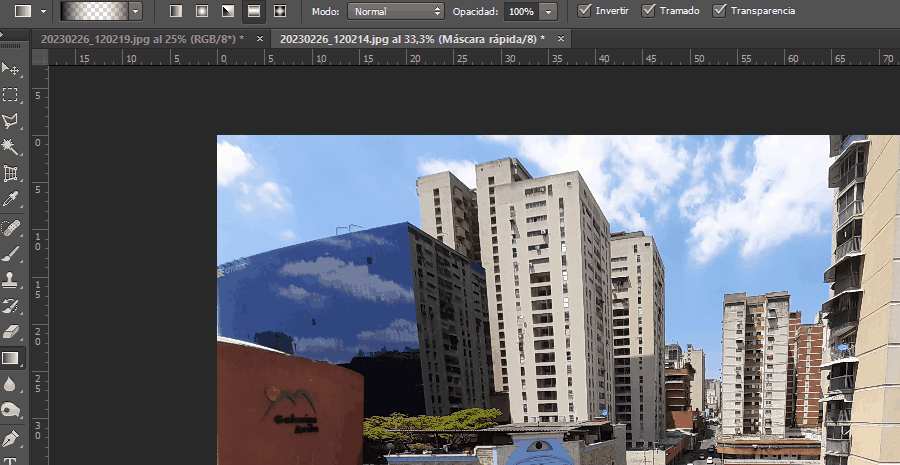
Cuando ya tengamos listo nuestro degradado, siempre con negro en los extremos y el centro transparente (Opacidad 0%) Ya podemos entrar en el modo de máscara rápida, y trazamos una línea vertical sobre la imagen, para que quede lo más derecha posible presionamos la tecla Mayúscula mientras la trazamos, al trazar este degradado sobre la imagen se pintará de rojo la foto que estamos trabajando, no se preocupen, este tinte es temporal.
When we have our gradient ready, always with black at the ends and the center transparent (Opacity 0%) we can enter the quick mask mode, and we draw a vertical line on the image, to make it as straight as possible we press the Shift key while we draw it, when we draw this gradient on the image the photo we are working on will be painted red, do not worry, this dye is temporary.

Entonces podemos ver que la zona teñida es el lugar que se va a congelar y donde nuestro filtro no se va a aplicar. Necesitamos invertir la selección, pues son esas precisamente las zonas donde vamos a aplicar el filtro de desenfoque gausiano. Para eso vamos a selección y clicamos en Invertir.
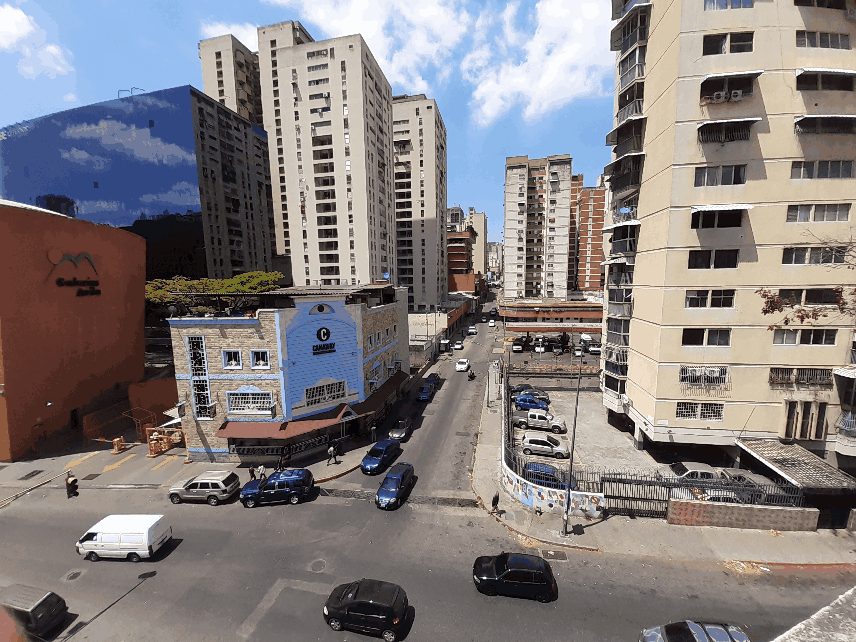
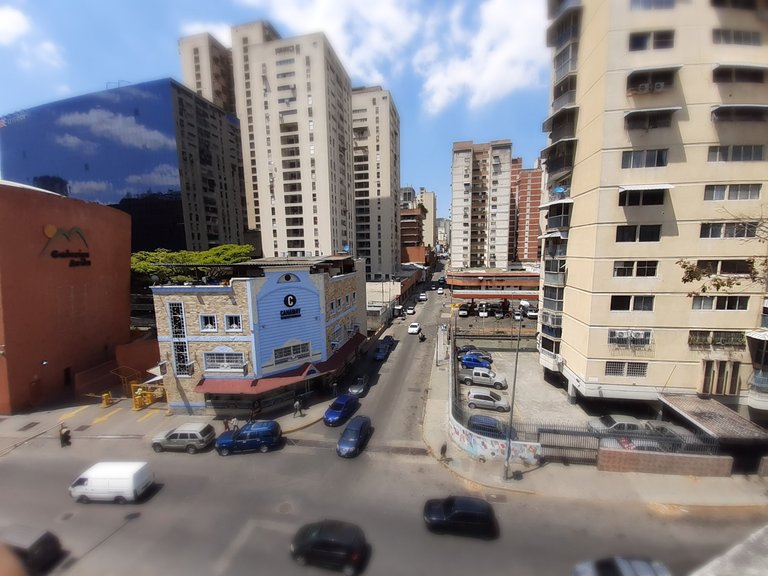
Así la zona de la foto que una vez estuvo teñida de rojo pasa a ser la parte donde aplicaremos el filtro, para esto vamos a Filtro en el menú principal, Desenfoque> Desenfoque gausiano. Y voilá nuestra imagen ahora parece una maqueta. El filtro también podemos ajustarlo a nuestras necesidades.
Puedes experimentar con tantas fotos como quieras, y ajustar el degradado, a mi me gusta más aplicar el desenfoque a la mayor parte de la imagen, porque obtendremos un efecto más de caricatura, pero todo depende del tipo de necesidades de cada quien.
Then we can see that the tinted area is the place that will be frozen and where our filter will not be applied. We need to invert the selection, because these are precisely the areas where we are going to apply the Gaussian blur filter. To do this we go to Selection and click Invert.
So the area of the photo that was once tinged with red becomes the part where we will apply the filter, for this we go to Filter in the main menu, Blur> Gaussian Blur. And voila our image now looks like a model. We can also adjust the filter to our needs.
You can experiment with as many photos as you want, and adjust the gradient, I like more to apply the blur to most of the image, because we will get a more cartoon effect, but it all depends on the type of needs of each one.
 |  |
|---|
Y eso es todo por hoy amigos!!
And that's all for today folks!

El contenido aquí presentado es de mi autoría.
Las fotografías fueron tomadas con mi teléfono.
La imagen de portada fue editada en Illustrator con una de mis fotos.
Los separadores y banner fueron hechos por mi en Illustrator
The content presented here is my own.
The photographs were taken with my phone.
The cover image was edited in Illustrator with one of my photos.
The separators and banner were made by me in Illustrator.
Tu lectura es un gran honor para mi
Your reading is a great honor for me
Follow me


Congratulations @caracasprin! You have completed the following achievement on the Hive blockchain And have been rewarded with New badge(s)
You can view your badges on your board and compare yourself to others in the Ranking
If you no longer want to receive notifications, reply to this comment with the word
STOPCheck out our last posts:
Yay! 🤗
Your content has been boosted with Ecency Points, by @caracasprin.
Use Ecency daily to boost your growth on platform!
Support Ecency
Vote for new Proposal
Delegate HP and earn more
Amiga te felicito x tu facilidad con el uso del Photoshop, a mi me intimida demasiado. Lo haces ver fácil y realmente parece una maqueta.
Felicitaciones 👏👏
Gracias por las felicitaciones!! Pero te digo que la verdad es muy fácil y que una vez que conoces las distintas herramientas lo demás es pan comido
¡Felicitaciones!
1. Invierte en el PROYECTO ENTROPÍA y recibe ganancias semanalmente. Entra aquí para más información.
3. Suscríbete a nuestra COMUNIDAD, apoya al trail de @Entropia y así podrás ganar recompensas de curación de forma automática. Entra aquí para más información sobre nuestro trail.
4. Creación de cuentas nuevas de Hive aquí.
5. Visita nuestro canal de Youtube.
Atentamente
El equipo de curación del PROYECTO ENTROPÍA
Que gusto inmenso!! Muchas gracias por apreciar mi trabajo!!!!