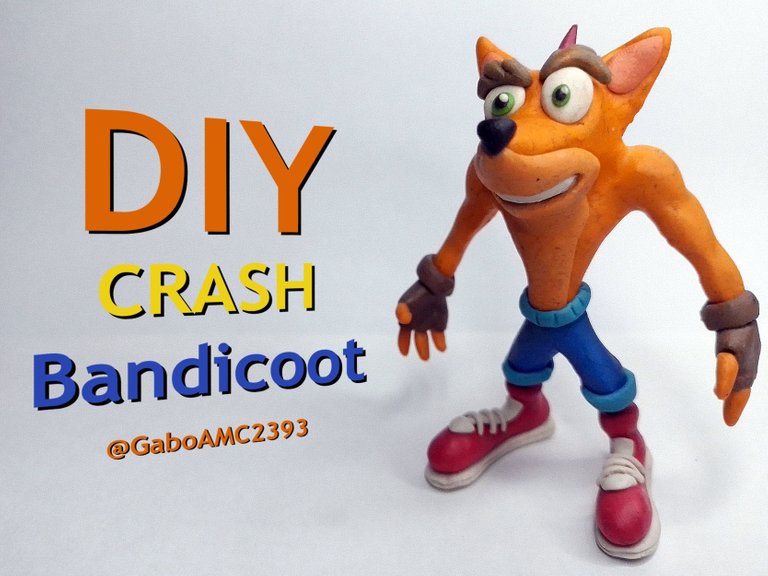
Video games can not only serve to amuse and entertain us, in my case they are a source of inspiration to make my sculptures. About a week ago I shared on my blog the creative process of a sculpture of Nemesis, a character from the Resident Evil game series.
Today I would like to share with you a sculpture of a character a little more retro and that maybe some of you know, Crash Bandicoot. Join me in this instructional post, I hope you like it!
Los videojuegos no solo pueden servir para divertirnos y entretenernos, en mi caso son fuente de inspiración para hacer mis esculturas. Hace aproximadamente una semana compartí en mi blog el proceso creativo de una escultura de Nemesis, un personaje de la sada de juegos de Resident Evil.
Hoy me gustaría compartir con ustedes una escultura de un personaje un poco más retro y que quizás algunos de ustedes conocen, Crash Bandicoot. Acompáñenme en este post instructivo, ¡Espero que les guste!
Materials
The materials I used for this figure were the following:
- Plasticine
- Wire
- Thread
- Glue
Materiales
Los materiales que utilicé para esta figura fueron los siguientes:
- Plastilina
- Alambre
- Hilo
- Pegamento
Step by step
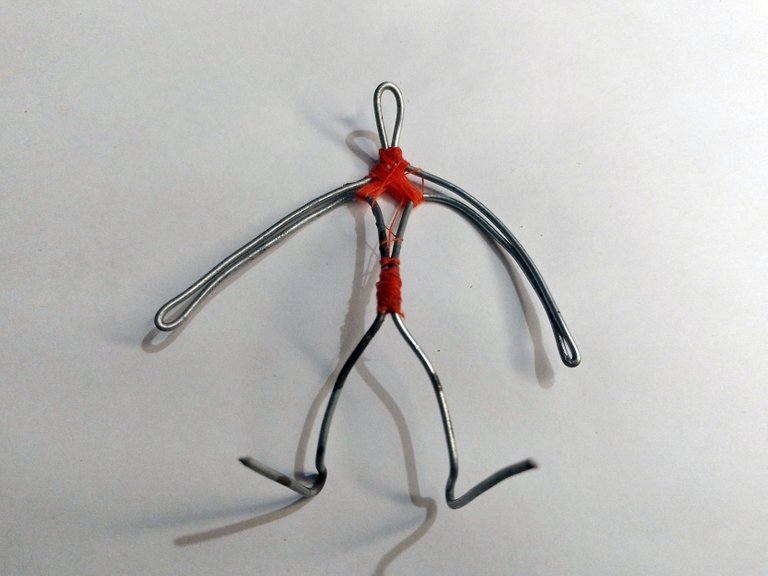
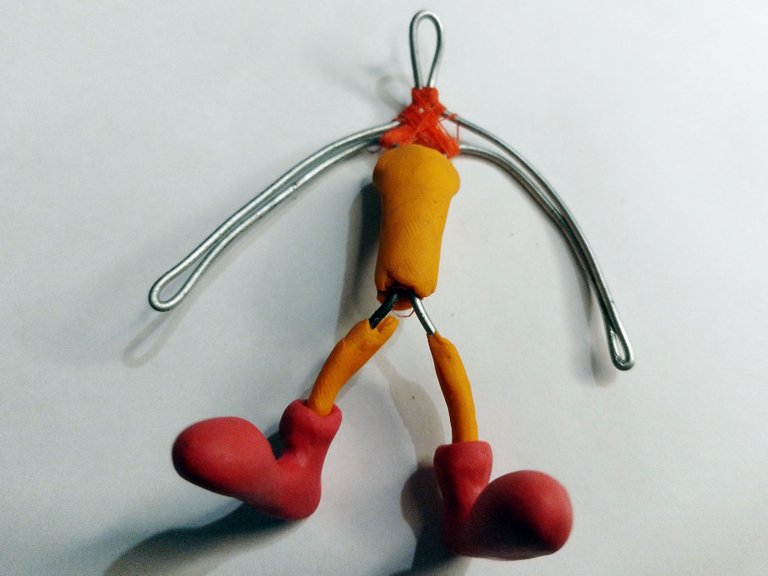
For this kind of figures I always make a wire skeleton. In this specific case I used an orange thread to hold the skeleton well and keep it tied in the way I wanted to keep it.
As you can see in the image below, I used quite a lot of thread to keep it attached, also, I used glue on the thread to hold the thread together.
Paso a paso
Para este tipo de figuras siempre suelo hacer un esqueleto de alambre. En este caso específico usé un hilo naranja para sostener bien el esqueleto y mantenerlo amarrado en la forma en que lo deseaba mantener.
Como pueden ver en la imagen de abajo, usé bastante hilo para mantenerlo sujeto, además, usé pegamento sobre el hilo para mantener unido el hilo.
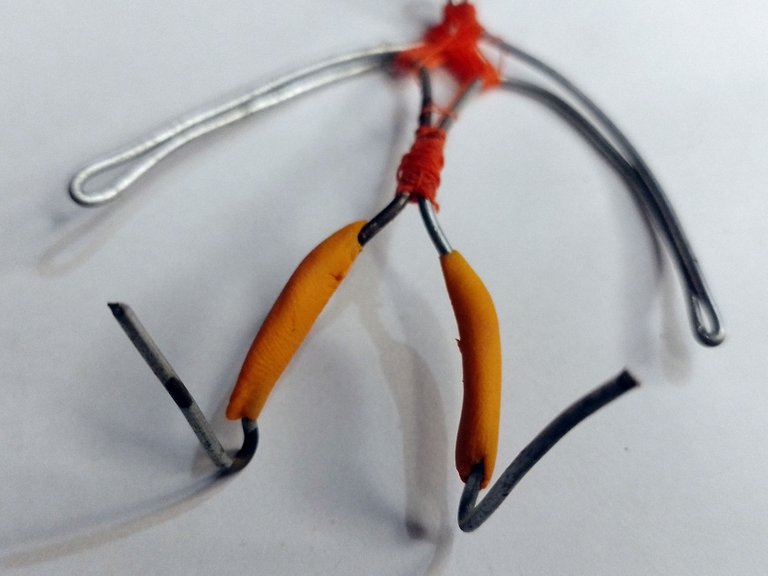
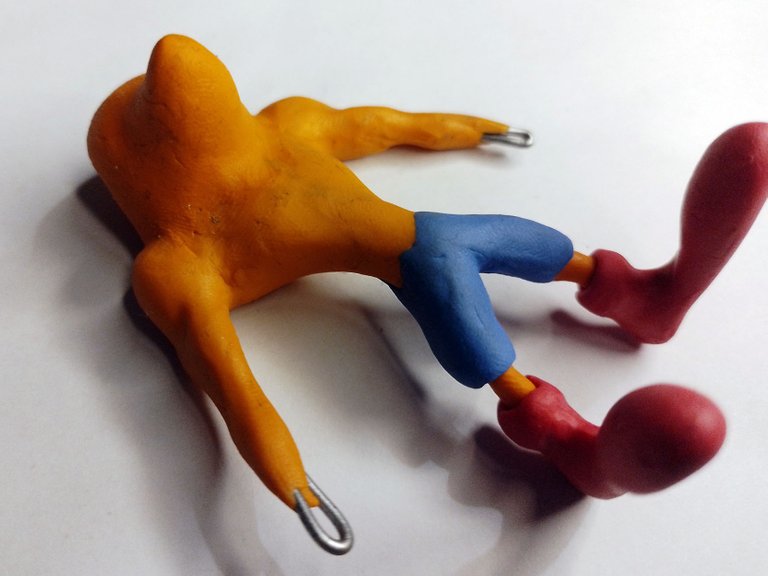
After making the skeleton, I usually start the molding of the piece with the legs.
I was not planning to use paint, but to use colored plasticine for this piece, so I used the orange plasticine to cover the legs with some thin plasticine tubes.
Después de hacer el esqueleto, suelo comenzar el moldeado de la pieza por las piernas.
No planeaba usar pintura, sino usar plastilina de colores para esta pieza, así que usé la plastilina naranja para cubrir las piernas con unos delgados tubos de plastilina.
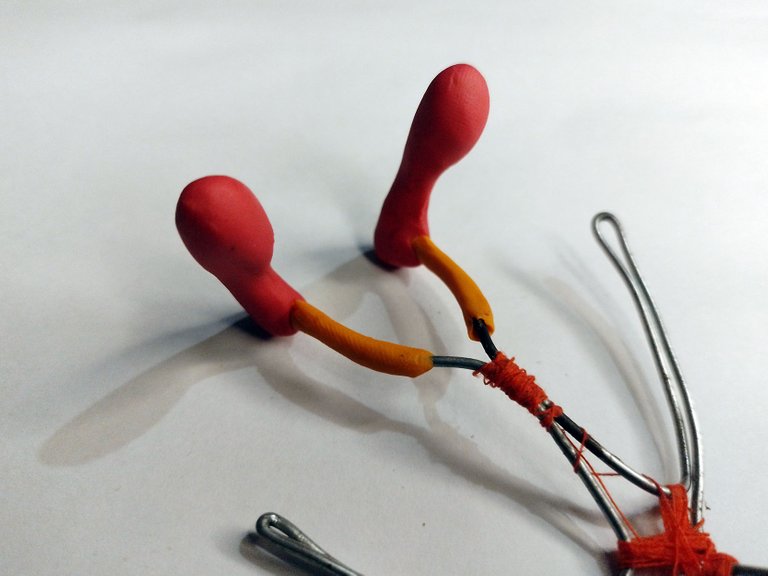
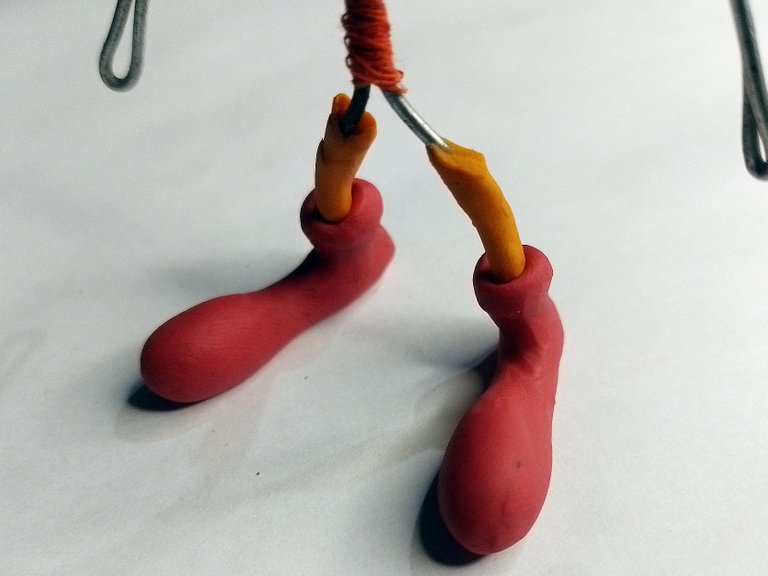
Then I placed long strips of red plasticine, only much thicker than the orange plasticine tubes.
If you look at the picture below, I made Crash's shoes to look like a clown's shoes. To make them, first place the clay on the wire and mold them with your fingers.
As you can see in the image on the right, I placed the edge of the shoes a little rounded, placing more clay around the ankles.
Después coloqué largas tiras de plastilina roja, solo que mucho más gruesas que los tubos de plastilina naranja.
Si se fijan en la imagen de abajo, los zapatos de Crash los hice parecidos a los zapatos de un payaso. Para hacerlos primero hay que colocar la plastilina sobre el alambre y moldear con nuestros dedos.
Como ven en la imagen de la derecha, le coloqué el borde de los zapatos un poco redondeado, colocando más plastilina alrededor de los tobillos.
 |  |
|---|
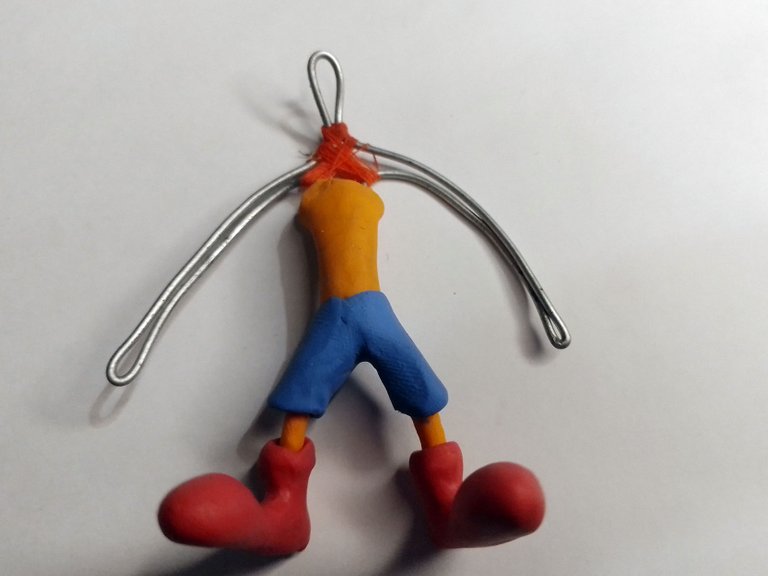
I continued placing more and more orange material on top of the wire skeleton. First was the torso, to define the thickness of the waist of the character.
Following this pattern, I also placed more plasticine on the legs, only in this case I used blue plasticine for the pants, instead of orange.
Continué colocando más y más material naranja encima del esqueleto de alambre. Primero fue el torso, para definir el grueso de la cintura del personaje.
Siguiendo este patrón, también coloqué más plastilina en las piernas, solo que en este caso usé plastilina azul para el pantalón, en lugar de la naranja.
 |  |
|---|
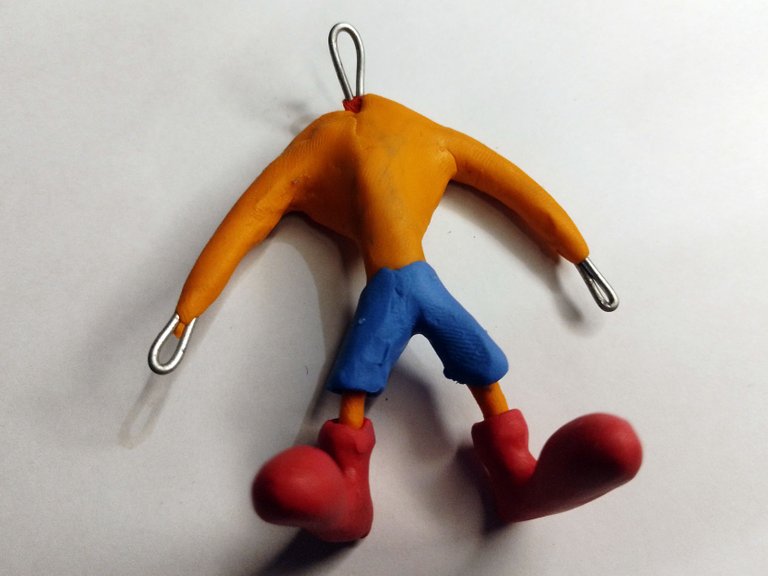
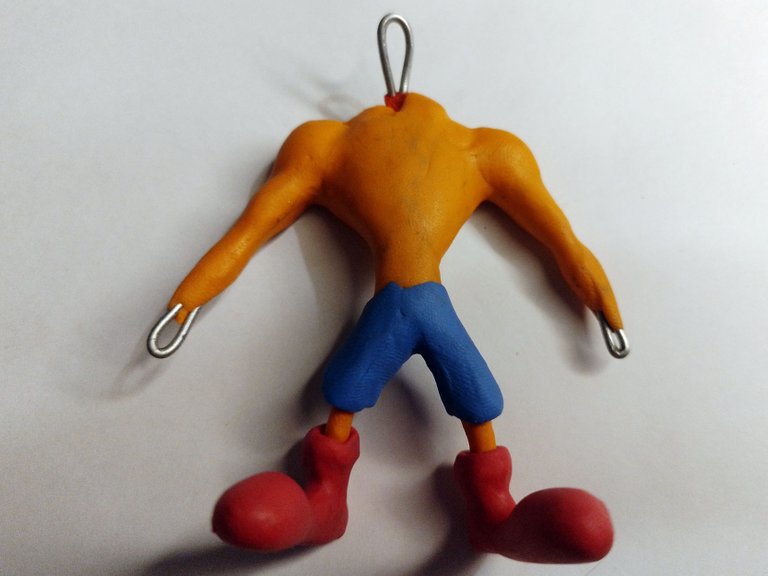
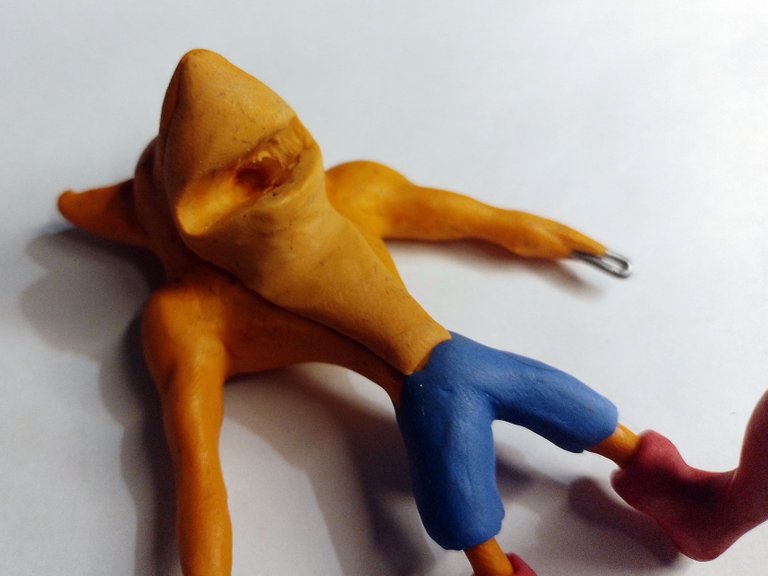
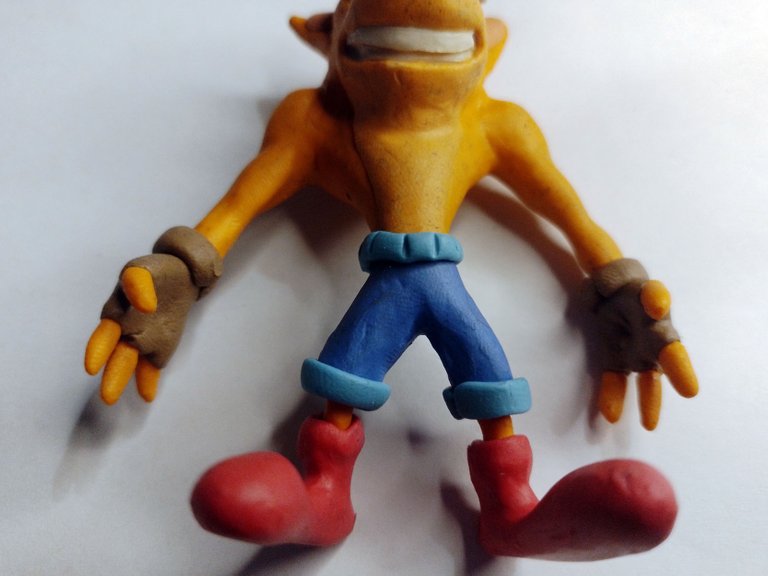
After defining the legs and waist, I added more plasticine in the area of the arms and torso, giving that big chest shape that this character has, which is a little hunchbacked.
In the images below you can clearly see before and after the molding process of the torso muscles, being the image on the right where you can see the muscles well defined.
Después de definir las piernas y la cintura, agregué más plastilina en el área de los brazos y del torso, dando esa forma de pecho grande que tiene este personaje, el cual es un poco jorobado.
En las imágenes de abajo se ve claramente antes y después del proceso de moldeado de los músculos del torso, siendo la imagen de la derecha donde se visualiza los músculos bien definidos.
 |  |
|---|
After making the chest, it was time to make the head, placing a sort of pear lying on the neck area.
The tip of the "pear" will be the mouth of the character.
On the other hand, I placed an orange plasticine lightened with yellow and white, for the different colored fur that the character has on the chest, neck and chin area, to call it somehow.
Después de hacer el pecho, llegó la hora de hacer la cabeza, colocando una suerte de pera acostada en el área del cuello.
La punta de la "pera" será la boca del personaje.
Por otra parte, coloqué una plastilina naranja aclarada con amarillo y blanco, para el pelaje de distinto color que el personaje tiene en el pecho, el cuello y el área de la barbilla, por llamarla de alguna manera.
 |  |
|---|
Finally, to give him that characteristic shape of a rodent-like mammal, but mutant, I made the pointed ears he has.
To make them I simply molded two triangles and glued them to each side of the head, then smoothed the joints in the plasticine.
Finalmente, para darle esa forma característica de un mamífero parecido a un roedor, pero mutante, le hice las orejas puntiagudas que tiene.
Para hacerlas simplemente moldeé dos triángulos y los pegué a cada lado de la cabeza, luego suavicé las uniones en la plastilina.
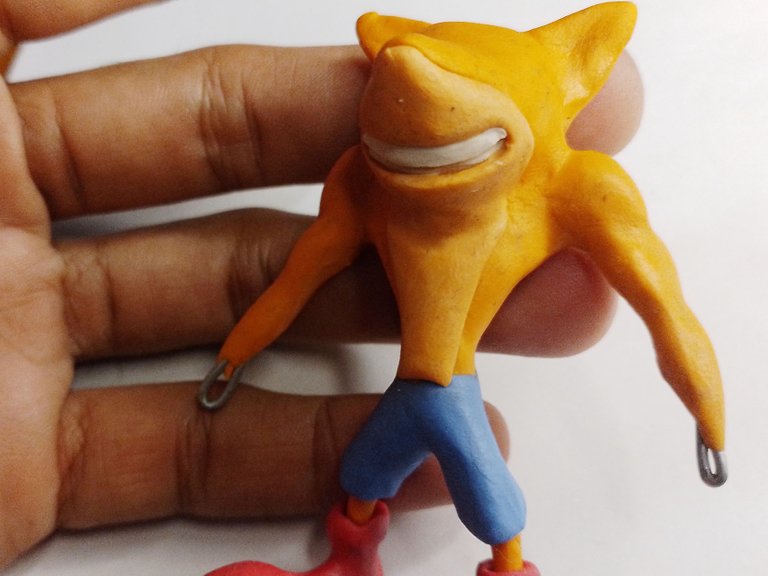
I wanted to make a crazy expression on the figurine, so I made that strange and expressive smile that the character has.
First I opened the mouth on the sculpture with the thick tip of a knitting needle and it was as you can see in the image on the left.
In the image on the right you can see the teeth, which I made by placing two strips of white plasticine, the same size as the hole I had made for the mouth. I placed one on top of the other, to simulate the upper and lower teeth.
Quería hacerle una expresión bien loca a la figurita, así que le hice esa sonrisa tan extraña y expresiva que tiene el personaje.
Primero abrí la boca en la escultura con la punta gruesa de una aguja de tejer y quedó tal como lo ven en la imagen de la izquierda.
En la imagen de la derecha se ve cómo quedó la dentadura, la cual hice colocando dos tiras de plastilina blanca, del mismo tamaño del orificio que había hecho para la boca. Coloqué una encima de la otra, para simular los dientes superiores e inferiores.
 |  |
|---|
Continuing with Crash's crazy expression, I added the nose, eyes and eyebrows. For each part of the face I used plasticine of my own colors, no paint.
Continuando con la loca expresión de Crash, le coloqué la nariz, los ojos y las cejas. Para cada parte de la cara usé plastilina de los propios colores, nada de pintura.
 |  |
|---|
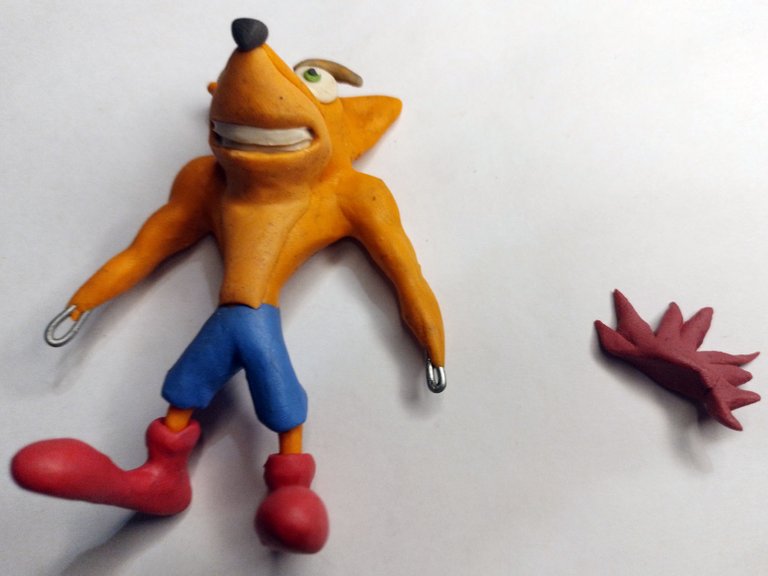
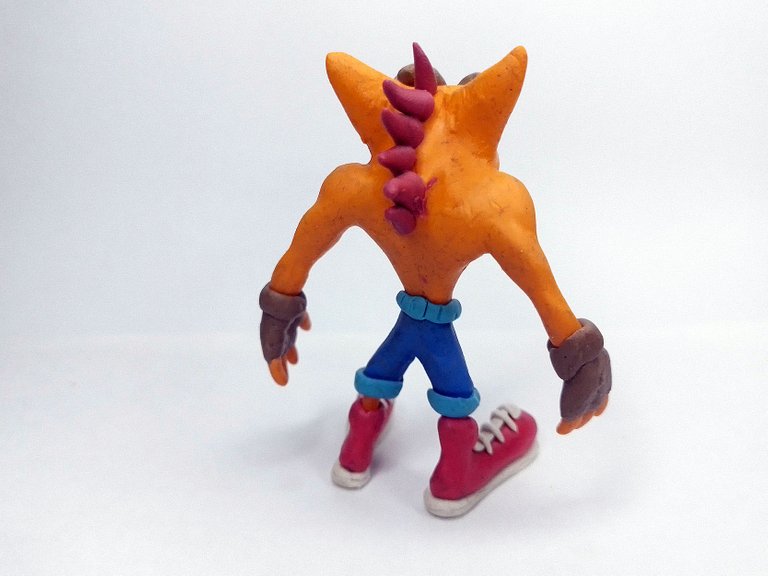
Then I placed the hair that the character has on the back/neck. They are a shade of crimson/vintage red, so I darkened the red with a little black and brown.
I cut this plasticine and gave it these pointy shapes, then put them in place.
Luego le coloqué los cabellos que el personaje tiene en la espalda/nuca. Son de una tonalidad carmesí/vinotinto, así que oscurecí el rojo con un poco de negro y marrón.
A esta plastilina la corté y le di estas formas puntiagudas, luego las coloqué en su lugar.
 |  |
|---|
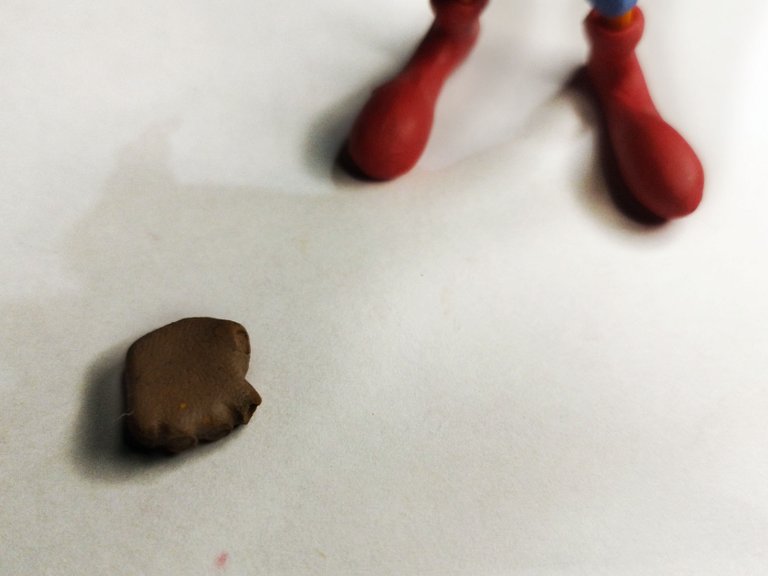
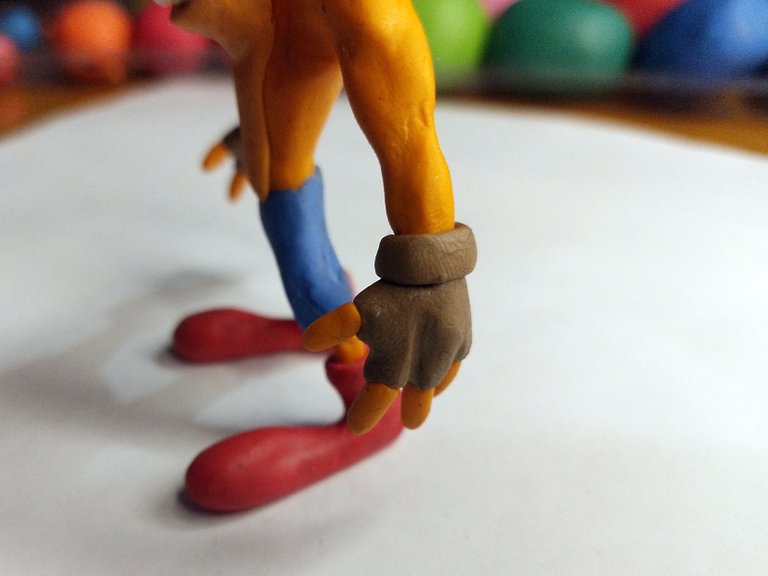
After all this process comes the hands. First I made the gloves with a brown color and then I added each finger, making them with orange plasticine.
Después de todo este proceso vienen las manos. Primero hice los guantes con un color marrón y después agregué cada dedo, haciéndolos con plastilina naranja.
 |  |
|---|
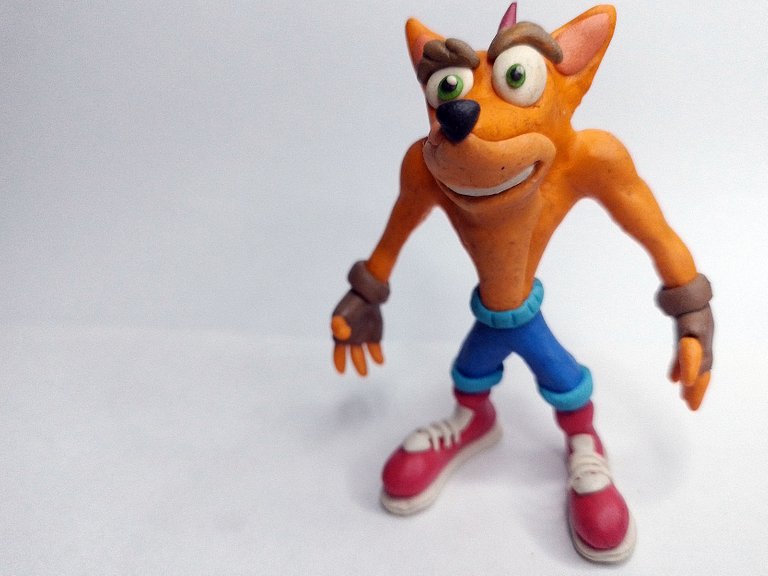
Finally I added more details to the outfit, such as the edges of the shorts and the laces of the shoes, as well as the white sole of the shoes.
Finalmente agregué más detalles a la vestimenta, como los bordes del pantaloncillo y los cordones de los zapatos, además de la suela blanca de los mismos.
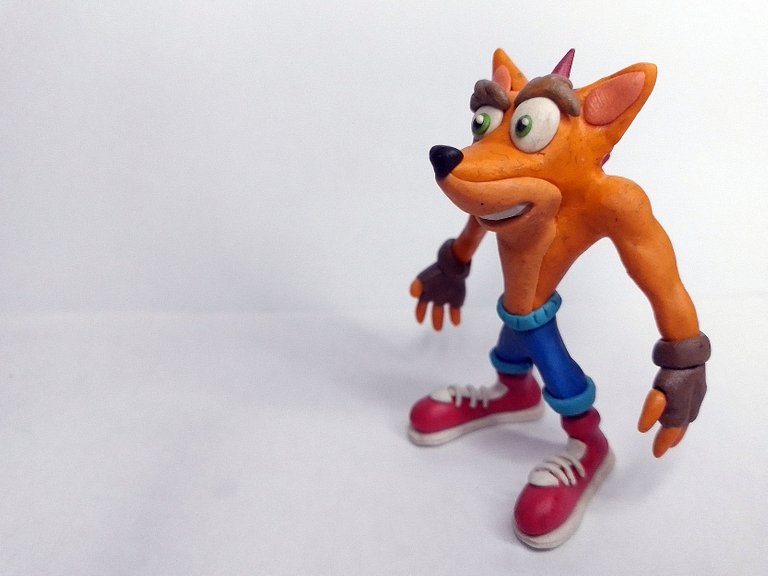
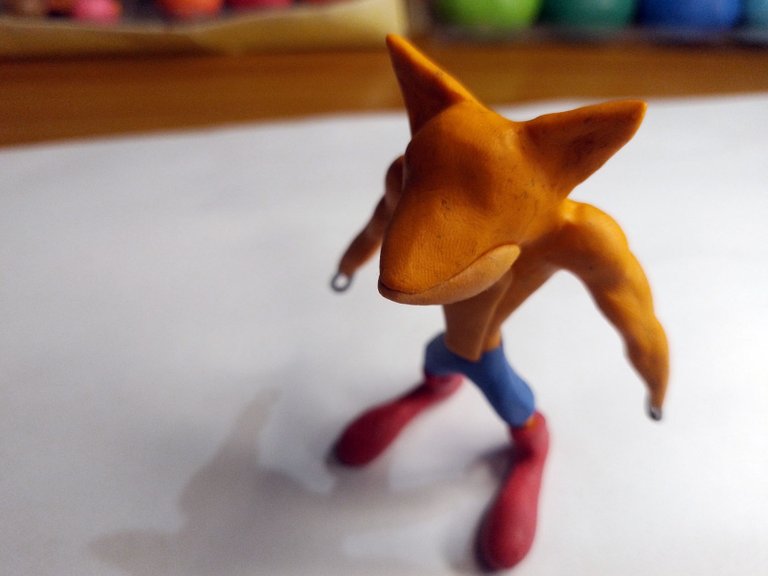
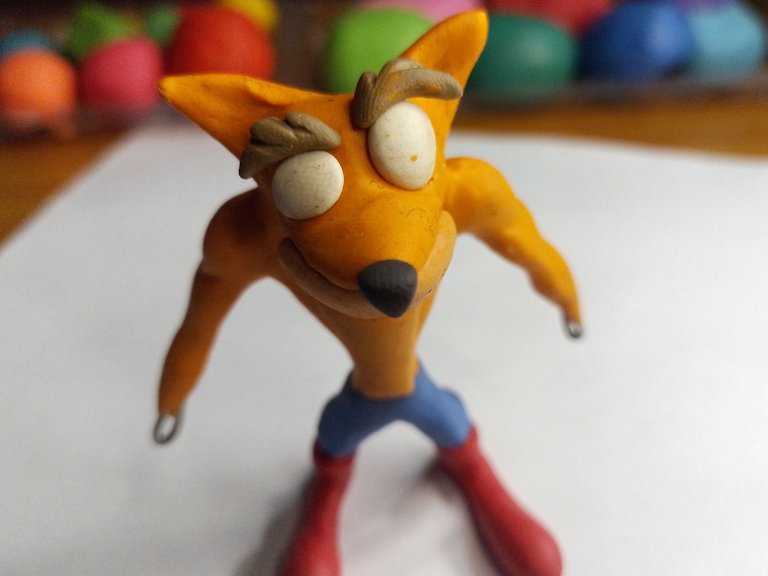
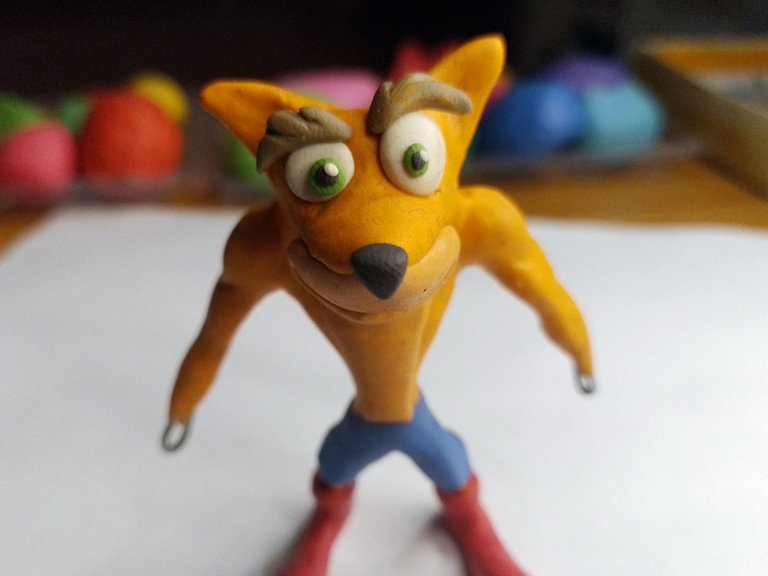
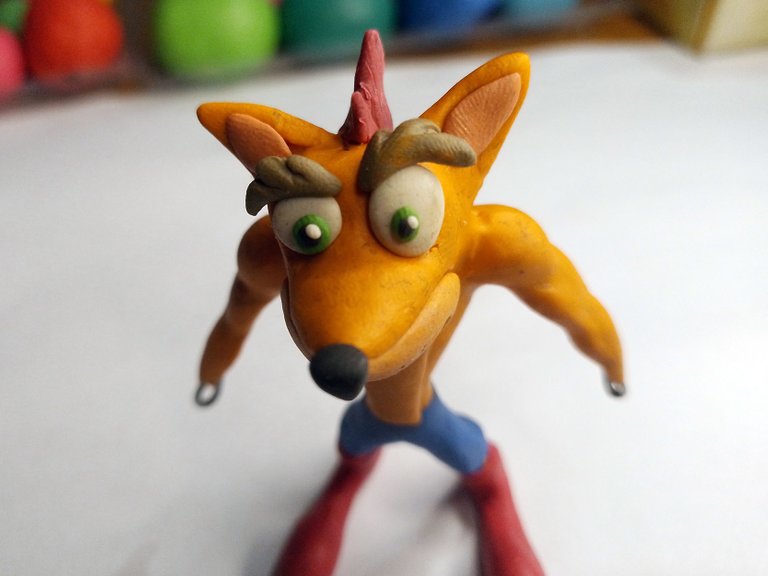
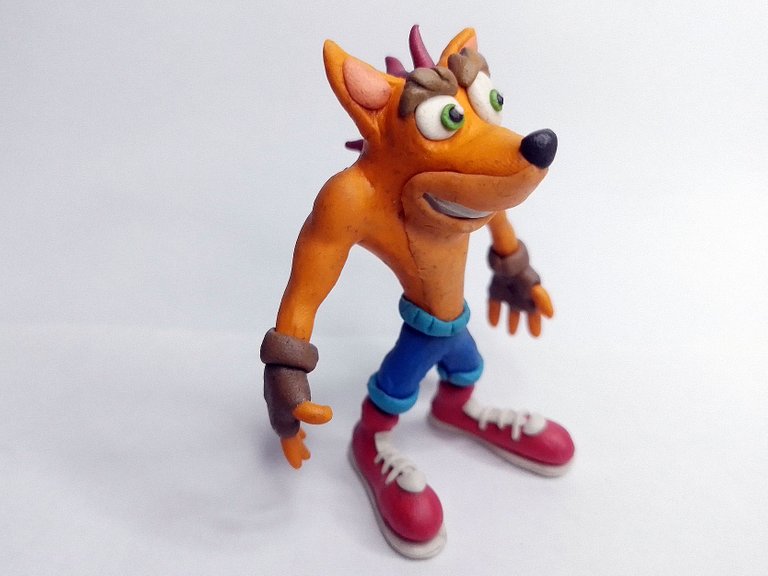
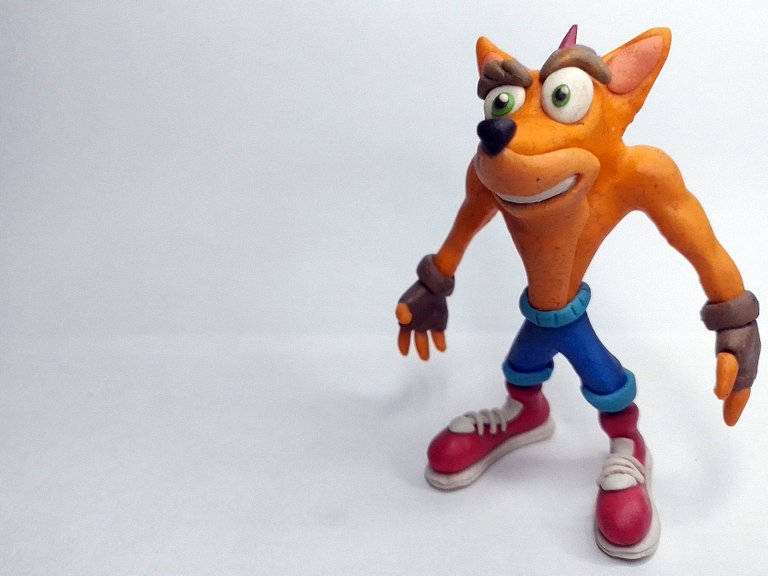
In this way the figure was completely finished. Below I leave a series of photographs of the final result:
De esta manera la figura quedó completamente terminada. A continuación dejo una serie de fotografías del resultado final:
Well friends, that's all for now, what do you think of this sculpture, do you know the character? I'm a big fan of the game, so if you liked the figurine I invite you to leave your opinions below in the comments, as always I'll be happy to read them.
I thank you very much for taking the time to read me, without more to add, I will say goodbye then...
See you next time!
Bien amigos, esto ha sido todo por ahora. ¿Qué les ha parecido esta escultura? ¿Conocen al personaje? Yo soy un gran fan del juego, así que si les gustó la figurita los invito a dejar sus opiniones abajo en los comentarios, como siempre estaré encantado de leerlos.
Les agradezco mucho que se tomaran el tiempo de leerme, sin más que agregar, me despido entonces...
¡Hasta la próxima!


Que talento. Le quedo hermoso amigo, yo lo jugaba mucho en el play 1. saludos desde Colombia.
!HBIT
!LUV
!LOLZ
@gaboamc2393, @davot(1/1) sent LUV. | connect | community | HiveWiki | NFT | <>< daily
! help(no space) to get help on Hive. InfoSiii es que es un clásico el juego, buenísimo. Gracias por pasar a comentar.
Te quedo genial, me gusto bastante como te quedaron los zapatos brother.
Bueno hay que tener cuidado en todos los aspectos jeje oara que quede bien todo. Saludos.
Muchas gracias por el apoyo.
!PIZZA
!PGM
!KING
Muchas gracias por los tokens.
Amazing work King @gaboamc2393, davot(2/11) is impressed by the energy and effort you put into this post. Your contributions are truly appreciated.
Wow, this post is truly amazing! As a reward, @davot has sent you 50.0 EXP. Keep up the great work!
BTW! EXP! is the token that will unlock the full experience of our games and give you access to all the rewards
$PIZZA slices delivered:
@davot(2/10) tipped @gaboamc2393
Sigue, contacta y se parte del testigo en: // Follow, contact and be part of the witness in:
Keychan -Hive.blog / https://wallet.hive.blog/~witnesses - Ecency - Peakd
Este siempre fue uno de mis personajes favoritos... recuerdo las horas / días jugando este juego. 🥹 Nostalgia.
Buen trabajo amigo
!discovery 45
Si, era genial, a mi me gustaba mucho crash carrito, buenísimo.
This post was shared and voted inside the discord by the curators team of discovery-it
Join our Community and follow our Curation Trail
Discovery-it is also a Witness, vote for us here
Delegate to us for passive income. Check our 80% fee-back Program
gracias por este arte mi pana
Gracias a ti por la visita y el comentario.
Excellent work as each of the sculptures that you have presented to us. Congratulations. Thank you for sharing in our community
Thanks for the support!
Se ve calidad este muñequito felicitaciones muy original 😉
Gracias gracias guarito por la visita!
This is really amazing and beautiful you gave us alot of detail and you have really put up a lot of effort to do this.
Thanks for sharing.
Yes, it took me a while to finish it but it was worth the effort. Thanks for visiting and commenting.