I have been a busy beaver! Finally I was able to 'have a go' at building the bed. Starting with the bare bones, I put all my McGyver skills to the 'Construction' test!
Spoiler Alert - Below you can see the finished article. Complete with the finalisation of added wheelarch finished carpet and a final layer of floor vinyl..jpg)
I was a bit sceptical at first as to how the wheelarches would turn out, but the 'four-way-stretch' van lining carpet was real easy to work with . . . . A bit of spray glue and apply!
.jpg) So long as it looks ok and is neat, then the job was done! The hardest part is to 'marry-up' the edges.
So long as it looks ok and is neat, then the job was done! The hardest part is to 'marry-up' the edges.
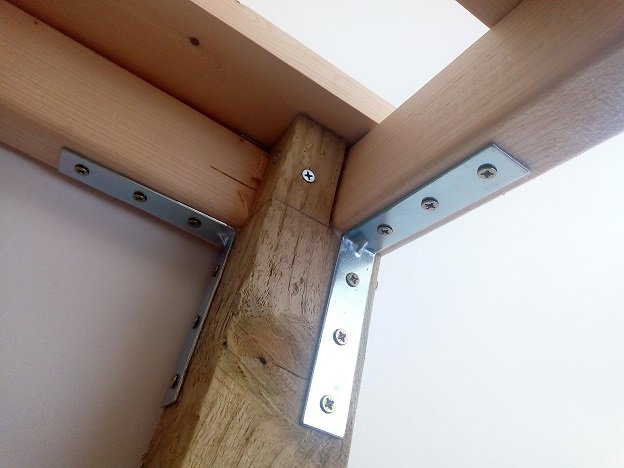
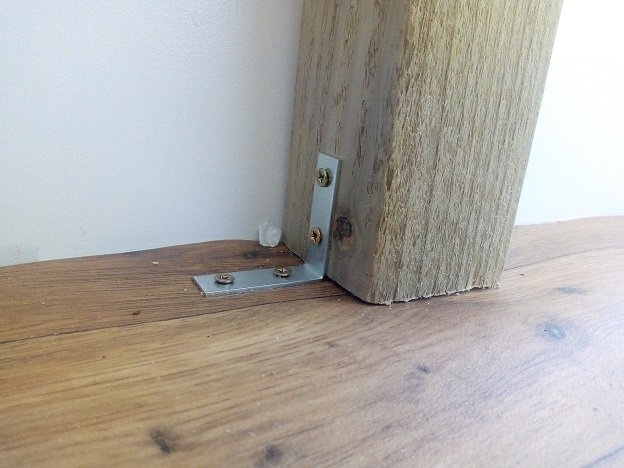
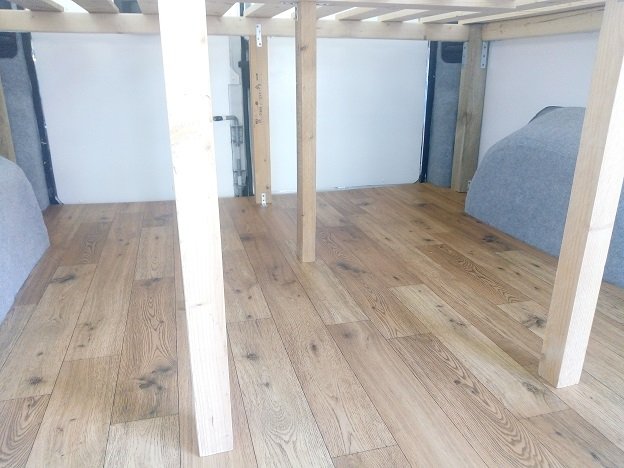
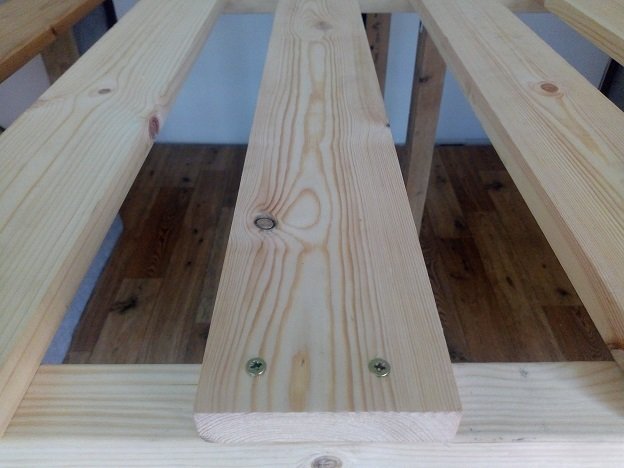
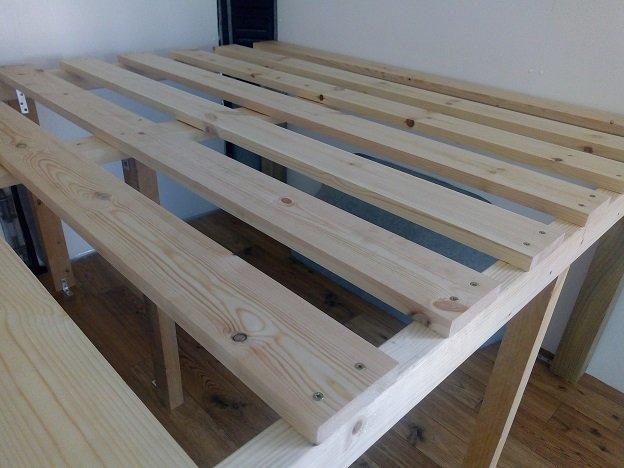
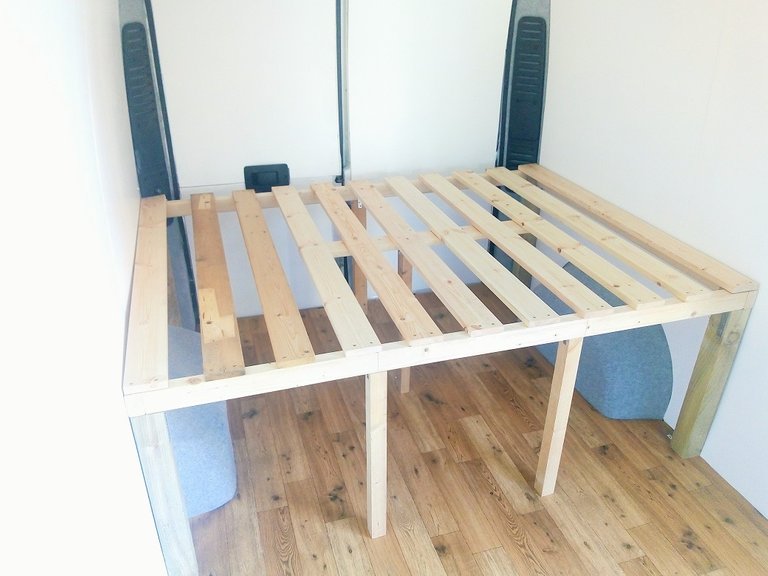
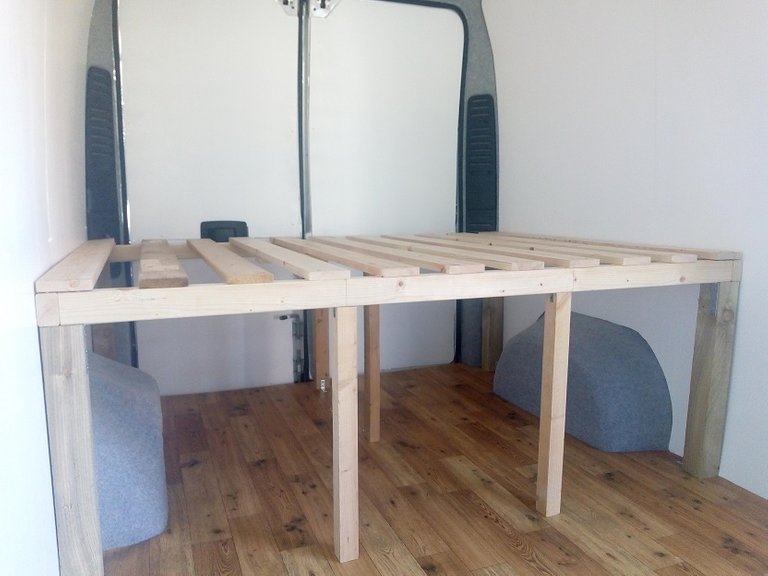
.jpg) Next it was onto the bed! I planned for the most robust and strongest of designs, so as you can see, my joints ensured maximum strength and support for right angles.... Very forgiving!
Next it was onto the bed! I planned for the most robust and strongest of designs, so as you can see, my joints ensured maximum strength and support for right angles.... Very forgiving!
.jpg)
.jpg)
.jpg)
.jpg)

.jpg)
The long and short of it? If i can do it, even on my first attempt, no doubt anyone else can!
.jpg)
Now it's time for a road-trip proving exercise!
Van-build stages:
My Latest Brainwave & Project
Assessing The Task
The Strip Out
Floor Preparation & Rust Treatment
Hole Plugging & Lock mending
Finalising The Floor Foundations
The Insulation Begins
Insulating The Floor
Wall Insulation
Coming along nicely, can't wait to see it all done and finished.
Thanks man..... It's a long slog doing it yourself i can tell ya.
beaver lol - Looking great man! Very clean install :)
Thanks man.
Oh yeah, the wheel wells are all set! Note to self on how you did that.
Bed frame looks really sturdy and secure. Perfect fit! Should last a long long time. Looking forward to the next step. Awesome job!!!!
Thanks SB.....
Just come back from a little Van Excursion too, to test out things...
How did it do? Just fine I bet!
Wow very cool @preppervetuk!!! I had no idea you'd been busy building out a van.... it's been a while since I've come see you page I must admit.
Looks really good! The wheelarches and your carpentry skills look good McGyver!!!
Thanks.... The speed of progression will now be dictated by the weather probably.
Well at least you have a dry place to sleep if you need it 😁.
Again, great work for someone who claims to not be a master carpenter!
You are a White Van Man now? Lol
LOL - Only by appearances...
Stealth is the name of the game....
Now I can blend in and drive around like an asshole, cutting people up lol.
Howdy sir preppervetuk! wow that bed is super well built! How long is it? the whole interior looks so nice.
Thanks man.... The bed is 6 feet long and 4 foot 6 inches wide...
In U.K. in order to qualify as a Campervan / Motorhome, we are required to adhere to certain criteria. One of them is to have a fixed 6ft long bed.
sir preppervetuk! dang they have regulations for everything don't they? amazing.