
Hi! I'm Skip Online!
First let me say that a professional designer I am not. I do make ALL the designs on https://novelteesandmore.skiponlinenow.com/products/, and just using hard work and determination, allows me to do this. I’m completely self taught, for two main reasons:
I love DIY
I’m too cheap to pay someone else!
I think the hardest part of designing, is coming up with new concepts and ideas, but if you look hard enough, something will eventually come to you!
Once I get that idea, I start with the text I will be using. I use two software programs in my design process, and the first one is called PhotoScape. It is a great FREE program, and allows you a lot of options, but one of those options it doesn’t have, is a good selection of Fonts.
So, for the rest of this post, I am going to show anyone who wants to know, how to add more fonts to expand your options in Photoscape. All in a few easy steps!
Step 1
The first thing you need to do is find fonts! If you are going to be using these fonts commercially, it is important you find fonts that allow you to use commercially, if you are going to be using them on a product you will be selling.
It’s easy, just do a Google Search. Once you find a site, click on it and search the different fonts and pick some you think will be perfect for your designs/projects. Then create a folder and download them to that folder.

Step 2
Now that you have found the fonts you want, you will have to unzip them,, because they are downloaded as a zipped file. Most operating systems today, come with a zip file extractor, if you don’t have one, you will have to download one.
Once you have done that, unzip the font files, and put them in a folder that you can easily access. You can even use the same one you downloaded the original zipped files!

Step 3
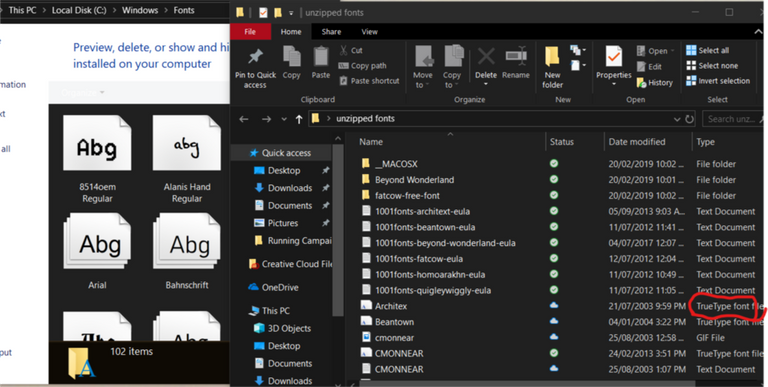
Now go to your local disk, and click on it, find your Windows folder, and open that.
Find your font folder, and open that!

Step 4
Now that you have your fonts folder open, you can drag and drop the fonts you have downloaded and unzipped into your fonts folder. Be sure you are dragging TRUE TYPE FONT File.
When you have placed all the new fonts into your fonts folder, close everything out, because, CONGRATULATIONS: you now have new fonts!
I hope anyone reading finds this brief tutorial on how to add fonts to PhotoScape helpful. It isn’t a complicated process, and really doesn’t take that long. The part i find the hardest is picking the fonts i want, because there are literally 1000’s of them out there you can download and use!
RESOURCES:
PHOTOSCAPE
FREE FONTS
WINZIP
Hi, @skiponline!
You just got a 0.24% upvote from SteemPlus!
To get higher upvotes, earn more SteemPlus Points (SPP). On your Steemit wallet, check your SPP balance and click on "How to earn SPP?" to find out all the ways to earn.
If you're not using SteemPlus yet, please check our last posts in here to see the many ways in which SteemPlus can improve your Steem experience on Steemit and Busy.