Valentine’s Day was last week, as I’m sure most of you are aware. It seems like it’s impossible to go anywhere in the weeks leading up to it without being inundated with all the PINK! and RED and
HEARTS!!!
It’s all very cute, and the kids of course totally love it. I know I did when I was little! Who didn’t get excited about receiving all these cute little cards, with silly little puns and mushy sentiments, all with loads of hearts and cutesy pictures. Plus, let’s not forget all the chocolate, cinnamon hearts, and sugary goodies.
These days, though, that’s not really what I’m about. I still helped the kids make those sweet little cards, and I still make heart-shaped, red and pink goodies, and play it up for them. But I don’t particularly buy into the commercialized “day of love” the way a lot of people do. I’d much rather all those romantic gestures (the flowers, chocolate, etc) on any other random day of the year, rather than a day we’re told that we “should”. It means more when it’s spontaneous.
As for me, the way that I show my love is by making things to share with the people I care about most. Sometimes that is a painting or a drawing, but usually it’s food. You know how people always say that Mom’s (or Grandma’s) food tastes the best because it’s made with LOVE? Well, I believe there has to be truth in that. And the more love you put in, the better it tastes. Which is part of the reason why I love making things from scratch. Yes, it takes longer, but there is a great deal of satisfaction that comes with the accomplishment, AND it tastes so much better!
And so, I give you my Lasagna from Scratch.
(Please give it a moment to load - this post is image heavy!)
This baby has homemade pasta, meat sauce, and cheese sauce. I didn’t make my own cheese, though that is something on my to-try list, and I didn’t make my own tomato sauce, though that is something I’m planning to do next harvest season, when the flats of tomatoes are on clearance. But, those things are typical pantry staples, so I don’t feel like I’m cheating too much, and can still call it “from scratch.”
I started by bringing the pasta dough together, since it needs to rest before being rolled out. I’ve discovered a very simple recipe that comes together very quickly in a food processor. It may not be 100% authentic to the Italian nonnas but until I take that much-dreamed-of trip to Italy to learn from one, I’ll stick with this simple method. All you do is put your flour, eggs, and a bit of olive oil into the bowl of the food processor, turn it on, and drizzle in a bit of water until it comes together!


While that rests it’s time to get started on the sauces. The meat sauce takes the most time, and is always best when it has a chance to simmer, so you want to get that going.
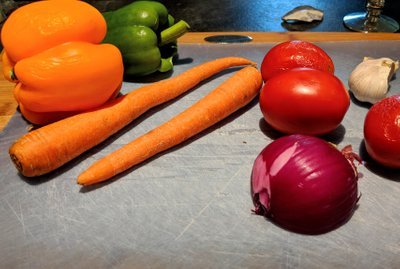
Here you can see all the lovely fresh veg I added to my sauce. Of course, everyone’s tastes are different, so if you’re going to make it yourself, feel free to add or subtract whatever veggies you like! This is a good base for flavor, though, so keep that in mind.

Once it’s sufficiently browned, add in your diced onions and carrots.These take the longest to break down, add loads of flavor and oompf to the sauce, and help to start deglazing the brown bits from the bottom of the pot.
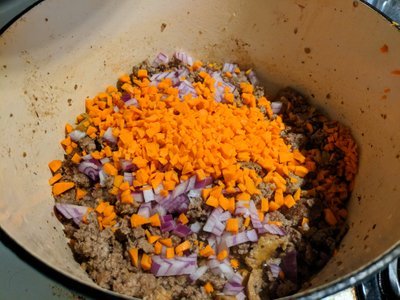
After those have broken down some, and the onions are translucent, you can add in some diced bell peppers, and seasonings.
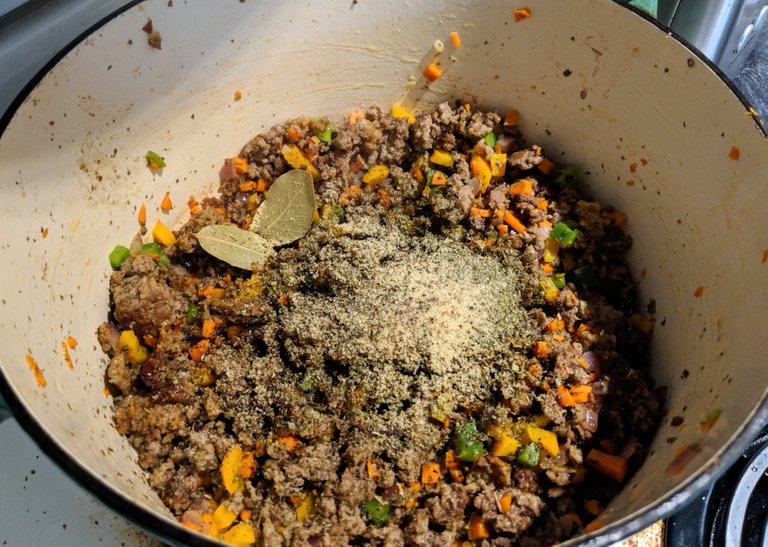
Italian seasoning, oregano, marjoram, ground fennel seeds, bay leaves, onion and garlic powder, salt, and pepper... Everything but the kitchen sink!
Yes, I do like to use a lot of seasonings… I’ve got loads of different herbs and spices on hand, and believe me I use them to their full advantage. And I like to add them before adding the sauce, to give them a chance to “bloom”. By getting those sad-looking dried herbs into the pot, into the high heat, and into some oil, you’re starting to reconstitute them, as well as awakening the oils inside of them, where all the flavor lives. Yes, adding them after the tomato sauce will still give you flavor, as it will rehydrate them, but we’re going for maximum flavor here, and the best way I’ve found to achieve that is by letting the oil do the work!
Once you’ve given that a few minutes to work its magic, add in a few minced cloves of garlic, and some diced fresh tomatoes, and allow them to break down for another few min, then deglaze the bottom of the pot fully with a few “glugs” of red wine. (Yep, pretty sure that’s a technical term of measurement. At least it is in our house. 😜)
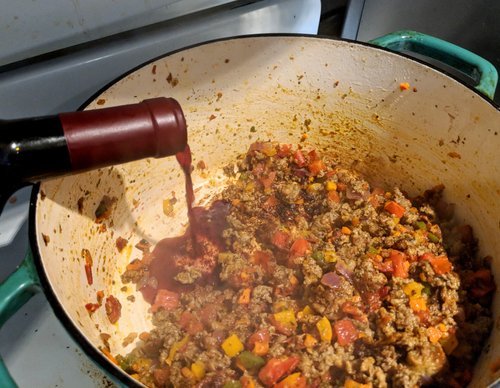
Allow the wine to reduce significantly, then add in your tomato sauce. Reduce the heat to low, and let it simmer.
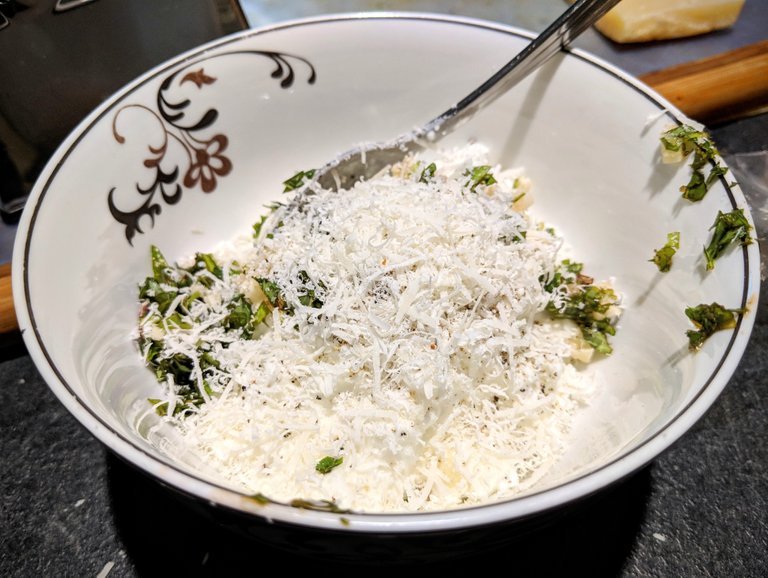
Now that you’ve got that working away, it’s time to slap together your cheese sauce. You can use ricotta as your base (as would be most authentic) but it can be quite pricey, and I feel it can get a little lost with everything else going on, so I save a buck, and use good old regular cottage cheese as my base. Season it up with some salt (I generally use our homemade smoked garlic salt in anything savoury) and pepper, a couple cloves of diced up garlic, and some fresh basil.

Then add an egg and throw in a pile of freshly grated parmigiano reggiano. (Other hard cheeses you could use are grana padano or pecorino romano.)
POOF! Cheese sauce done!
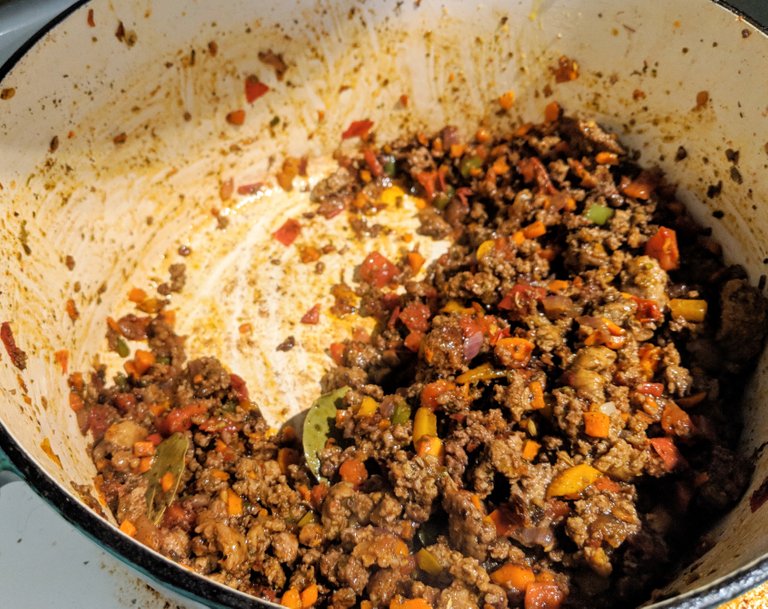
At this point, get your butt back to the stove and check on that sauce. Is it simmering nicely? Adjust the temperature if it’s boiling too hard, or not really simmering. Give it a stir. Is anything sticking on? If so, your stove is probably too hot. Give it a taste. Does the seasoning need adjustment? Remember, there will be several layers of pasta between the sauce, so you want it to have enough flavor to carry through. But don’t over-do it! Especially on the salt! No one wants pickled lasagna!!!
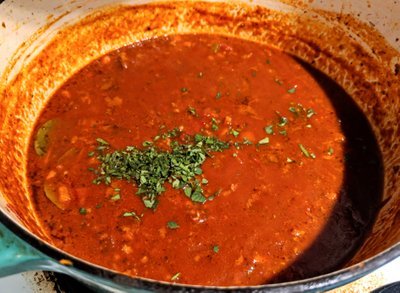
I added a little fresh oregano from my herb garden.
And now it’s time to get back to the pasta. We have a hand crank roller, but there are also nifty attachments you can get for your stand mixer. OR you could always go old-school and roll it out by hand. That method, as with most anything done fully by hand, can take a lot of elbow grease, and a lot of time. So plan accordingly. 😉
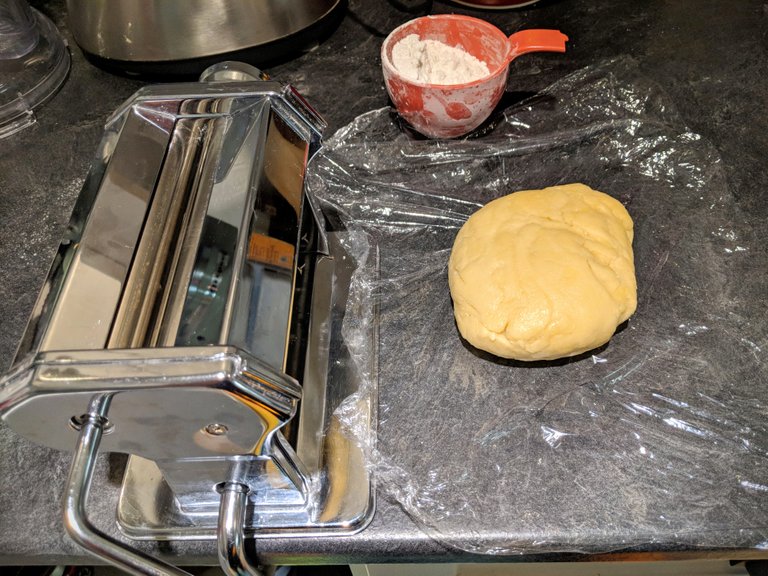
You can see the dough is nicely rested, and I’ve got lots of flour on hand to make this job a little easier.
I start by cutting my dough into about 6 pieces. Make sure you keep the pieces not being rolled out under some plastic or a damp cloth so that they don’t get dried out.
Grab a piece of dough, and flatten it slightly with your hand, then crank it through the rollers on the widest setting. If your edges are rough (as they will tend to be after the first roll) then give it a tri-fold and re-roll it.
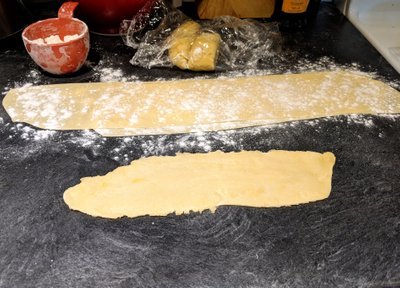
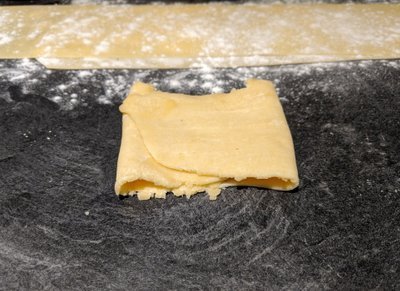
Once the edges are smooth, turn the dial down 2 notches, so the rollers are slightly tighter, crank it through, and repeat, continuing to turn the dial down, until you get to the lowest or second-lowest setting. (For mine, it’s 7, 5, 3, 1.) Set the rolled-out dough aside, and sprinkle liberally with flour, so they don’t stick together.
Alright! Now it’s time to assemble!
Am I the only one who immediately thinks of the Avengers and/or Anchor Man whenever someone says ‘assemble’?

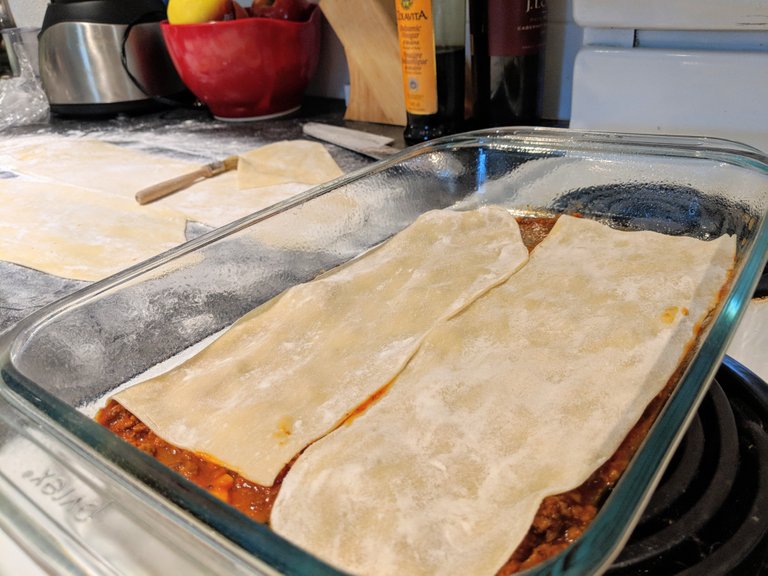
Remember to dust off the excess flour before putting into your pan! You don't want to eat paper mâché paste.
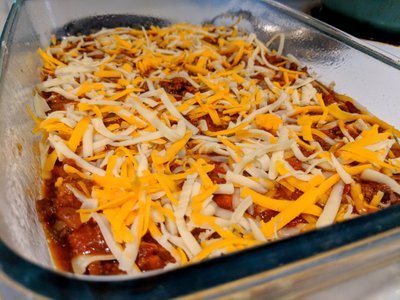
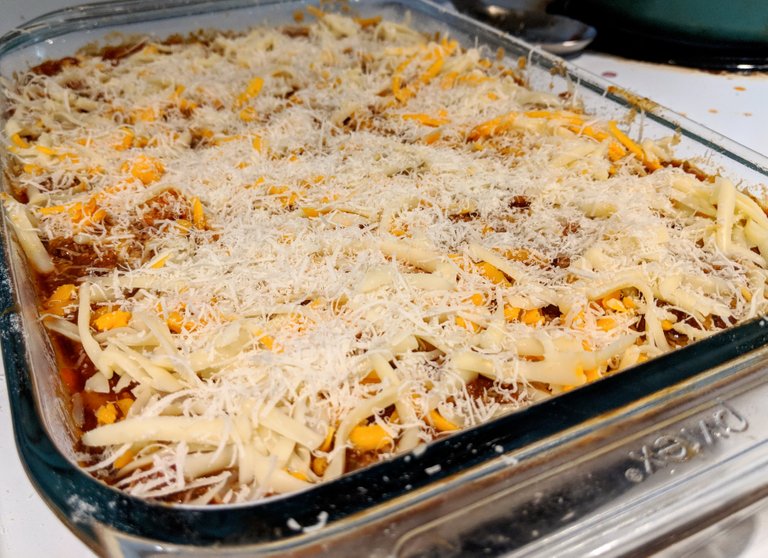
Now you want to put a thicker layer of the tomato/meat sauce on top of the pasta, and top that with some grated cheese. I used a mixture of mozzarella and aged cheddar.
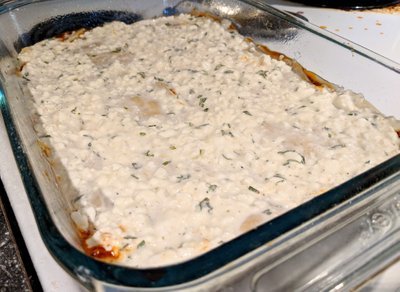
Then top that with another layer of pasta, followed by your white cheese sauce.
Cover it with foil, slightly loosely, so that the cheese doesn’t stick on, and pop it into the oven (350-375F) for a good half hour. Then remove the foil and continue to bake for another 20-30 min, until everything is bubbly, melty, and golden brown.
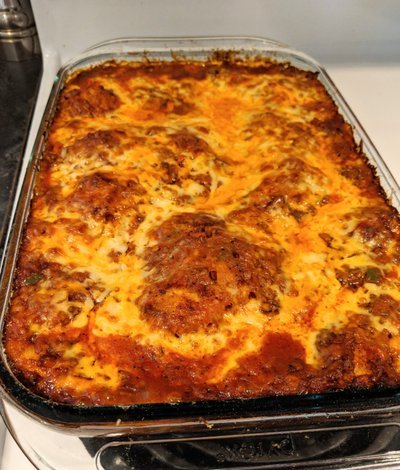
Let it rest at room temperature for a good 10-15 min before you try slicing into this thing. I know, it smells yummy and you’re hungry! Trust me, if you want to get actual squares of lasagna, this is the trick. Cut into it too soon, while it’s still molten hot, and it’s just going to run and slide everywhere. Go fold that pile of laundry that’s been looking at you from the corner. Go set the table. Go tell the kids to clean up their room for the 15th time. Go open all your windows to tease the neighbours with the delicious smell that has now permeated your home. Whatever you feel fits best for you… just do something other than cutting this lasagna for the first 10 minutes out of the oven! K? K, cool. 😎
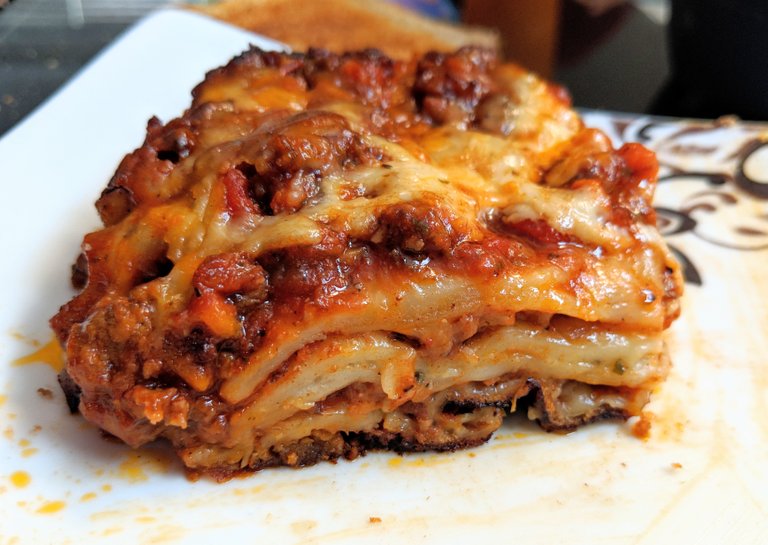
Once it has had a chance to rest and come back together, you should have no problem getting that beautifully layered square of deliciousness onto a plate… and into your mouth.
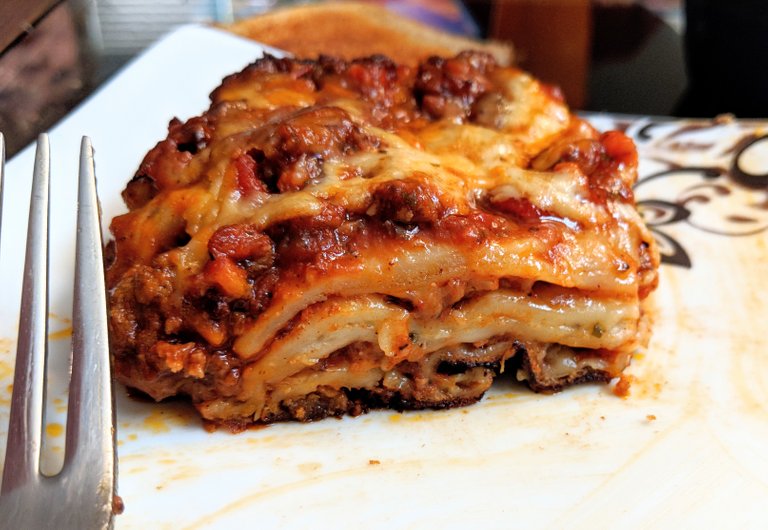
Each layer is full of flavor, and each mouthful has so many layers, your taste buds are in for a ride.
What’s your favorite ‘takes forever to make but oh so worth it in the end’ meal?
How do you show your favorite people that you love them?
Let me know!
In the meantime, I hope you enjoyed this walk-through, and that maybe it’s inspired you to give a little extra the next time you’re making something in the kitchen.
Congratulations @offbeatbroad! You have completed the following achievement on the Steem blockchain and have been rewarded with new badge(s) :
You can view your badges on your Steem Board and compare to others on the Steem Ranking
If you no longer want to receive notifications, reply to this comment with the word
STOPVote for @Steemitboard as a witness to get one more award and increased upvotes!
Yum! Your post would look great with the #foodie tag. You have been curated by @razack-pulo on behalf of FoodiesUnite.net. We are a tribe for the Foodie community with a unique approach to all things food.
Join the foodie fun! We've given you a FOODIE boost. Come check it out at @foodiesunite for the latest community updates. Spread your gastronomic delights on https://foodiesunite.net and claim your tokens.
Megan, this type of publication whet my appetite. How delicious the lasagna looks in the pictures! I love the use of Roman pecorino cheese. And what makes the difference: homemade pasta.
I am imagining the smells of the oven and then the exquisite sabar to glory. Thank you for sharing this Italian recipe in detail. Bon Appetite! and greetings @offbeatbroad