Hello Everyone,
Today i want to share with you an interesting thing i learned recently. It is called Duracoating, Cerakoting, Alumaheide, Etc. There are several different brands you can choose from, the ones i mentioned are simply three of the more popular coatings on the market. I chose to use Duracoat because it doesn't require that you bake it to set the finish. Although i believe that Cerakote now has a "no bake" aplication now as well(although i believe i've heard their no bake version's finish isn't as durable as Duracoat's no bake version). Today i'll be discussing the process, and hopefully showing you how easy it is to do. While Duracoating your weapon isn't necessary, it is about the best way to make your gun stand out. While at the same time make it a one of a kind weapon. Let's get started shall we?
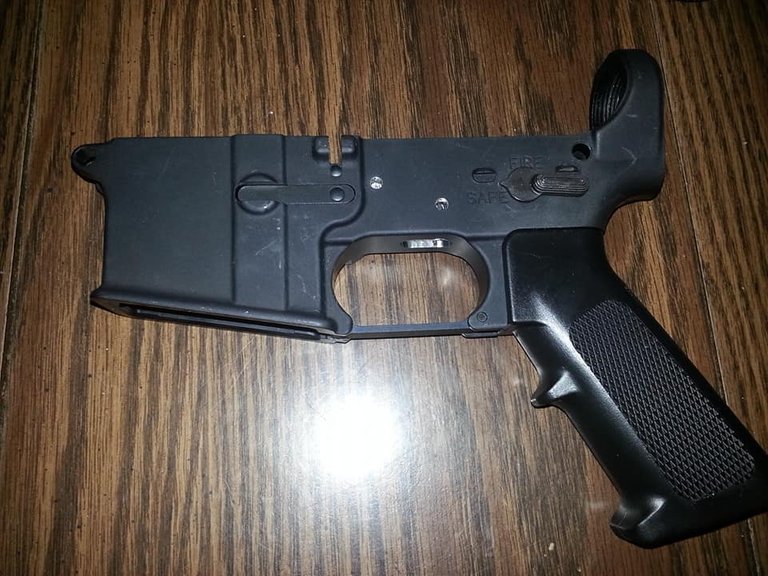
First, if necessary.... Assemble your gun. Then proceed to use an abrasive such as a sand blasting agent or a light grit sandpaper(I used my drill with a wire stripping brush), to rough up the all surfaces on your gun. It is important to use something that allows you to get into all of the tight corners and hard to get to spots. you do this to give the coating a surface in which it can easily adhere to. This will make the coating less prone to "chipping" or "flaking off" when it gets dinged or scratched during use. Next, we will need to clean the weapon parts free, of any leftover debris from the preparation process. A quick wipe down with a damp cloth will help, but we also want to remove ALL grease, oils, chemicals from the parts. For this, i recommend using Brake kleen, or other acetone based solution. This will ensure there are no chemicals which will keep the Duracoat from bonding to the metal.
Next, we will want to choose which color we will want our base color to be. Once you choose, you will spray your entire weapon with a good coating of your base color(be careful not to overspray to avoid runs in the coating.) Your base color should be the thickest layer you will spray(I sprayed 2 coats allowing the recommended 1 hour between coats). Once you have done this first spraying of the base color, I have found it best to allow the parts to "cure" overnight. I do this so it is easier to handle the parts without concern of smudging the base coat when applying the first set of stencils before spraying your second color.
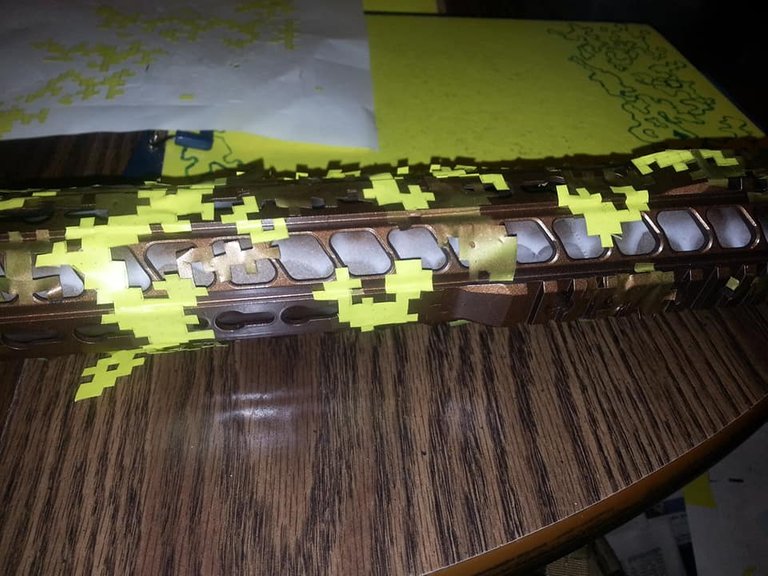
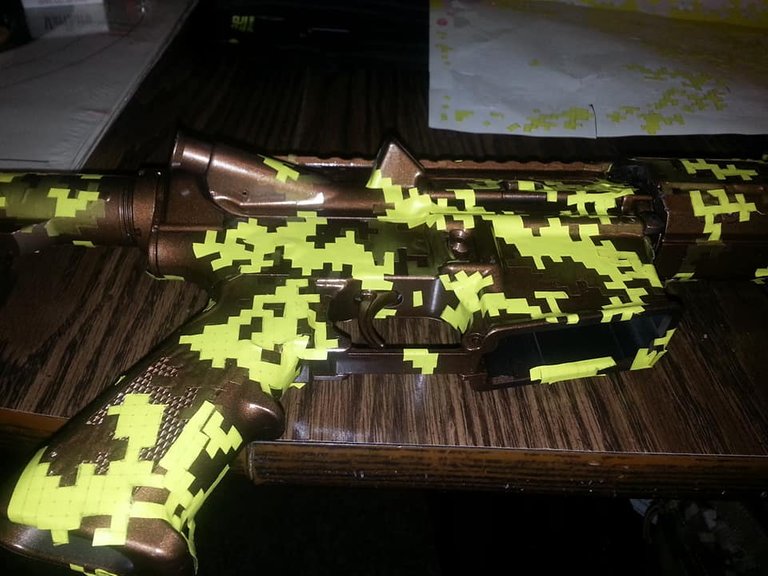
Which brings us to our next point....Stencils. There are several places online where you can purchase pre-made stencil kits. Personally i find them to be overpriced, and the patterns to be somewhat repetative. This is fine, and won't cause an issue. I chose to source my own vinyl sheeting, make my own stencils, and making my own patterns. I felt that by creating my own stencils and patterns it could make my gun look even more individual and one of a kind look. rather than using some website's precut patterns that countless people would use. Again, you don't have to do this. The pre-cut stencils work just fine. Although to give you an idea of cost : most premade rifle stencils sell for between $35.00-$50.00 depending on how many sheets you need. I bought 2 12"x25' rolls of uncut, unsized rolls of vinyl for about $70.00. I will be able to make stencils for about 20 rifles, cut to custom size, custom patterns. let that sink in for a sec.. 1 rifle stencils for as much as $50.00 or enough vinyl for 20 rifles for about $70.00, there is a clear and definite advantage to cutting your own vinyl if you are inclined to do so. Anyhow, lets get back to topic at hand, lol.. Ok, so your first base color is dry and has been curing overnight, and is completely safe to handle. Now we need to place our stencils in a random manner on the weapon. Affix as many stencils you want to save in the color of your basecoat. Once done, we will need to spray the weapon in our next color. Again, letting the Duracoat "cure" for at least an hour, before applying your next set of stencils. Repeating this process for each color you are spraying. Spray, cure, stencil, repeat..
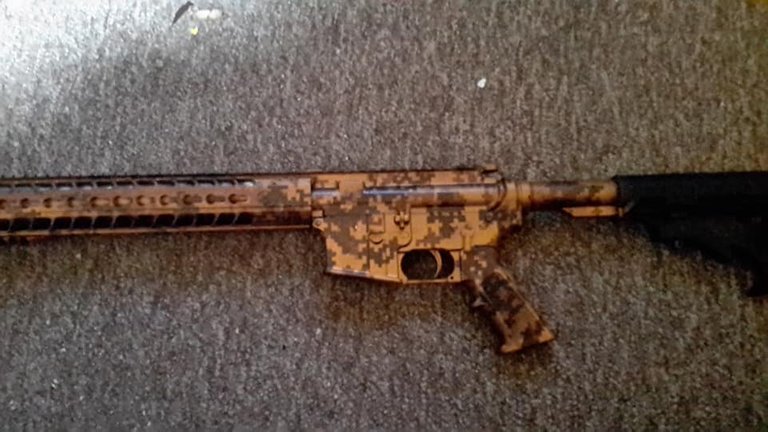
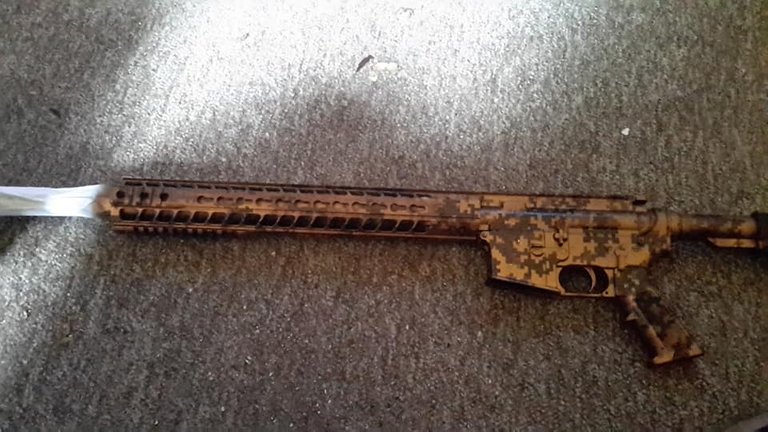
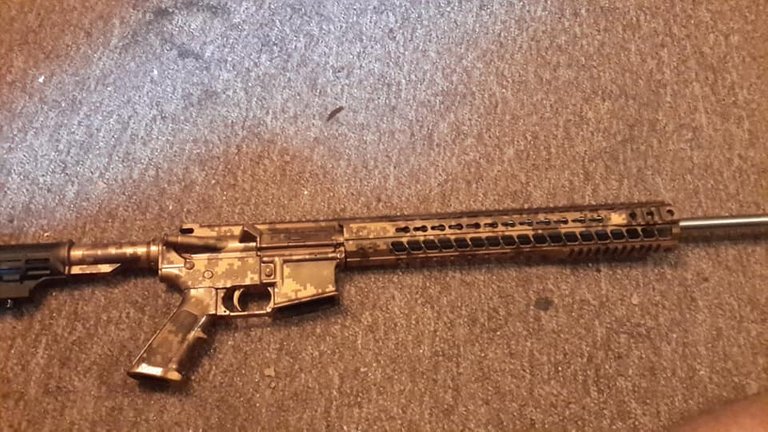
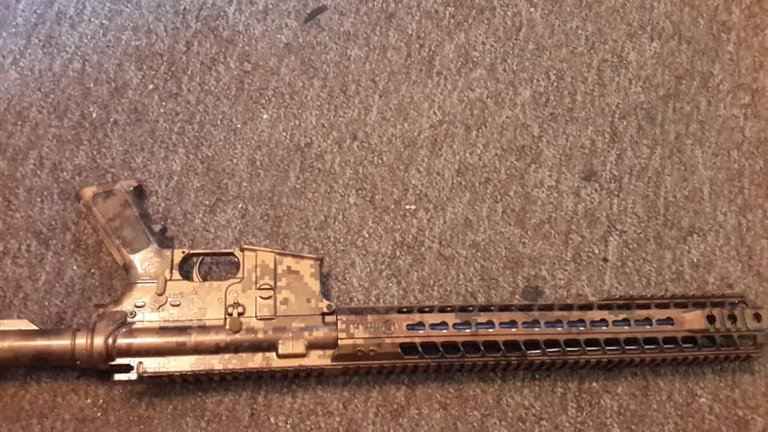
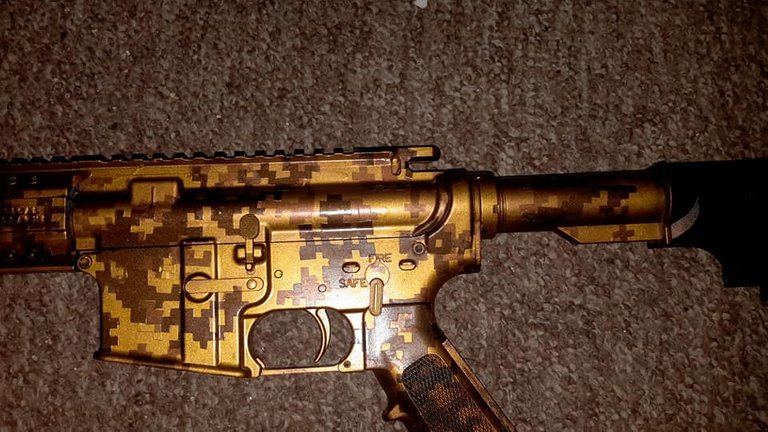
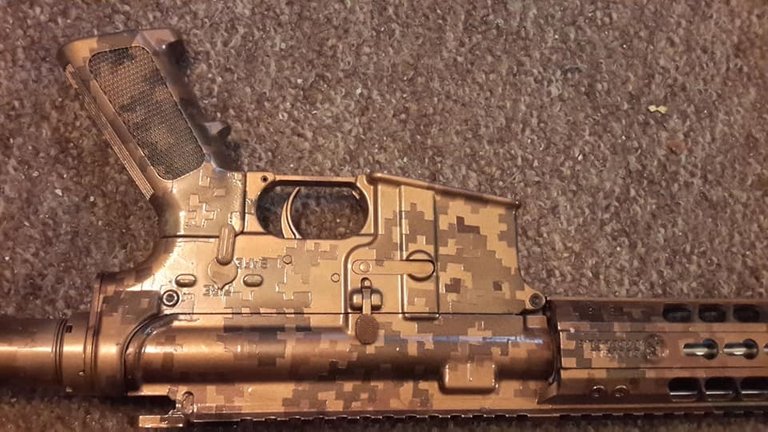
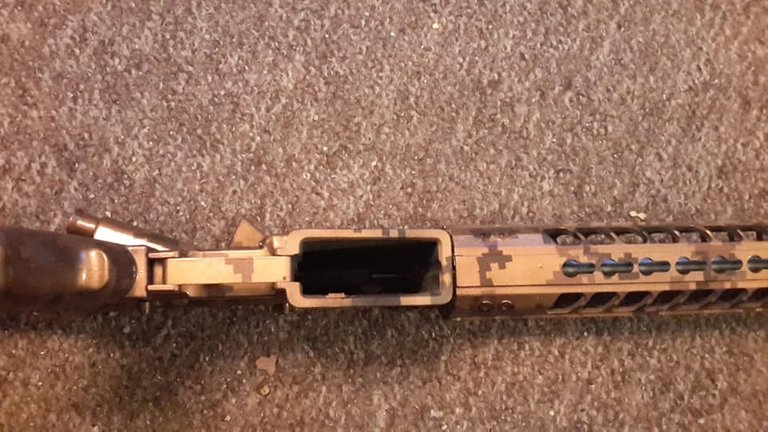
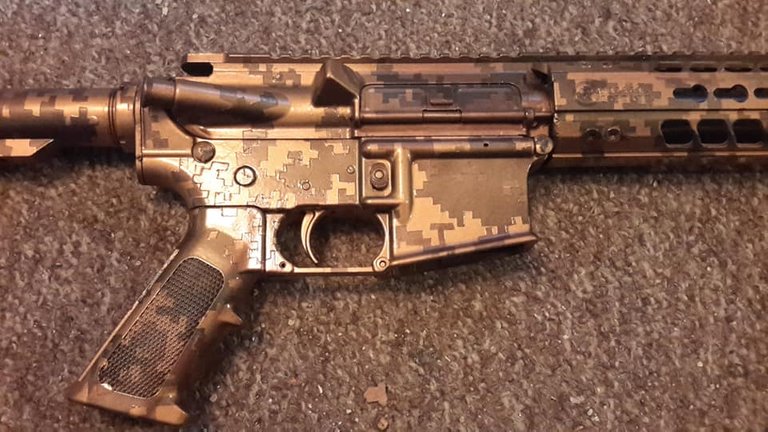
Next , once you have applied your last color we need to let the weapon cure overnight. This will allow the Duracoat to cure long enough so you don't peel it off when removing your stencils. For removing your stencils i suggest using an exacto knife or razor blade to aid in picking up the corners of the stencils. Making it easier for you to grab them with your fingers. This also will help keep you from chipping the coating, and removing more than you want to remove. Once you have removed your stencils, step back and look at your handiwork. I suggest you look at the weapon from many different angles, and distances. I have found that when you look at the weapon close up it doesn't look as good as it does from even a meter away. It is easy to see any imperfections you made all up close and personal, as the following pictures will show. The weapon has a whole different look at different angles and distances.
If you have any questions, or are unsure of the steps and process... please leave me questions, and i will try and get back to you in a fairly timely manner.
Also, I am going to be putting a few links as to where i sourced my materials for this project
Here are the colors i used on this gun : DURAMETYL Bronzy Osbourne, Marylin Bronzen, and Van Golden.
I used DuraPearl Gold, and plain Duracoat satin clearcoat as my top coats...
LINKS:
DURACOAT: https://www.duracoatfirearmfinishes.com/
BRILLIANT VINYL: https://www.brilliantvinyl.com/
OTHER tools used can be bought at most hardware stores, i used tools i already had onhand.
Airbrushes can be bought on the Duracoat website, Amazon, and Harbor Freight. I used one from Amazon, and it died.. i bought a cheap $10 one at Harbor Freight, and it worked like a champ. At $10 a pop they are almost disposable at that price.
WEBSITES SELLING STENCIL KITS:
https://www.weaponstencils.com
https://www.freedomstencils.com
https://www.acidtactical.com
https://www.montactical.com (Which sells freedomstencils.com stencils)
Ok everyone, please.........if you have any questions, comments, complaints, etc. Please post them below and will seriously try and respond in a timely manner. Thank you for taking the time to check out my tutorial, if you have suggestions on how can improve this "how to" topic let me know below. if you have suggestions on anything else gun related you want to know about i will try and accommodate your request if i know the subject.
THANK YOU!!
You have a minor misspelling in the following sentence:
It should be accommodate instead of accomodate.thank you grammarnazi... i didn't catch that.
You can 'accomodate' me (life is too short to live inside spell check anyway!
:)), while I say thanks, I am building several right now, so thanks, I will try this.so far i have built 2 "ghost" guns from milling the 80% lowers on up. One in .300blk, and the other in 6.5 Grendel. I love both for different aspects. the .300blk because at under 100yds it packs a punch and is accurate, the 6.5 grendel because i can still hit a sub MOA group at 800yds so far... i plan on building a .458 socom and a .500 on the AR15 platform, and several on the AR10 platform. i love the gunsmithing hobby, it is an expensive hobby though. thank you for your comment.
I have a couple of mills in my shop, so I love the 80% lowers! I would like to make the 6.5 (I have a Sweedish Mauser in 6.5, and I LOVE IT!) Grendel. because it is balistically sound, and an excellent choice for this frame! I run an M14 for the punch, so I will avoid another calibre on the 300, even though I hear it is excellent. I have thought about the larger sizes, but I wonder if the design is up to that much more stress.
I have heard horror stories about building to 308, and having stress failures; but I find myself questioning their abilities, and wondering if that is the source of the failures.
hmmm... that's kinda odd seeing as the 7.62 and the .308 are pretty close to the same round with the exception of chamber pressure with the .308 . The failures i've heard occurring is blowing the barrel, due to powder overloads to increase muzzle velocity... but this only happens if you are running self loaded overcharged rounds, i don't think i've heard of failures with manufactured rounds with specific loads... with the exception of them not using a heavy barrel. Sometimes people like to crop as much weight on their weapon as possible while still maintaining functionality.... the barrel is not the place you want to reduce your weight on a high velocity weapon...
I hunt with a 300 win mag, so I Like velocity, and weight is no problem. Yes, people do stupid things! As you say, only an idiot would cut down a barrel to reduce weight! Larger rounds make sense for the AR platform; the 223 is too small for my tastes (I do like to play with them though). I am biased towards the 6.5 because that size has worked so well for me before.
Idiots should NOT reload! The reason to reload is NOT to see how much powder you can force into a brass case, and how heavy a tip you can ram in on top of it! It is a dance with the firearm and ammunition, to find the sweet spot, that gives you a tight MOA, and hits hard.
Sadly there are a lot of 'reloaders' that will never figure that out!