Una de las preparaciones que tenía pendiente hacer era una Red Velvet. Es una torta que me encanta comer, su ligero sabor a chocolate, combinado con la crema de queso crema, hace de este pastel uno de mis favoritos. Sin embargo, yo soy enemigo de los colorantes, por cosas que sufrí de niño por comerlos y que, a medida que estudio y me especializo, me doy cuenta de lo dañino que son para el organismo y el pastel red velvet últimamente lo hacen con tanto colorante rojo, que para mí deja de ser apetecible.
One of the preparations I had pending to make was a Red Velvet. It is a cake that I love to eat, its light chocolate flavor, combined with the cream cheese cream, makes this cake one of my favorites. However, I am an enemy of dyes, because of things that I suffered as a child for eating them and that, as I study and specialize, I realize how harmful they are for the body and the red velvet cake lately is made with so much red dye, that for me it is no longer appetizing.
Me puse a estudiar sobre el pastel red velvet y entre tantas cosas que leí, se mencionaba que su color más tradicional es el del rojo ladrillo, producto de la remolacha que se le agregaba, el poco cacao en polvo que lleva y la reacción química que tiene el cacao en polvo con el bicarbonato de sodio y el vinagre. En la cocina todo se trata de reacciones químicas y físicas, y al comprender cómo los componentes de cada ingrediente pueden reaccionar, se logran grandes cosas. Para no hacer esto más aburrido, puedes investigar qué son las antocianinas y en qué cantidades las tiene el cacao.
I started to study about red velvet cake and among the many things I read, it was mentioned that its most traditional color is brick red, a product of the beets added to it, the little cocoa powder it contains and the chemical reaction of the cocoa powder with the baking soda and vinegar. Cooking is all about chemical and physical reactions, and by understanding how the components of each ingredient can react, great things are achieved. Not to make this any more boring, you can research what anthocyanins are and in what quantities cocoa has them.
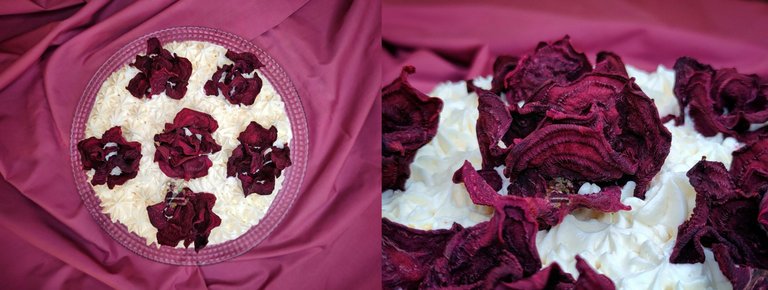
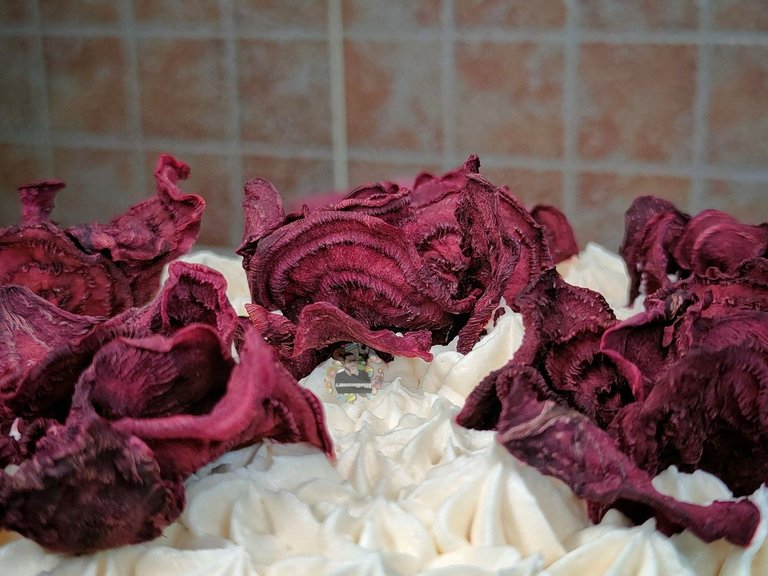
Descartando el color rojo radioactivo, lo que pensé fue en usar mermelada de remolacha. Se puede utilizar un puré de remolacha, pero opte por mermelada, para más sabor y una mejor textura húmeda. Yo la mermelada de remolacha la hago con jugo de naranja y limón, eso me permite obtener un sabor crítico que le va superbién a esta torta. Si no sabes cómo hacer la mermelada de remolacha, puedes chequear mi receta. Adicionalmente, para decorar utilice chips de remolacha, que parecen pétalos de rosa y hace que la torta se vea más elegante.
Ruling out the radioactive red color, what I thought of was to use beet jam. You can use a beet puree, but I opted for marmalade, for more flavor and a better moist texture. I make the beet marmalade with orange and lemon juice, that allows me to get a critical flavor that goes super well with this cake. If you don't know how to make beet jam, you can check my recipe. Additionally, to decorate I use beet chips, which look like rose petals and makes the cake look more elegant.
Si quieres aprender a preparar esta versión de la torta red velvet, estos son los ingredientes que yo utilicé:
If you want to learn how to prepare this version of red velvet cake, these are the ingredients I used:

Ingredientes || Ingredients
|
Para la mezcla de la torta
Para la crema
|
For the cake mix
For the cream
|

Preparación || Preparation
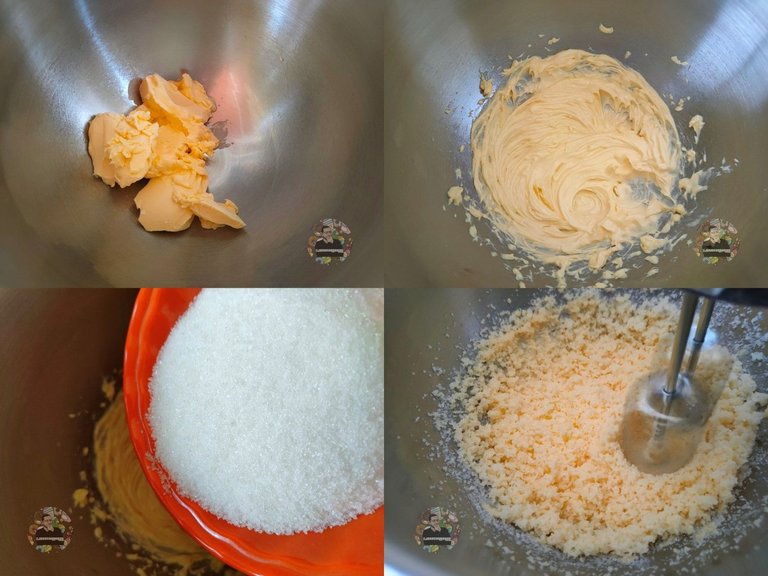
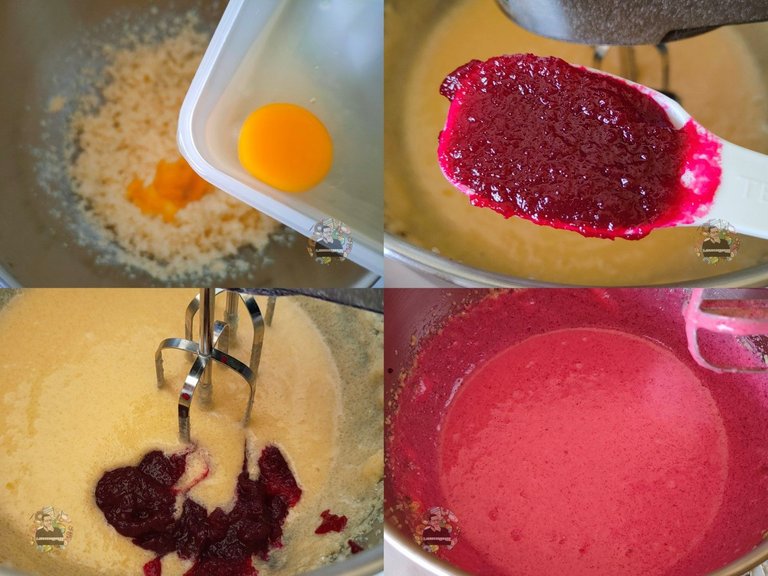
- En un bol, agregar la margarina y suavizarla con ayuda de un globo batidor o batidora eléctrica. Una vez suavizada, se agrega el azúcar y se integra bien a la preparación.
- In a bowl, add the margarine and soften it with the help of a balloon whisk or electric mixer. Once softened, add the sugar and integrate it well into the preparation.
- Se agregan los huevos de 1 en uno, mezclando bien para ayudar a que todos los granitos de azúcar estén bien disueltos. Se agrega la mermelada y se integra bien a la mezcla, para que el color se distribuya bien.
- Add the eggs one at a time, mixing well to help all the sugar granules to be well dissolved. Add the marmalade and mix well so that the color is well distributed.
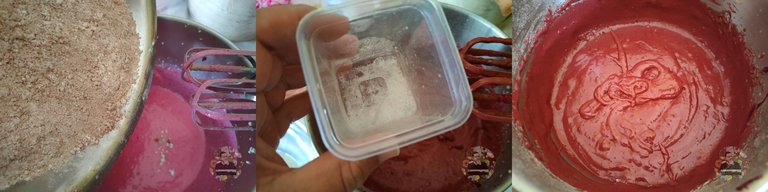
- En una taza, se agrega la leche y el vinagre, para que se comience a cortar y se forme la buttermilk o suero de leche. Esto tarda unos 5 minutos, pasados ese tiempo y con los ingredientes secos tamizados, se agregan alternando es decir, se agrega una parte de los ingredientes secos y otra de la buttermilk hasta agotar ambos ingredientes. En una taza pequeña, se agrega el bicarbonato de sodio junto con el vinagre, va a comenzar a hacer espuma y se agrega a la mezcla, mezclando suavemente hasta que este integrado.
- In a bowl, add the milk and the vinegar, so that it starts to cut and the buttermilk is formed. This takes about 5 minutes, after that time and with the dry ingredients sifted, add them alternately, that is to say, add a part of the dry ingredients and another part of the buttermilk until both ingredients are used up. In a small cup, add the baking soda together with the vinegar, it will start to foam and add it to the mixture, mixing gently until it is integrated.
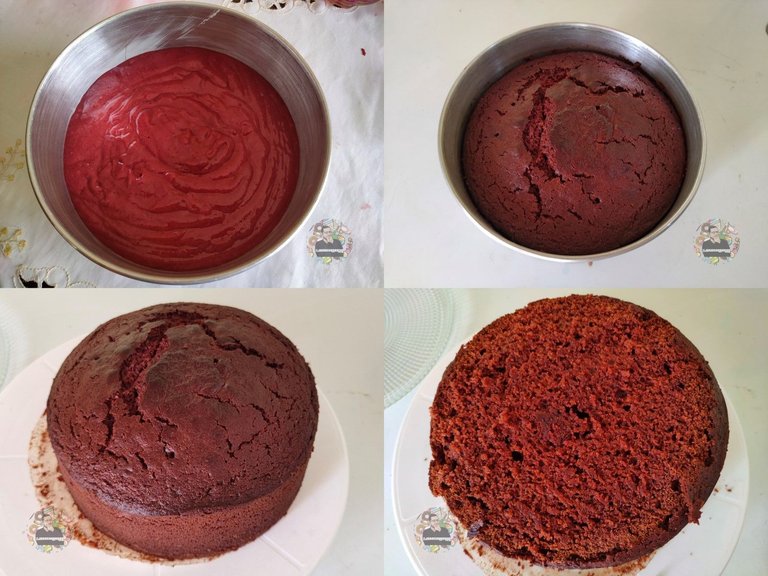
- Con un molde engrasado y papel de horno en el fondo, se agrega la mezcla y se lleva a hornear por el espacio de 1 hora a 175°C o hasta que al pincha con un palito, el palito salga sin restos de mezcla. El tema del horno debes estar pendiente, cada horno es diferente. Yo hornee solo con calor abajo y en el medio del horno.
- With a greased baking pan and baking paper in the bottom, add the mixture and bake it for 1 hour at 175°C or until it comes out with a toothpick without any leftover mixture. You must be aware of the oven, each oven is different. I bake only with heat below and in the middle of the oven.
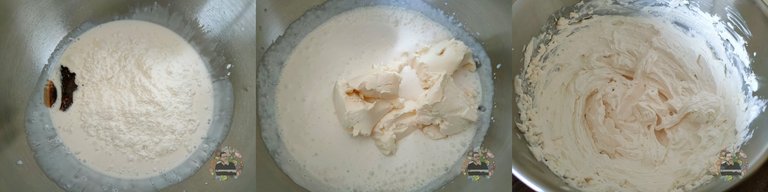
- Para preparar la crema, se coloca la nata para montar bien fría en un bol, se agrega la vainilla y la azúcar pulverizada. Se comienza a batir la crema hasta que este a medo montar, o cuando veas que la crema comienza a espesar. Se agrega el queso crema, previamente batido para suavizar y se integra a la nata hasta que la mezcla se ponga firme.
- To prepare the cream, place the cold whipping cream in a bowl, add the vanilla and the powdered sugar. Begin to whip the cream until it is half whipped, or when you see that the cream begins to thicken. Add the cream cheese, previously beaten to soften, and add it to the cream until the mixture becomes firm.
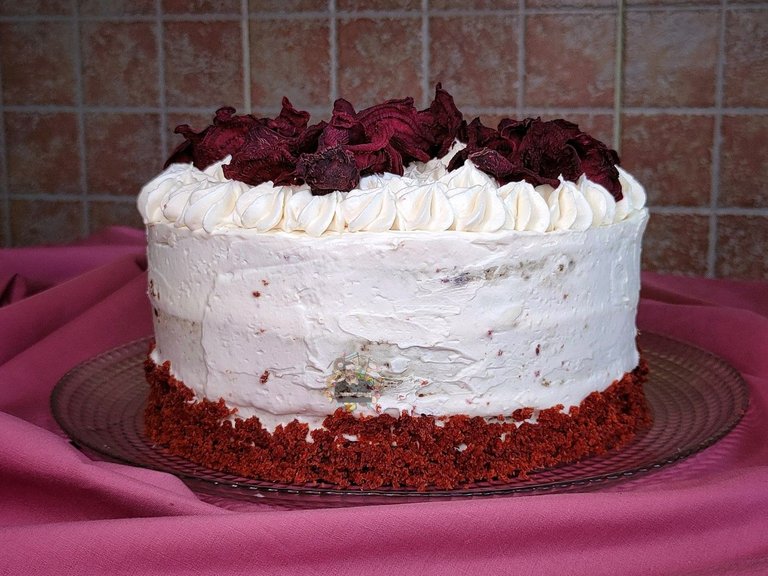
- Para armar la torta, se corta la barriga del ponqué y se corta en 3 discos. Puedes hornear también los 3 discos por separado, dividendo la mezcla en 3. Se coloca un disco, se agrega crema, se coloca un disco sobre la crema y así se va hasta tener los 3 discos y luego se cubre con la mezcla por toda la torta. Si no te has comido la barriga que se corta al inicio, se le quita la miga y se coloca en la base para decorar y con ayuda de una manga, se le hacen picos en la parte superior.
- To assemble the cake, cut the belly of the cake and cut it into 3 disks. You can also bake the 3 disks separately, dividing the mixture into 3. Place a disk, add cream, place a disk on top of the cream and so on until you have 3 disks and then cover the whole cake with the mixture. If you have not eaten the belly that is cut at the beginning, remove the crumbs and place it on the base to decorate and with the help of a sleeve, make peaks on the top.
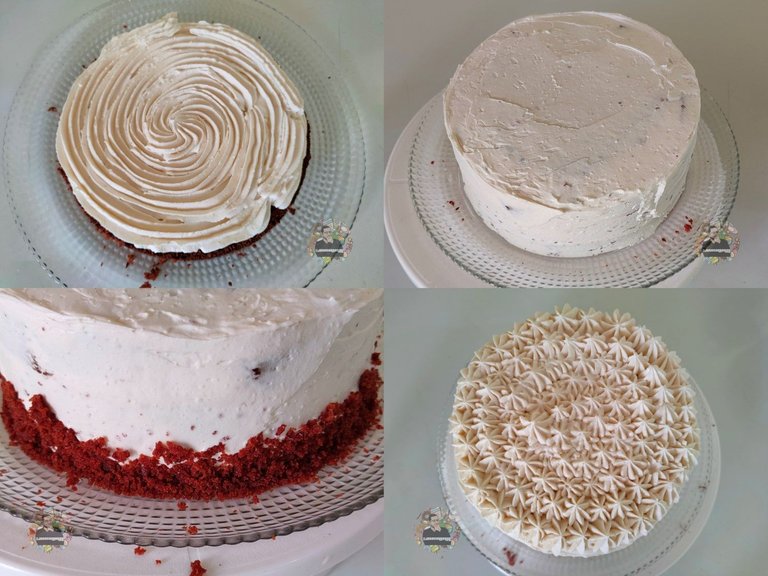
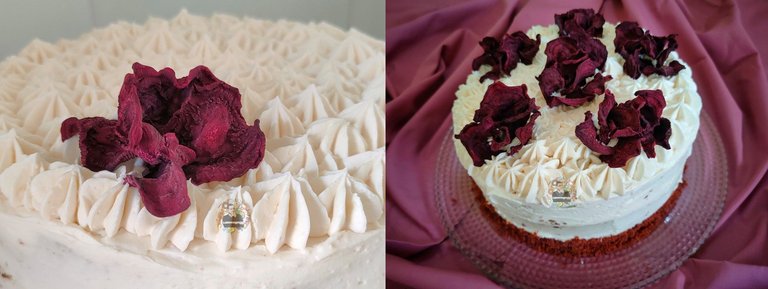
- Para decoración extra, le coloque unos chips de remolacha que parecen pétalos de rosas, eso le da elegancia a este pastel que tiene una alisado rustico. También se puede decorar semi desnuda, eso queda a tu gusto y como desees decorar este pastel.
- For extra decoration, I put some beet chips that look like rose petals, that gives elegance to this cake that has a rustic smoothness. It can also be decorated semi naked, it is up to your taste and how you want to decorate this cake.
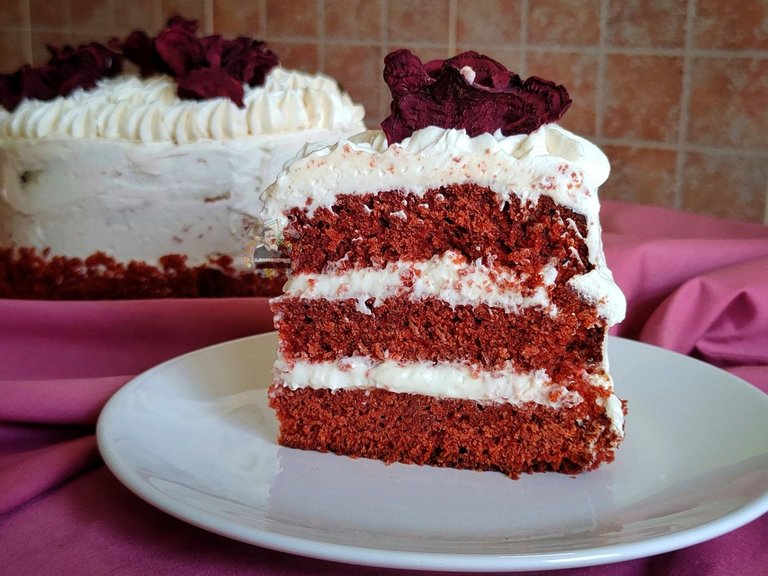
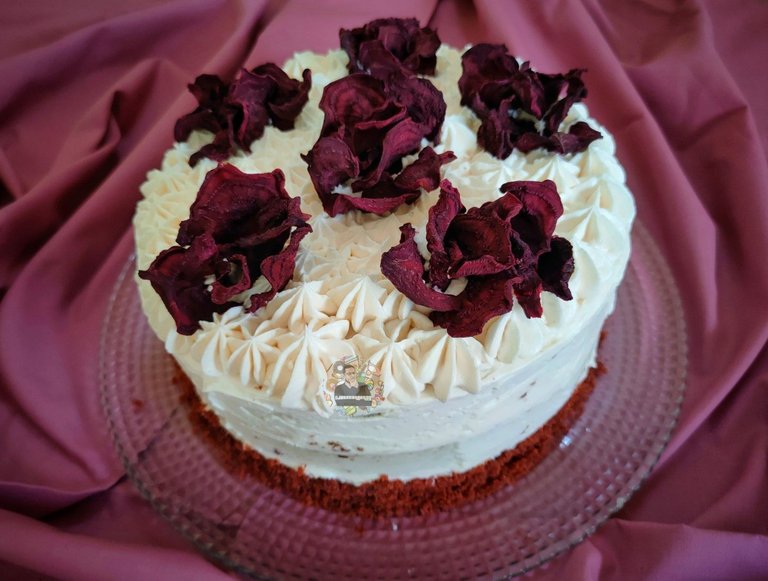
Con todos estos pasos, el pastel red velvet ya esta listo. La mermelada cítrica le da un toque especial de sabor y humedad, adicional que el color rojo ladrillo le quedo bonito, esperando que así fuera el color como la hacían antes. El sabor ligero a chocolate se siente, pero no es predominante, ya que la crema se hace notar, el sabor del queso crema con la vinilla es imparable en este pastel.
With all these steps, the red velvet cake is ready. The citric marmalade gives it a special touch of flavor and moisture, in addition to the brick red color, hoping that this was the color as they used to make it. The light chocolate flavor is felt, but it is not predominant, since the cream is noticeable, the flavor of the cream cheese with the vinegar is unstoppable in this cake.
Déjame saber en los comentarios si has comido un pastel red velvet antes y cual ha sido tu experiencia. ¡Hasta una próxima receta!
Let me know in the comments if you've had a red velvet cake before and what your experience was - until a future recipe!

Todas las fotografías fueron tomadas por mí con un Realme 7 pro. No autorizo a nadie reutilizarlas. Esta publicación fue escrita en español y luego traducida al inglés.
All photographs were taken by me with a Realme 7 pro. I do not authorize anyone to reuse them. This publication was written in Spanish and then translated into English.
No hay forma correcta de comer una Red Velvet, a mí me encanta y podría comerla fácil jajaja pero tienes mucha razón con respecto al colorante. Hubo una vez en la que sentí un merengue tan amargo y desagradable pues para darle el color rojo, utilizaron (de seguro) muchísimo colorante. Finalmente todo evoluciona y creo que es mejor hallar nuevas formas para darle color a los alimentos. Me hiciste recordar a una amiga que es chef pastelera y me decía que "cocinar es cómo la química". Un abrazo, excelente resultado.
El exceso de colorante hace eso, amarga las cremas o preparaciones. Hemos pasado de que las cosas sepan bien a que se vean bien. Yo prefiero algo rustico, como campestre pero cargado de buenos sabores a algo que se vea super bien pero solo tenga sabor a azúcar jeje. Ahorita lo ideal con cremas pintas es con aerógrafo, eso hace que solo la superficie sea de color y el resto va normal y se evita eso del amargo. Gracias por pasar, un abrazo 💙
He tenido la oportunidad de preparar estas tortas, un verdadero terciopelo rojo, aunque siempre lo he hecho con colorante! De igual manera queda muy buena!
Amigo lindo que delicia y espectacular postre de verdad nunca me dejas de sorprender con excelentes recetas de postres. Que Dios te continúe bendiciendo y cuidando tus manos. Muchas gracias por compartir tu hermosa recetas🙏🙌🤗
Wow I love it red velvet it's one of my favourite cake 🍰🍰🍰