Excel form controls are a kind of user interface that can be added to a worksheet. You can add a single form control to a worksheet, or a group of form controls. Some of the form controls that you can choose from include list boxes, check boxes, radio buttons, scroll bars, combo boxes, and control buttons.
You can use Excel form controls to design a workbook that encourages users to make certain choices and selections. Operations can then be performed based on the selections made. Form controls can also be used to provide data options or choices for the user.
Essentially, form controls let you manage what kind of data a user can enter or manipulate and what happens in your worksheet after a user has performed specific actions. You can even combine form controls to create a simple user interface or Form for interacting with a workbook.
The following is a list of the main form controls available in Excel .
 |
The label control allows you to add a text label to a worksheet. |
 |
The button control allows you to add a button to a worksheet. (The button could be assigned to a macro if you wish.) |
 |
The check box control allows a user to make selections based on true or false values. |
 |
The option (radio) button control can enable a selection from mutually exclusive items. |
 |
The list box control can provide options based on a list of worksheet data. |
 |
The combo box control can provide options based on worksheet data. |
 |
The scroll bar control allows you to scroll through a selection of data. |
 |
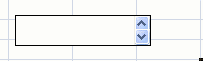
The spin button control allows you to increase or decrease a numeric value for input. |
Adding an Excel Form Control to a Worksheet
In Excel , it is fairly easy to add a form control to a worksheet. The first step is to display the Developer tab and then display the options under the Insert button.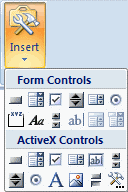
Under the heading Form Controls, you will see a panel of control icons like the ones described above. If you single click on one of these icons, your mouse pointer will turn into a cross as you move the mouse over the grid area of the worksheet. To add a control, choose it by clicking on it, and then drag the mouse pointer to draw out the control on the worksheet.
To add a list box, for example, you would perform a single left click on the list box button under the Form controls heading, and then move your mouse pointer to the location of your choice. When you find the right spot, click on it, and a list box control will be placed at your chosen location.
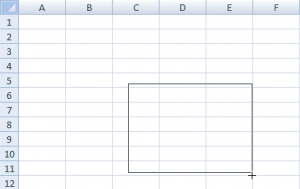
You can resize the list box by mouse dragging the small circles positioned around its border. If you click on an empty cell, the circles will disappear and the list box will be embedded in the worksheet.
When you right click on a form control, it can be removed (cut), copied, grouped, resized, relocated, or have its Format Controls modified.
If you right click on the list box and then click the Format Control option on the pop-up menu, a Format Control dialog box will appear.
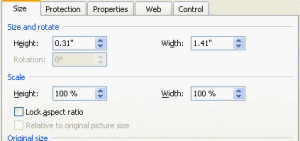
Under the Size tab, you will find options to modify the size of the control.
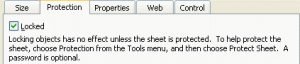
Under the Protection tab, you can choose to lock or unlock the control (used with protected worksheets).
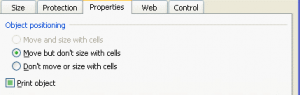
Under the Properties tab you can modify how the control object is positioned when cells are moved or resized. You can also specify whether or not you want the control to be printed with the worksheet.
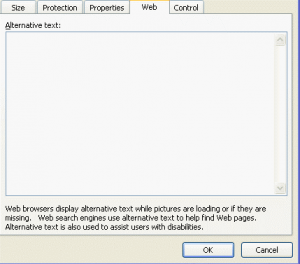
The Web tab has options for displaying alternative text for the control.
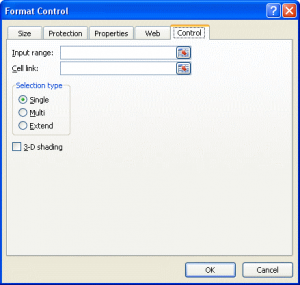
Finally, under the Control tab, you will find options for specifying the input range, (a specific cell range containing the data that will appear in the list), and the cell link, which is the cell that will receive an index value corresponding to the item chosen from the list. When you make a selection from a list box, Excel will place the index value into the specified cell link.

To select an input range, put your cursor in the input range data field and use your mouse to select the range of data to be displayed in the list box. To select the cell link, use the Tab key or click your mouse to place your cursor in the Cell Link field. Next, use your mouse to select the cell that the list box output will be placed in. You can also type the cell references for the input range and the cell link directly if you wish.
When you are finished setting up the list box, click OK to implement your modifications.
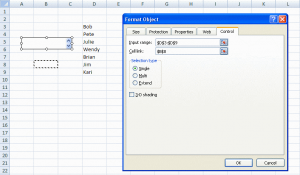
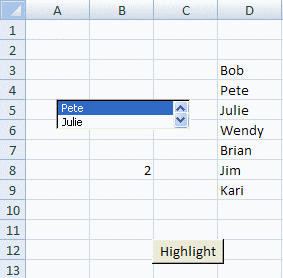
In this image, you can see that the Input range D3:D9 has been entered as well as the cell link, B8.
Clicking the OK button will implement your list box setup.
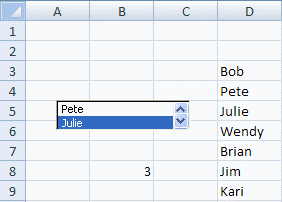
Here you can see that the list box contains the names of the people in cells D3:D9.
The list of names can be navigated by the arrow buttons on the right side of the list box. You can also see the index number of a selected item from the list in cell B8. Put another way, Julie has been selected from the list box, and the number corresponding to Julie’s order in the original cell range (3) is visible in the linked cell (B8).
You can just as easily have the source list or linked cell on a separate worksheet from the form control if you wish.
The process described here is basically the same for any of the form controls. The only differences are the control property modifications, and data source and link options which vary from control to control.
Remember, the best way to get familiar with the different form controls is to experiment with them.
Assigning a Macro to an Excel Form Control
If you add a form control to a worksheet and right click on it, the menu that appears will often have an Assign Macro option. (The label control and the group box control do not have a macro option available on the menu.)
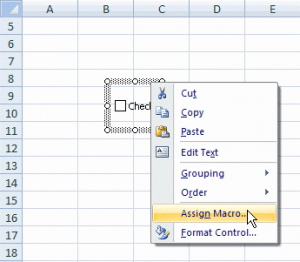
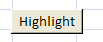
Before you assign a macro, you should make sure that the purpose of the button is clear. You can change the text that appears on a button control by choosing Edit Text from the menu. For this example, the button text is changed to Highlight.
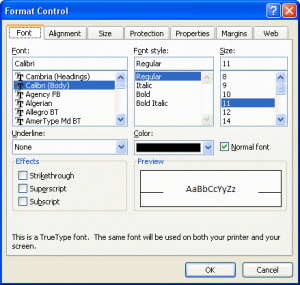
If you select the Format Control option from the pop-up menu, you can change the font type and size of the button’s text.
If you select the Assign Macro option, you will display the Assign Macro dialog box.
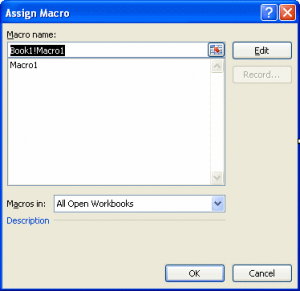
You can choose a macro to assign to the button control by selecting one from the list of available macros and clicking OK. The macro you choose will be activated when you click the button it is assigned to.
You can also record a new macro for the button control by clicking the Record button in the Assign Macro dialog box. (This button will appear when you type a new macro name.)
Clicking Record will display the Record Macro dialog.
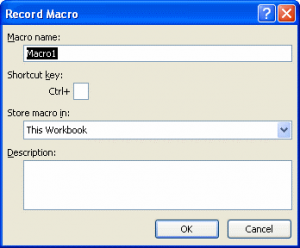
In the Record Macro dialog, you can give your macro a name, a shortcut key, specify where it will be stored, and supply a description for it.
When you click OK, the macro will begin recording. For this example, the cell range D3:D9 containing people’s names is selected from the worksheet, and the background color for the selected range is shaded yellow. Clicking the stop (blue square) button in the lower left of the Excel screen will stop the macro from recording. The new macro will be activated when the Highlight button control is clicked.
Here is the original list.
Here is the list after clicking the Highlight button. The button has activated the assigned macro and the list is highlighted in yellow.

You can change the macro assigned to a given form control by right clicking the control and choosing the Assign Macro option from the menu. When the Assign Macro dialog box is displayed, select the macro of your choice from the list and click OK. The macro you choose will now be the one that is assigned to the form control.
You can assign macros to other form controls, like lists boxes or combo boxes, but these macros will often require Visual Basic programming to handle and manipulate the values captured by the controls.
Using Excel Form Controls
There are many ways to apply form controls in Excel. They can be used to make selections and trigger simple calculations, or to provide a basic interface that allows a user to interact with the workbook data.
When using form controls in your workbook, keep in mind that one type of form control may be better suited for a task than another. Here are a few examples to give you a better idea of what you can do with form controls.
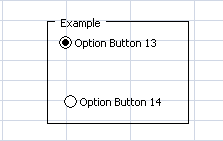
This is a group box control, containing two radio button (option button) controls. Radio buttons are used when you want to make a mutually exclusive selection; if you select one radio button, any others will be deselected.
The group box control allows you to have different groups of radio buttons for different purposes. If radio buttons are in a group box, selecting one will only deselect the other radio buttons in the same group box, rather than all other radio buttons.
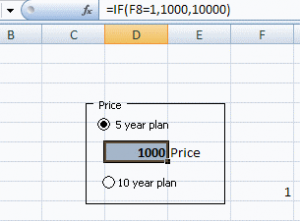
The image above will give you a better idea of how option buttons work. With the 5 year plan selected, the price is 1000. You can see the value returned from the radio button control in cell F8. Now, look at the formula for the active cell in the formula bar. If the value in F8 = 1 (meaning if the first option button in the grouping been selected), 1000 will be displayed. If the value in F11 is not 1, 10000 will be displayed.
The following example demonstrates the use of check boxes. In this example, there are three check box controls. Check boxes return a true or false value indicating if they have been checked or not. You can see that the product1 and product3 checkboxes have been selected, and the total is 4000 dollars.

Here, you can see how the checkboxes work. The true and false values from the check boxes are entered in H1:H3 (the linked cells).
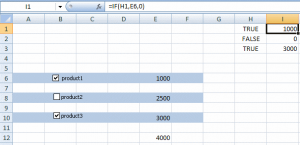
Cells I1:I3 contain IF functions that display the values from column E corresponding to the checkboxes (you can see the IF function for I1 in the formula bar). If the corresponding value in column H is true, the value from column D will be shown in the cell with the IF function. If the value from column H is not true, zero will be shown. Cell E12 sums the values in I1:I3 for a total.
This is an example of a combo box control. This combo box allows you to select a given month from a drop list. When a selection is made, the profit for that month is shown.
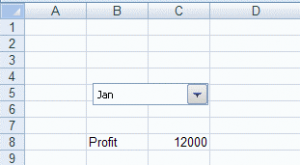
This image shows how the combo box works. Notice the VLOOKUP function in the formula bar.

When a month is selected from the combo box, Excel puts the index value of the month in the combo box cell link G1. (The index is 1 because Jan is the first month.) Cells E5:G16 contain a lookup table with profit figures for each month. Cell C8 contains a VLOOKUP formula that looks up the index value from G1 in the lookup table. VLOOKUP then displays the value from column 3 of the look up table corresponding to the index given from the combo box. In this example, the resulting value is 12000.
Take A FREE course with us Today!

- includes XLOOKUP and will soon include Dynamic Arrays


Power Query Excel 365

Best Value Excel and Excel Power Tool Learning. Access All Areas, Unlimited Learning Subscription

Sign up to my newsletter for Excel and Power BI Tips, Ticks and Hacks
Sign Up
In return for this Tip - Up and Running with Excel Form Controls- I ask that you share this post or the video with your friends and colleagues
Cross posted from my blog with SteemPress : https://theexcelclub.com/introduction-to-excel-form-control/
Congratulations @theexcelclub! You have completed the following achievement on the Hive blockchain and have been rewarded with new badge(s) :
You can view your badges on your board and compare to others on the Ranking
If you no longer want to receive notifications, reply to this comment with the word
STOPDo not miss the last post from @hivebuzz:
Support the HiveBuzz project. Vote for our proposal!
Congratulations @theexcelclub!
You raised your level and are now a Dolphin!
Do not miss the last post from @hivebuzz:
Support the HiveBuzz project. Vote for our proposal!
Congratulations @theexcelclub! You received a personal badge!
You can view your badges on your board And compare to others on the Ranking
Do not miss the last post from @hivebuzz:
Support the HiveBuzz project. Vote for our proposal!
Your level lowered and you are now a Minnow!
Do not miss the last post from @hivebuzz:
Support the HiveBuzz project. Vote for our proposal!