Photos: By Me | Draws: Acuvue | Cover: Canva
Photos: By Me | Draws: Acuvue | Cover: Canva

Hablemos de lentes de contacto de colores
Para mí siempre ha sido un tema el poder colocarme lentes de contacto, no requiero por tener mal la vista, pero estando metida en la comunidad de maquillaje, armando una tienda de maquillaje virtual y en el mundo de las redes sociales, es muy importante hacer lo necesario para resaltar los looks que se hagan —sobretodo en temporada de halloween y día de muertos— porque sí cambia totalmente la mirada.
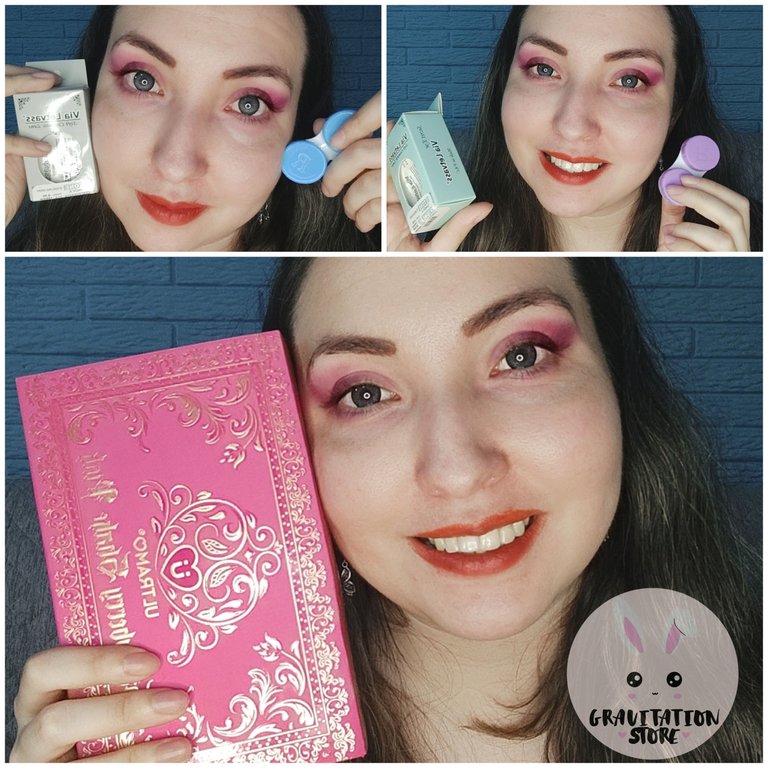
Hice un unboxing en Twitch de los lentes que acabo de comprar y me probé los dos pares color gris y turquesa. Yo adquirí pinzas y una especie de chupón para poder colocar los lentes pero antes lo hacía con el dedo así que las instrucciones que daré serán con los dedos.
Al igual que el vídeo, también creo importante hablar sobre lo que se debe hacer para colocar los lentes.
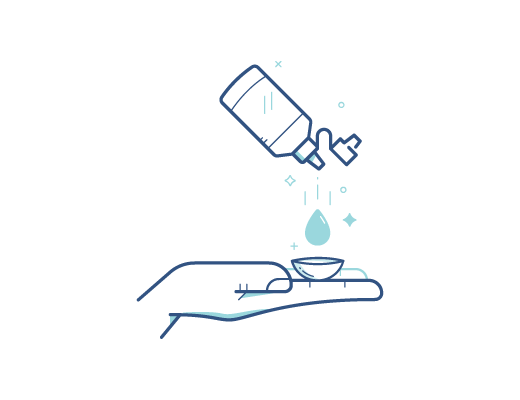
Es fundamental que se laven antes y después de su uso con su solución especial, hay diferentes líquidos para lentes, busca que sea para lente blando y aclarando que es para lentes de color. Para esto, sobre la palma limpia y seca de tu mano, y aplica unas gotas de solución desinfectante sobre el lente de contacto. Con la yema del dedo frota cuidadosamente el lente en la palma de tu mano para limpiar las superficies del lente.
Lo que siempre hay que recordar:
- En primer lugar, arréglate el pelo para evitar secar los lentes de contacto con sprays, secadoras o cepillos de calor
- Ponte siempre los lentes de contacto antes de maquillarte
- Utiliza productos sin aceites ni polvos, ya que el aceite puede hacer que los lentes de contacto se empañen
- Quítate los lentes de contacto antes de desmaquillarte
Antes de empezar:
Siempre lávate bien las manos con un jabón suave, enjuágalas por completo y sécalas con una toalla sin pelusas antes de tocar sus lentes.
Indicador derecho revés:
Asegúrate que el lente no esté del lado del revés.
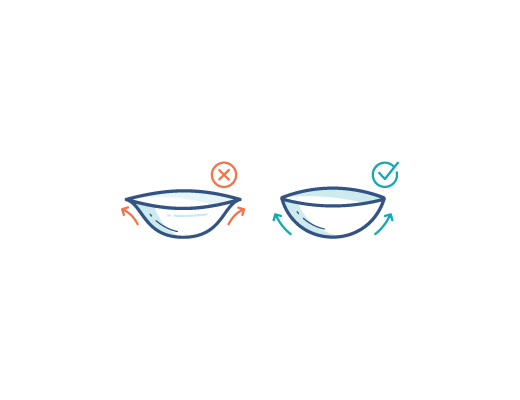
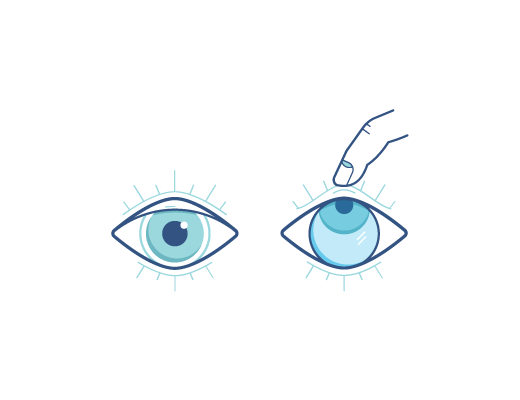
Coloca el lente en la punta de su dedo índice y verifica su perfil. El lente debe asumir una forma natural, curvada, similar a un cuenco. Si los bordes del lente tienden a apuntar hacia afuera, el lente está del lado del revés.
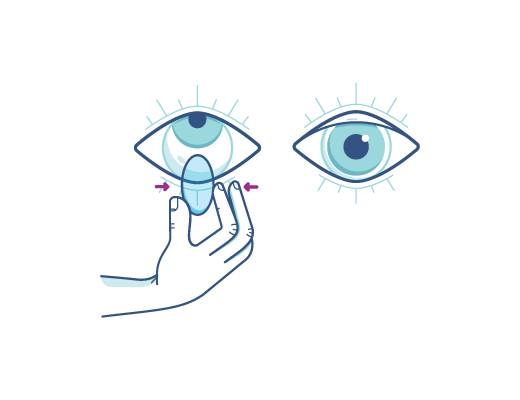
Aprieta suavemente el lente entre el pulgar y el dedo índice. Los bordes deben tornarse hacia adentro. Si el lente está del lado del revés, los bordes se tornarán ligeramente hacia afuera. Coloca el lente sobre la punta del dedo índice y, mirando el lente, localiza los números 1-2-3. 1-2-3 indica una orientación correcta mientras que una inversa de 1-2-3 indica que el lente está del lado del revés. Si el lente está del lado del revés (1-2-3 inverso), invierte el lente y localiza los números nuevamente para confirmar la orientación adecuada del lente.
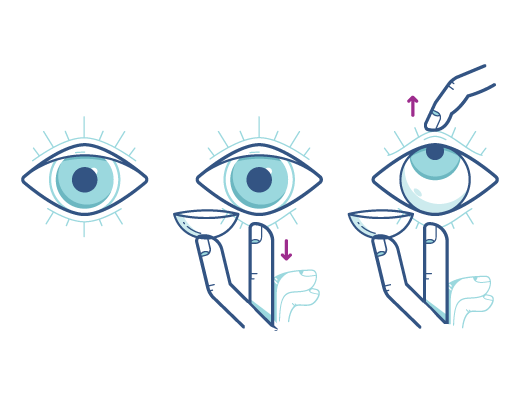
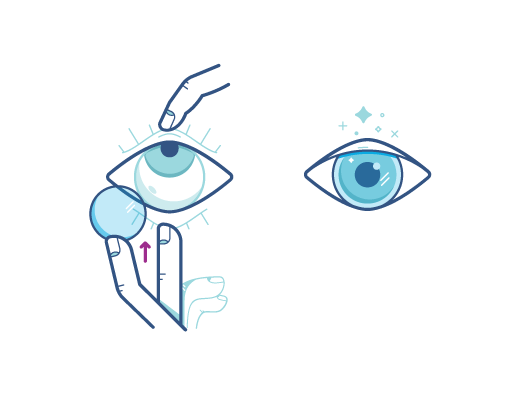
Usa la mano que tenga más coordinación:
Mientras tienes el lente en tu dedo índice, utiliza la otra mano para mantener levantado el párpado superior y así evitar parpadear. Empuja el párpado inferior hacia abajo con los demás dedos de la mano con la que estás sosteniendo el lente.
Puede ocurrir que se te caiga un lente o que te distraigas y necesites un par de intentos para ponerlos. Deberás humedecer los lentes de contacto con solución antes de volver a intentarlo.
PARA RETIRARLOS:
Recuerda, retira siempre los lentes de contacto antes de quitarte el maquillaje. Empieza lavándote y secándote bien las manos para que no entre suciedad en los ojos. Después, quítate los lentes de contacto con cuidado para que no entren en contacto con la cara.
Asegúrate de que tus manos estén limpias
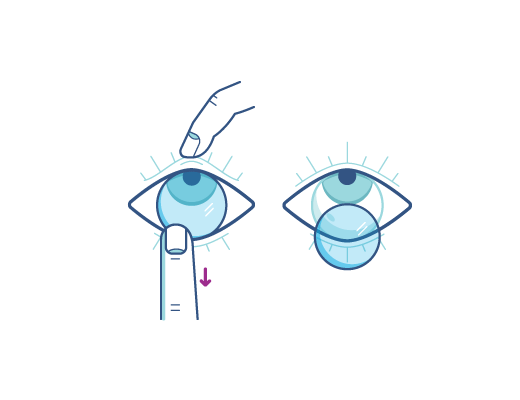
y secas, y comienza con tu ojo derecho, luego mira hacia arriba y con cuidado baja tu párpado inferior con tu dedo mayor.
Lleva tu dedo índice hasta tu ojo
lentamente, hasta que toque el borde inferior del lente, y desliza el lente a la parte blanca inferior de tu ojo.
Toma el lente con suavidad entre tu dedo índice y pulgar, y retíralo. Repite los mismos pasos para el lente izquierdo.

Let's talk about colored contact lenses
For me it has always been an issue to be able to wear contact lenses, I don't need them because I have bad eyesight, but being involved in the makeup community, setting up a virtual makeup store and in the world of social networks, it is very important to do what is necessary to highlight the looks that are made -especially in halloween and day of the dead season- because it totally changes the look.
I did an unboxing on Twitch of the glasses I just bought and tried on the two gray and turquoise pairs. I acquired tweezers and a kind of pacifier to be able to put the lenses on but I used to do it with my finger so the instructions I will give will be with my fingers.
Like the video, I also think it's important to talk about what to do to attach the lenses.
It is essential that you wash them before and after use with your special solution, there are different liquids for lenses, look for it to be for soft lens and clarifying that it is for colored lenses. For this, on the clean and dry palm of your hand, and apply a few drops of disinfectant solution on the contact lens. With your fingertip, carefully rub the lens in the palm of your hand to clean the lens surfaces.
What to always remember:
- First, fix your hair to avoid drying contact lenses with sprays, blow dryers or heat brushes.
- Always put in your contact lenses before applying makeup.
- Use oil- and powder-free products, as oil can cause contact lenses to fog up.
- Remove your contact lenses before removing your makeup
Before you begin:
Always wash your hands thoroughly with a mild soap, rinse them completely and dry them with a lint-free towel before touching your lenses.
Indicator right side up:
Make sure the lens is not on the upside down side.
Place the lens on the tip of your index finger and check its profile. The lens should assume a natural, curved, bowl-like shape. If the edges of the lens tend to point outward, the lens is on the upside down side.
Gently squeeze the lens between your thumb and forefinger. The edges should turn inward. If the lens is upside down, the edges will turn slightly outward. Place the lens on the tip of your index finger and, looking at the lens, locate the numbers 1-2-3. 1-2-3 indicates a correct orientation while a reverse of 1-2-3 indicates that the lens is on the wrong side. If the lens is on the wrong side (reverse 1-2-3), invert the lens and locate the numbers again to confirm proper lens orientation.
Use the hand that has the most coordination:
While holding the lens on your index finger, use the other hand to hold up the upper eyelid to avoid blinking. Push the lower eyelid down with the other fingers of the hand you are holding the lens with.
You may drop a lens or get distracted and need a couple of tries to put them in. You will need to moisten the contact lenses with solution before trying again.
TO REMOVE THEM:
Remember, always remove your contact lenses before removing your makeup. Start by washing and drying your hands thoroughly to keep dirt out of your eyes. Then, carefully remove your contact lenses so they don't come in contact with your face.
Make sure your hands are clean and dry
and dry, and start with your right eye, then look up and carefully pull down your lower eyelid with your middle finger.
Bring your index finger up to your eye
slowly, until it touches the bottom edge of the lens, and slide the lens to the lower white part of your eye.
Gently grasp the lens between your index finger and thumb, and remove it. Repeat the same steps for the left lens.
▶️ 3Speak
Para resaltar los colores de los lentes de contacto, utilicé la paleta de sombras de ojos Ultramo Strawberry Shake Pink.
To highlight the contact lens colors, I used the Ultramo Strawberry Shake Pink eyeshadow palette.

No olviden seguirme en/Don't forget to follow me in:
ALL MY SOCIAL MEDIA
Primera vez que veo un tutorial para colocar lentes de contactos, me intriga ¿Cómo es colocarlo con chupón? a mi me encantaría colocarme unos color miel, pero realmente soy muy cobarde para ello jeje.
Hola! El chupón lo que hace es que evita que el lente se deforme y mantenga la forma del ojo para la colocación. Si ves el vídeo, estaba muerta de miedo porque sentía que me picaba el ojo, después ya de tener el ojo tan lloroso y lleno de líquido, fue fácil.
Muchas gracias mi hermosa comunidad
Una sola vez intentaron colocarme unos lentes de contacto y no lo lograron jajaja. Apenas veía el dedo de mi amiga acercarse con el lente, me movía por temor y nada. Después de varios intentos le dije que mejor lo dejáramos así
Particularmente a mí no me gusta mucho que otras personas me intenten meter dedos al ojo. Con trabajo no tiemblo cuando me han maquillaje otras personas profesionales.
Siento que lo de los lentes debe de hacerlo uno mismo, independientemente de que tanta higiene tenga la otra persona.