
Hello friends of #MakeUpPower here greets you again @susamusic, this week I wanted to bring you a makeup inspired by the cartoon "The Pink Panther" I was watching the chapters of this cartoon and I said to myself why don't I do a pink makeup that reminds me a little of this iconic cartoon and then I got down to work and started making this beauty that you will see at the end, it is very simple and I will do it step by step, I hope you can replicate it with me, and we begin.
Hola amigos de #MakeUpPower por aquí le saluda nuevamente @susamusic, esta semana quise traer usted es un maquillaje inspirado en la comiquita " La pantera rosa " estuve viendo los capítulos de esta comiquita y me dije porque no me hago un maquillaje rosado que me haga recordar un poco a esta icónica caricatura y pues puse manos a la obra y comencé hacer esta hermosura que verán al final, es muy sencillo y lo hare paso a paso, espero y puedan replicarlo conmigo, y comenzamos.
With our face very clean we are going to start this makeup, for those who do not know I always start my makeup moisturizing my face, and another little thing I will always remind you that the moisturizing should be placed from the inside out and you will never place it from top to bottom, you should not pass your hands from the forehead to the chin, because we stretch the face and our expression lines will become more settled and we want our expression lines to stay the way they are and that our face does not look more wrinkled.
Con nuestra cara muy limpia vamos a a empezar este maquillaje, para los que no saben yo siempre comienzo mis maquillaje hidratando mi cara, y otra cosita siempre les voy a recordar que la hidratación se debe colocar de adentro hacia afuera y nunca la vas a colocar de arriba hacia abajo no se debe hacer el pasar las manos desde la frente hasta el mentón, porque estiramos la cara y nuestras líneas de expresión se van a hacer más asentada y que queremos que nuestras líneas de expresión se mantengan cómo está y que nuestra cara no se vea más arrugada.

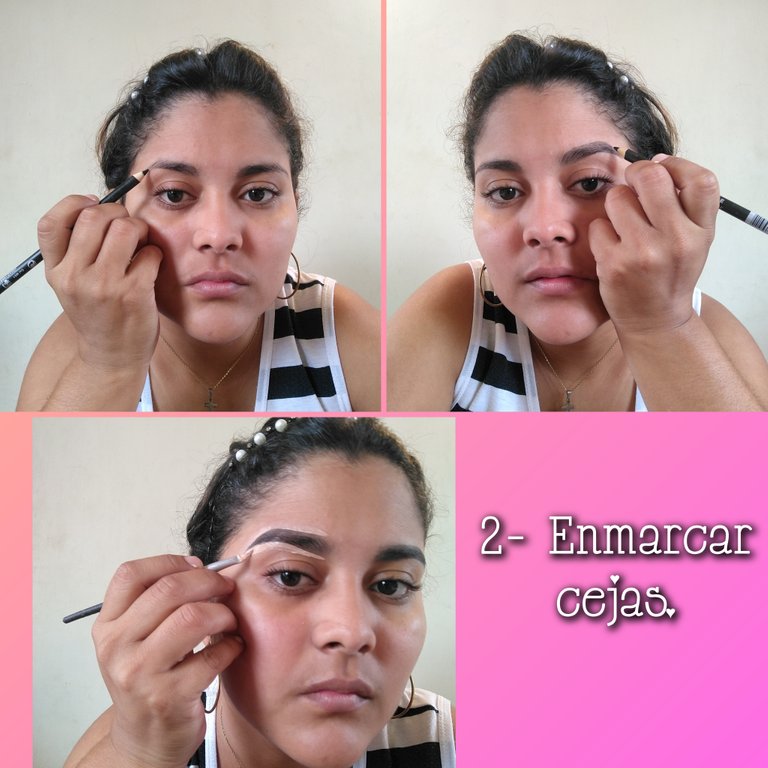
Now we proceed to frame our eyebrows to our liking, at least I like them to be a little bit thicker than I have them, you will notice it when you see the final process, you have to look for the color that is right for your eyebrows and second you must start from the back to the front because we are going to make it a little bit darker in the back and in the front we almost don't touch it so the eyebrows look super natural and don't look so artificial, after this we apply concealer or base in this case I used base to correct some parts and to get the desired model.
Ahora procedemos a enmarcar nuestras cejas a nuestro gusto, por lo menos a mí me gusta que me queden un poquito más gruesa de lo que yo las tengo se van a dar cuenta cuando vean el proceso final, tienen que buscar el color que sea adecuado para sus cejas y segundo deben comenzar desde atrás hacia adelante porque porque atrás la vamos hacer un poquito más oscuro y en la parte delante de casi ni tocamos para que la ceja se vea súper naturales y no se vean tan artificiales, luego de esto aplicamos corrector o base en este caso yo usé base para corregir algunas partes y para que quedara el modelo deseado.
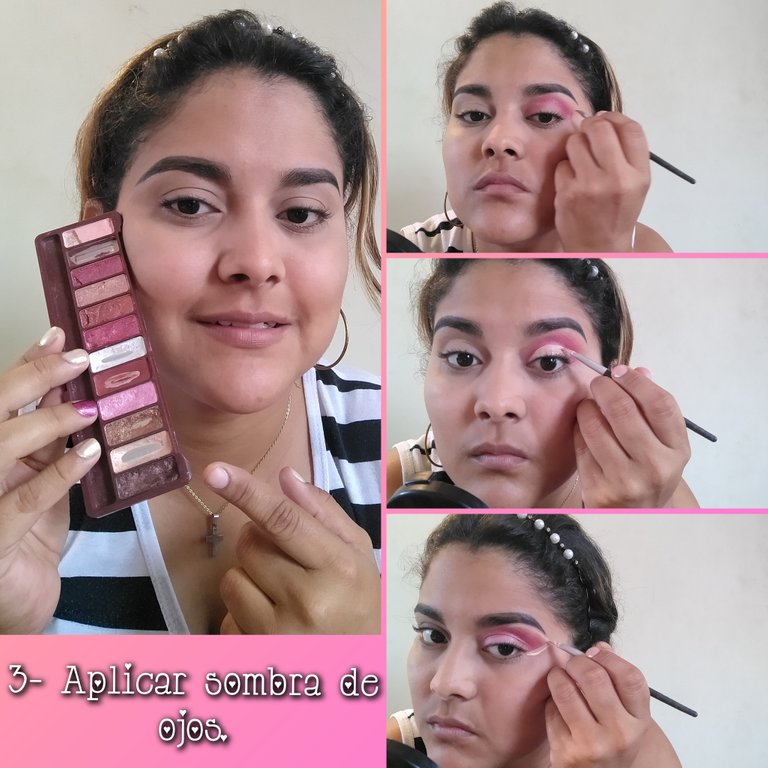
With our eyebrows ready, let's place eye shadows, as I mentioned before I was inspired by an old cartoon called the pink panther, so I took my palette with pink and wine tones, I applied the strongest color as a base and I was blending with my fingers, well I like to do it that way I feel that my fingers are the best brush I can have hehehe, then I placed concealer in the area I wanted to place the lighter tones, illuminate the tear tones and finally corrected with concealer to give the shape I wanted.
Con nuestras cejas ya lista, vamos a colocar sombras de ojos, como ya mencioné antes, me inspire en una caritura vieja que se llama la pantera rosa, así que tome mi paleta con tonos rosa y vino, aplique el color más fuerte como base y fui difuminando con los dedos bueno así me gusta hacerlo a mi siento que mis dedos son la mejor brocha que puedo tener jejeje, luego coloque corrector en la zona que deseaba colocar los tonos más claro, ilumine el lagrimal y por último corregí con corrector para dar la forma que quería.
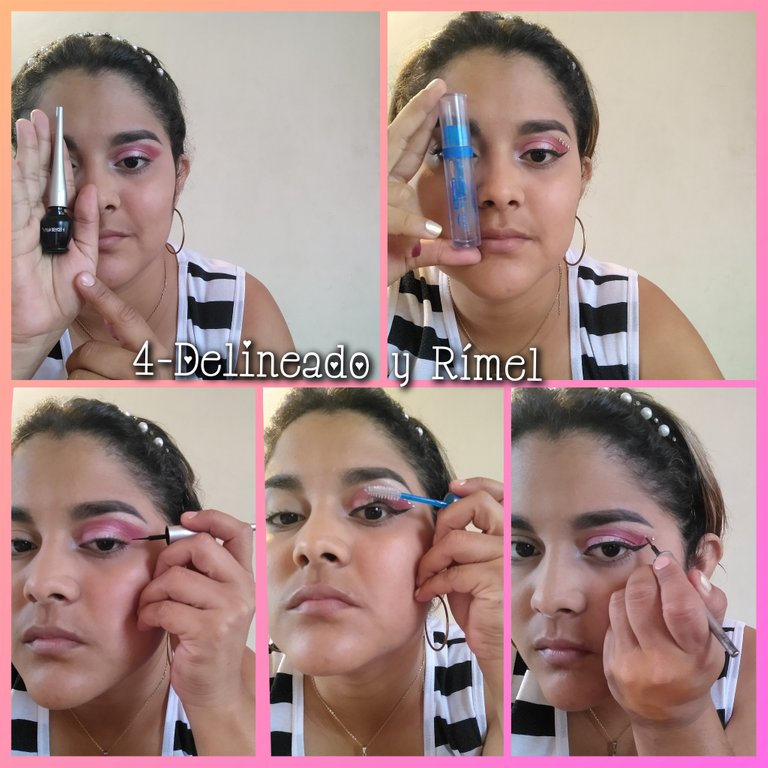
To finish with the process of the eyes we are going to apply an eyeliner that looks very pronounced up to the top, some small stones to decorate, in this case I used litmus stone and finally I am going to apply mascara, for this makeup I wanted to use transparent mascara so it does not take away the visibility of the eyeliner or the shadow, I do not like to overload my eyelashes, I love how transparent mascara looks, it looks super natural.
Para terminar con el proceso de los ojos vamos a aplicar un delineado que se vea muy pronunciado hasta la parte de arriba algunas piedritas para decorar que yo en este caso use piedra tornasol y por último voy a aplicar rímel en este para este maquillaje quise usar rímel transparente para que no me quite la visibilidad del delineado ni de la sombra no me gusta recargar mucho mis pestañas me encanta cómo queda el rímel transparente, se ve super natural.
When I apply eye shadows I like to leave this step last, because if a little bit of shadow falls on the cheekbones or cheeks I don't have to reapply foundation or powder, I put it last and this way I do only one process with less work and less product.
Listo con los ojos procedo a colocar base, contorno y sello todo con el polvo, cuando me coloco sombras de ojos me gusta dejar este paso de último, porque si cae un poquito de sombra a los pómulos o cachetes no tengo que volver a colocar base o polvo, sino que los colocó de último y así hago un solo proceso con esto menos trabajo y menos producto.

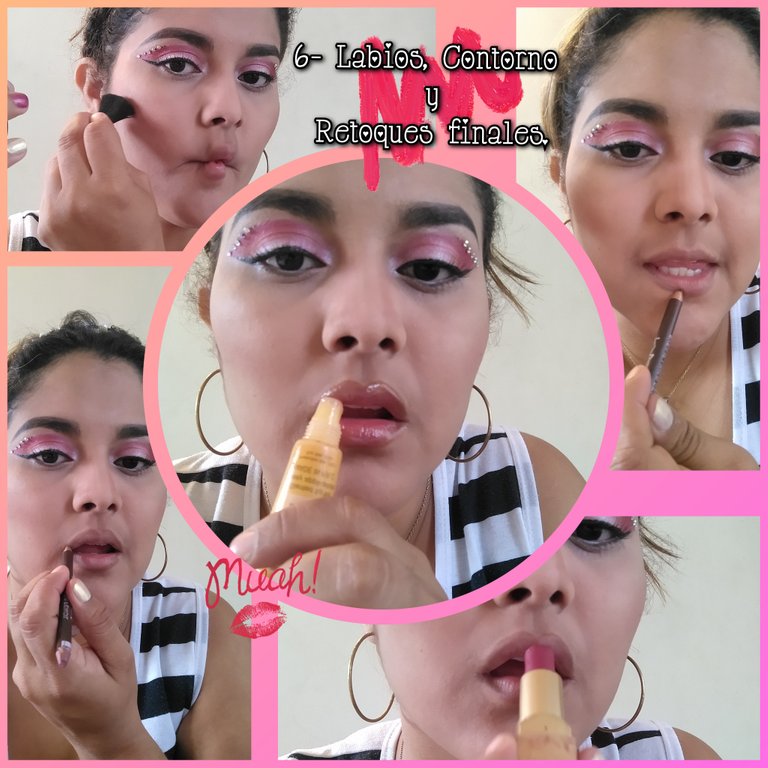
ITo finish with this make-up section I prepare my lips I make an outline of the same color of the border of the same, then I put a color not so strong applying the Japanese technique of only marking the central inner part and ends with a little glitter, ready the lips I correct the contour and illuminated the parts that are necessary as the nose, forehead and cheekbones in the corner of the top.
Para culminar con esta seción de maquillaje preparo mis labios le hago un delineado del mismo color del borde de los mismos, luego coloco un color no tan fuerte aplicando la técnica Japonésa de solo marcar la parte interior central y termina con un poco de glitter, listo los labios corrijo el contorno he iluminó las parte que son necesarias como la nariz, frente y los pómulos en la esquina de la parte superior.
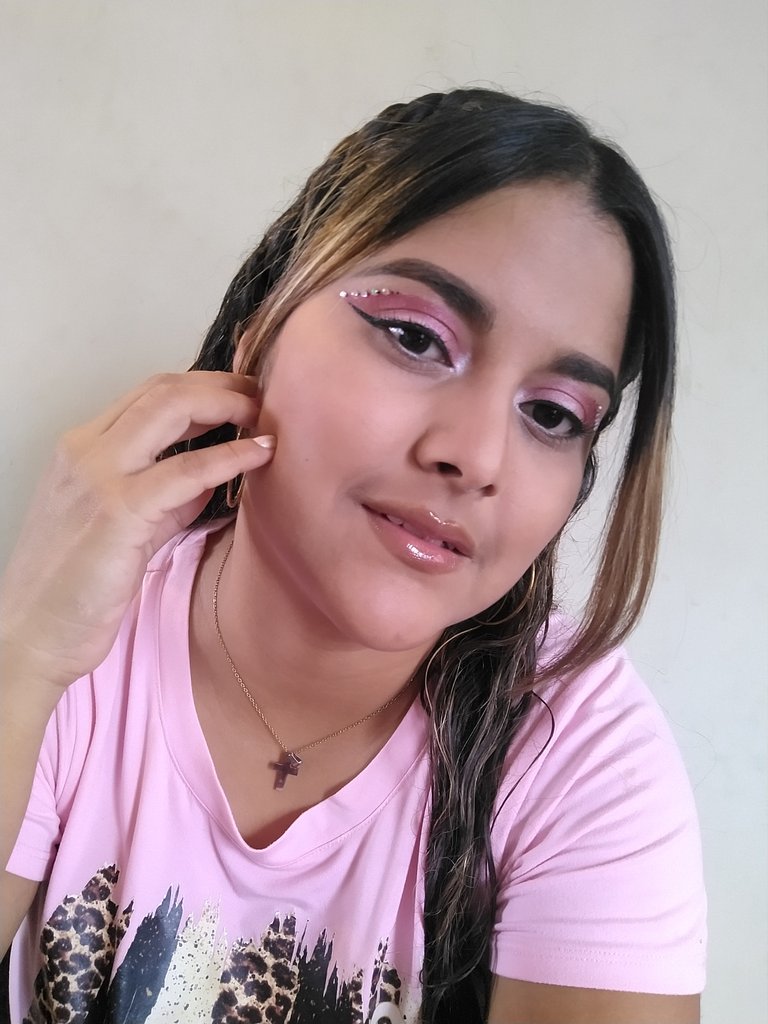
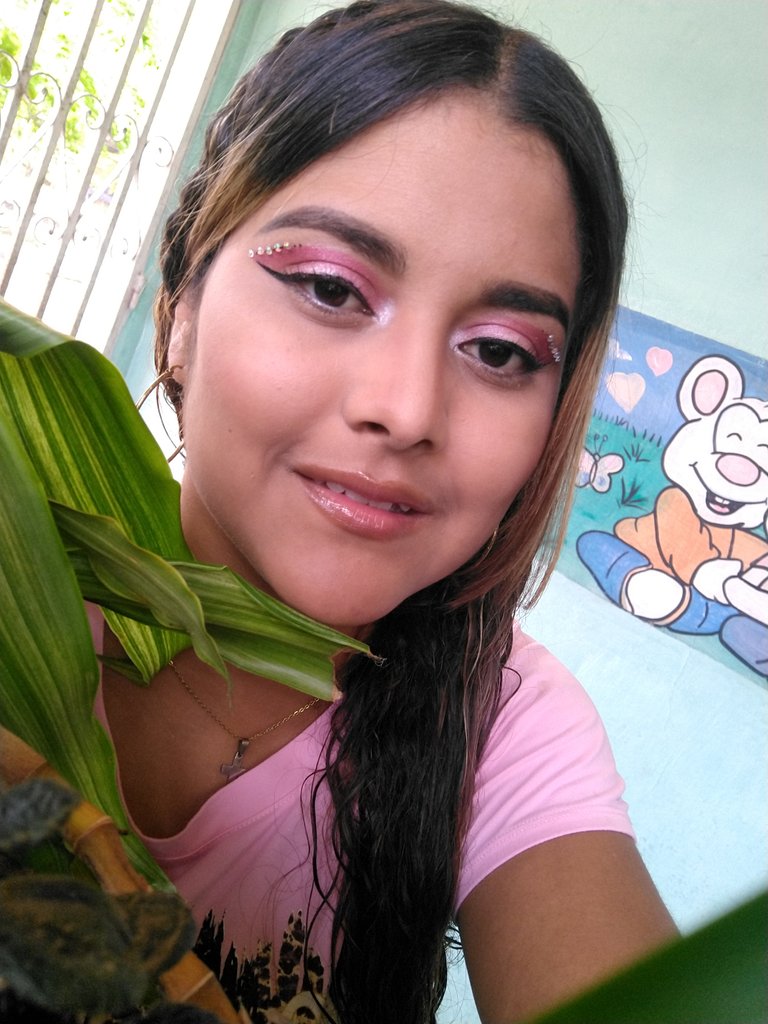
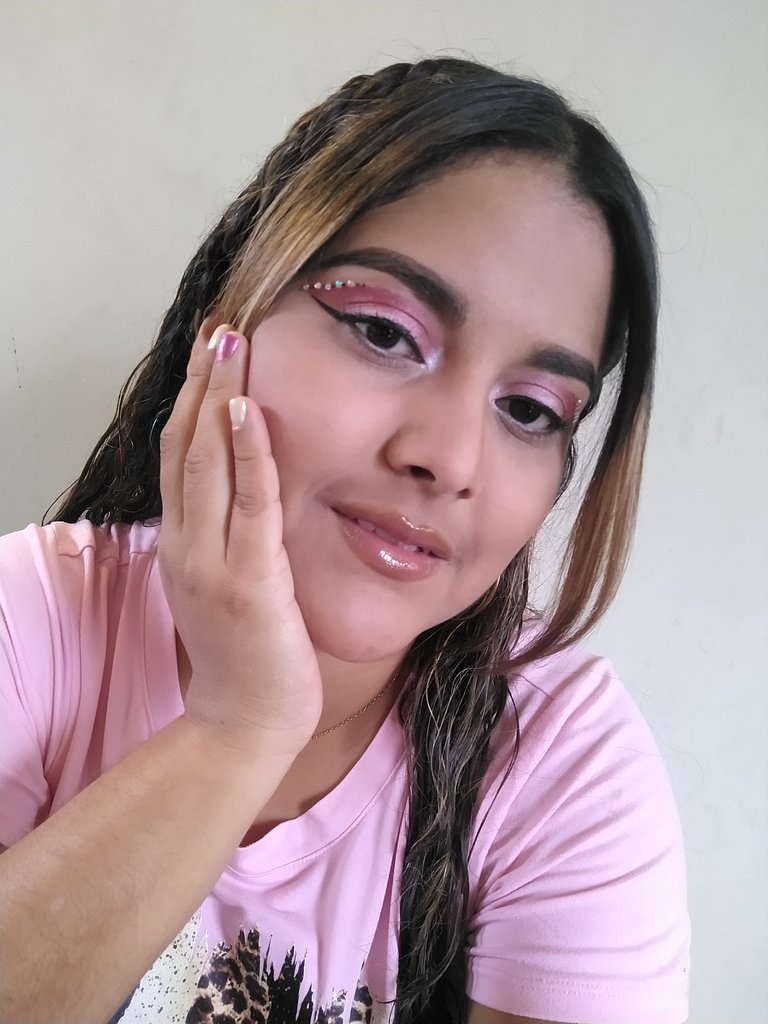
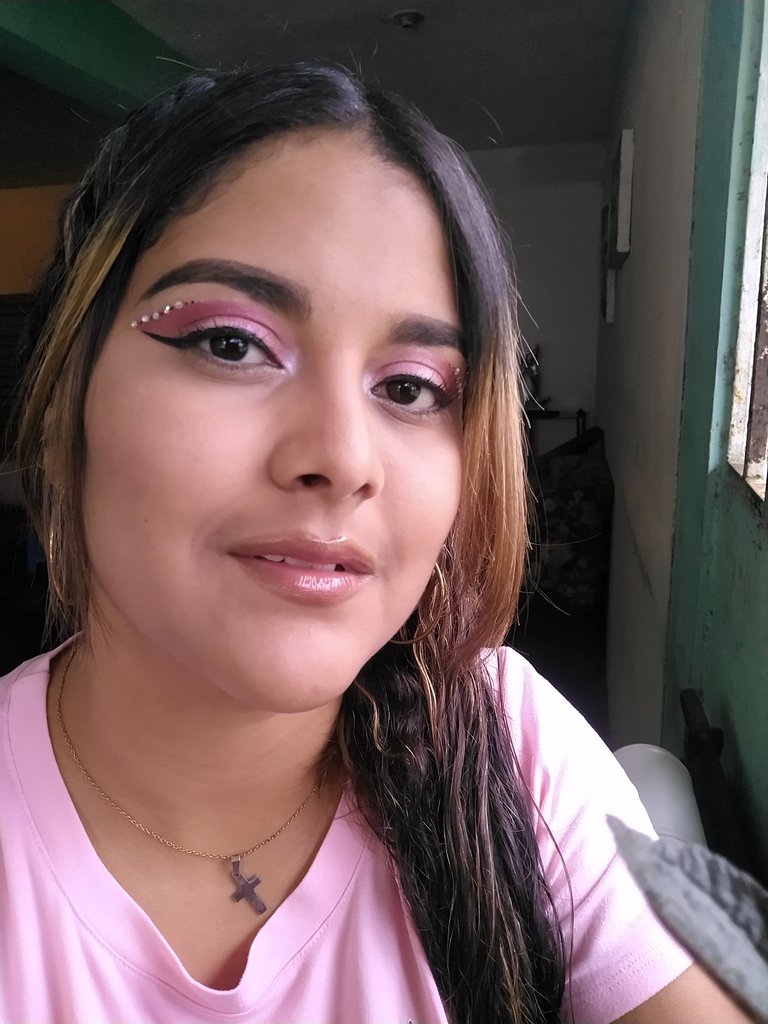
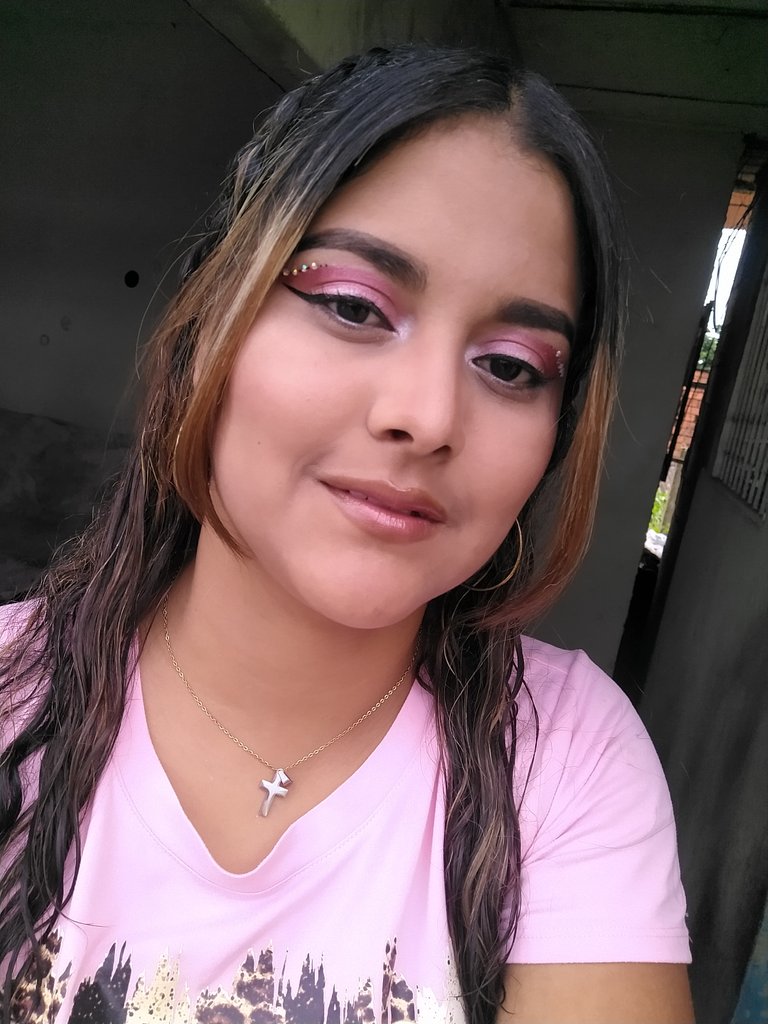
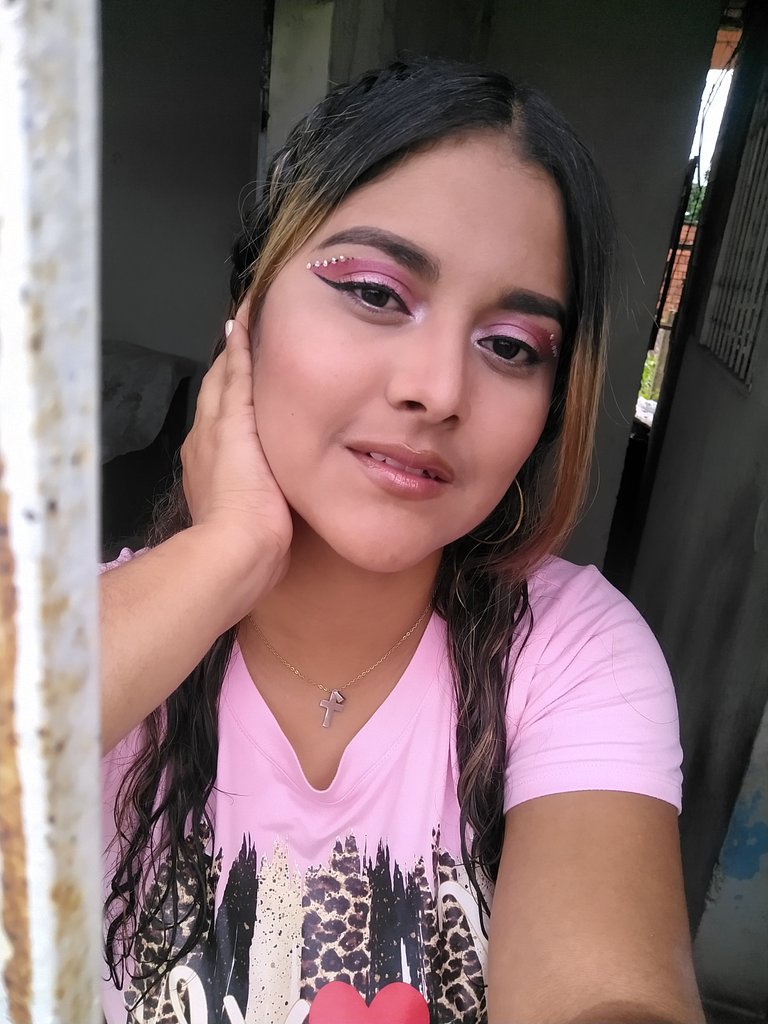
Ready the MaKeup we close as I like with a photo session I hope and you enjoyed the process 😊, peace to all ✌🏼.
Listo el MaKeup cerramos como a mí me gusta con una sesión de fotos espero y hayan disfrutado del proceso 😊, paz para todos ✌🏼.
¡¡¡ Estoy super agradecida de estar aquí en la familia de hive !!! .
Si tienes alguna sugerencia que me ayude a mejorar mi blog no dudes en escribir en los comentarios.
Traductor usado: Deepl
Imágenes editadas en: Canva
Logos de #hive
Fotos tomado con mi teléfono Motorolo G8 plus

I'm super grateful to be here in the Hive family !!! .
*If you have any suggestions that will help me improve my blog feel free to write in the comments .
Translator used: Deepl
Images edited in: Canva
logos of #hive
Photo taken with my Motorola G8 plus phone.
