

El tutorial hace referencia a una aplicación del paquete ofimático Microsoft Office, que como todos lo conocemos, es un programas básico de oficina, ya sabemos que es uno de los más conocidos a nivel mundial, dentro de este paquete tenemos al procesador de palabra como lo es el Word, Las hojas de cálculo como lo es Excel y el presentador de diseño o diapositivas como lo es el PowerPoint donde realizaremos el tutorial en 12 pasos.
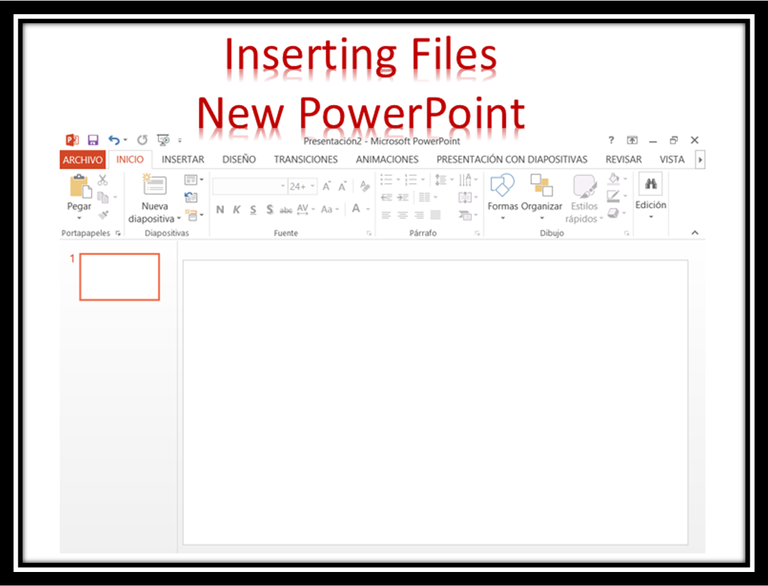
1. Lo primero que haremos es insertar un archivo en blanco.
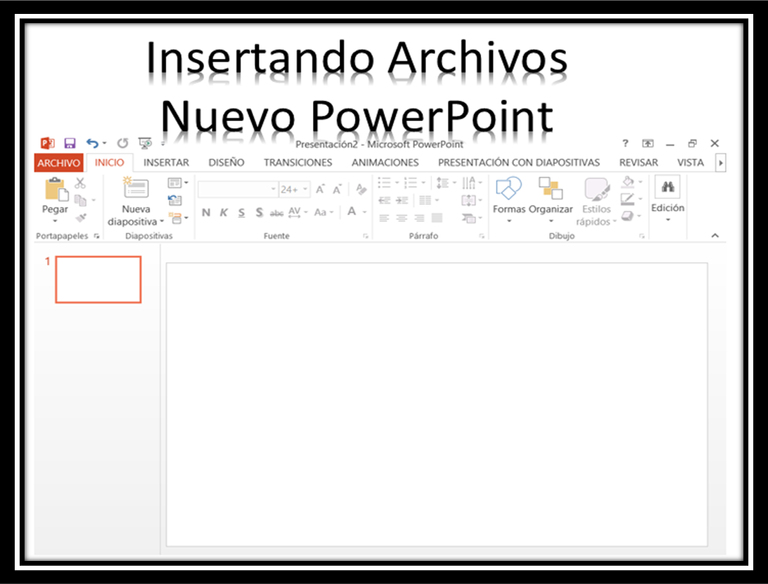
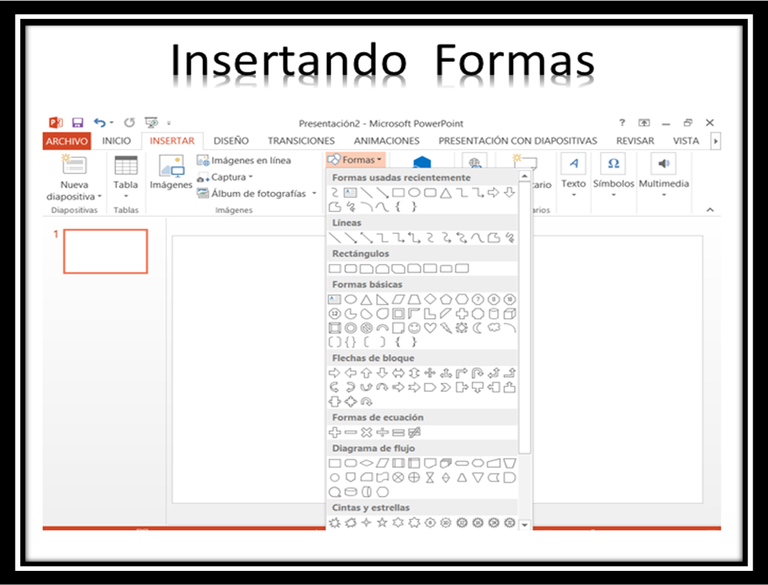
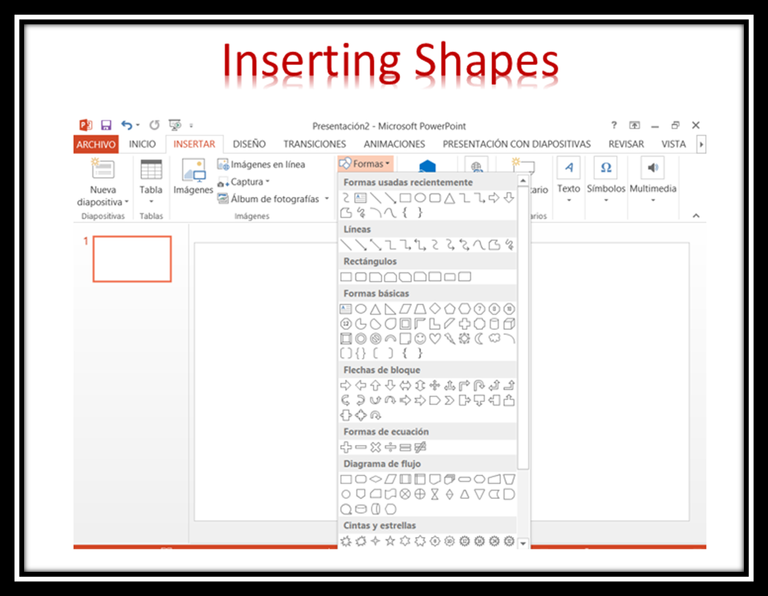
2. Nos dirigimos a la opción de insertar del menú superior de la aplicación.
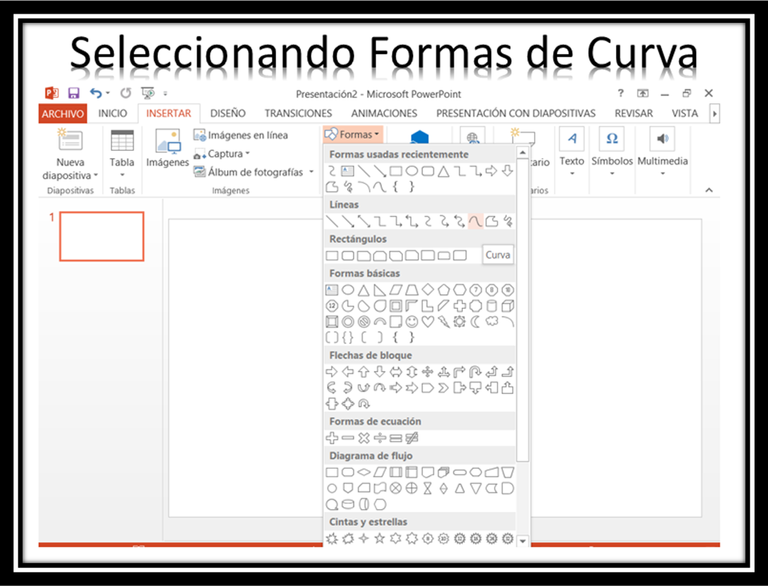
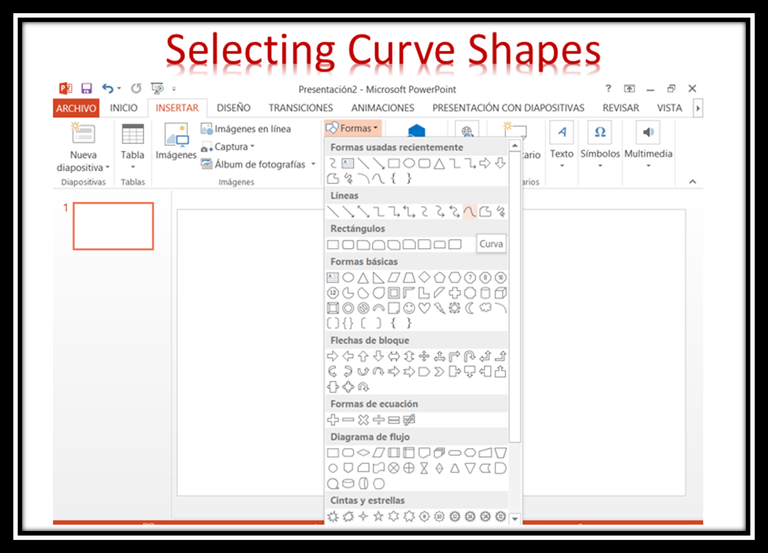
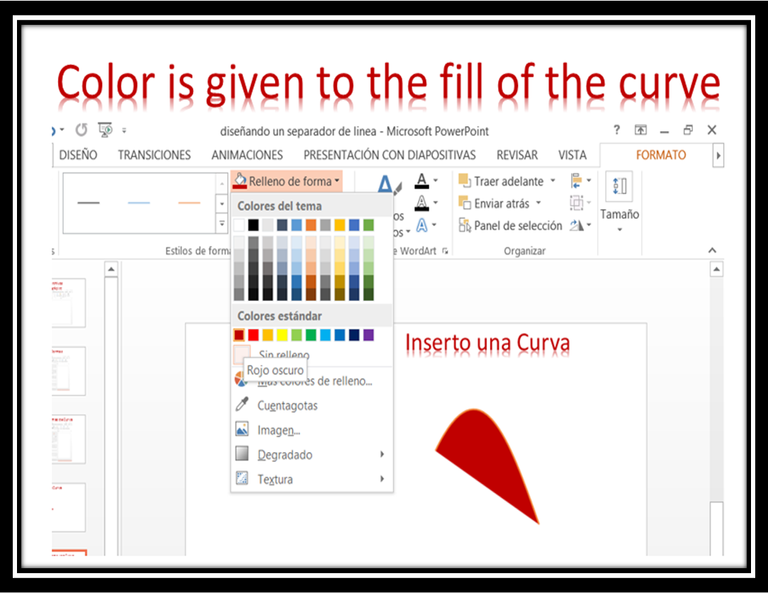
3. Se selecciona una curva de la opción del menú; Insertar, ubicado en la barra superior de la aplicación.
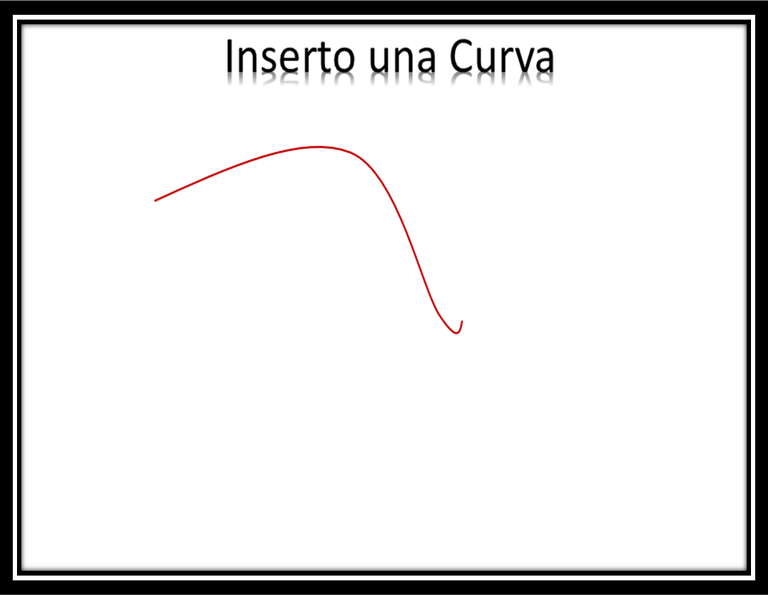
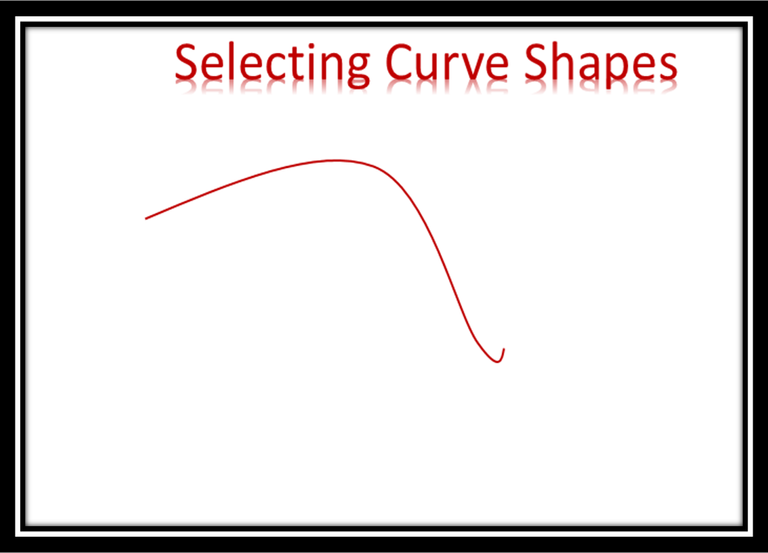
4. Con el Puntero del ratón se moldea el diseño que se le quiera dar a la forma seleccionada.
5. Se le da color al relleno de la forma diseñada.

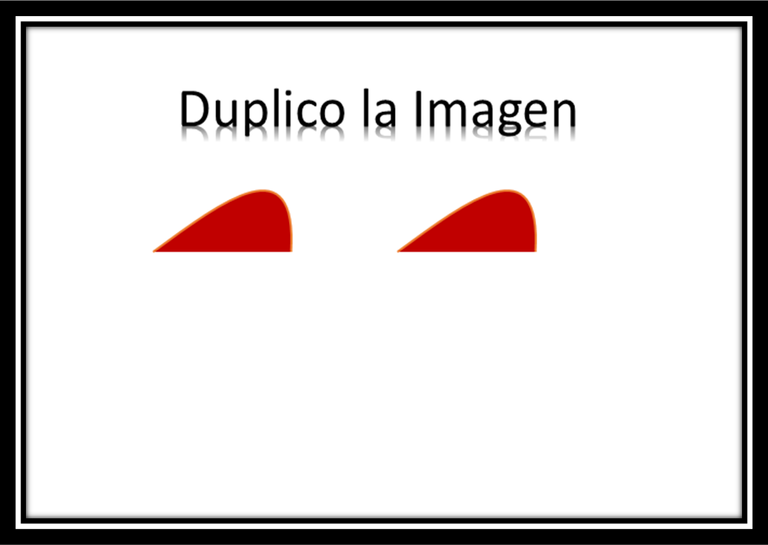
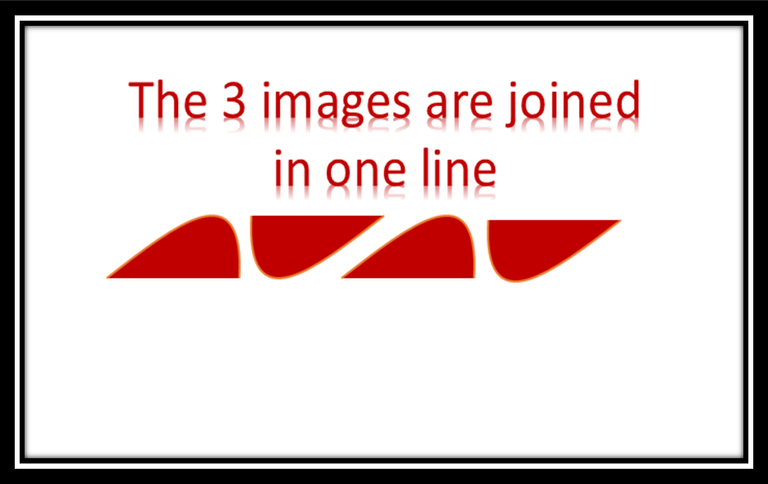
6. Se duplica la forma Diseñada, Se Agrupa en un solo bloque.
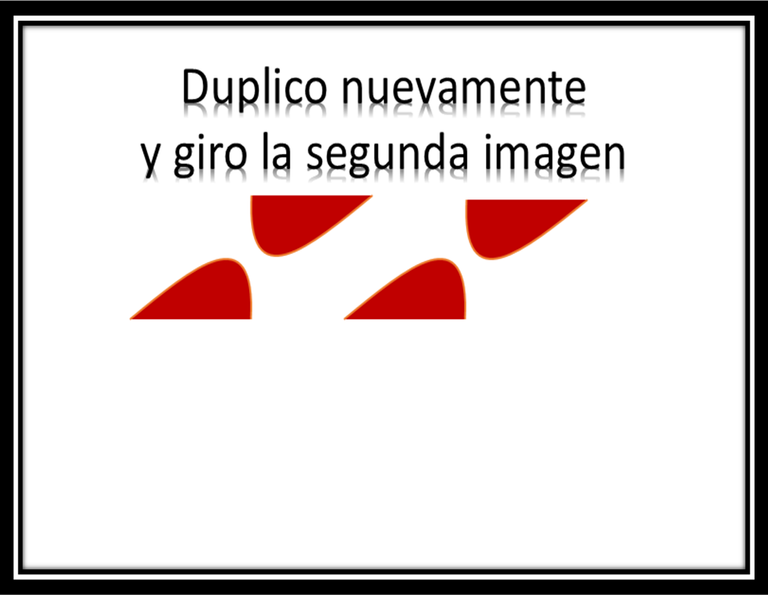
7. Luego se duplica la forma y se gira verticalmente el diseño.
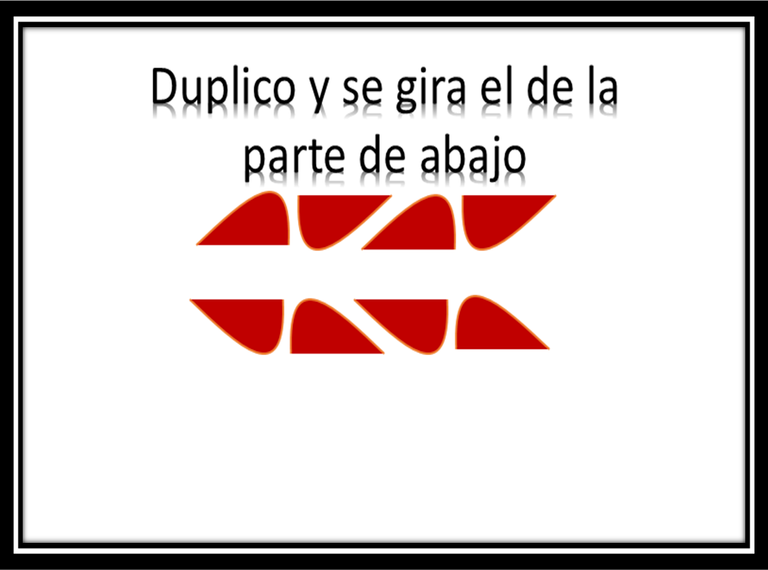
8. Se unen los diseños, casi en una misma línea, dejando que se vea un espacio en blanco.

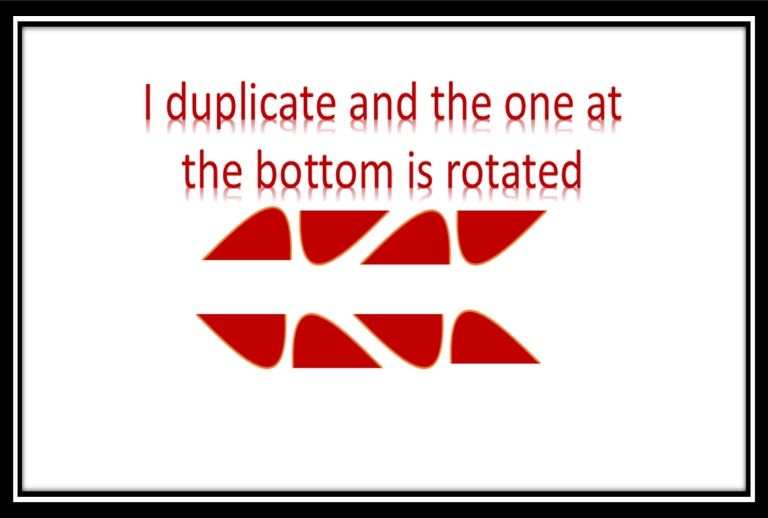
9, Se vuelve a duplicar el diseño y se gira verticalmente, se deja una línea de espacio entre los dos diseños para volver agrupar todo.
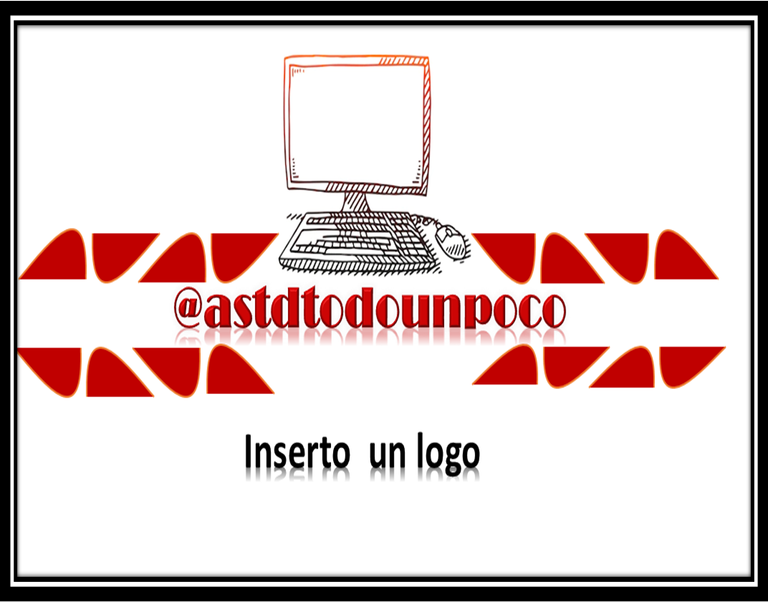
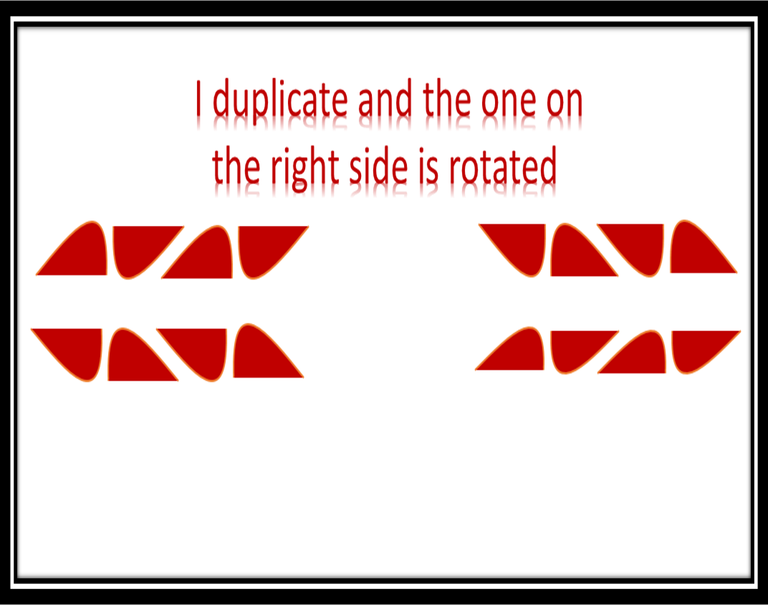
10. Se duplica todo el diseño y se gira horizontalmente hacia la derecha, para luego agruparlo.

11. Ya En este paso comienza a volar la imaginación, ya que se puede colocar un nombre, un icono, un avatar y colocarlo entre los dos diseños, yo le colocare mi nombre de usuario hive.

12. Hasta este punto se puede colocar como separador de línea, pero como les dije sigue volando la imaginación y podemos seguir agregando cosas.

Bueno Espero que sea de su agrado y entretenido este tutorial


Continuing with what is learned day by day I wanted to improve the appearance of my presentations and decided to make this publication with a small tutorial where I will explain how to make a line separator or a header or footer but inserting a form of the application called PowerPoint.
The tutorial refers to an application of the office automation package Microsoft Office, that as we all know it is a basic office program, we already know that it is one of the best known worldwide, within this package we have the word processor such as Word, spreadsheets such as Excel and the design or slideshow presenter such as PowerPoint where we will perform the tutorial in 12 steps..
1. The first thing we will do is to insert a blank file.
2. We go to the insert option in the top menu of the application.
Select a curve from the Insert menu option, located on the top bar of the application.
4. With the mouse pointer you can shape the design you want to give to the selected shape.
5. Color is given to the filler of the designed shape.
6. The designed shape is duplicated, it is grouped in a single block.

7. The shape is then duplicated and the design is rotated vertically..

8. Join the designs, almost on the same line, leaving a blank space visible.
9, The design is duplicated again and rotated vertically, leaving a line of space between the two designs to regroup everything.
10. The entire design is duplicated and rotated horizontally to the right, then grouped.
11. In this step the imagination begins to fly, since you can place a name, an icon, an avatar and place it between the two designs, I will place my user name hive.

12. Up to this point it can be placed as a line separator, but as I said, our imagination keeps flying and we can keep adding things.


Well, I hope you enjoy and enjoy this tutorial.

Gracias por el tutorial
Hola @astdtodounpoco, muy bueno el tutorial, ya estaré practicando jejeje.
Hello @astdtodounpoco. You have posted this content already, here. Please don't post the same content several times as that is considered abuse on Hive.
Congratulations @astdtodounpoco! You have completed the following achievement on the Hive blockchain And have been rewarded with New badge(s)
Your next payout target is 50 HP.
The unit is Hive Power equivalent because post and comment rewards can be split into HP and HBD
You can view your badges on your board and compare yourself to others in the Ranking
If you no longer want to receive notifications, reply to this comment with the word
STOPCheck out our last posts:
Support the HiveBuzz project. Vote for our proposal!