Versión en Español/ Spanish Version.
Hola Hivers, les presento un post de cómo hacer un corte recto de cabello corto.
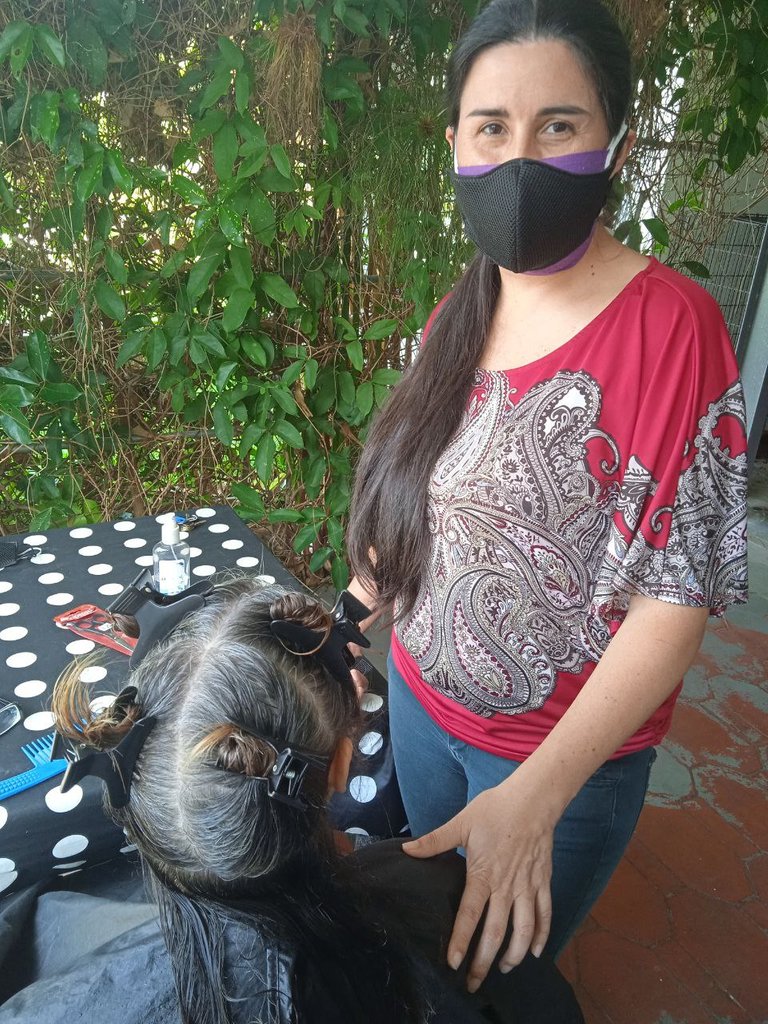
Para traerles a ustedes esta información, he pasado una tarde muy agradable con mi amiga Ana y mi hija @danielamilanesa, quien tomó las fotos. Mi amiga, muy amablemente, permitió servir de modelo.
Si lo quieres hacer, solo se necesita amor y dedicación y si eres habilidosa o habilidoso con las manos, entonces de seguro lo podrás hacer. Al principio es un poco lento el proceso, pero si se lo realizas a varias personas, cada vez irás tomando mayor destreza y lo harás más rápido.
Mi experiencia, durante la primera vez que corté el cabello, fue muy emocionante y no sabía si lo podía hacer bien, pero siguiendo las indicaciones del profesor, de cómo agarrar la tijera y como manipular el peine y los dedos e ir viendo como se hacía, al final, fue sencillo realizar mi primer corte recto.
Materiales y herramientas:
- Tijera de cortar cabello.
- Peine.
- Dispensador de agua.
- Ganchos para cabello.
- Champú.
Para comenzar, primero debemos lavar el cabello con champú y si está limpio, solo necesitaríamos humedecerlo con un spray de agua, (también se le llama dispensador). Seguidamente, debemos desenredar el cabello, hay que hacerlo de abajo hacia arriba, es decir, desde las puntas del cabello e ir peinando, poco a poco, hasta la raíz del mismo. Para cuidar no jalar tanto el cabello, mientras vamos peinando, sujetamos el mechón con una de las manos y así no maltrataremos a la persona a quien le vamos a cortar el cabello.
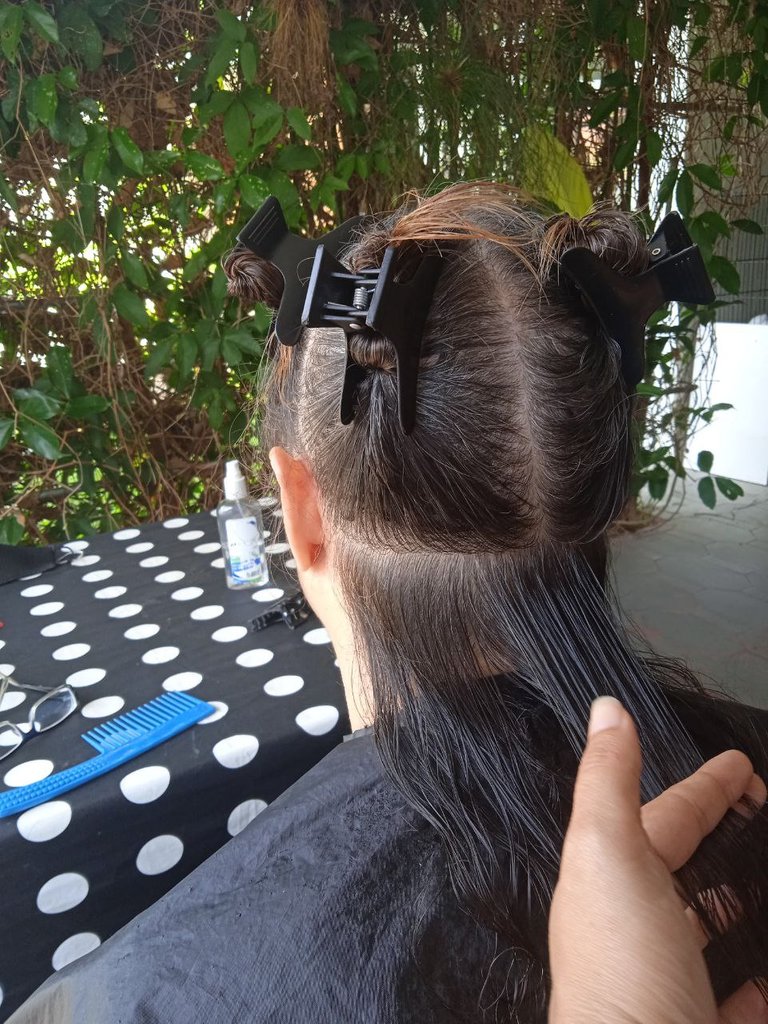
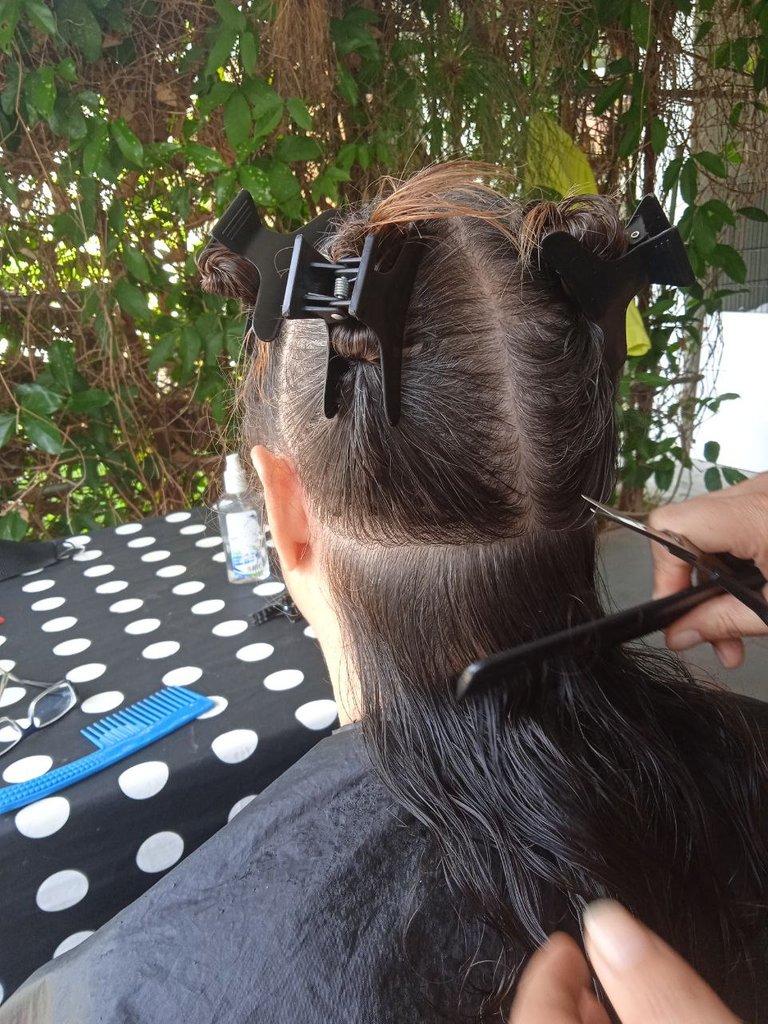
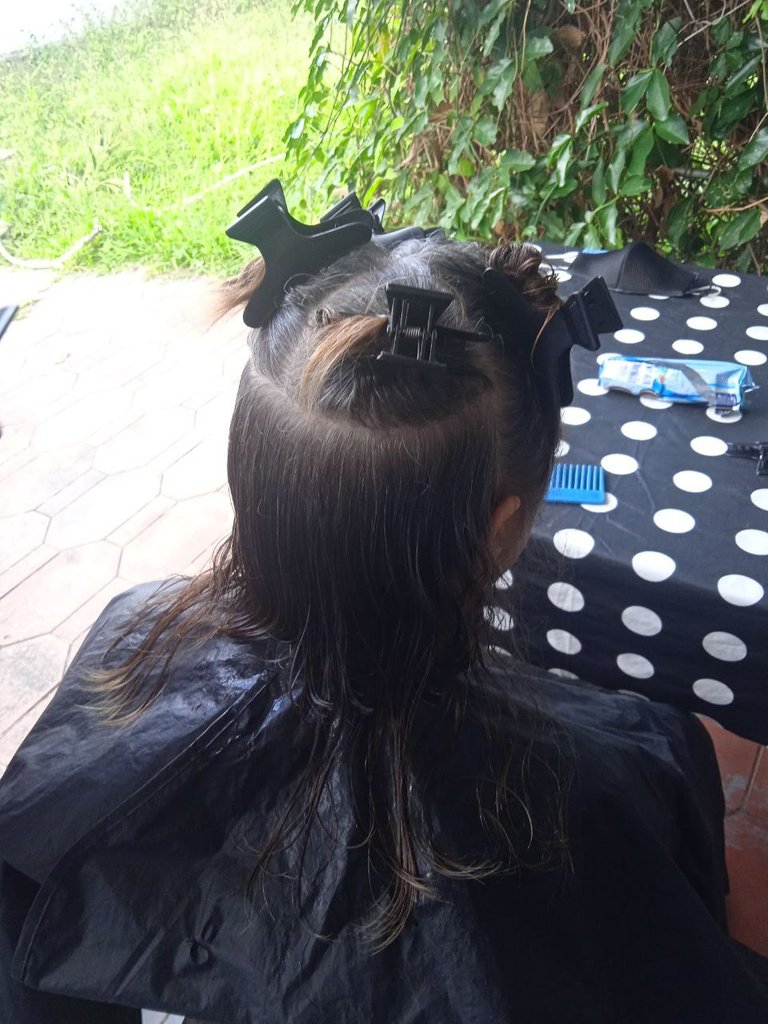
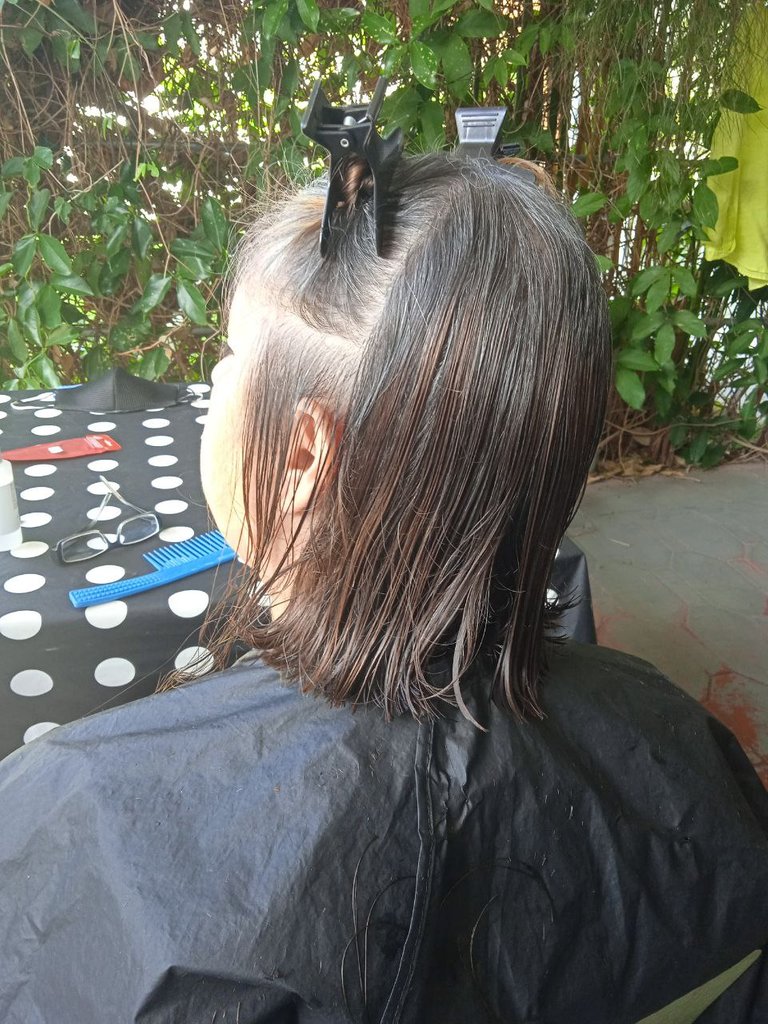
Debemos hacer las divisiones con los ganchos de cabello y con ayuda del peine. la primera línea toma como referencia desde la nariz hasta la baja nuca y la segunda línea de oreja a oreja. Lo pueden apreciar en la siguiente imagen:
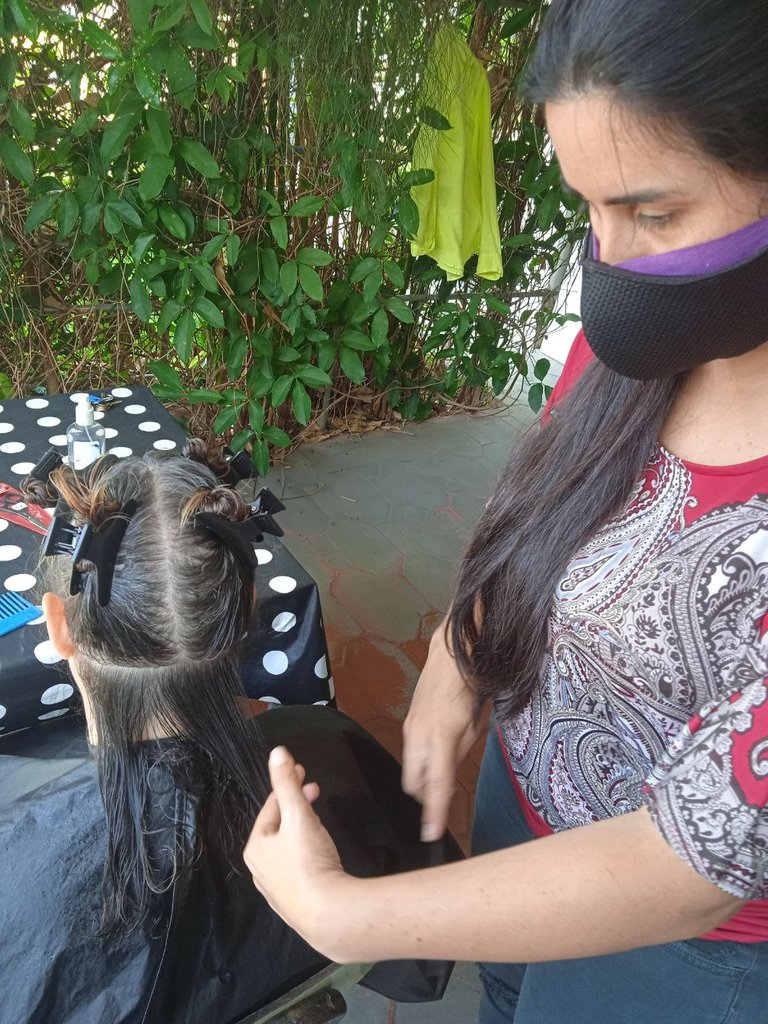
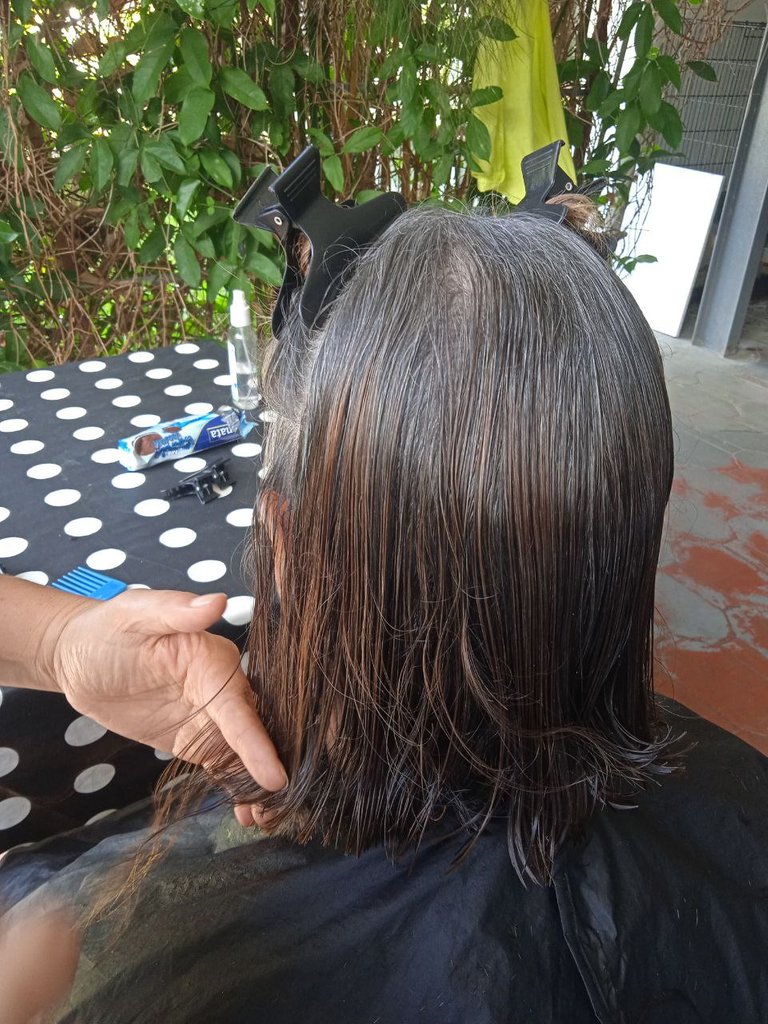
Para cortar el cabello, debemos dejar una capa de cabello de 3 centímetros de grosor aproximadamente, dependiendo de la cantidad de cabello, si es muy abundante debemos sacar menos cabello, si es escaso sacaremos una capa más ancha. Para ello, debemos hacer una línea divisora, recta y horizontal, que va aproximadamente desde la mitad de la oreja hasta la otra, separando el cabello que vamos a cortar, luego recogemos el cabello que aún no vamos a cortar con los ganchos, tal y como se muestra en la imagen.
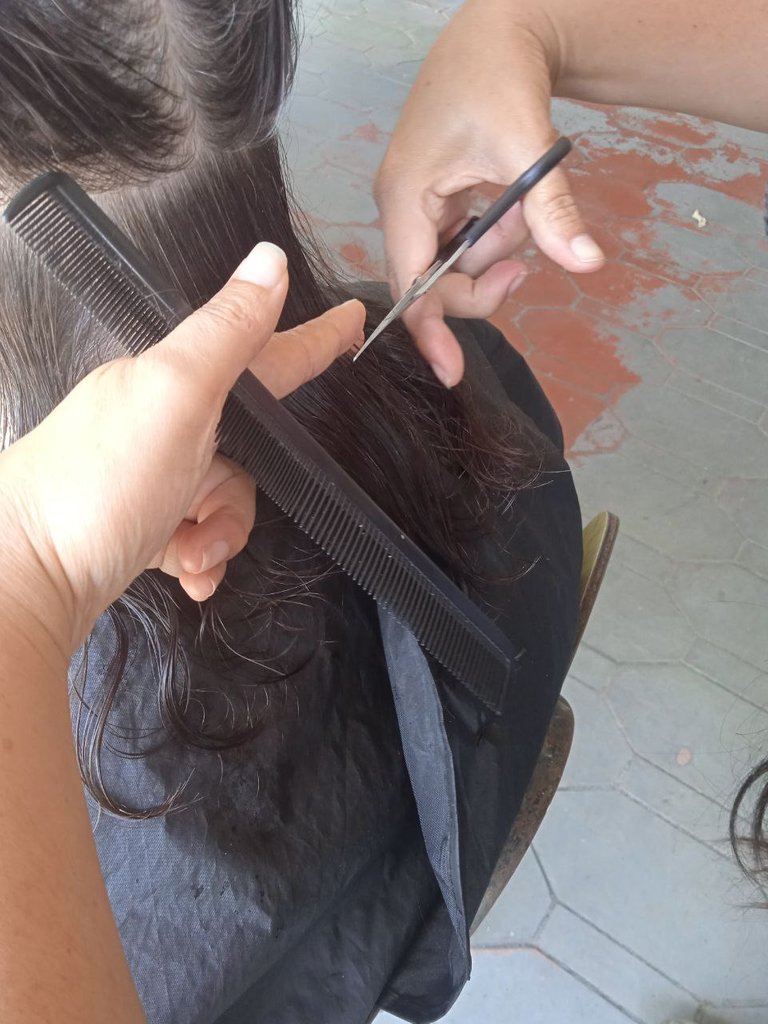
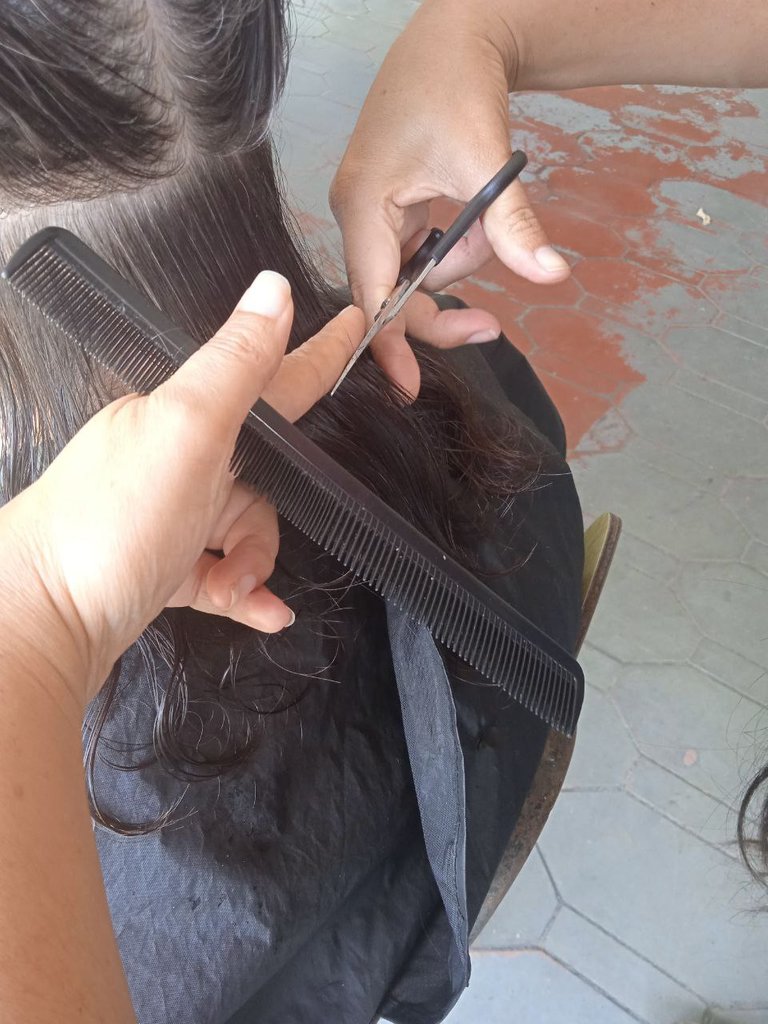
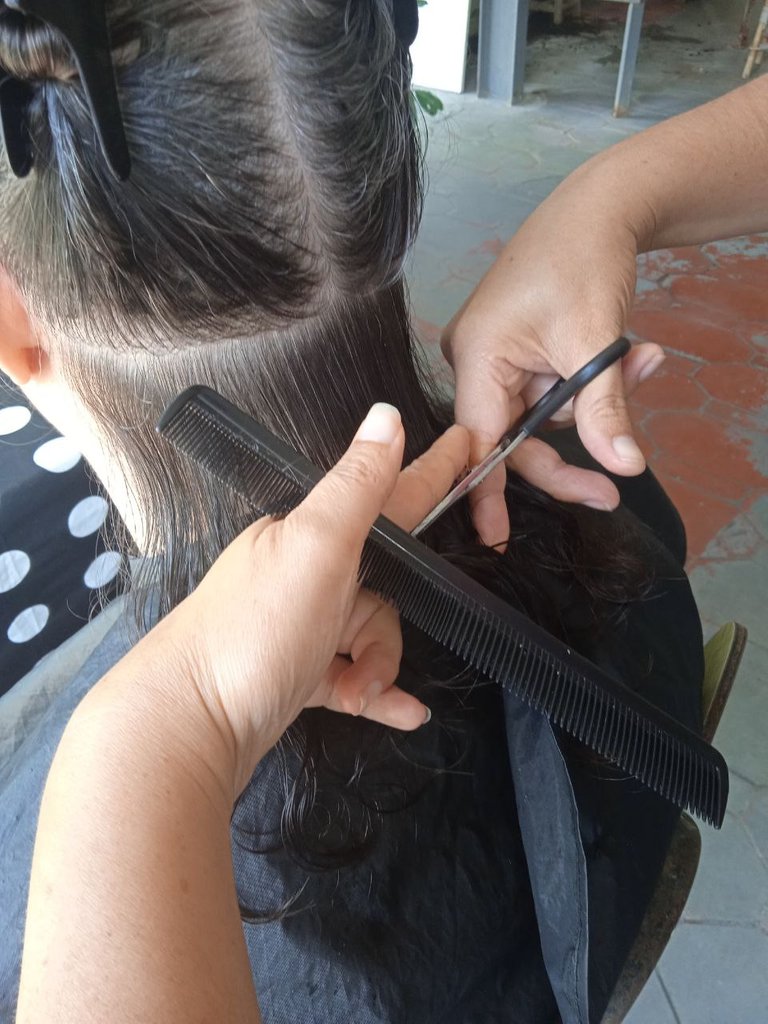
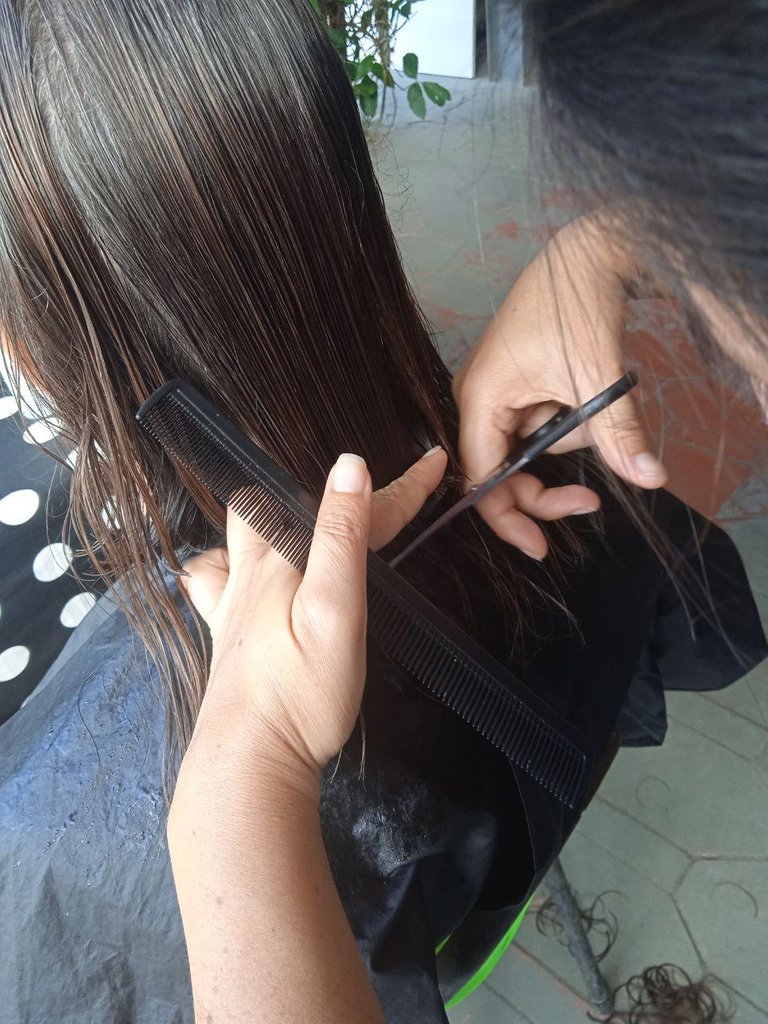
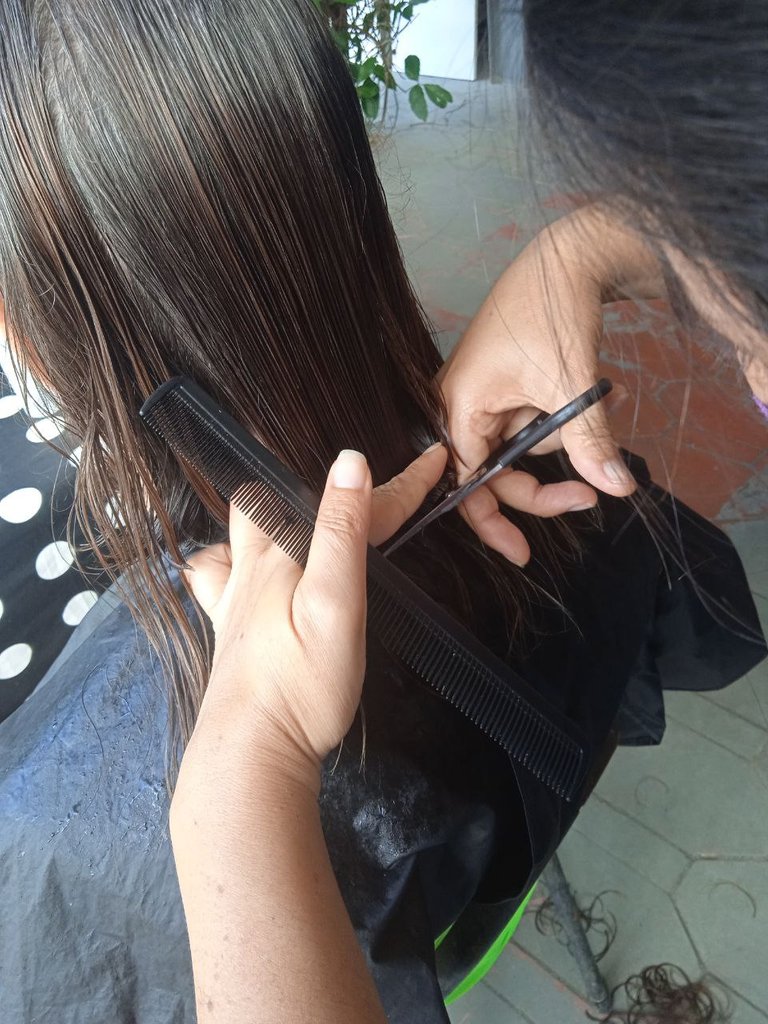
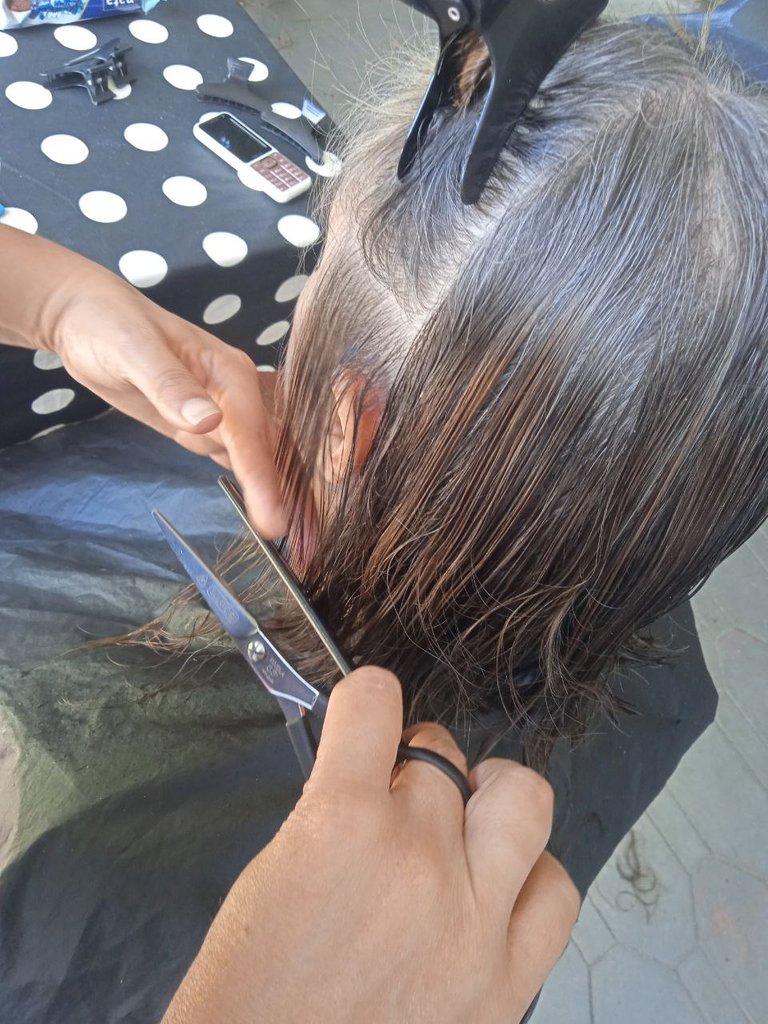
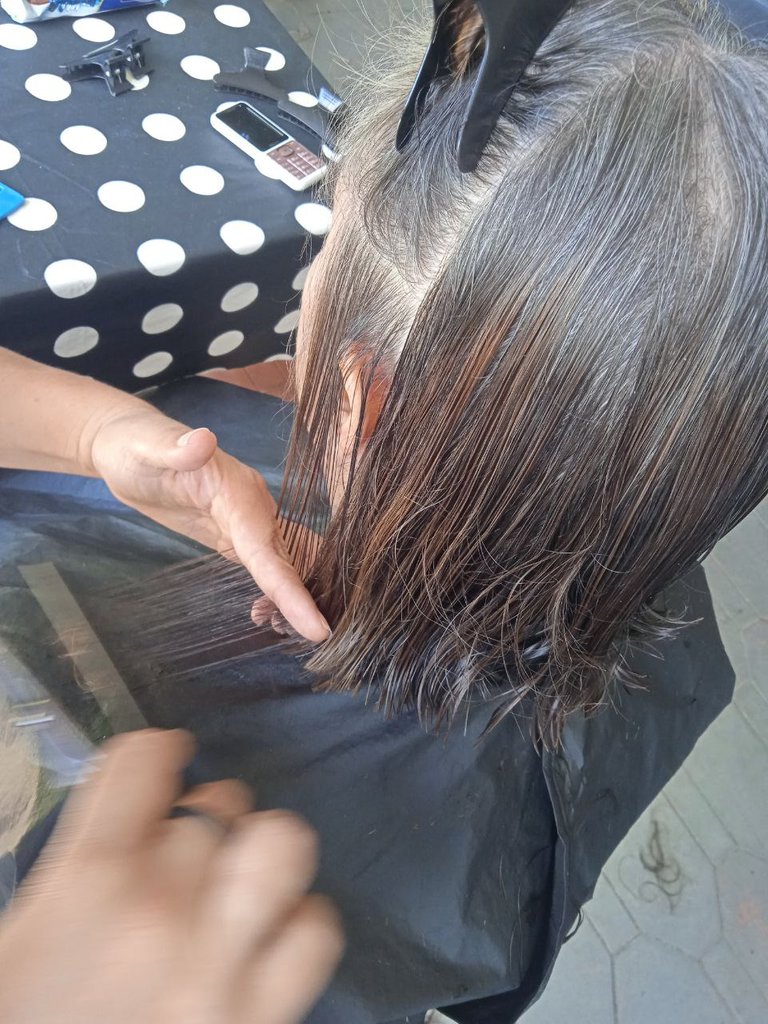
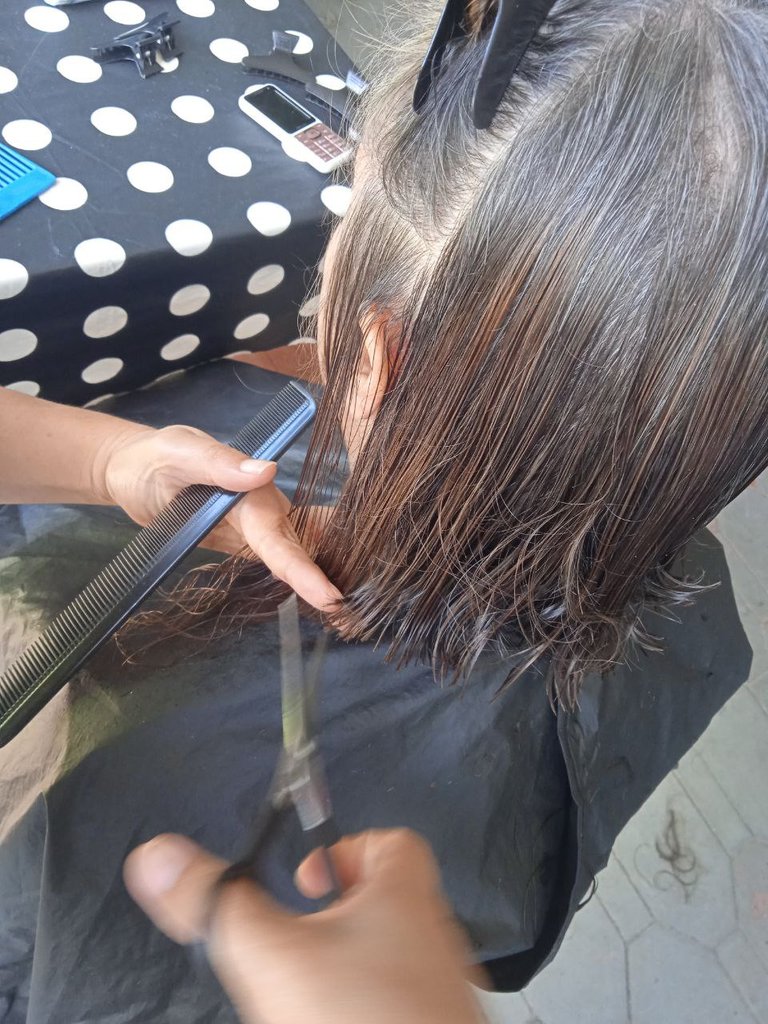
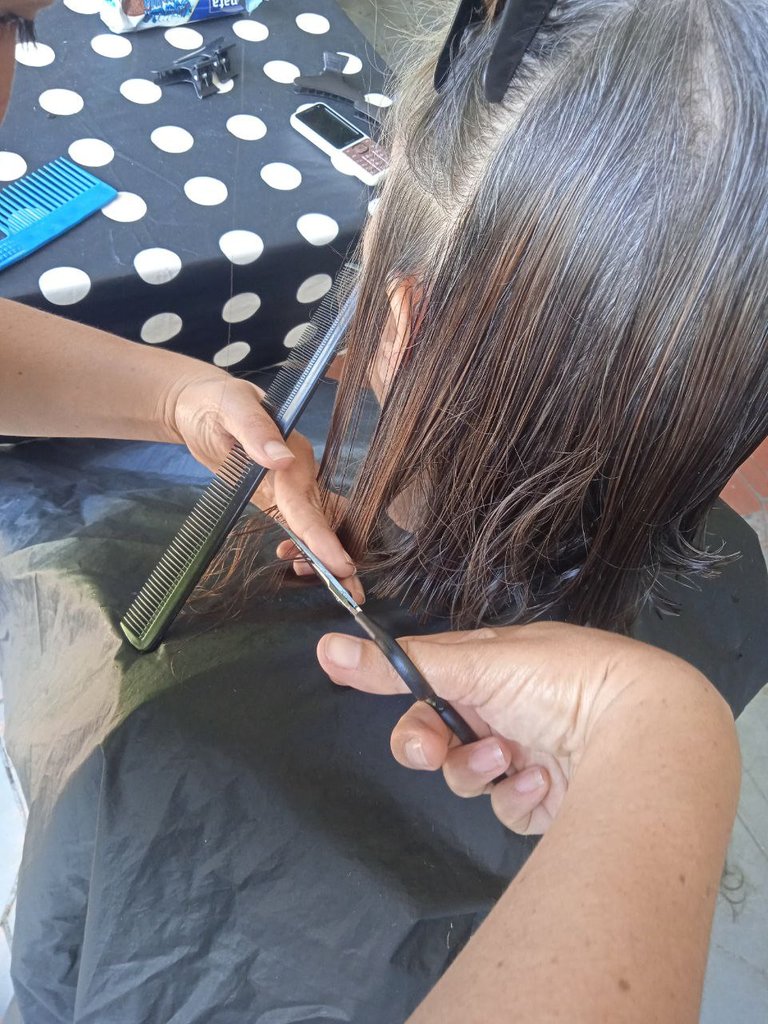
Para tomar el mechón a cortar les voy a dar un tip muy importante, que es: estirar el cabello con los dedos, antes de cortar el mechón, para ello debes poner los dedos de tu mano izquierda, (en el caso de escribir con la mano derecha), en forma de una tijera y cerrarlos con el mechón entre los dedos y deslizarlos de arriba hacia abajo detrás del peine mientras peinamos el mechón, hasta encontrar la posición correcta que indique el largo que queremos cortar, como se muestra en las fotos.

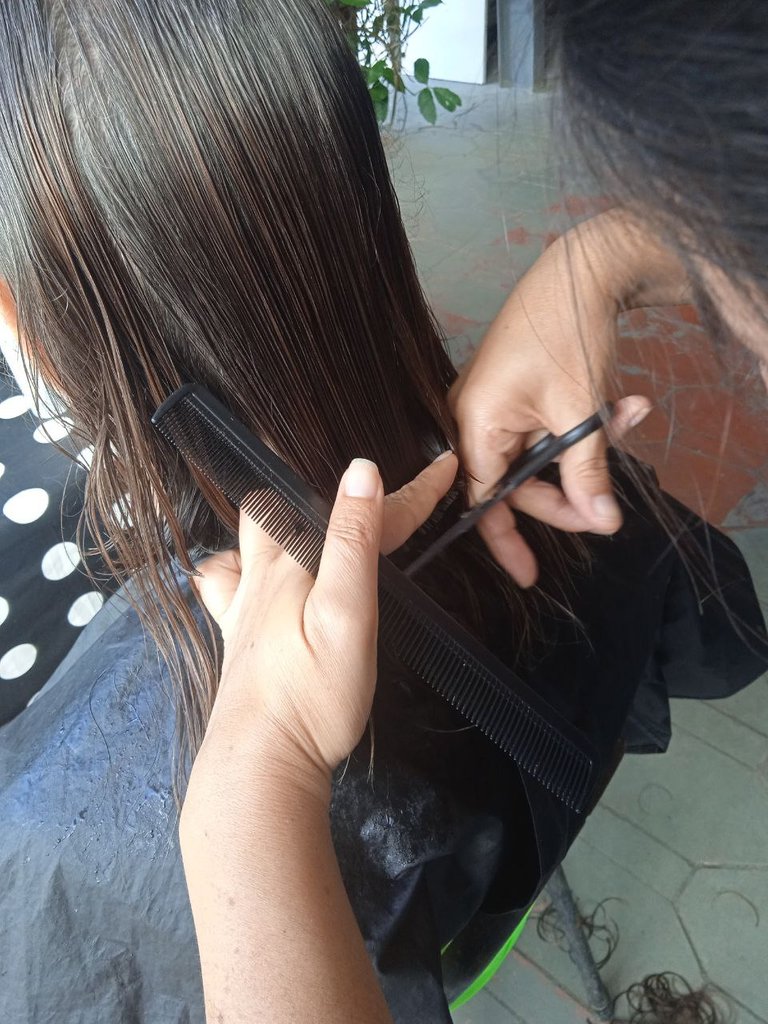
Esto es para guiarnos como si fuera una regla y así poder cortarlo de forma recta, ubicando la tijera debajo de los dedos que están en forma de tijera
y procediendo a cortar.
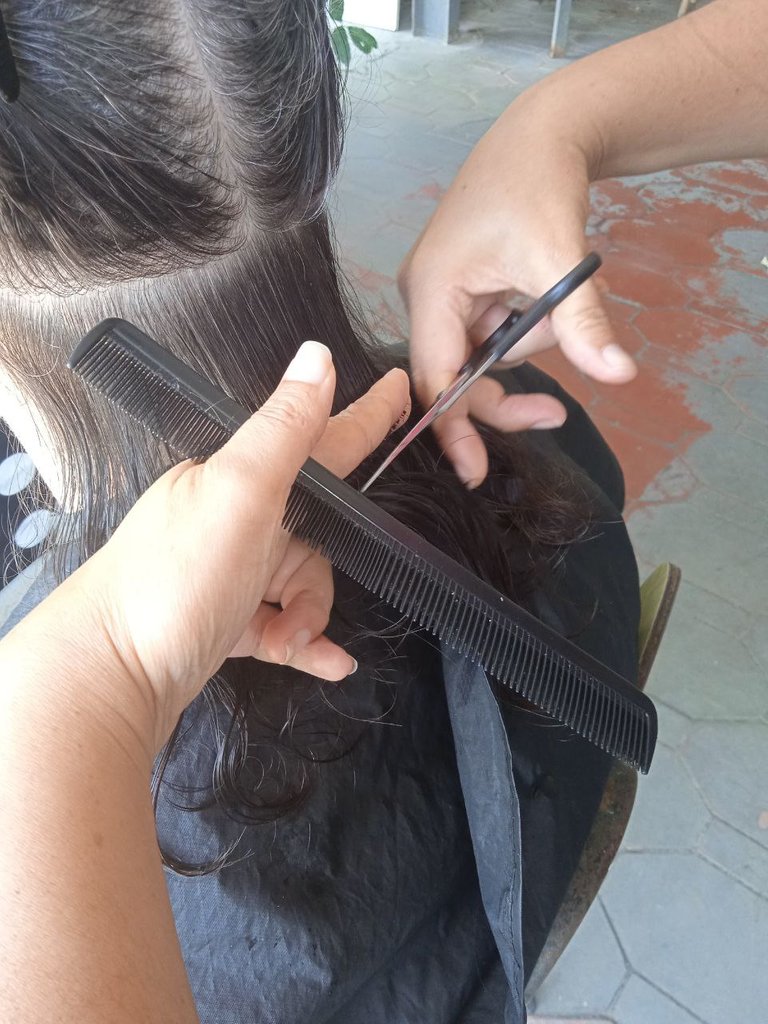
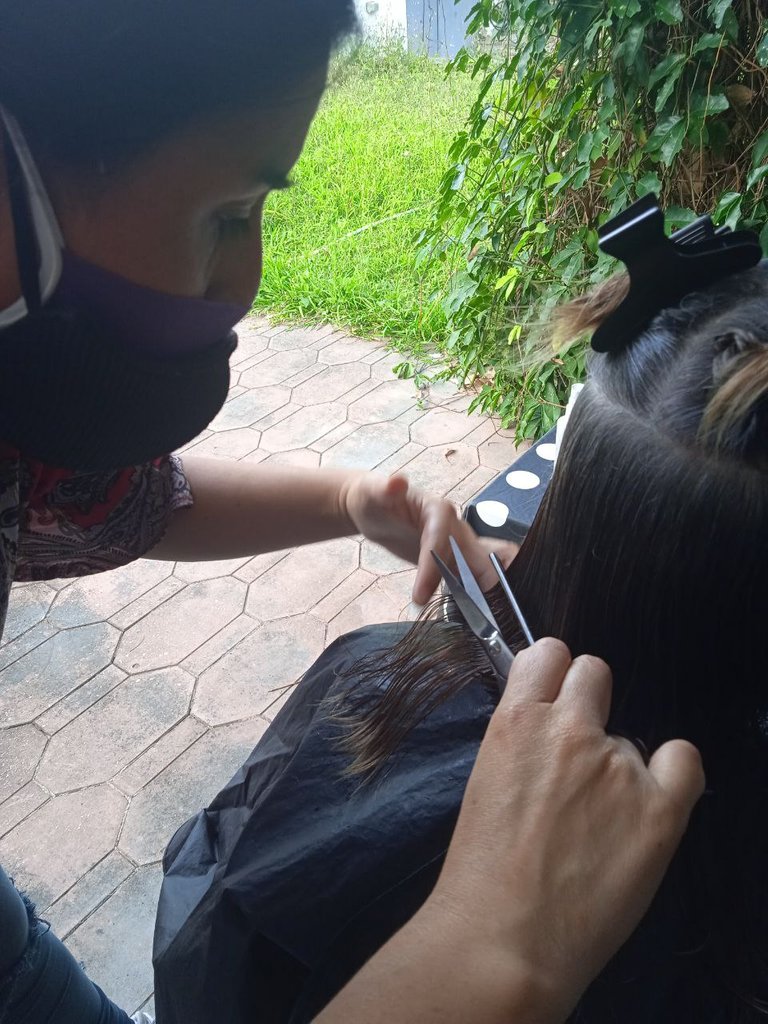
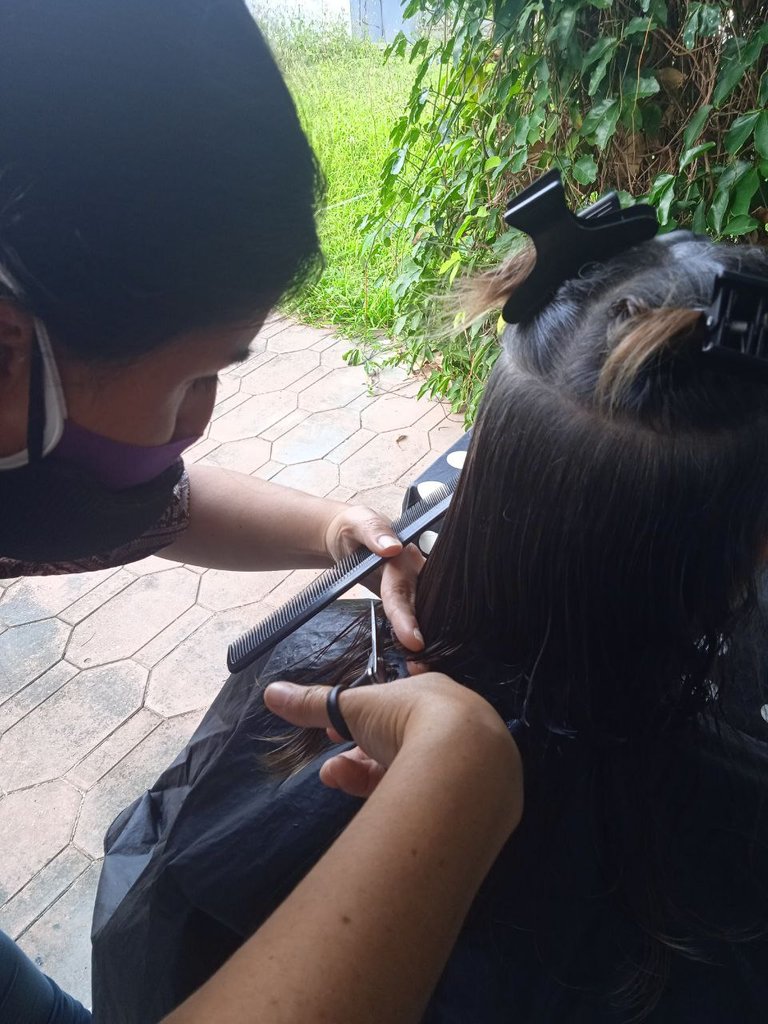
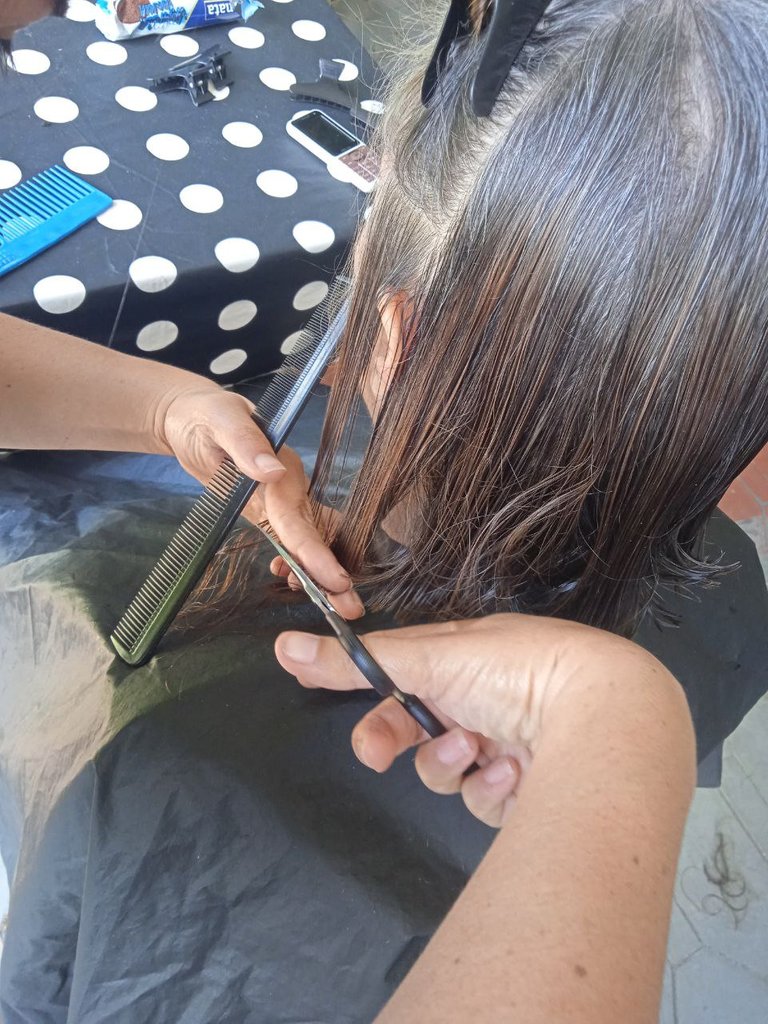
Se recomienda cortar desde la parte central y luego a los lados “izquierda y derecha” para establecer la línea recta. Posteriormente, vamos bajando la segunda capa de cabello. Igual con 3 cm de grosor aproximadamente, dependiendo de la cantidad de cabello, si es escaso es mas ancho y si es abundante, el grosor sera menor. Hasta ir bajando todas las capas y completar el corte, nos debemos guiar del largo de la capa anterior para que el cabello quede parejo. Primero comenzamos por la parte de atrás de la cabeza y al culminar esa parte, proseguimos en cada lateral de la cabeza, siempre se comienza de abajo hacia arriba y por capas, hasta no tener más cabello por sacar de los ganchos.
Veamos algunas imágenes:
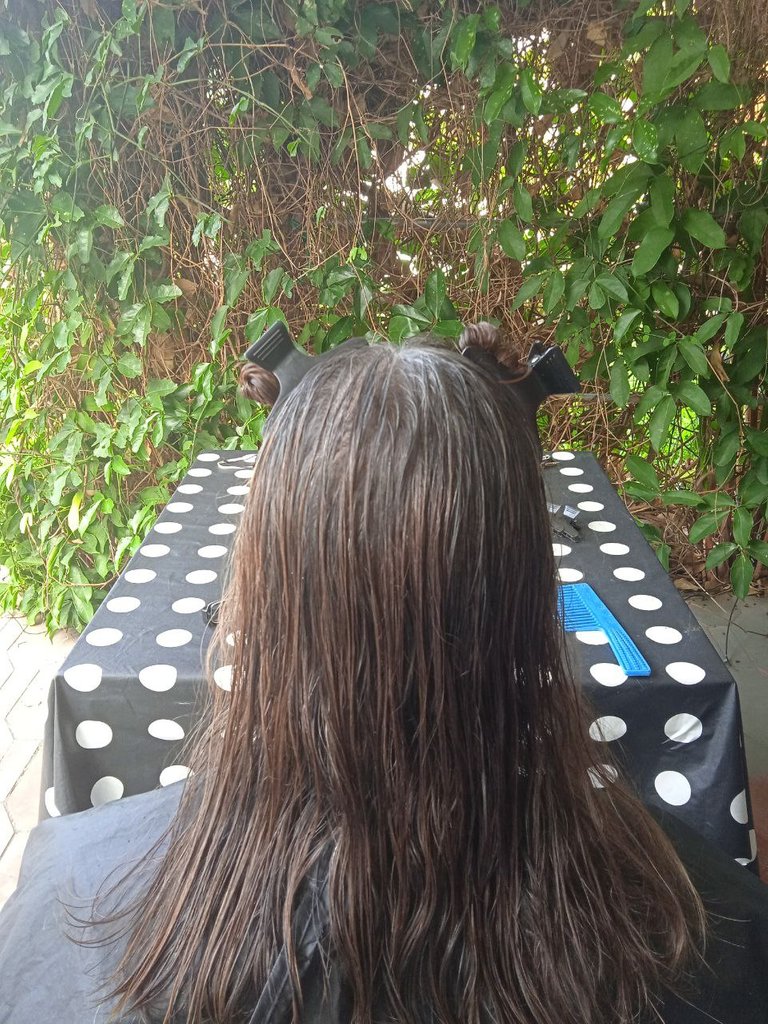


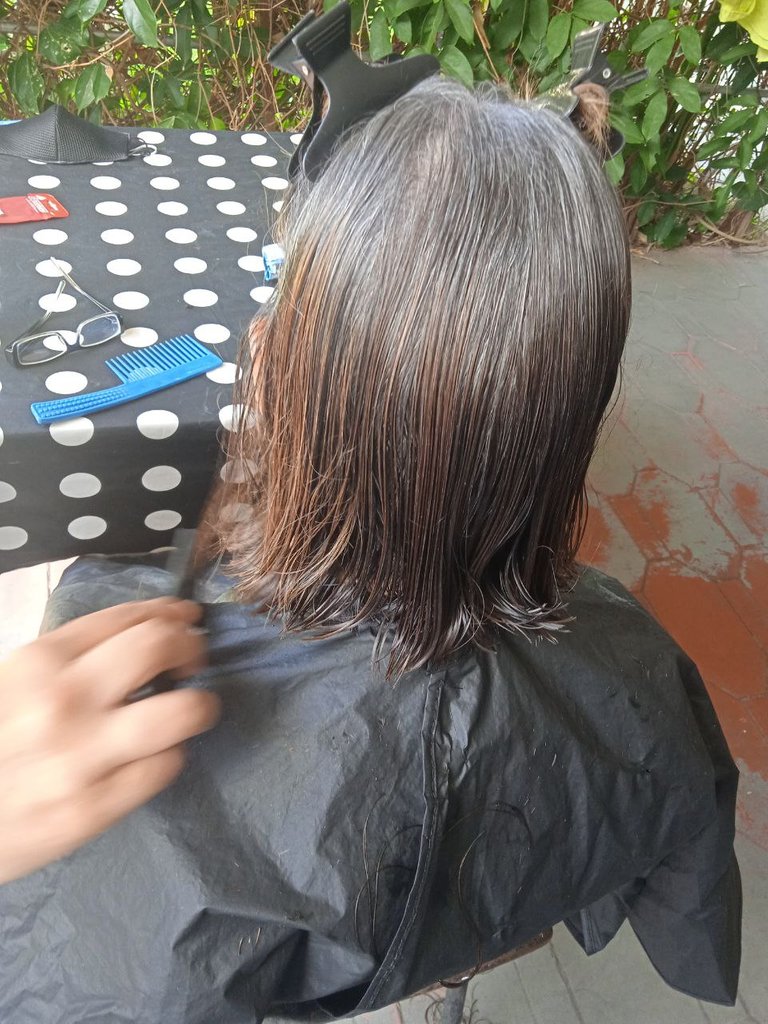

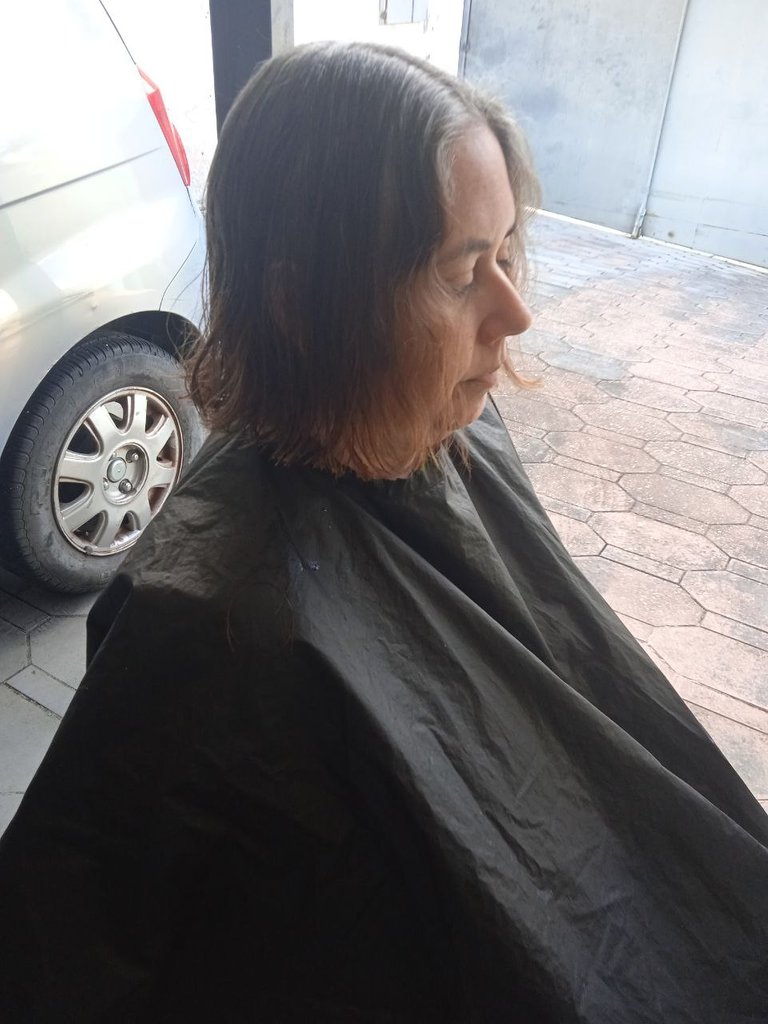
Luego secamos el cabello.
Y el resultado: ¡mi amiga feliz!.

Versión en Inglés/ English Version.
Hi Hivers, I present to you a post on how to do a short straight haircut.
To bring you this information, I spent a very nice afternoon with my friend Ana and my daughter @danielamilanesa, who took the pictures. My friend, very kindly, allowed to serve as a model.
If you want to do it, you only need love and dedication and if you are skilled with your hands, then you can do it for sure. At first the process is a little slow, but if you do it to several people, you will become more and more skilled and you will do it faster and faster.
My experience, during the first time I cut my hair, was very exciting and I didn't know if I could do it right, but following the teacher's instructions, how to hold the scissors and how to manipulate the comb and fingers and see how it was done, in the end, it was easy to make my first straight cut.
Materials and tools:
- Hair clippers.
- Comb.
- Water dispenser.
- Hair clips.
- Shampoo.
To begin, we must first wash the hair with shampoo and if it is clean, we would only need to moisten it with a water spray (also called dispenser). Next, we must untangle the hair, we must do it from the bottom up, that is to say, from the ends of the hair and go combing, little by little, to the root of the hair. To take care not to pull the hair so much, while we are combing, we hold the lock with one of the hands and thus we will not mistreat the person whose hair we are going to cut.
We must make the divisions with the hair clips and with the help of the comb. The first line takes as reference from the nose to the low nape of the neck and the second line from ear to ear. You can see it in the following image:
To cut the hair, we must leave a layer of hair about 3 centimeters thick, depending on the amount of hair, if it is very abundant we must remove less hair, if it is scarce we will remove a wider layer. To do this, we must make a dividing line, straight and horizontal, that goes approximately from the middle of the ear to the other, separating the hair that we are going to cut, then we collect the hair that we are not going to cut with the hooks, as shown in the image.
To take the lock to cut I am going to give you a very important tip, which is: stretch the hair with your fingers, before cutting the lock, for this you must put the fingers of your left hand, (in the case of writing with the right hand), in the form of a scissors and close them with the lock between your fingers and slide them up and down behind the comb while combing the lock, until you find the correct position that indicates the length we want to cut, as shown in the photos.
This is to guide us as if it were a ruler and thus be able to cut it straight, placing the scissors under the fingers that are in the form of scissors and proceeding to cut.
and proceeding to cut.
It is recommended to cut from the center part and then to the "left and right" sides to establish the straight line. Subsequently, we go down the second layer of hair. The same with approximately 3 cm of thickness, depending on the amount of hair, if it is scarce it is wider and if it is abundant, the thickness will be smaller. Until we go down all the layers and complete the cut, we must be guided by the length of the previous layer so that the hair is even. First we start at the back of the head and when we finish that part, we continue on each side of the head, always starting from the bottom up and in layers, until we have no more hair to remove from the hooks.
Let's take a look at some images:
Then we dried the hair.
And the result: my happy friend!
Traducido en www.DeepL.com
Translated with www.DeepL.com/Translator (free version)
¡Felicitaciones!
1. Invierte en el PROYECTO ENTROPÍA y recibe ganancias semanalmente. Entra aquí para más información.
3. Suscríbete a nuestra COMUNIDADEntra aquí para más información sobre nuestro trail., apoya al trail de @Entropia y así podrás ganar recompensas de curación de forma automática.
4. Creación de cuentas nuevas de Hive aquí.
5. Visita nuestro canal de Youtube.
Atentamente
El equipo de curación del PROYECTO ENTROPÍA
Congratulations @izulina! You have completed the following achievement on the Hive blockchain and have been rewarded with new badge(s):
Your next target is to reach 400 upvotes.
You can view your badges on your board and compare yourself to others in the Ranking
If you no longer want to receive notifications, reply to this comment with the word
STOPCheck out the last post from @hivebuzz:
Support the HiveBuzz project. Vote for our proposal!