Saludos querida familia #hive, el día de hoy trabajaremos con un #tutorial paso a paso, para la elaboración de hermosos #toppers para sus #tortas. Aprende con nosotros el bello #arte de las #manualidades. Sigamos adelante.
Greetings dear #hive family, today we will work with a step-by-step #tutorial, for the elaboration of beautiful #toppers for your #cakes. Learn with us the beautiful #art of #handicrafts. Let's move on.

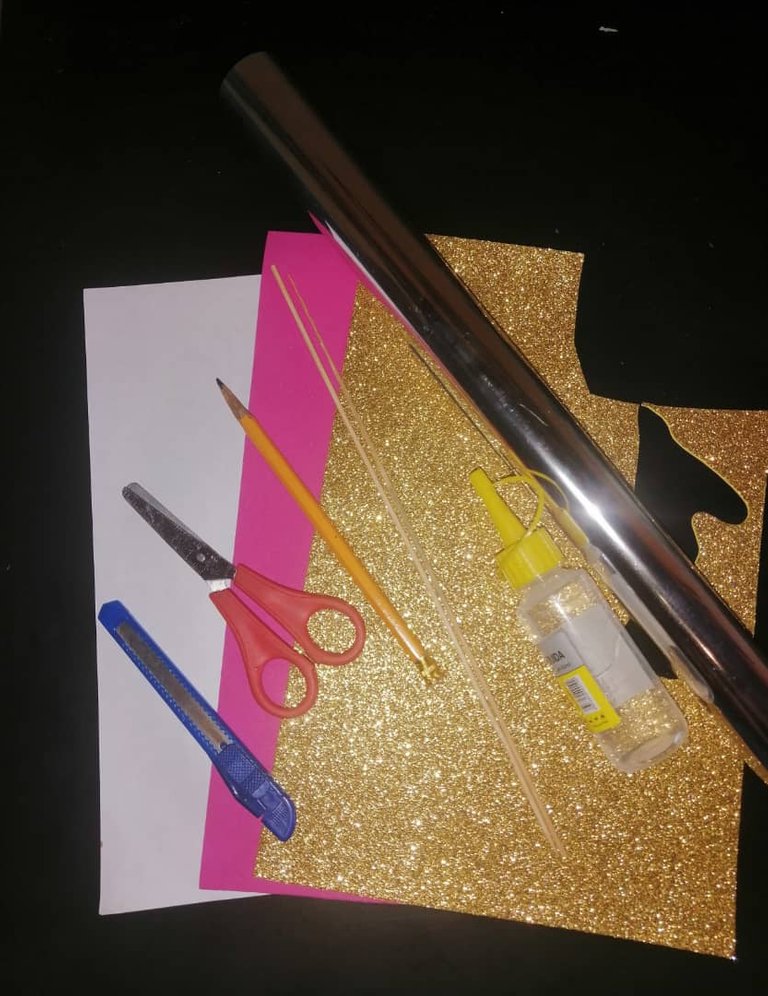
- 1 Foami dorado escarchado.
- 1 Foami rosado.
- 1 Foami rojo escarchado.
- 1 hoja de papel reciclada.
- 1 Papel hojilla.
- Tijera y exacto.
- Lápiz.
- Silicón líquido.
- 1 Palillo de altura.
Materials for the Toppers
- 1 Frosted golden foam.
- 1 Pink Foami.
- 1 Frosty red foam.
- 1 sheet of recycled paper.
- 1 Sheet paper.
- Scissors and exact.
- Pencil.
- Liquid silicone.
- 1 Height stick.
Procedure
- Paso 1 En la hoja reciclada, sacamos los moldes de las letras con el mensaje deseado, cuyo tamaño va a depender de las dimensiones de la torta. Luego, plasmamos cada letra en el papel hojilla y recortamos.
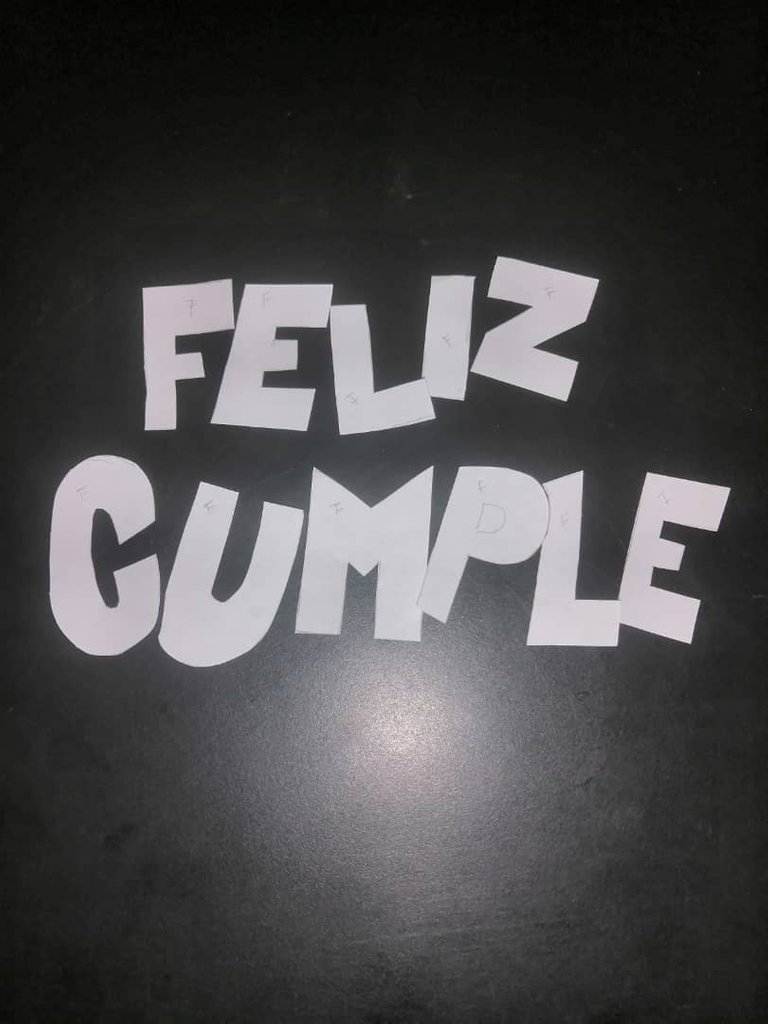
- Step 1 On the recycled sheet, we take out the molds of the letters with the desired message, the size of which will depend on the dimensions of the cake. Then, we shape each letter on the slip paper and cut out.
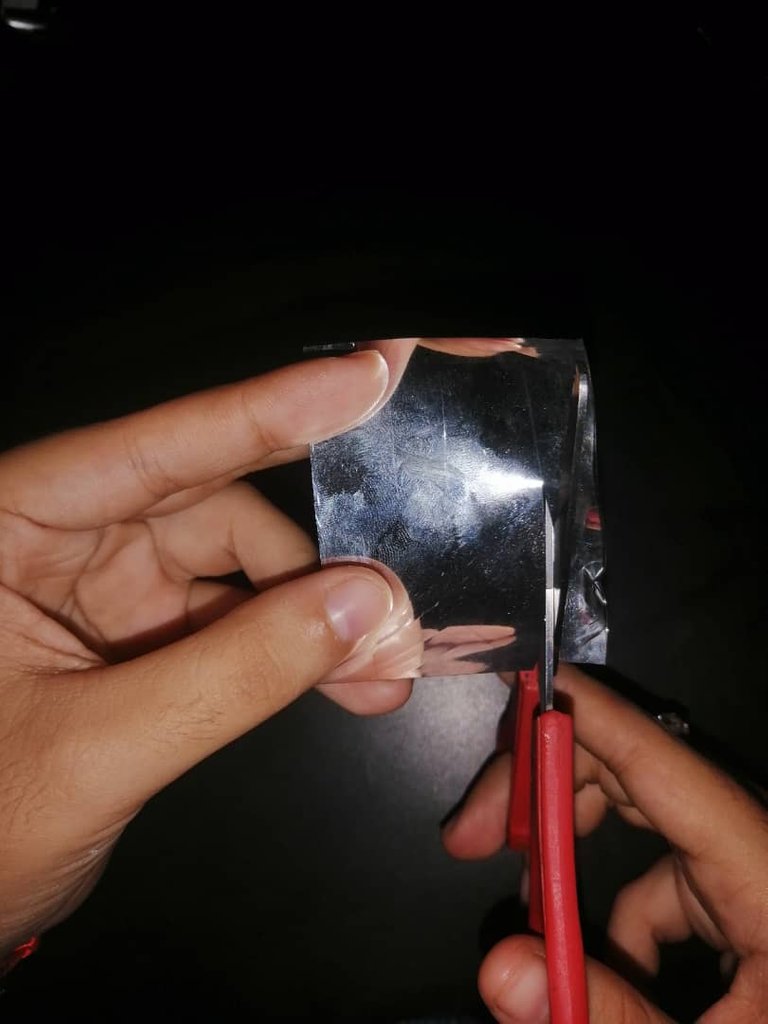
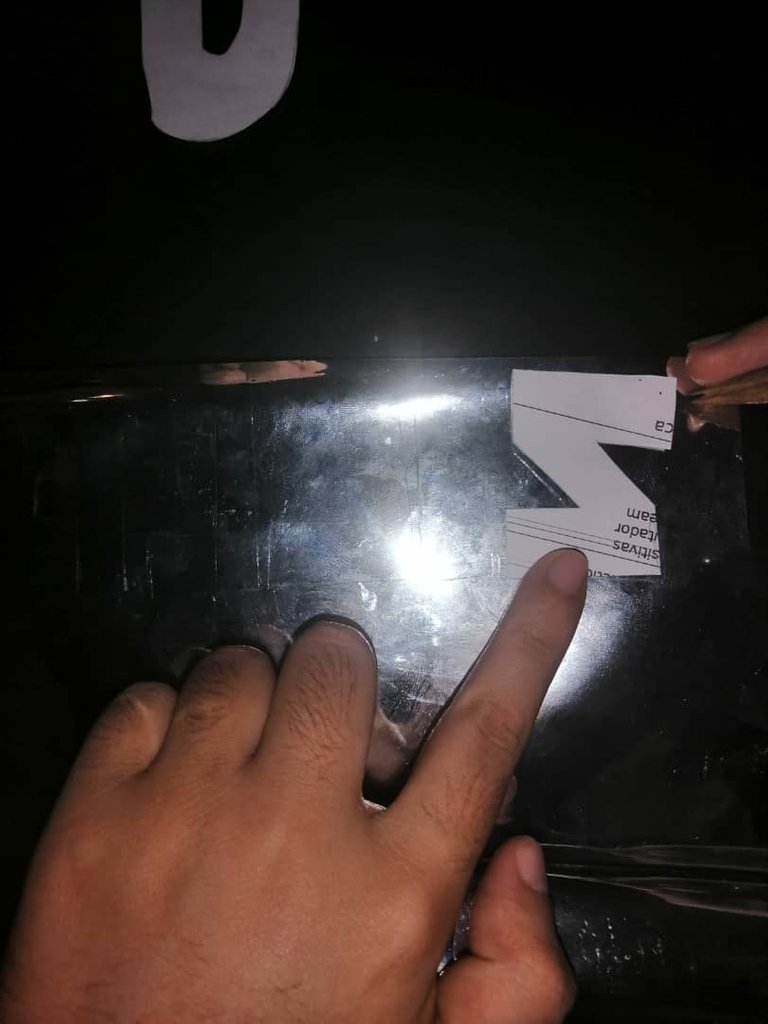
- Paso 2 Con ayuda del silicón, procedemos a pegar cada letra en el foami rosado, no importa el orden, pero si debemos dejar espacio entre ellas, ya que al recortarlas hay que dejar pequeños bordes, obteniendo así, cada letra por separado.

- Step 2 With the help of the silicone, we proceed to glue each letter on the pink foami, the order does not matter, but we must leave space between them, since when cutting them we must leave small edges, thus obtaining each letter separately.
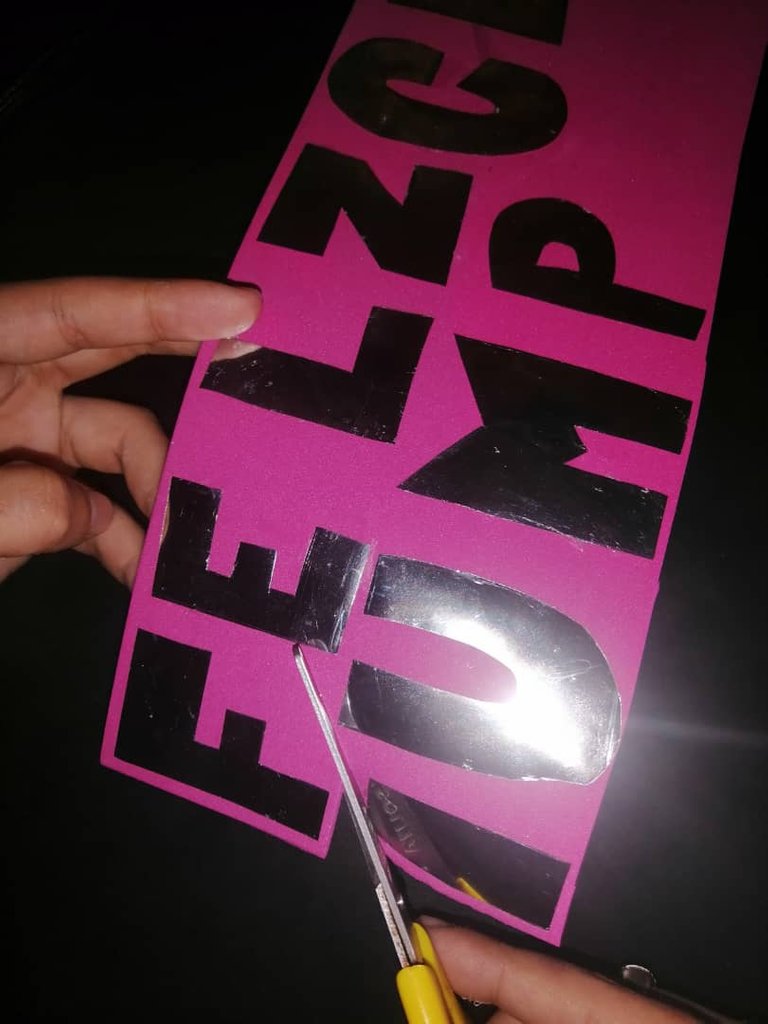

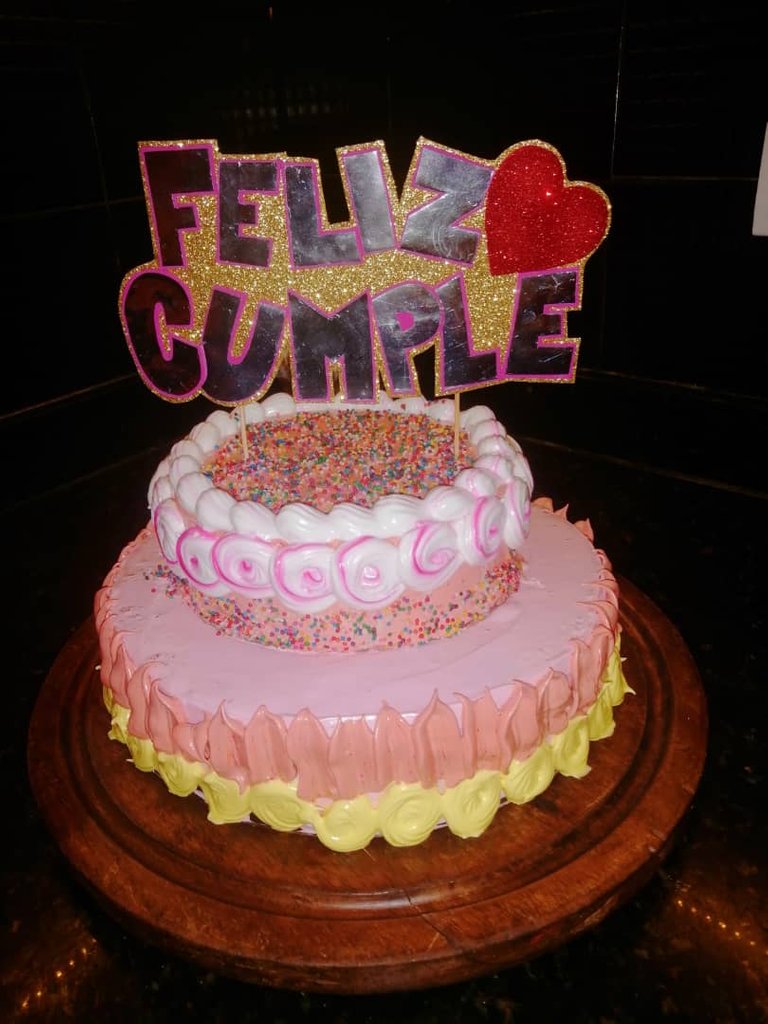
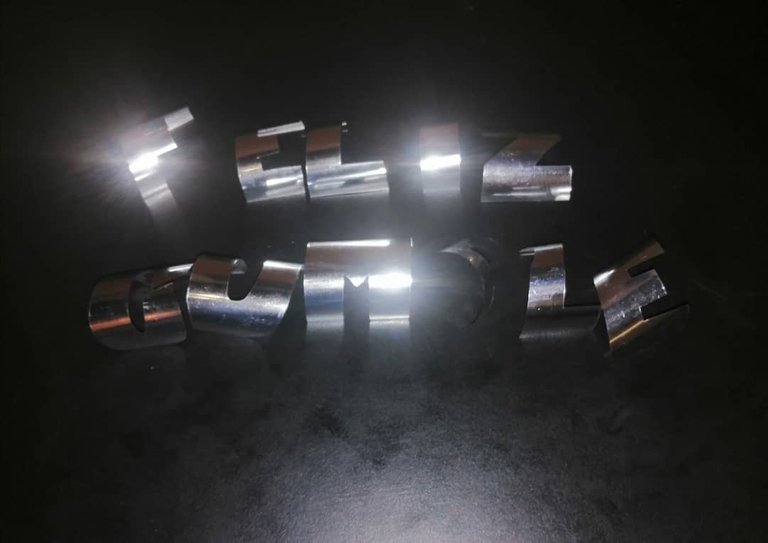
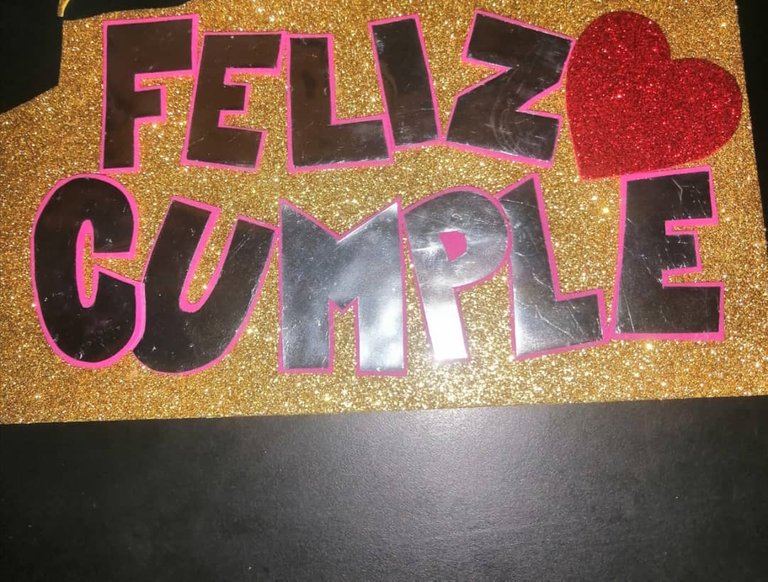
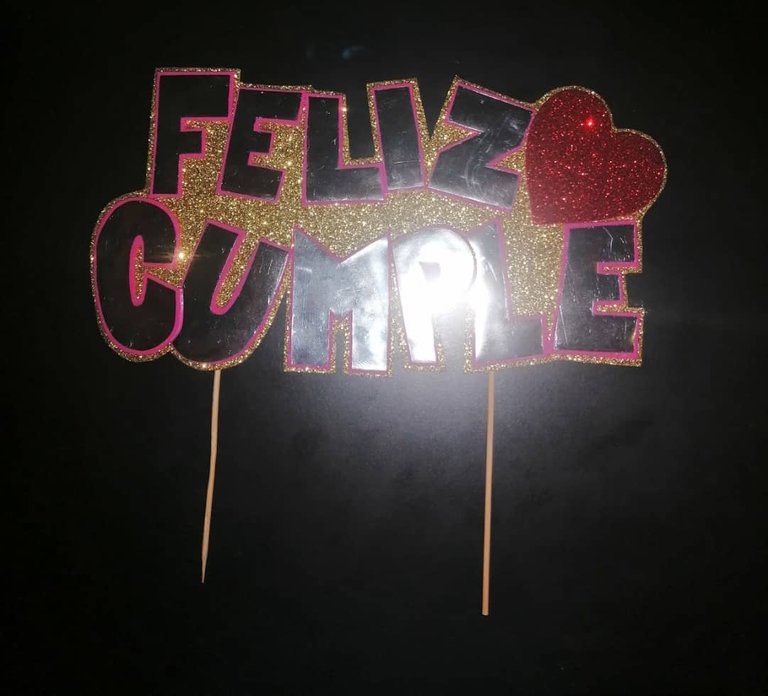
- Paso 3 En orden, ahora sí, pegamos cada letra para formar las palabras deseadas, dejando espacio para el corazón que irá al lado de la letra Z, el cual tendrá un tamaño de 5.5x6cm; recordando que el diseño del Toppers, dependerá del tamaño de la torta.
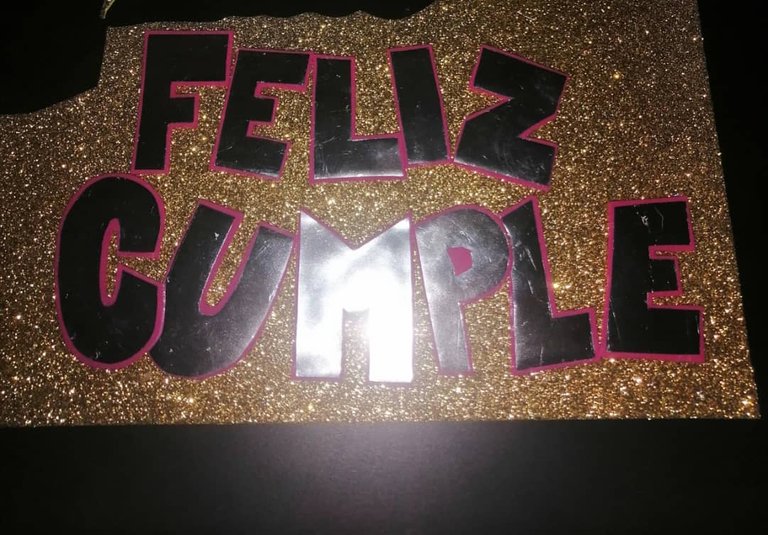
- Step 3 In order, now yes, we glue each letter to form the desired words, leaving space for the heart that will go next to the letter Z, which will have a size of 5.5x6cm; Remembering that the design of the Toppers will depend on the size of the cake.
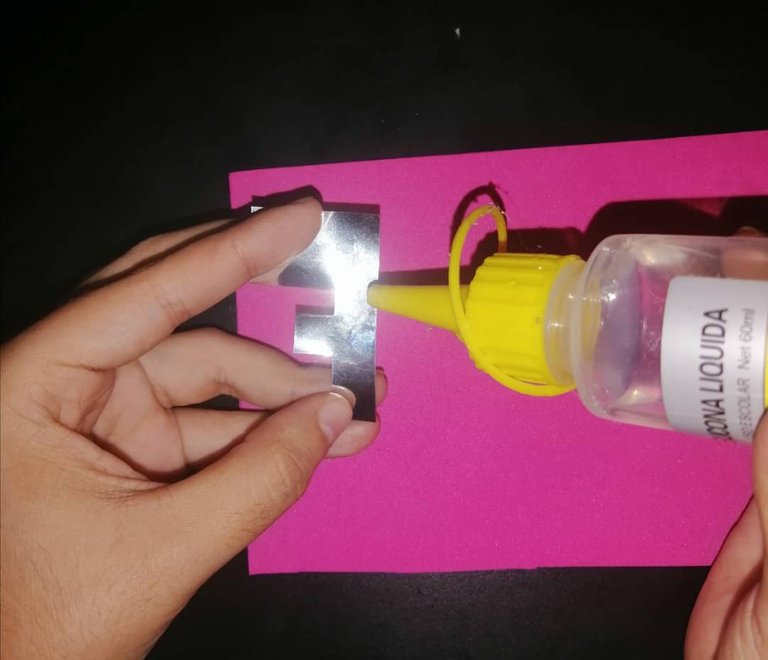
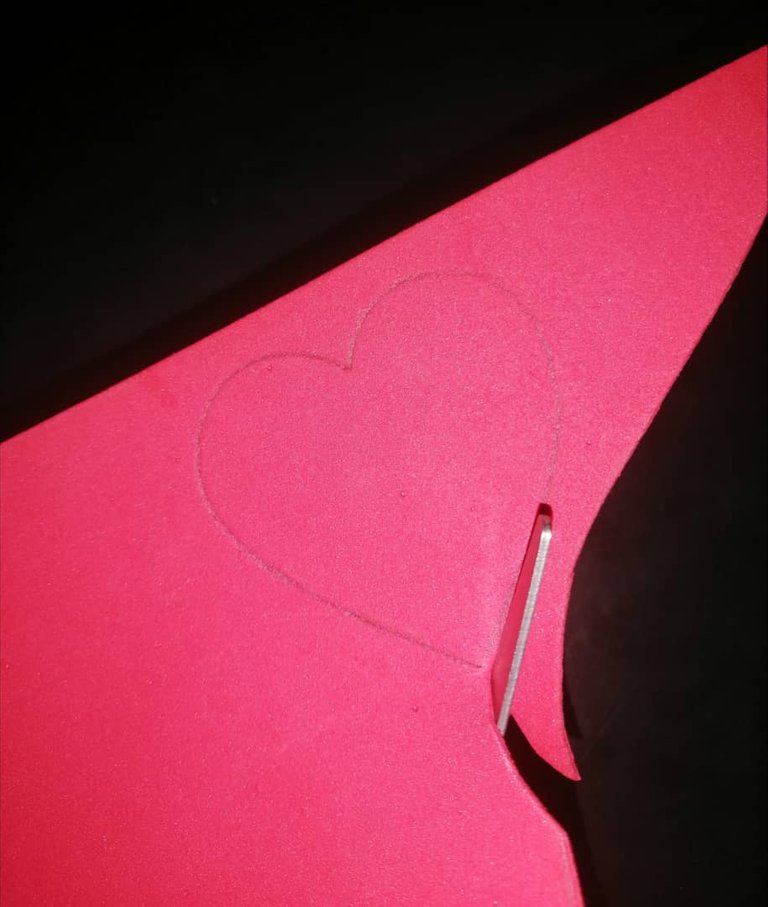
- Paso 4 En una parte de la hoja reciclada, dibujamos y recortamos el corazón de 5.5 X 6 cm, y lo plasmamos en la parte posterior del foami rojo escarchado, y de nuevo recortamos el corazón ya en el foami.
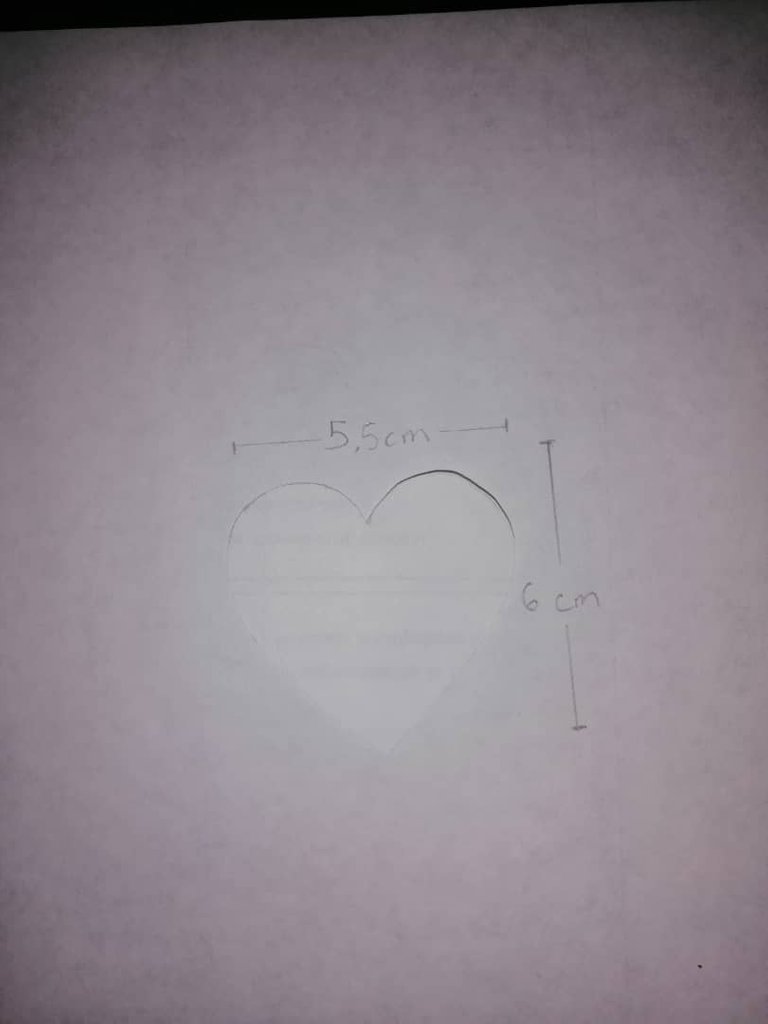
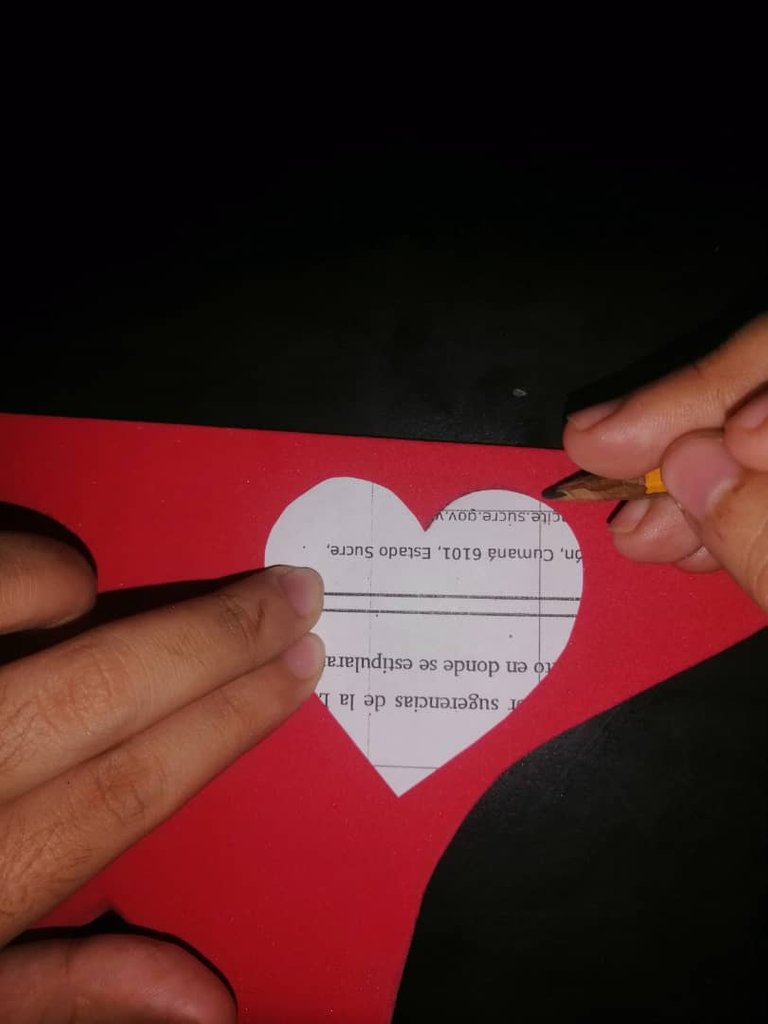
- Step 4 In a part of the recycled sheet, we draw and cut out the 5.5 X 6 cm heart, and we shape it on the back of the frosted red foami, and again we cut out the heart already in the foami.

- Paso 5 Con ayuda del silicón, pegamos el corazón en la esquina superior derecha del toppers como se muestra en la imagen.
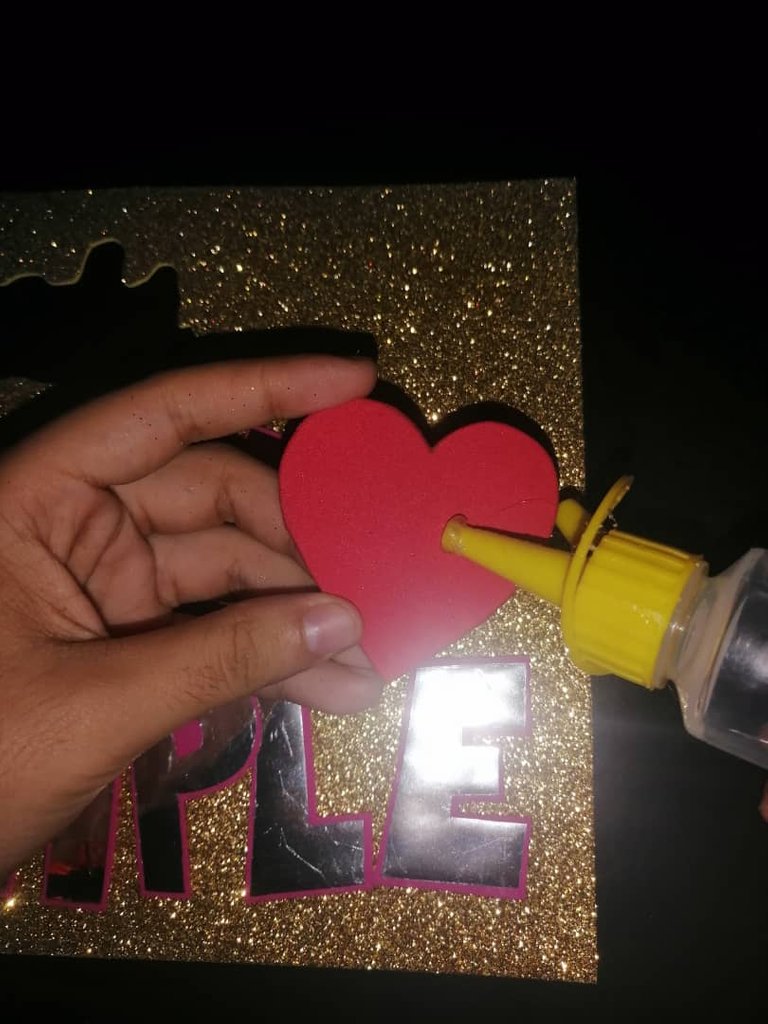
- Step 5 With the help of the silicone, we glue the heart in the upper right corner of the toppers as shown in the image.
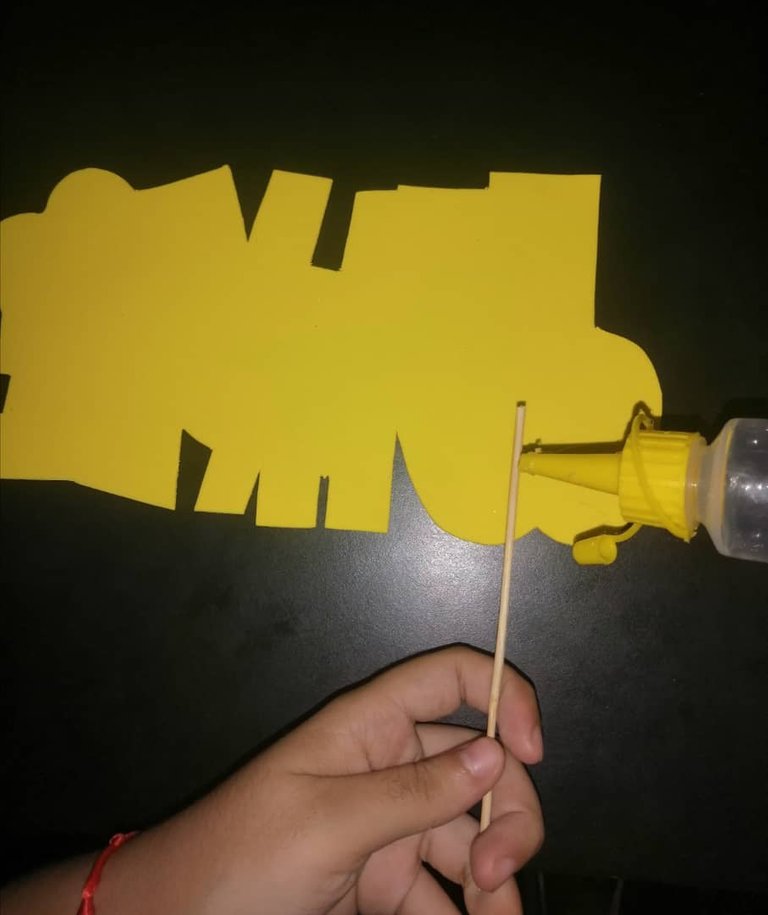
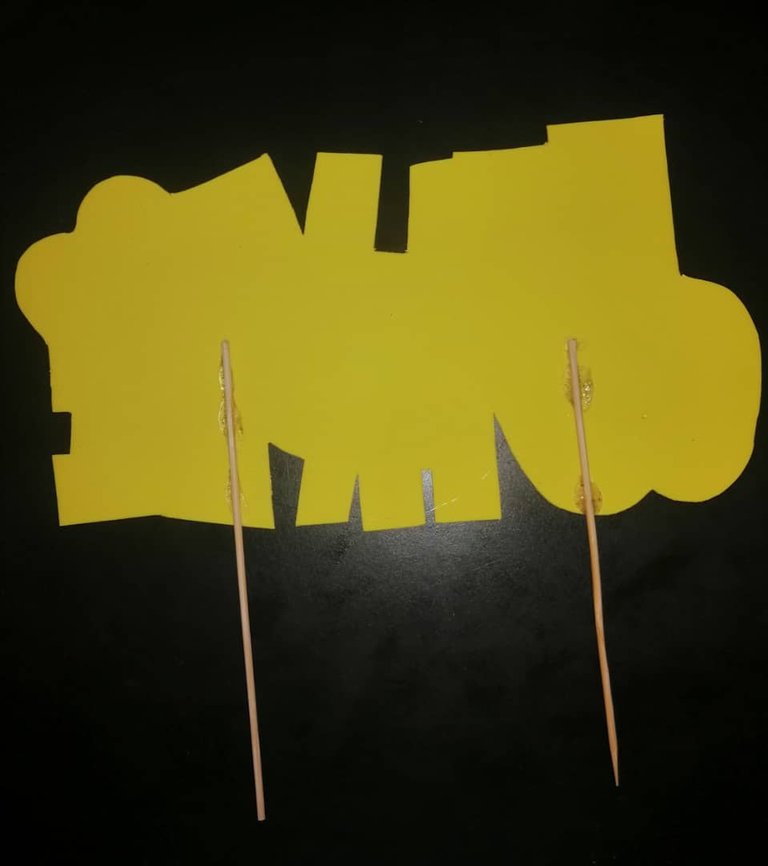
- Paso 6 Para finalizar, recortamos el toppers para que adquiera forma, y pegamos las dos mitades de los palillos de altura por detrás del mismo.
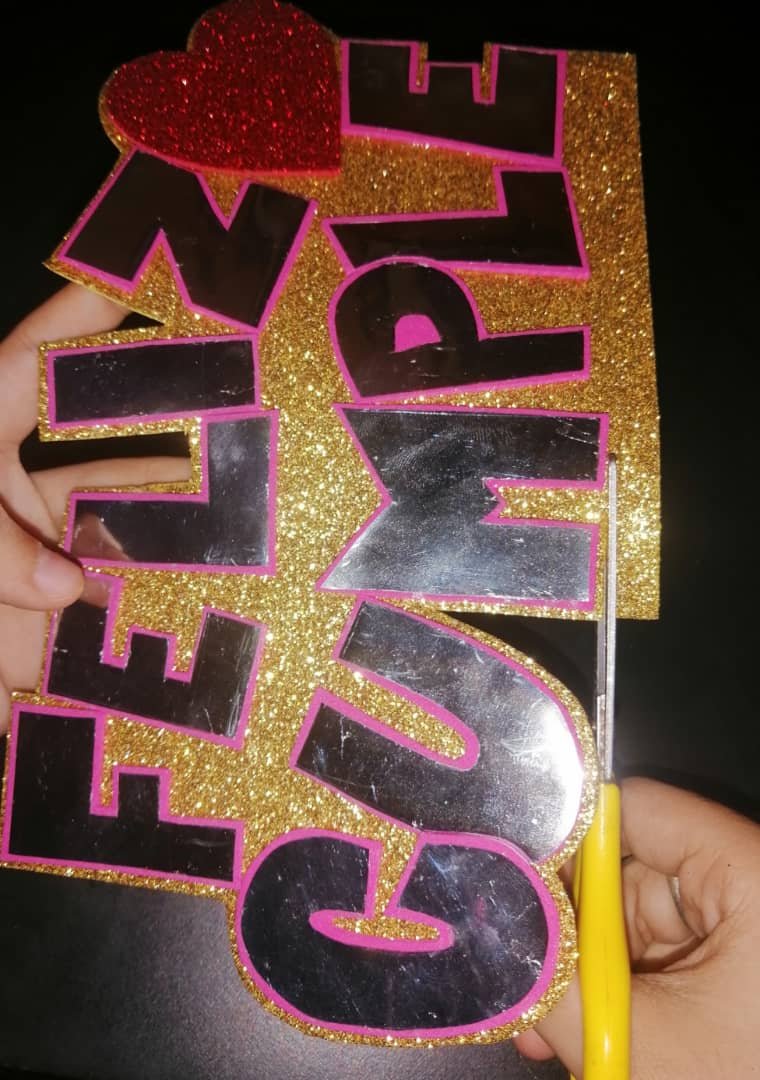
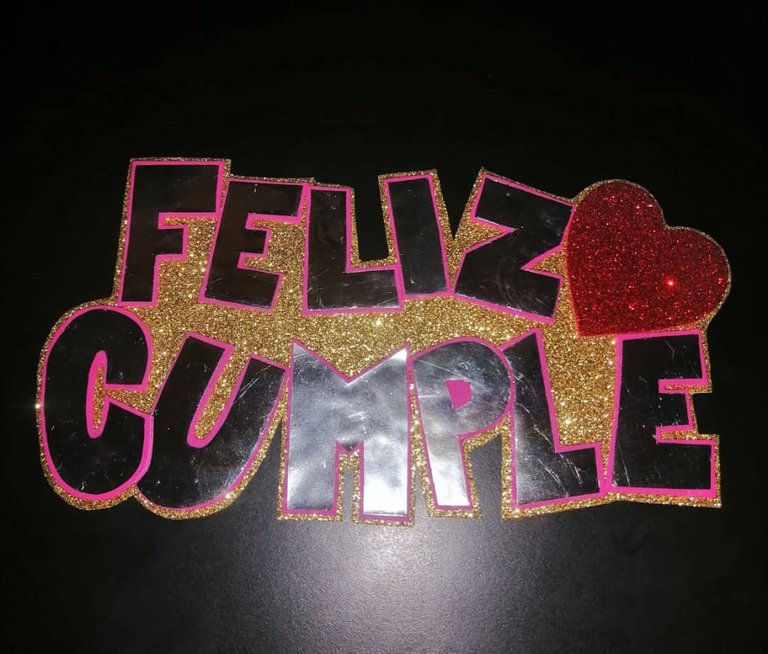
- Step 6 To finish, we cut the toppers so that it acquires shape, and glue the two halves of the tall toothpicks behind it.
Nuevamente con ustedes gente bonita, con el diseño y elaboración de las más hermosas manualidades, para cualquier tipo de ocasión. Seguimos en contacto, saludos y abrazos.
Again with you beautiful people, with the design and elaboration of the most beautiful crafts, for any type of occasion. We keep in touch, greetings and hugs.
...Gracias Por Visitar...
...Thanks for visiting...
Imágenes Fotográficas, tomadas por Ronmel Nuñez.
Photographic images, taken by Ronmel Nuñez
Congratulations @nancytarojas! You have completed the following achievement on the Hive blockchain and have been rewarded with new badge(s) :
You can view your badges on your board and compare yourself to others in the Ranking
If you no longer want to receive notifications, reply to this comment with the word
STOPDo not miss the last post from @hivebuzz: