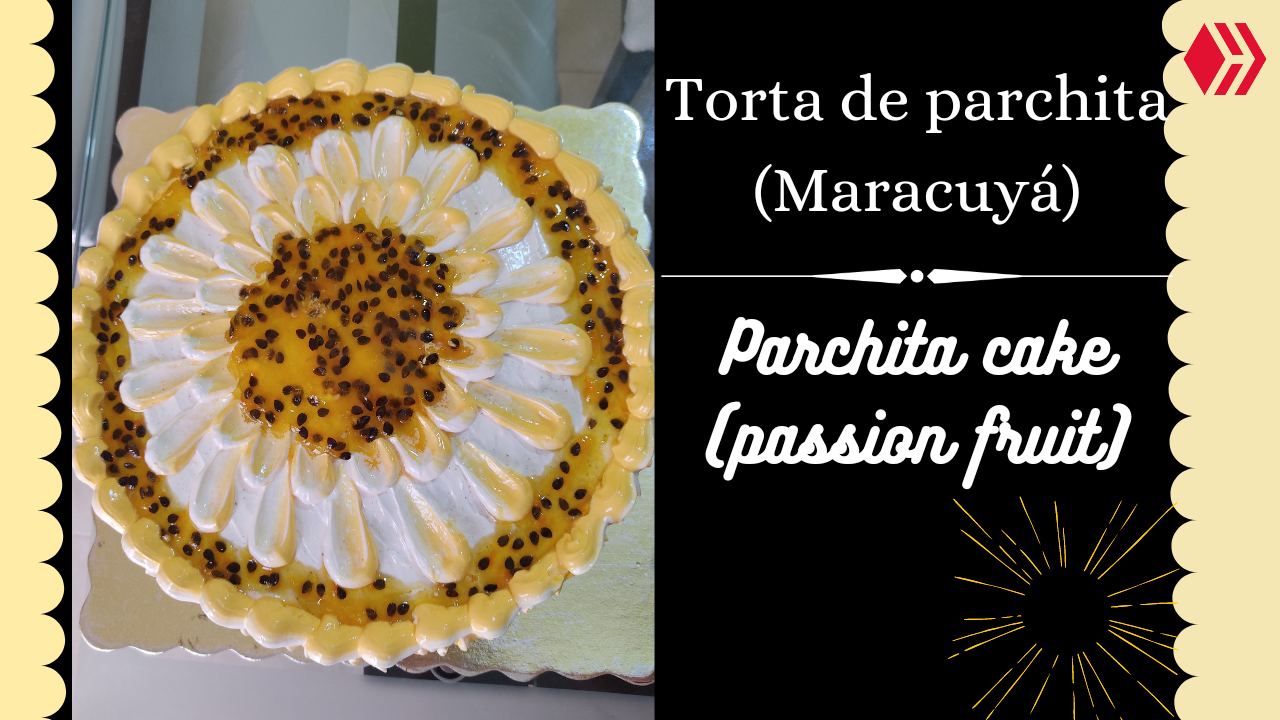
Hola chicos de Hive, espero estén teniendo un bonito Miércoles. Hoy les traigo una receta de lo que más me gusta hacer, la torta de parchita es una de mis favoritas y en ésta oportunidad me tocó hacerla para una amiga en su cumpleaños ☺️❤️.
Hi Hive guys, I hope you are having a nice Wednesday. Today I bring you a recipe of what I like to make the most, parchita cake is one of my favorites and this time I had to make it for a friend on her birthday ☺️❤️.

EMPECEMOS! 🍽️
LET'S GET STARTED! 🍽️

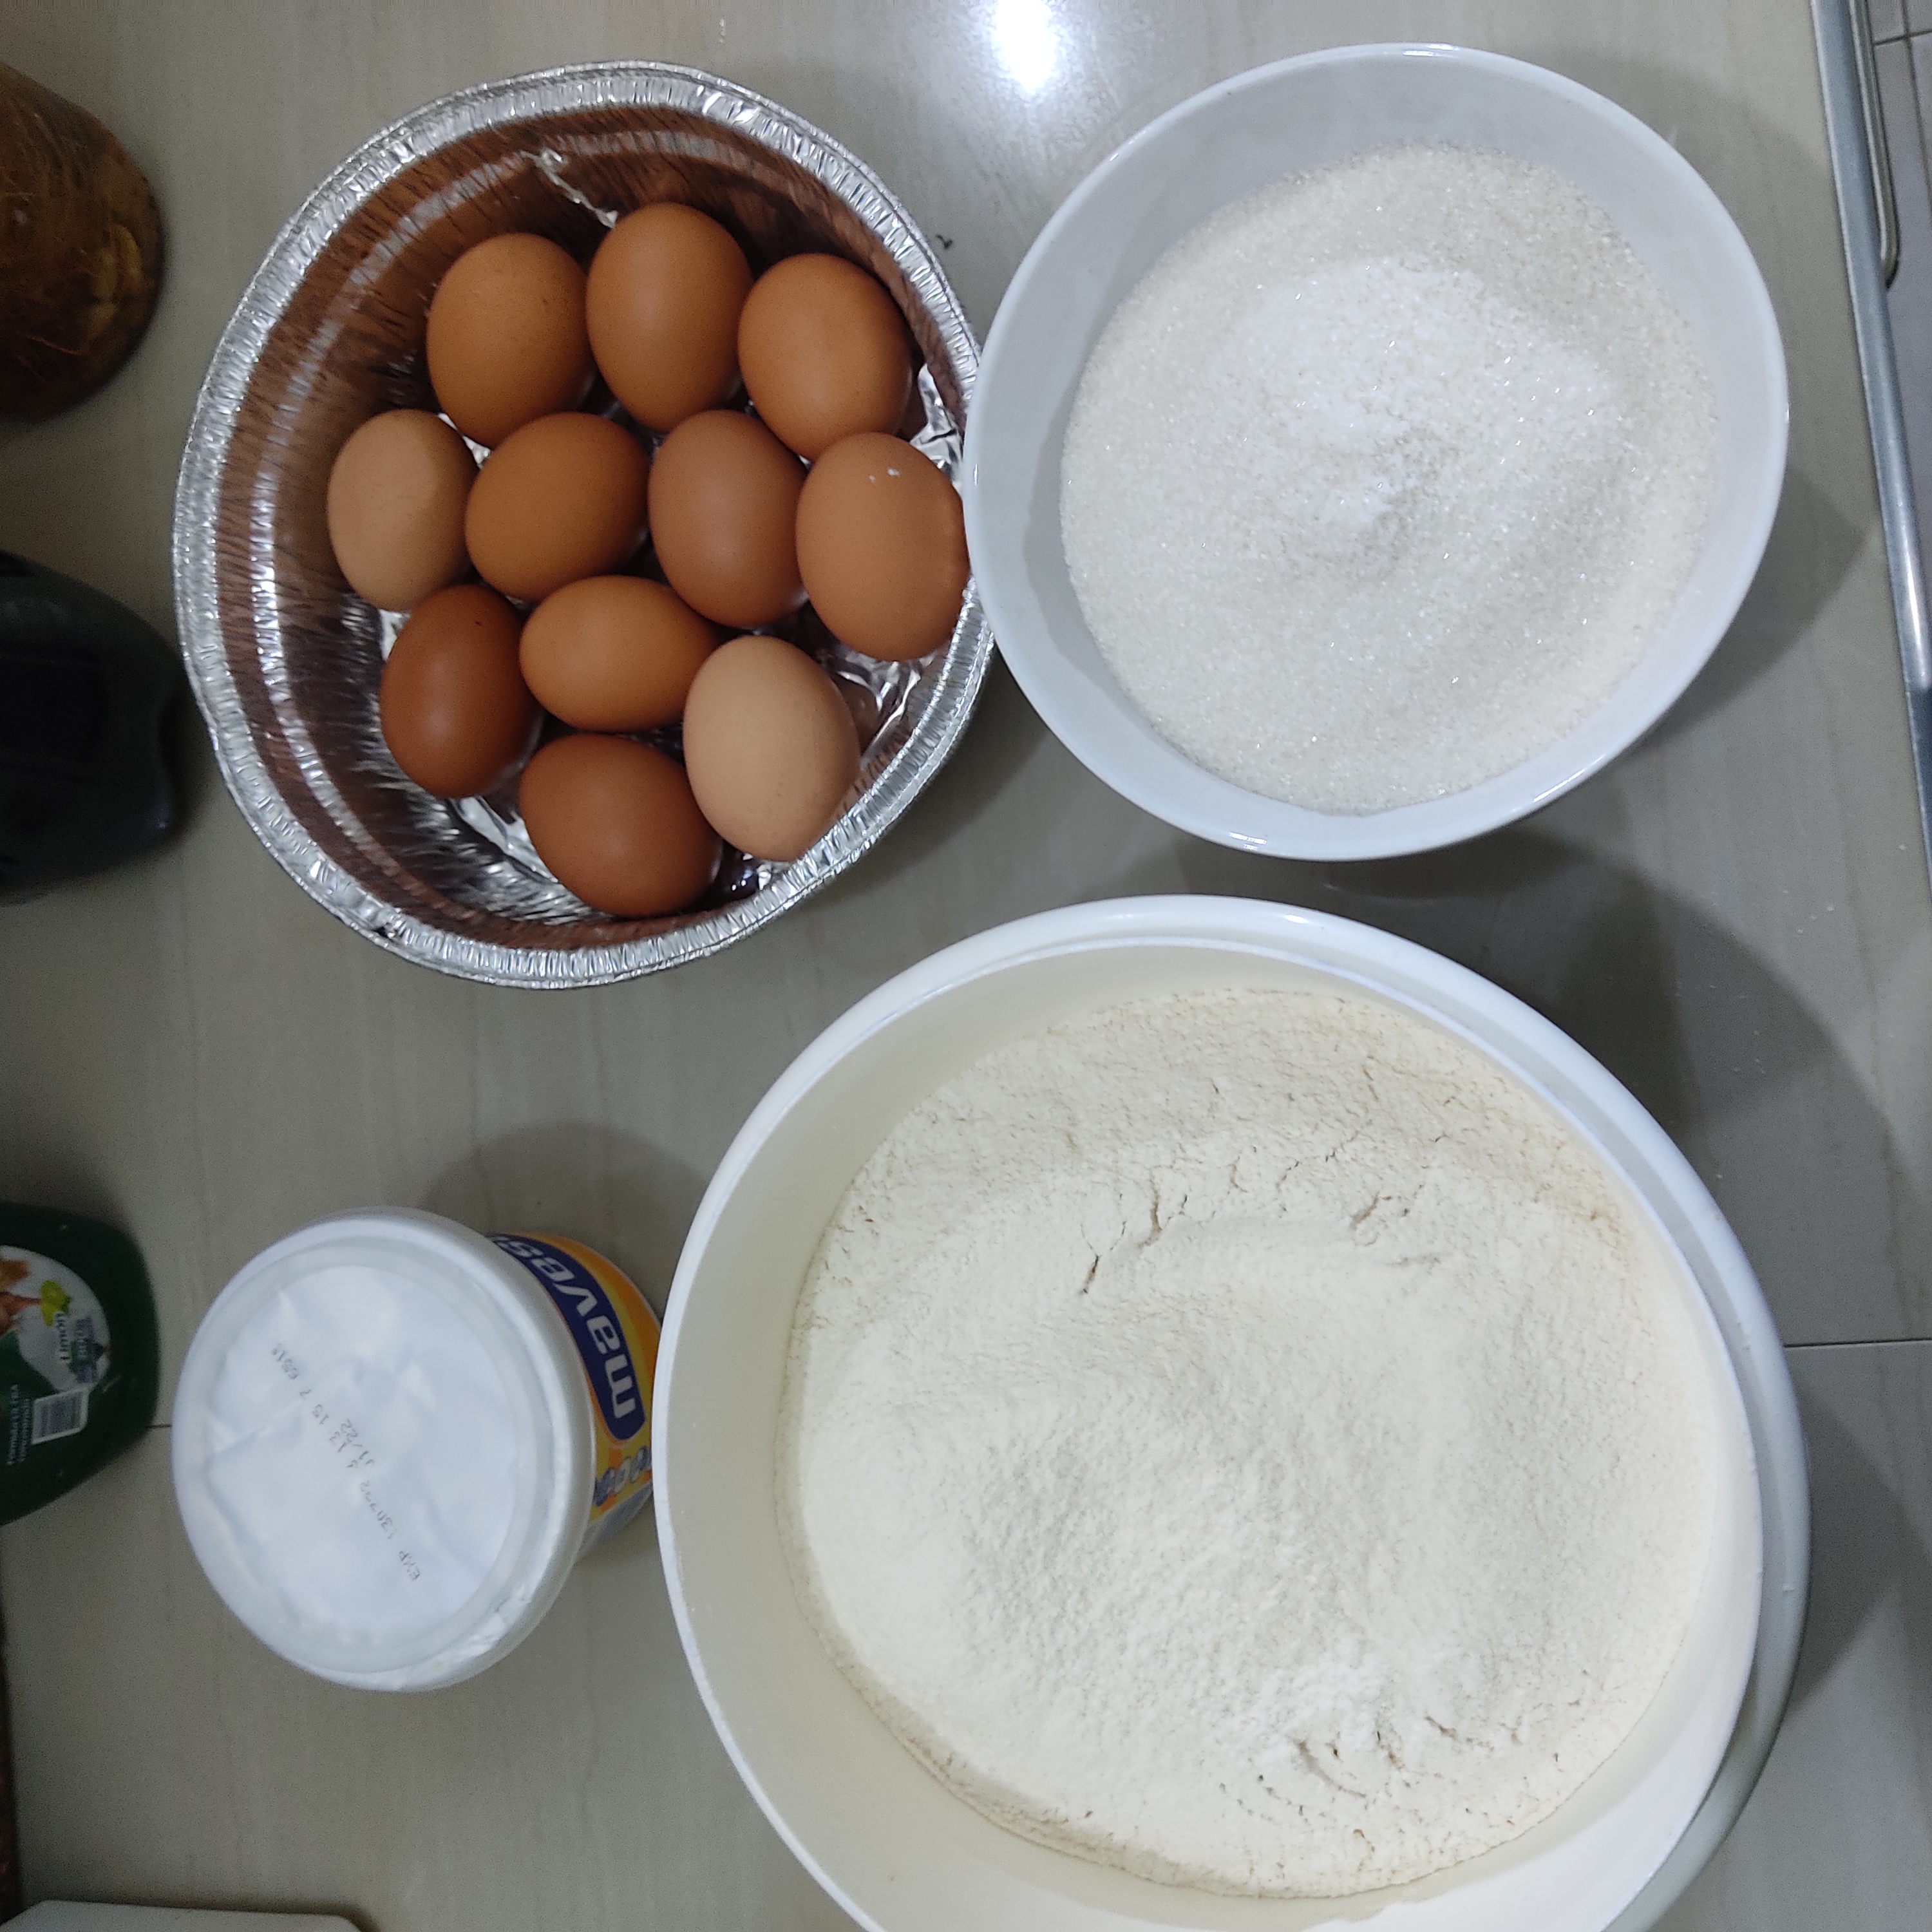
• Parchita (maracuyá)
• Azúcar
• Harina de trigo
• Mantequilla
• Huevos
• Esencia de vainilla
• Polvo de hornear
• Parchita (passion fruit)
• Sugar
• Wheat flour
• Butter
• Eggs
• Vanilla essence
• Baking powder

Para el jugo de Parchita / For the Parchita juice:
Paso 1. Procedemos a sacar la pulpa de las parchitas, tiene que ser aproximadamente 3 tazas y lo batimos en la licuadora. Pero debemos dejar un poquito a parte para poder hacer la mermelada de parchita que irá en la decoración.
Step 1. We proceed to take out the pulp of the parchitas, it has to be approximately 3 cups and we beat it in the blender. But we must leave a little bit aside to be able to make the parchita jam that will go in the decoration.
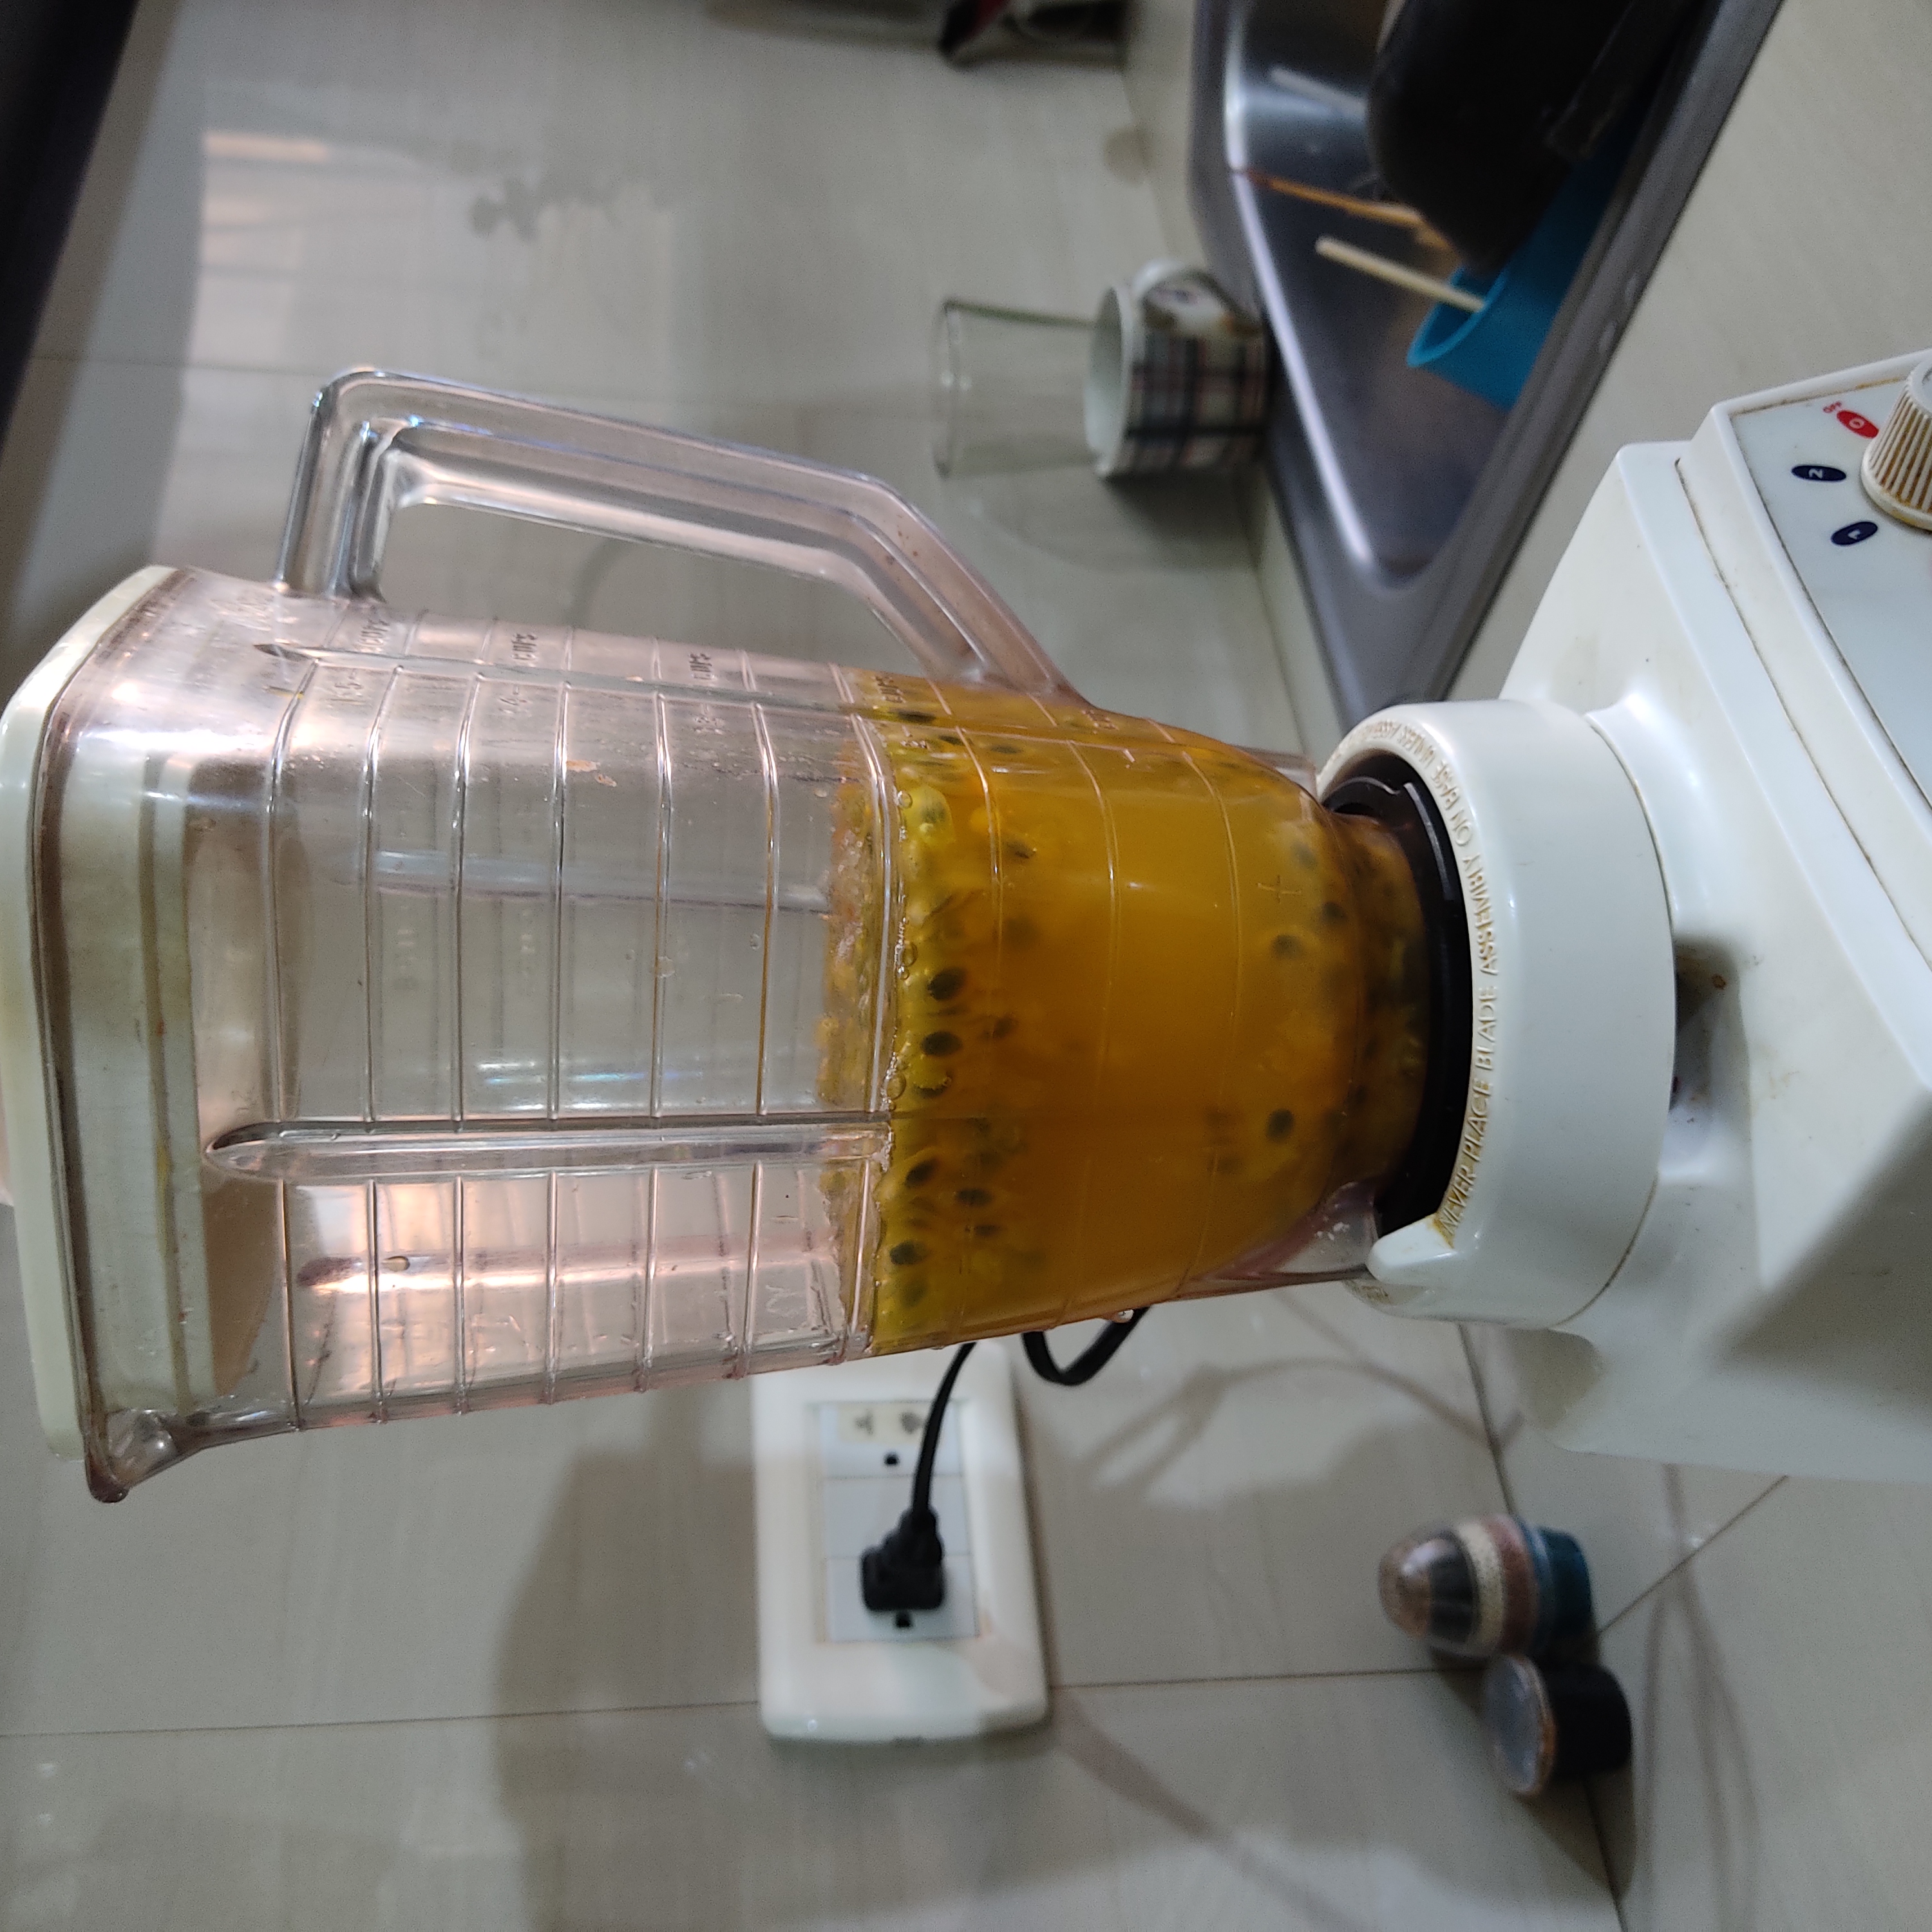
Paso 2. Luego de licuarlo procedemos a colarlo para que el líquido quedé totalmente limpio, sin semillas.
Step 2. After liquefying it, we proceed to strain it so that the liquid is completely clean, without seeds.

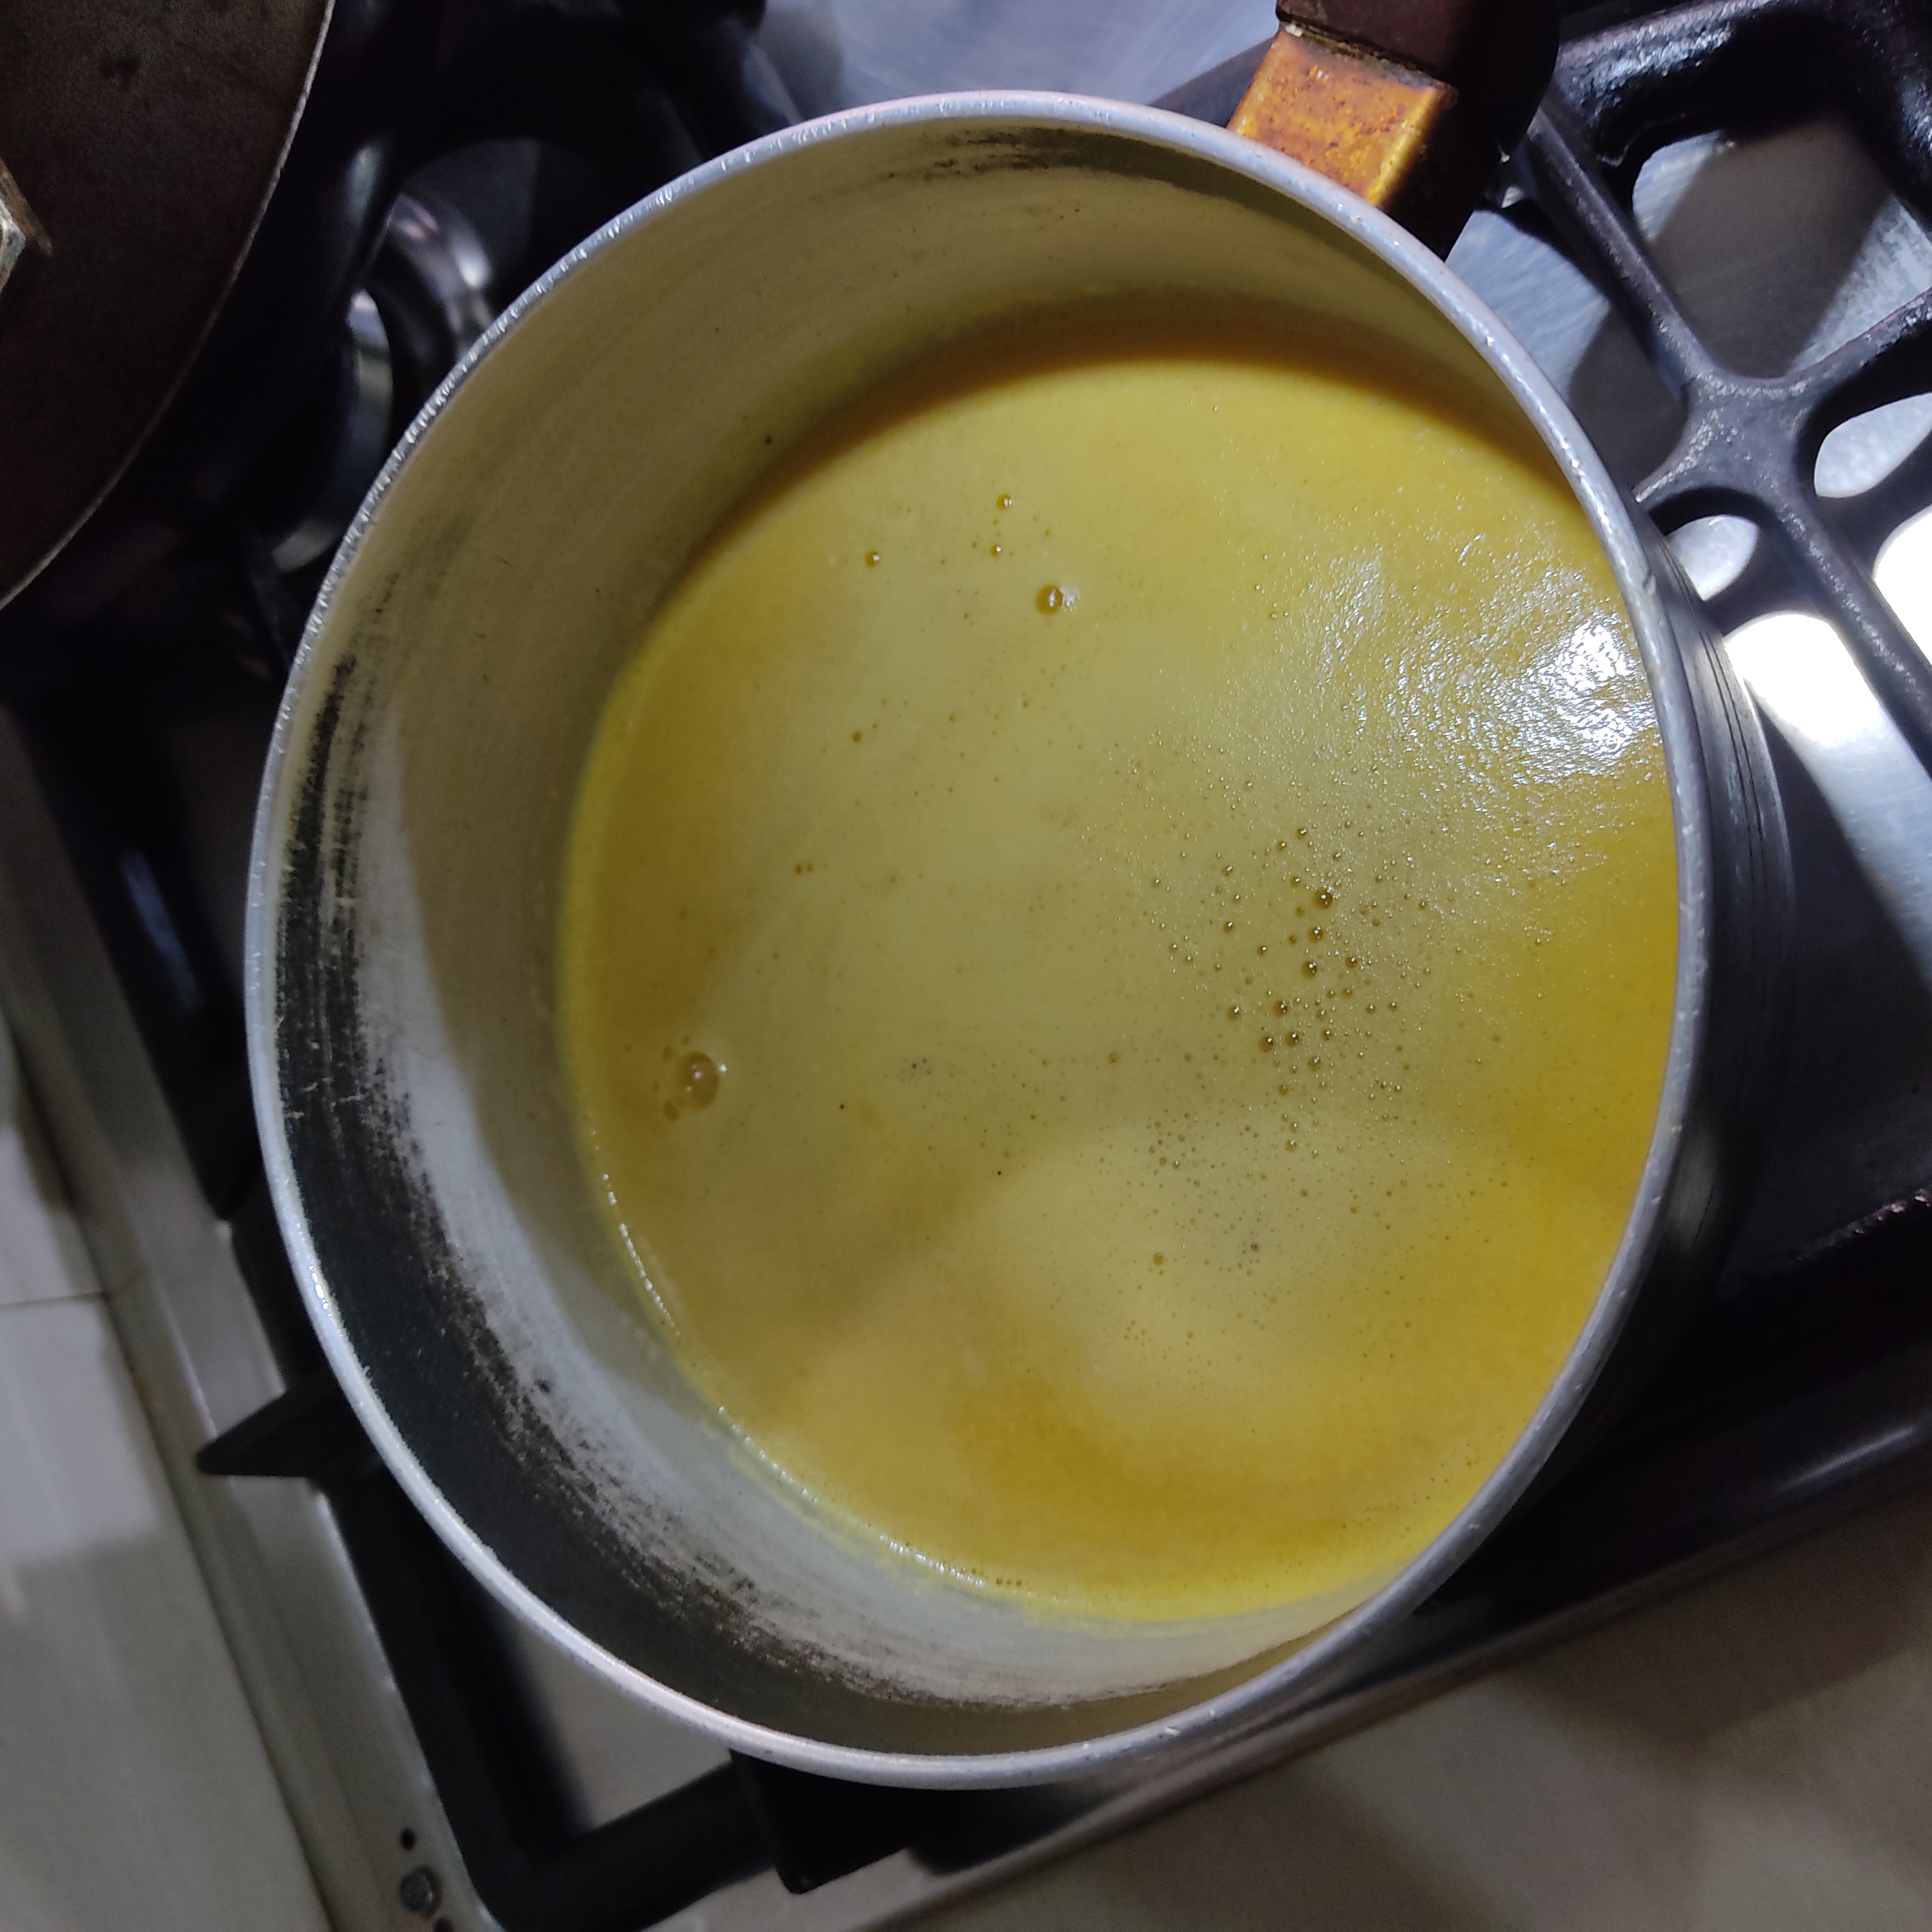
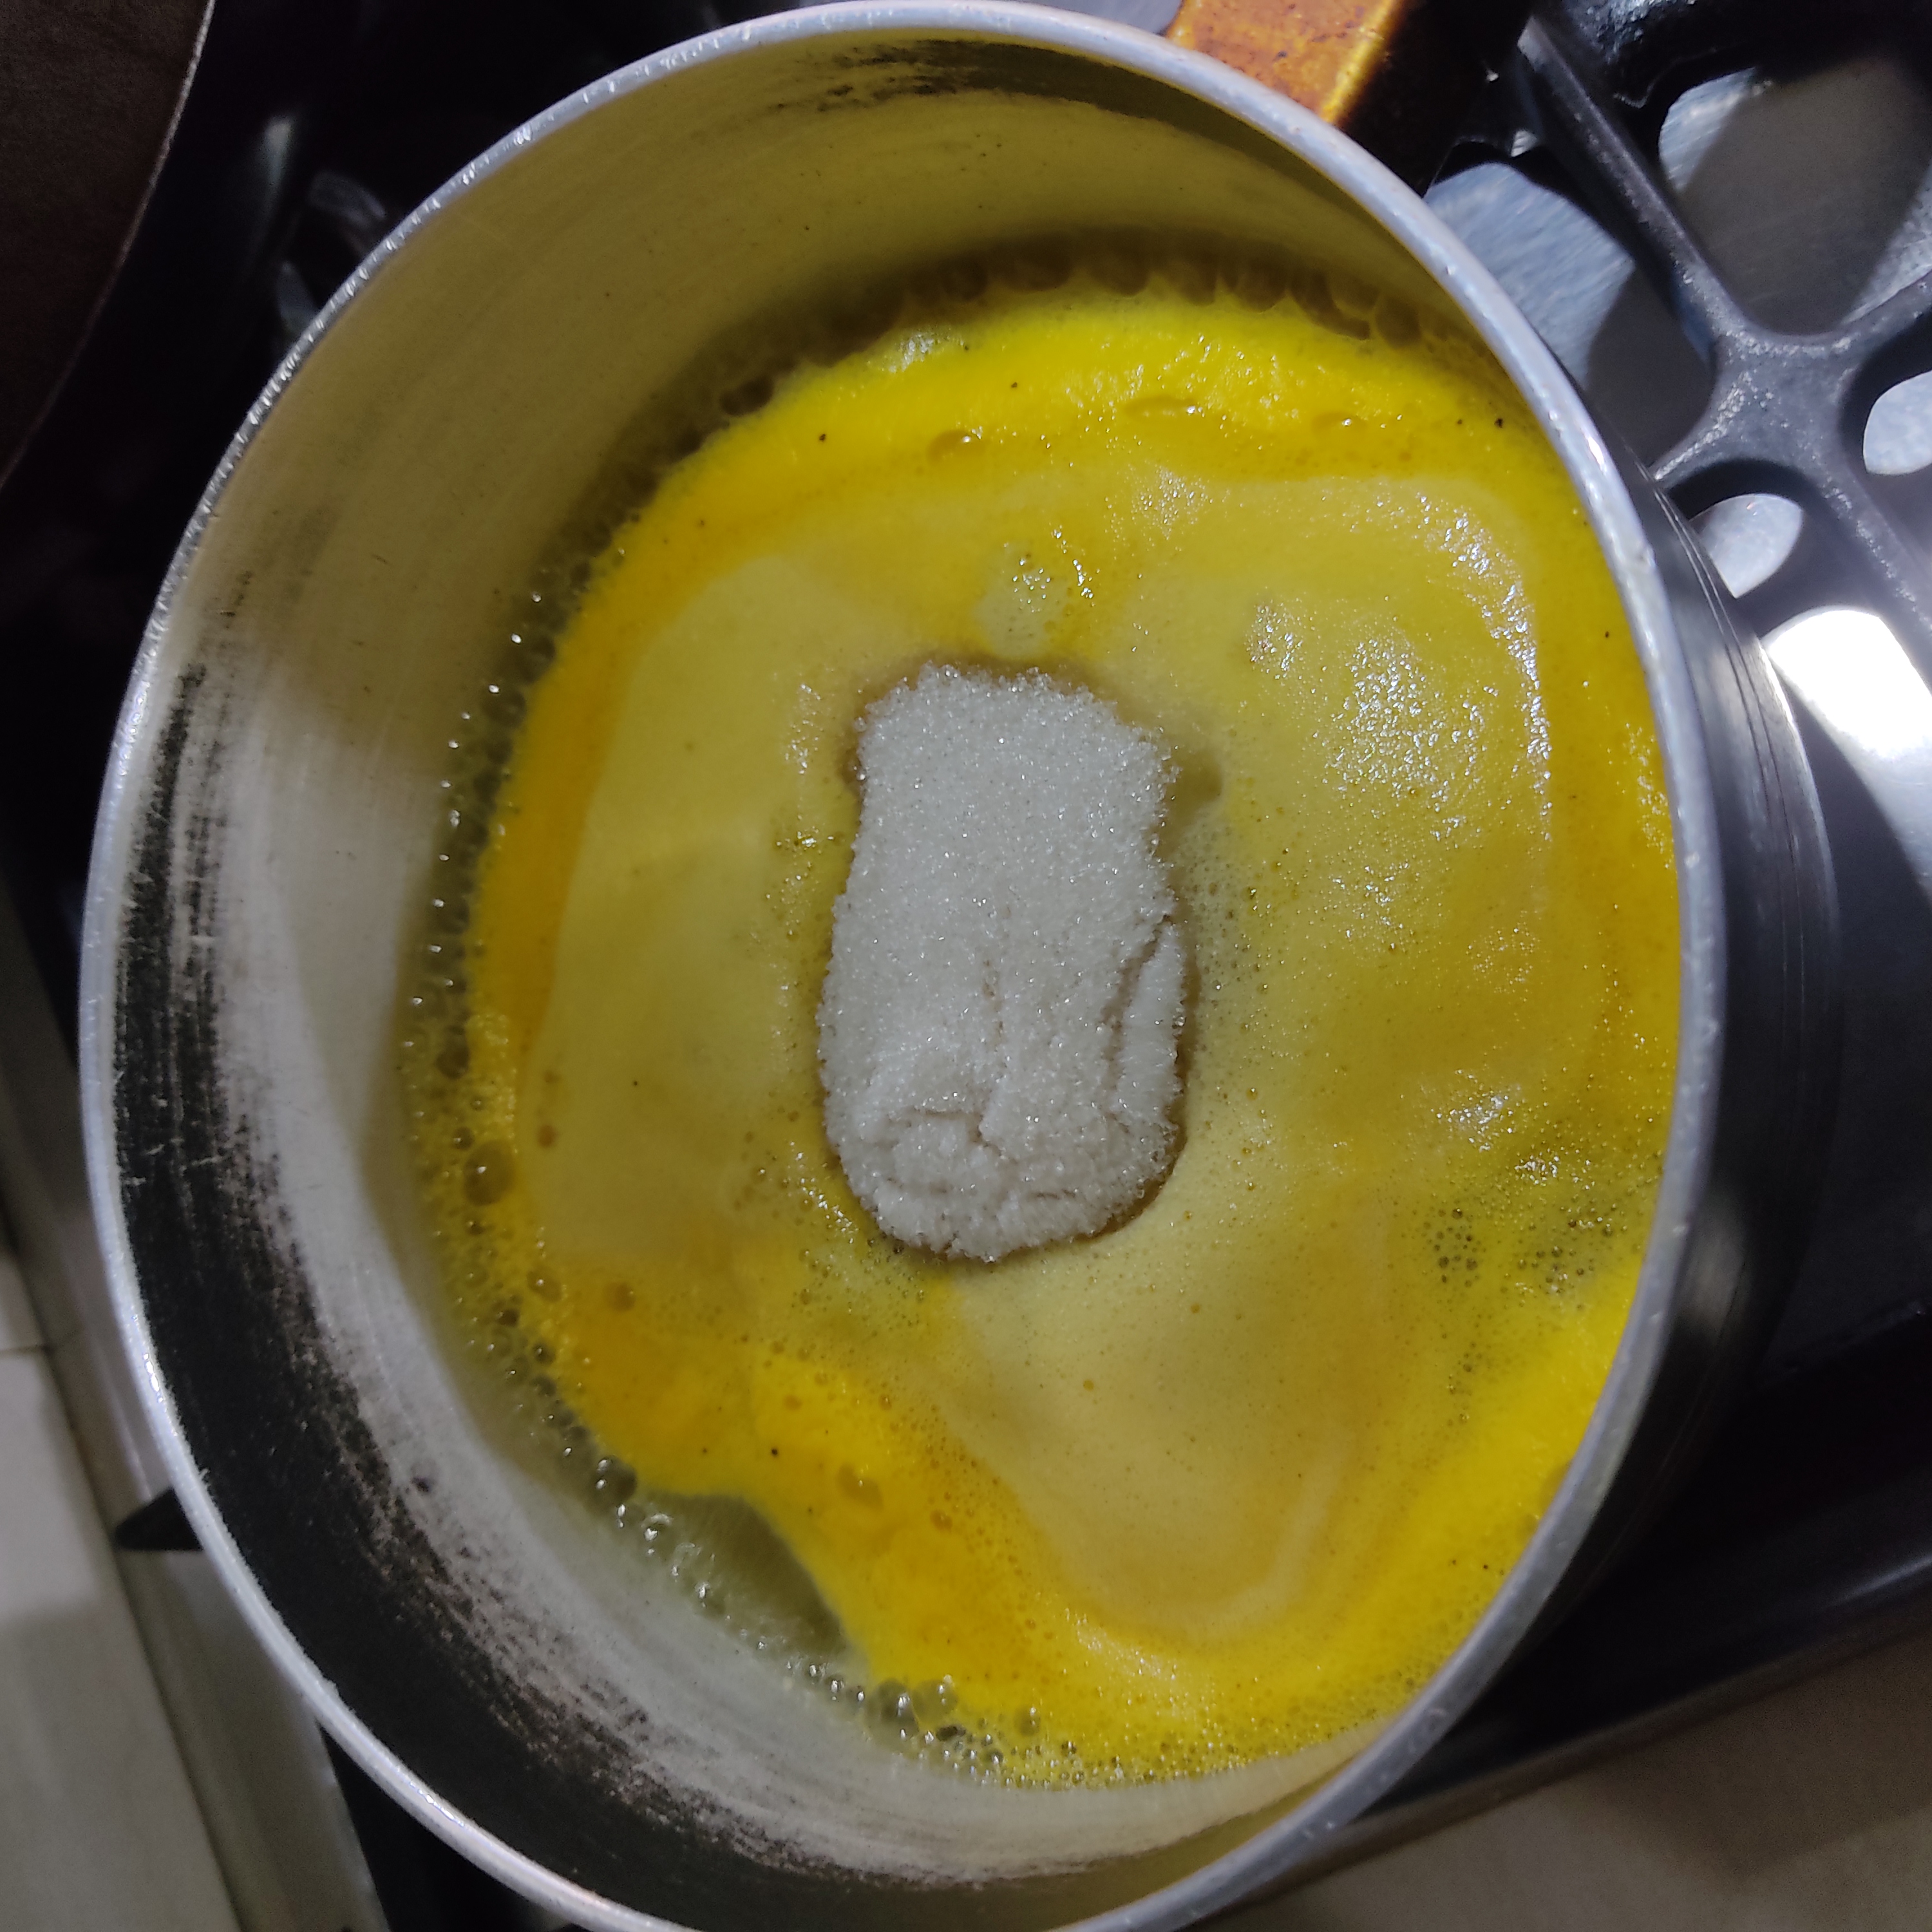
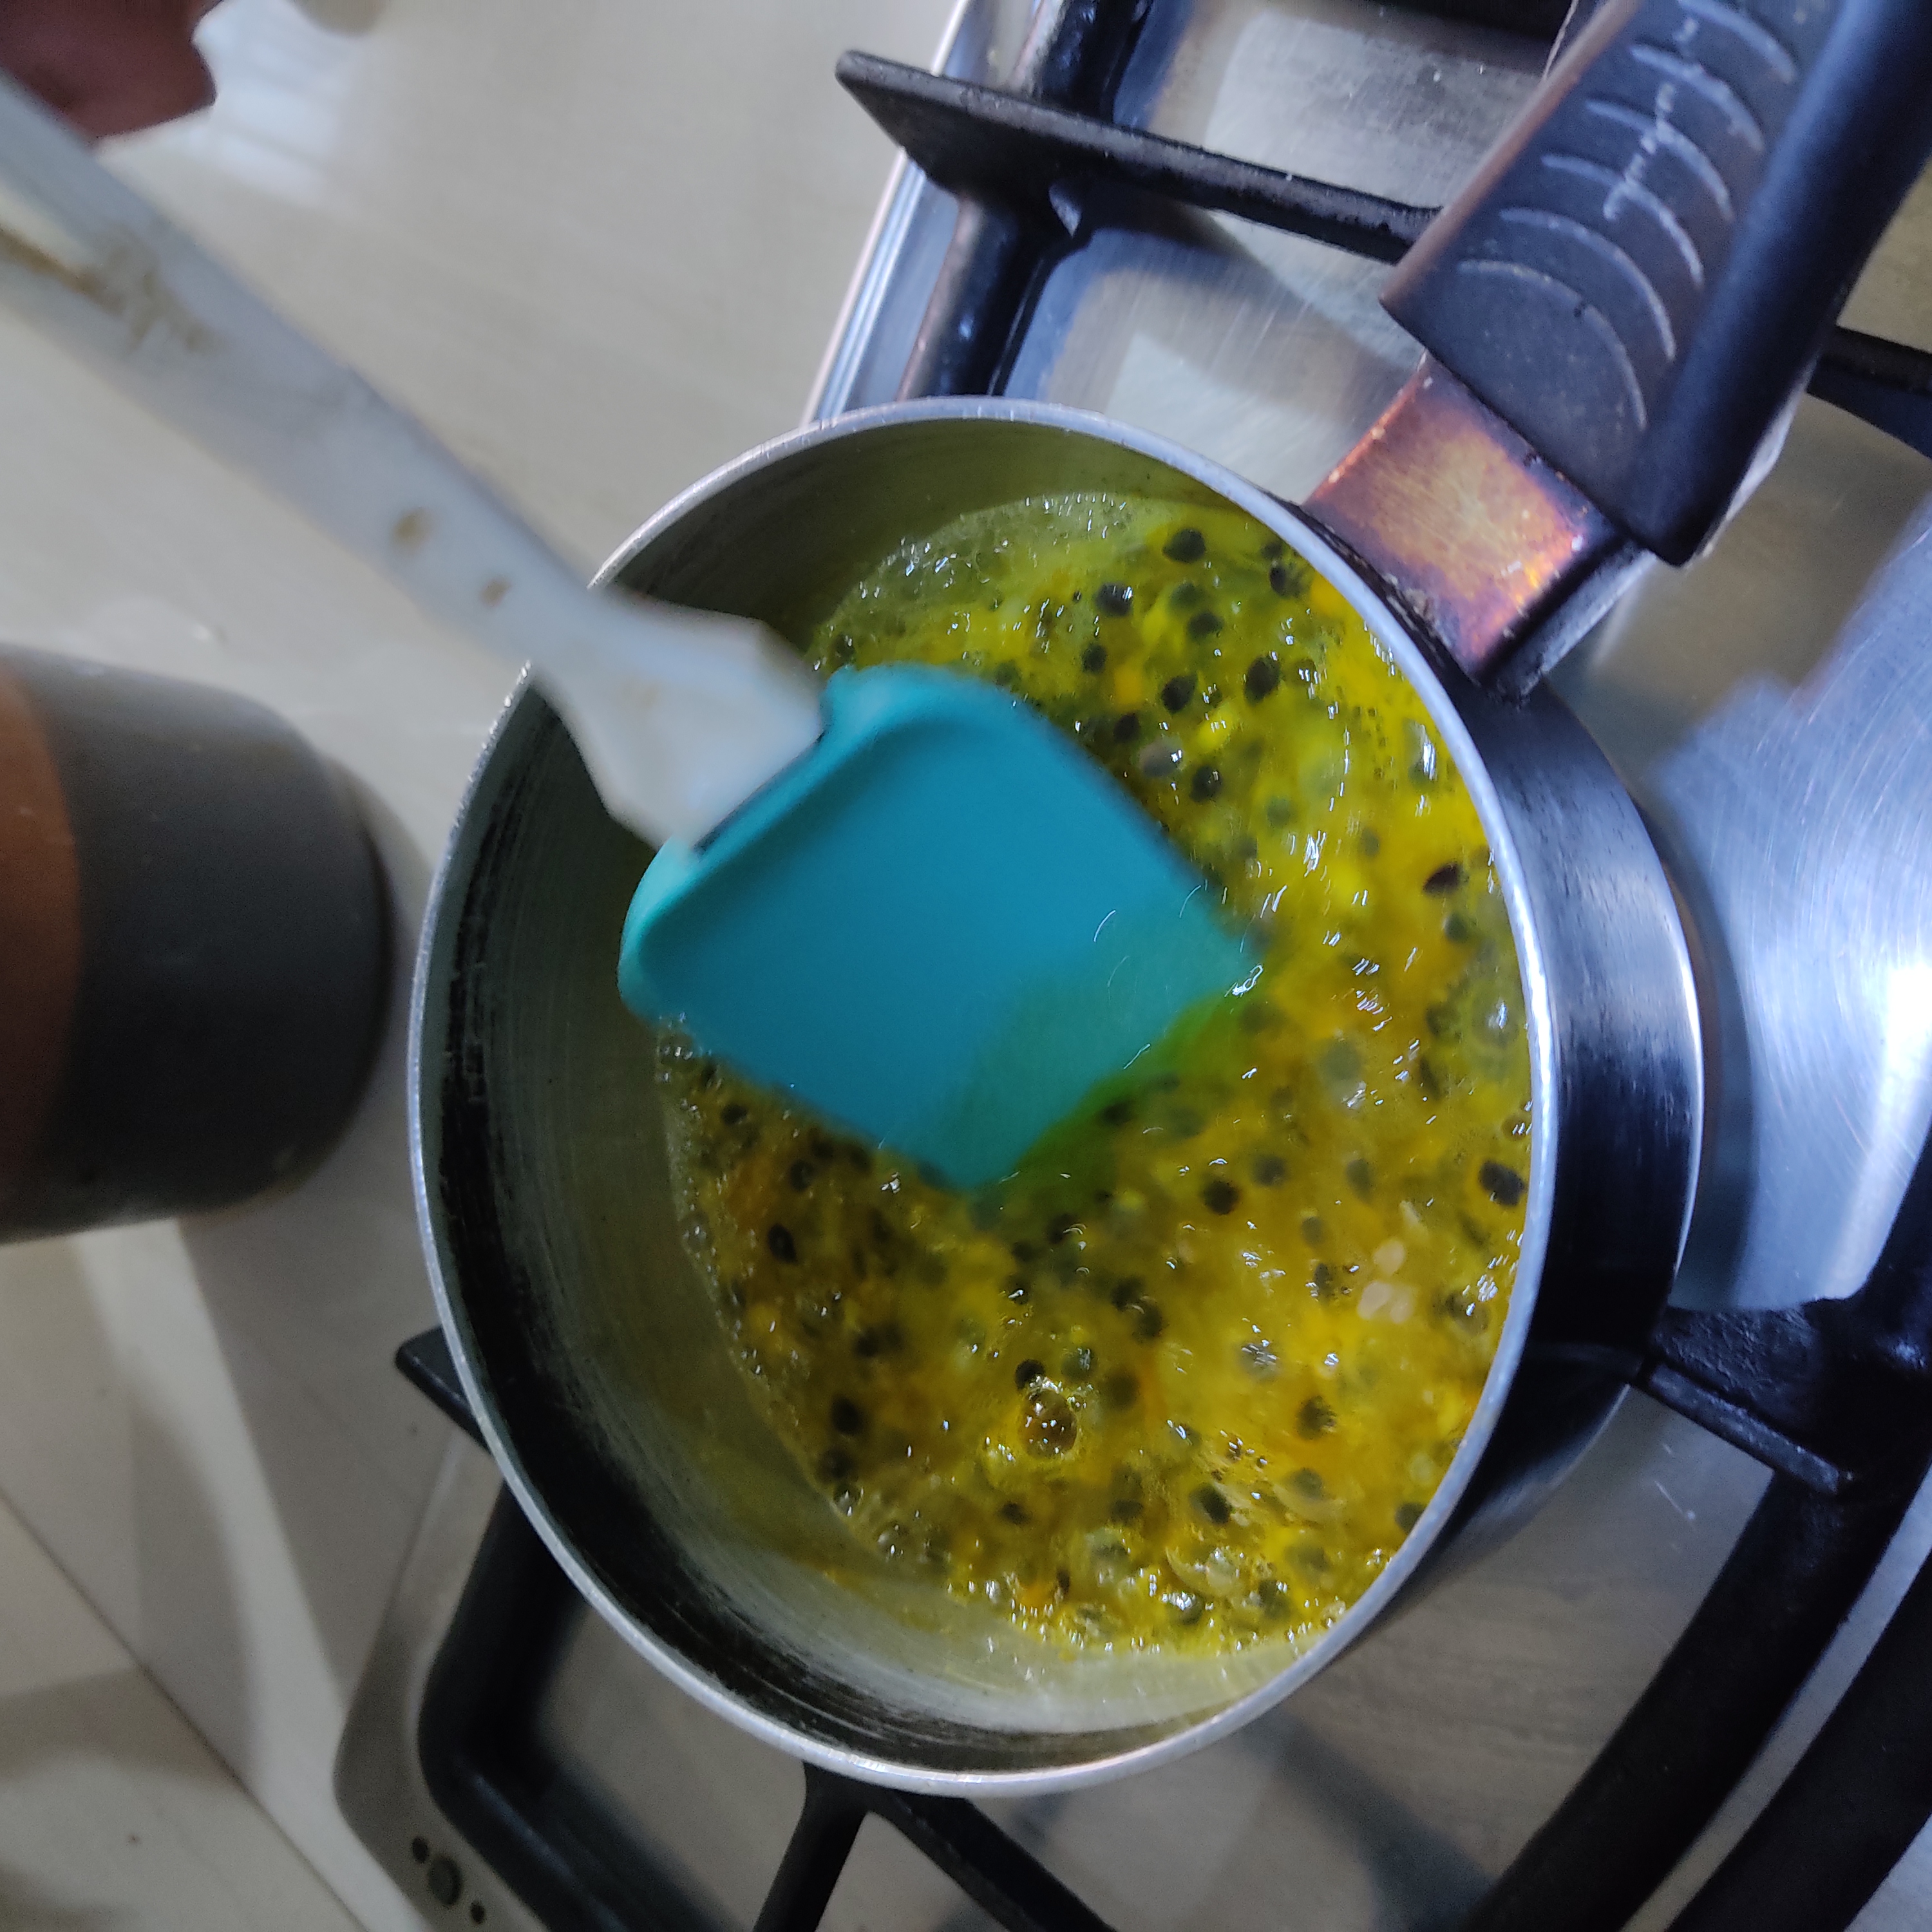
Paso 3. Colocamos nuestro jugo en una ollita a fuego lento y le agregamos taza y media de azúcar, tenemos que removerlo cada cierto tiempo para que no se pegue.
Step 3. We place our juice in a small pot over low heat and add a cup and a half of sugar, we have to stir it from time to time so that it does not stick.
 |  |  |
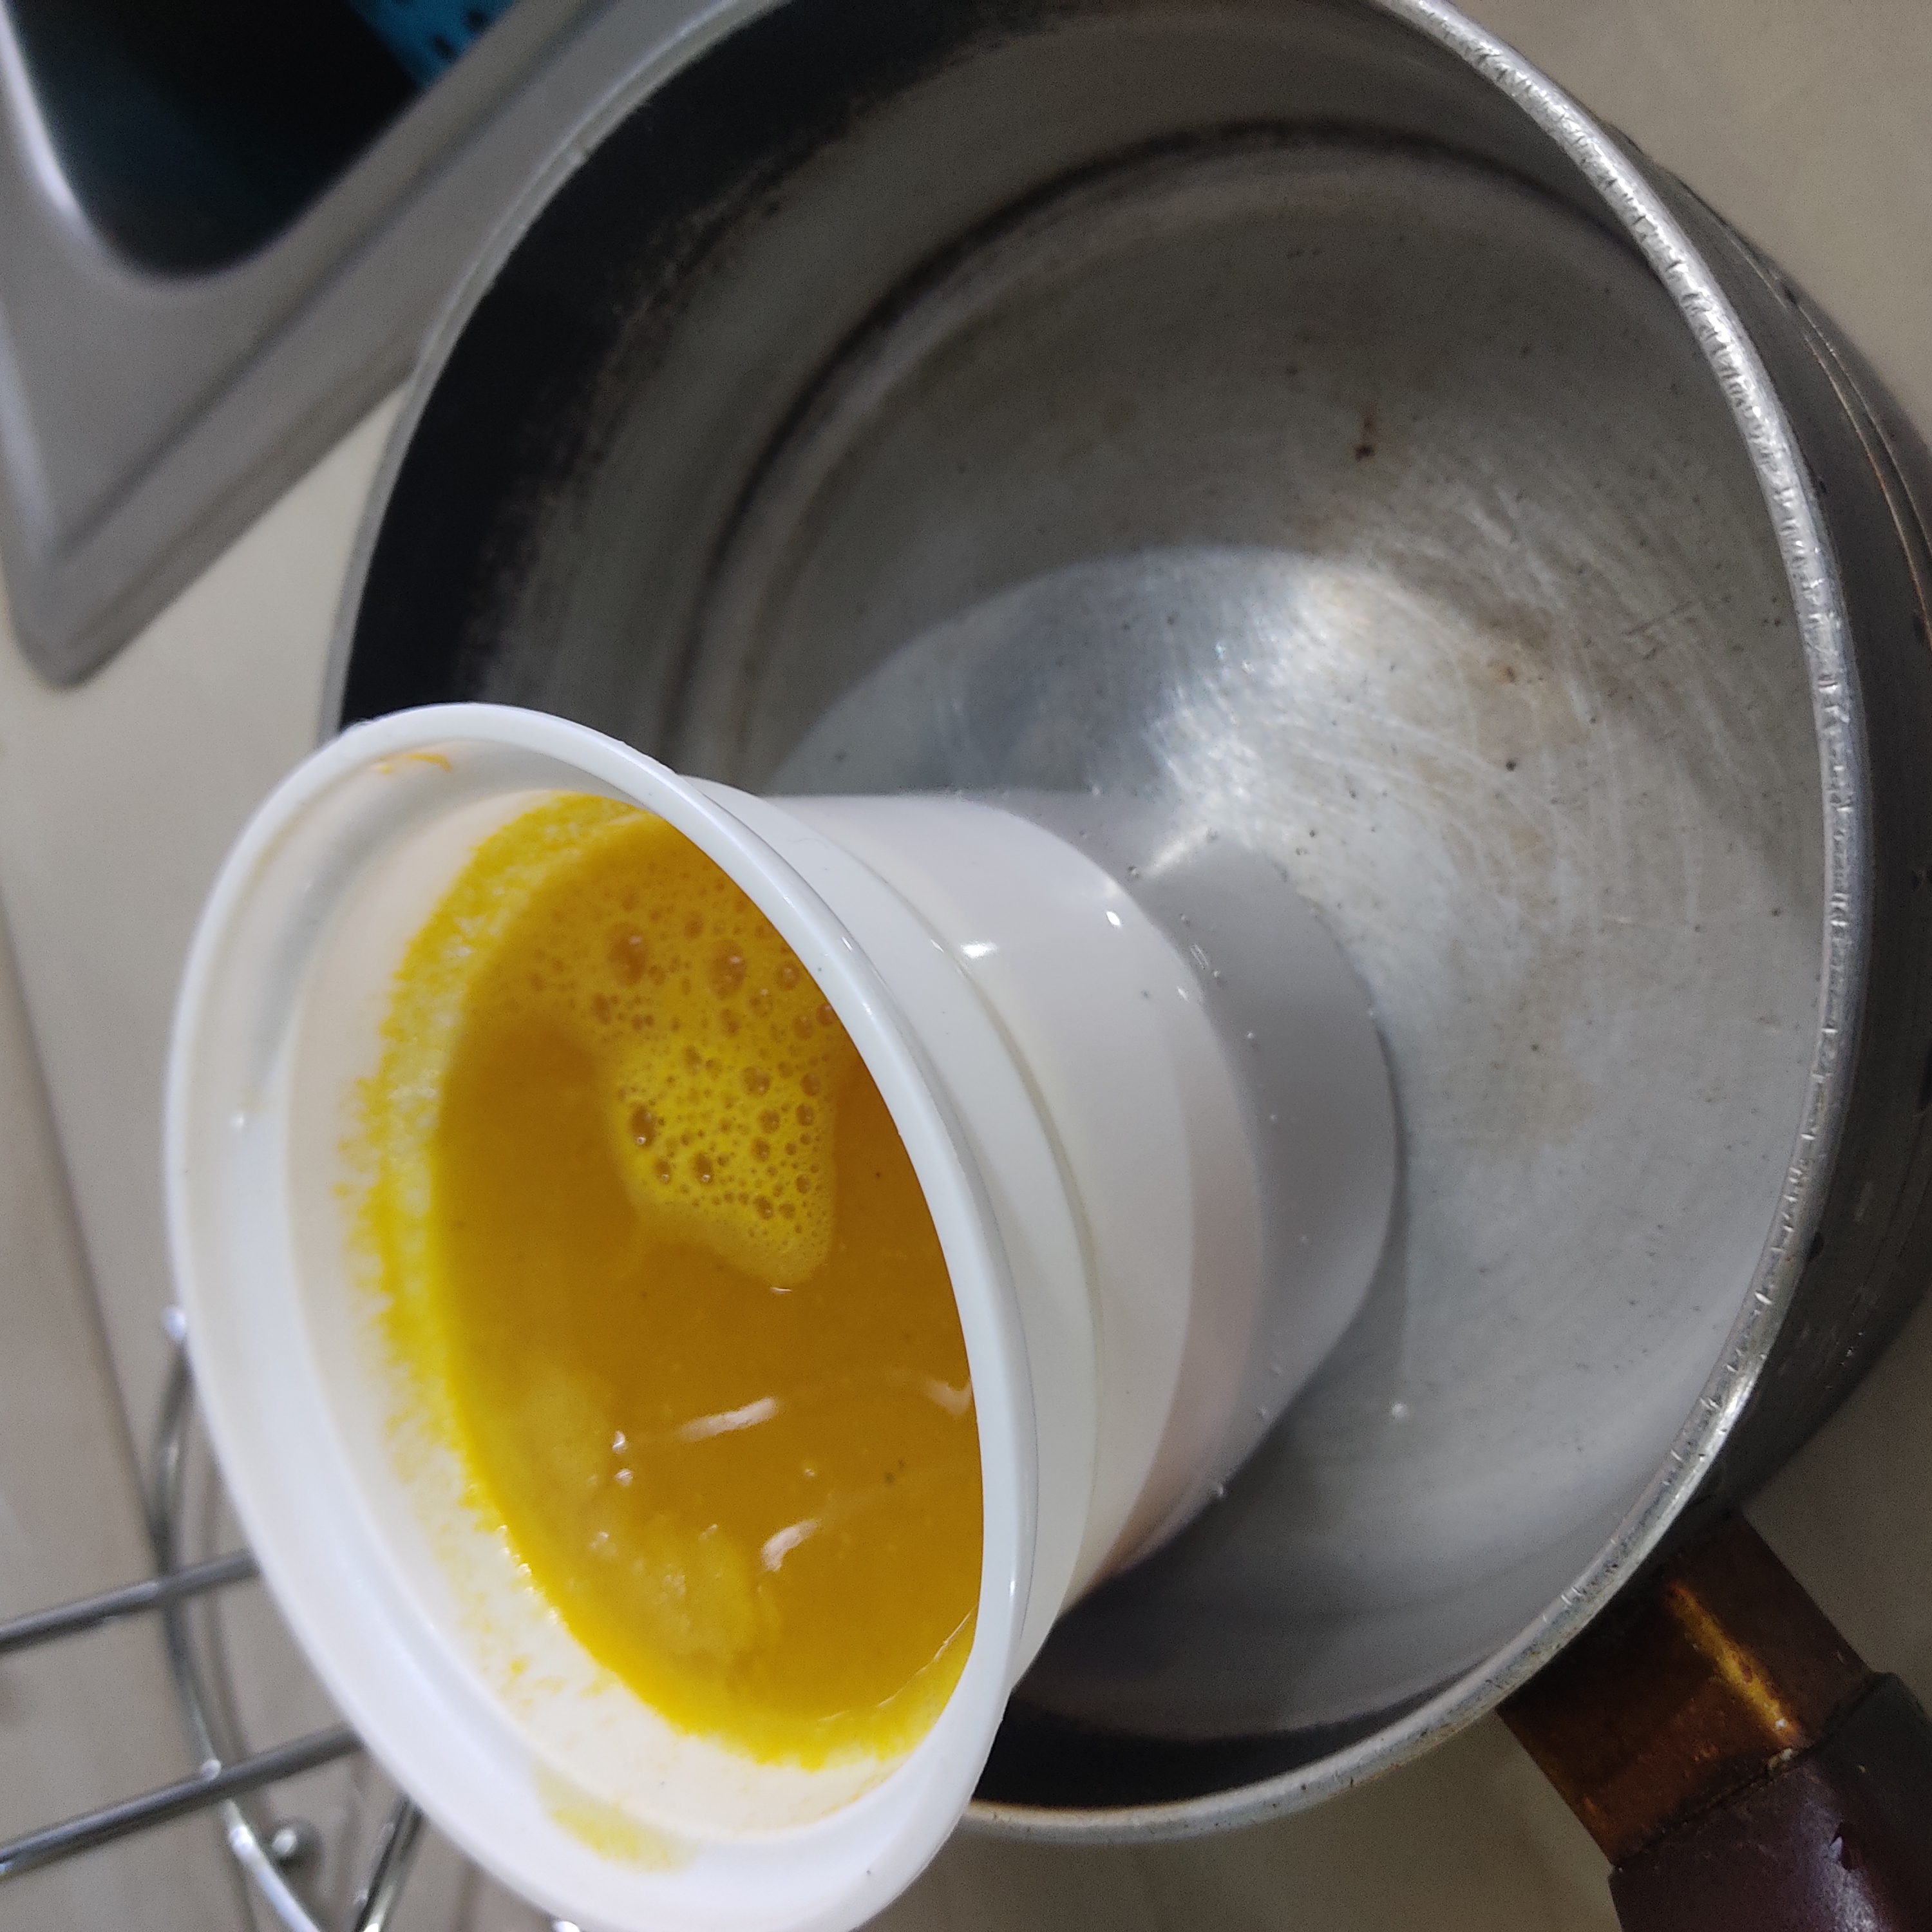
Paso 4. Luego al estar listo lo colocaremos en un envase. Agarramos un recipiente con agua y colocaremos el envase encima para que el jugo se enfríe rápido y poder trabajar con el cuando la torta esté lista.
Step 4. When it is ready, place it in a container. We take a container with water and place the container on top so that the juice cools quickly and we can work with it when the cake is ready.
Para la mermelada / For the jam:
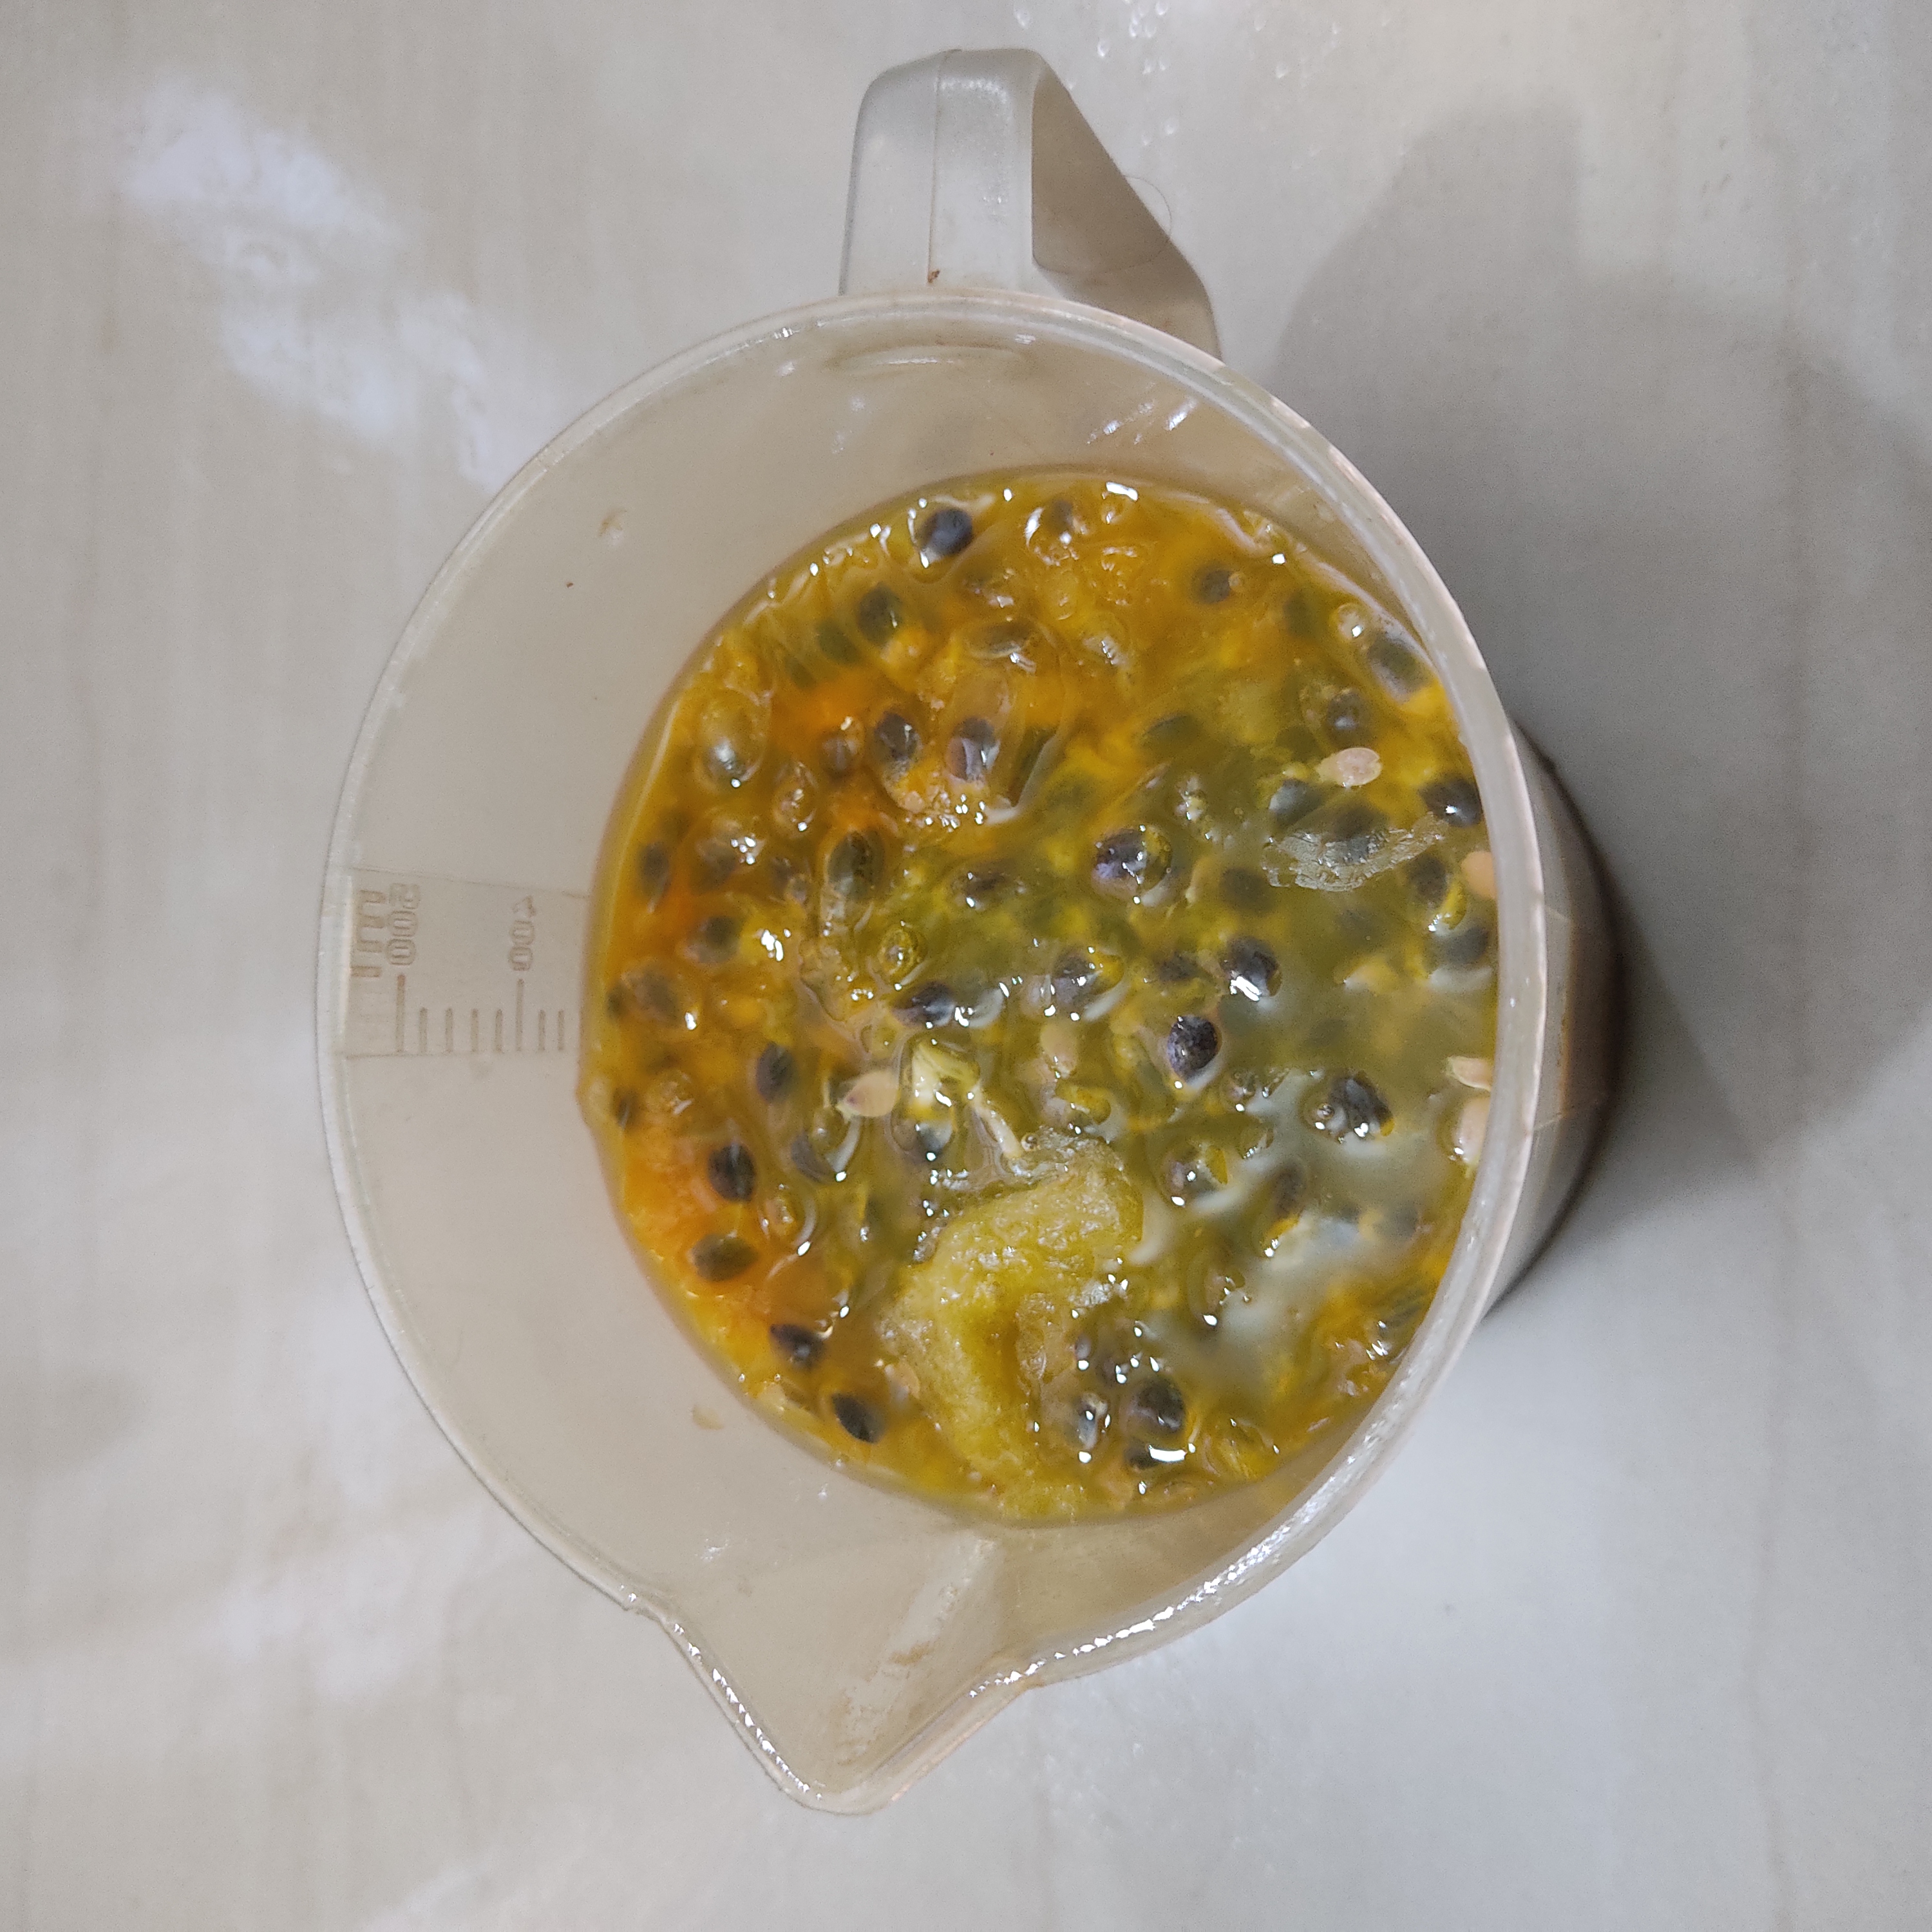
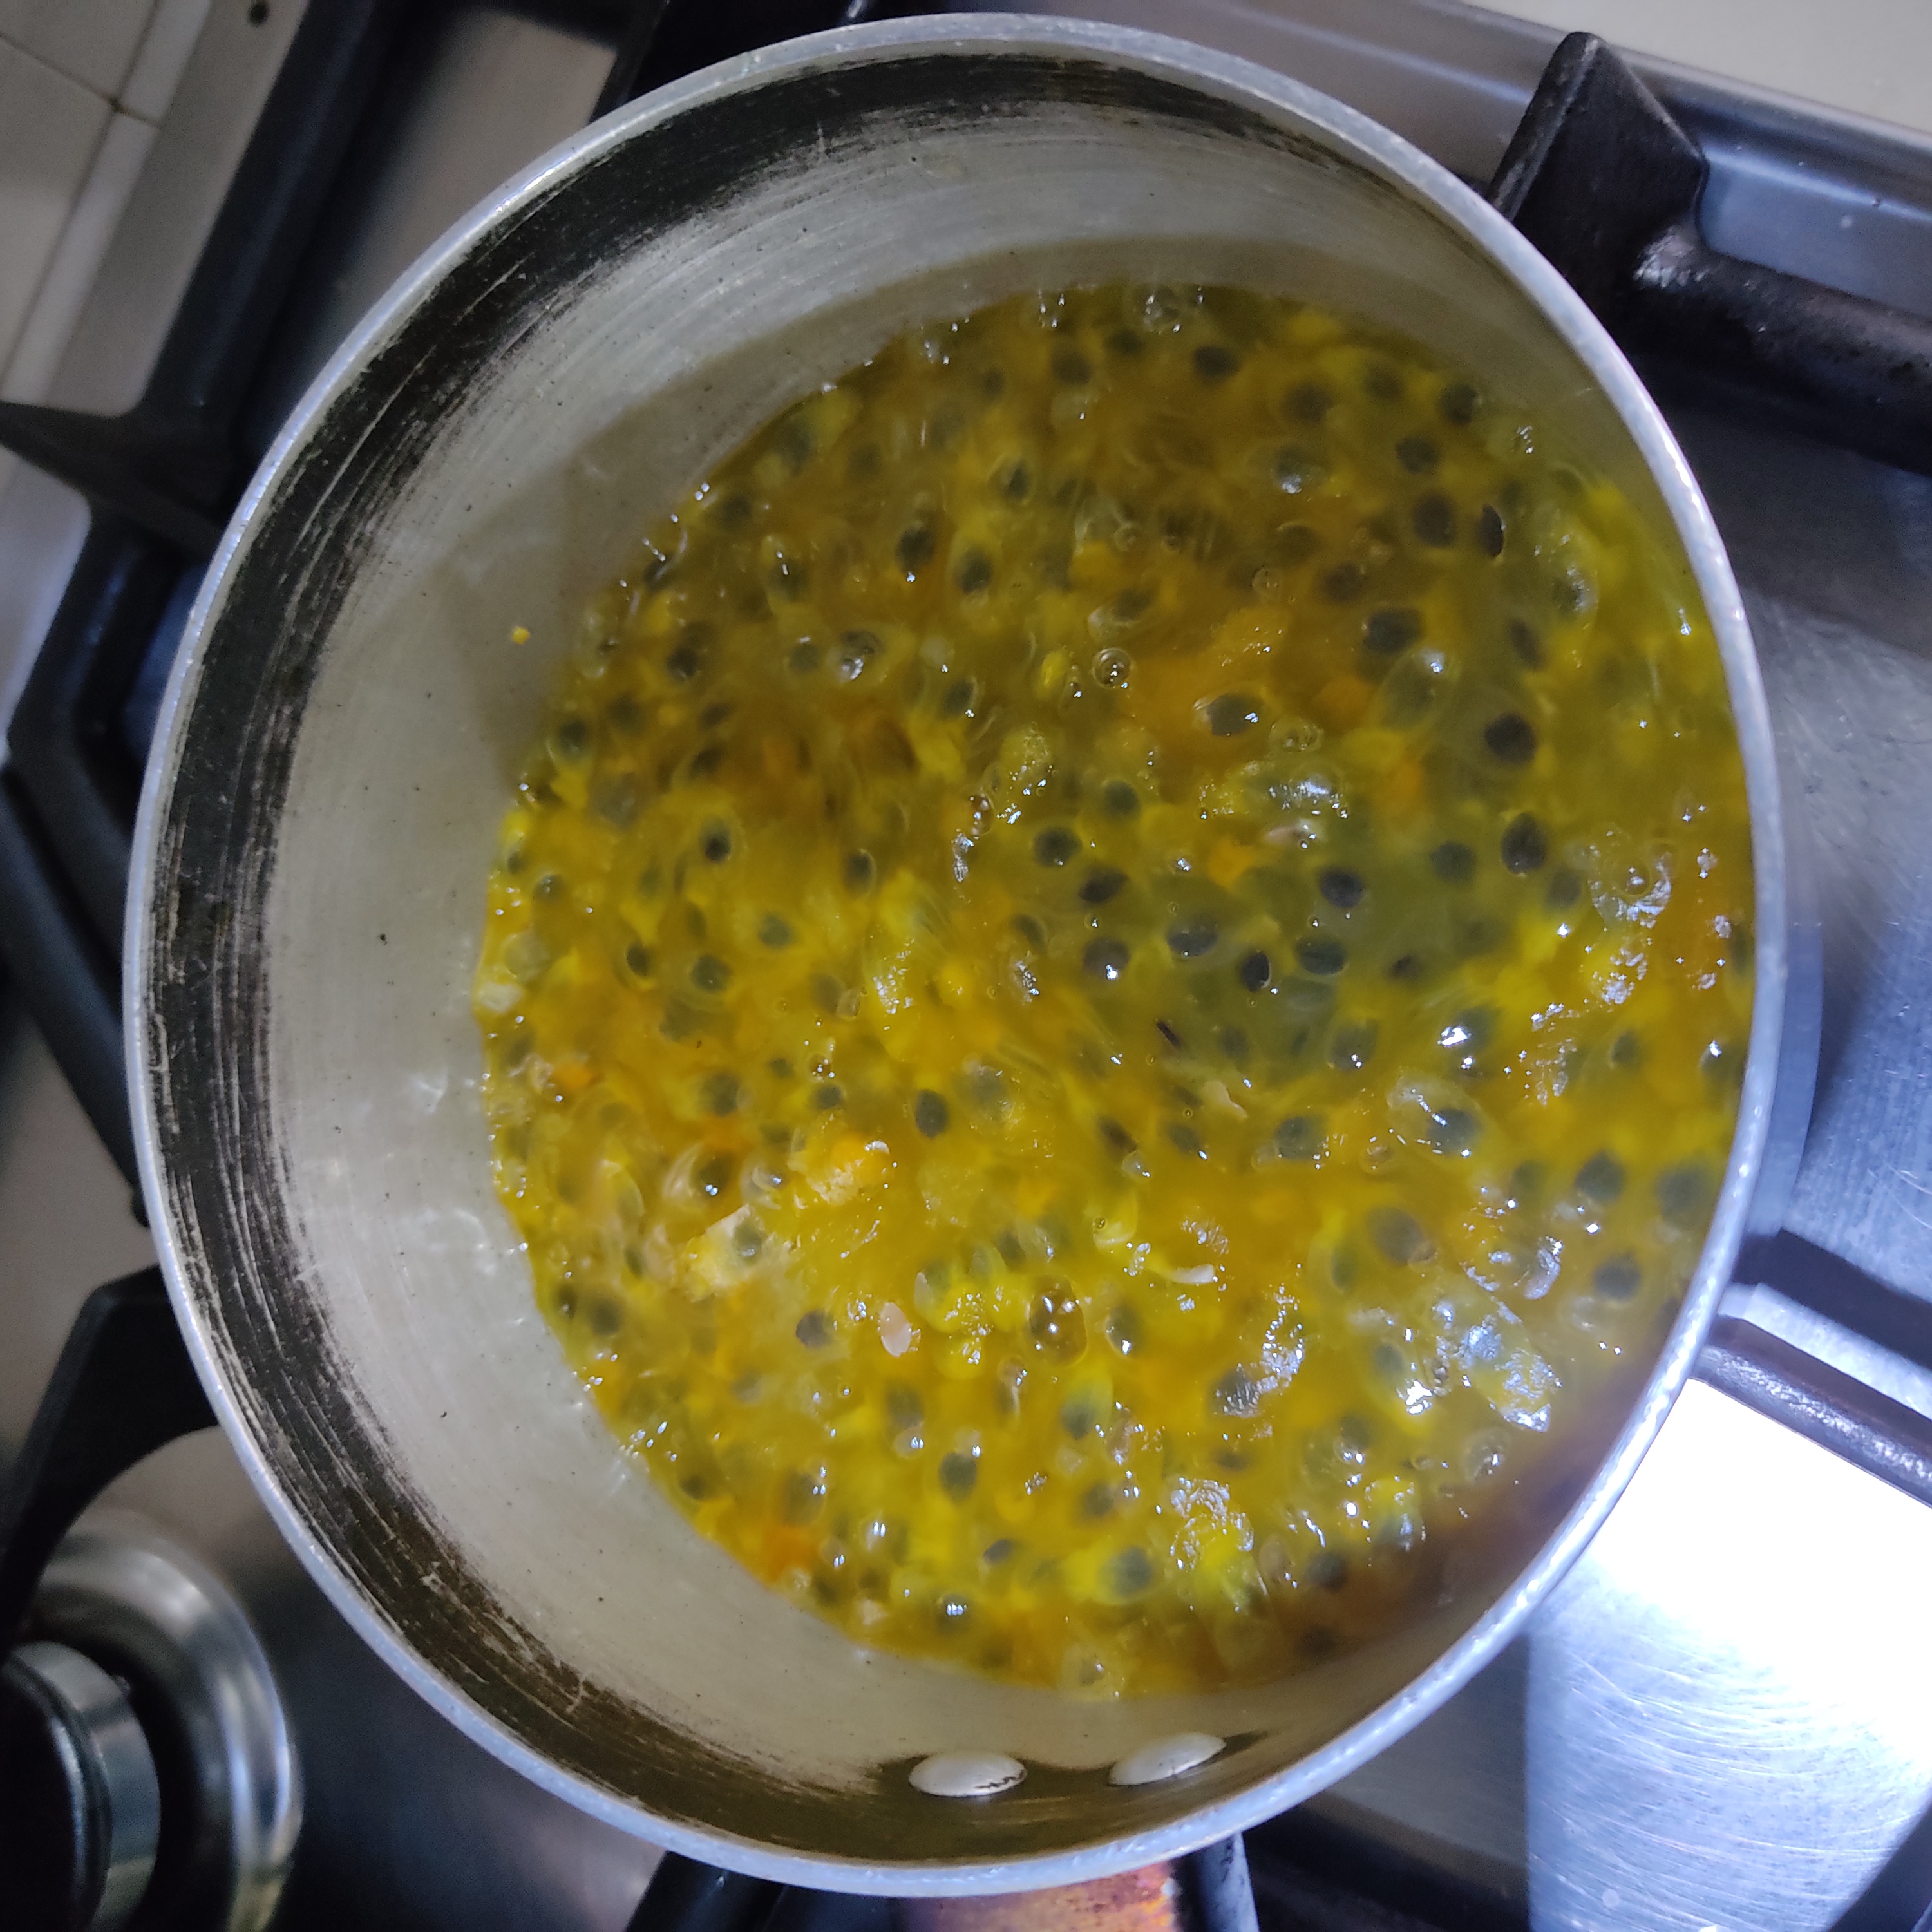
Paso 1. Lo que habíamos guardado de la pulpa de parchita, lo vamos a colocar en una olla a fuego lento.
Step 1. What we had saved of the parchita pulp, we are going to place it in a pot over low heat.
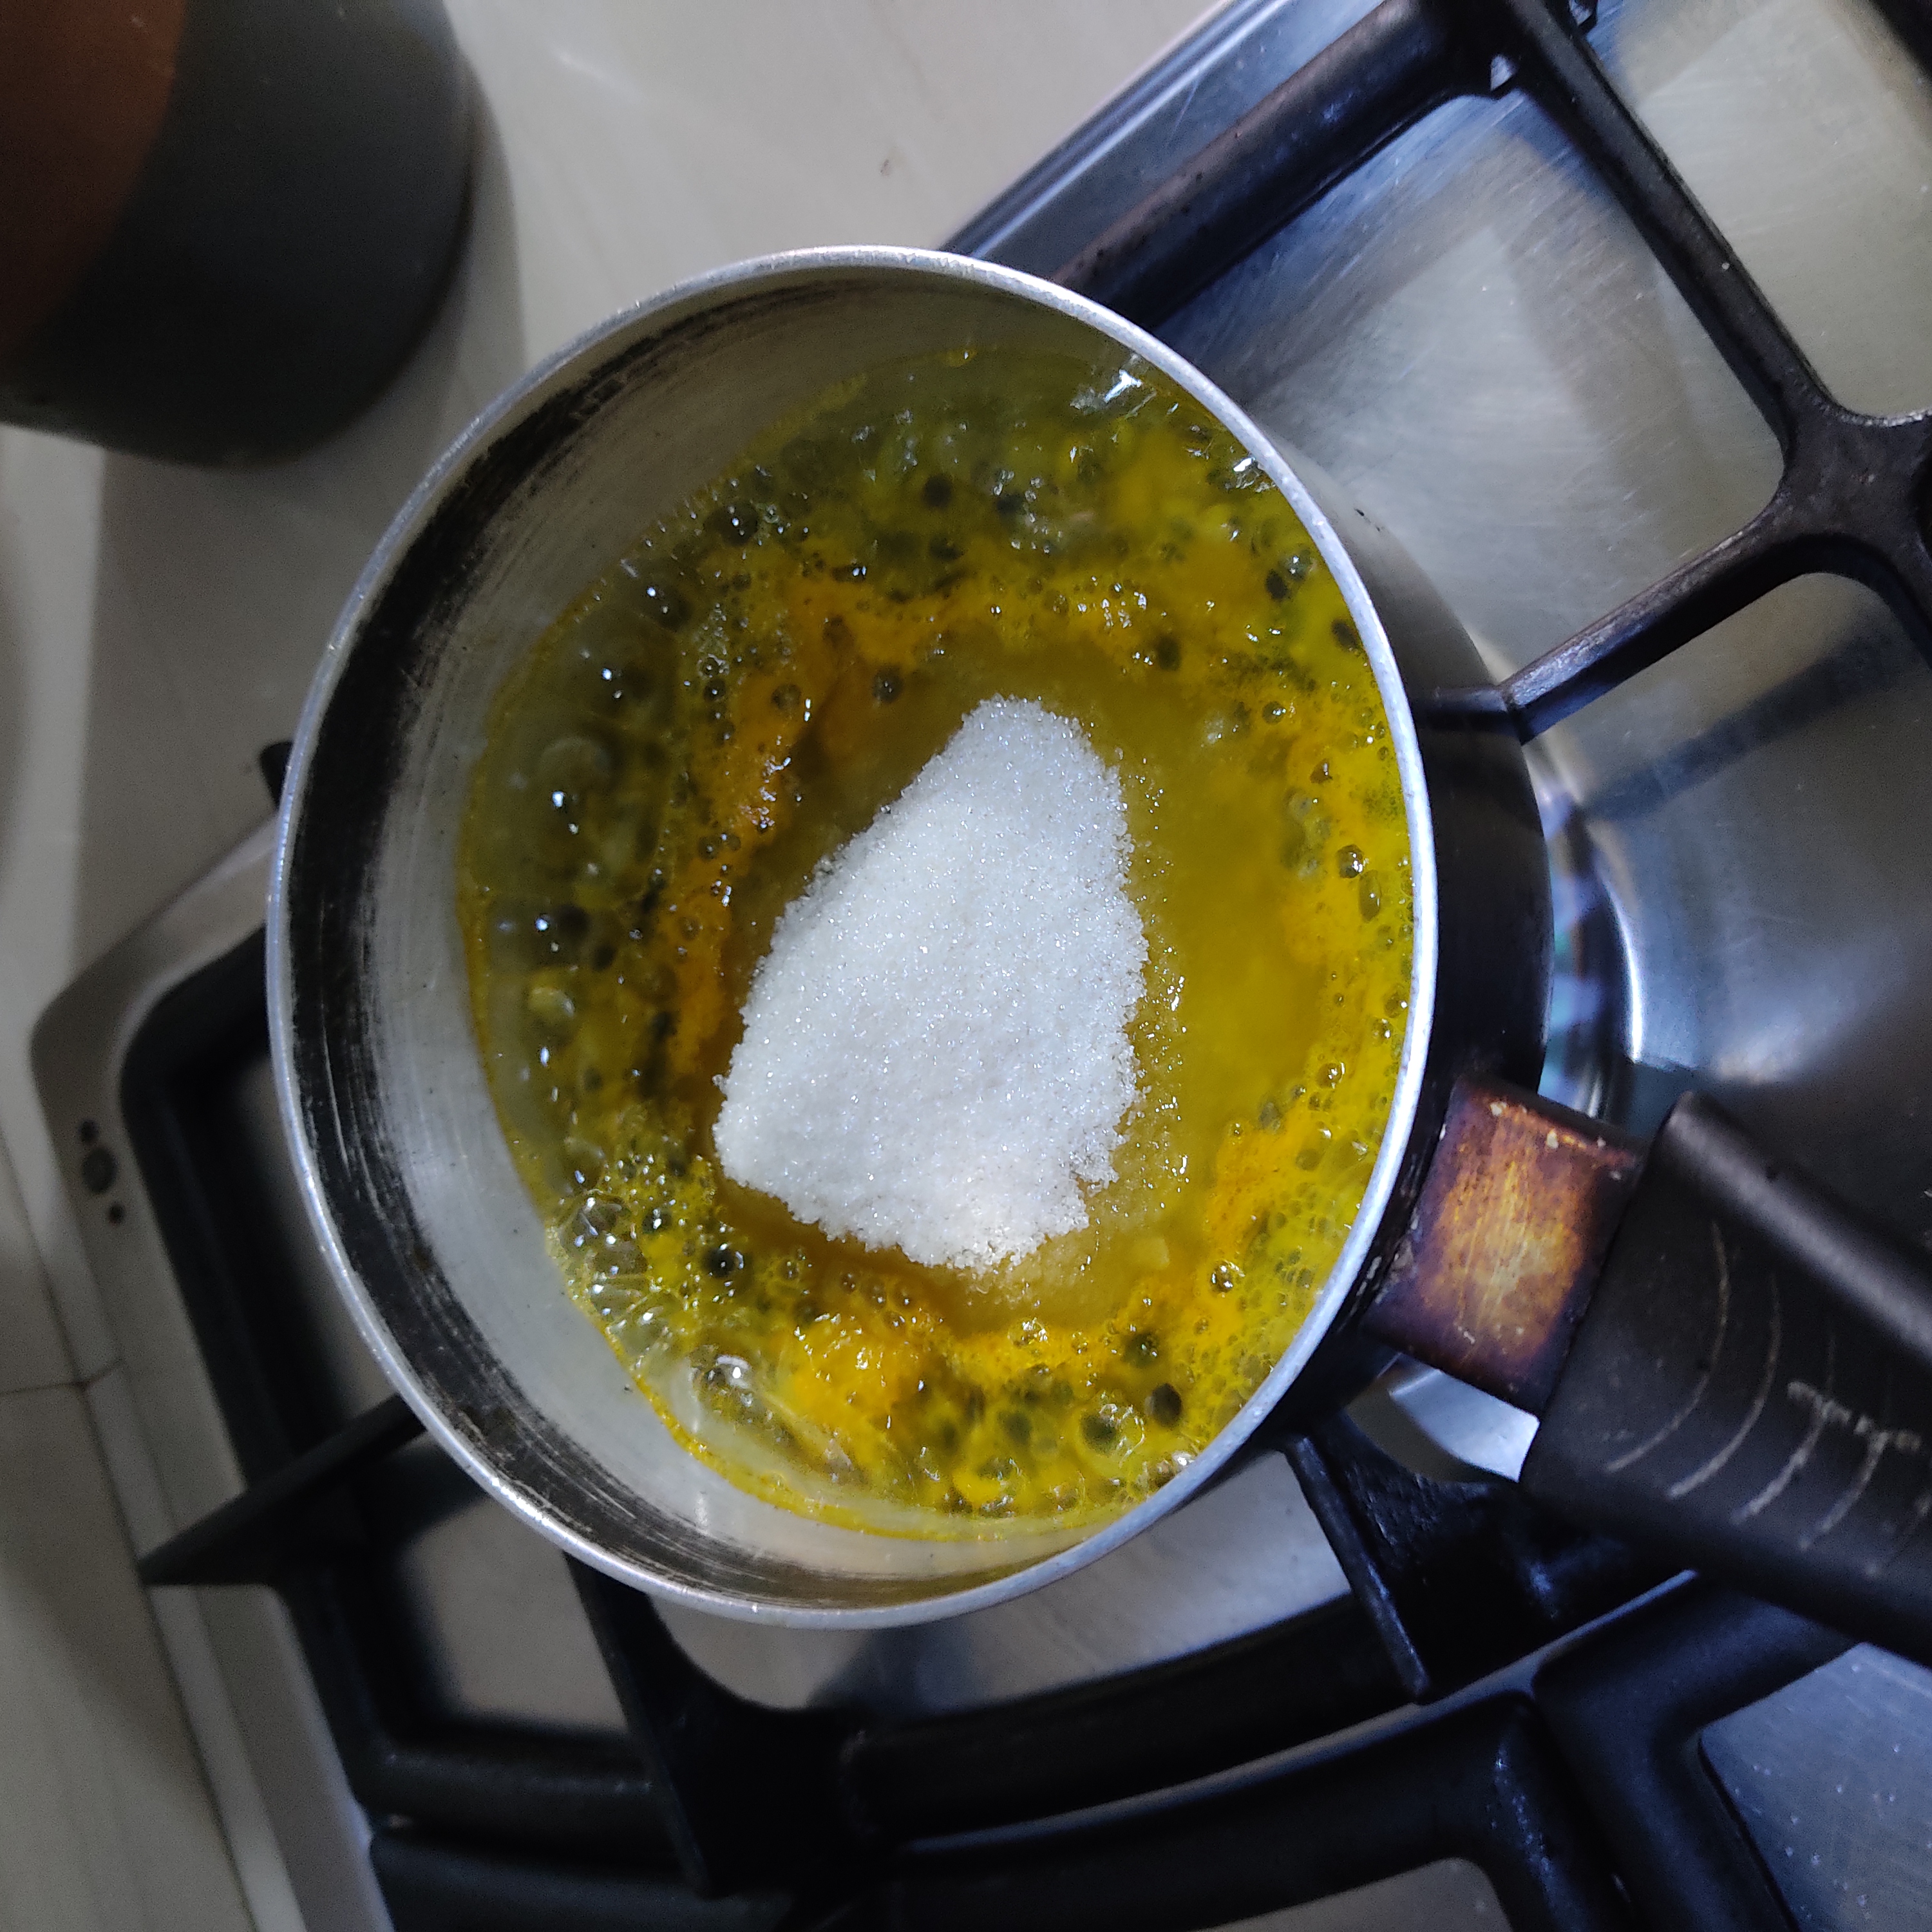
Paso 2. Procedemos a agregarle 1 taza de azúcar y lo vamos a remover constantemente para que no se pegue de la olla. Dejaremos cocinar durante aproximadamente 5 minutos y luego lo pasamos a un envase para reservarlo hasta el momento de la decoración.
Step 2. We proceed to add 1 cup of sugar and stir it constantly so that it does not stick to the pan. Let it cook for approximately 5 minutes and then transfer it to a container to reserve it until it is time to decorate.
Para la torta / For the cake:
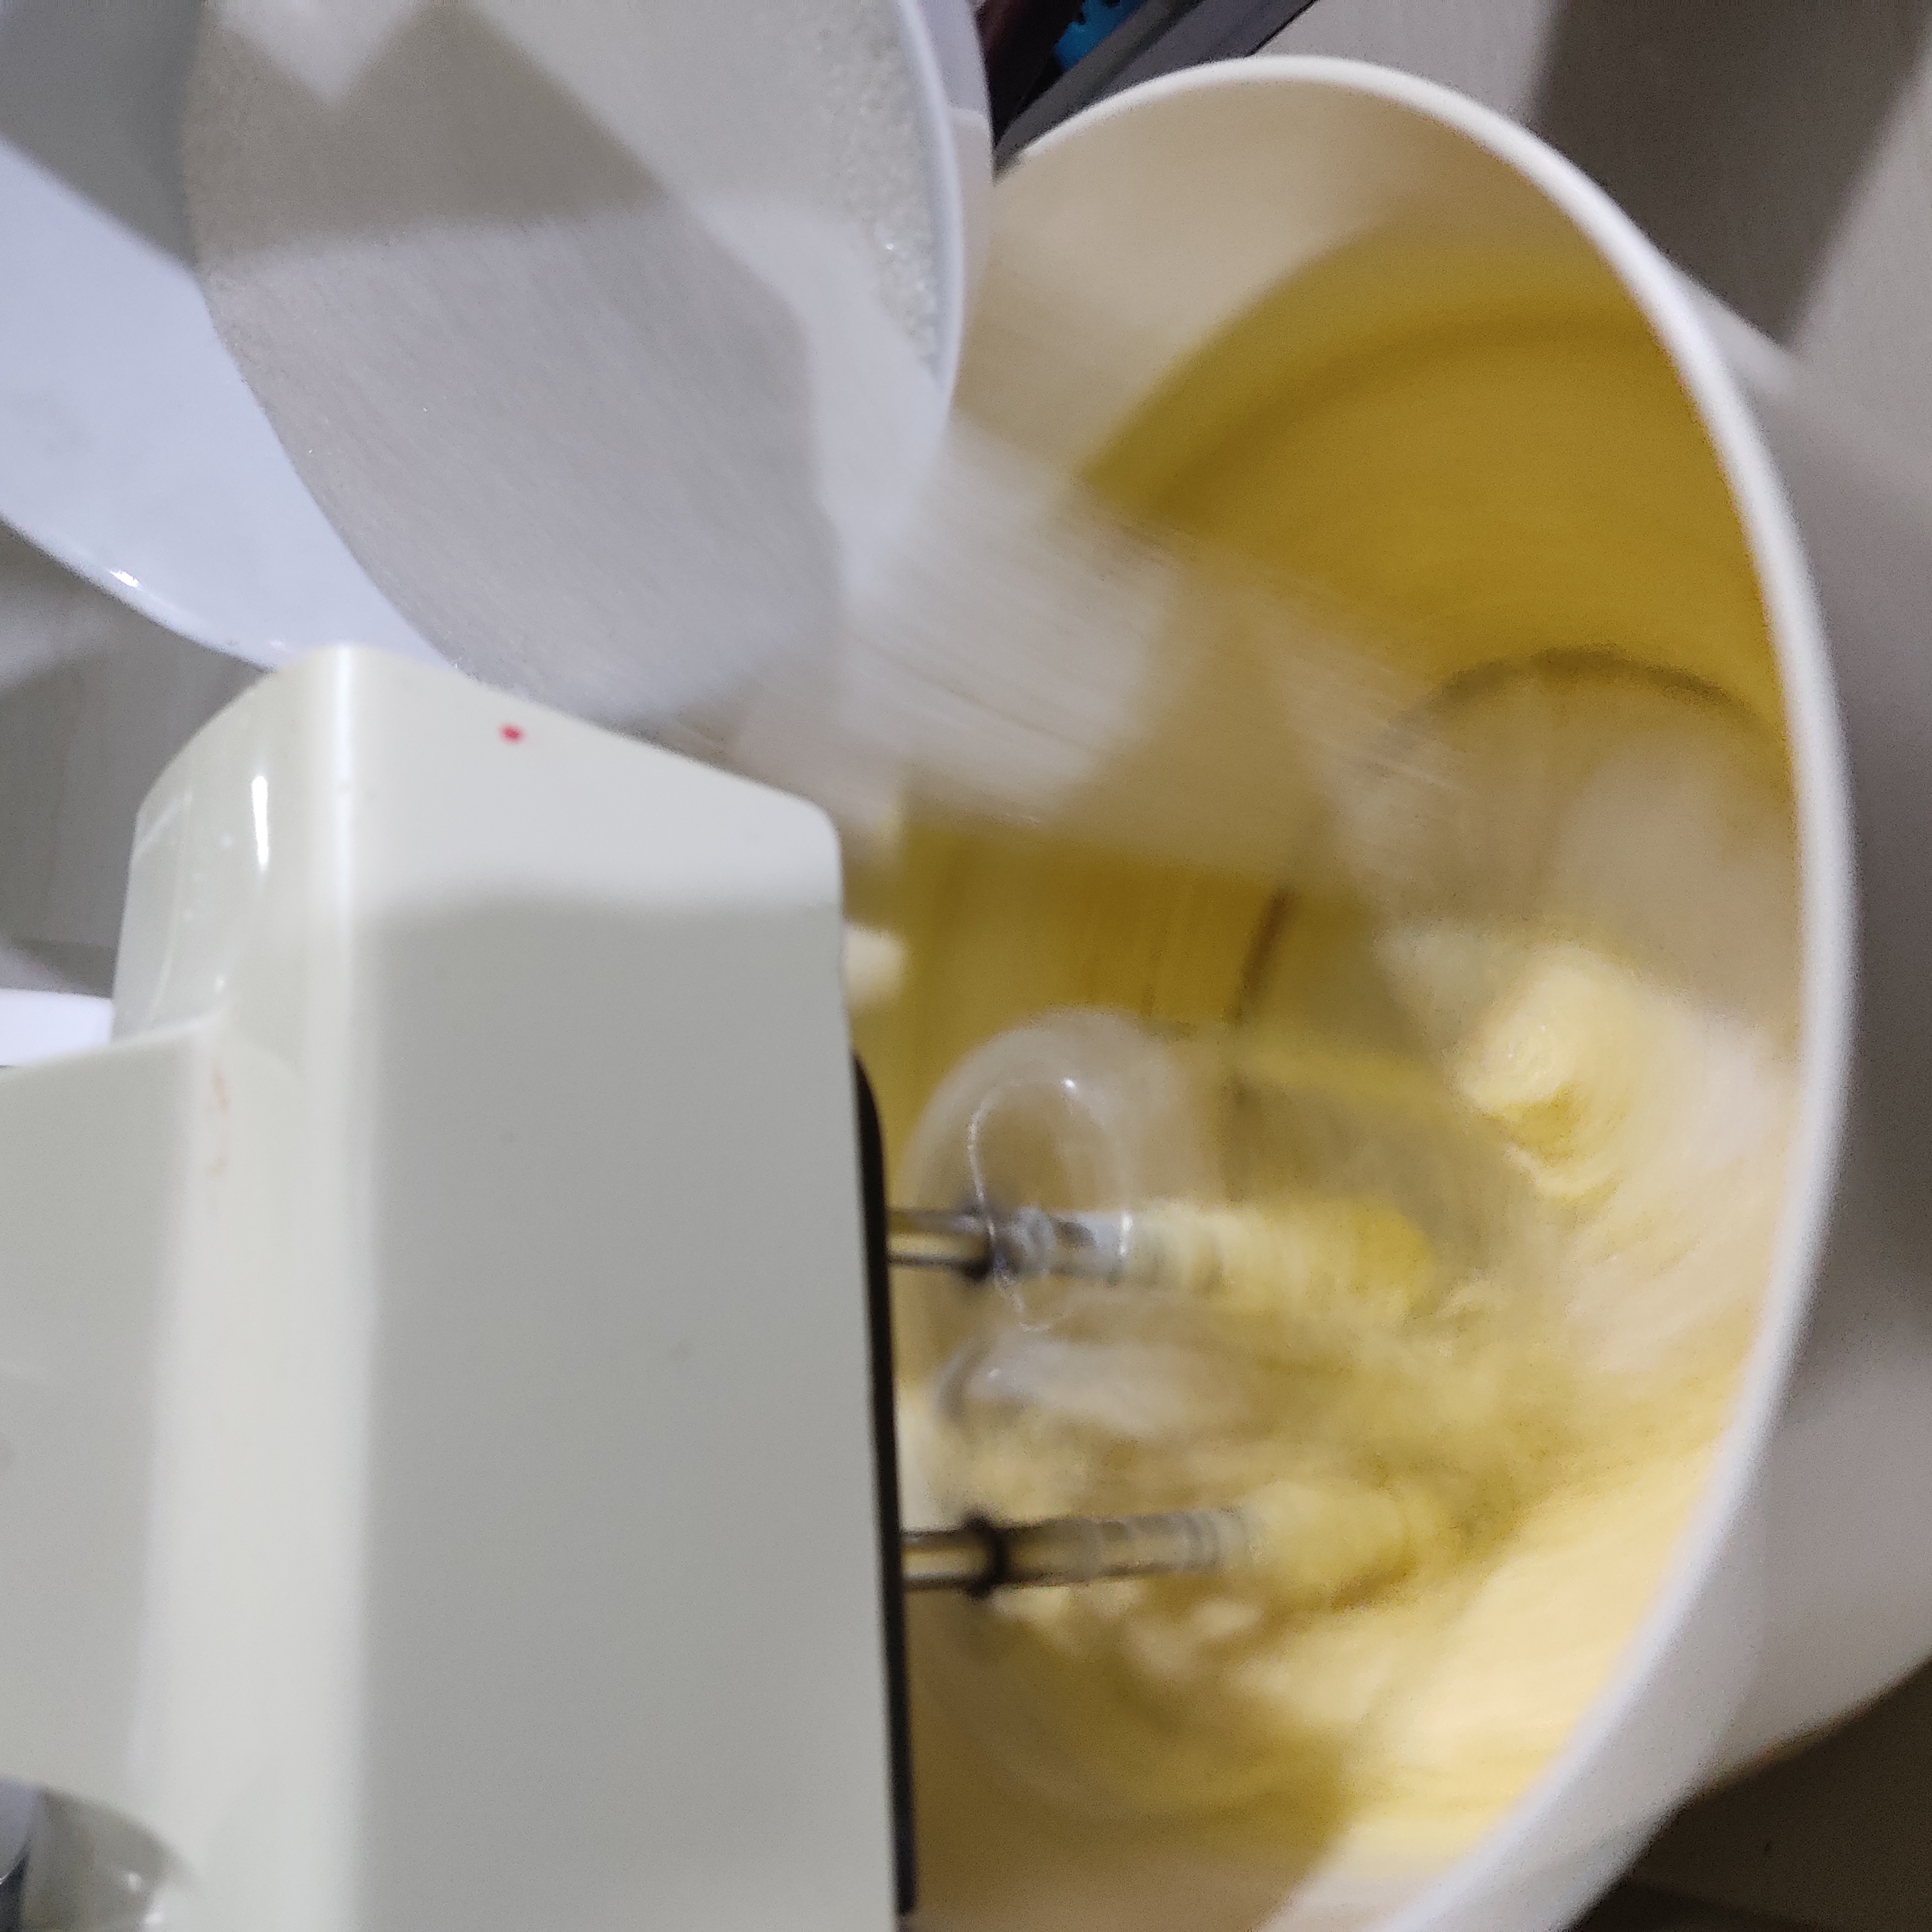
Paso 1. Armamos nuestra Mise en place. Cernimos el azúcar para que éste quede suelta. La harina junto con el polvo de hornear la vamos a cernir dos veces. Nota; todos nuestros ingredientes deben estar a temperatura ambiente.
Step 1. We assemble our Mise en place. Sift the sugar so that it is loose. The flour together with the baking powder we are going to sift it twice. Note; all our ingredients must be at room temperature.
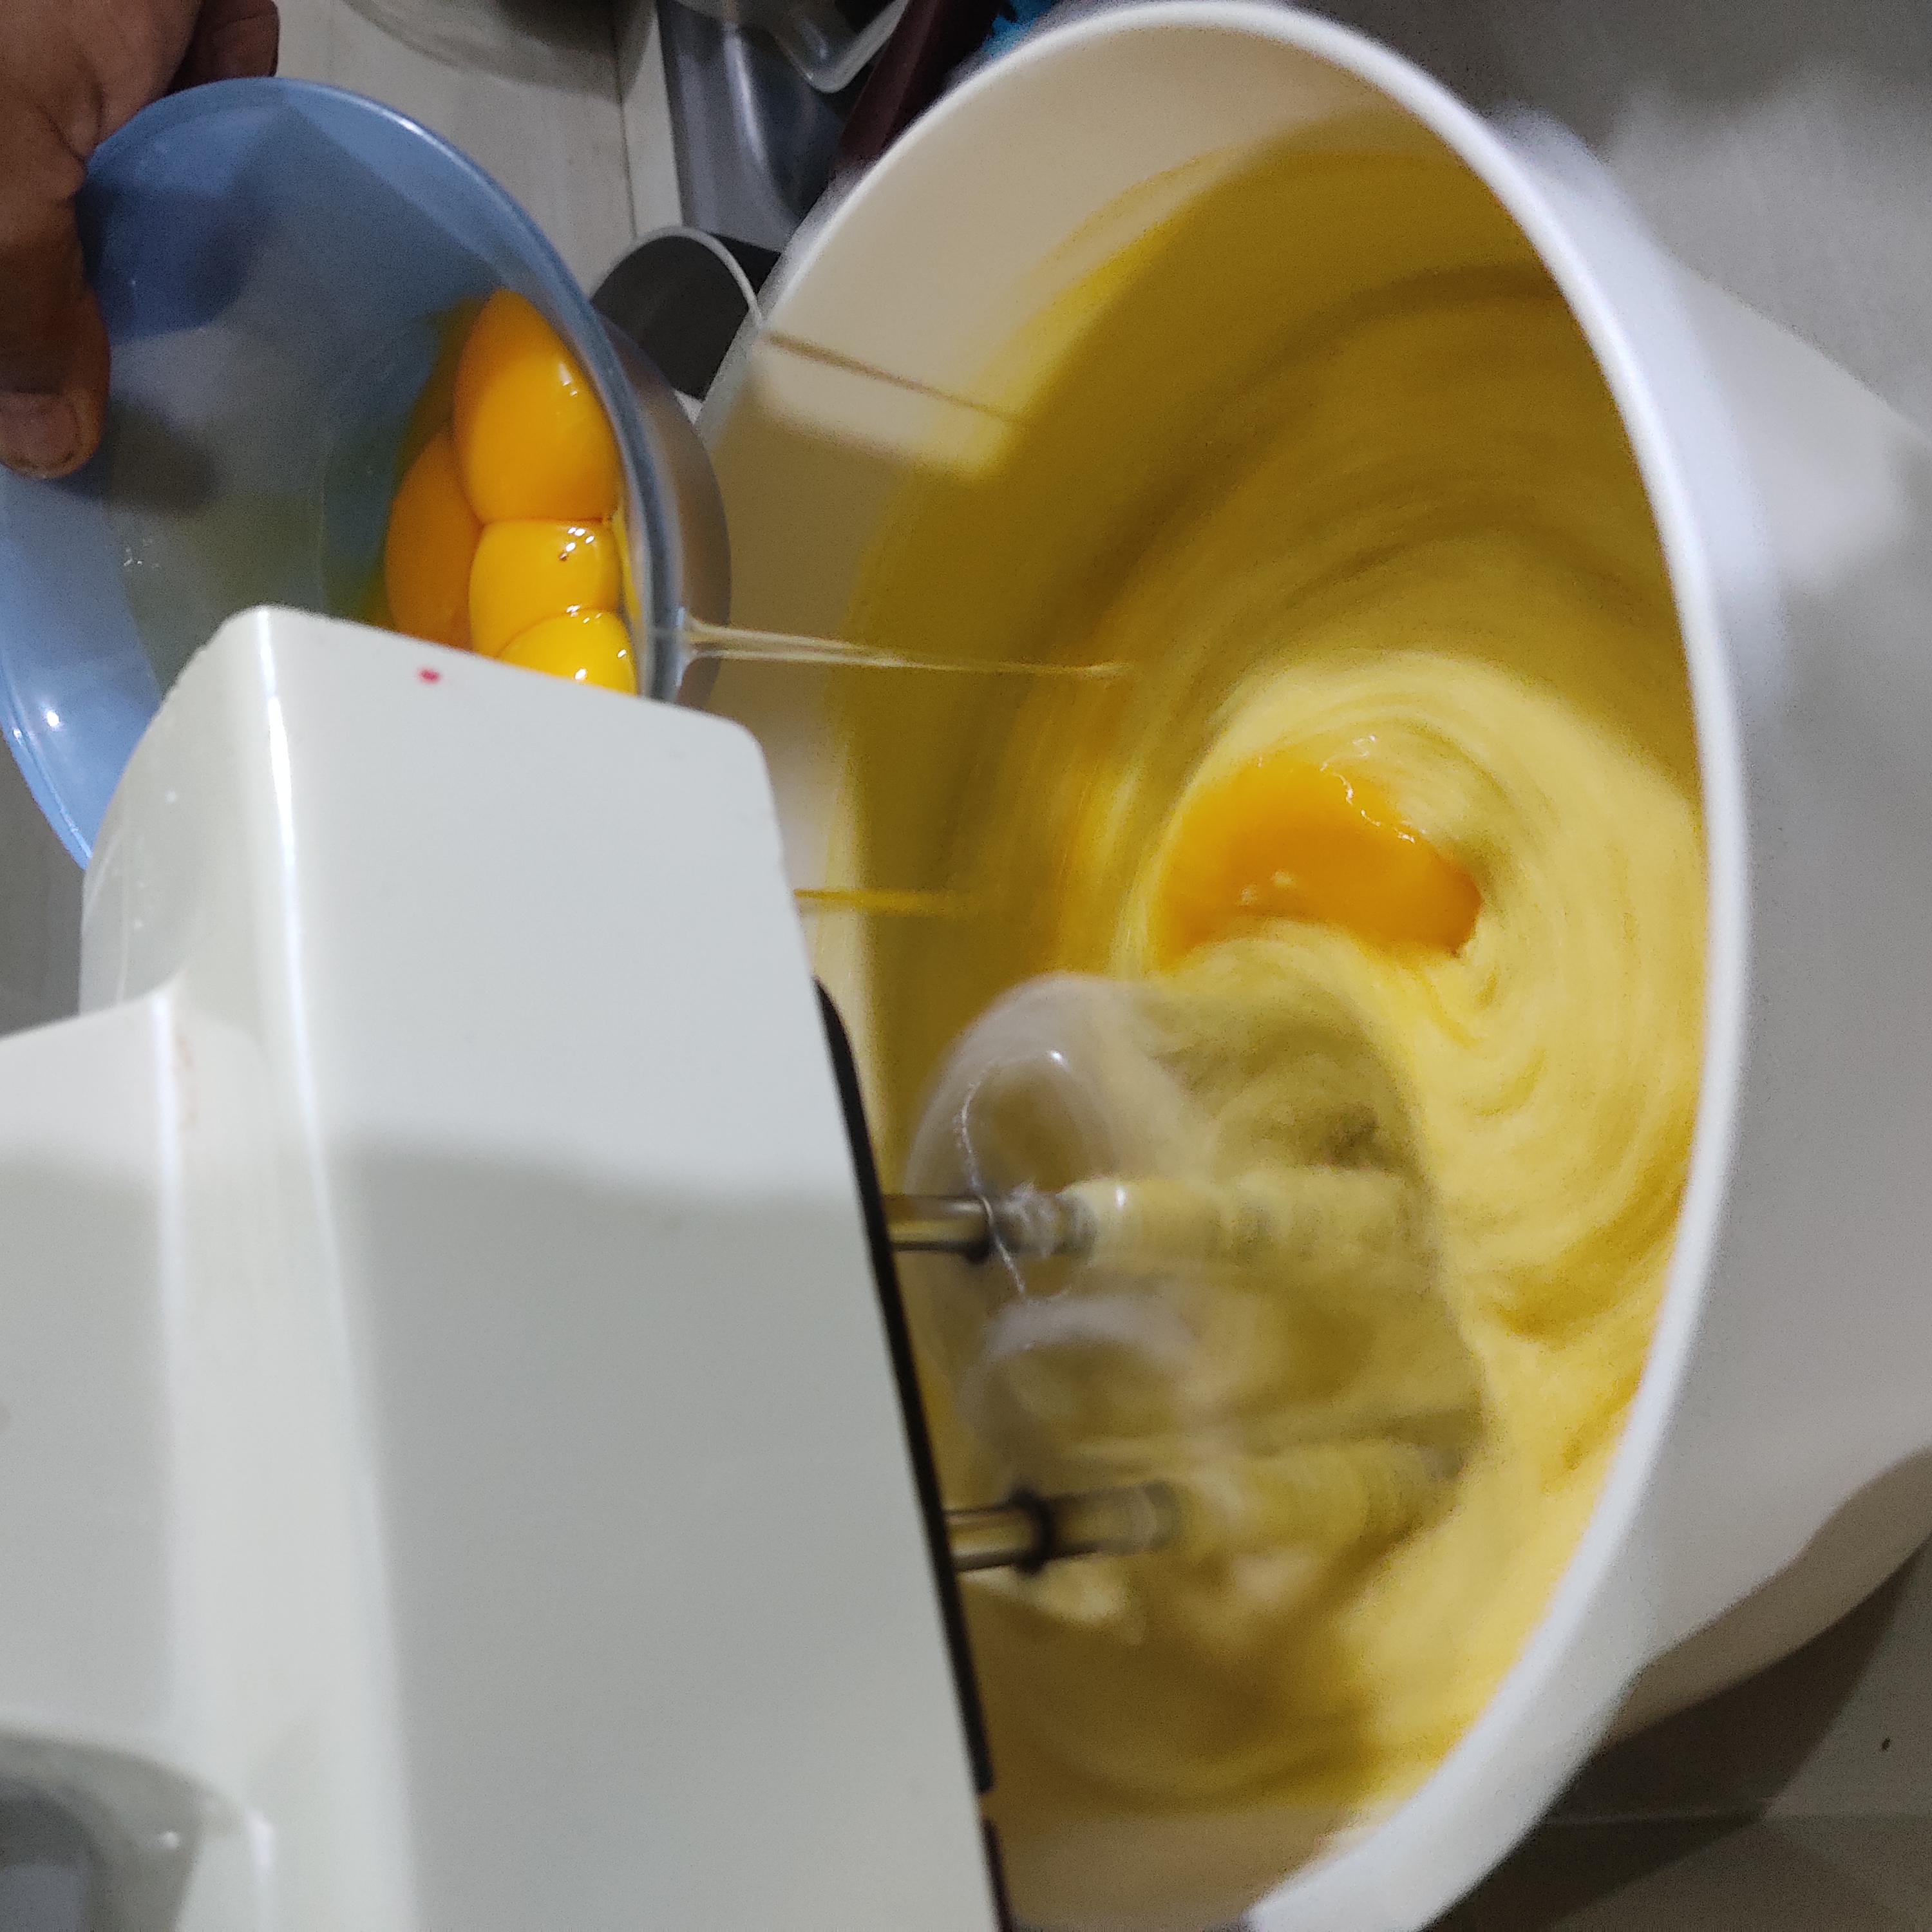
Paso 2. Vamos a separar la yema de la clara de 8 huevos.
Step 2. Let's separate the yolk from the white of 8 eggs.

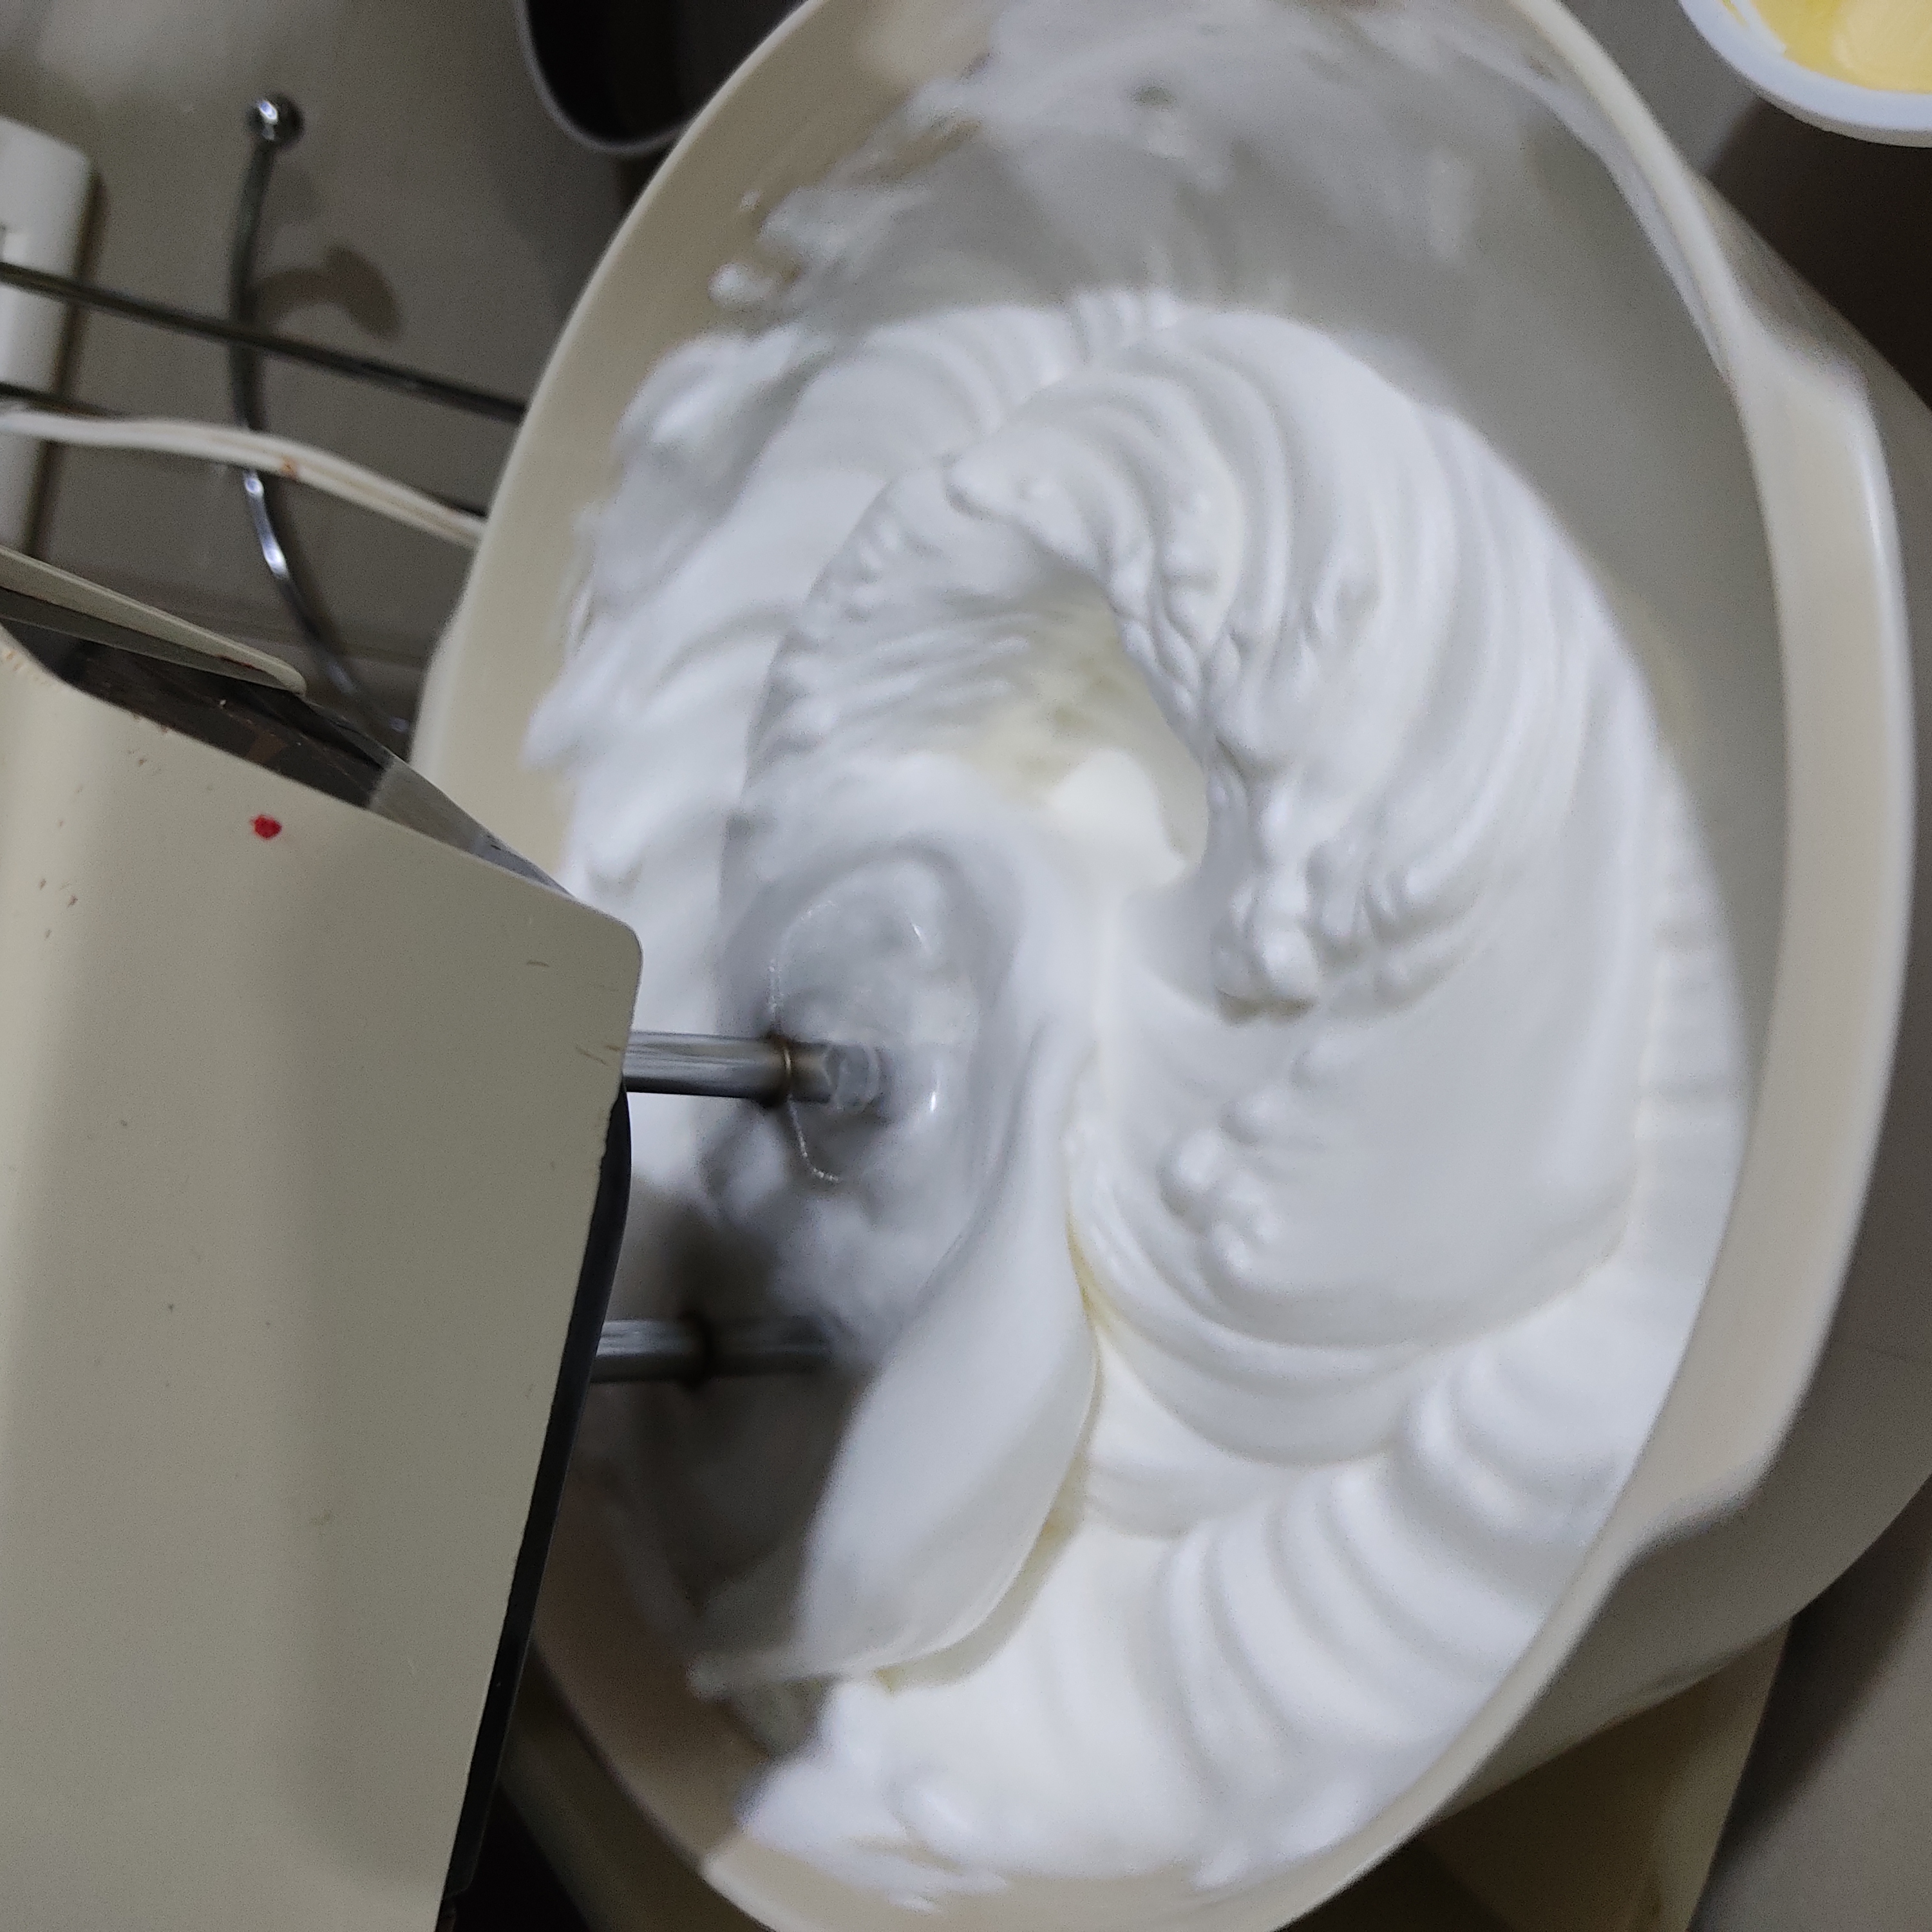
Paso 3. En una batidora procedemos a batir las claras hasta que se formen unos pocos, lo colocamos en un envase y lo reservamos (sin tapar ni mover tanto para que la mezcla no se caiga).
Step 3. In a mixer proceed to beat the egg whites until they form a few, place it in a container and set aside (without covering or moving so much so that the mixture does not fall).
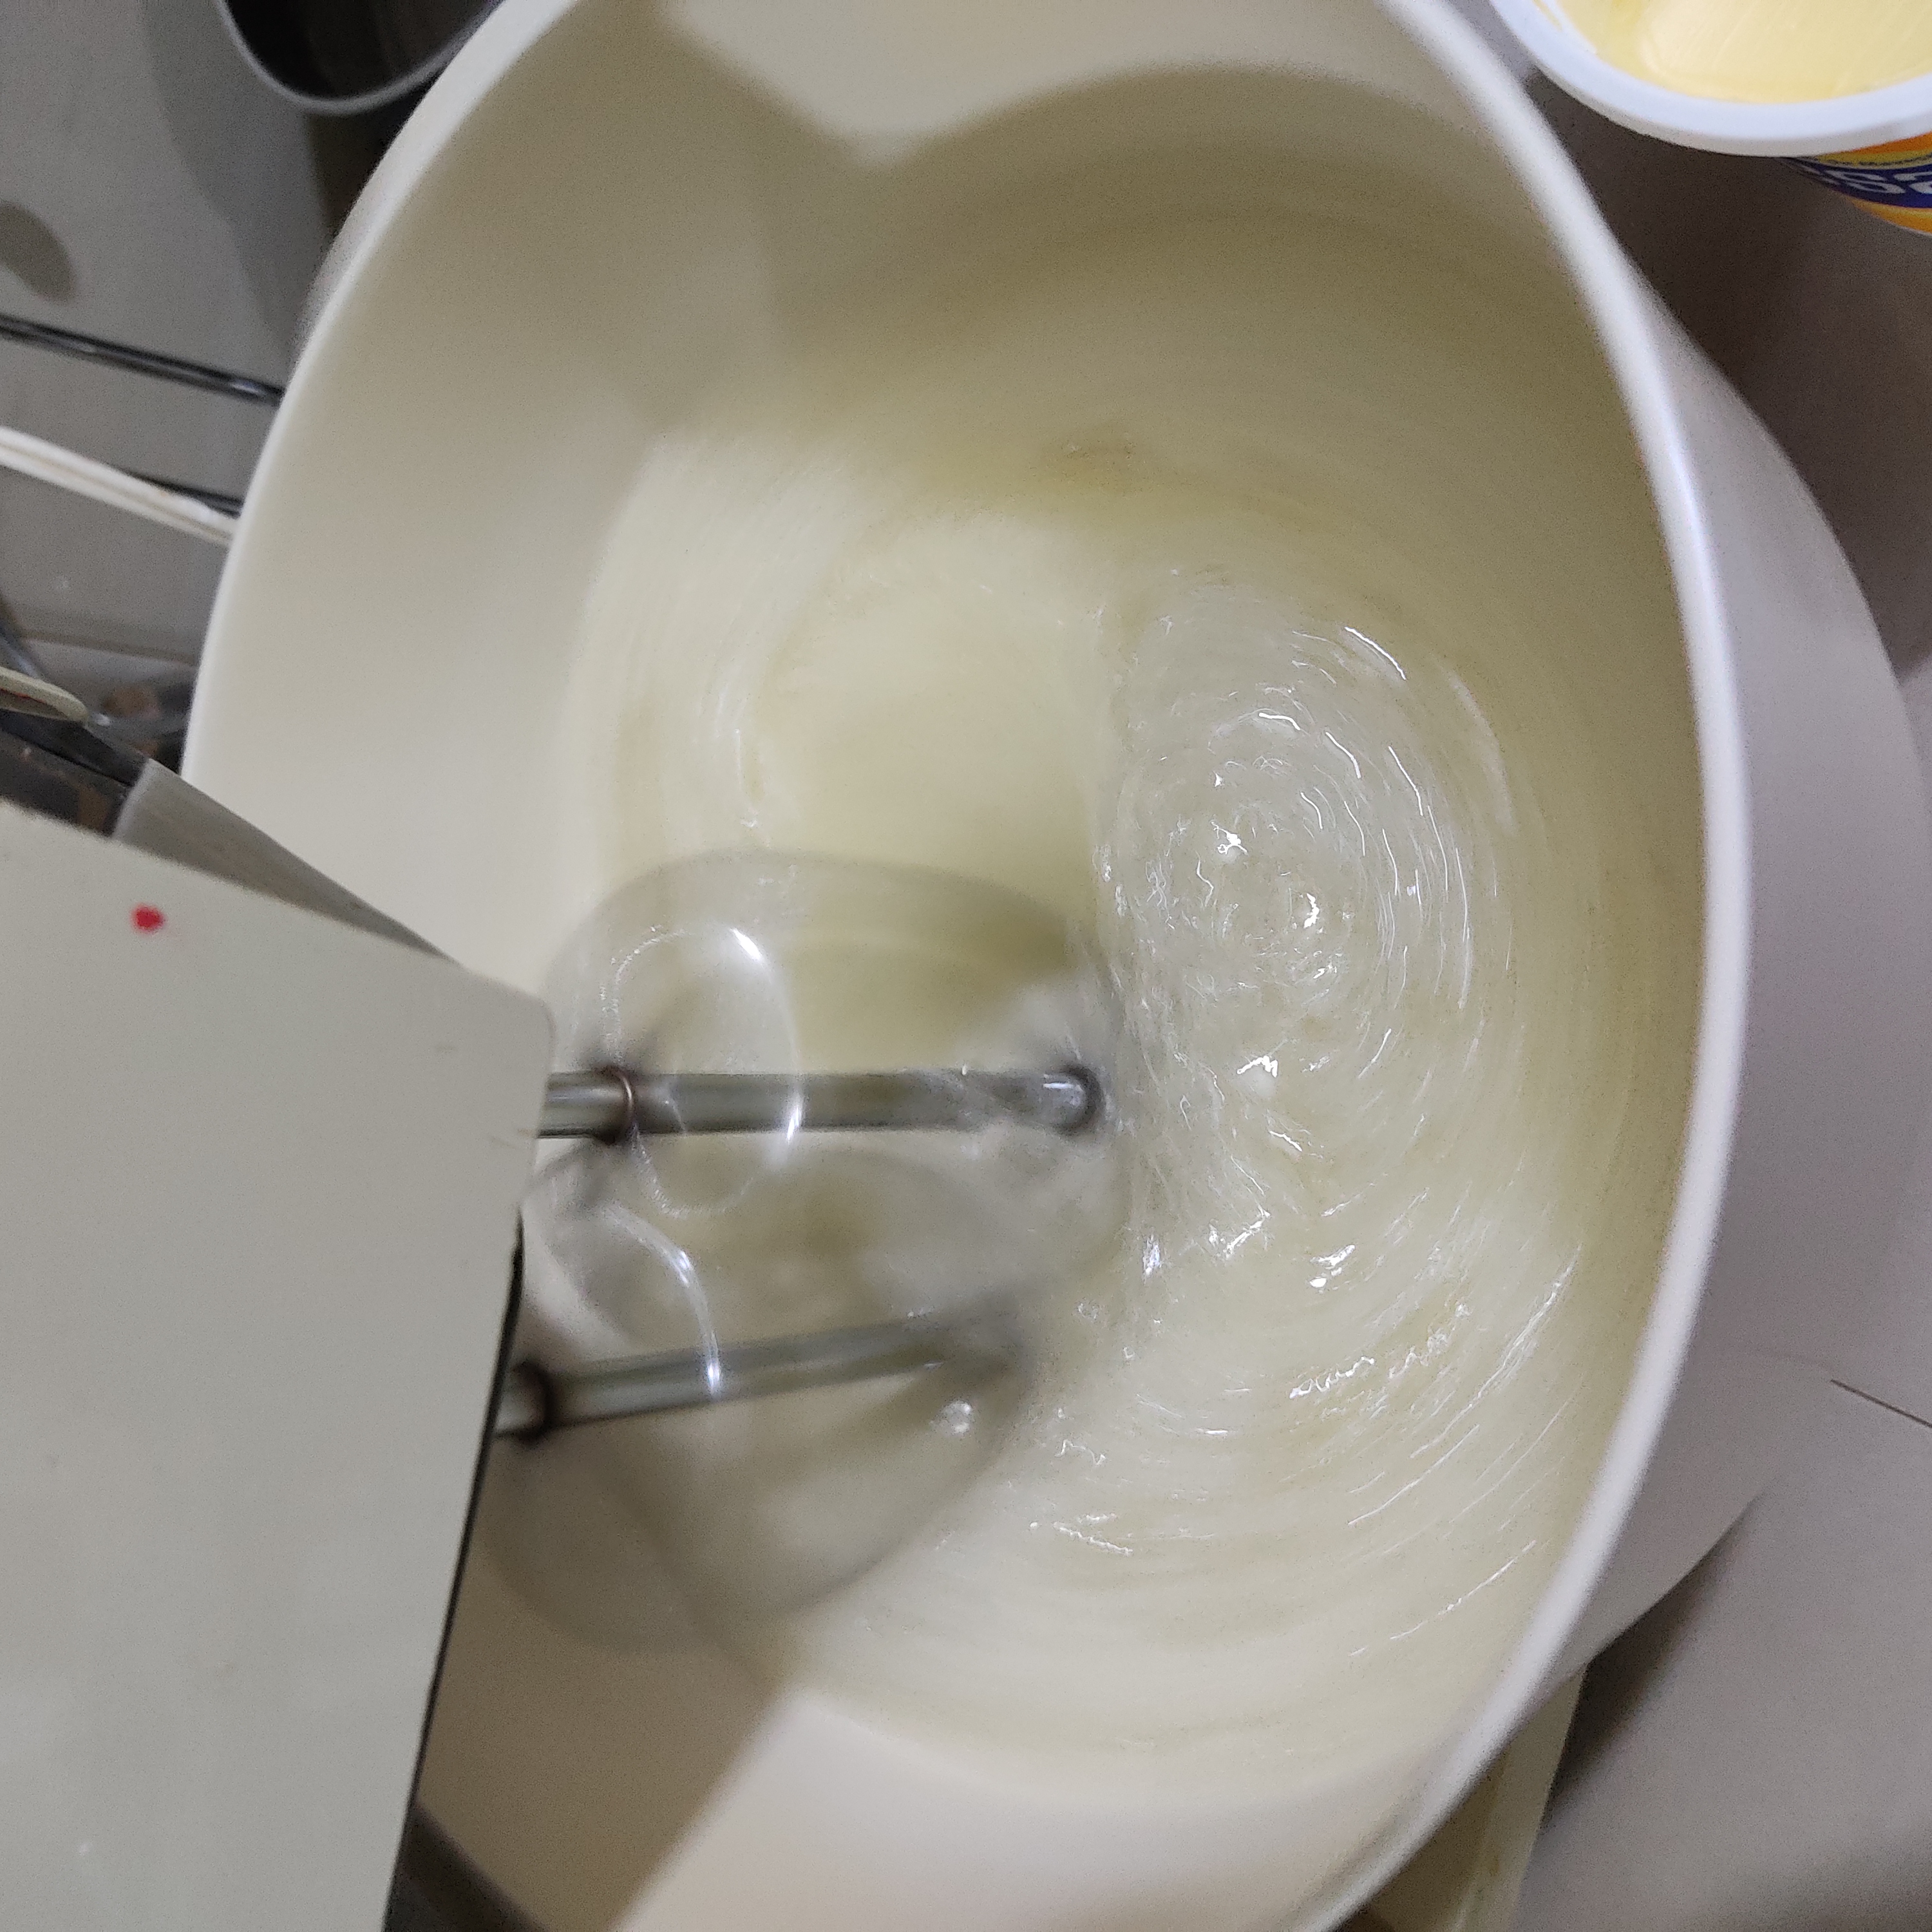
Paso 4. En el mismo Bolt de la batidora o en un envase a parte, como ustedes se sientan más cómodos, batimos la mantequilla hasta blanquearse y luego le agregamos el azúcar hasta formar una crema.
Step 4. In the same bowl of the mixer or in a separate container, as you feel more comfortable, beat the butter until it whitens and then add the sugar until it forms a cream.
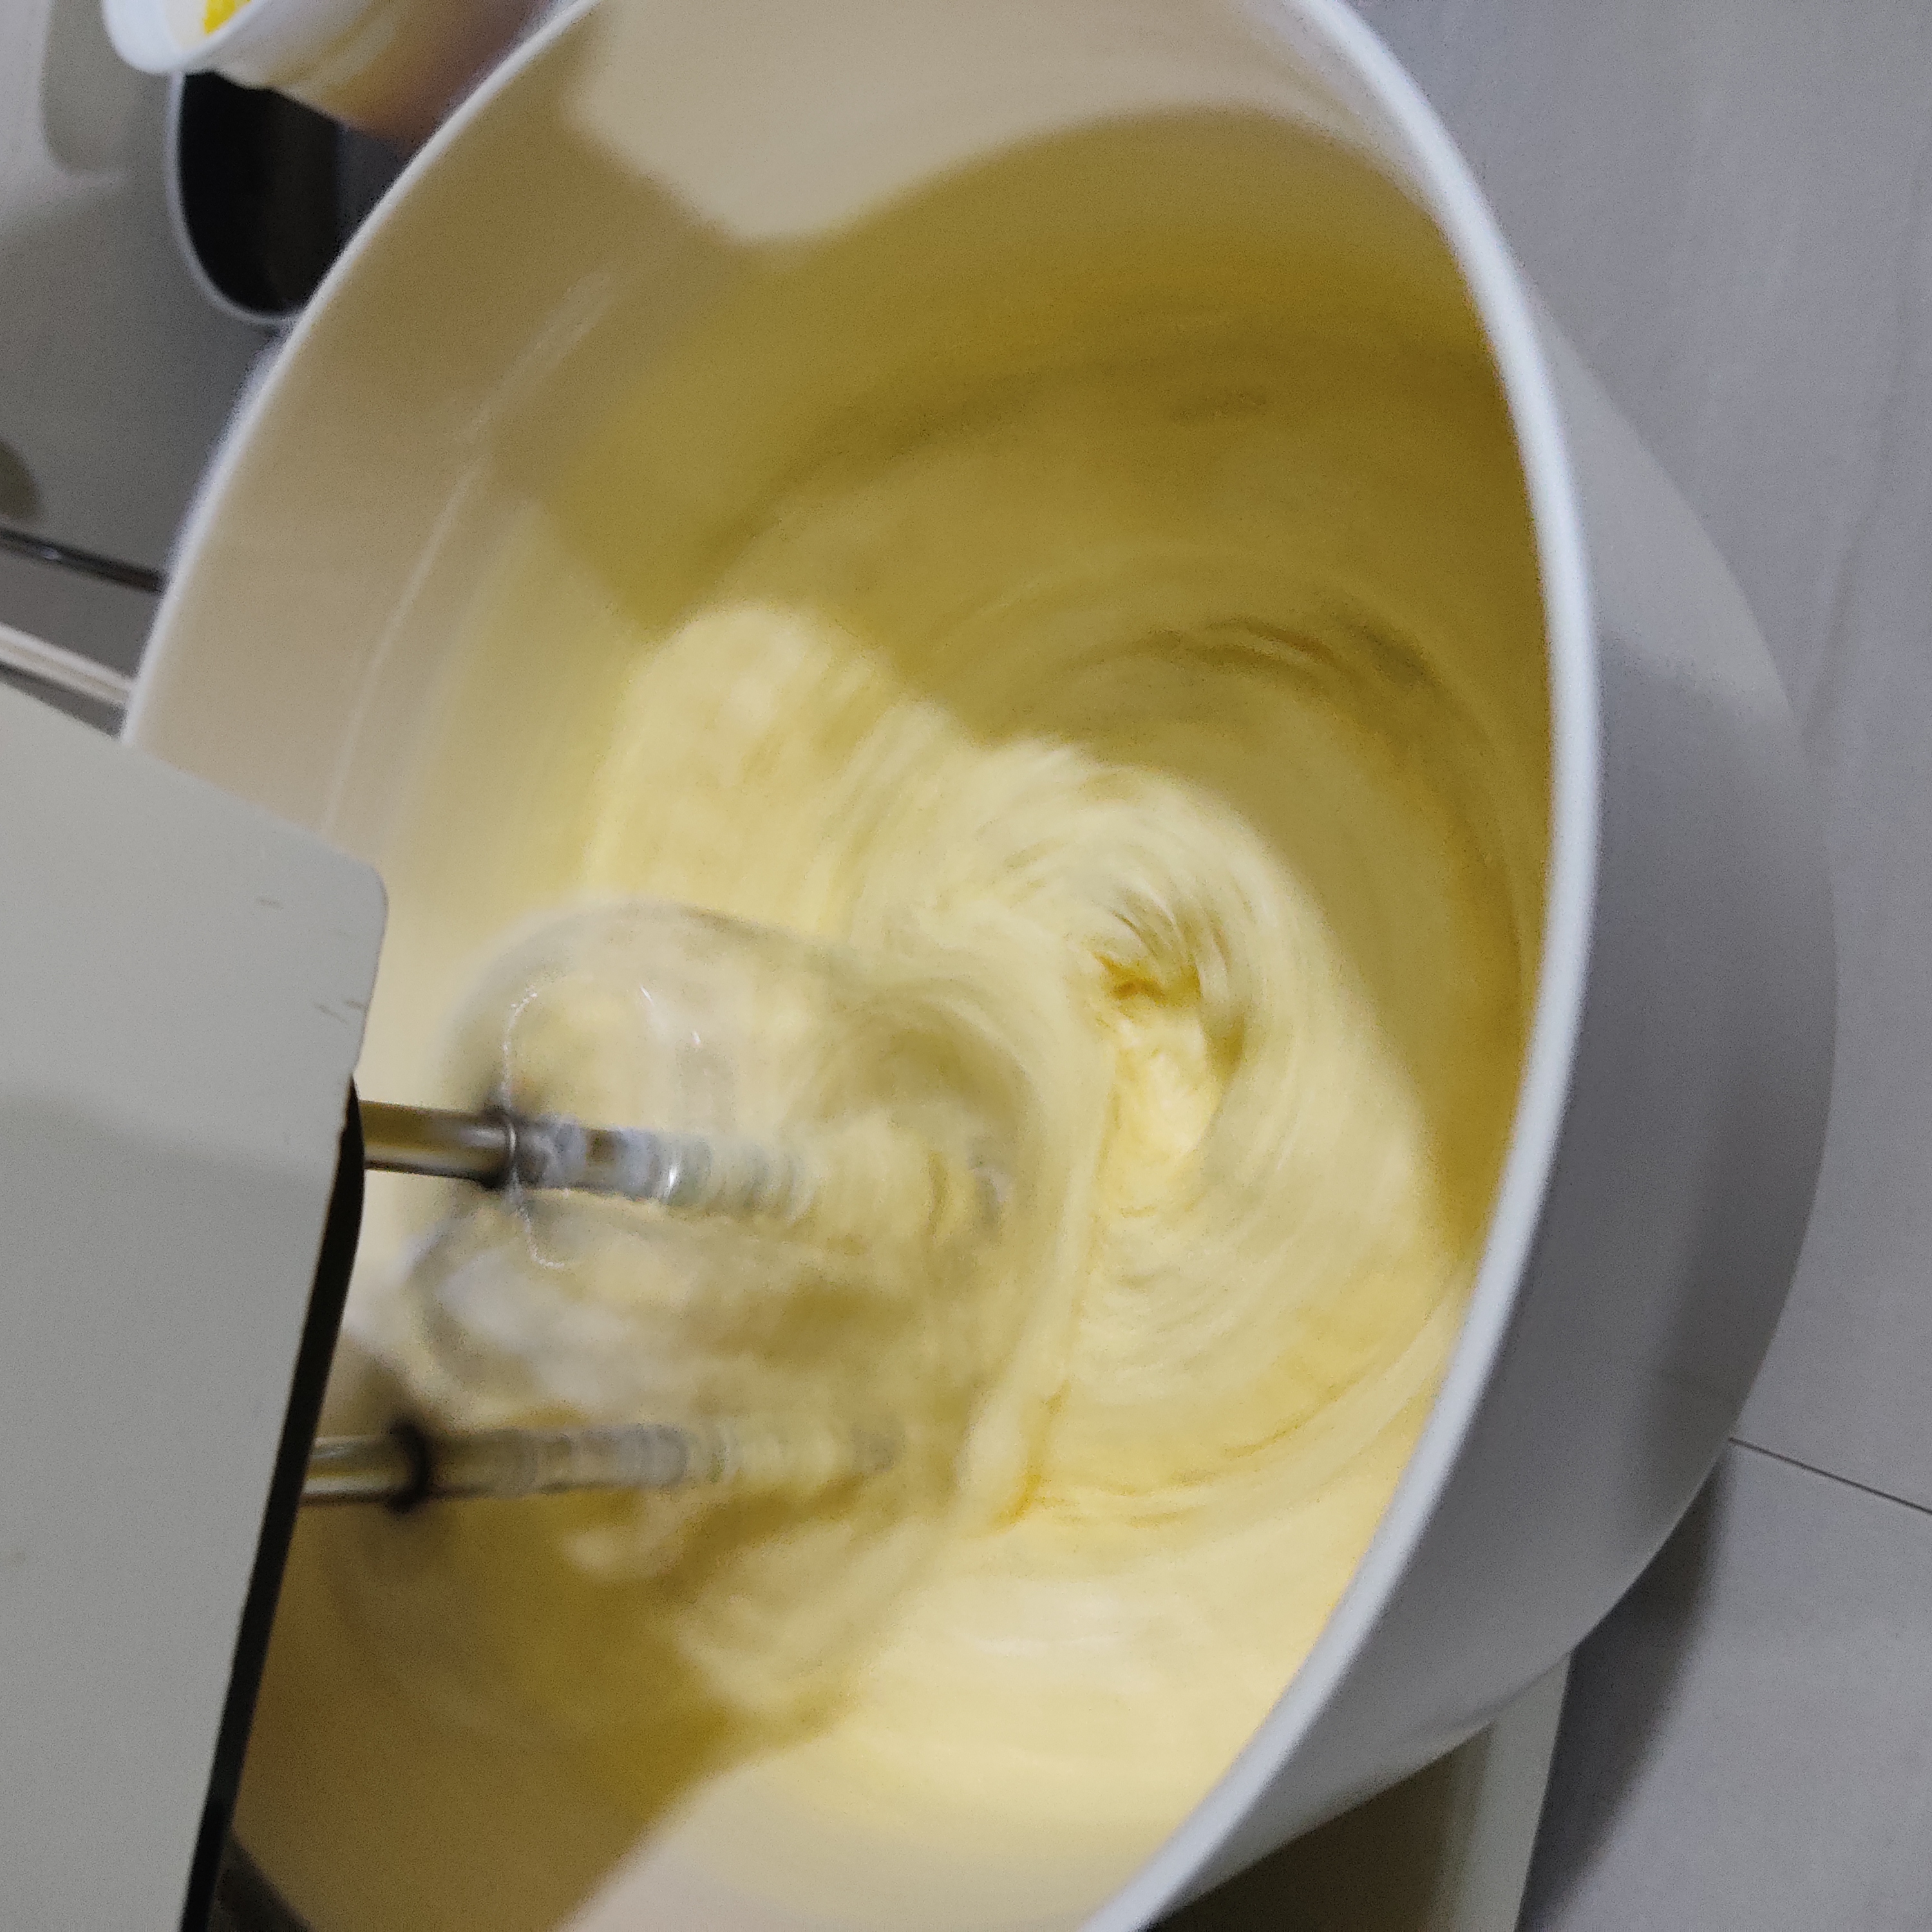
Paso 5. Seguimos batiendo para así agregarle las yemas una por una durante aproximadamente 5 minutos más.
Step 5. Step 5.** Continue beating and add the egg yolks one by one for approximately 5 more minutes.
Paso 6. Procedemos a bajar la velocidad de la batidora para así agregarle un chorrito de esencia de vainilla. Nos debería quedar esa consistencia como sale en la imágene de la derecha.
Step 6. We proceed to lower the speed of the mixer to add a dash of vanilla essence. We should have the consistency as shown in the image on the right.
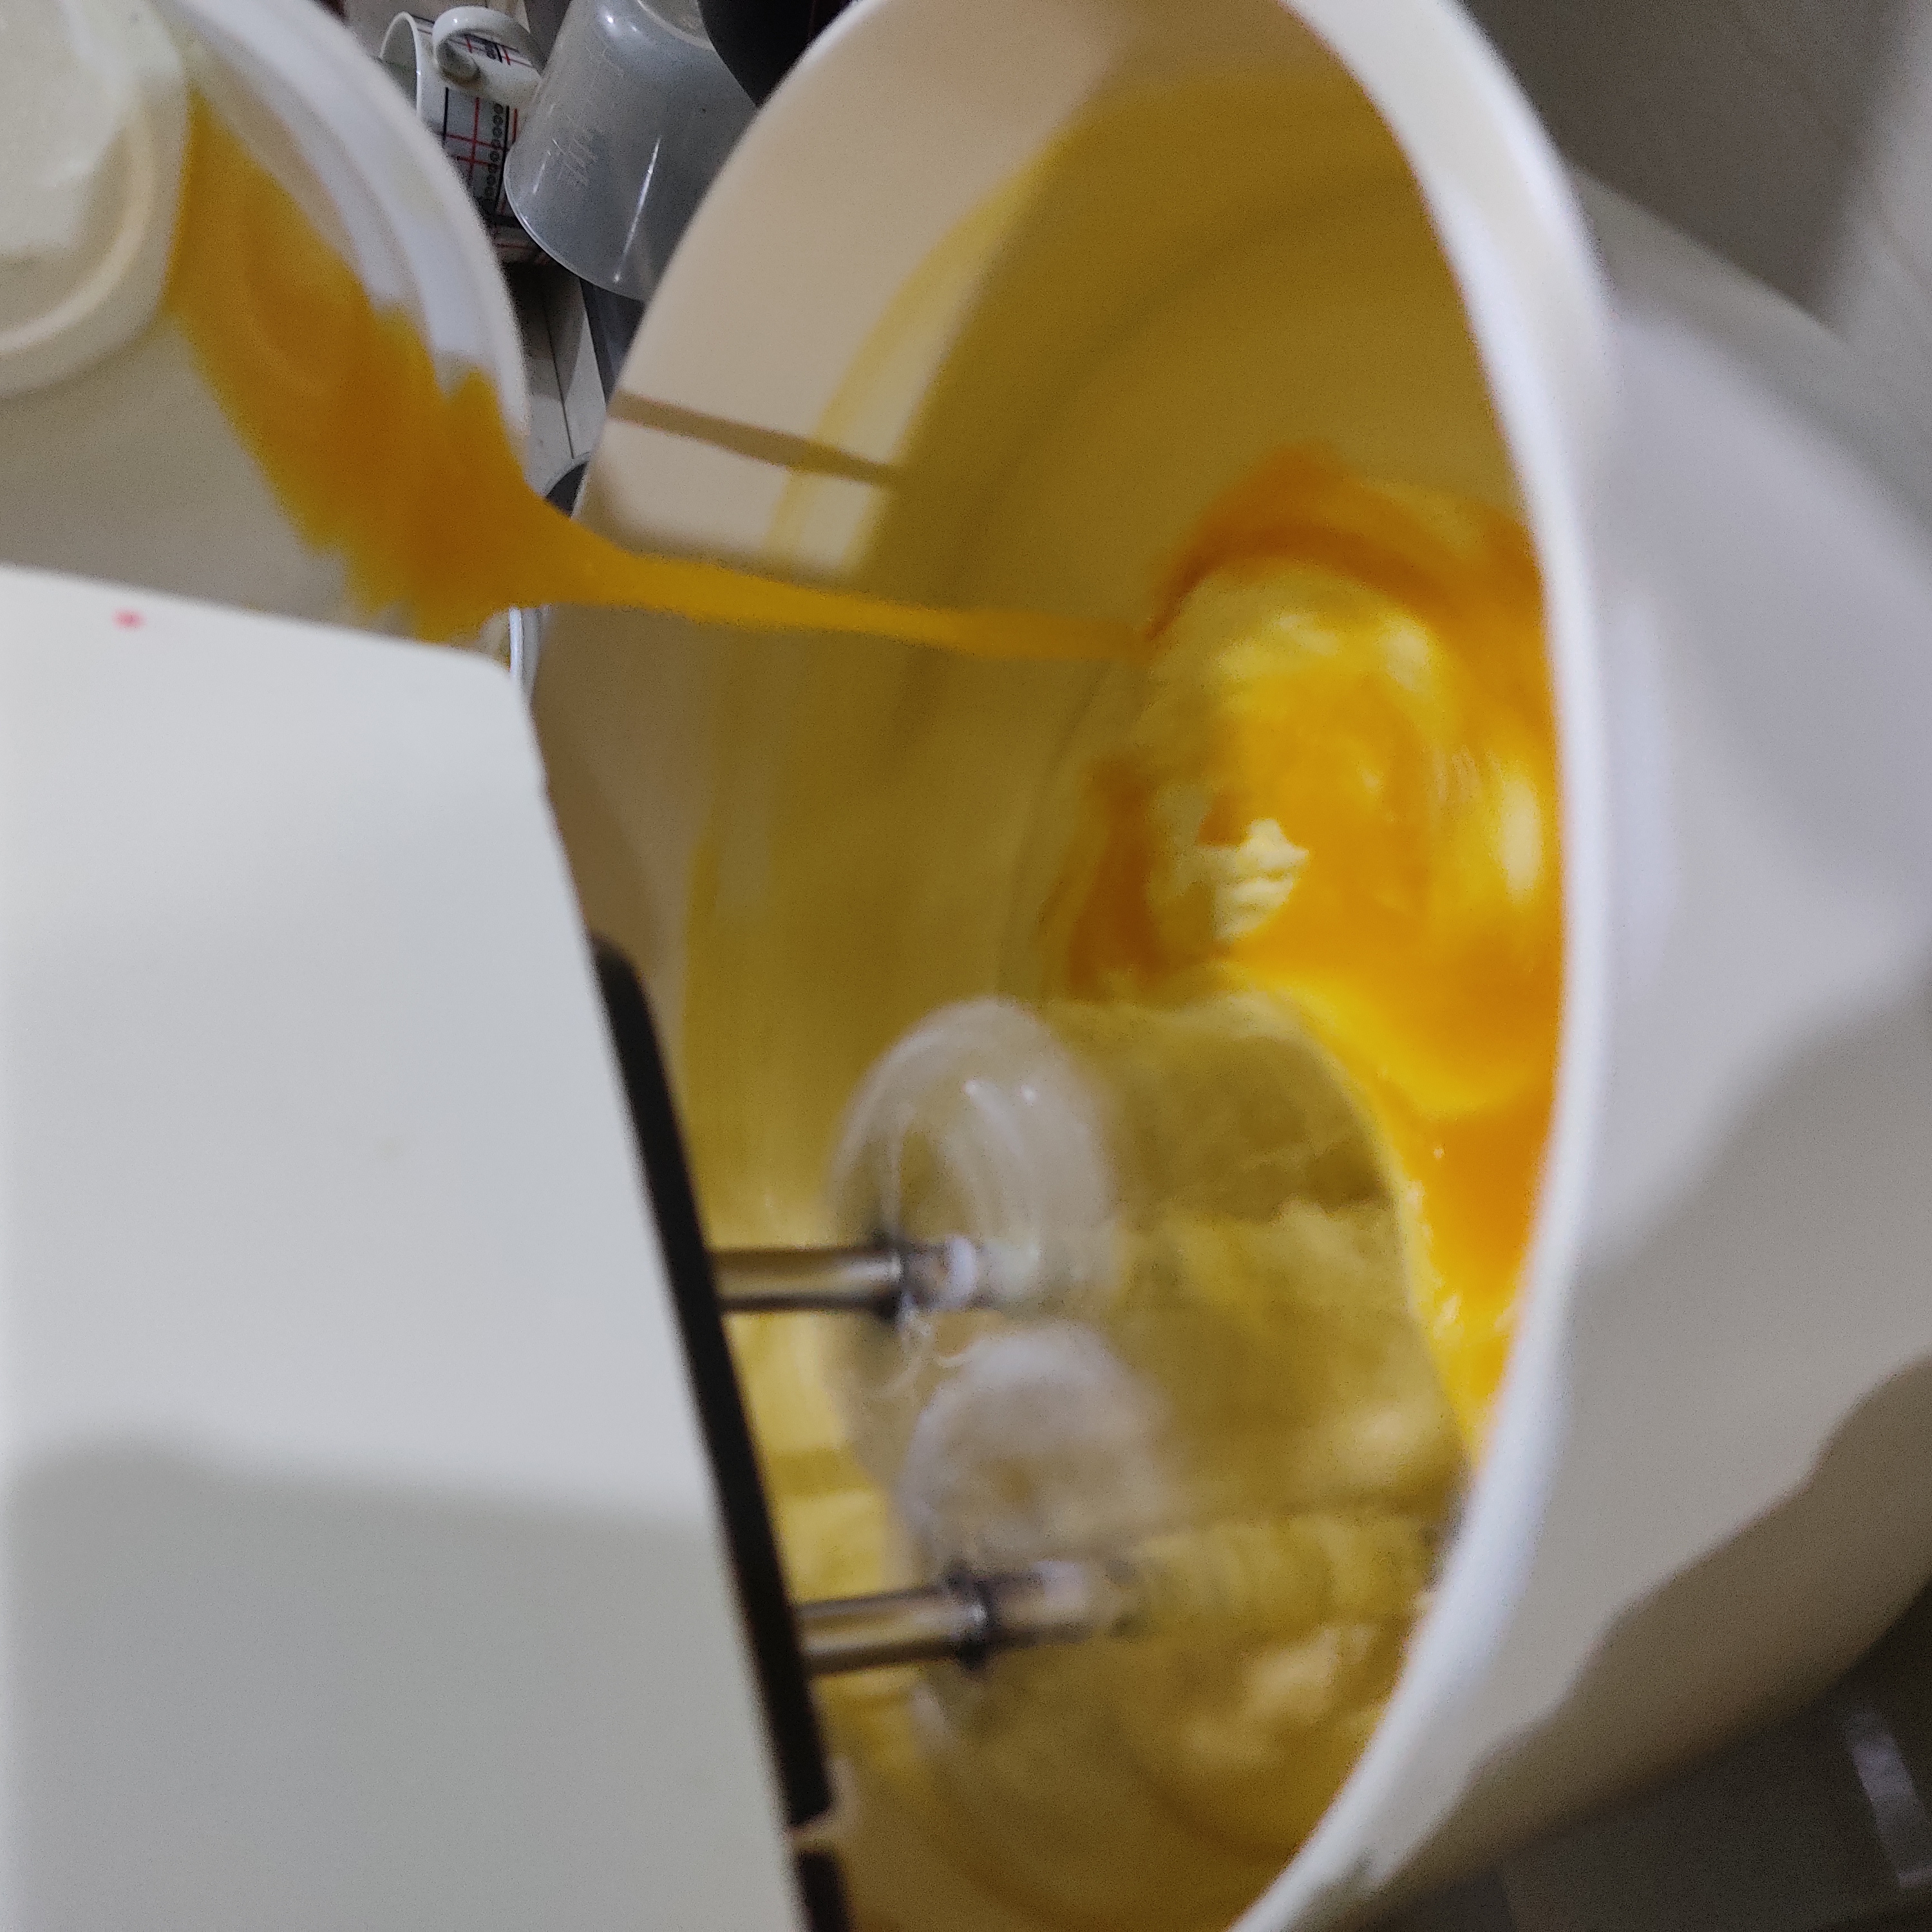
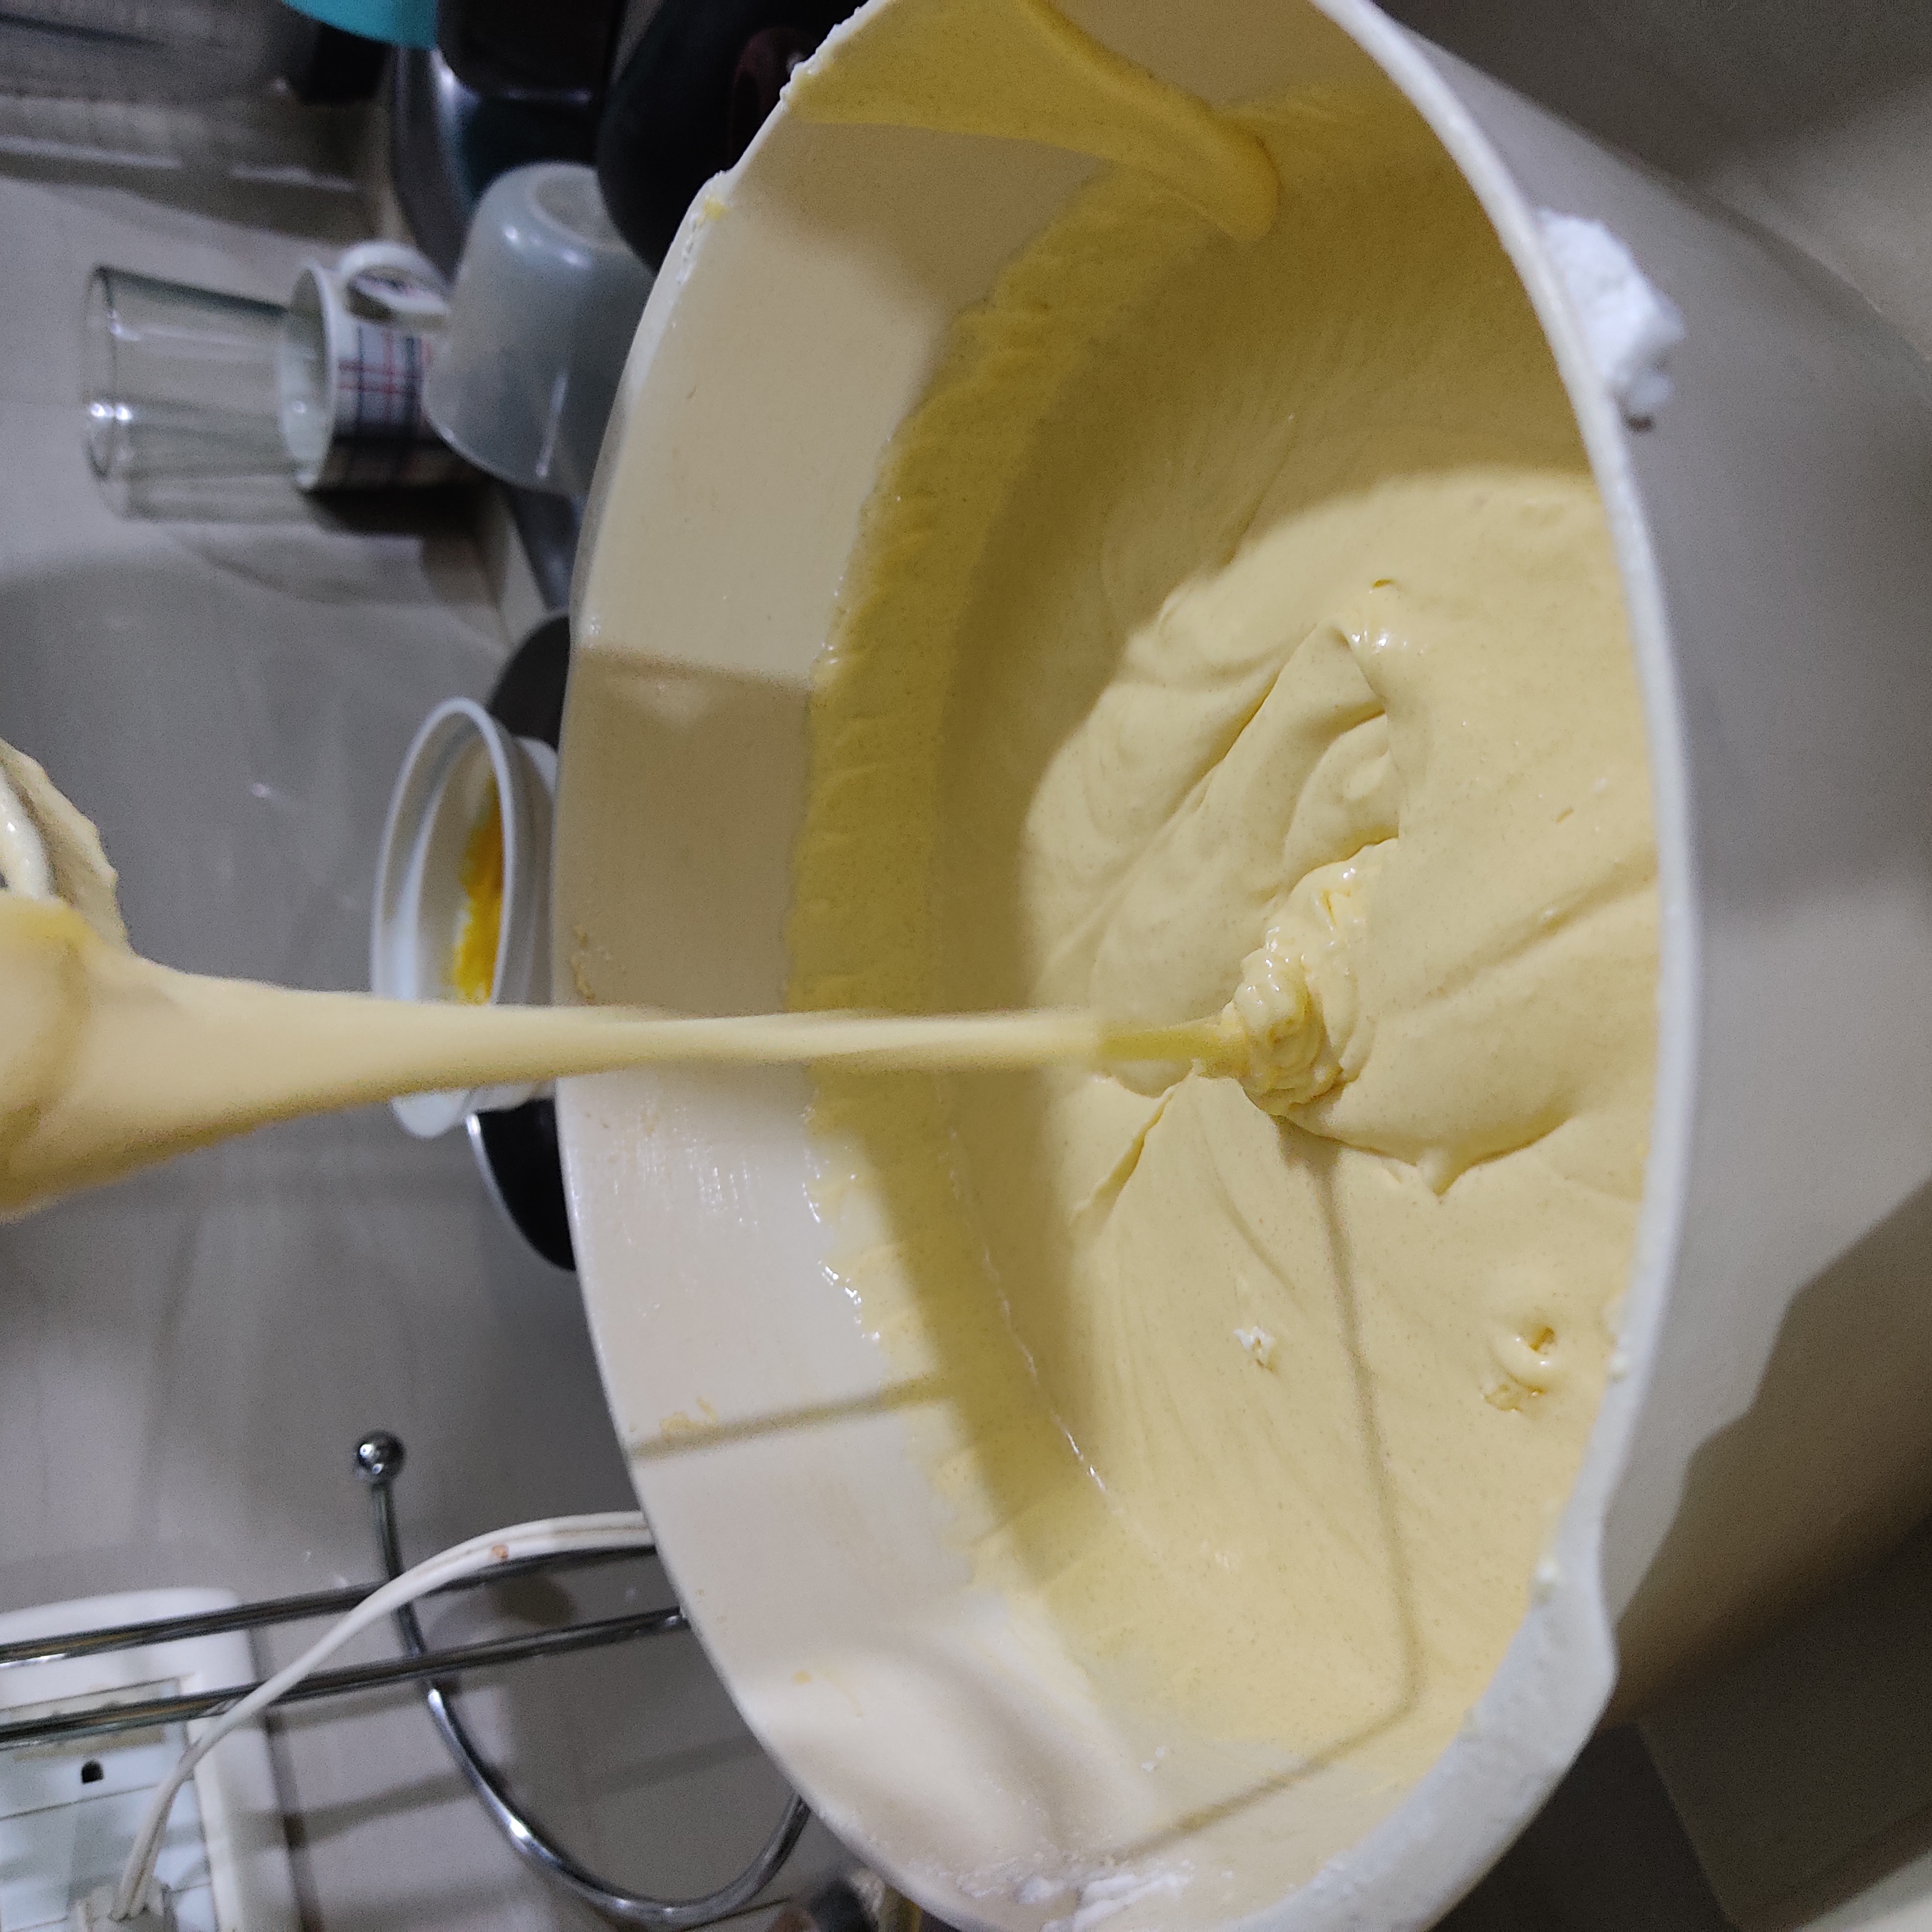
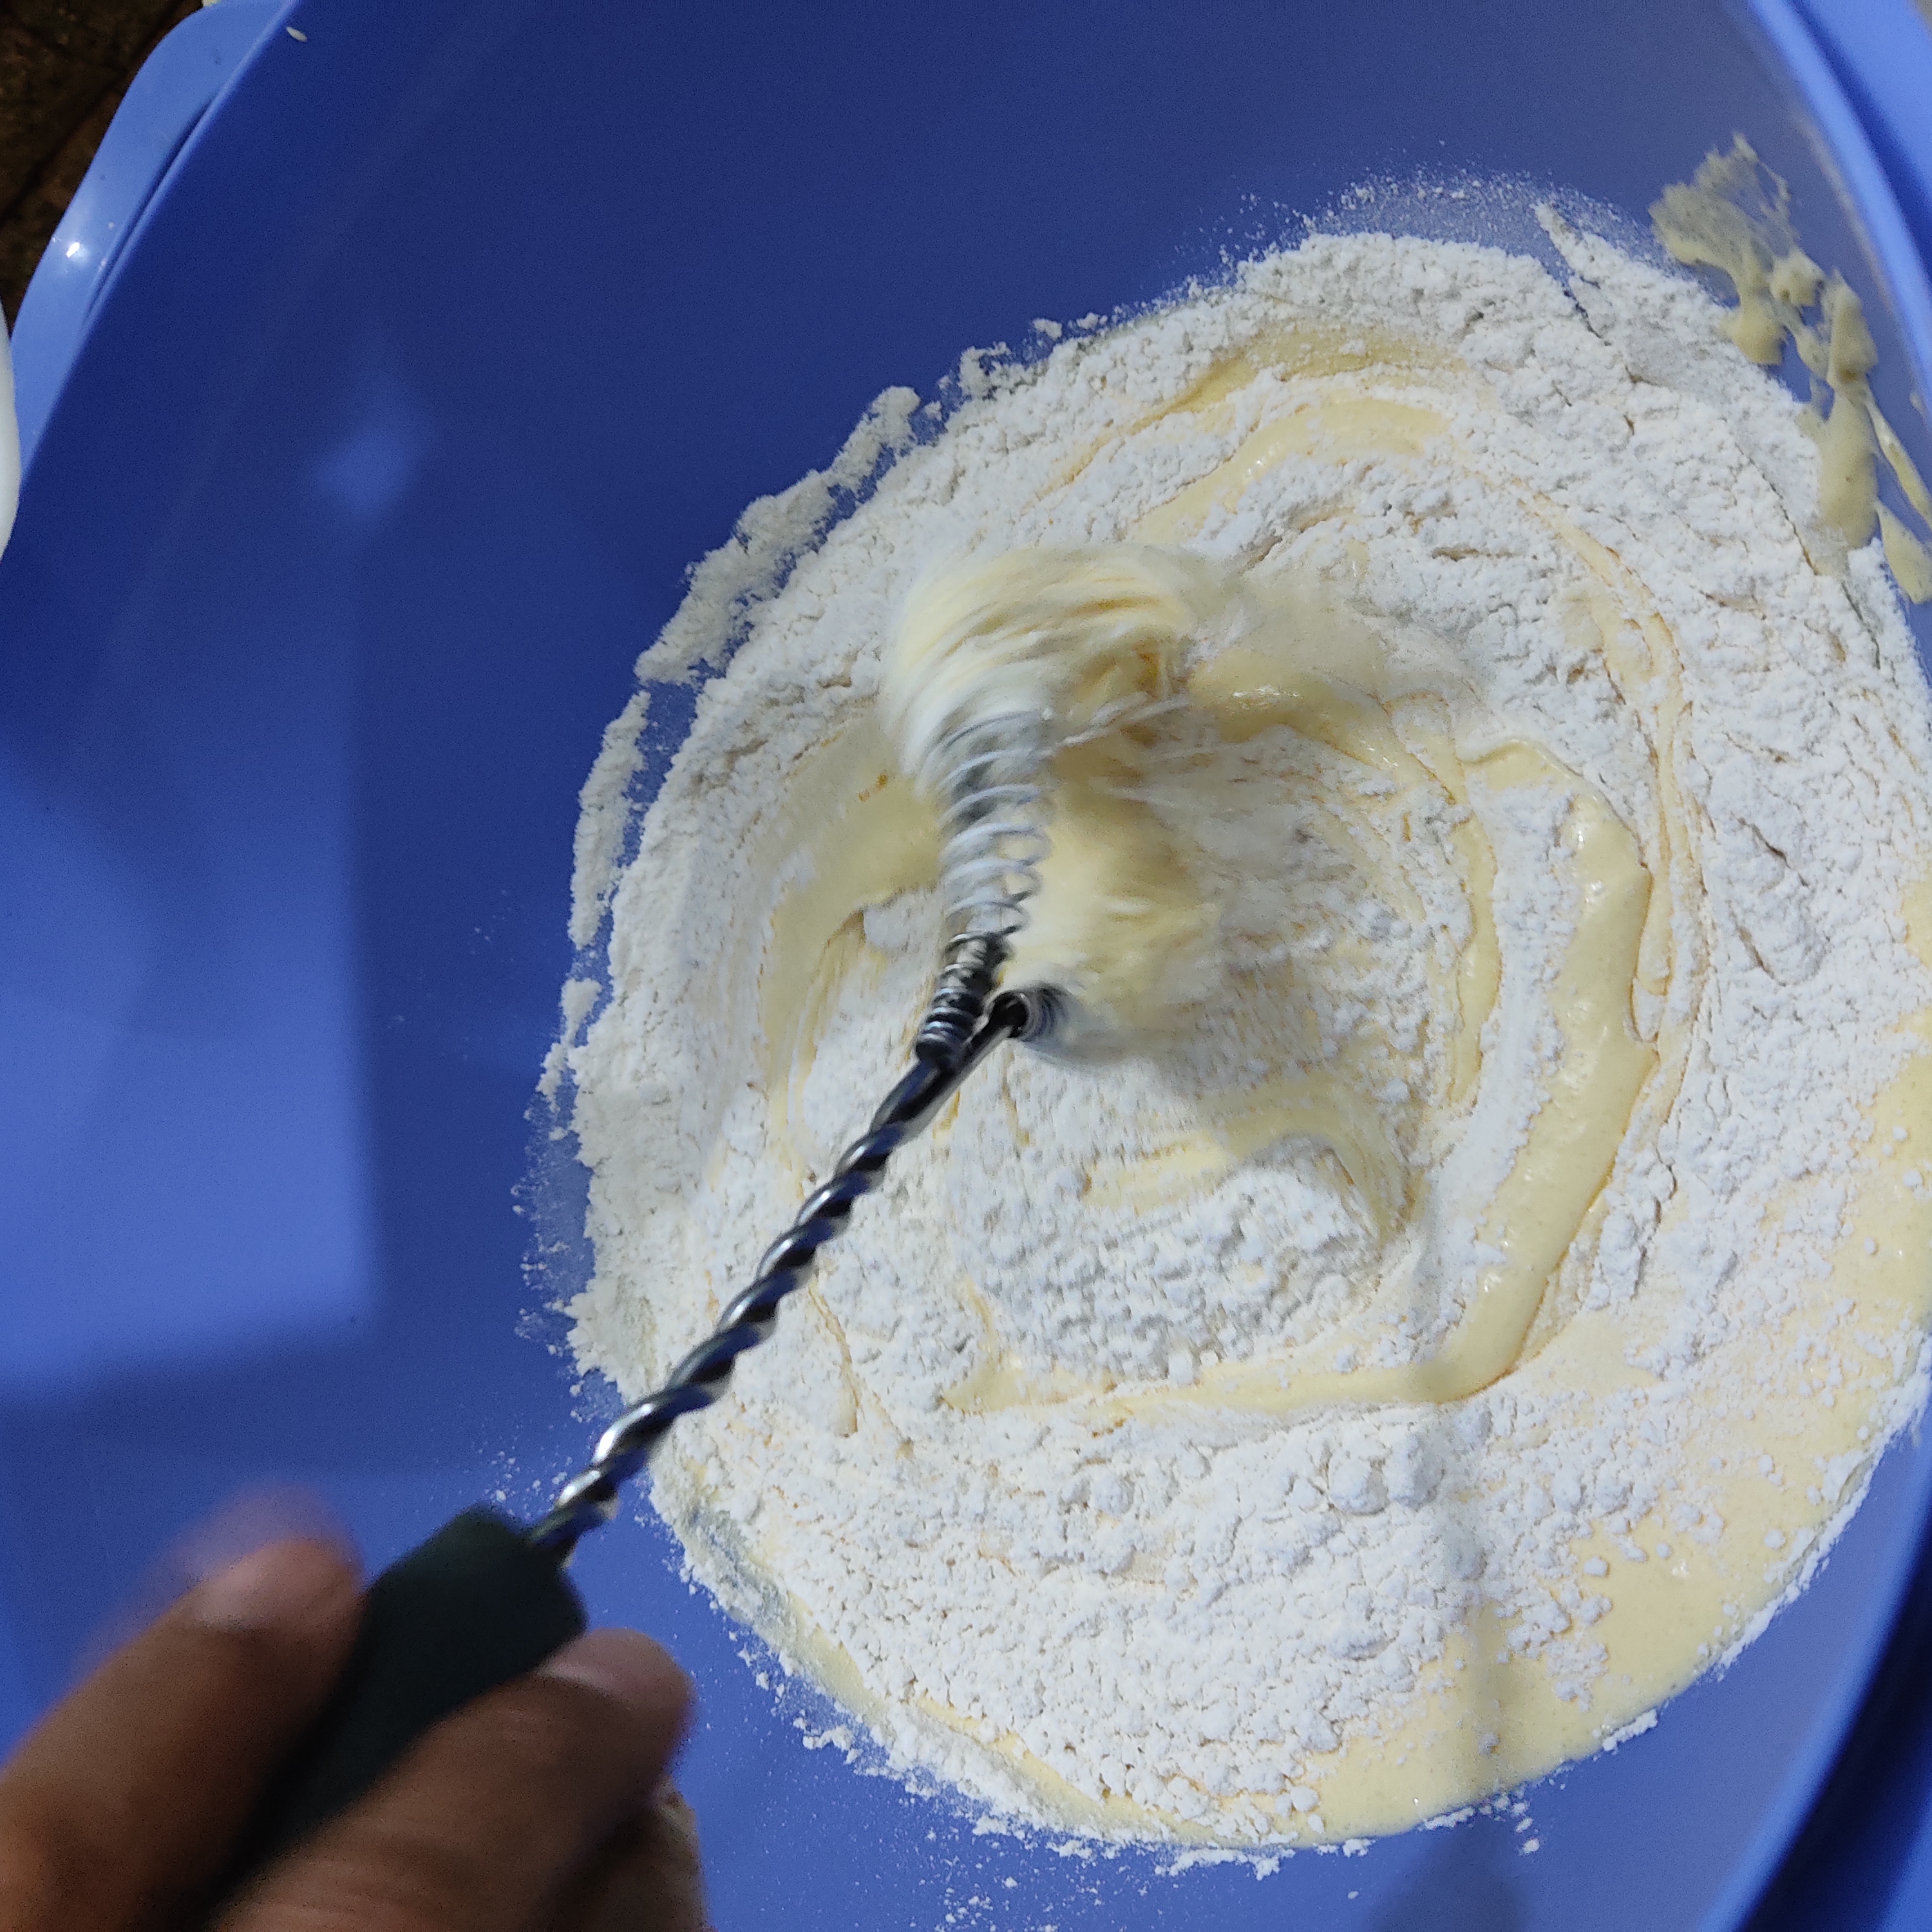
Paso 7. Pasamos a un Bolt más grande en donde agregaremos la mezcla y con ayuda de una paleta agreremos la harina en tres tandas, alternando la con el jugo de Parchita que teníamos reservado. Debemos terminar en harina y mezclamos en forma envolvente hasta integrar la harina, sin batir mucho para no desarrollar gluten. No importa si en la mezcla se observan bolitas de harina ya que éstas se disuelven durante la cocción.
Step 7. We move to a larger bowl where we will add the mixture and with the help of a paddle we will add the flour in three batches, alternating it with the Parchita juice that we had reserved. We must finish in flour and mix in an enveloping way until integrating the flour, without beating too much so as not to develop gluten. It does not matter if flour balls are observed in the mixture because they dissolve during cooking.
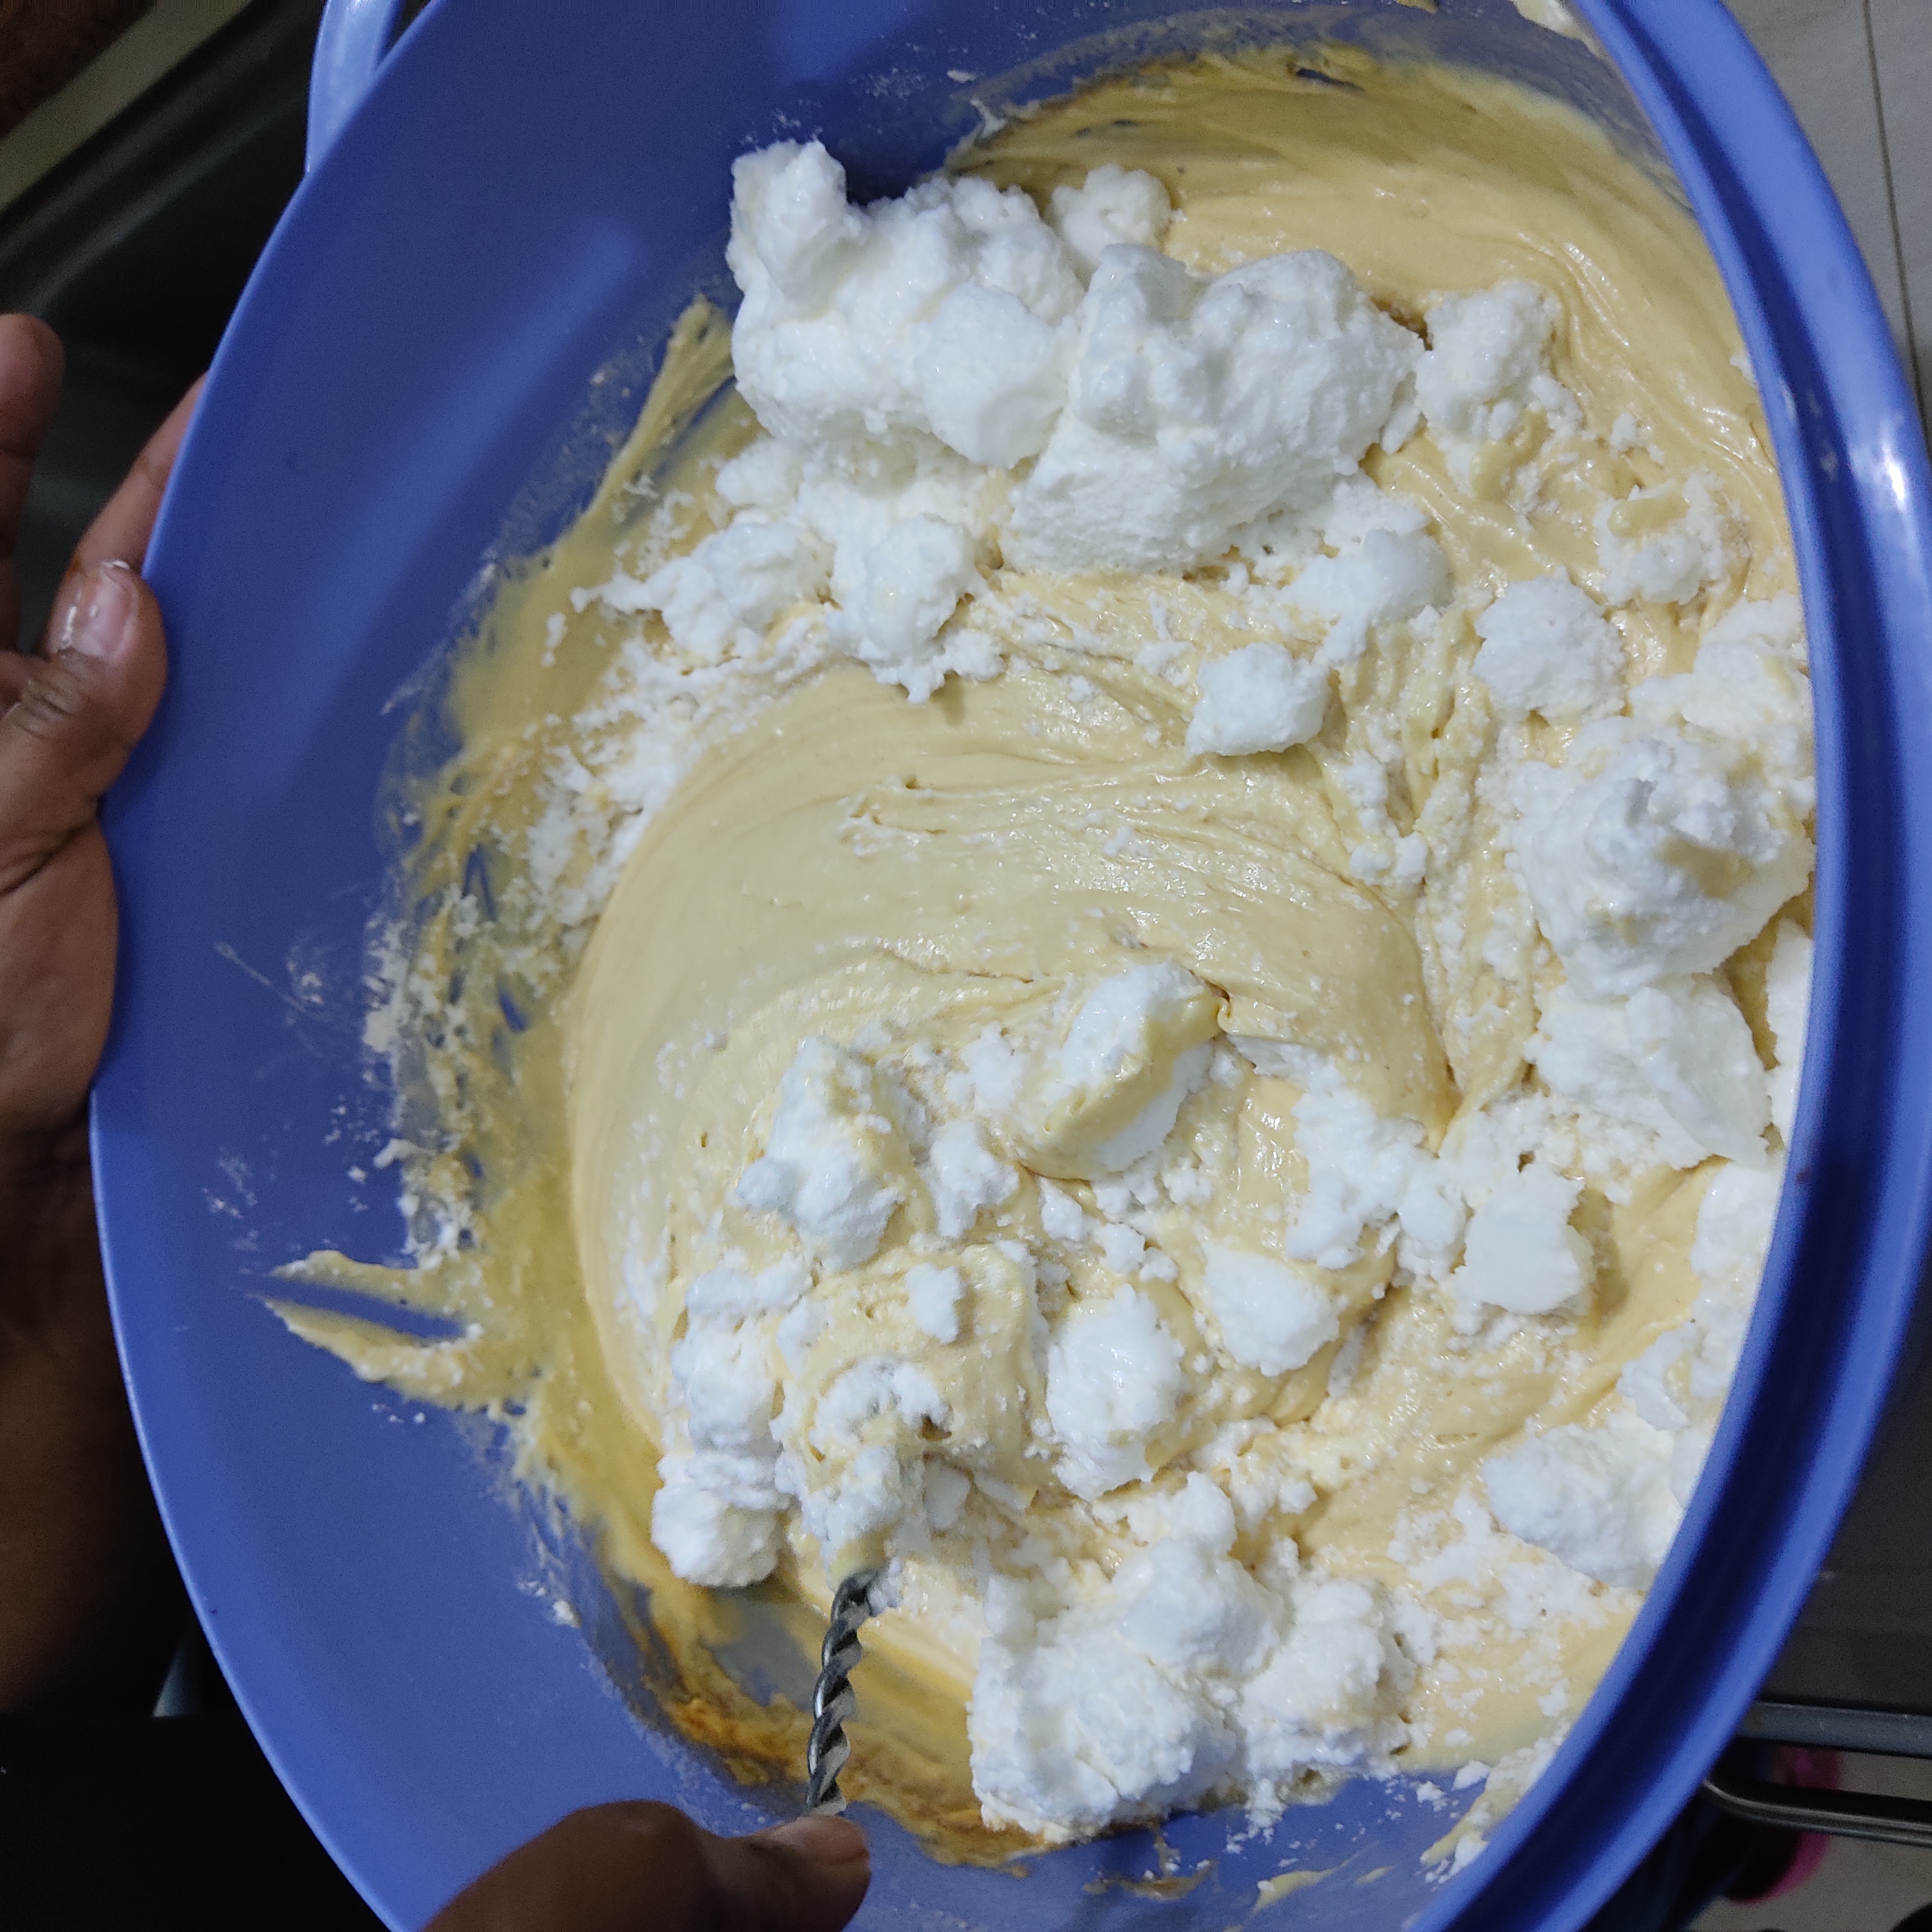
Paso 8. Luego a ésta mezcla le agregaremos en 2 tandas las claras a punto de nieve que teníamos reservadas. La mezclaremos igualmente en forma envolvente hasta integrar.
Step 8. Then to this mixture we will add in 2 batches the egg whites in stiff peaks that we had reserved. We will also mix it in an enveloping way until integrating.
Paso 9. En la tortera, procedemos a mantequillarla y agregarle harina para luego agregarle nuestra mezcla. Se hace esto para que al momento de despegar la torta, ésta no se pegue.
Step 9. In the cake pan, we proceed to butter it and add flour and then add our mixture. This is done so that when we take off the cake, it does not stick.

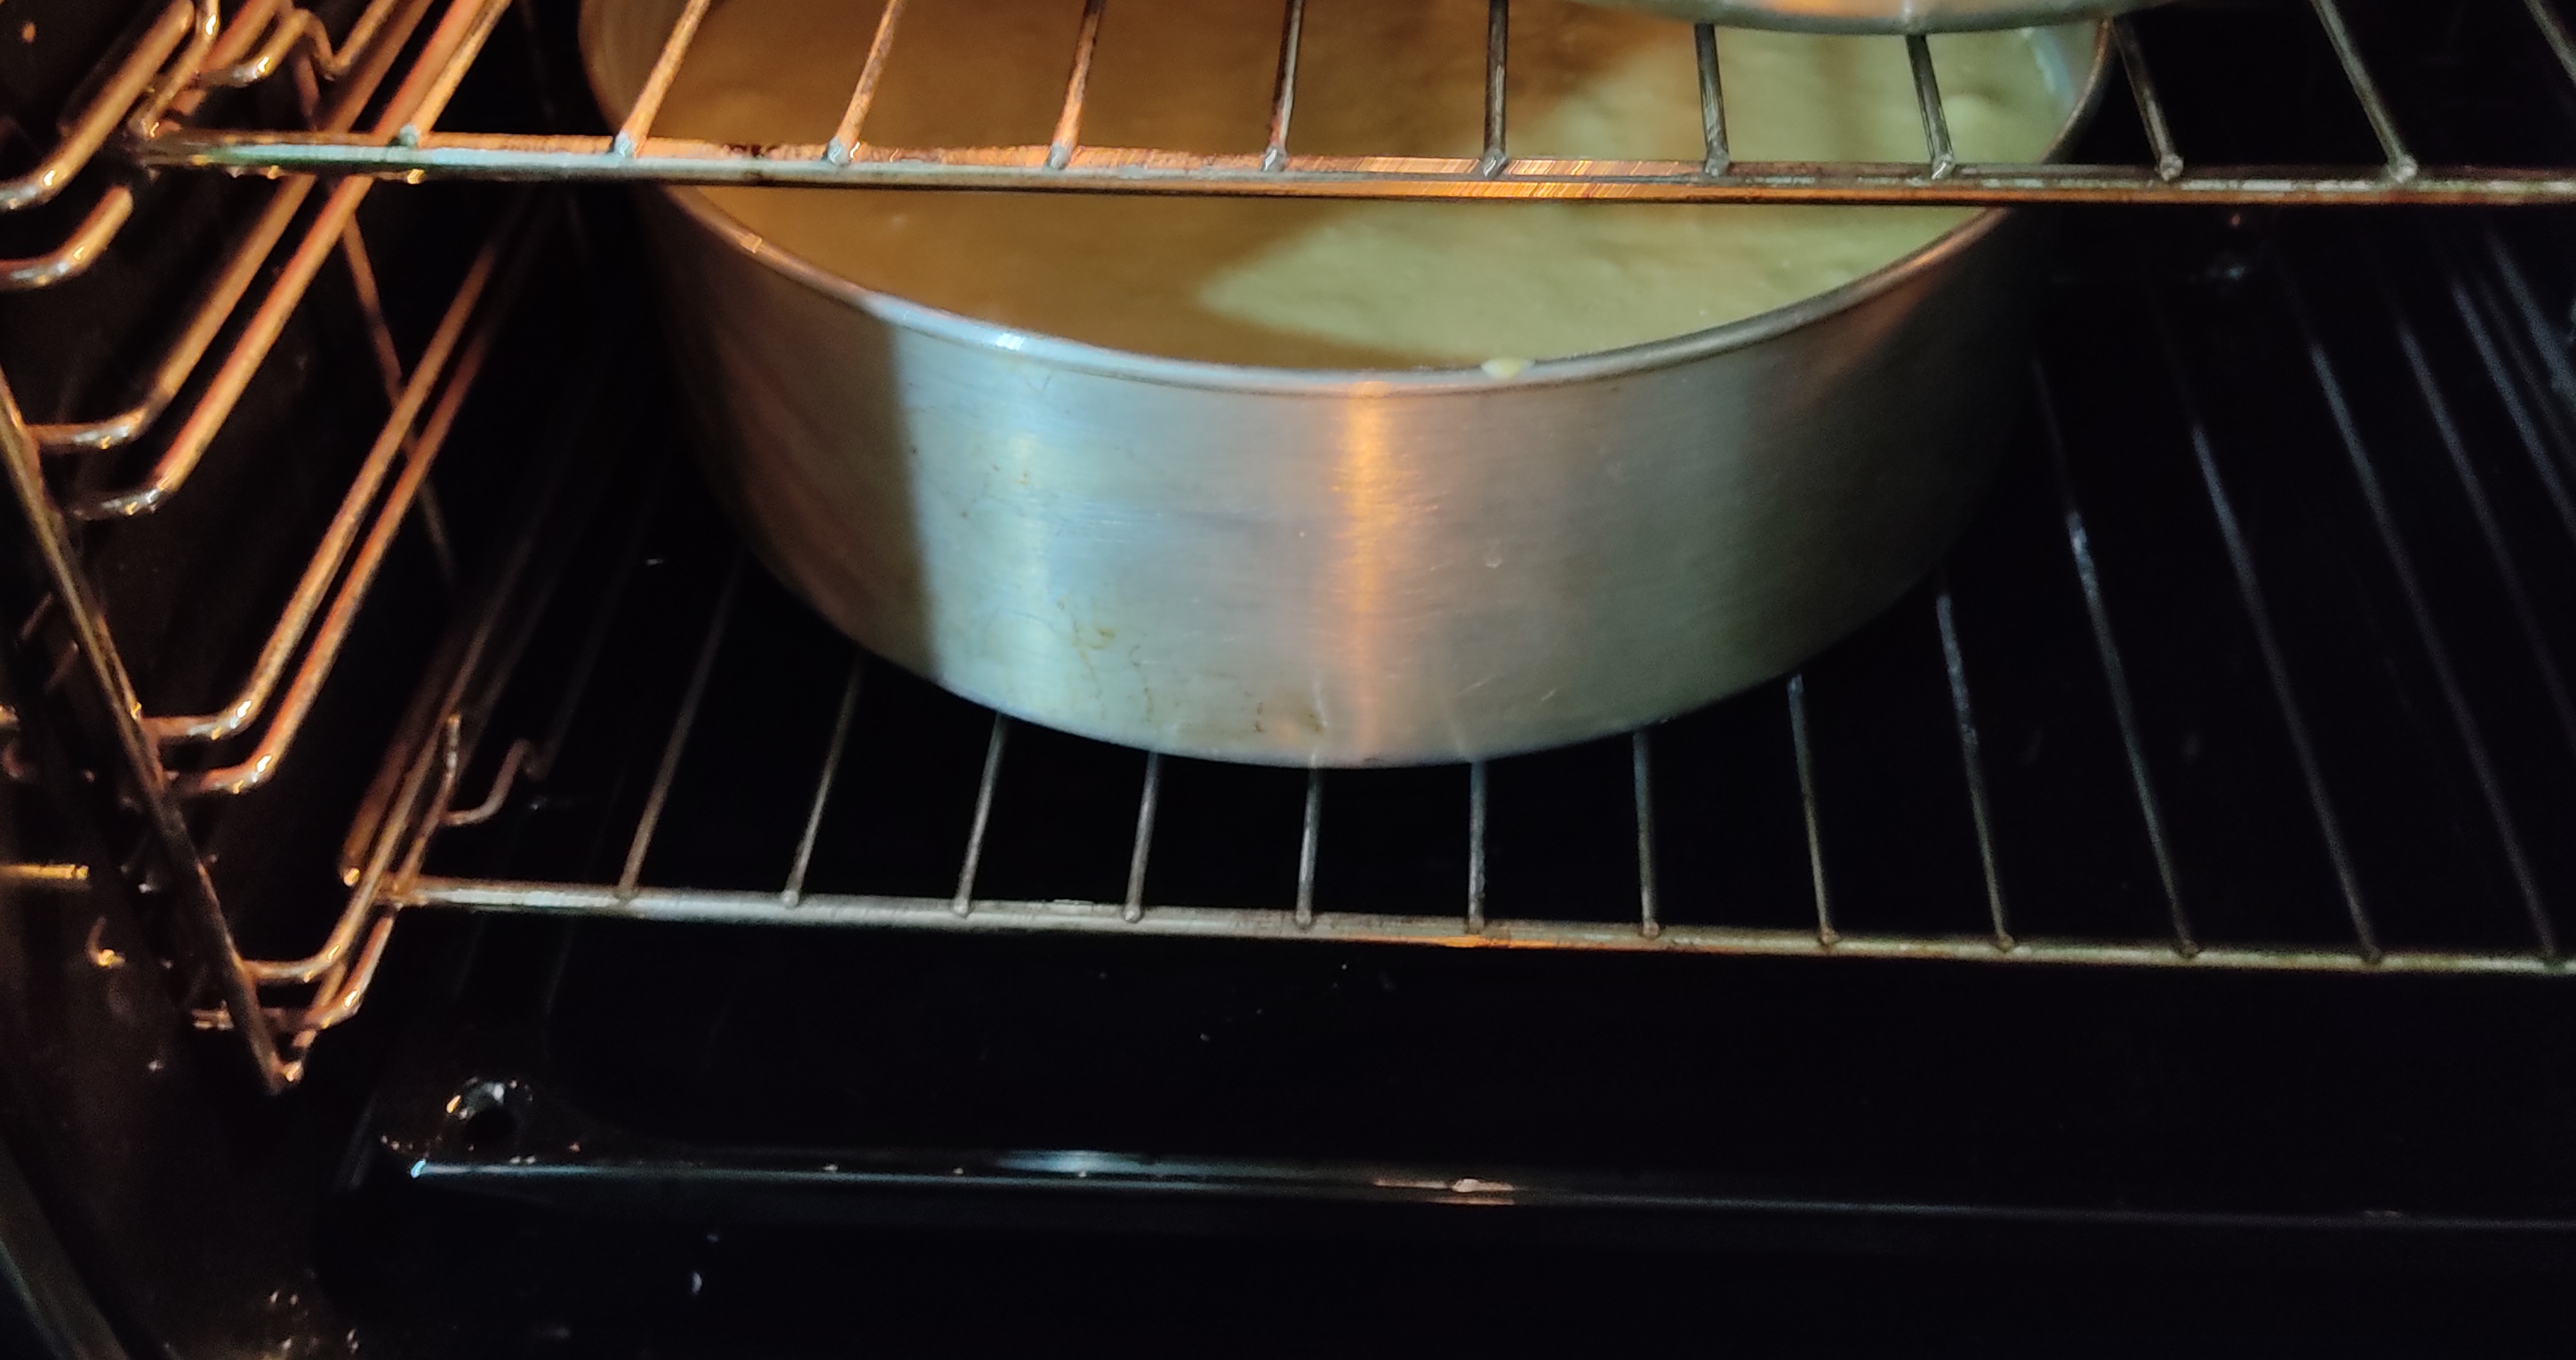
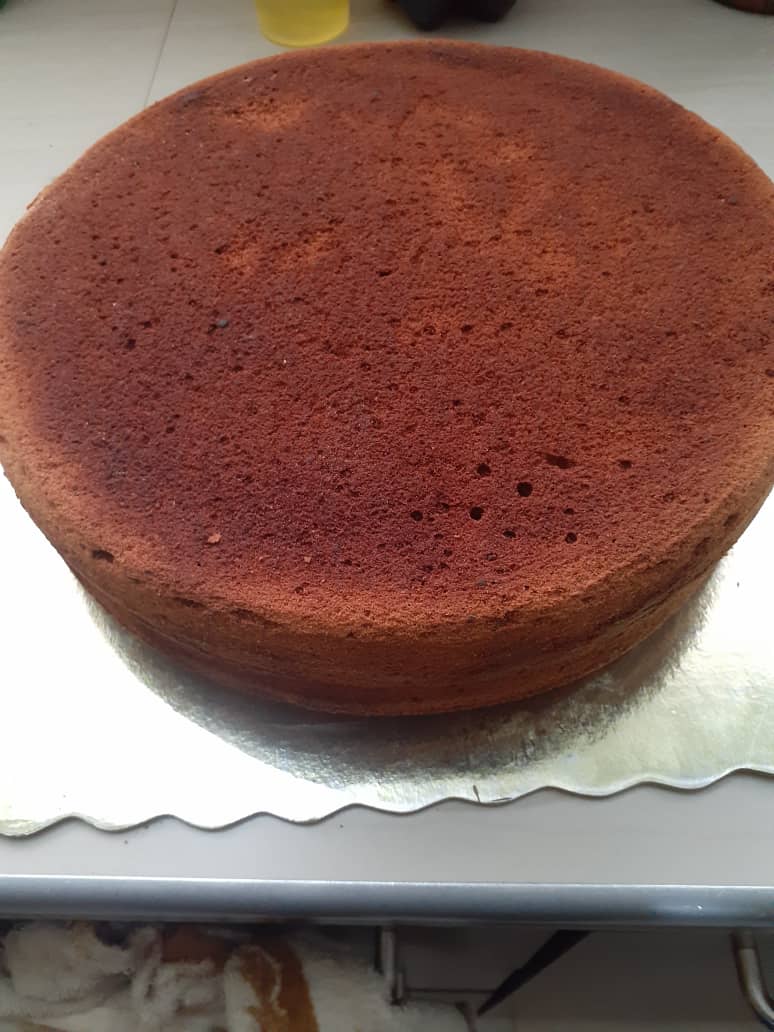
Paso 10. Luego procedemos a meter la torta en el horno ya precalentado (por 10 minutos) a 180°C por aproximadamente 1 hora. Para darse cuenta si la torta está lista, puede abrir el horno e introducir un palillo en el centro de la torta, si éste sale limpio su torta ya estará lista y procede a sacarla del horno. El tiempo de cocción no es uno exacto porque todo depende del horno que utilicen.
Step 10. Then proceed to put the cake in the preheated oven (for 10 minutes) at 180°C for approximately 1 hour. To see if the cake is ready, you can open the oven and insert a toothpick in the center of the cake, if it comes out clean your cake is ready and proceed to remove it from the oven. The cooking time is not an exact one because it all depends on the oven you use.
Paso 11. Una vez que sacamos la torta del horno, dejaremos reposar por 10 minutos en la tortera antes de proceder a desmoldar, si se desmolda caliente corremos con el riesgo de que se pueda quebrar. Luego dejamos que se enfríe completamente para poder decorarla.
Step 11. Once the cake is out of the oven, let it rest for 10 minutes in the cake pan before proceeding to unmold it, if it is unmolded while hot there is a risk that it may crack. Then let it cool completely to be able to decorate it.
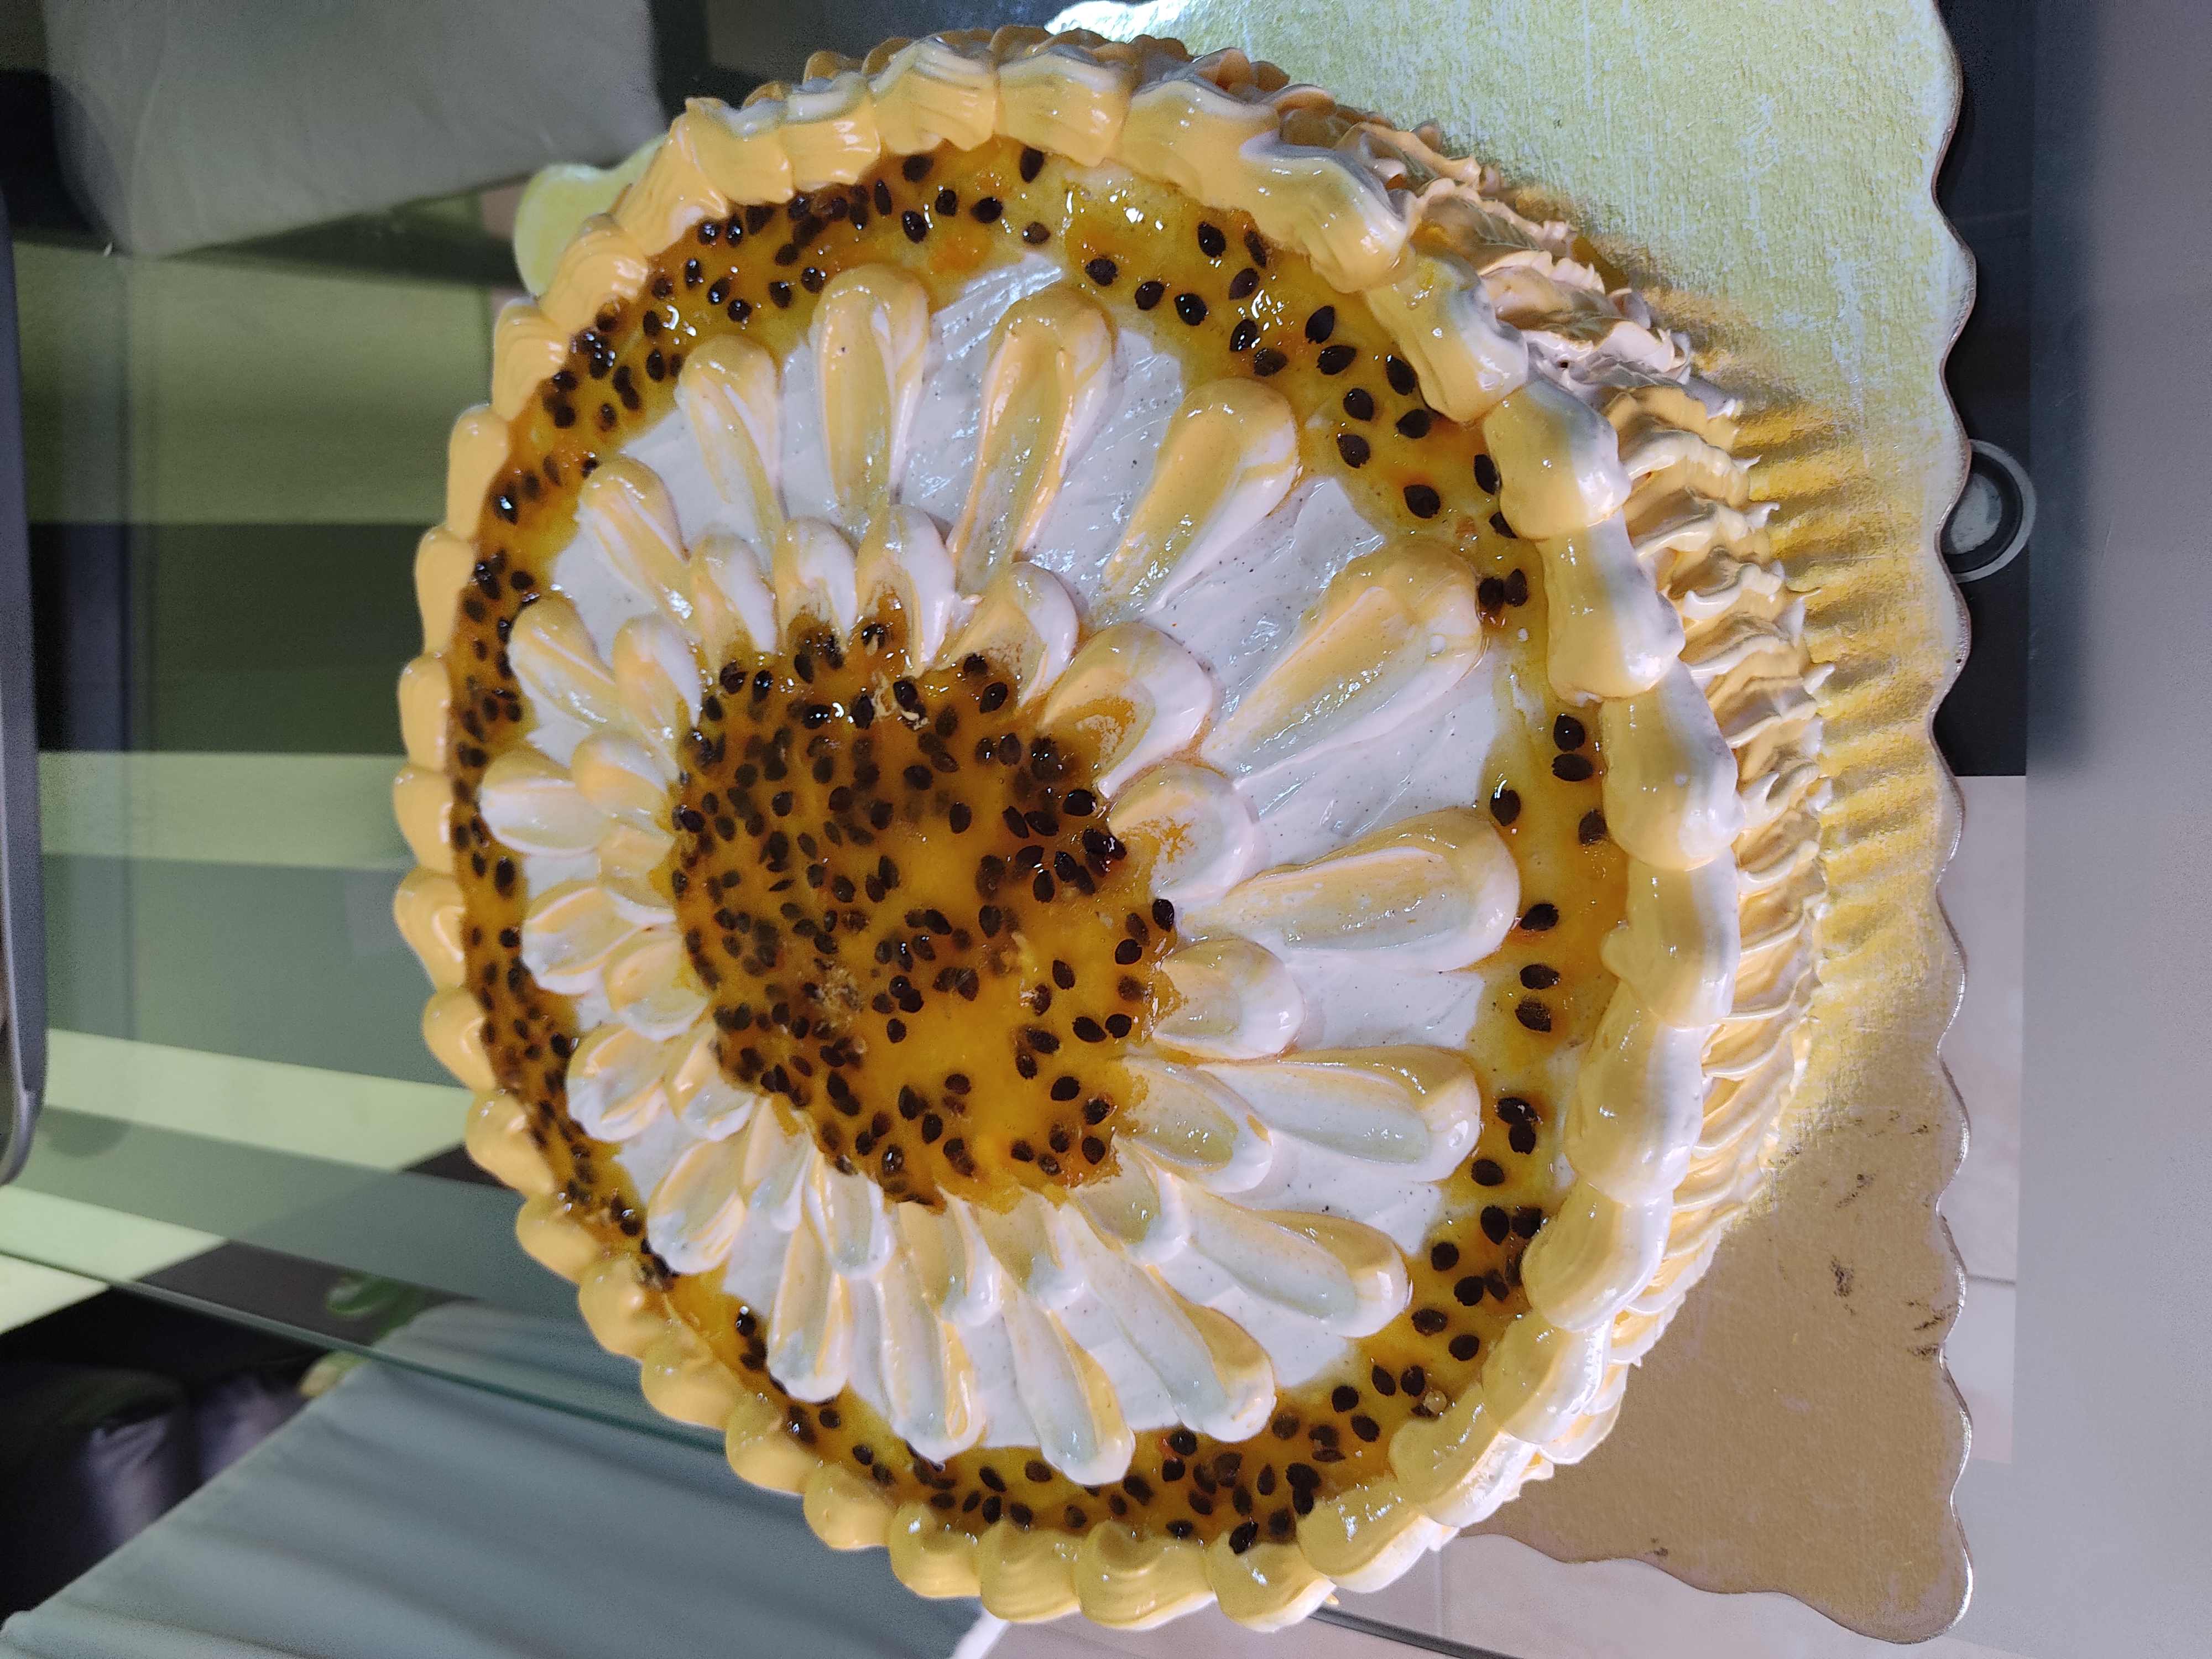
Y finalmente procedemos a la decoración!☺️
Pronto les puedo mostrar una pequeña receta en cómo hacer varios tipos de merengues para las decoraciones y varios estilos de boquillas.
And finally we proceed to the decoration!☺️
Soon I can show you a small recipe on how to make various types of meringues for decorations and various styles of nozzles.
Y éste sería el resultado final 🤩
And this would be the final result 🤩.
Cada banner y separador que se encuentra en éste Post son de mi propiedad, elaborados en la app Canvas
Las imágenes adjuntas son mías tomadas desde mi celular
Each banner and separator in this Post are my property, made in the Canvas app
The attached images are mine taken from my cell phone

Parchita, maracuyá o fruta de la pasión, demasiado rico. Todo lo que se hace con esta fruta queda increíble. Además la decoración te quedó genial. Muy atractiva.
Saludos desde Bogotá.
Definitivamente! Una de mis frutas favoritas para los postres. Me alegra que te haya gustado. Muchísimas gracias 😊❤️❤️
Un postre ejemplar amiga😋👏🏼😃😍☺️🤗😁😉😊😋👍🏼
Gracias por compartir
🌻💮🌹🌺🌼🏵️🌸🌷💐💜
Gracias a ti por pasar por aquí ☺️❤️
Congratulations @lemarysdr! You have completed the following achievement on the Hive blockchain and have been rewarded with new badge(s):
Your next payout target is 250 HP.
The unit is Hive Power equivalent because post and comment rewards can be split into HP and HBD
You can view your badges on your board and compare yourself to others in the Ranking
If you no longer want to receive notifications, reply to this comment with the word
STOPTo support your work, I also upvoted your post!
Check out the last post from @hivebuzz:
Support the HiveBuzz project. Vote for our proposal!
I love passion fruit thus cake must be super delicious!!😍