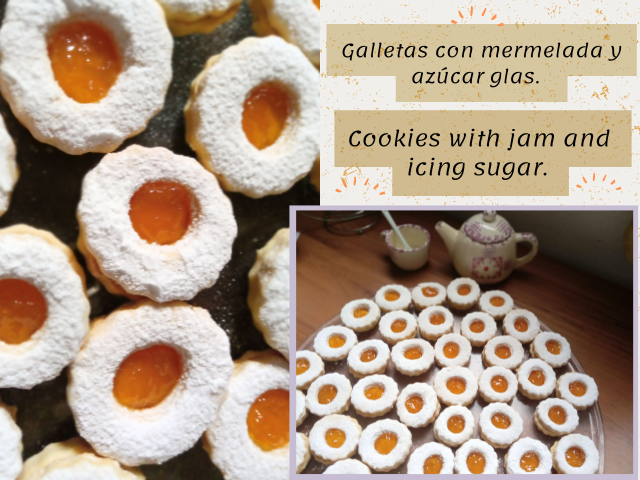
🍯¡Buenas tardes amigos amantes de la comida! Espero pasen un excelente fin de semana.🍯
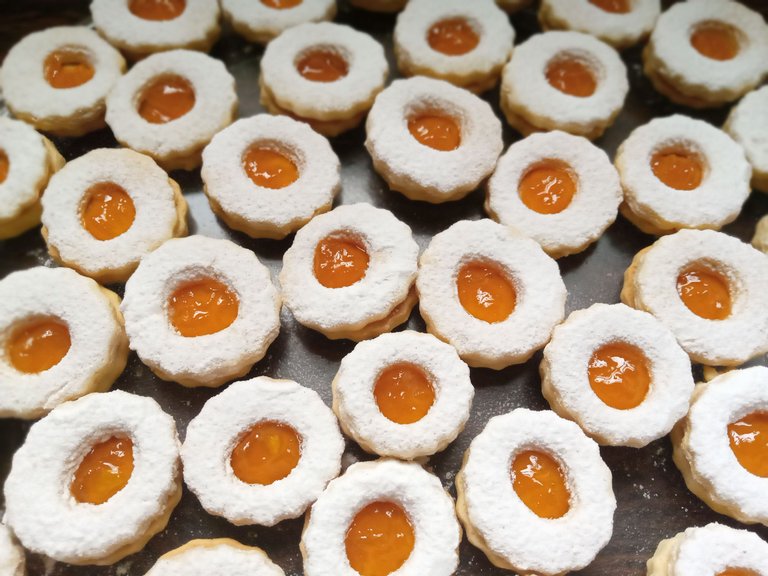
En esta ocasión les traigo una receta de galletas rellenas de mermelada y espolvoreadas con azúcar glas, seguro que les va a encantar. Prepararlas es más fácil de lo que parece y no hay que dejar reposar esta masa. Estoy muy feliz con el resultado, parecen compradas. Incluso, me preguntaron que si las había comprado. Son ideales para cualquier ocasión o evento, pero yo las veo perfectas para la época navideña, el azúcar glas les da un aspecto de nieve muy bonita. Espero se animen a prepararlas.
🔸A continuación, les dejo la receta con el paso a paso.🔸
🍯¡Good afternoon food loving friends! I hope you have a great weekend.🍯
This time I bring you a recipe for cookies filled with jam and sprinkled with icing sugar, I'm sure you're going to love it. Preparing them is easier than it seems and you should not let this dough rest. I am very happy with the result, they seem bought. They even asked me if I had bought them. They are ideal for any occasion or event, but I see them as perfect for the holiday season, the icing sugar gives them a very pretty snow-like appearance. I hope you are encouraged to prepare them.
🔸Next, I leave you the recipe with the step by step.🔸
♥️Espero les guste. ¡Comencemos!
♥️I hope you like it. Let's get started!

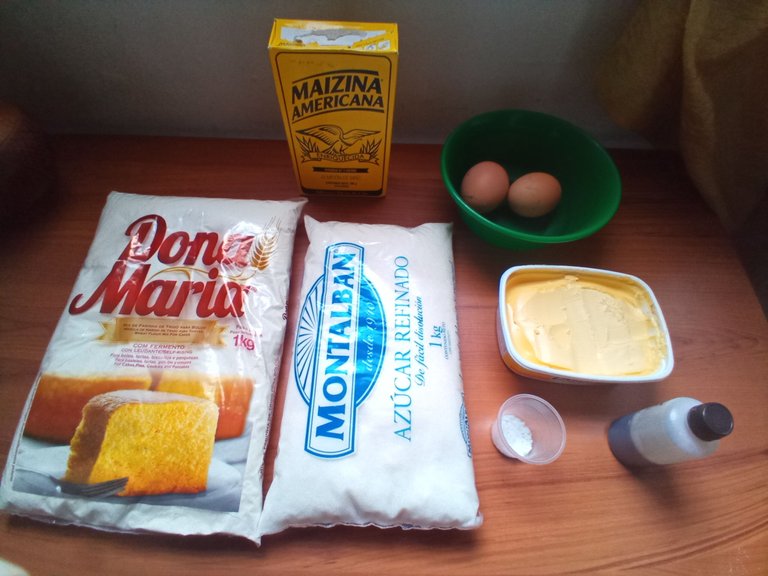
🍶 INGREDIENTES | 🍶 INGREDIENTS
- 3 tazas y ½ de harina de trigo.
- ¾ de taza de fécula de maíz.
- 180gr de mantequilla.
- 1 taza de azúcar.
- 2 huevos.
- 1 cucharadita de vainilla.
- Pizca de sal.
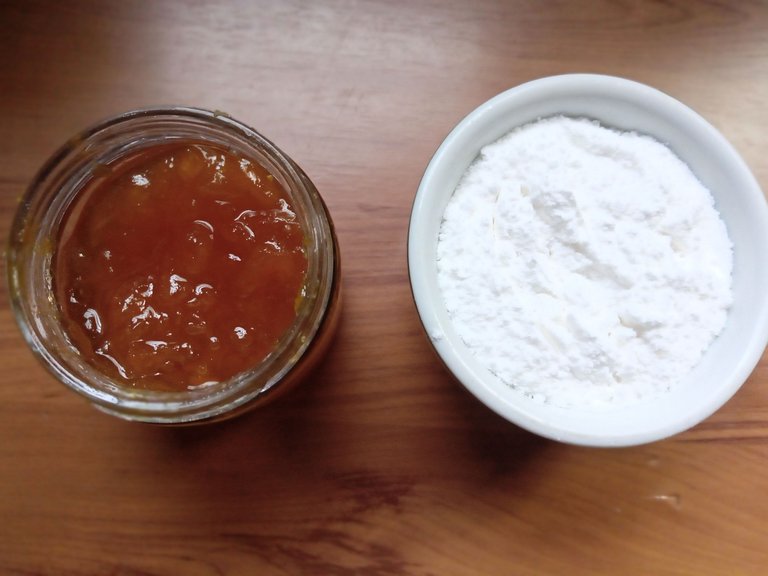
🍶Para el relleno y cobertura:
- 🍯 Mermelada.
- 🍬 Azúcar glass.
- 3 and ½ cups of wheat flour.
- ¾ cup of cornstarch.
- 180gr butter.
- 1 cup of sugar.
- 2 eggs.
- 1 teaspoon of vanilla.
- Pinch of salt.
🍶for the filling and topping:
- 🍯 Jam.
- 🍬 Sugar glass.
🍪 PREPARACIÓN | 🍪 PREPARATION
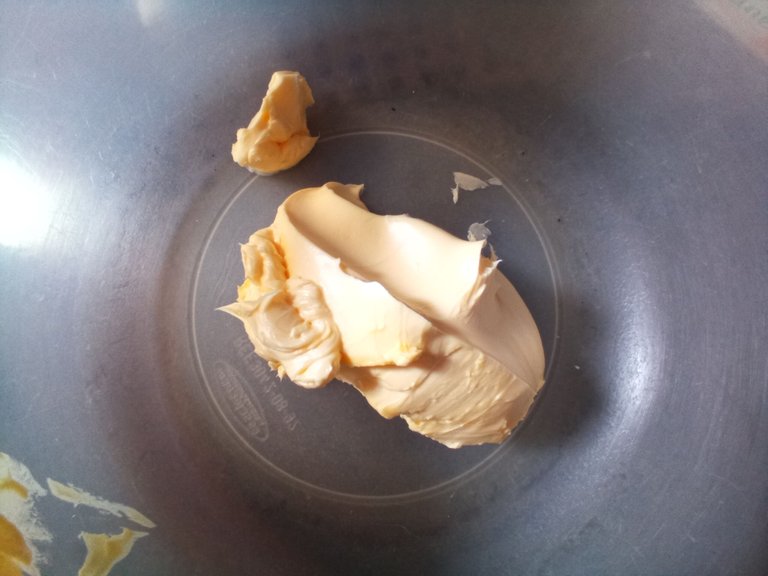
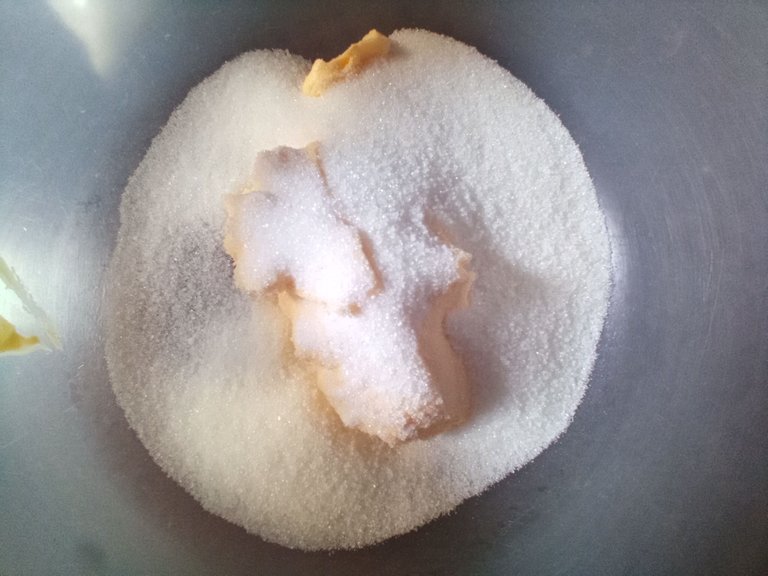
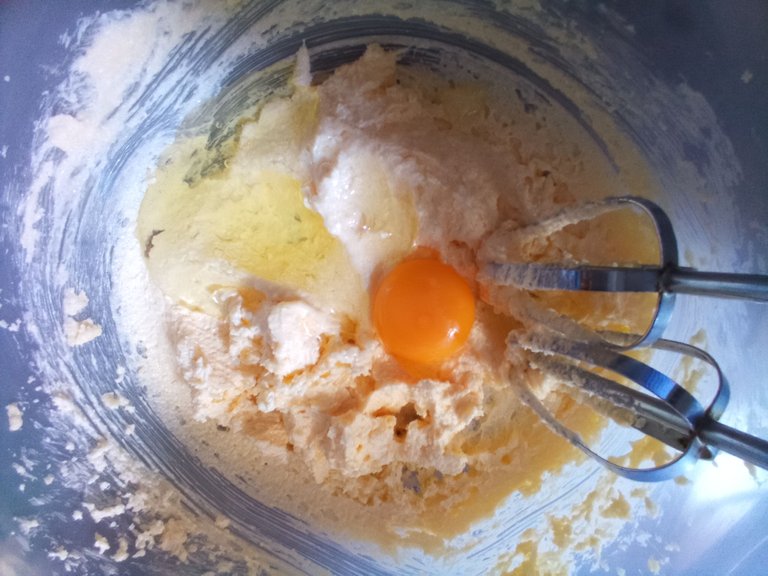
- 1 PASO:
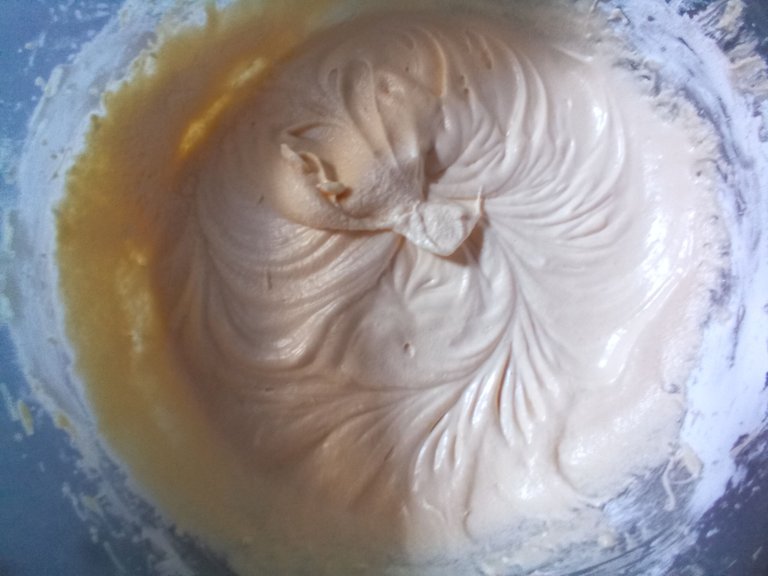
Empezamos añadiendo a un recipiente los 180 gramos de mantequilla, 1 taza de azúcar y batimos. Cuando el azúcar esté bien integrado y la mantequilla esté un poco más blanca, añadimos; los huevos uno a uno y unimos muy bien.
- 1 STEP:
We start by adding the 180 grams of butter, 1 cup of sugar to a container and beat. When the sugar is well integrated and the butter is a little whiter, we add; the eggs one by one and combine very well.

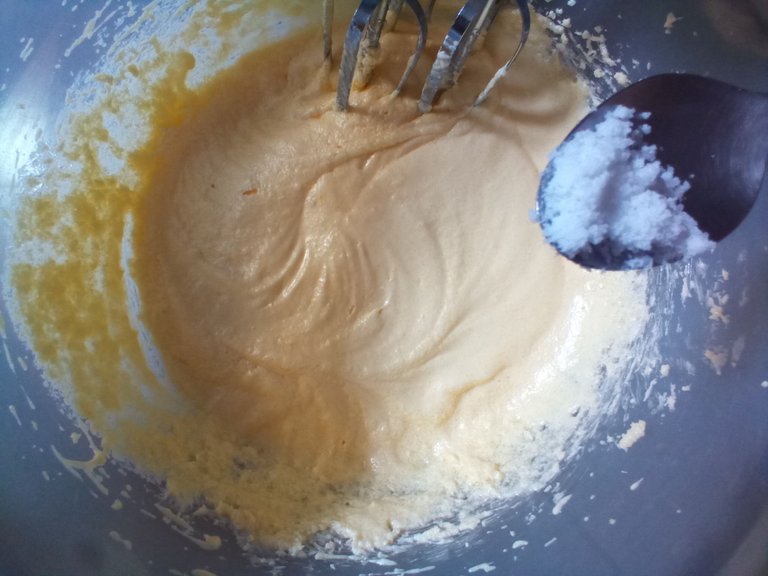
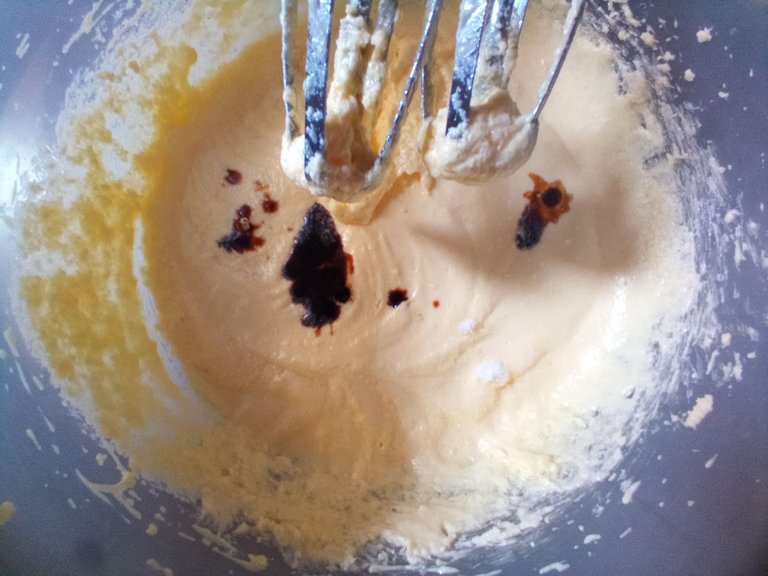
- 2 PASO:
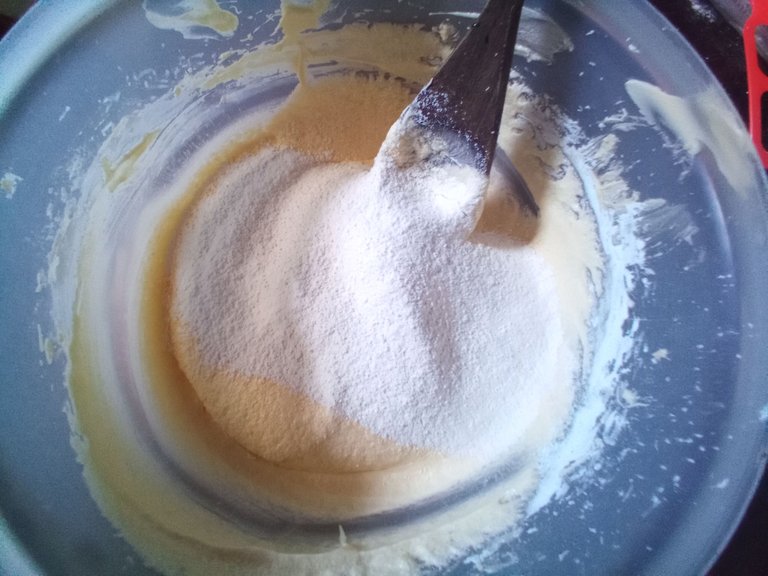
Una vez hecho esto, le agregamos una pizca de sal, 1 cucharadita de esencia de vainilla, ¾ de taza de fécula de maíz y nuevamente batimos muy bien con nuestra batidora eléctrica, globo o cuchara de madera. (En el caso de que tu harina de trigo no tenga levadura agrega 1 cucharadita de polvo para hornear).
- 2 STEP:
Once that is done, we add a pinch of salt, 1 teaspoon of vanilla essence, ¾ cup of cornstarch and again, we beat very well with our electric mixer, balloon or wooden spoon. (In the event that your wheat flour does not have yeast add 1 teaspoon of baking powder).
- 3 PASO:
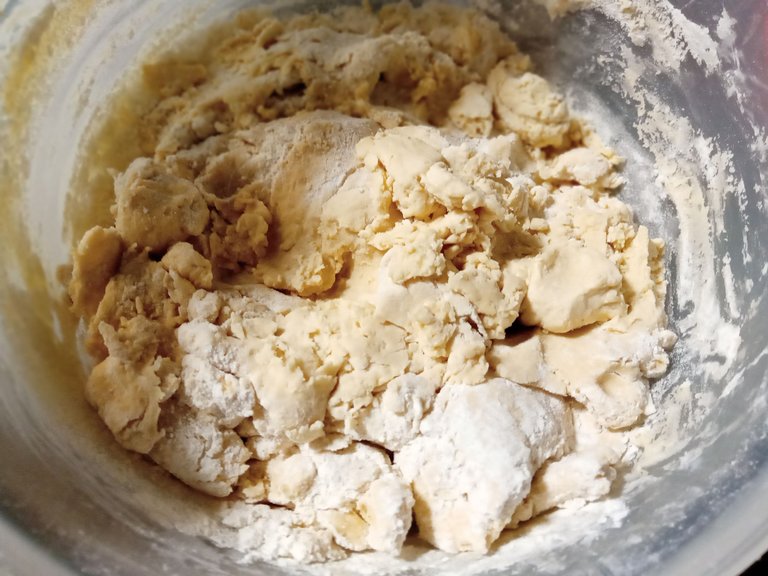
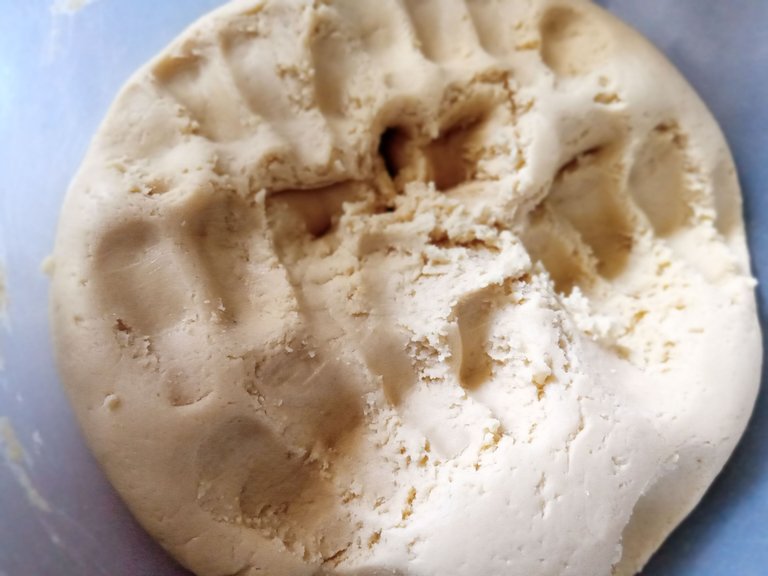
Continuamos, en este punto podemos utilizar una cuchara de madera. Agrega las 3 tazas y ½ de harina de trigo, una por una. Es decir, añadimos uno, unimos y así hasta terminar con la harina. En el punto en que ya no podamos movernos con la cuchara de madera, podemos ayudarnos con las manos.
- 3 STEP:
We continue, at this point we can use a wooden spoon. Add the 3 and ½ cups of wheat flour, one by one. That is, we add one, unite and so on until we finish with the flour. At the point where we can no longer move with the wooden spoon, we can help ourselves with our hands.
- 4 PASO:
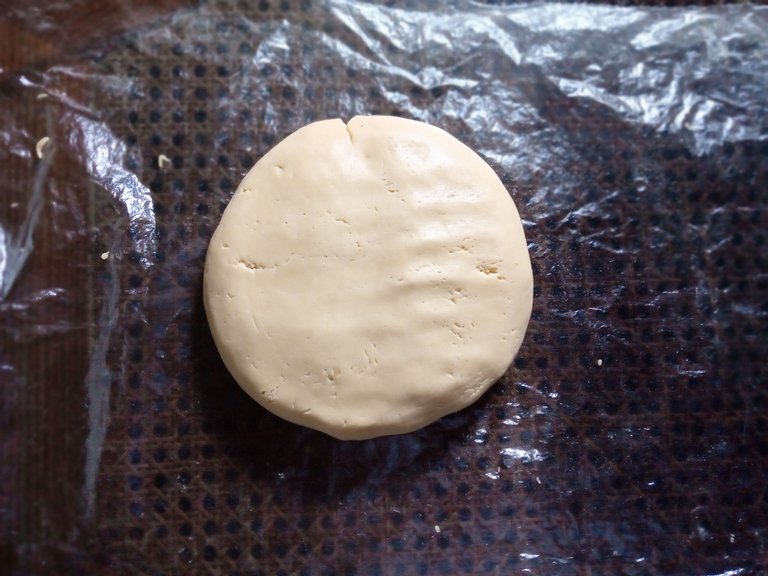
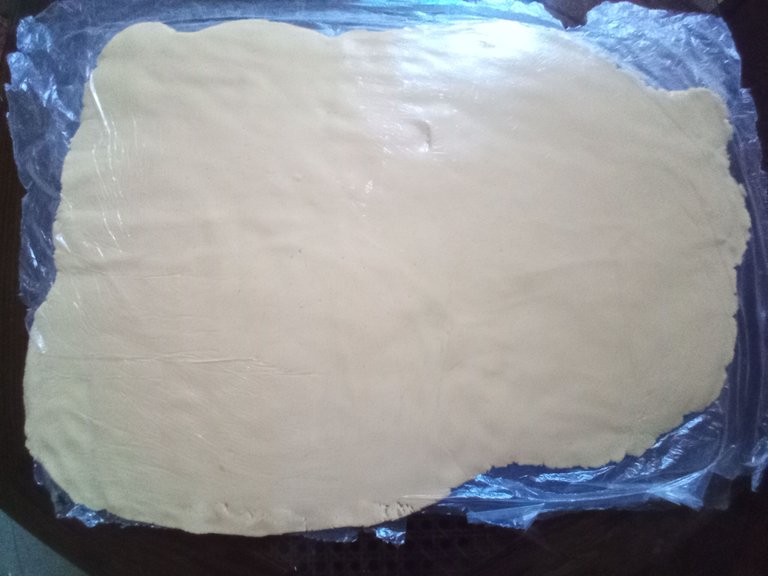
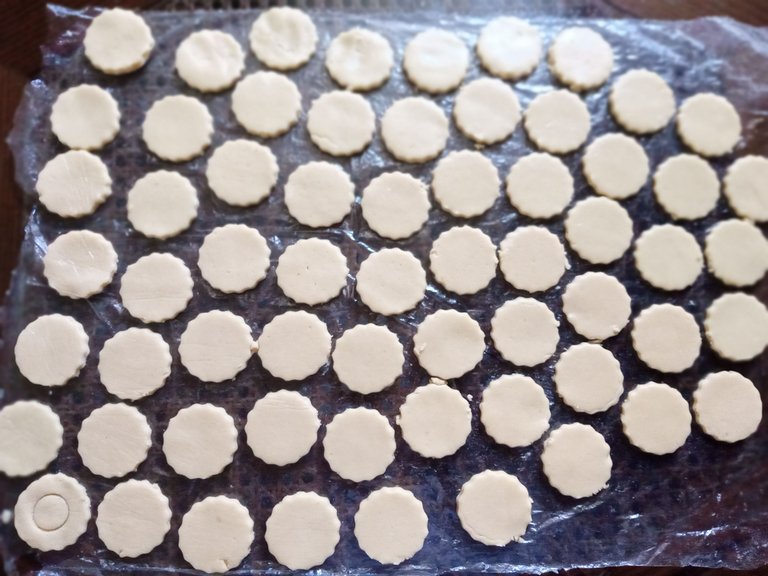
Una vez lista nuestra masa, podemos empezar a formar nuestras galletas. Ponemos un plástico sobre la mesa y encima nuestra masa para galletas. Luego, con un rodillo, extendemos muy bien (En caso de no tener rodillo, podemos colocar otro plástico sobre la masa y extender con las manos).
- 4 STEP:
Once our dough is ready, we can begin to form our cookies. We put a plastic on the table and on top of it our cookie dough. Then, with a roller, we spread very well (In case we don't have a roller, we can place another plastic on the dough and spread with our hands).
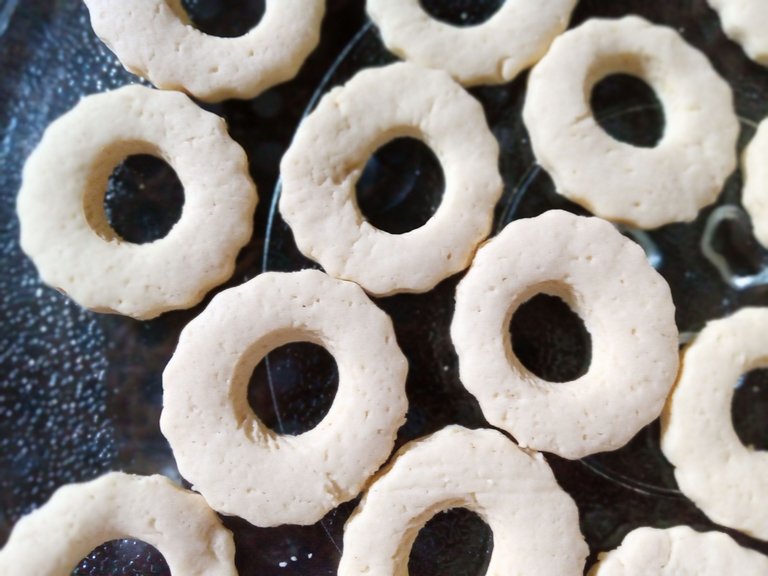
- 5 PASO:
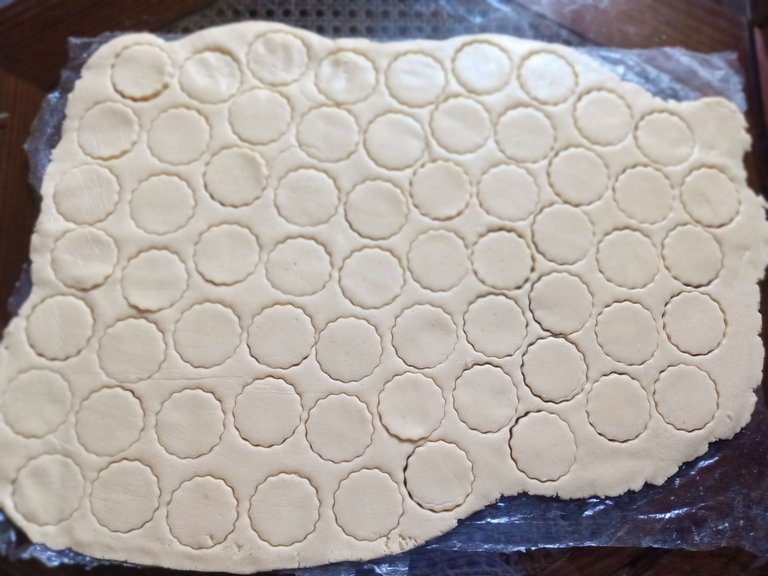
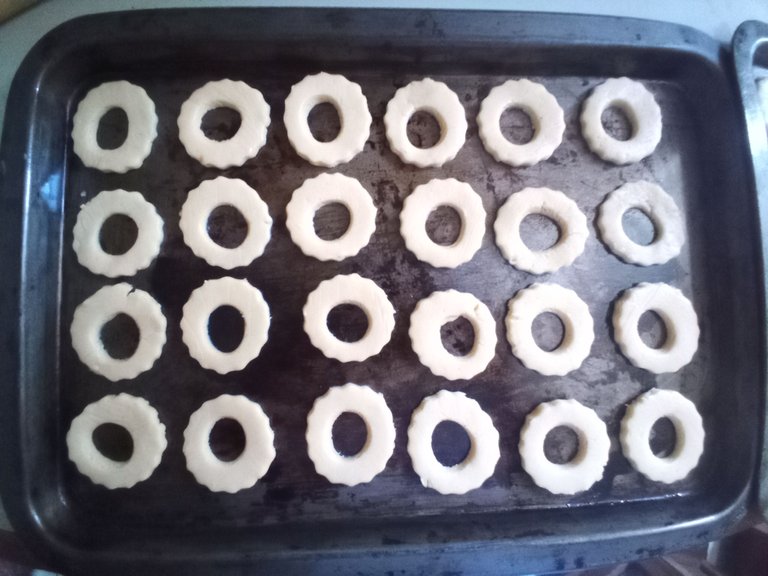
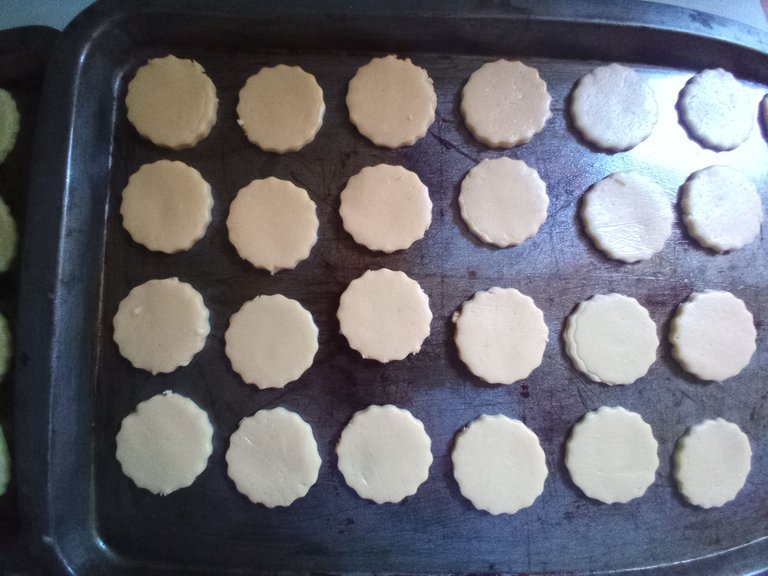
Una vez hecho esto, con la ayuda de un molde o recipiente redondo damos forma a nuestras galletas. Retiramos el exceso de masa y con ayuda de un molde más pequeño marcamos el centro de las galletas, solo la mitad del total de nuestras galletas, estas serán las tapas. Luego, llevamos las bases y las tapas a una bandeja previamente engrasada con un poco de aceite. Llevar al horno precalentado a 170°C por 12 a 14 minutos aproximadamente.
🔸(Repetimos el proceso hasta acabar con toda nuestra masa).
- 5 STEP:
Once this is done, with the help of a round mold or container we shape our cookies. We remove the excess dough and with the help of a smaller mold we mark the center of the cookies, only half of the total of our cookies, these will be the tapas. Then, we take the bases and the tops to a tray previously greased with a little oil. Bake in a preheated oven at 170°C for approximately 12 to 14 minutes.
🔸(We repeat the process until we finish all our dough)
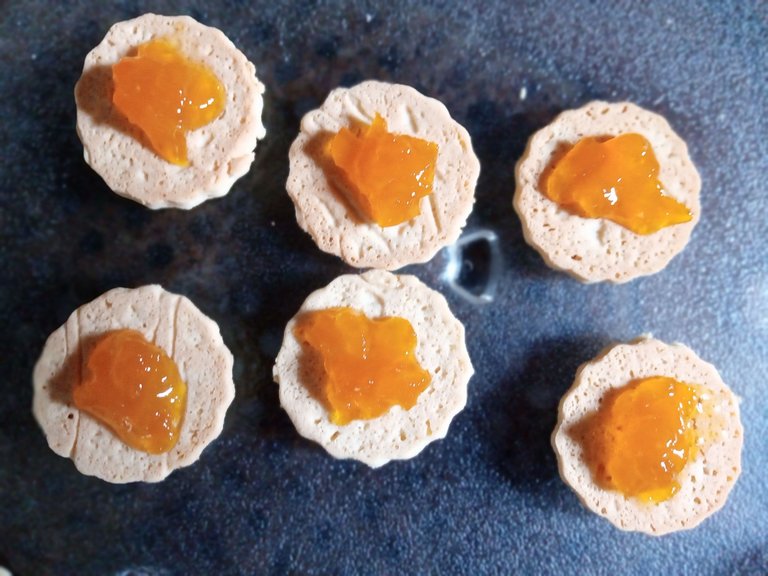
- 6 PASO:
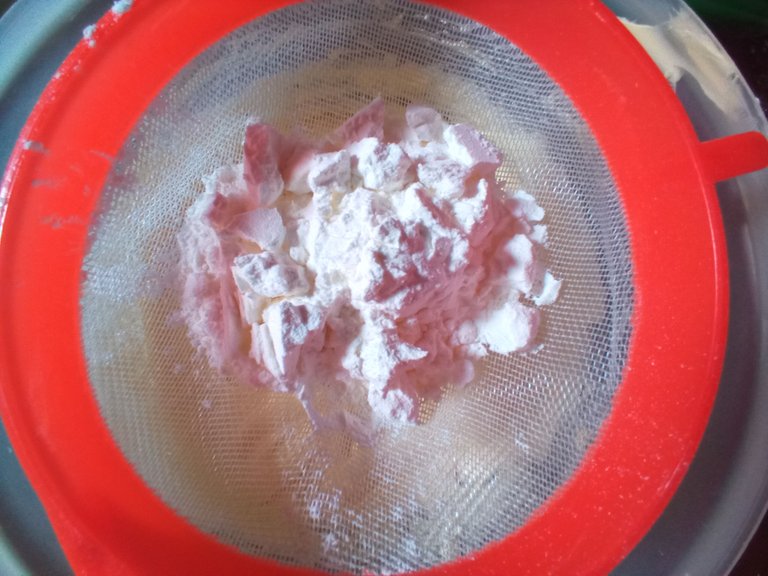
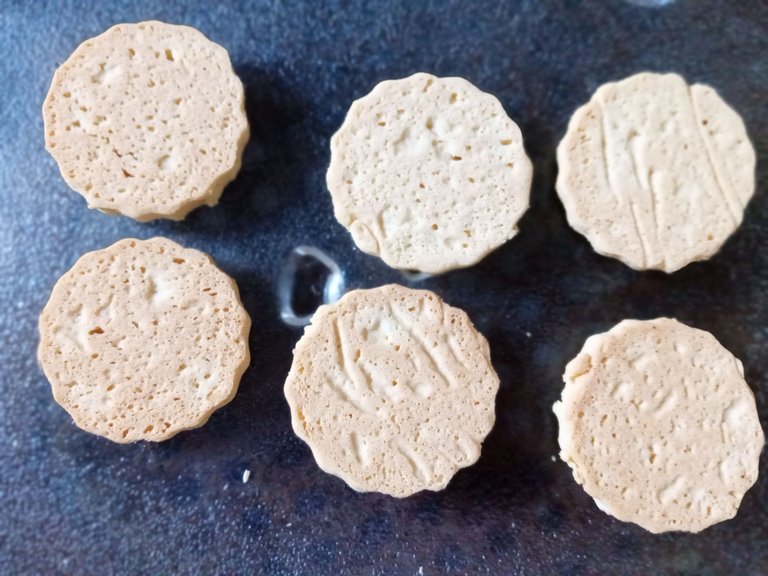
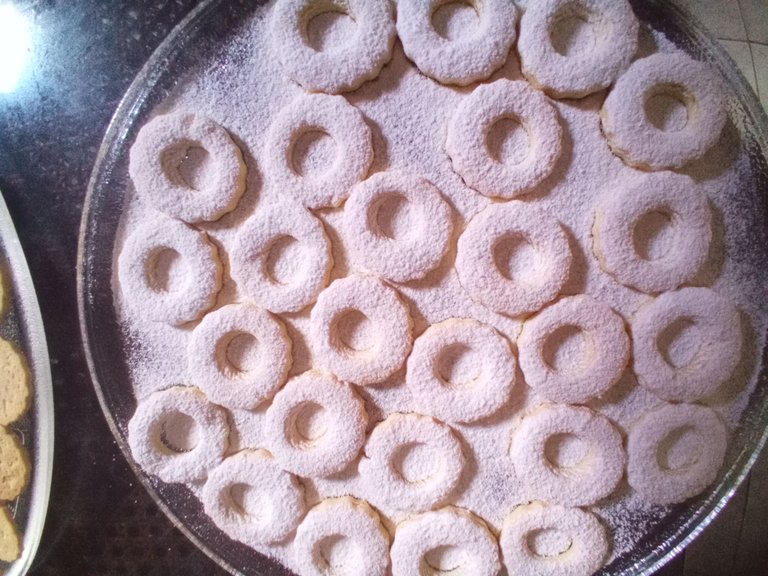
Cuando nuestras galletas estén listas, dejamos enfriar un poco, retiramos de la bandeja y separamos las bases de nuestras galletas en un recipiente plano y las tapas en otro. luego, a las bases les añadimos un poco de mermelada en medio y por encima espolvoreamos azúcar glas con ayuda de un colador y, por último, unimos ambas partes.
- 6 STEP:
When our cookies are ready, let cool a bit, remove from the tray and separate the bases of our cookies in a flat container and the tops in another. then, to the bases we add a little jam in the middle and to the tops we sprinkle icing sugar with the help of a strainer and, finally, we join both parts.

🍯¡Y listo!🍯 Habremos terminado con esta deliciosa receta de galletas rellenas de mermelada y espolvoreadas con azúcar glas, súper fáciles de hacer y las puedes hacer con la esencia que tú elijas. Espero que se animen a prepararlas y les gusten, quedaran satisfechos con el resultado. Hasta la próxima.
🍯¡And ready!🍯 We will have finished with this delicious recipe for cookies filled with jam and sprinkled with icing sugar, super easy to make and you can make them with the essence of your choice. I hope you are encouraged to prepare them and like them, you will be satisfied with the result. Until next time.
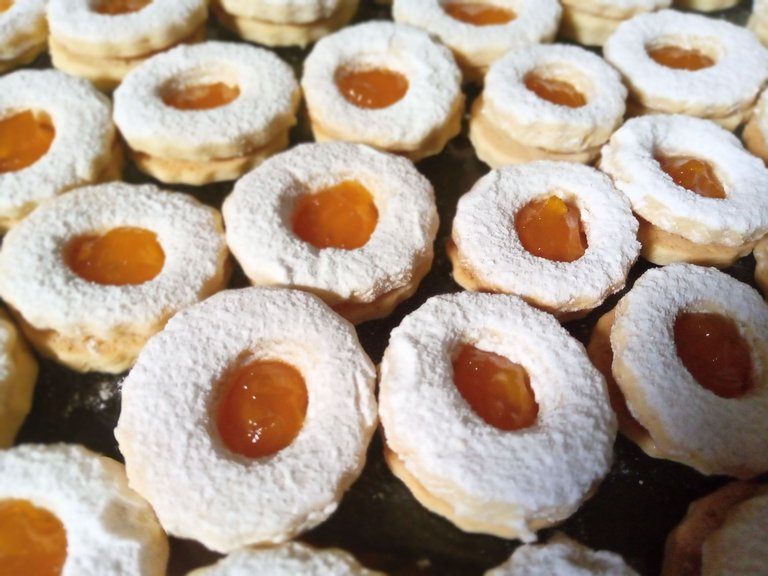
✨RESULTADO: | ✨RESULT:


Todas las fotografías son de mi propiedad.
Separador y Fotos editadas en Canva
All photographs are my property.
Photos edited in Canva
Thank you for sharing this amazing post on HIVE!
Your content got selected by our fellow curator @hafizullah & you just received a little thank you via an upvote from our non-profit curation initiative!
You will be featured in one of our recurring curation compilations and on our pinterest boards! Both are aiming to offer you a stage to widen your audience within and outside of the DIY scene of hive.
Join the official DIYHub community on HIVE and show us more of your amazing work and feel free to connect with us and other DIYers via our discord server: https://discord.gg/mY5uCfQ !
If you want to support our goal to motivate other DIY/art/music/homesteading/... creators just delegate to us and earn 100% of your curation rewards!
Stay creative & hive on!
Muchas gracias amigos @diyhub ✨💕
Congratulations @valenpba! You have completed the following achievement on the Hive blockchain and have been rewarded with new badge(s):
Your next target is to reach 3000 upvotes.
You can view your badges on your board and compare yourself to others in the Ranking
If you no longer want to receive notifications, reply to this comment with the word
STOPCheck out the last post from @hivebuzz:
Support the HiveBuzz project. Vote for our proposal!