Ya sabemos que esta pieza ha regresado por necesidad convirtiéndose en el accesorio vital del 2020, incluso del siglo XXI. Muchos son los modelos que hay en el mercado, con filtros especiales, de telas resistentes al agua, recién salieron unos especiales para deportistas. Como en la vida, paso a paso este accesorio se va ajustando según las necesidades de cada quien. Pensando en eso hoy te traigo un tutorial para que lo hagas como gustes, es un ejercicio de costura que puede ser a mano o a máquina.
We already know that this piece has returned by necessity becoming the vital accessory of 2020, even the 21st century. There are many models on the market, with special filters, made of water-resistant fabrics, and some have just come out for sports people. As in life, step by step this accessory is adjusted according to the needs of each person. Thinking about it today I bring you a DIY so you can do it as you like, it is a sewing exercise that can be done by hand or by machine.
.png)
Empecemos con el patrón:
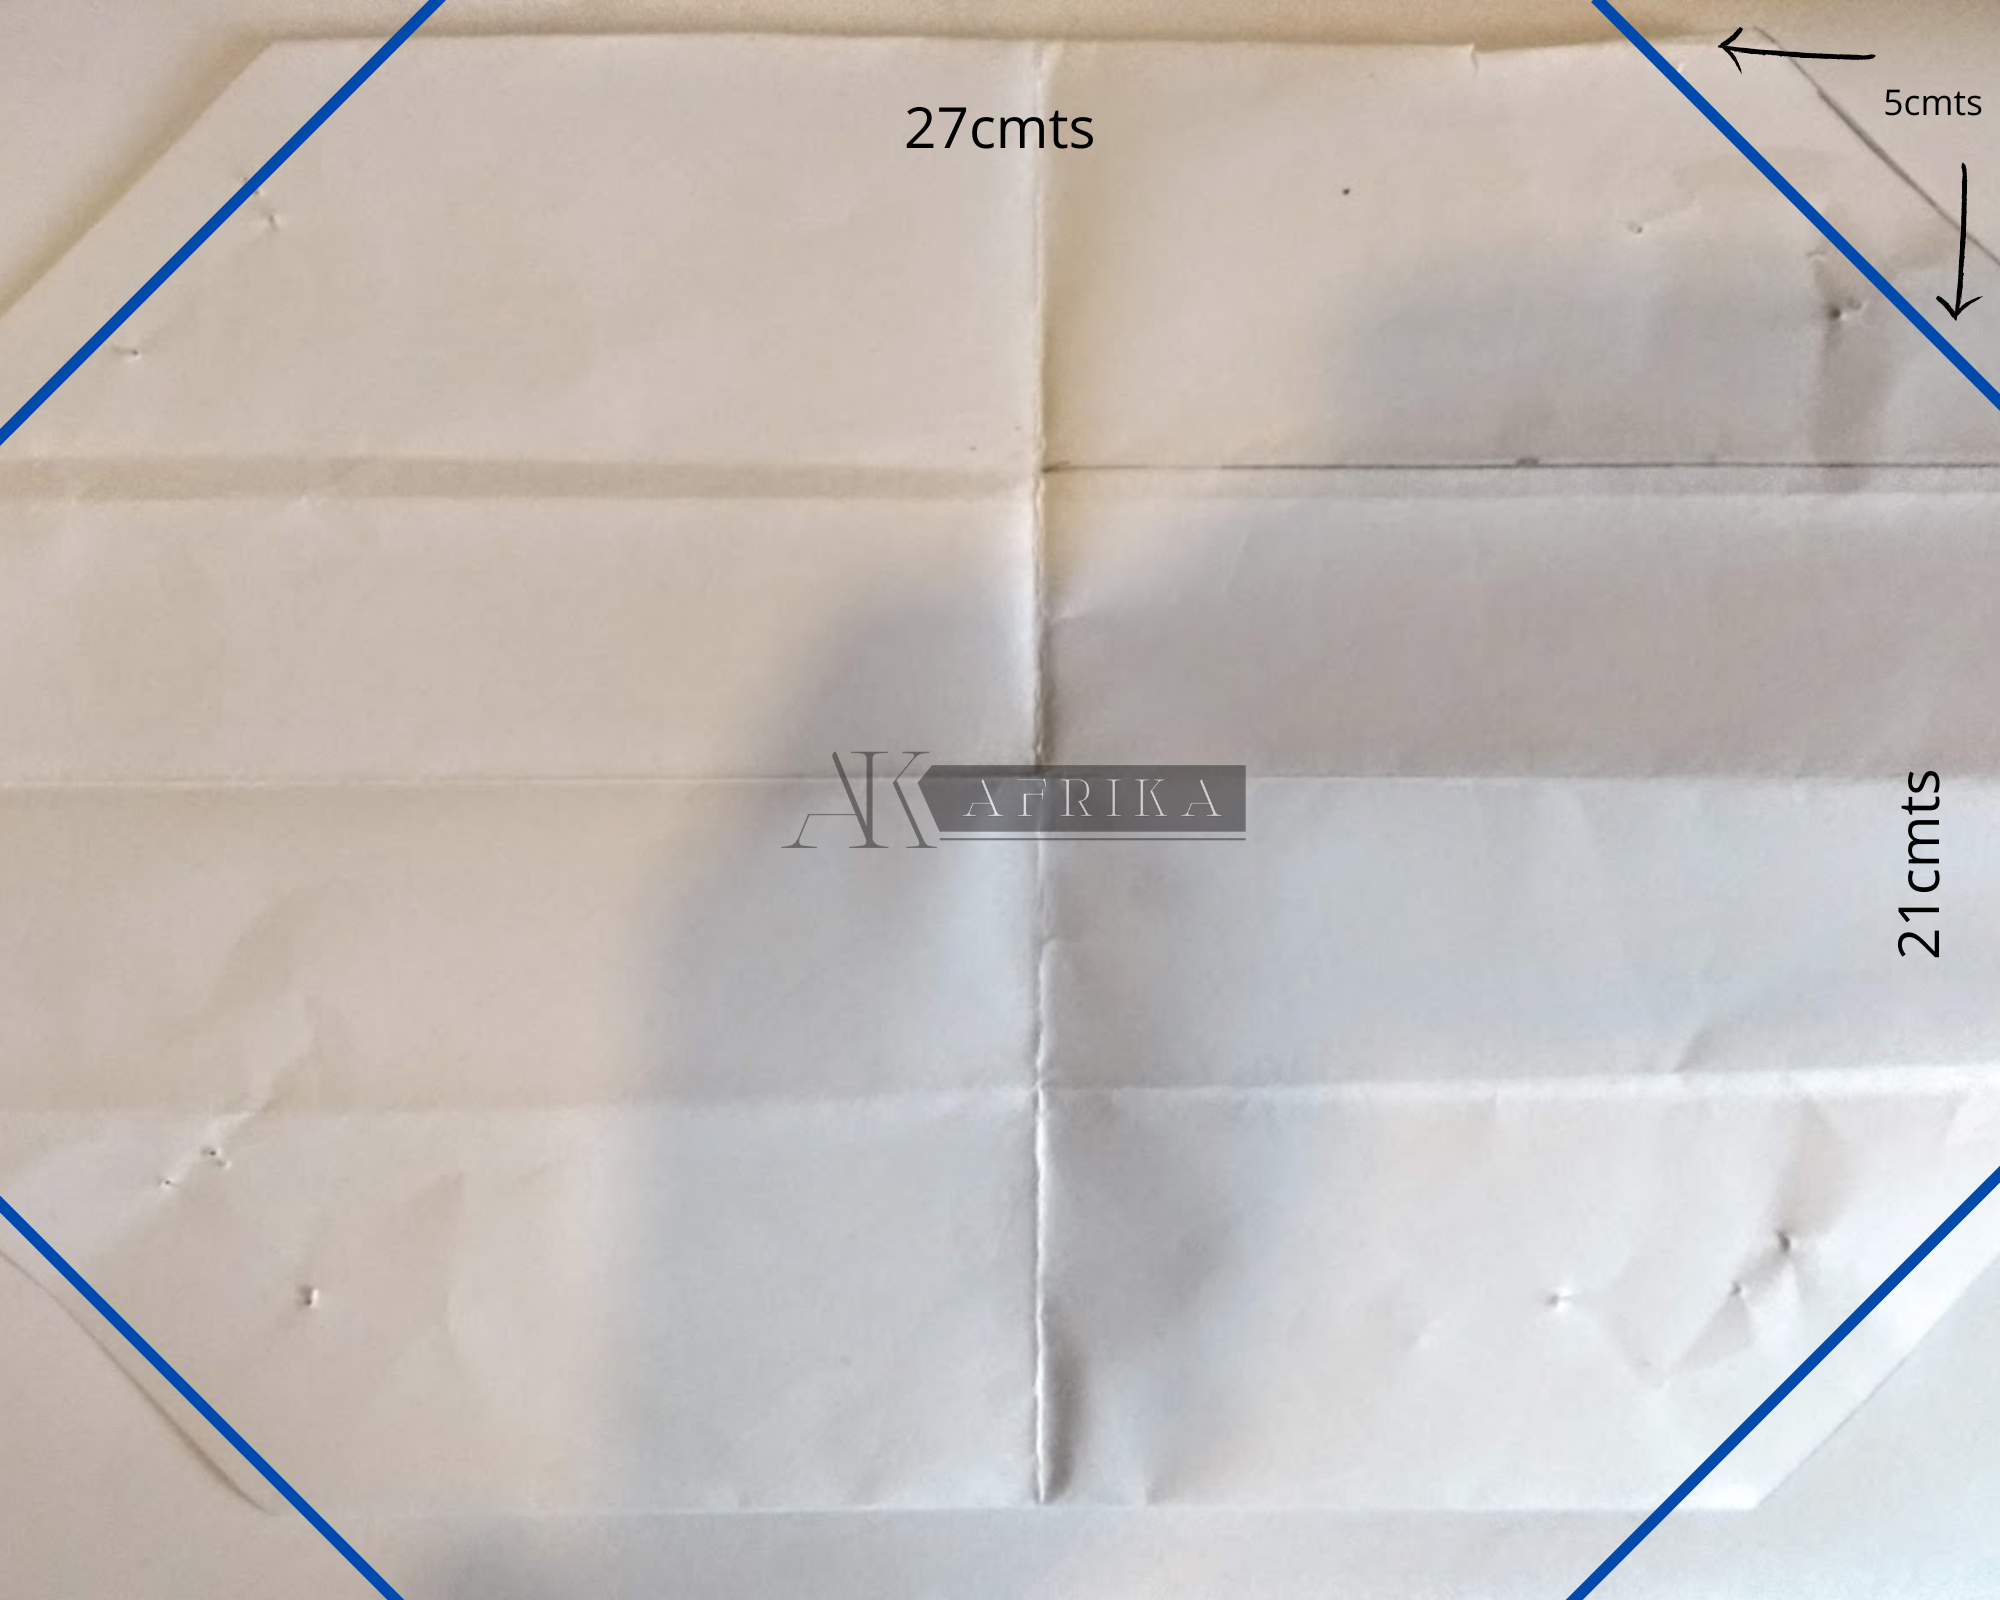
En un papel haz un rectángulo de 27 cmts por 21 cmts y en cada esquina, marca 5 cmts hacia adentro y cortalas, tal como indica la imagen.
On a piece of paper, make a rectangle measuring 27 cm by 21 cm, and in each corner, mark 5 cm inwards and cut them, as shown in the image.
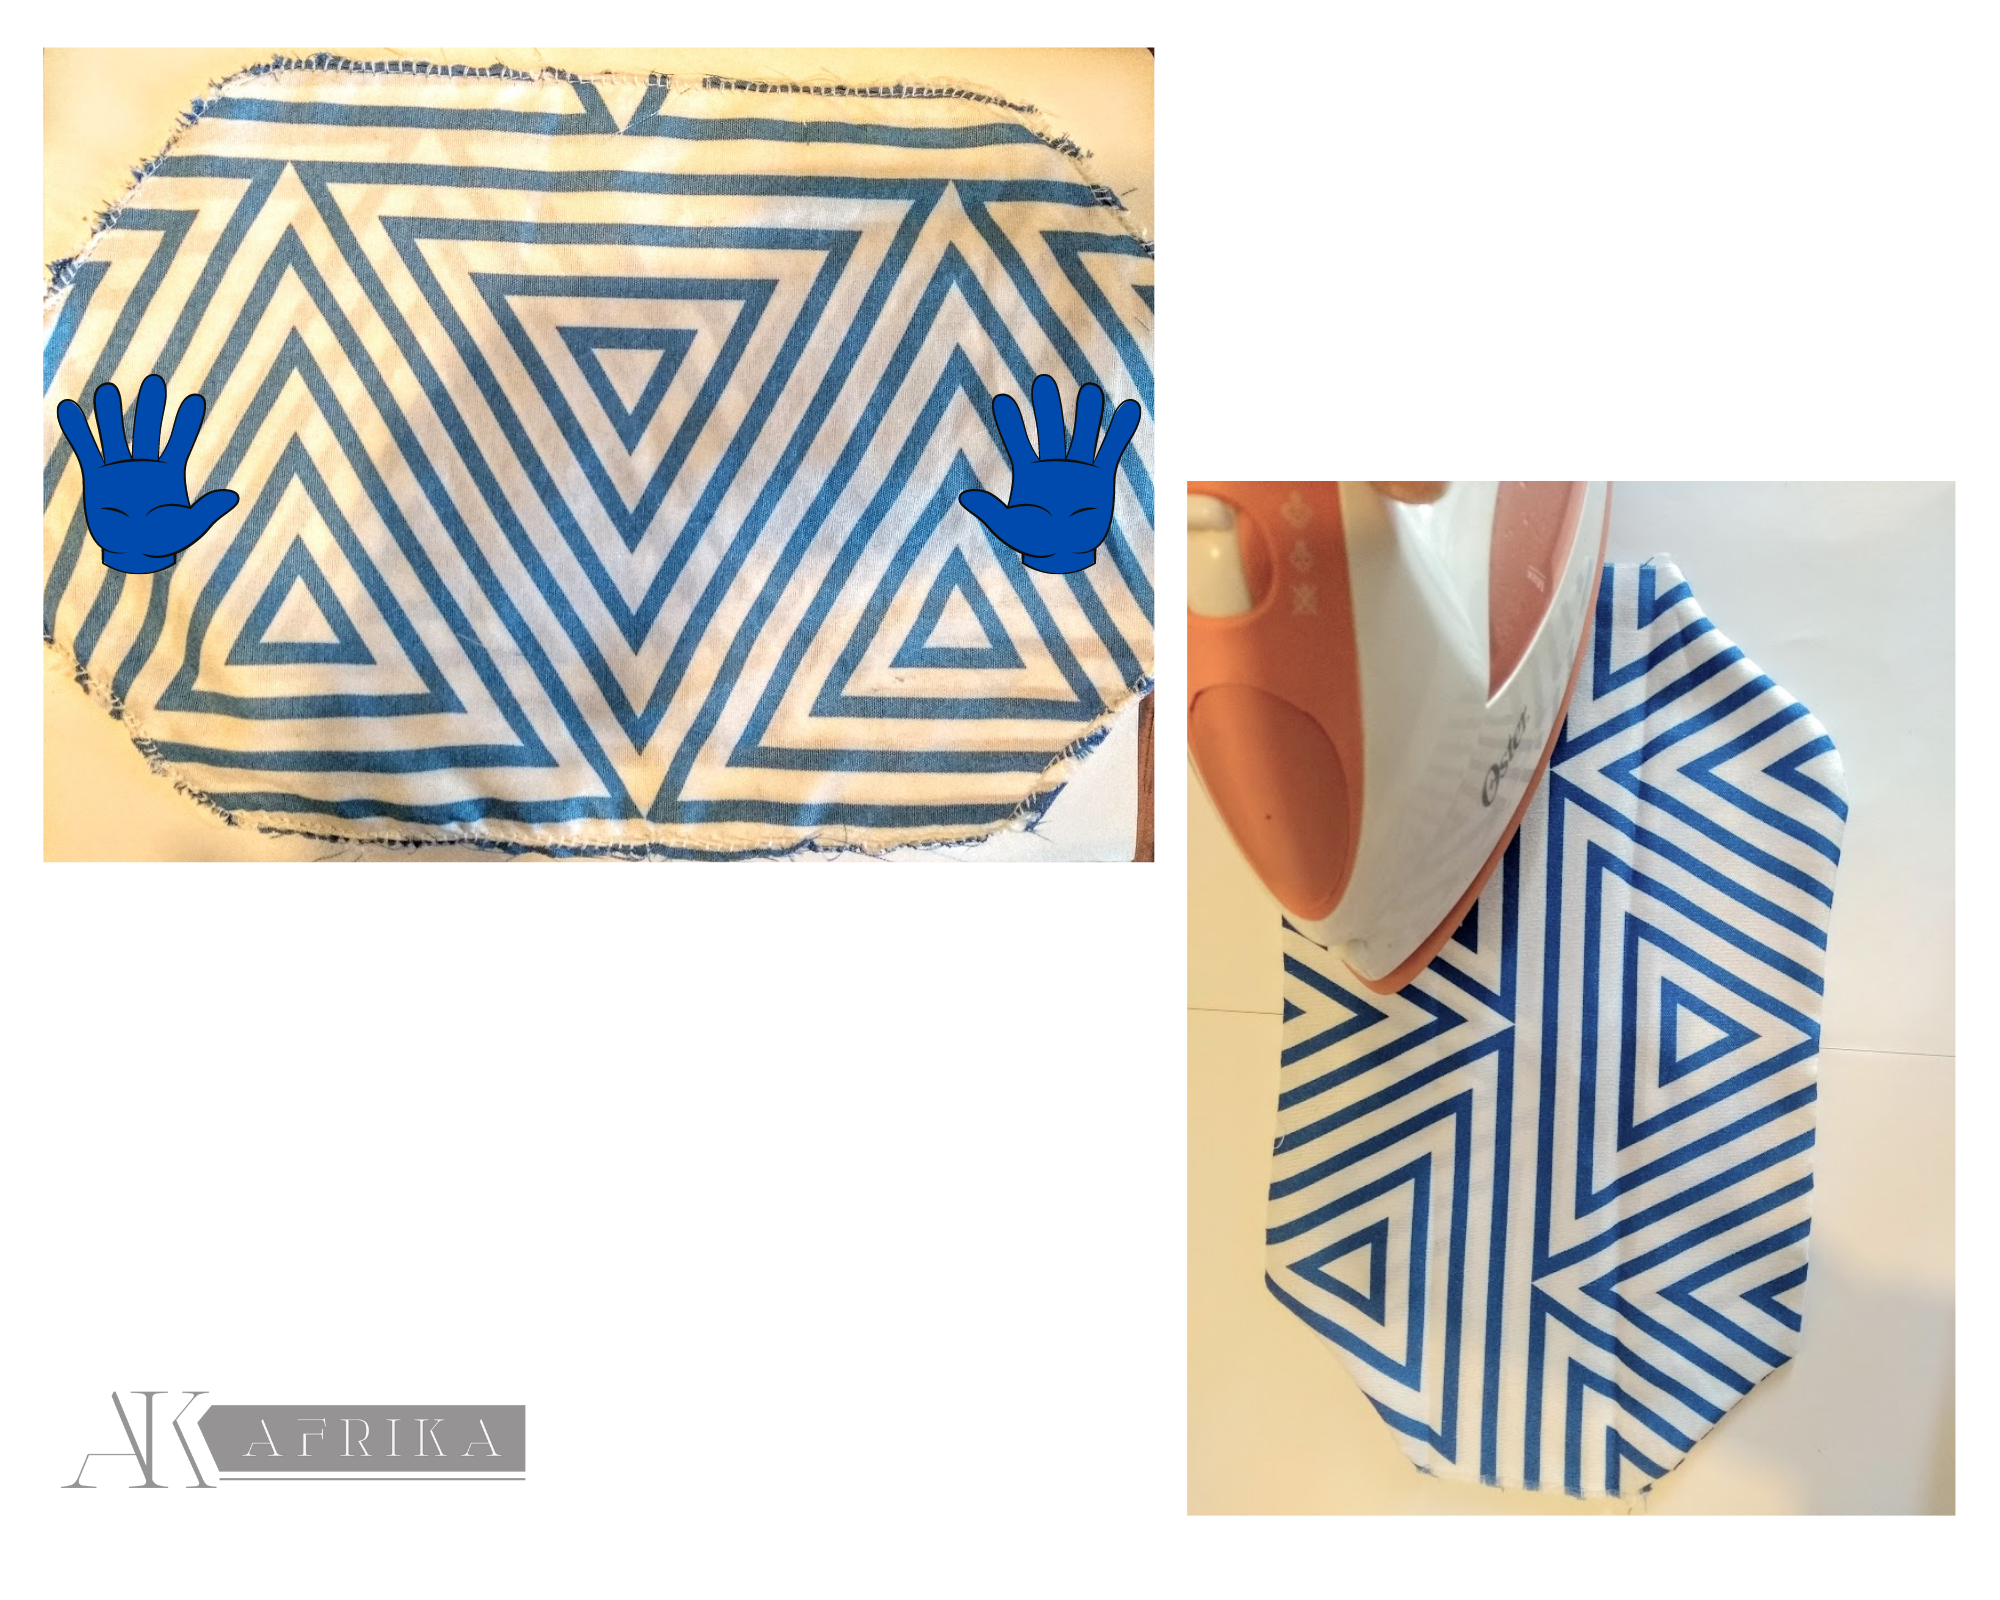
Ahora vamos a la acción, con el patrón vas a picar 2 piezas de tela, con esta elección puede ser creativo y elegir estampados de tu estilo. Ten en cuenta que la textura de la tela sea cómoda para ti. Procedemos a coser todos los bordes, excepto los centrales, donde están las manitos en la imagen. Por allí le damos vuelta y planchamos, para darle mejor acabado.
Now let's go to the action, with the pattern, cut 2 pieces of fabric, with this choice you can be creative and choose prints of your style. Make sure the texture of the fabric is comfortable for you. We proceed to sew all the edges, except the central ones, where the little hands are in the image. Then we turn it over and iron it, to give it a better finished.
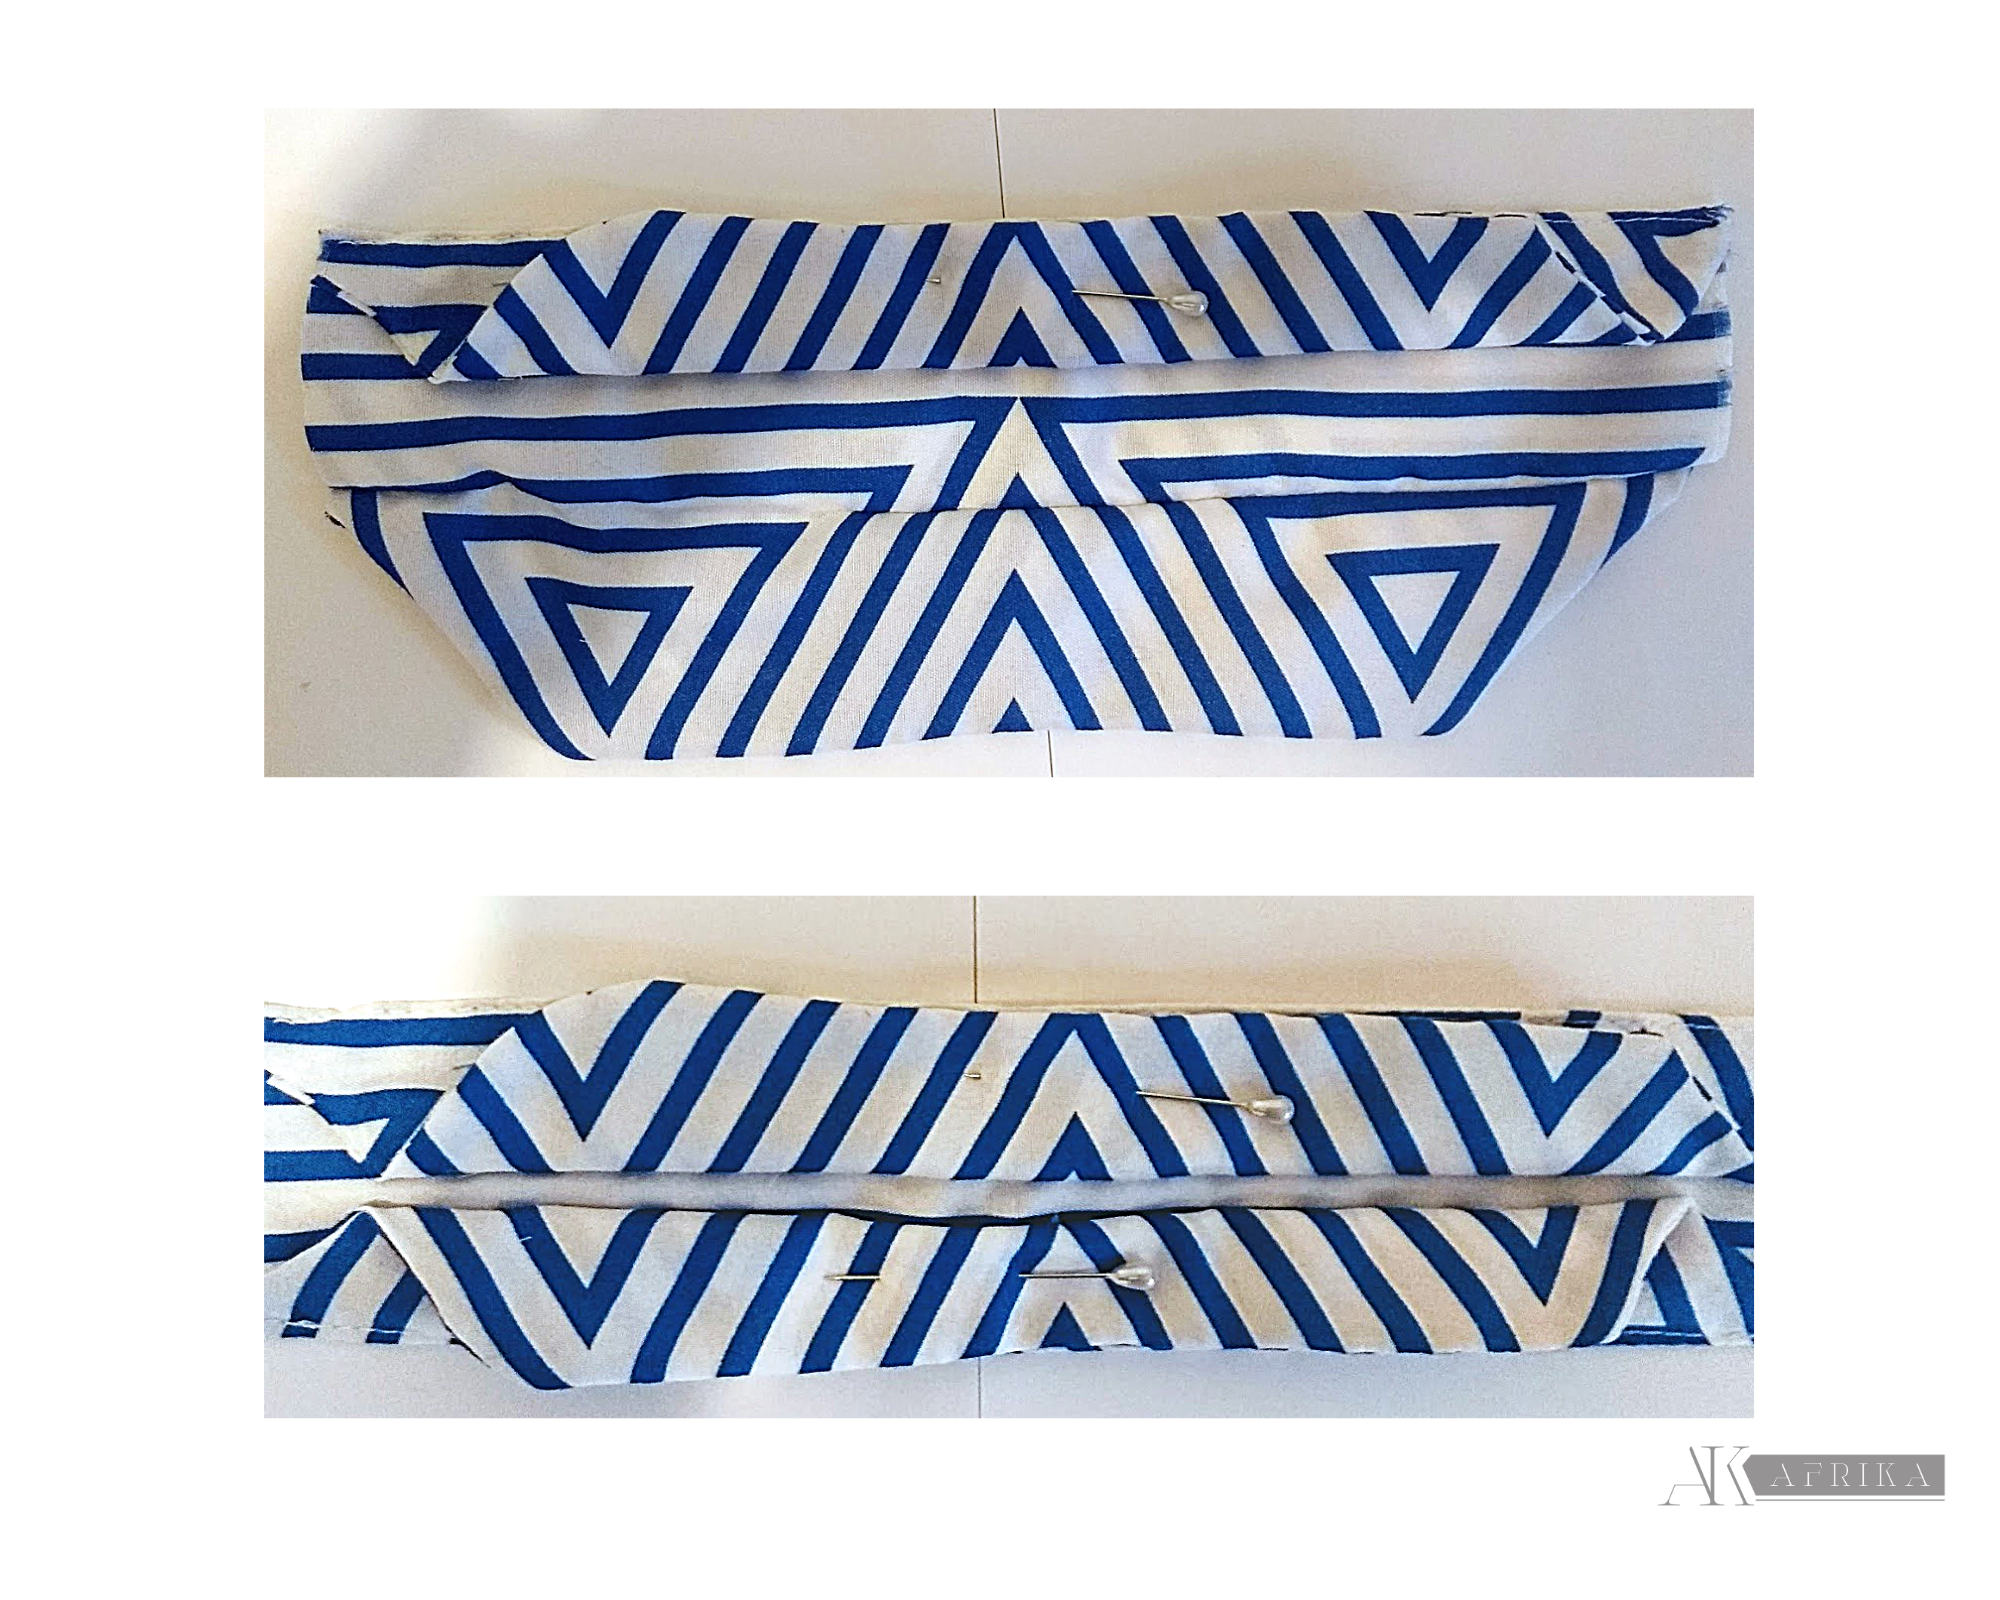
Para este diseño doblamos en 3 partes la pieza, planchamos para marcar la línea por donde vamos a coser. Nos va a quedar como un tríptico.
For this design we fold the piece in 3 parts, iron it to mark the line where we are going to sew. It will look like a triptych.
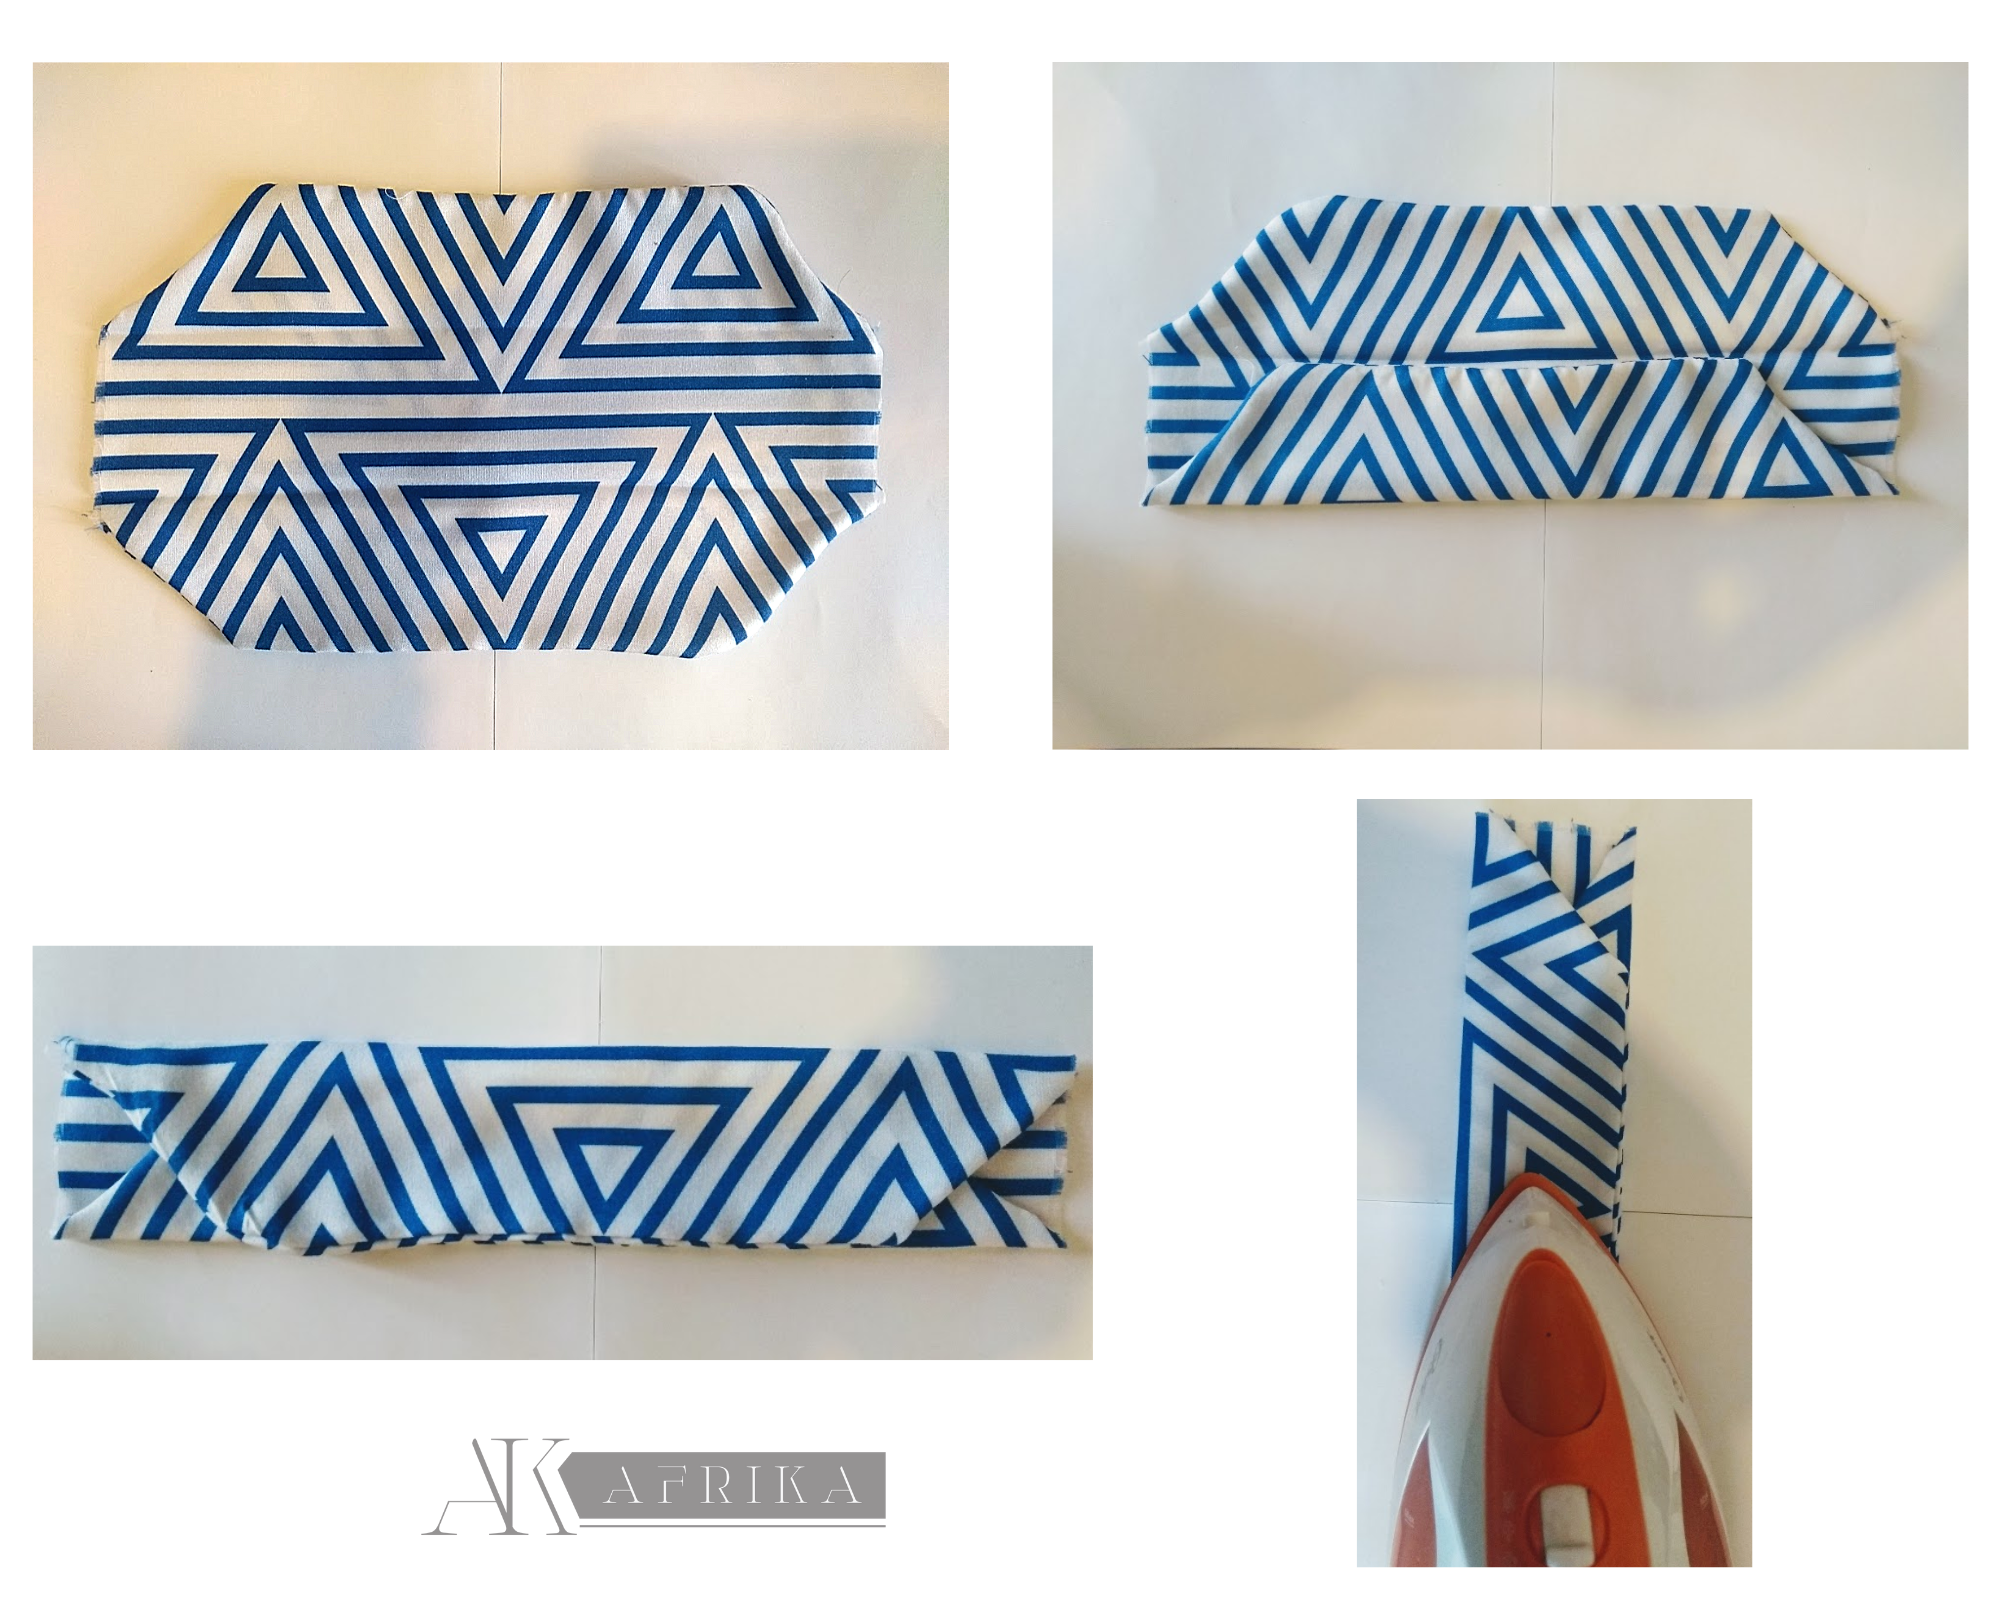
Tomamos hilo y aguja para coser una fina línea en el borde superior e inferior, luego abrimos nuestra pieza y queda el rectángulo tal como en la imagen. Te recomiendo volver a plancharla, siempre buscando un acabado estético.
Time for thread and needle to sew a thin line on the top and bottom edge, then we open our piece and the rectangle looks like in the picture. I recommend you to iron it again, always looking for an aesthetic finished.
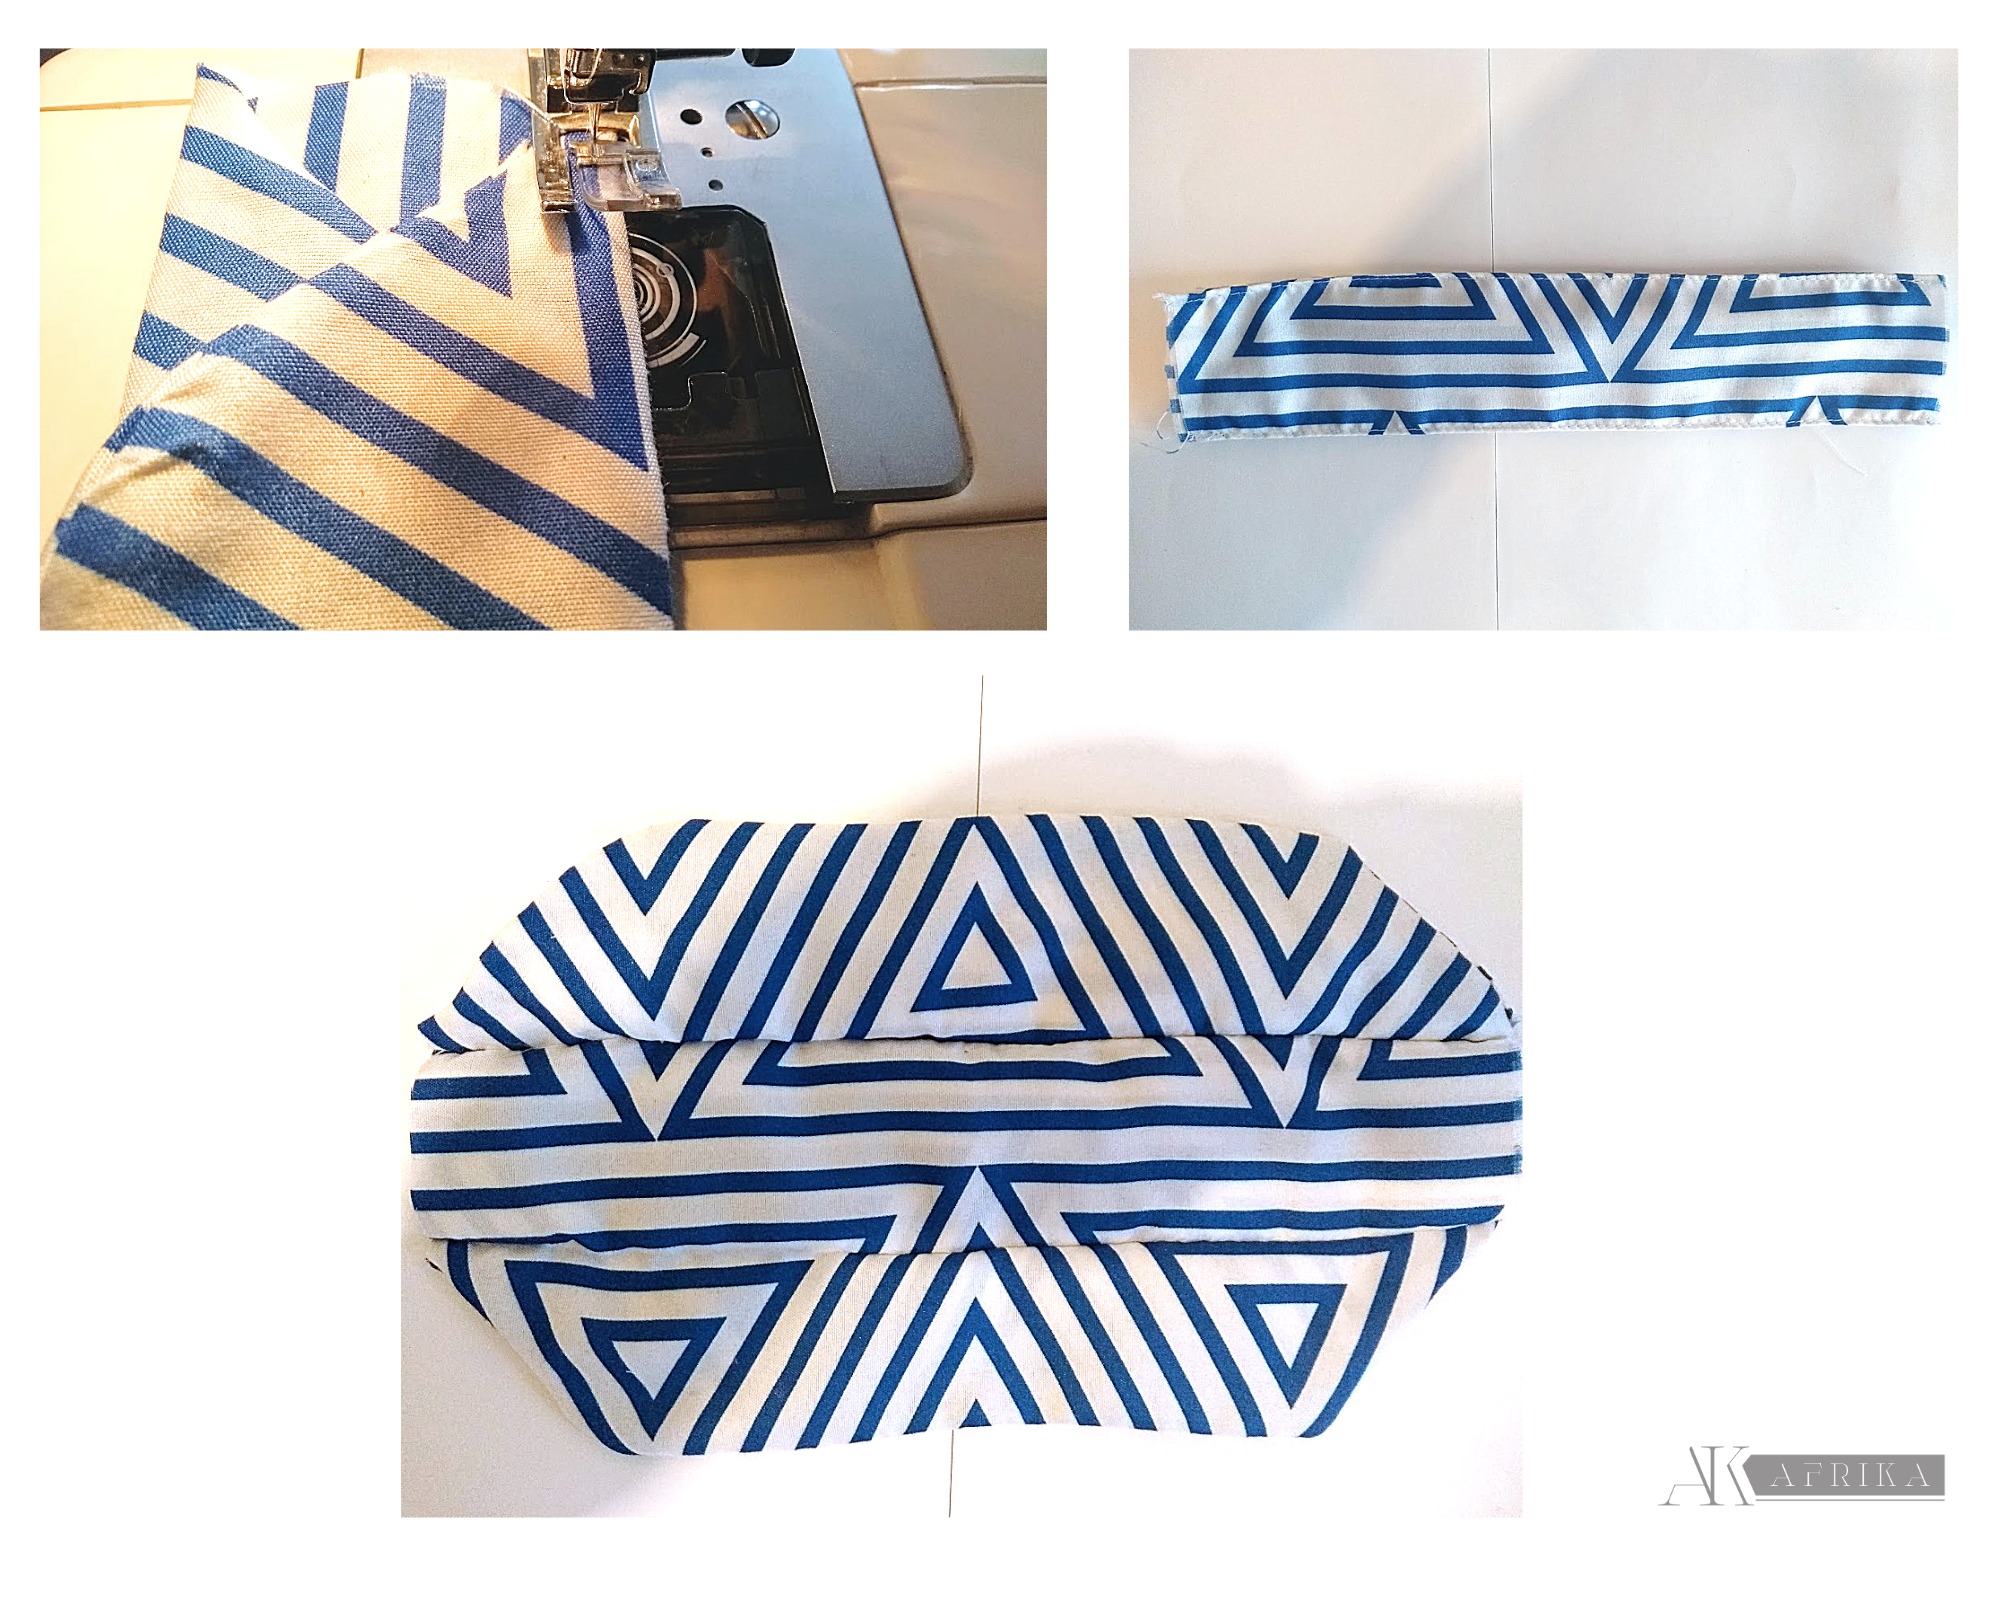
Doblamos por la mitad las piezas recién cosidas, así como ves en la imagen y sostenlas con alfileres para seguir trabajando cómodamente. Ya estamos por terminar, vamos por un par de pasos más.
We fold in half the pieces just sewn, as you see in the picture, and hold them with pins to continue working comfortably. We are about to finish, go for a couple stepsmore.
En los extremos laterales pon 2 elásticas, en mi caso son de 23 cmts, te invito a medir antes para saber exactamente cuánto necesitas. Ajustalas y dobla los extremos, como arropando las elásticas.
At the edges put 2 elastics, in my case they are 23 cmts, I invite you to measure before to know exactly how much you need. Adjust them and bend the ends, as if wrapping the elastics.
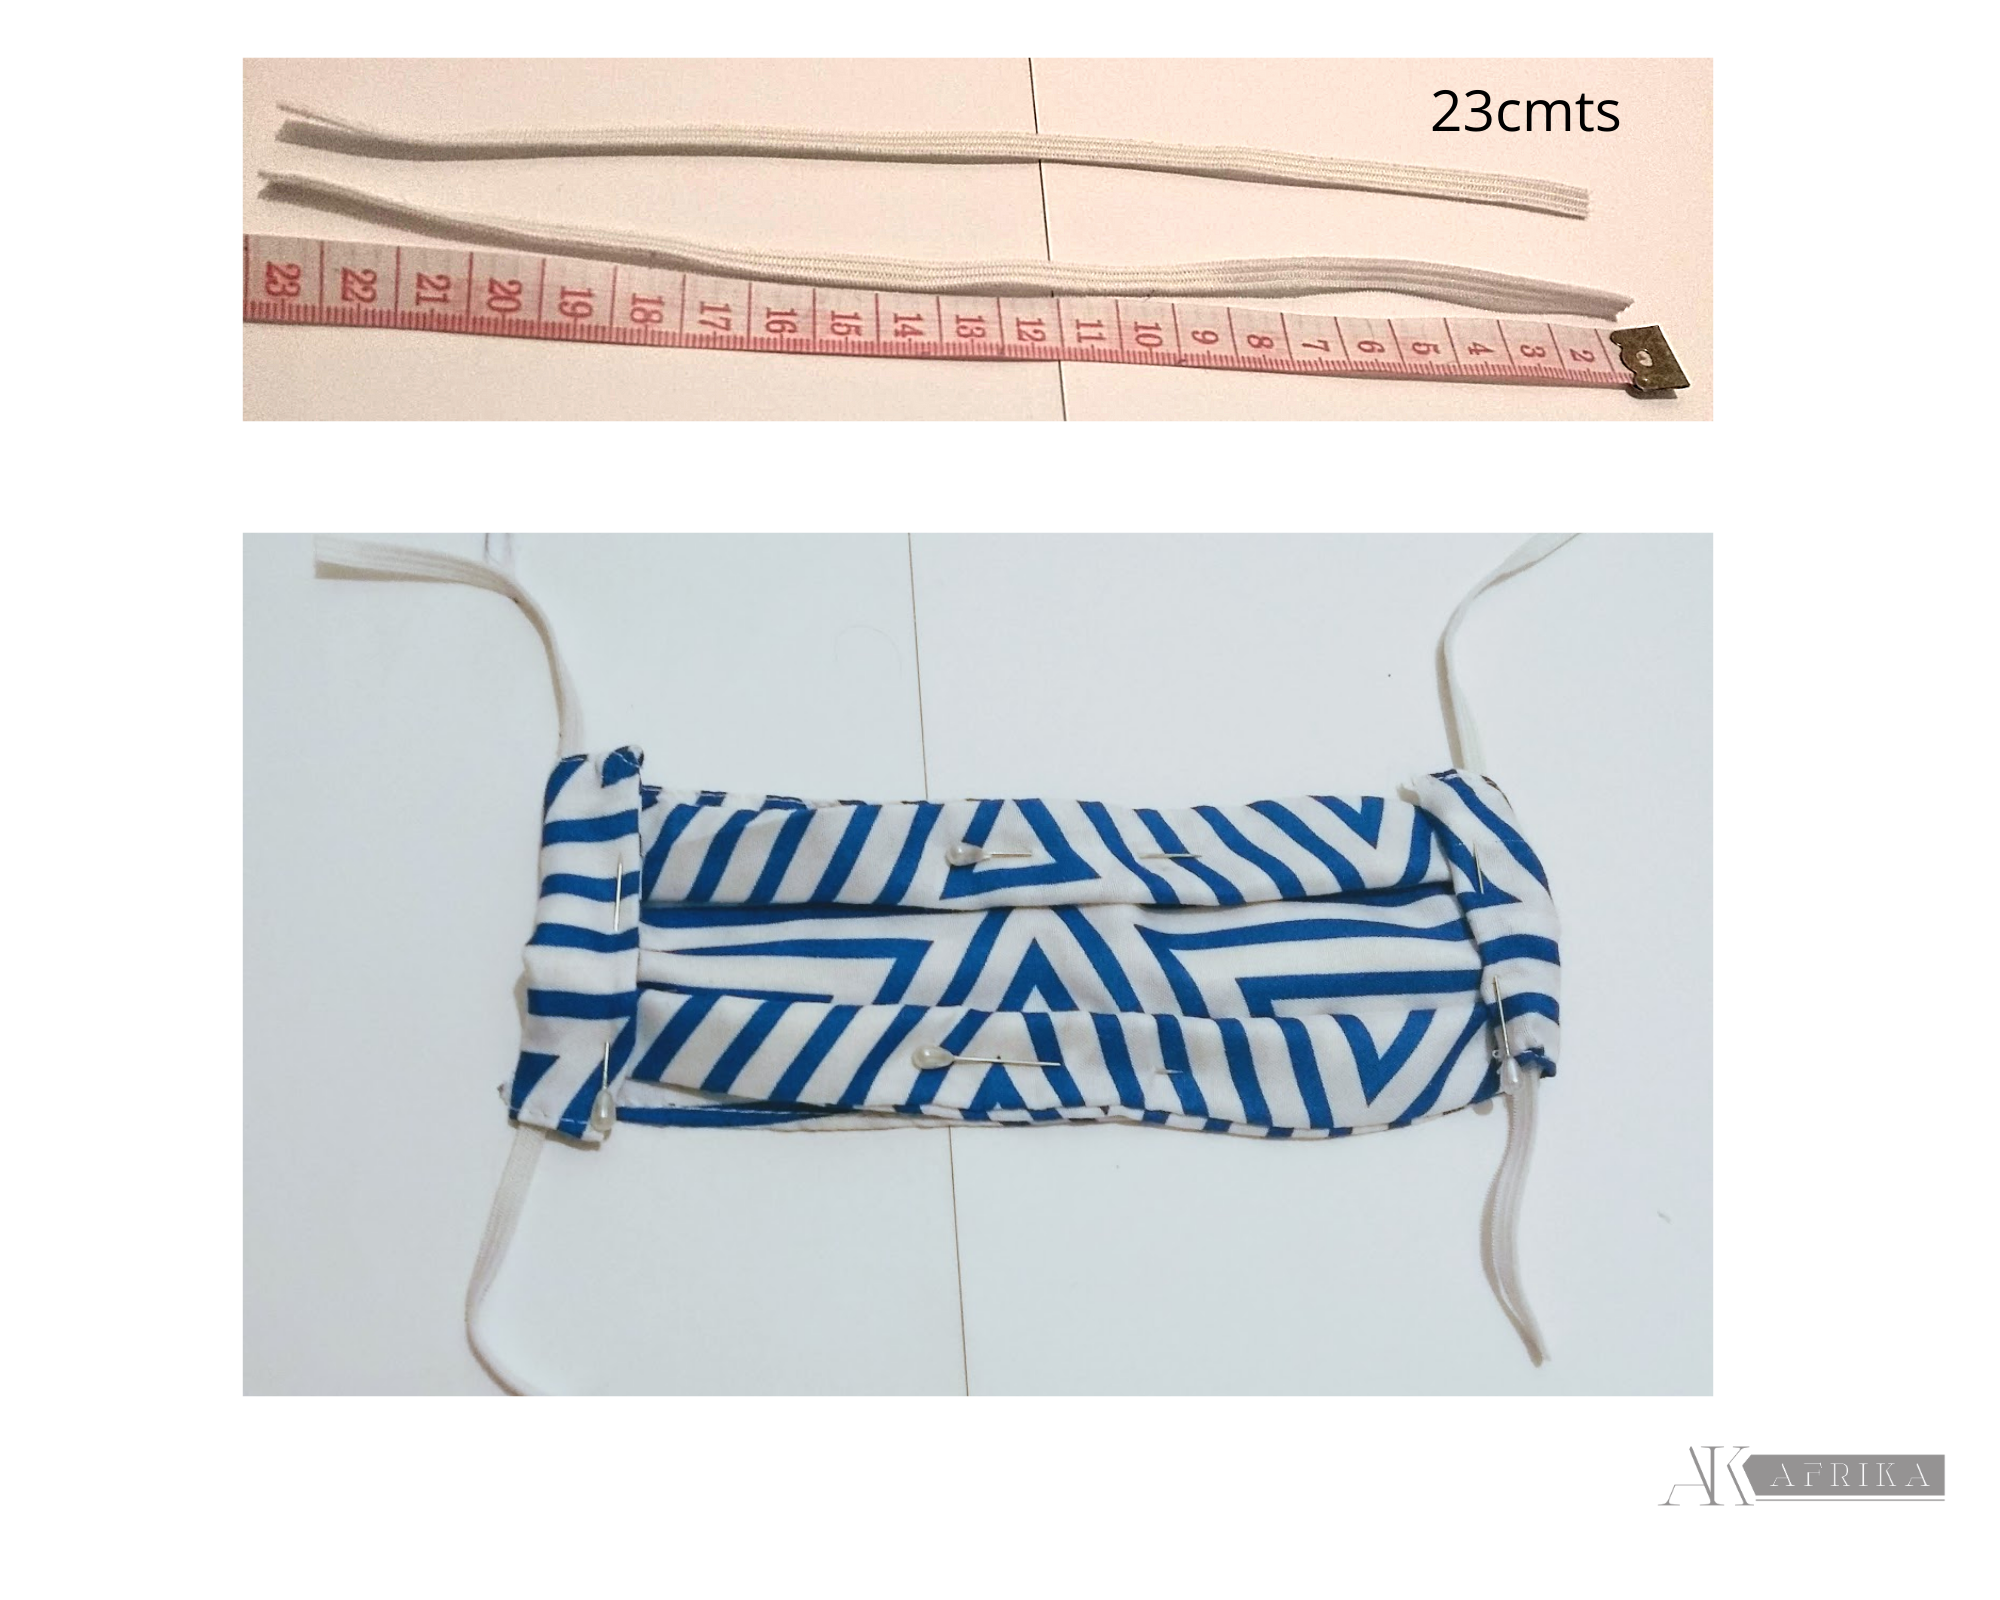
Le pasamos una costura simple, luego procedemos a hacer un aro con cada elástica, puedes hacer un nudo o coserle los extremos y los llevas hacia dentro con ayuda de algo puntiagudo, te va a quedar así como en la imagen.
We passed a simple stitching, then proceed to make a circle with each elastic, you can make a knot or sew the ends and bring them in with the help of something sharp, check the image.
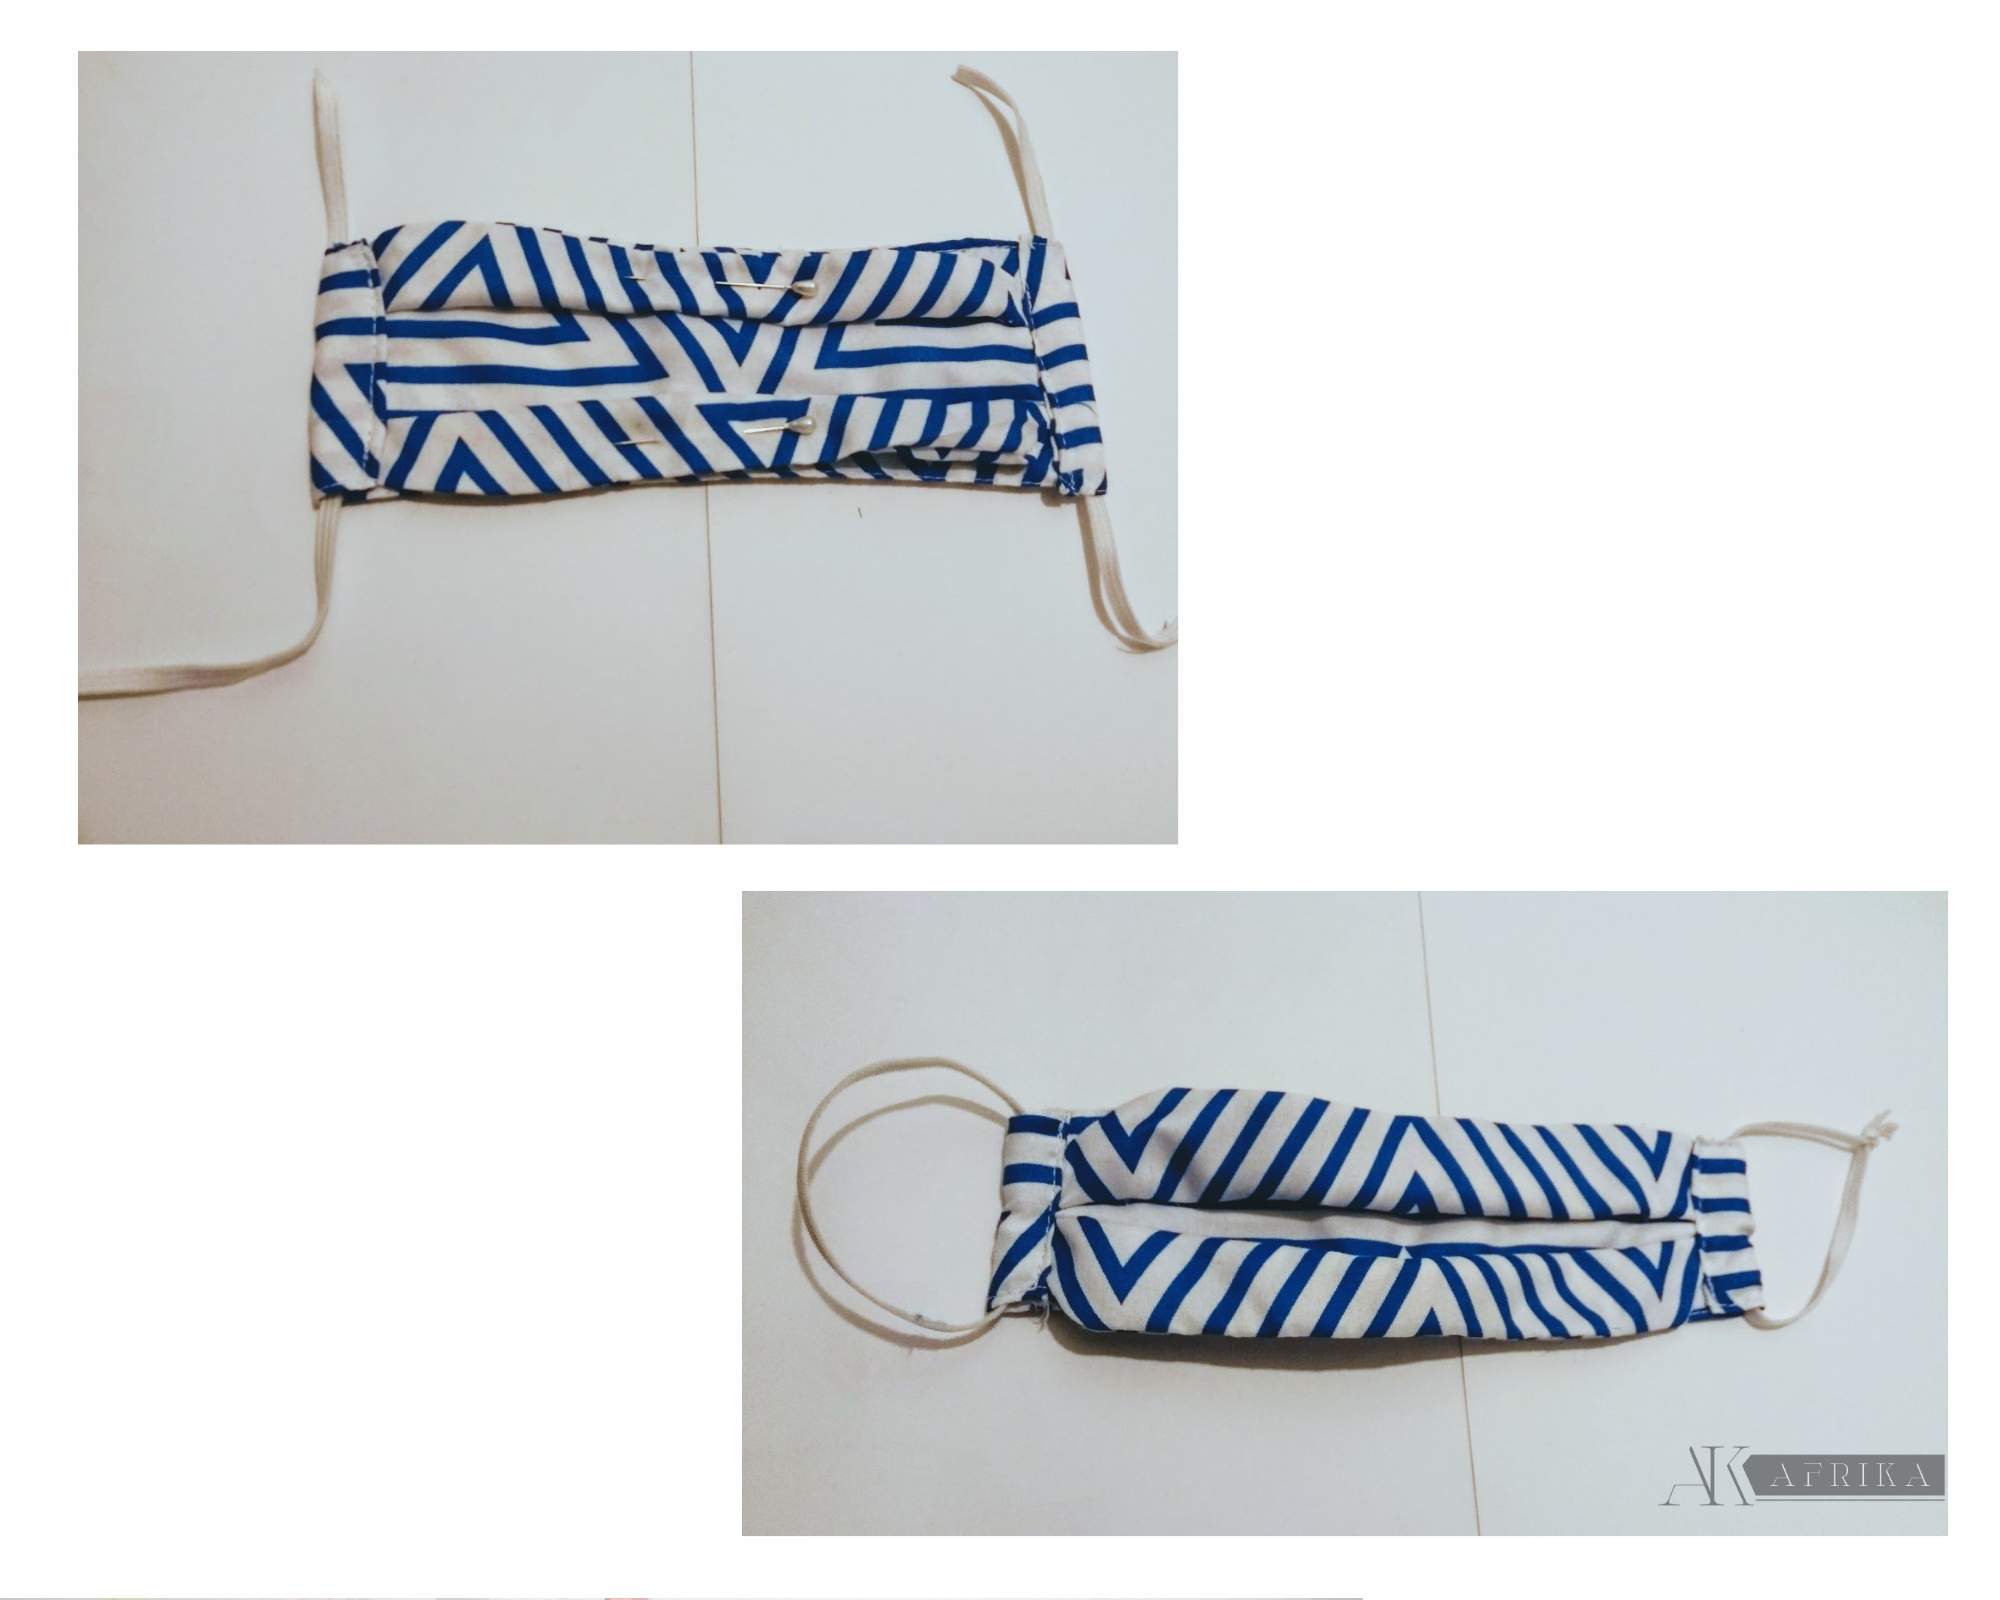
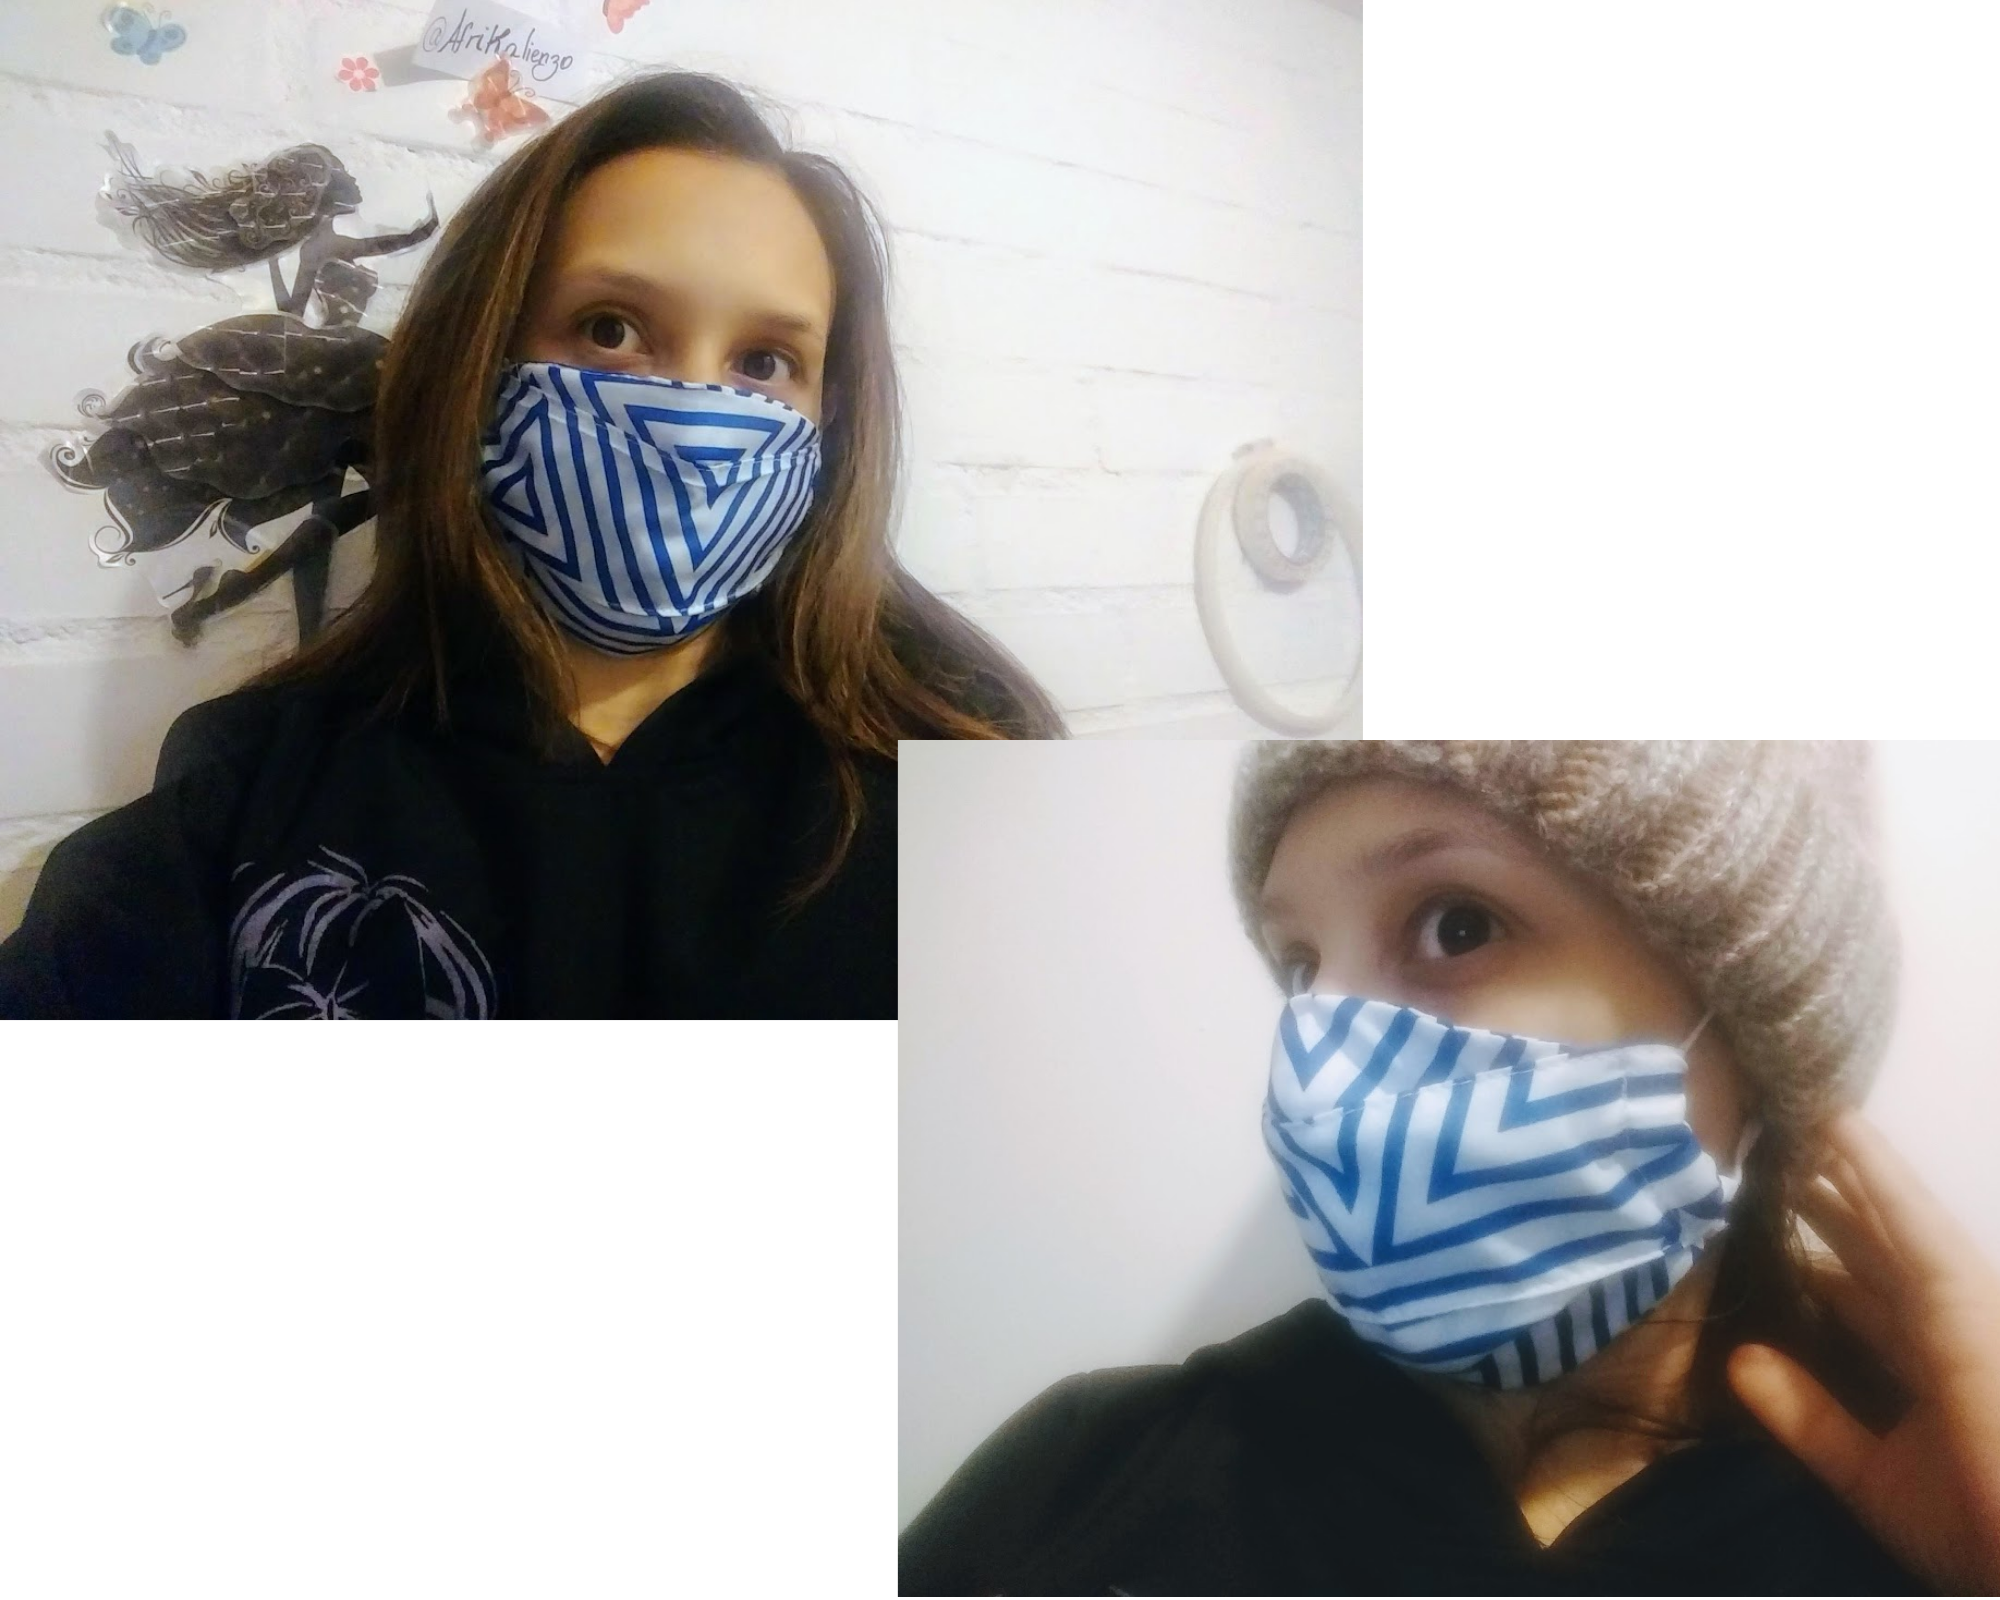
Ya está listo para salir, todo lo cosí con costura recta simple y zig zag por el revés para cuidar los bordes de la tela. Las fotos son del teléfono moto g 5 y editadas con canva. Espero sea de tu utilidad, si lo haces me etiquetas para verlo.
It's ready to go, I sewed it all with simple straight stitching and zigzagging at the back to take care of the edges of the fabric. The pictures are from the moto g 5 phone and edited with canva. I hope it's useful for you, if you do it tag me to see it.
Gracias gente hive por leerme, acá encuentras te dejo el tutorial de otro accesorio para que sigas en casa creativo.
Thanks for reading me hive people, here you find another DIY accessory for you to continue at home creative.
Wow, interesting technique to sew a masks. And it looks especially good (as far as a mask can look stylish) with the stripes. It is interesting how many different types of mask patterns there are. This helps to find one which fits best for ones face/head. Thanks for sharing the instructions
Oh, thanks for your words, let me know if you do it.