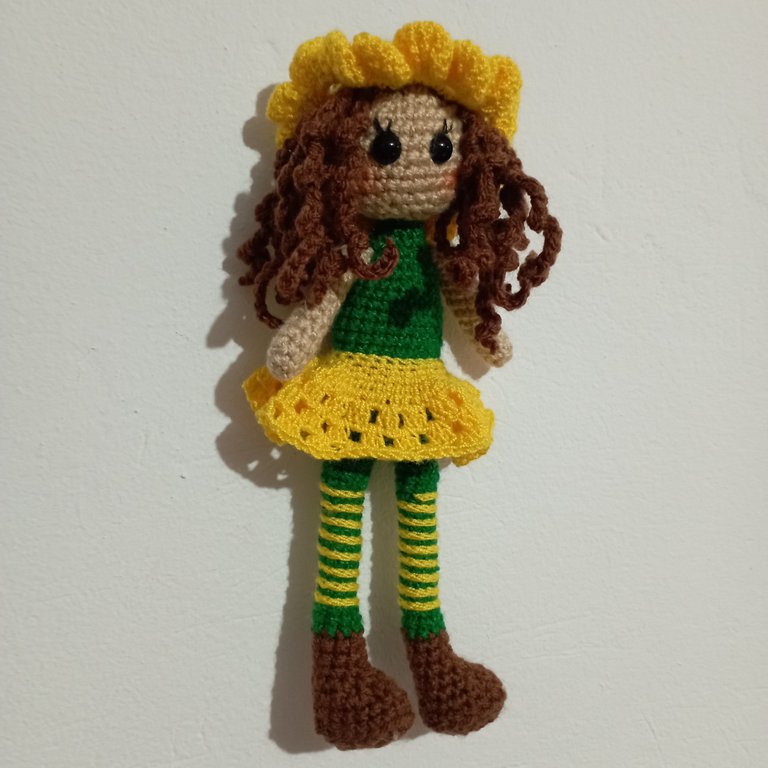
Well, I had some green wool and yellow crochet and it immediately occurred to me to make a doll inspired by a sunflower. I got down to work and now I'm going to share the process in a nutshell since it has a lot of details. | Pues bien, tenía algo de lana verde y crochet amarillo y de inmediato se me ocurrió hacer una muñeca inspirada en un girasol. Me puse manos a la obra y ahora les voy a compartir resumidamente el proceso ya que tiene muchos detalles.
|
|

| |
|---|
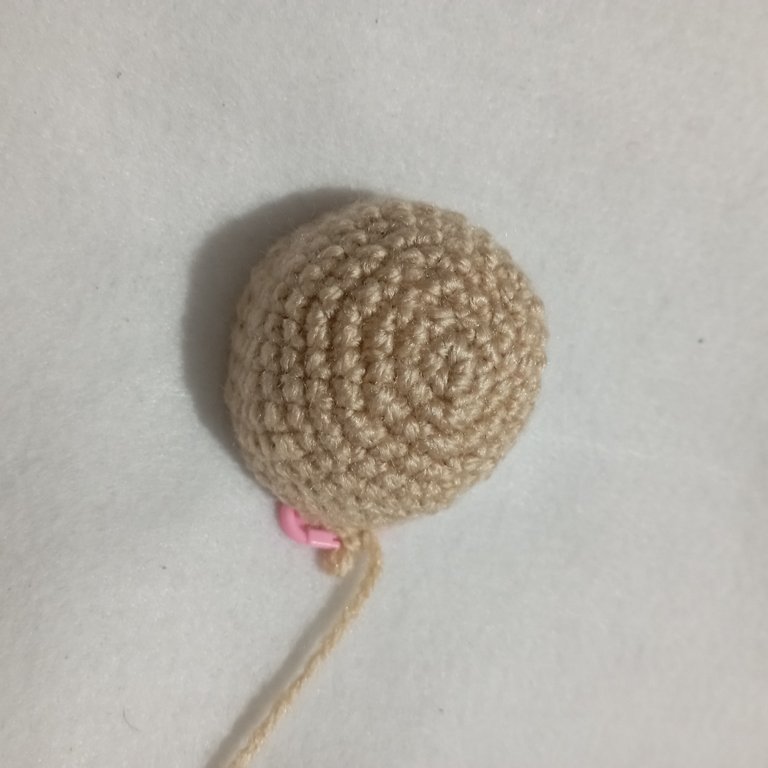
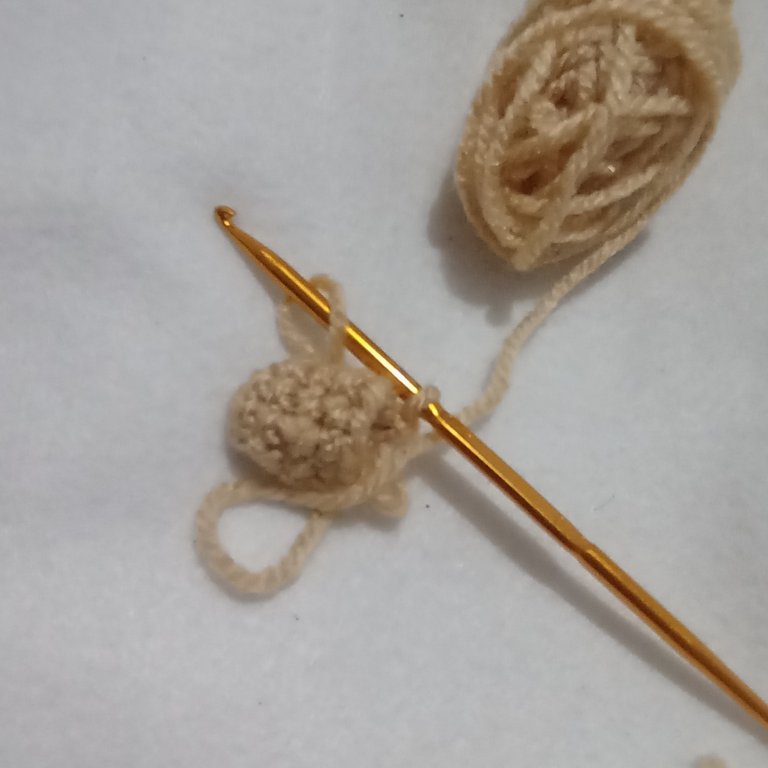
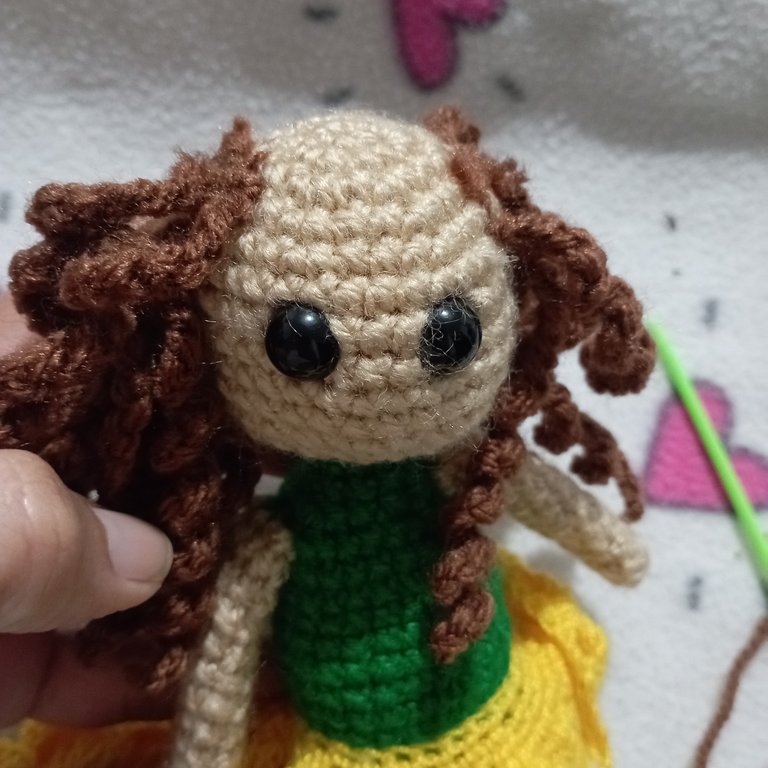
I made the head the way I have been working so far: with 6 stitches in a magic ring and then I made 6 increases. For the second round, 1 single crochet and 1 increase. Third row, 2 single crochet and 1 increase. Fourth row, 3 single crochets and 1 increase, by this time we have reached 30 single crochets. We start with the decreases; 3 single crochets and 1 decrease. Next, 2 single crochets and 1 decrease and finally 1 single crochet and 1 decrease. The arms are made with 6 stitches in a magic ring and then single crochet until the desired length. | Realicé la cabeza de la forma que he venido trabajando hasta ahora: con 6 puntos en un anillo mágico y luego hice 6 aumentos. Para la segunda vuelta 1 punto bajo y 1 aumento. Tercera vuelta, 2 puntos bajos y 1 aumento. Cuarta vuelta, 3 puntos bajos y 1 aumento, para este momento ya hemos alcanzado 30 puntos bajos. Comenzamos con las disminuciones; 3 puntos bajos y 1 disminución. Siguiente, 2 puntos bajos y 1 disminución y por último 1 punto bajo y 1 disminución. Los brazos los realice con 6 puntos en un anillo mágico y luego puntos bajos hasta el largo deseado. |

| |
|---|
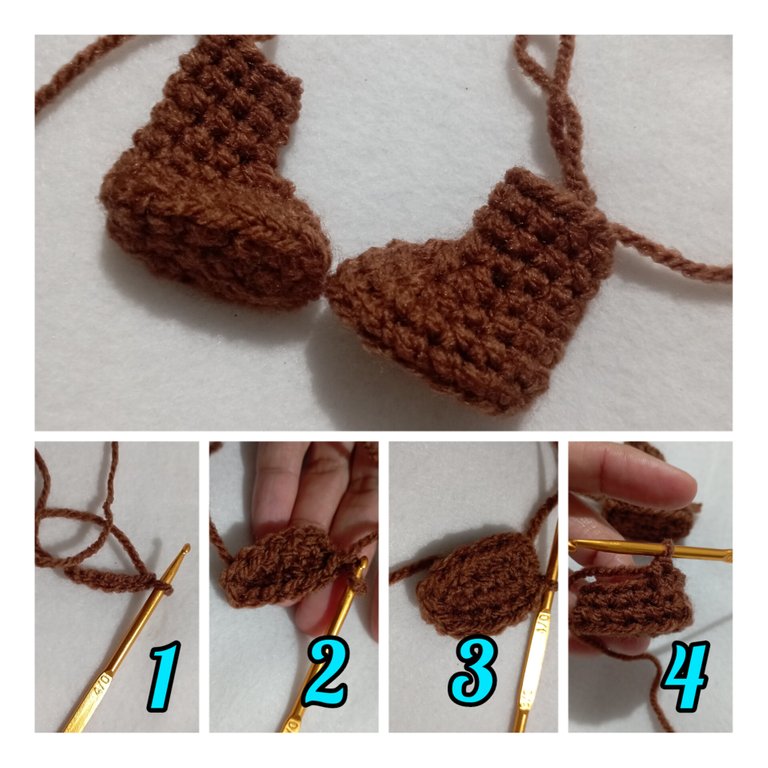
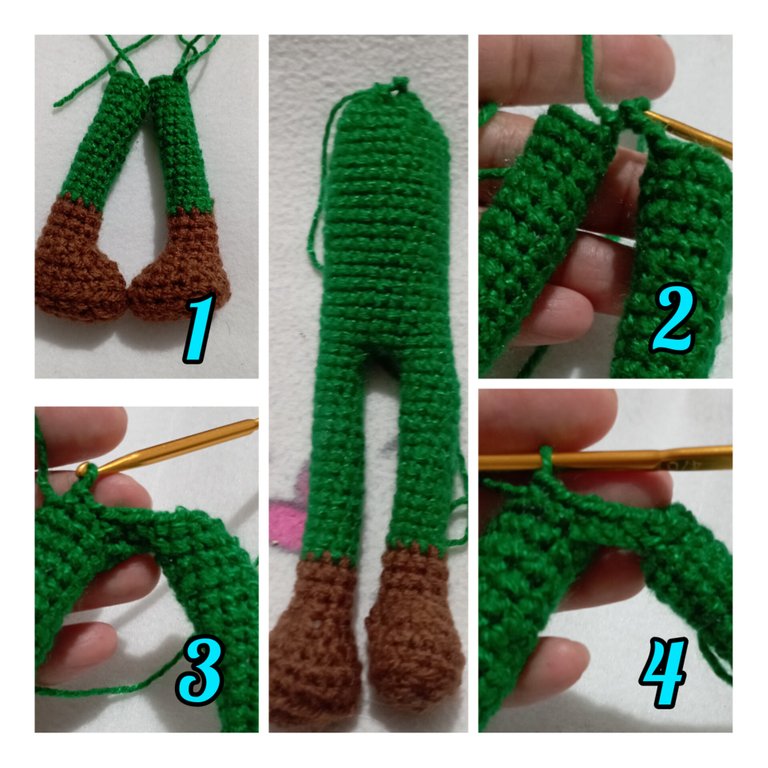
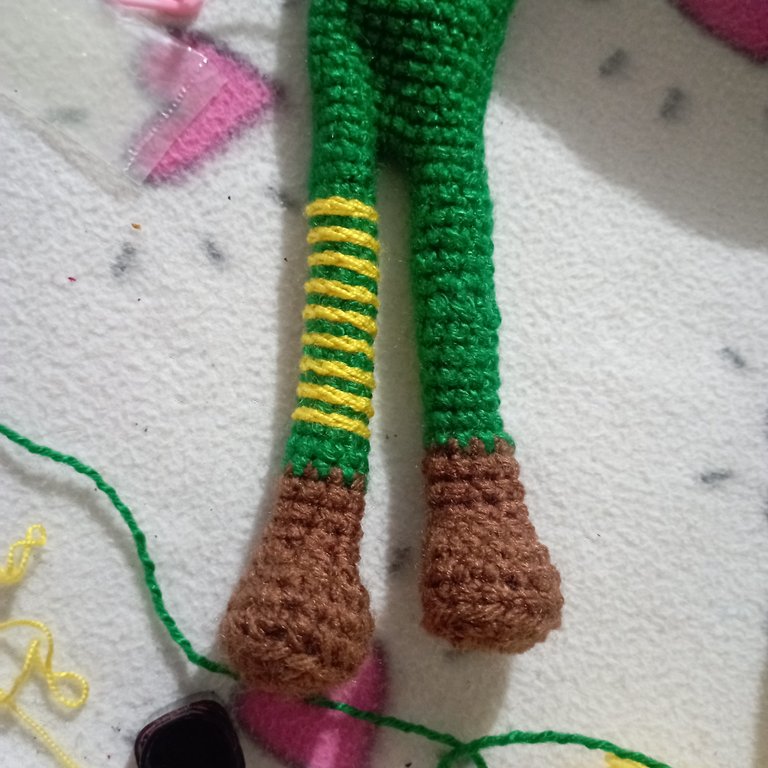
With the shoes I made a chain of 5 stitches with brown yarn and then took a loop passing through the penultimate stitch of the chain, from there I made single crochet until I reached the last stitch where I made an increase. Then I knit a single crochet until I reached the end of the other side of the chain and cast on a double crochet. The second round in the same way but with two increases at the ends of the base. From there continue with low stitches to give height to the base of the shoes and then make several decreases to make the narrowest part where it connects to the legs. | Con los zapatos realicé una cadena de 5 puntos con lana marrón y luego tome lazada pasando por el penúltimo punto de cadena, a partir de allí realicé puntos bajos hasta llegar al último punto dónde realice un aumento. Luego puntos bajos hasta llegar al final del otro lado de la cadena y un aumento. La segunda vuelta de la misma manera pero con dos aumentos en los extremos de la base. De allí segui con puntos bajos para dar altura a la base de los zapatos y luego realice varias disminuciones para hacer la parte más angosta dónde conectaría con las piernas. |
| |
|---|
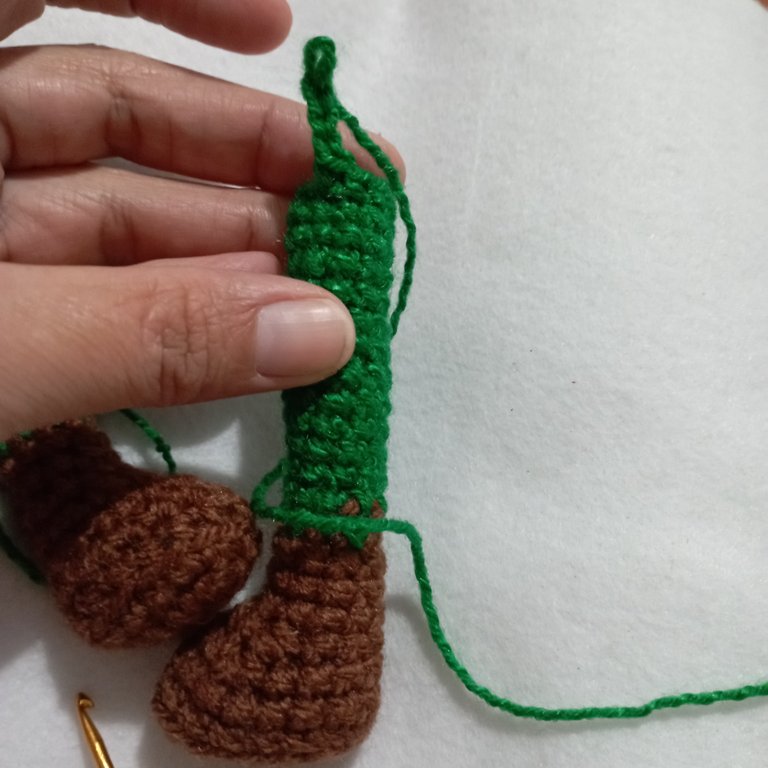
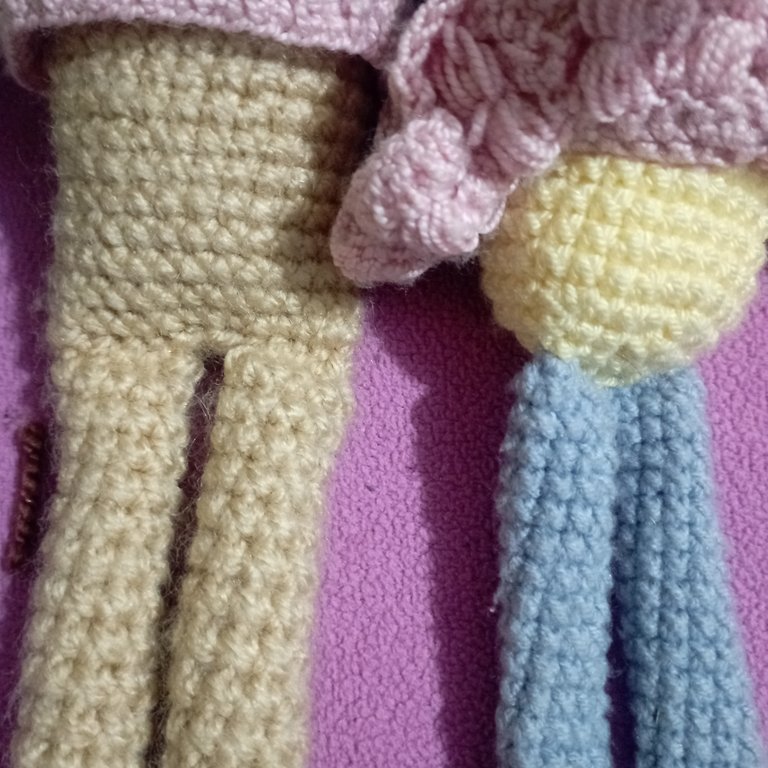
For the legs I took green yarn and continued knitting the same amount of stitches of the base of more boots until I reached the desired height. To join the legs I made a chain of 4 stitches right in the middle of one of the legs. Be especially careful to place that stitch where the feet are positioned to the front and then join with a slip stitch in the middle of the other leg. From there on, knit a slip stitch all the way around the edge of the leg and in that first row through the 4 stitches that join both legs. By continuing to knit one stitch in each stitch you are gaining height and giving way to the body. | Para las piernas tome lana verde y seguí tejiendo la misma cantidad de puntos de la base de más botas hasta llegar a la altura deseada. Para unir las piernas realicé una cadena de 4 puntos justo en la mitad de una de las piernas. Hay que tener especial cuidado en ubicar ese punto donde los pies queden posicionados hacia el frente y luego se une con un punto deslizado en la mitad de la otra pierna. A partir de allí se tejen puntos bajos en todo el borde de la pierna y en esa primera vuelta por los 4 puntos que unen ambas piernas. Al seguir tejiendo un punto en cada uno se va ganando altura y dando lugar al cuerpo. |
| |
|---|
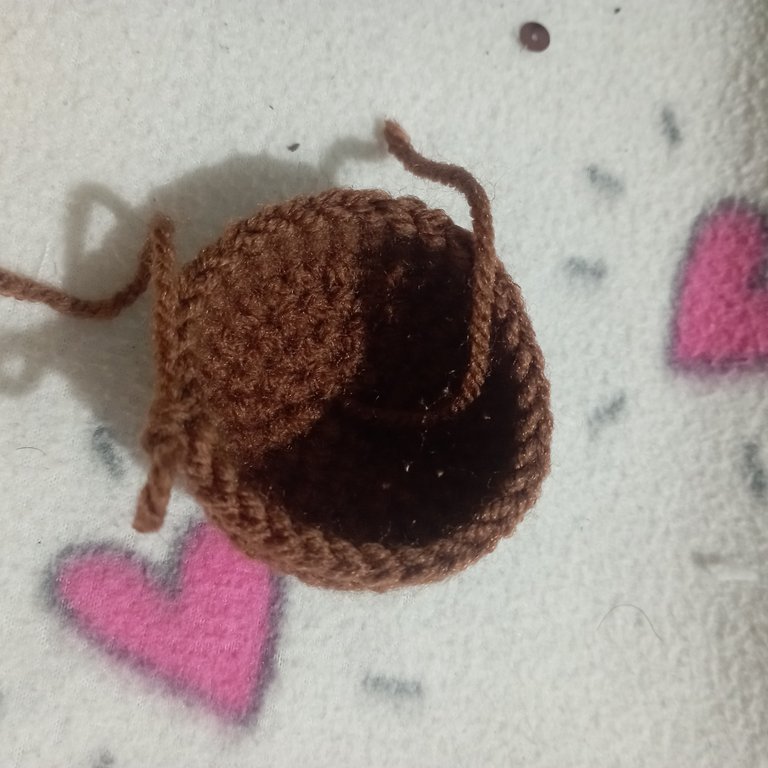
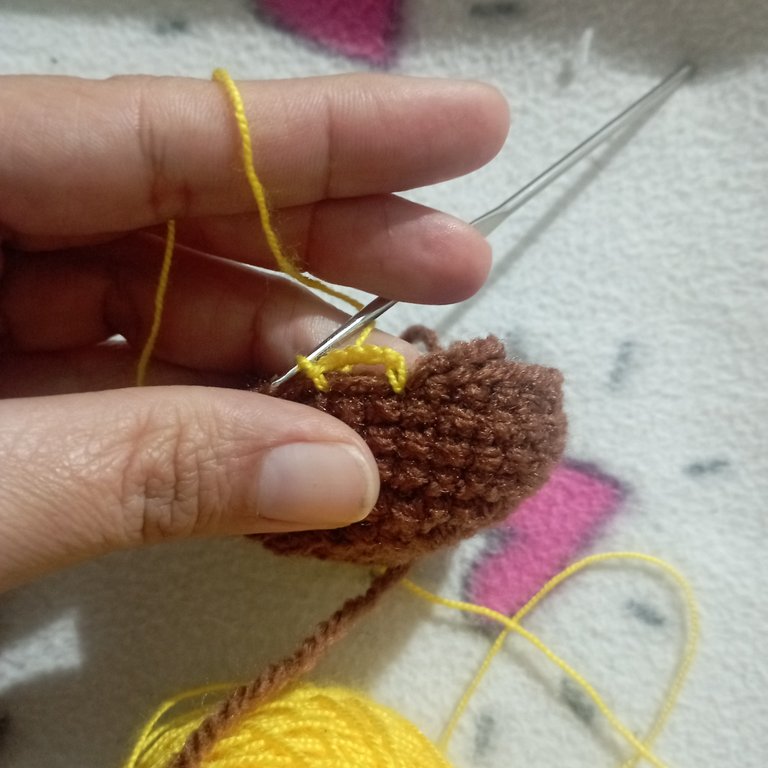
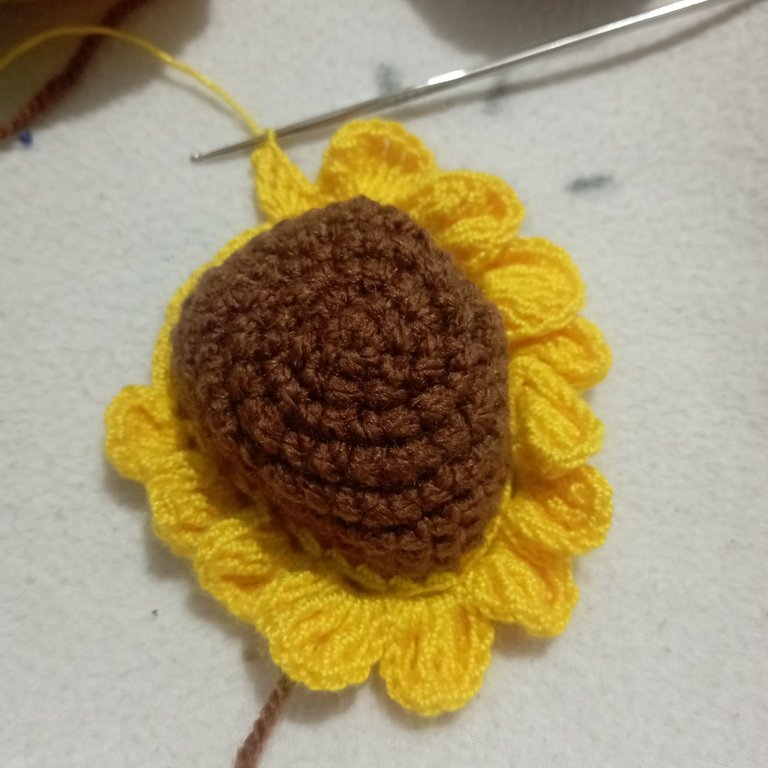
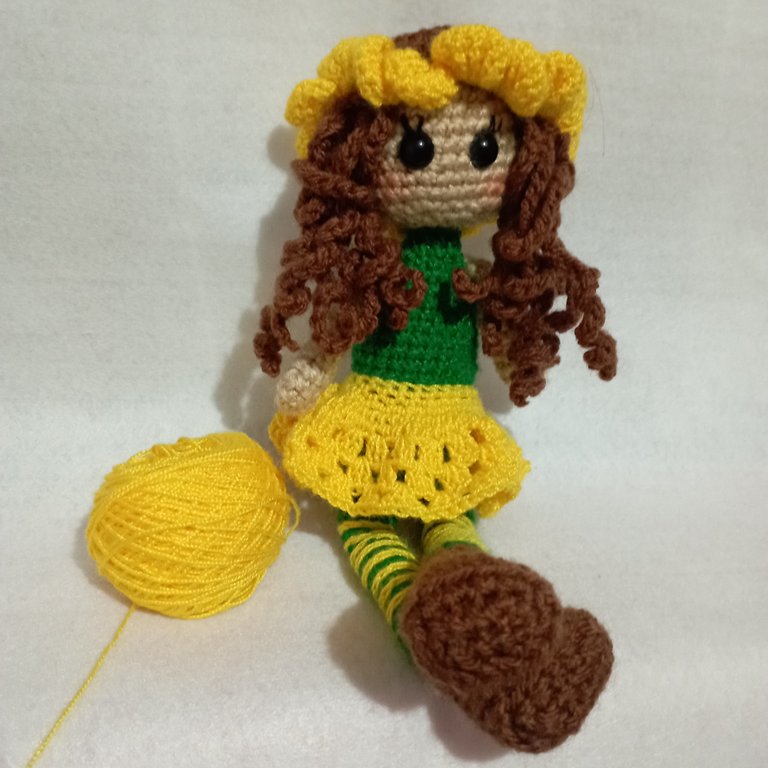
For the sunflower shaped cap I made a half circumference with brown yarn and then with yellow crochet thread I made 16 chains of three stitches each separated by slipped stitches at the base of the brown cap. Then make each petal with 1 low stitch, 1 medium high stitch, 7 high stitches, 1 medium low stitch and 1 low stitch; these complete the 10 stitches of each petal. When I completed all 16 petals, I cast on a full round of single crochet over all petals. | Para el gorro en forma de girasol realicé media circunferencia con lana marrón y luego con hilo crochet amarillo realice 16 cadenas de tres puntos cada una separadas por puntos deslizados en la base del gorro marrón. Luego realice cada pétalo con 1 punto bajo, 1 medio alto, 7 puntos altos, 1 punto medio bajo y 1 punto bajo; estos completan los 10 puntos de cada pétalo. Al completar los 16 pétalos, realicé una vuelta completa de puntos bajos sobre todos los pétalos. |
| |
|---|
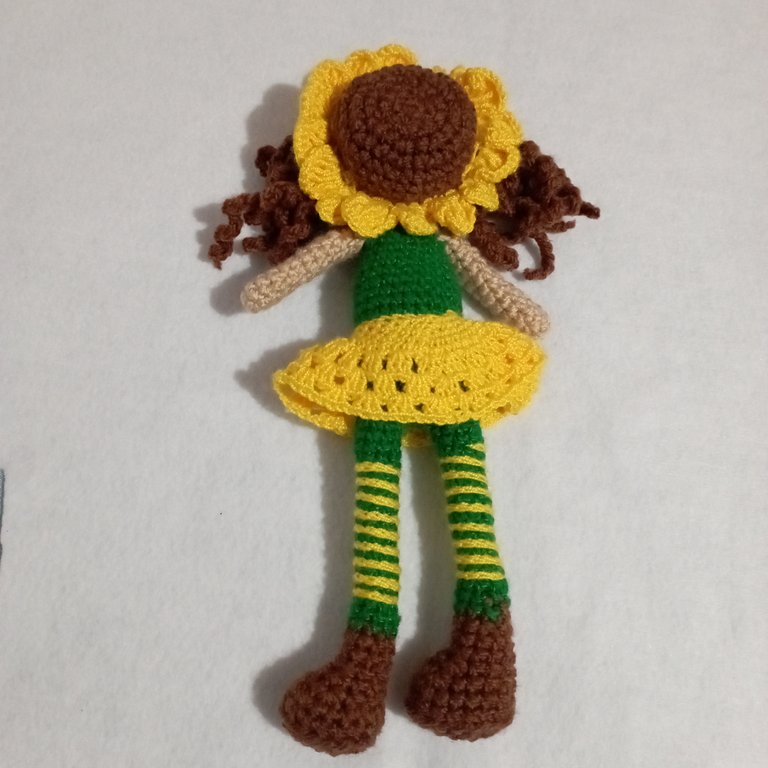
I made brown wool chains to make the hair. A yellow skirt and I attached the sunflower hat with a wool needle. I also put the eyes and all the stuffing I was placing as I went along in the process and according to the need of the moment. | Realicé cadenas de lana marrón para hacer el cabello. Una falda amarilla y fijé el gorro de girasol con aguja lanera. También puse los ojos y todo el relleno lo fui colocando en la medida que avanzaba en el proceso y según la necesidad del momento. |


| |
|---|
I think the hardest part was to summarize all the work in this post. I hope I have explained myself well since there are many details and I don't want to bore you, on the contrary, I hope you can enjoy this publication. It was a pleasure and an honor to share it with the #needleworkmonaday family. Greetings and good wishes to all. | Creo que la parte más difícil fue resumir todo el trabajo en este post. Espero haberme explicado bien ya que son muchos detalles y no deseo aburrirlos sino que por el contrario puedan disfrutar de esta publicación. Fue un placer y un honor compartirla con la familia de #needleworkmonaday. Saludos y mis buenos deseos para todos. |

Para traducir utilice: Traductor DeepL
Imágenes editadas en: inshot
Fotos tomadas con Redmi 10
translated in: DeepL Translate
Images edited in: inshot
Photos taken with Redmi 10

The rewards earned on this comment will go directly to the people( @semarekha ) sharing the post on Twitter as long as they are registered with @poshtoken. Sign up at https://hiveposh.com.
Sinceramente te quedo muy bonita, y bastante explicado tu trabajo, tengo algo de conocimiento en tejer. Pero me gustaría tener más experiencia y en tu publicación deja ver el trabajo claramente como para realizarlo. Felicidades. 😉
Muchas gracias por tu comentario. Te animo a que empieces y lo mejor es con cosas sencillas para que no te desanimes y vas progresivamente con cosas más avanzadas. Tejer es una gran aventura y cada vez quieres hacer más y más. Espero ver algo de ti.
Mis saludos.
Gracias por los buenos ánimos espero pronto aunque tengo una pequeño desacuerdo con el tiempo 😁, siento que tengo tantas ganas de hacer pero el no me deja. Gracias por responderme. saludos también para ti
Te comprendo. Pero es bueno que te regales un tiempito para eso que tanto te gusta hacer, es muy reconfortante.
Abrazos.
@artsugar que ternura de muñeca,de ve muy bien combinada y diseñada , me encantó 😍.
Muchas gracias mi estimada amiga. Perdón por no responder antes. Los fines de semana estoy con mucha actividad y por eso no había respondido.
Me alegra saber que te gustó mi muñequita de girasol.
Abrazos.
¡Te quedó preciosa! y la combinación de colores de lujo. Que bueno que tengas al lado un niño como control de calidad en tus diseños, jaja. Justo la unión de las piernas tiene un truco, eso se nota sobre todo cuando se cambia de color. Por ejemplo generalmente yo le pongo su ropa interior (jaja) y es de color distinto a la piel y cuerpo. Un abrazo.
Jajajaja. Que linda idea. Me parece genial. Yo no sabía esta técnica y me encanta. Ya mis muñecas no tienen esa unión que no me gusta para nada. Queda mucho más prolijo.
Respecto al control de calidad, pues también es quien me apresura con mis proyectos y ahora apenas me ve tomar un ganchillo me pregunta: Que me estás tejiendo?.
Es una hermosa muñequita de girasol 🌻, me gustó el detalle de las piernas se ve linda la combinación de colores, gracias por compartir el proceso, espero tengas un feliz día 🤗
Muchas gracias mi estimada amiga por apreciar los pequeños detalles. Gracias por tu tiempo.
Bendiciones.n
This look so beautiful, children will really feel happy to have this by their side. You post is great 👍👍 thanks for sharing this with us
Thank you very much for sharing your appreciation. My daughter loved it and I really enjoy seeing her so happy with her new doll.
Best regards.
Cosita linda, cosita hermosa 🎉🌷 Floricienta ❤️
🥰🥰🥰
Que belleza la muñeca 🌻, además con un explicación muy clara, saludos @artsugar.