¿Cuántas maneras de colocar el cabello conoces?
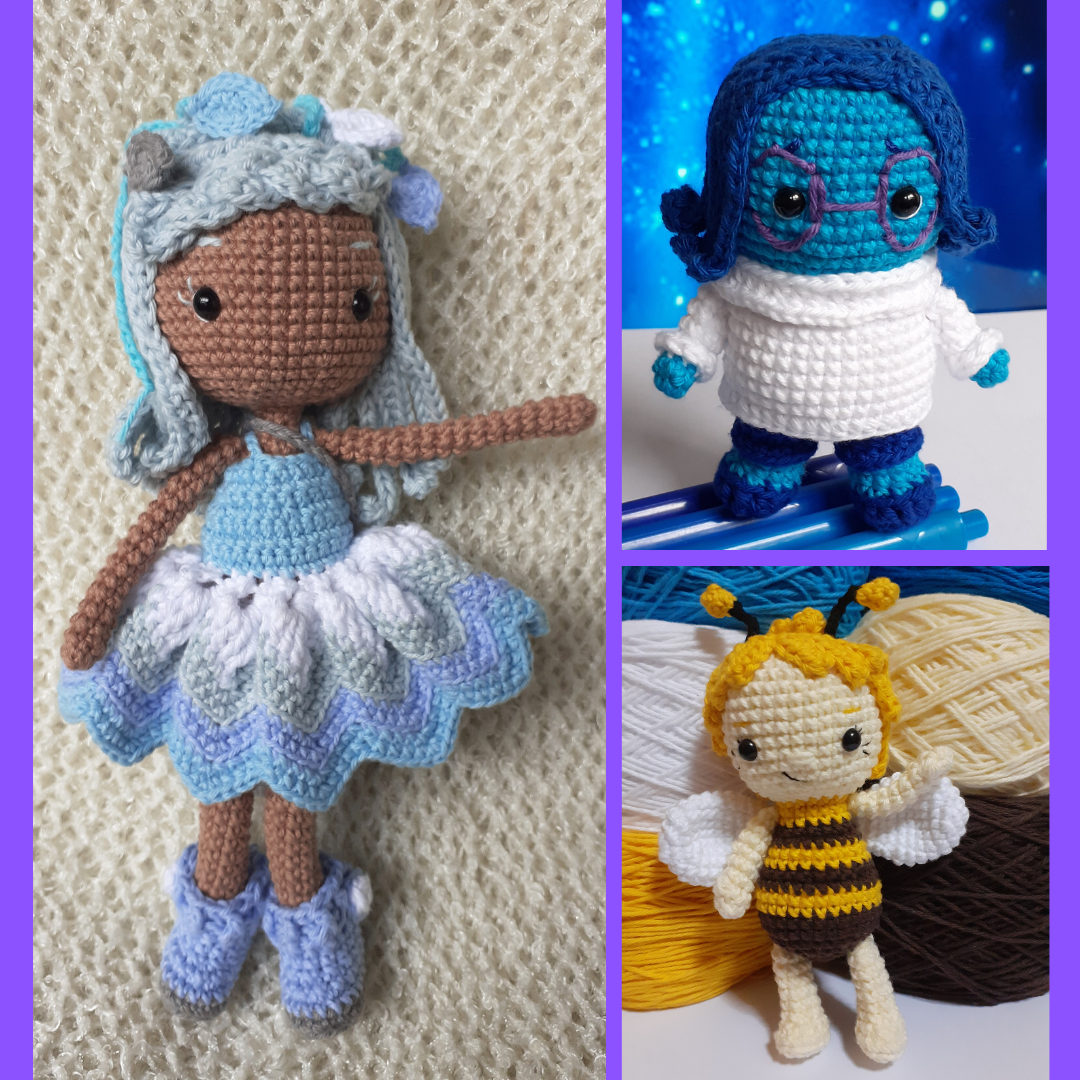
¡Hola, espero la estén pasando bien!
Hi, I hope you are having a good time!
En el post anterior (https://hive.blog/hive-127911/@inici-arte/tipos-de-cabellos-para-tus-amigurumis-parte-1-types-of-hair-for-your-amigurumis-part-1) nos quedamos en que veríamos variaciones del tipo de cabello número 1.
In the previous post (https://hive.blog/hive-127911/@inici-arte/types-of-hair-for-your-amigurumis-part-1-types-of-hair-for-your-amigurumis-part-1) we said that we would see variations of hair type number 1.
Raya al costado / stripe down the side
Esta puede ser de 3 formas: En piezas, con el inicio en forma ovalada y el común.
This can be in 3 forms: In pieces, with the oval-shaped start and the common one.
a) En piezas / In pieces
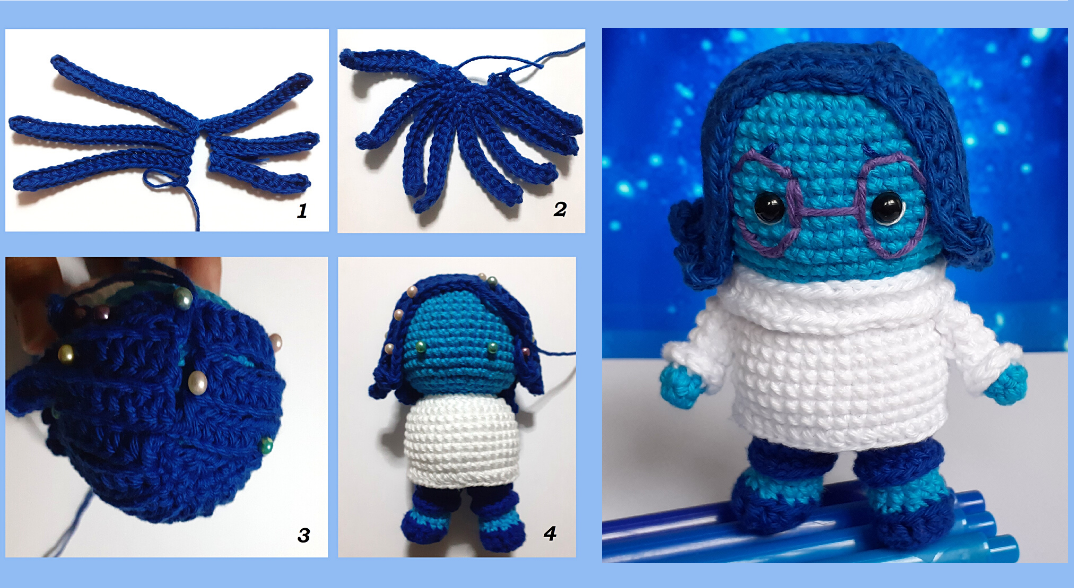
Aquí tejí el cabello en 2 piezas, la parte de adelante y la de atrás.
Fig. 1: mechones delanteros
Fig. 2: mechones traseros
Fig. 3 y 4: Diagramación del cabello con alfileres
Here I wove the hair in 2 pieces, the front and the back
Fig. 1: front locks
Fig. 2: back locks
Fig. 3 and 4: Diagramming the hair with pins
b) Forma ovalada / Oval shape
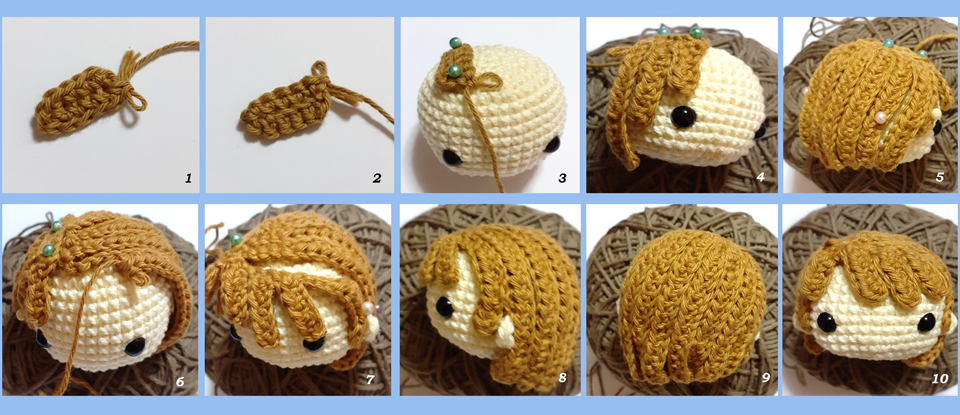
A mi parecer, este tipo es el más complicado, ya que al ser ovalado al inicio no se tiene un número de mechones de inicio y este puede variar, por lo que demandará de aumentos si en caso no llegase a tapar la cabeza. También habrá variaciones en la longitud del largo de los mechones, para que tenga una caída pareja y al ras.
Fig. 1: Esta cabeza la inicié con un anillo mágico de 7 puntos, por lo que salió achatada. Para el cabello se tejió 6 cadenas, luego se retornó por la hebra de atrás de las cadenas con 1 aumento, 3puntos y un aumento triple.
Fig. 2 y 3: Se voltea el tejido al revés y colocar alfileres para sujetarlo a la cabeza. Colocar la pieza donde deseas colocar la raya.
Fig. 4 y 5: Se teje los mechones por la hebra delantera variando el número de cadenas, según la imagen de referencia. Aquí los alfileres ayudan bastante ya que sirve para fijar los mechones a la cabeza (el área ocupada).
Fig. 6: Aquí dejé un espacio para colocar las orejas
Fig.7: En el último mechón, aproveché tejerle el cerquillo o mechones cortos.
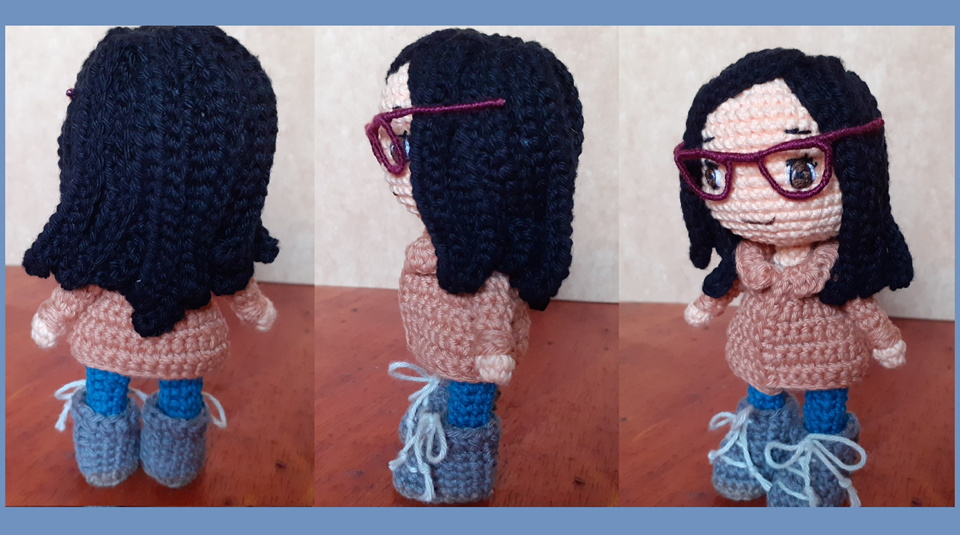
Fig. 8: Vista de perfil
Fig 9: Una vez que tienes todos los mechones diagramados se puede pegar con silicona o coserlo a la cabeza
Fig. 10: Vista de frente
In my opinion, this type of hair is the most complicated, as it is oval at the beginning, there is no set number of locks and this can vary, so it will need to be increased if it does not cover the head. There will also be variations in the length of the locks, so that they fall evenly and flush.
Fig. 1: I started this head with a magic ring of 7 stitches, so it came out flat. For the hair, 6 chains were knitted, then the strand at the back of the chains was returned with 1 increase, 3 stitches and a triple increase.
Fig. 2 and 3: Turn the fabric inside out and place pins to attach it to the head. Place the piece where you want to place the stripe
Fig. 4 and 5: Weave the locks through the front strand, varying the number of strands, as shown in the reference picture. Here the pins help a lot as they serve to fix the strands to the head (the occupied area).
Fig. 6: Here I left a space for the ears
Fig. 7: In the last tuft, I weaved in the short locks
Fig. 8: Profile view
Fig 9: Once you have all the locks diagrammed you can glue it with silicone or sew it to the head
Fig. 10: Front view
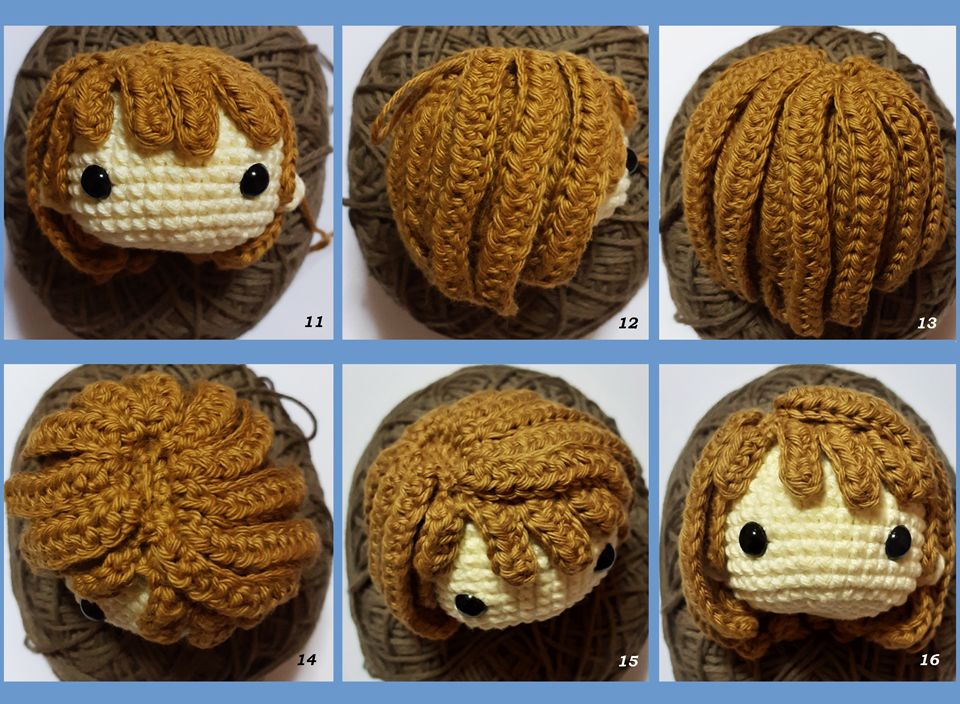
Como se tejió por la hebra delantera, aún nos queda la hebra trasera. Es allí donde tejeremos la segunda fila de cabello.
Fig. 11: Se teje cadenas según el largo deseado
Fig. 12: Aquí tienes la opción de tejer pocos o muchos mechones
Fig 13: Cabello visto de atrás
Fig. 14 y 15: posición de la raya al costado
Fig 16: Vista de manera frontal.
As the front strand was knitted in, we still have the back strand left. This is where we weave in the second row of hair.
Fig. 11: We weave in strands according to the desired length
Fig. 12: Here you have the option to weave in a few or many strands
Fig. 13: Hair seen from the back
Fig. 14 and 15: Position of the side parting
Fig. 16: View from the front.
c) Común / common
Este tipo de cabello lo vimos en el post anterior. Se trata de tejer un el anillo mágico al costado en lugar de un óvalo. La ventaja es que tienes un número fijo de mechones los cuales puedes intercalarlos.
We saw this type of hair in the previous post. It involves weaving a magic ring on the side instead of an oval. The advantage is that you have a fixed number of strands which you can intersperse.
Otros datos/ other data :
- Para adherir el cabello a la cabeza por lo general utilizo como pegamento silicona líquida fría.
- El cabello también puede ir tejido a la cabeza, eso le dará más volumen.
- También se puede utilizar para el cabello ondulado, aunque para ello no se tendrá que voltear el tejido.
- Para el cabello tipo “b”, también se puede tejer los mechones intercalados, es decir en la primera capa dejo espacios, quienes serán cubiertos por la segunda capa.
- Se puede colocar cuantas capas de cabello deseas, eso dependerá del tamaño de la cabeza del amigurumi.
- To attach the hair to the head I usually use cold liquid silicone as glue.
- The hair can also be woven into the head, which will give it more volume.
- It can also be used for wavy hair, but the weave does not have to be turned upside down.
- For type "b" hair, you can also weave the strands in between, i.e. in the first layer you leave spaces, which will be covered by the second layer.
- You can place as many layers of hair as you want, it will depend on the size of the amigurumi head.
¡Y eso es todo!,
¡…Hasta la próxima!
See you next time!
Dato curioso: En el próximo post veremos un tipo de cabello no tan conocido pero sí tradicional / In the next post we will look at a not so well known hair type.
►Encuéntranos en:
- Instagram: https://www.instagram.com/inici_arte_craft/
- Creary: https://creary.net/@diana.waranqa/
- Facebook: https://www.facebook.com/iniciartecraft/
Hola @inici-arte hermoso trabajo, siempre tienes ideas creativas y nuevas formas de hacer tus creaciones. Adore el cabello ovalado, lo voy a poner en práctica cuando teja un amigurumi
Hola, muchas gracias por comentar. Cuando se trata de amigurumis dan ganas de seguir aprendiendo. Para el cabello puedes ponerle varias capas de mechones. Por lo general tejo amigurumis pequeños (13cm). ¡Buenas vibras!.