The Braided Fabric Wreath
Hello Everyone!
Here´s hoping all of you are safe as we go on with our lives during this difficult time. I am definitely coping with my time packing in preparation of our moving to a new apartment, so busy at the moment that there is no time to feel bored. Today, I will be sharing a project I have done in the past which had been my idea for gift giving to friends. I have done this lots of times before and each time I came up with different trimmings.
Source of inspiration
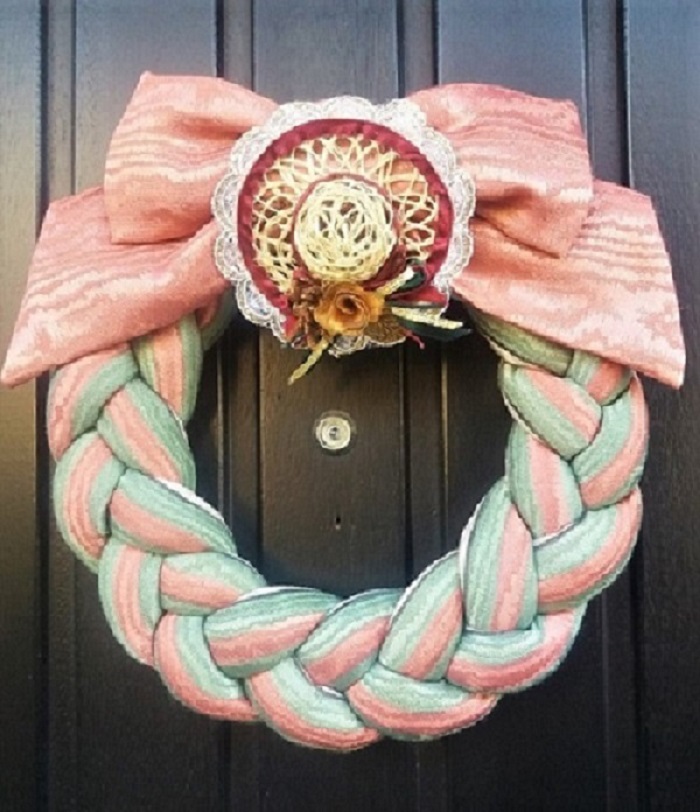
I saw a photo of this wreath from a german magazine for women but it did not have any instructions. So I began contemplating and experimenting on how I would do it. The trimmings hide both ends of the braid which were both connected by sewing them by hand. The process is quite tedious but not difficult ... do not worry since the ribbon and the trimmings will hide all the "not so lovely" top on the back side.
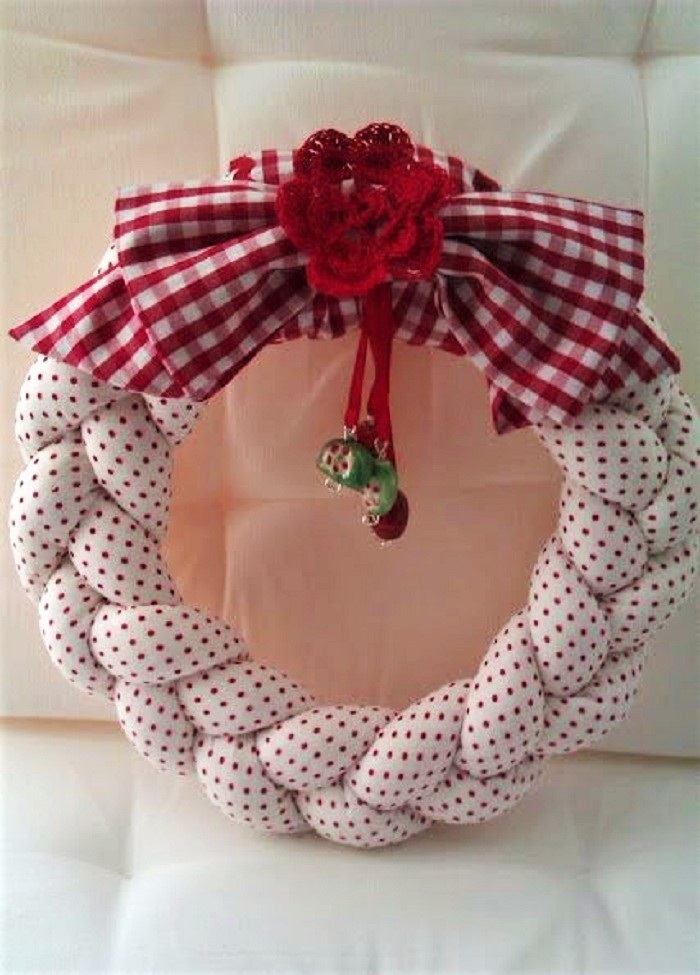
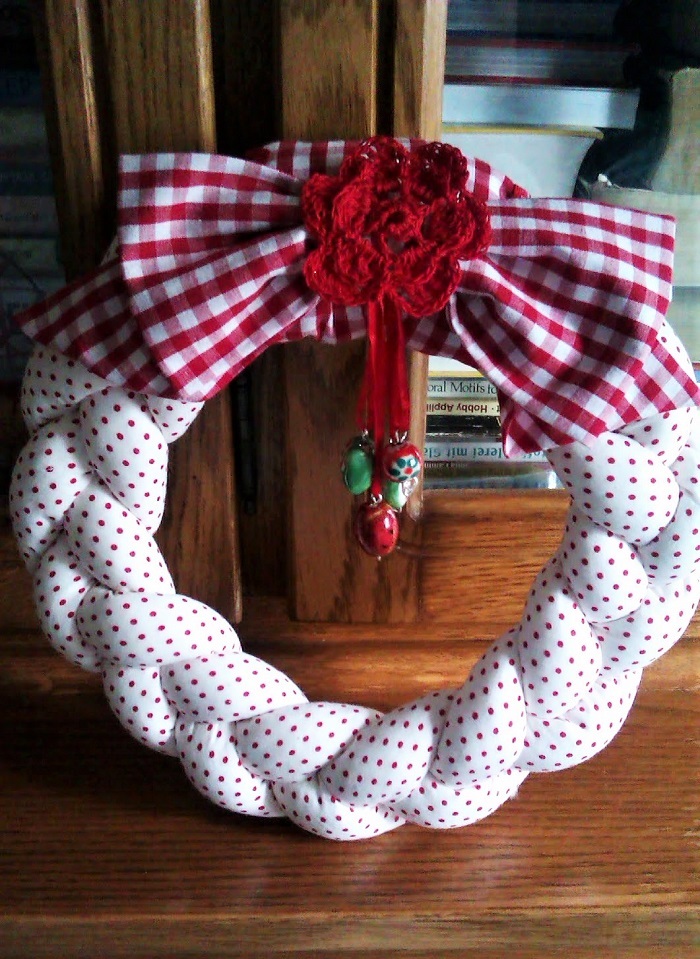
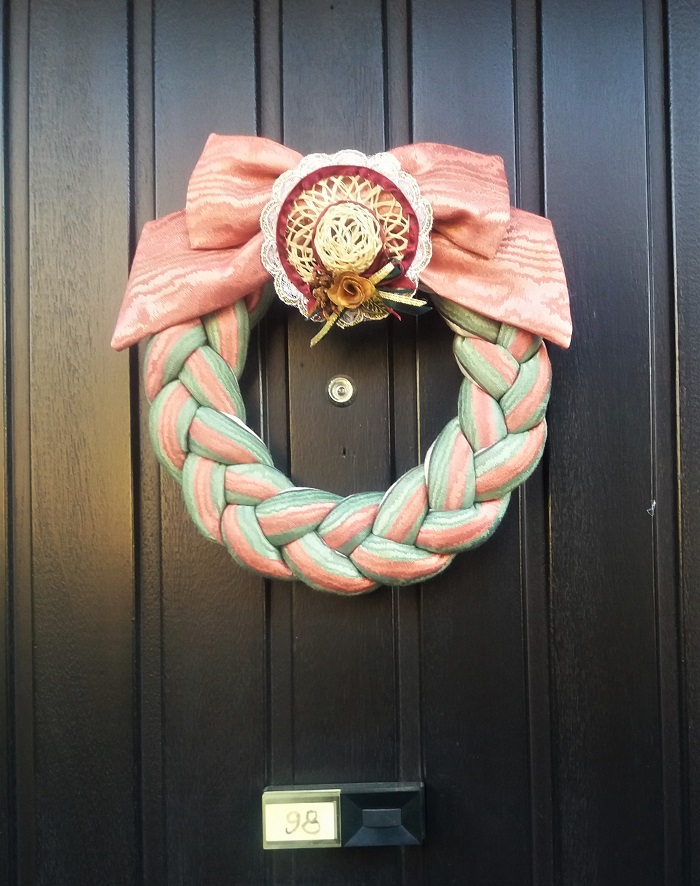
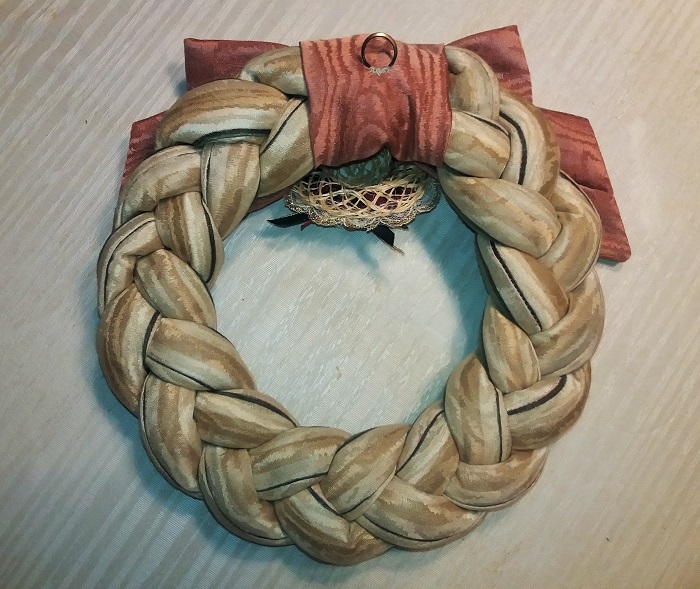
In the first wreath above, I used a 100 cm x 50 cm dotted cotton fabric, whereas the second wreath was made of curtain fabric with stripes. Here´s how I did this:
Materials :
fabric measuring 100 cm x 50 cm preferably cotton
organic/synthetic/ eco friendly toy fillers (it is your choice)
1 metal ring for wreath hanging
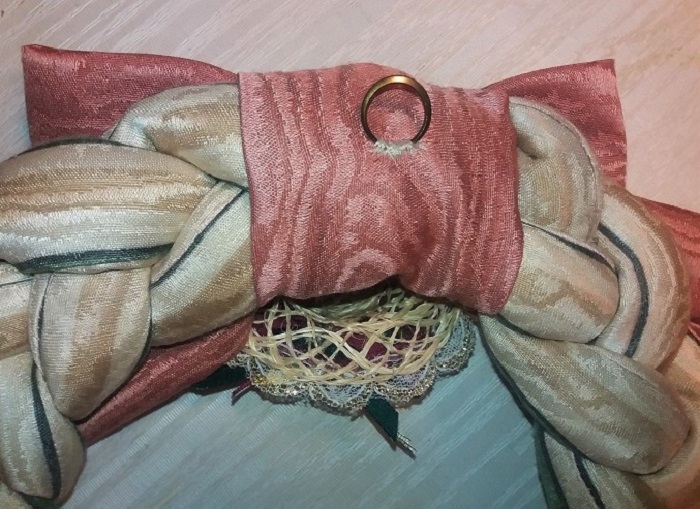
a scrap of contrasting fabric for the ribbon and a strip to hide the attached ends of the tubes
needle and thread, scissors
trimmings you like to adorn the ribbon (optional)
Preparation:
1... Cut 3 fabric stripes of 100 cm x 9 cm. Depending on the size of the wreath you want to make but the 9 cm should be good enough.... fold each stripe in the middle so that the wrong side is facing you... the sewing allowance is 0.50 cm of the open sides including closing one end to make a tube, the finished tube should be 4 cm in diameter . Reverse the sewn side by using a long stick, here I used the handle of my wooden spoon to reverse to the right side of the fabric.
2... Fill the tube with cotton fillers which you can buy at craft stores... or sometimes I used cotton balls and insert them using the handle of the wooden spoon. insert fillers til the end of the tube but keep it light so that later the shape of the braids can still be adjusted.
3... After the fabric tubes are completely stuffed with fillers, gather the 3 open ends and secure them by using 2 laundry clips to be attached to a clothes hanger or you can run stitches to secure the 3 ends. One way to fix the end when braiding is to ask a friend to hold the other end while you braid.
Braid the 3 tubes til you reach the preferred size of the wreath, try to connect both ends by hand at first securing them with safety pins. Remember you can always cut the excess tubes when you reach the wreath size you want.
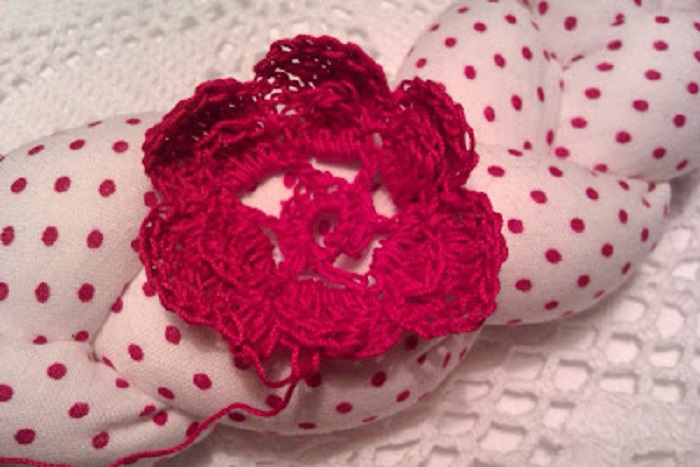
4... Make a contrasting fabric strip large enough (folded) to cover the attached ends of the braid, to hide so to speak the connected ends. A ribbon is actually optional but it will look lovelier if you have it placed on top of the cover strip. Add any trimmings you like. The first dotted wreath has a crocheted trimming and I added colored beads as decor. There are many tutorials online on how to make a fabric ribbon... one can be found here.
Note: You can also use glue gun instead of sewing the strip to hide the attached braid ends, but be careful as glue gun may leave a mess when the glue drops get into the braided front.
A lovely handmade gift with personal touch...
All in all, I think I made 6 of these wreaths and gifted my friends by sending one to each of them. A beautiful handmade wreath with personal touch, one went to the US to my american girlfriend, 1 to my german girlfriend in Spain and two for my Filipina friends in Vienna.
Stay safe everyone!

Congratulations @mers! Your post has been placed in the spotlight for this week's @NeedleWorkMonday Featured Posts 83!
Thank you for your quality post and for being a part of the needlework community!
#NeedleWorkMonday is an initiative that supports and rewards the needlework community while inspiring the Steemit blockchain.
Subscribe to our NeedleWorkMonday Community today!
For more information on #NeedleWorkMonday and the @needleworkmonday community please visit our FAQs!
Many thanks for featuring my post in the @NeedleWorkMonday Featured Posts 83! Will strive harder to share my crafts here...
Wonderful handmade gift idea @mers ^_^
Thank you Barbara dear.. it is!
This is a wonderful wreath idea for Easter. As we are currently under lockdown only handmade presents are possible and a wreath for the door (or even indoors) is such a nice idea. So far I only made wreath with a styrofoam as a ring base. Your braided fabric is a cool idea.
Thank you for sharing.
You are welcome.. I hope at least that I have given ideas to those users under lockdown... it´s not easy to get bored, but we crafters always have a thing to do, lockdown or not, right?
Thanks and stay safe!
Yes, I could start a million new projects, so many beautiful things to do... :-D
I hope you and your loved ones will be well <3