Hello guys
Good morning everyone in this great platform, I how are you all doing I hope you all are doing great has for me I am doing pretty good.
It is a new week and the first day of a week which is Monday, today is a very special day to us here in this community where we are to share our needle work here. I always feel so happy to share my own work here, what needle can do. Needlework is very important to everyone in this life and without needle work we cannot look beautiful and neat.
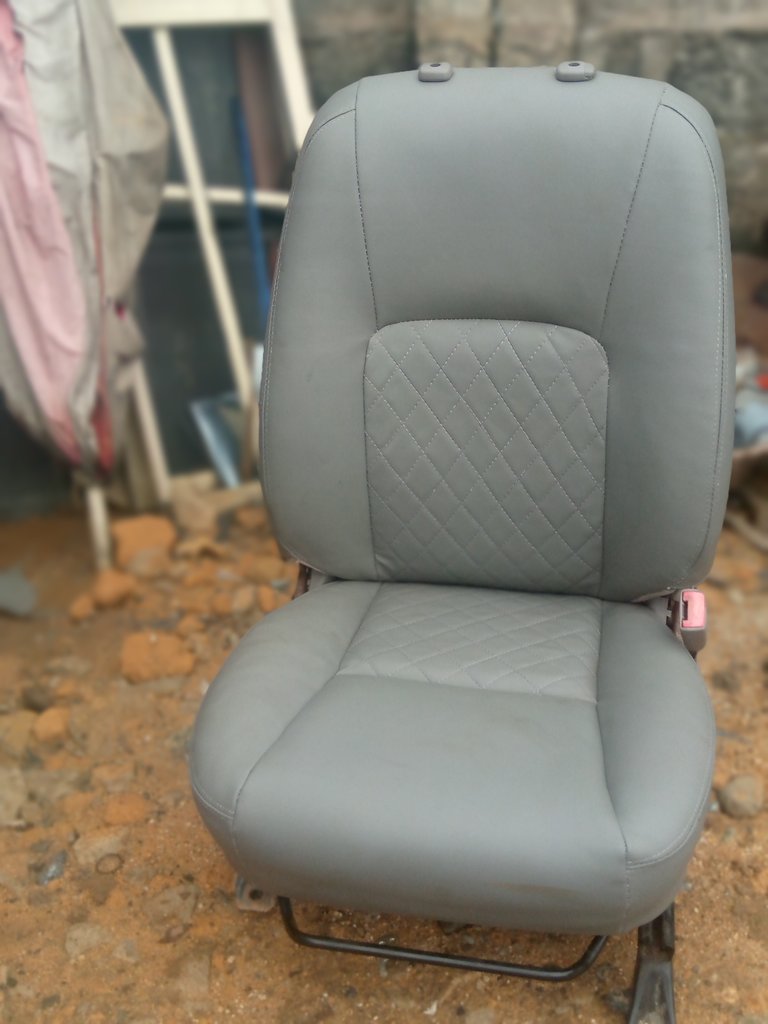
Today I want to share with you all a beautiful Toyota Camry seat that I just finished sewing using need.
Here is the seat
Here was the seat before

This seat was given to me by a close customer which I work for him once and since that day any thing about car interior I bring it to me, I am so happy. The car the owns the seat is for sale and because of the way I trusted my work he now bring it to me with full hope that I will needle it out for him. The seat is complete seat but I am just done with the first two front and the back I am still working on it.
I really love this community and is one if my best community on hive and the is nothing that will stop me from keep contributing to this community.
I will love to share with you all some steps I follow to make the seat come to reality.
Material/tools needed
- Sewing machine
- thread
- needle
- star and flat screwdriver
- roof material
- upholstery gum
- sucket spanner etc
Here is the material I used

Step 1
I loose the seat from the back with the help of my star screw driver and my sucket spanner 14. For easy measurement and upholstery. See photo below 👇👇

Step 2
After I datch the seat I now use my sewing tape to measure out the vertical and horizontal length and then write it out on the old seat. See photo below 👇👇

Step 3
I now transfer the measurement I took to my new leather by still using my sewing tape to mark out the measurement with the help of my chalk and then join the line together with my long range. See photo below 👇👇


I then finally cut it out

Step 4
Here in this step is were I form my pattern, has I explain in my previous post , to form a new pattern is simple by placing the cut material on it position and then use chalk to shape it out or you remove the old seat pattern and then trace it out.
Here I have form my pattern and i trace it out

And after forming my pattern I now place it on a roof material and then gum it together so has to make it thick and smooth

Then I finally cut them out for sewing

Step 5
The sewing process, here in this step I carefully use my sewing machine to join each of my pattern together has exactly has it was in the old seat.
I introduced a new design at the center of the seat to make the seat look more beautiful by running thread through at the center of the seat. See photos below 👇👇


Step 6
Here is the final step, which is the upholstery process, where I will now cover my seat with the new sew seat cover.
This process is simple and at the same time hard, but to me it is simple because I know it but when I started this work it was hard for me.
I first of all cover the back seat by using a clip and Pilar to clip it to the frame.


Note: the is a roll that is being pass on the seat cover and the main frame where we clip it together
Then I finally cover it

I did the same to the main seat. See photo below 👇👇


Then I finally tight them together which gives me this
Wow this is beautiful,
I hope you enjoy reading and you love the outcome of it. Thanks everyone for stopping by and please do well to boost this post, I love you all.
Nice to meet a customer who now gives you work. Customers are like that because they need one to trust at all times.
Yes that is true. Thanks for stopping by
Hello Mosses 😌. This seat turned out great, it's good that your friend and client trusted you to restore it. Now it looks like new. Congratulations 🎉🥂.
Thanks so much for stopping by on my post
Yesterday I was very close to a place where they upholster car furniture. I remembered you.
This kind of work is laborious. The finished Toyota chair looks very nice. Very fancy.
Thanks for keeping me in your mind and also for stopping by, I really appreciate
The transformation is awesome. It's no surprise your customer keeps coming back
Congratulations @mosesessien! You have completed the following achievement on the Hive blockchain and have been rewarded with new badge(s):
Your next target is to reach 2250 upvotes.
You can view your badges on your board and compare yourself to others in the Ranking
If you no longer want to receive notifications, reply to this comment with the word
STOPCheck out the last post from @hivebuzz: