
I've been working on putting together the kitchen of my house that I've been slowly building for the past couple of years - almost there. Previously I assembled the kitchen sink base cabinet, a blind corner cabinet, and a 9 inch base cabinet, all with hinged doors. I already have the sink, the counter top will be ready for pickup tomorrow - I recently assembled this base cabinet with three drawers that will be to the left of the 30 inch kitchen sink cabinet.
Three Drawer Cabinet Assembly
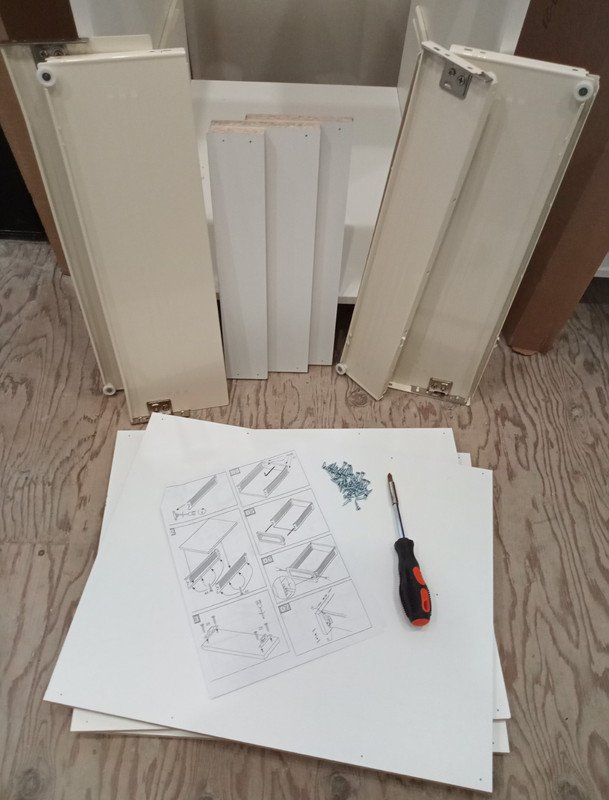
Neatly packed 18" three drawer base cabinet, the drawer fronts are sold separately. Straight forward assembly - all that's required is a Phillips head screw driver, but I did use the Phillips head bit with the power drill a few times.
 |  |
|---|
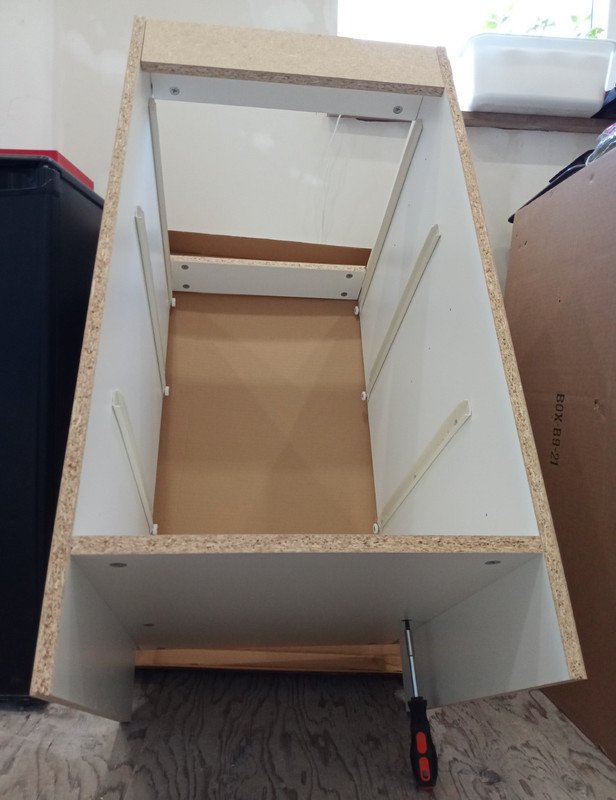
Solid looking rails for hanging the drawers on, I made a mental note of the smallest drawer on the top, largest on the bottom. Standard furniture assembly push pegs with the circular Phillips head parts to tighten and lock in the pegs.
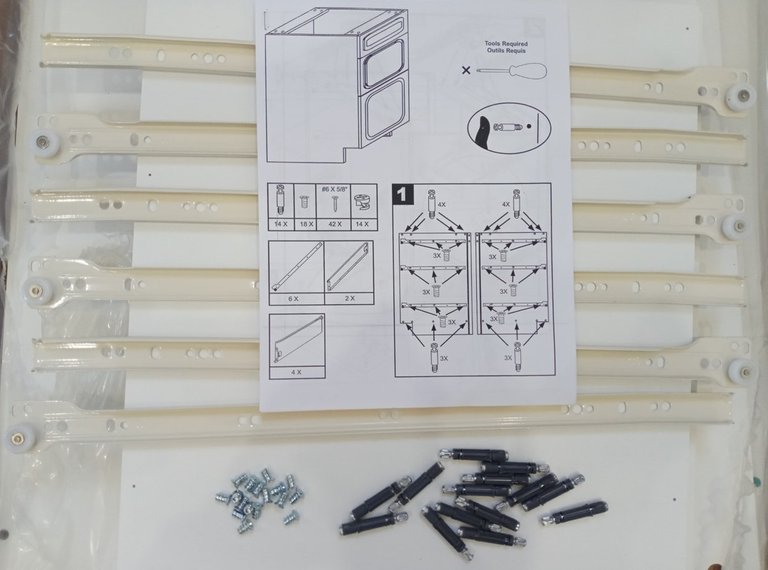
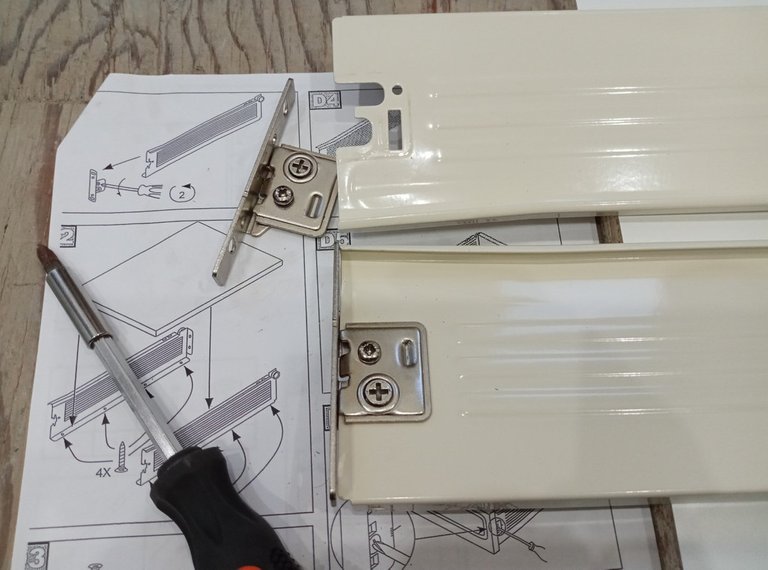
The plastic ribbed sides of the pegs get pushed into the pre-drilled holes of the insides of the two sides of the cabinet, as seen in the picture below. The drawer rails have also been attached, as in the instructions, with the wheel at the front end of the drawers and on the bottom of the rail.

The peg locks were already pushed into the pre-existing holes of the width wise pieces with the arrow pointing towards the hole that the peg will be inserted into - it's easier to insert the locks before the pegs are pushed in.
 |  |
|---|
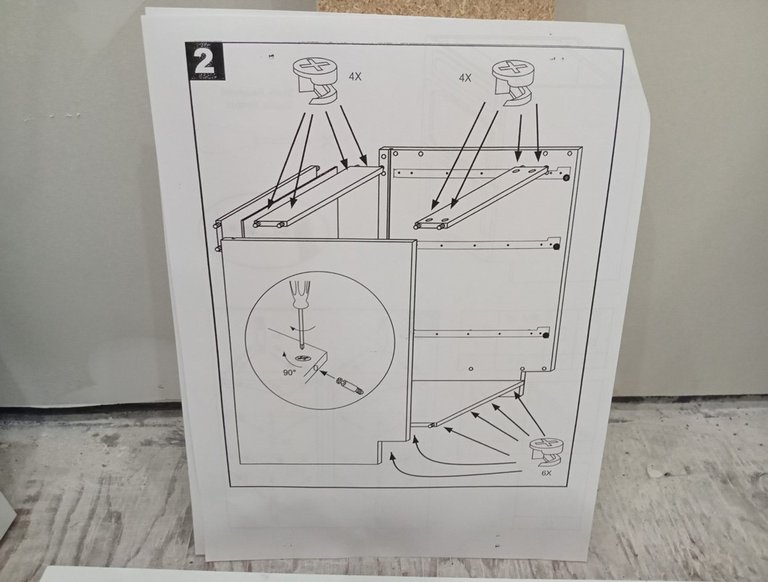
I loosely inserted the width wise pieces into the pegs until all of the width wise pieces were in place, then the sides were pushed together tightly - a light bumping put the tighter fitting pegs in place.
 |  |
|---|
While keeping the cabinet tightly together, the peg locks were tightened - to lock in the peg and to pull tight the connection, barely a half turn, I was careful not to over tighten.
 |  |
|---|
Drawer Assembly
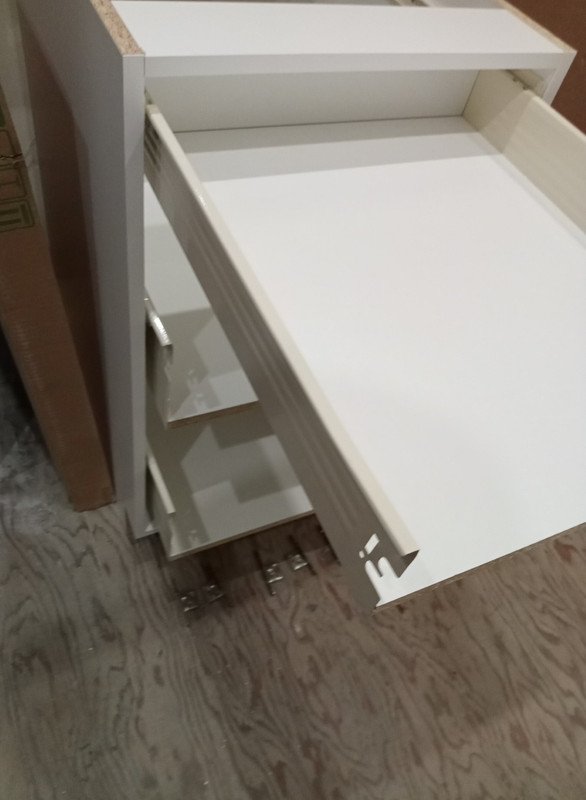
I was impressed with the metal drawer sides/rail sliders, and the thick bottom and back of the drawers - all of the screw locations were pre-drilled.
 |  |
|---|
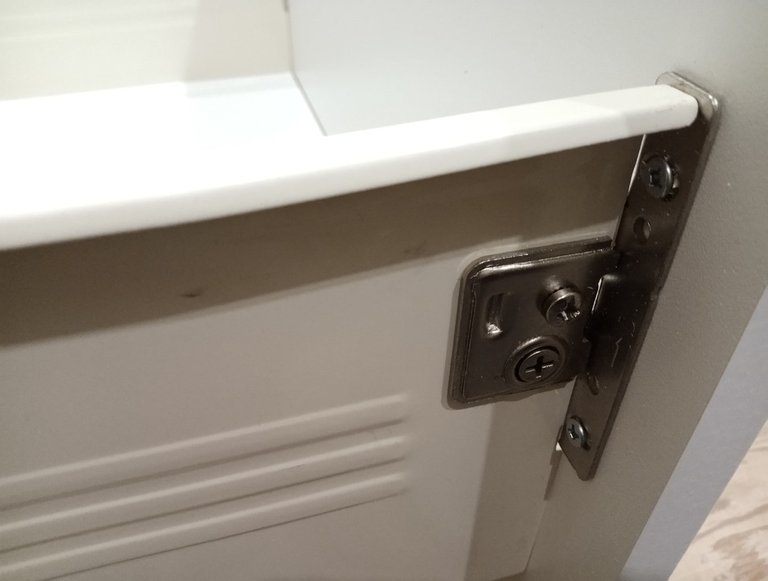
The drawer front bracket removal was necessary before assembly - the smaller screw is for removing the bracket, the larger one is for drawer front adjustments.
First the metal drawer sides are screwed onto the drawer bottom, I fount that easiest with a drill and with the drawer bottom stood up as shown below.

Next the drawer back is attached to the drawer sides.

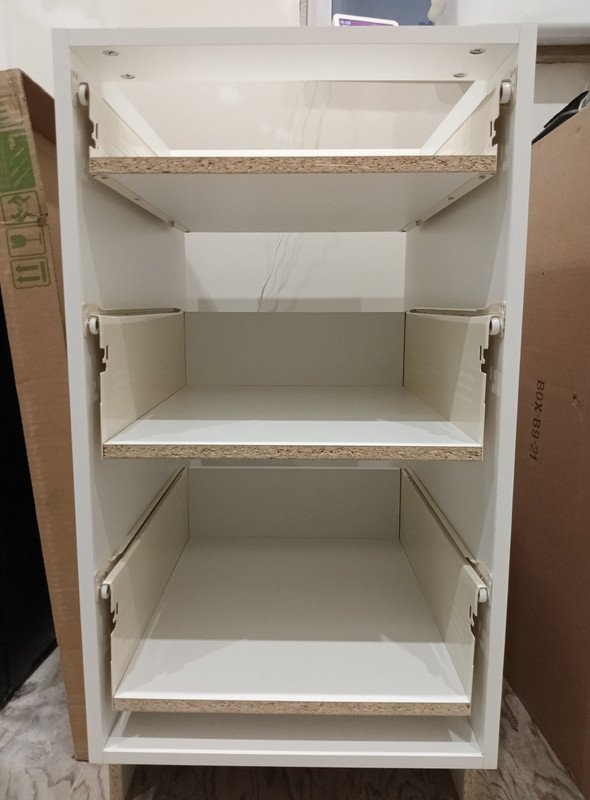
As show in the directions, the smallest drawer is on the top, then the medium drawer, and the large drawer on the bottom. The drawers have an easy glide to them with a good pull out distance.
 |  |
|---|
Drawer Fronts
The drawer front brackets that were removed from the drawer side sliders are first attached to the drawer fronts with the attachment and adjustment screws on the outside of the brackets.
 |  |
|---|
The brackets slide into the front of the drawer sides, the little Phillips screw is tightened to lack the drawer front into place.
 |  |
|---|
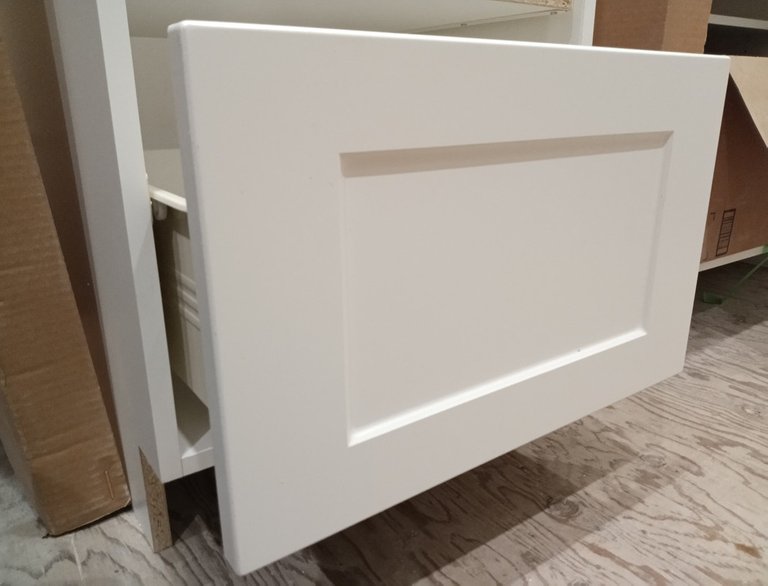
I had the bottom drawer front upside down - in the picture below on the left you can see the bottom of the drawer doesn't line up with the bottom of the cabinet...
 |  |
|---|
Added the stick on drawer stoppers to prevent the drawers from slamming shut...

The three drawer kitchen base cabinet assembly is complete, relatively painless assembly. Next up is to shim and install the kitchen base cabinets into position, up against the wall, in preparation for the counter top and sink install. I'll have to eventually pick out some drawer and door handles to install.
 |  |
|---|