
Saludos amigos de #hive y #diy, el día de hoy comparto con ustedes este paso a paso de como realizar un cohete, el cual realice para el proyecto de aprendizaje de mi primita que trataba del espacio y el sistema solar, proyecto que presentó la semana pasada, siendo esa una semana donde se presentaron los proyectos de aprendizaje de todos los grados en la escuela. Este cohete lo realicé con materiales básicos y con un procedimiento super sencillo y rápido también, además no niego que me encantó realizarlo ya que me hizo recordar mis tiempos cuando era niño y veía art-attack en disney.
Greetings friends of #hive and #diy, today I share with you this step by step on how to make a rocket, which I made for my little cousin's learning project that dealt with space and the solar system, project that she presented last week, being that a week where the learning projects of all grades were presented at school. I made this rocket with basic materials and with a super simple and fast procedure too, and I don't deny that I loved making it because it reminded me of my times when I was a kid and watched art-attack in disney.

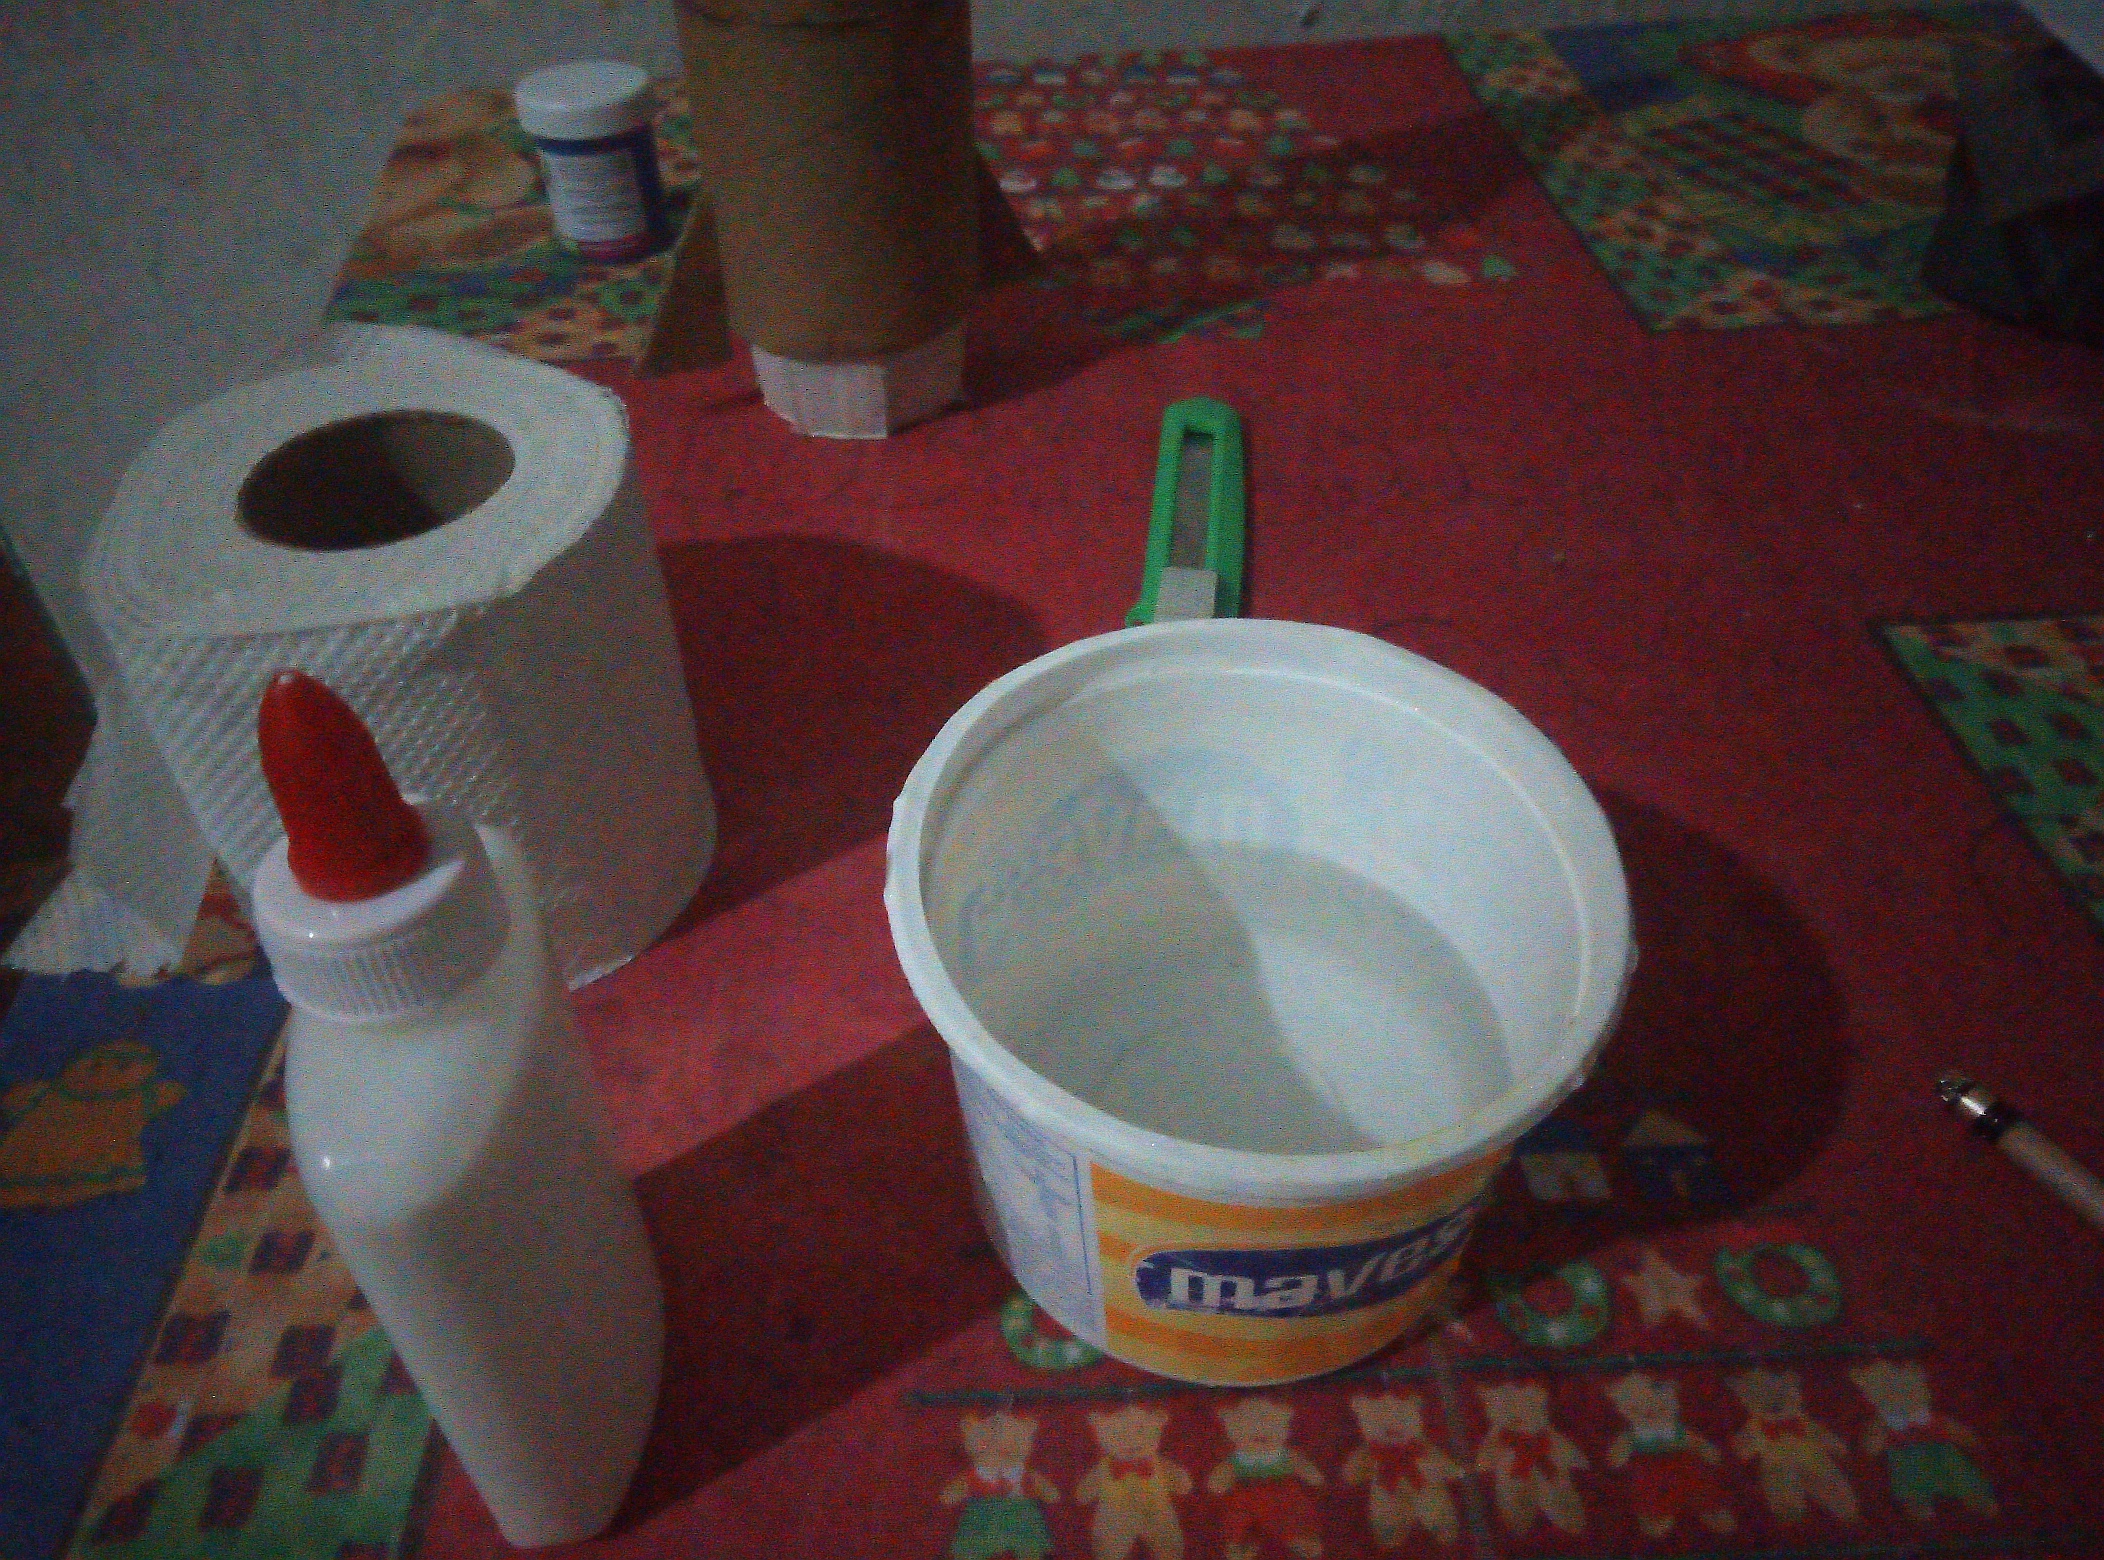
✂️𝑴𝒂𝒕𝒆𝒓𝒊𝒂𝒍𝒆𝒔✂️
Two thick rolls. Lid of a shoe box. White glue. Paints (yellow, blue and orange). Exact. Brushes. Silicon. Cardboard. Black marker. Golden decorative rain.
🖌️Procedimiento🖌️
🖌️Procedure🖌️
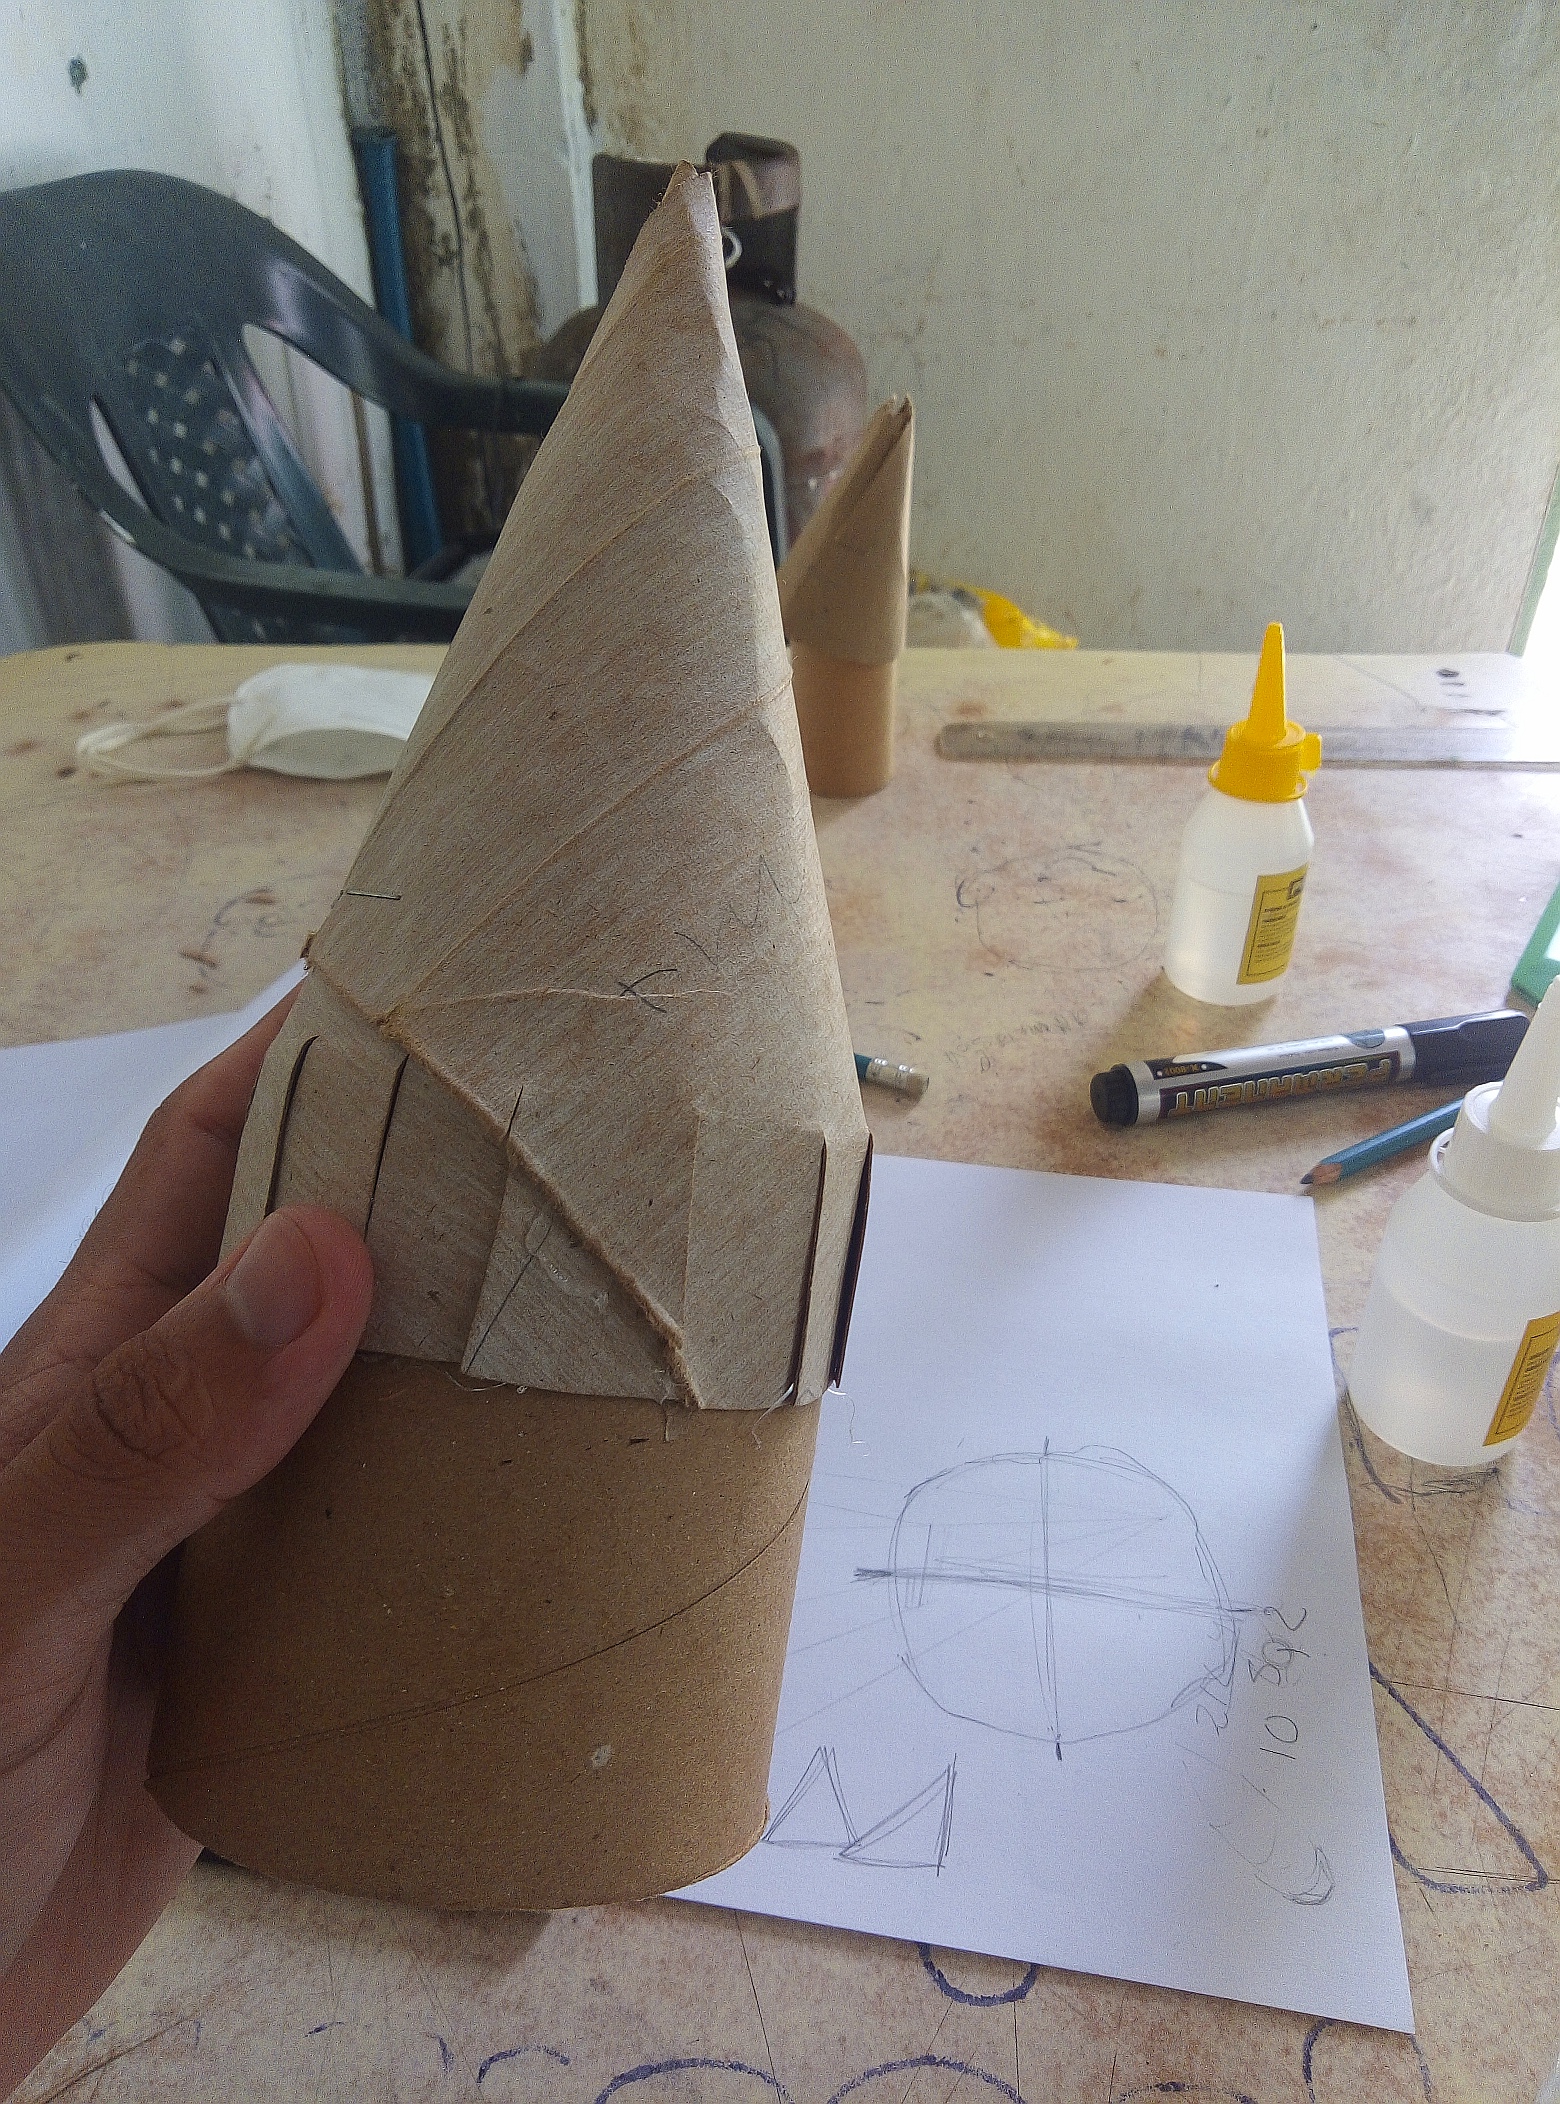
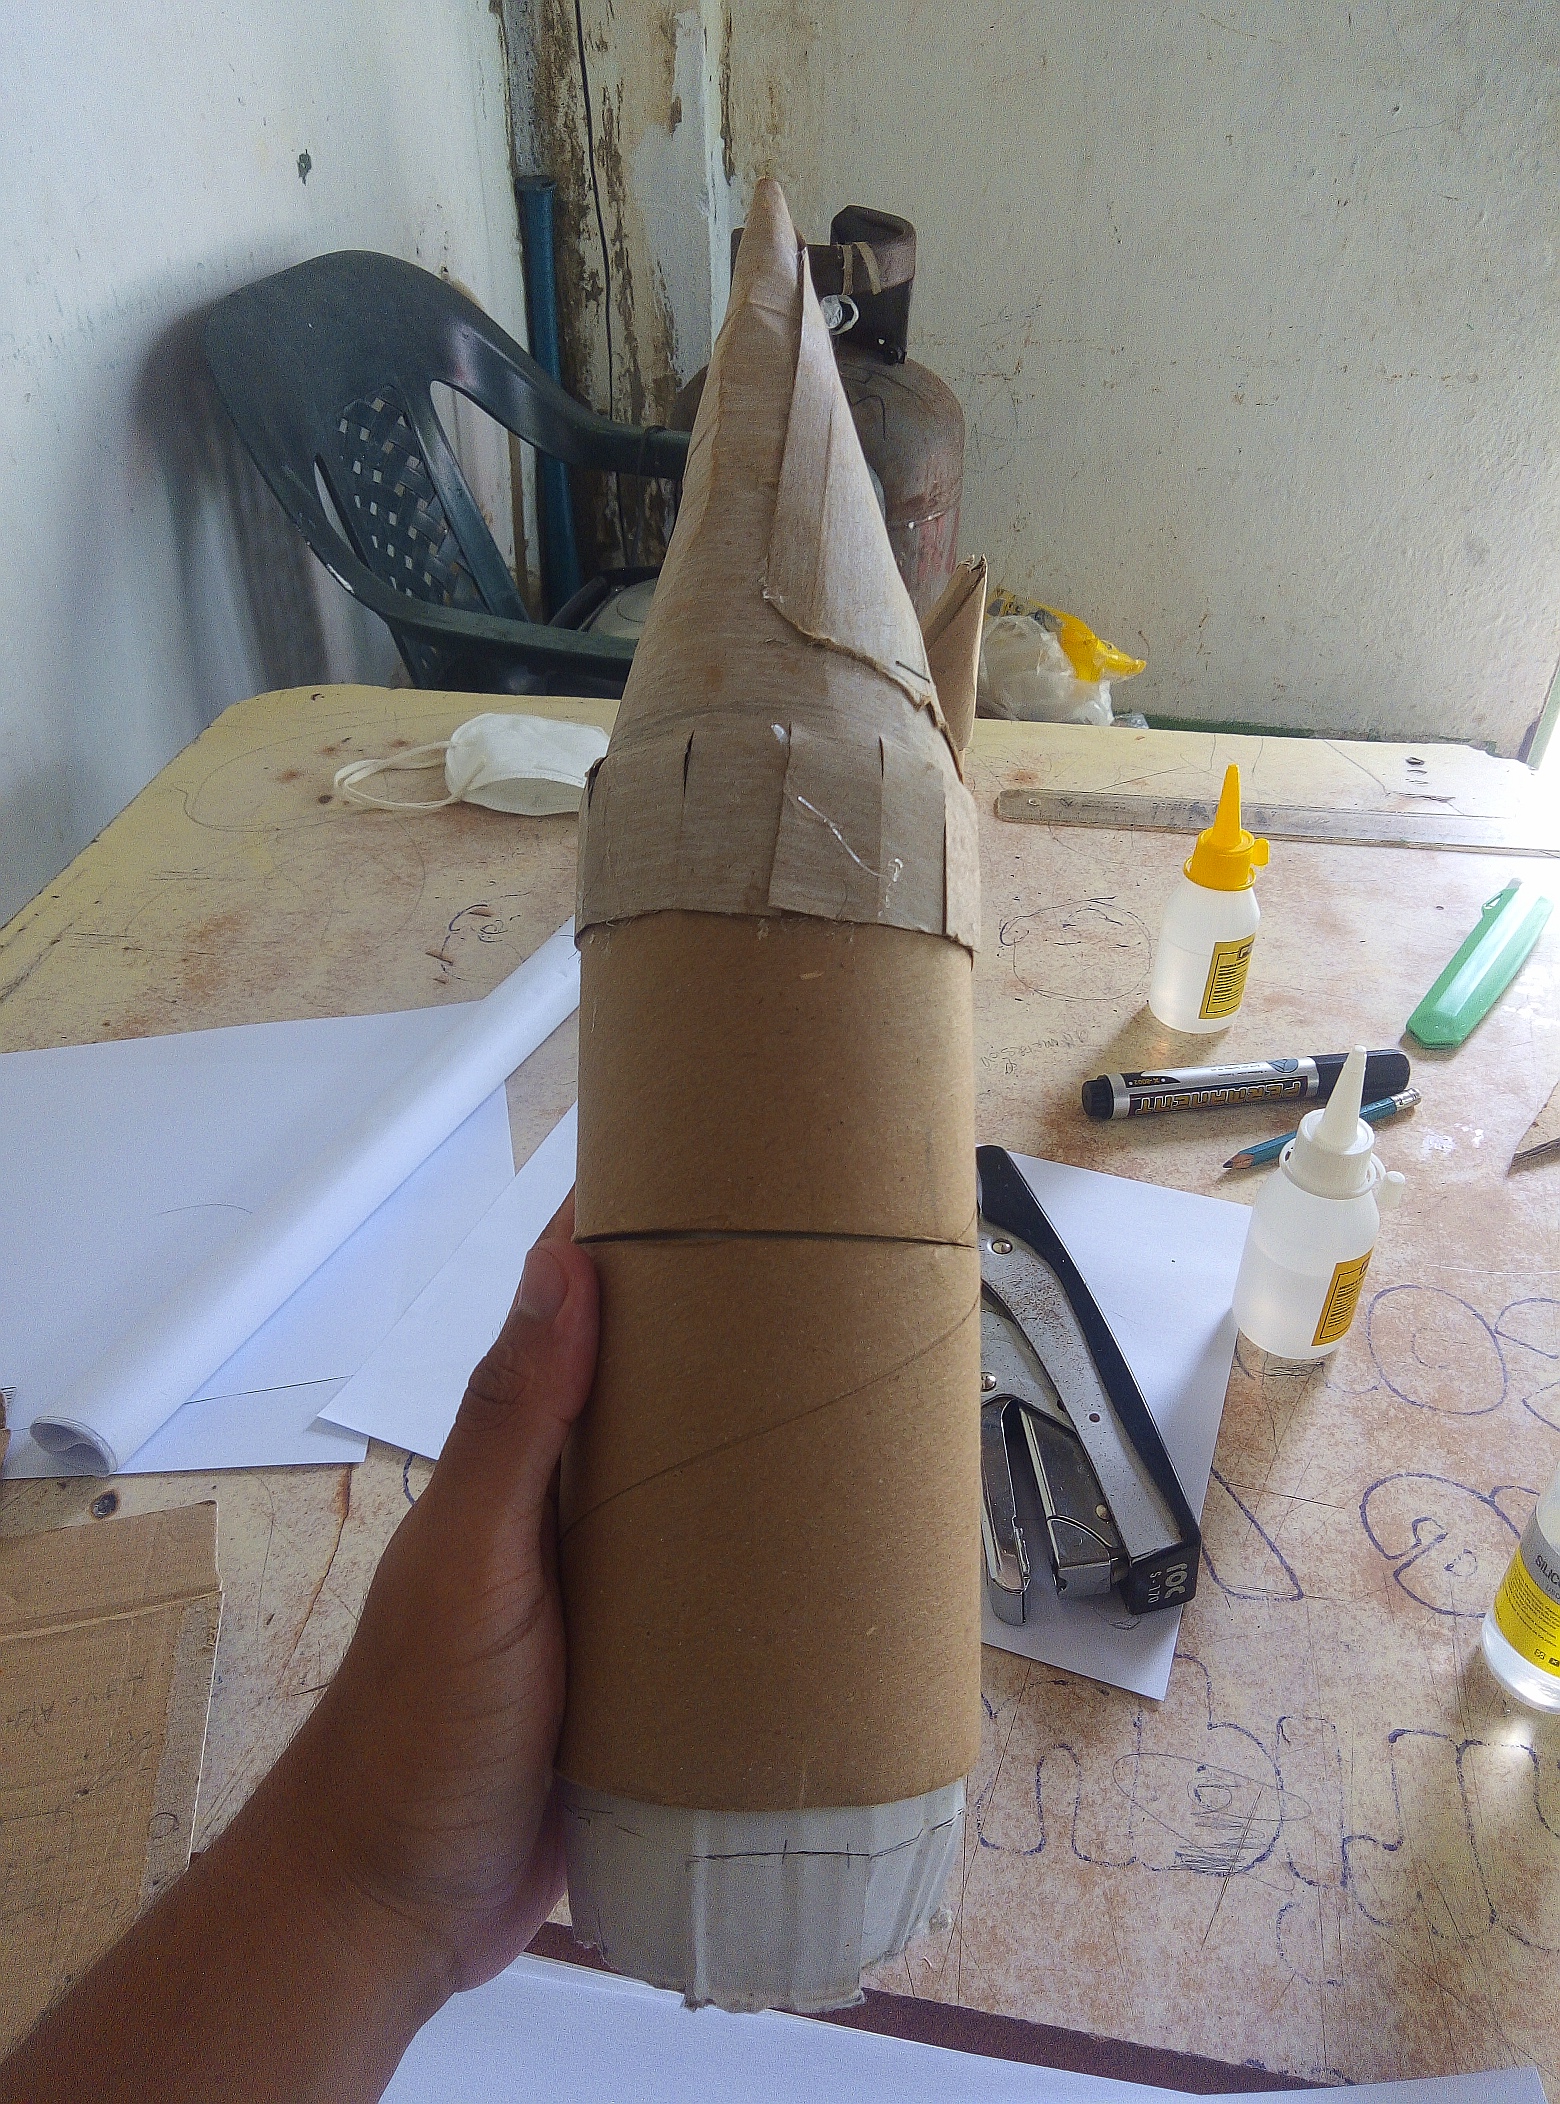
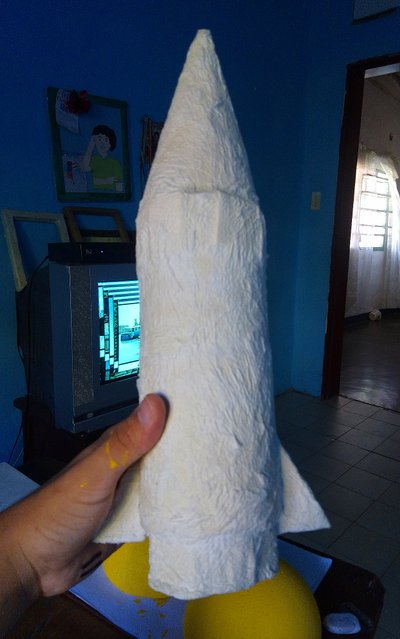
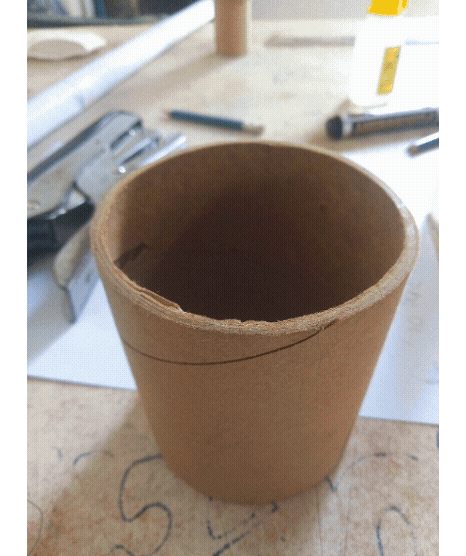
| Empecé sacándole las medidas al rollo de cartón para realizar el cono con la caja de zapato, para realizar el cono solamente la enrolle hasta dar forma, recorté y realicé pequeños cortes para facilitar la unión de esta al rollo de cartón. Lo pegue con silicon y después pegue ambos rollos de igual forma empezando a obtener la forma de cohete. |
I started by taking the measurements of the cardboard roll to make the cone with the shoe box, to make the like I just rolled it to shape, cut and made small cuts to facilitate the union of this to the cardboard roll. I glued it with silicone and then glued both rolls in the same way starting to get the rocket shape.

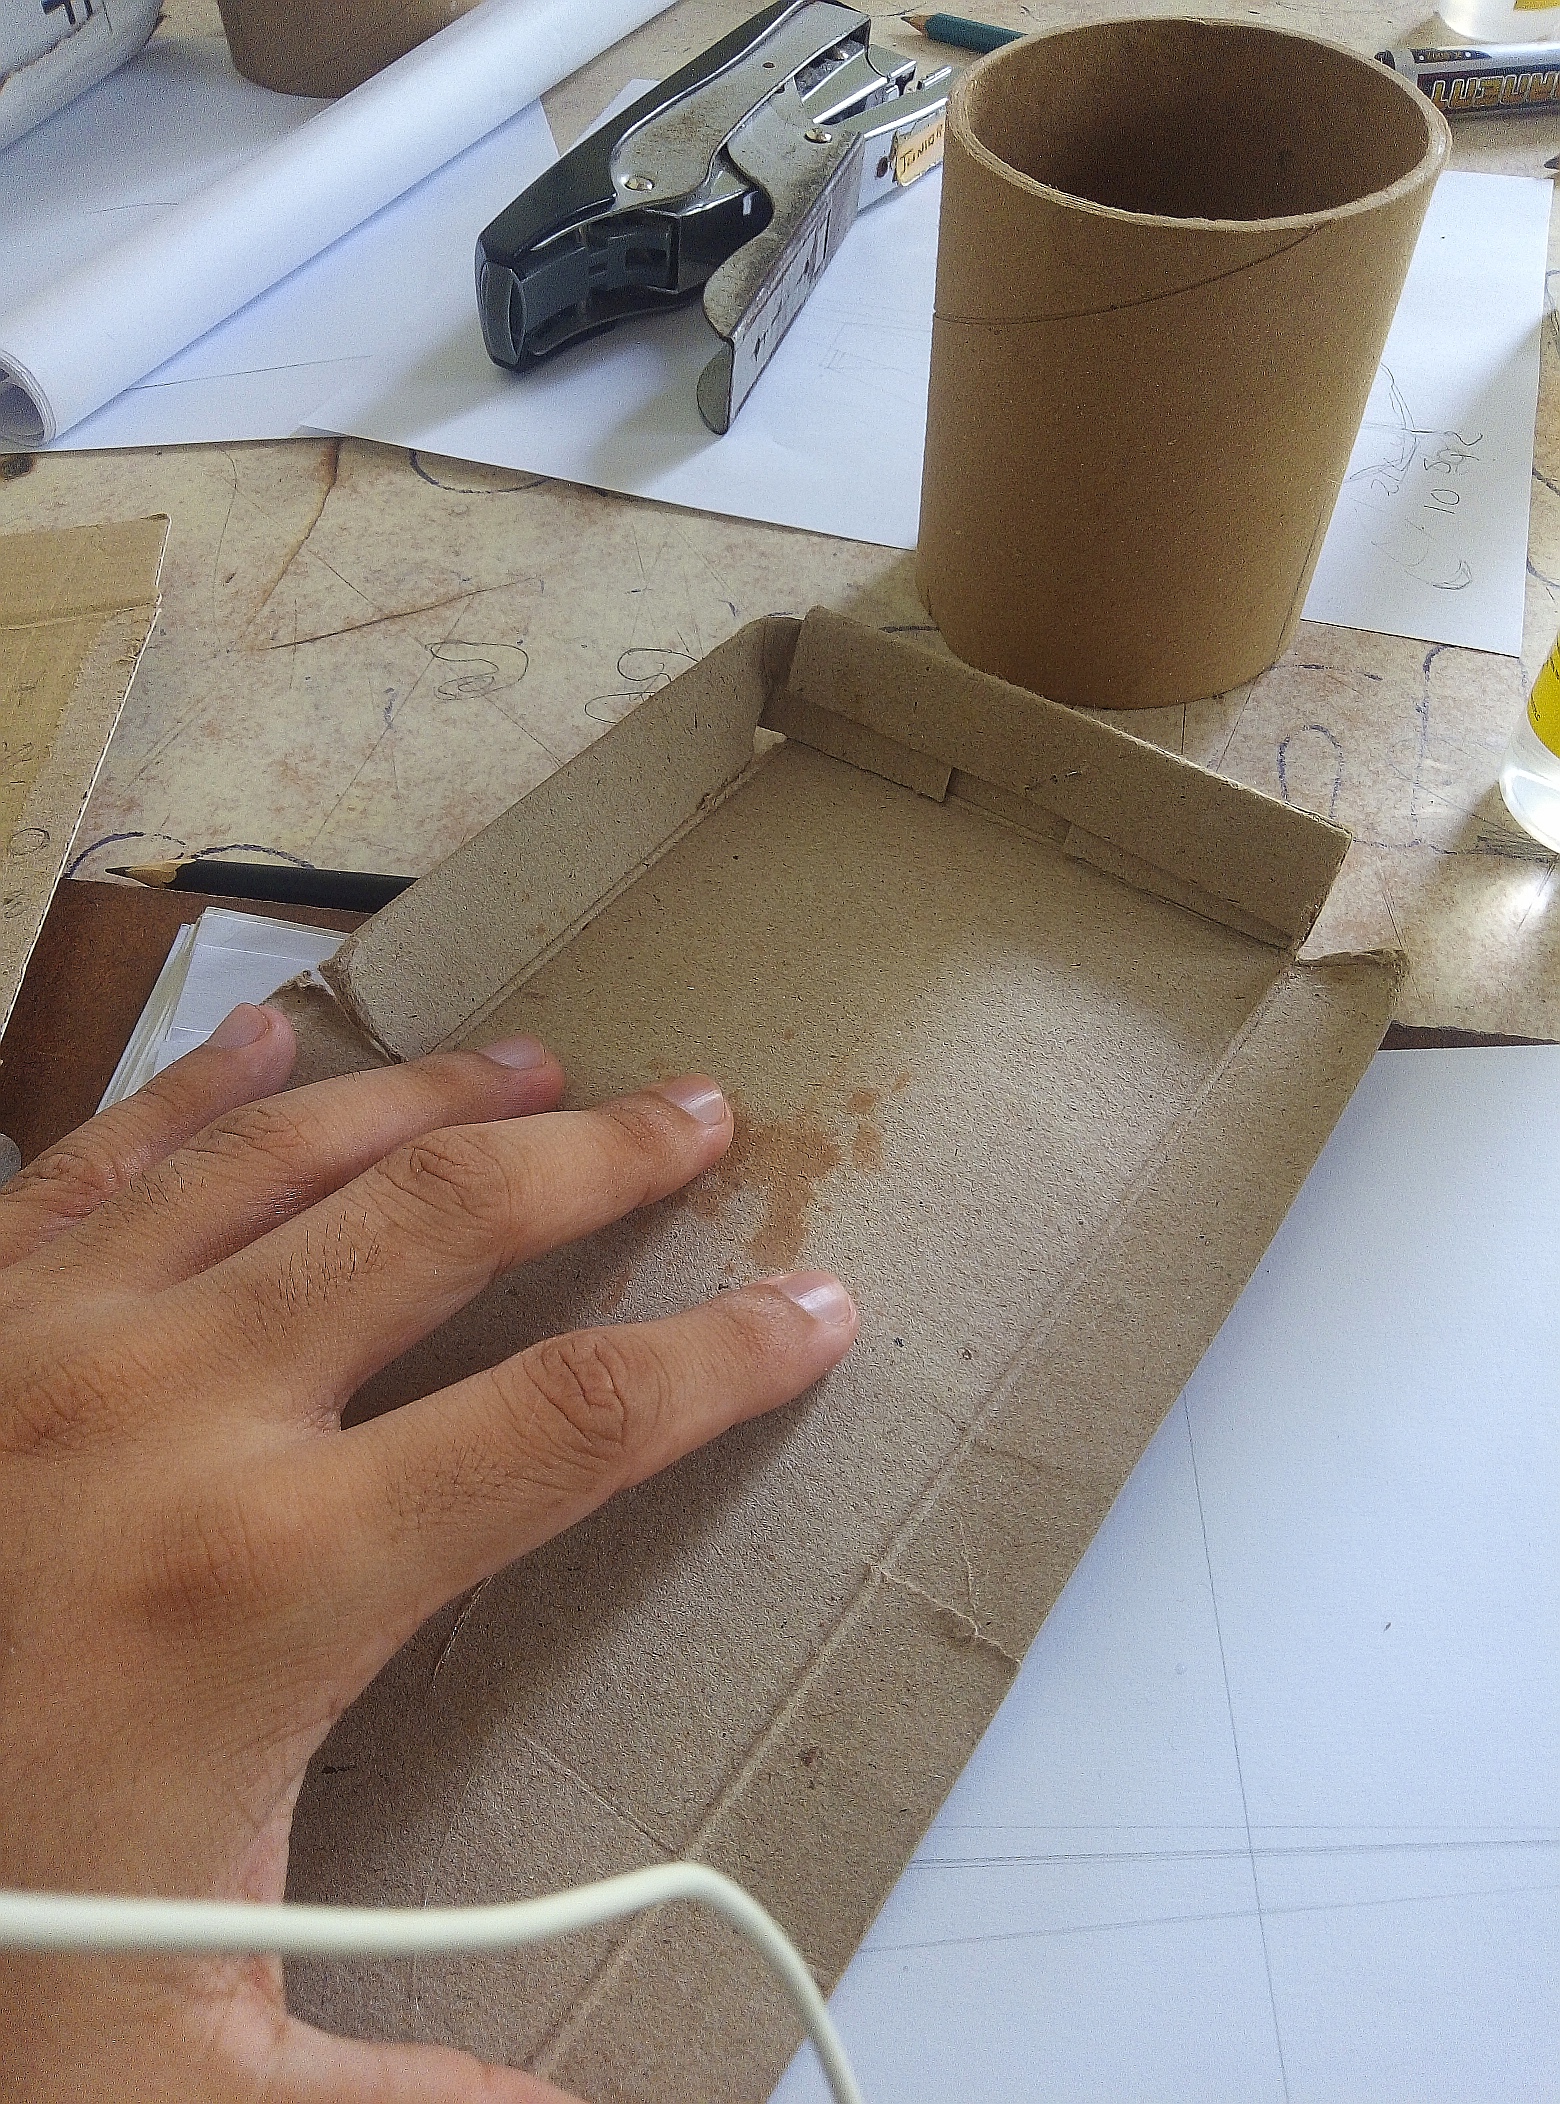
| Para la base del cohete use otro pedazo de cartón el cual nuevamente enrolle y con el exacto le di forma, pasándolo suavemente para poder realizar los doblez, después recorté dos pequeños pedazos de cargos los cuales serían las alitas que siempre están en las bases de los cohetes. |
For the base of the rocket I used another piece of cardboard which I rolled again and with the exact shape, passing it gently to make the folds, then I cut two small pieces of cargo which would be the wings that are always at the base of the rocket.
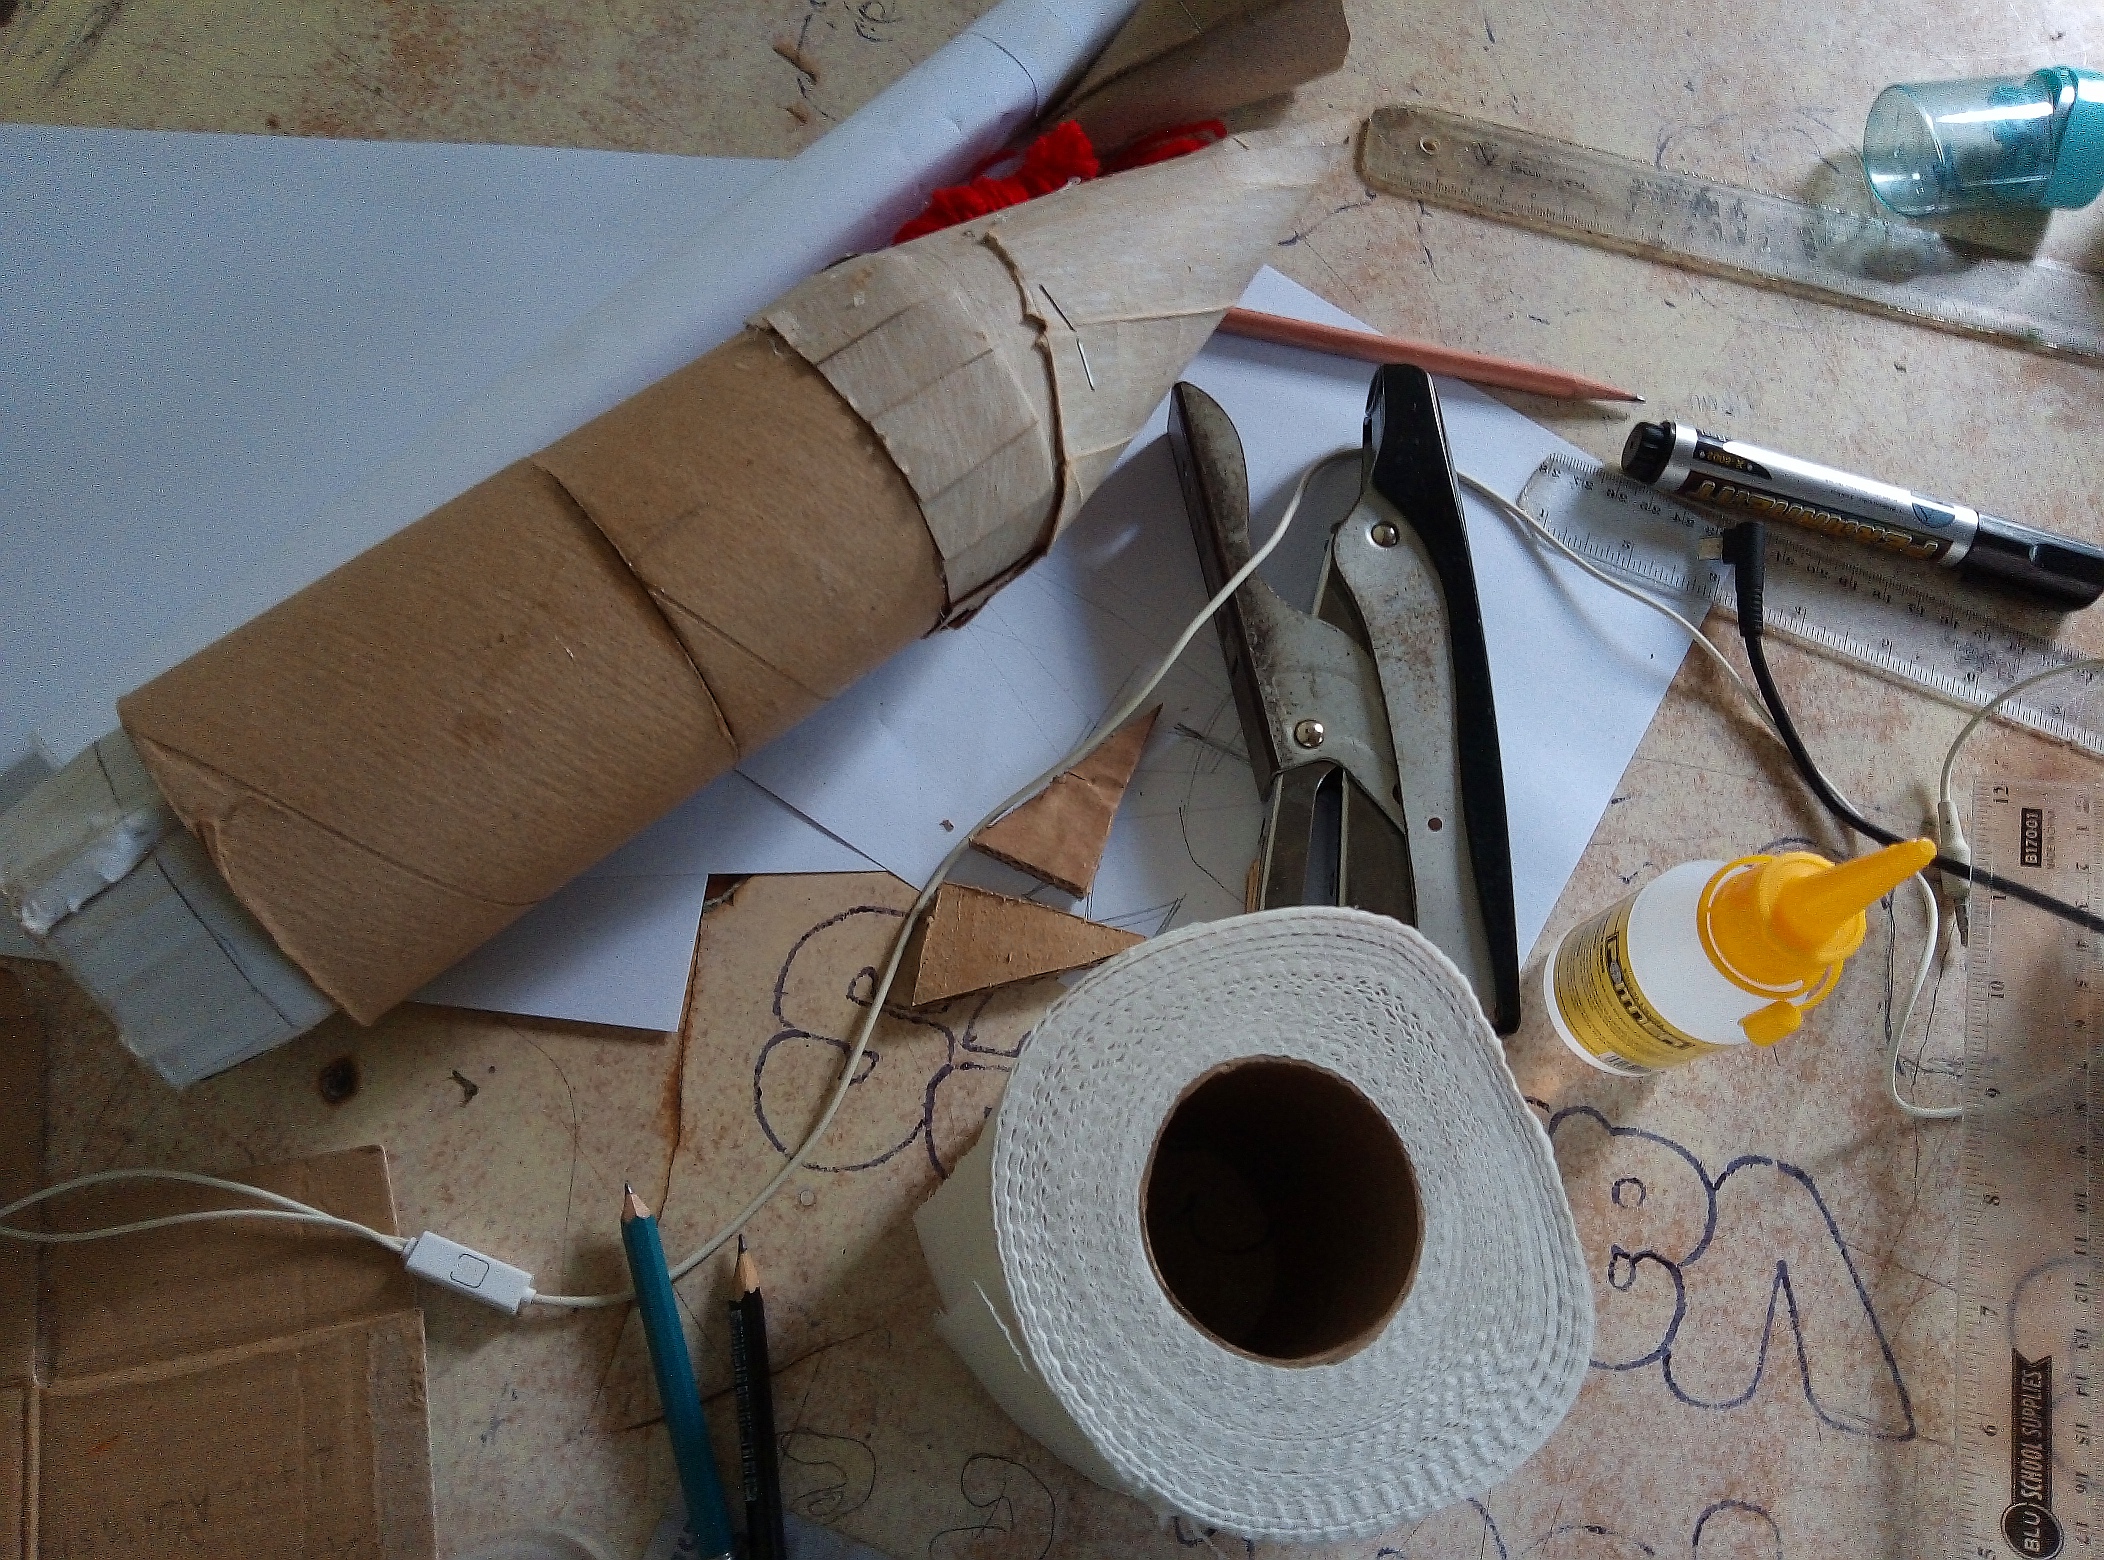
| Una vez terminado el cohete en cartón, en un pote ligue agua con pega para dar paso a realizar el "engrudo especial" y empezar a pegar pedacitos de papel y darle forma con el pincel. Terminado este proceso lo coloque a que se endurezca mientras seca, obteniendo un aspecto más sólido y más resistencia. |
Once the cardboard rocket was finished, in a pot I mixed water with glue to make the "special paste" and start gluing small pieces of paper and give it shape with the brush. Once this process is finished, let it harden while it dries, obtaining a more solid aspect and more resistance.
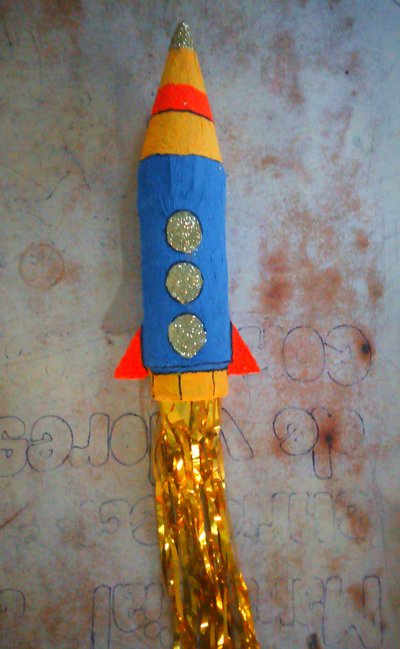
| Después de que seco aplique dos bases de pintura, la primera sólo de azul y amarillo, y la segunda base aplique anaranjado en ciertas zonas y volví a echar azul y amarillo en las zonas restantes. |
After it dried I applied two coats of paint, the first one only blue and yellow, and the second coat I applied orange in certain areas and then blue and yellow again in the remaining areas.

| Cuando seco la segunda capa utilice el marcador negro para realizar líneas y escarcha para rellenar las ventanas y la punta del cohete. Para finalizar le pegué una cola con la lluvia dorada para que este diera aspecto de cola al momento de moverlo y así también lo haga ver más llamativo. |
When the second coat was dry I used the black marker to make lines and frost to fill the windows and the tip of the rocket. To finish I glued a glue with the golden rain so that it would look like glue when moving it and also make it look more striking.
Resultado Final
Final Result
Espero les haya gustado este pequeño cohete realizado con materiales sencillos, el cual sin duda le encantaría realizar a un niño, además es una buena opción cuando no hay cartulinas o foami en casa a la mano para poder forrar más rápido este tipo de manualidades.
I hope you liked this little rocket made with simple materials, which undoubtedly would love to make a child, it is also a good option when there is no cardboard or foami at home at hand to be able to line faster this type of crafts.
Quisiera invitarlos a visitar mi perfil 👉🏼@afa.hb03, donde podrán ver la variedad de diseños e ilustraciones que realizo diariamente.
I would like to invite you to visit my profile 👉🏼@afa.hb03, where you can see the variety of designs and illustrations that I make daily.

✨🌟✨
✨🌟✨
 @rafahb03 @rafahb03 |
 @rafahb.art @rafahb.art |
 @rafahb.03 @rafahb.03 |
✨🌟✨
Hola amig, te ha quedo muy hermoso cohete espacial. Me encanto. Exitos y feliz dia.
Muchas gracias! 😁😁⭐
Congratulations @afa.hb03! You have completed the following achievement on the Hive blockchain and have been rewarded with new badge(s):
Your next target is to reach 500 upvotes.
You can view your badges on your board and compare yourself to others in the Ranking
If you no longer want to receive notifications, reply to this comment with the word
STOPTo support your work, I also upvoted your post!
Check out the last post from @hivebuzz:
Support the HiveBuzz project. Vote for our proposal!