trike with copper wire
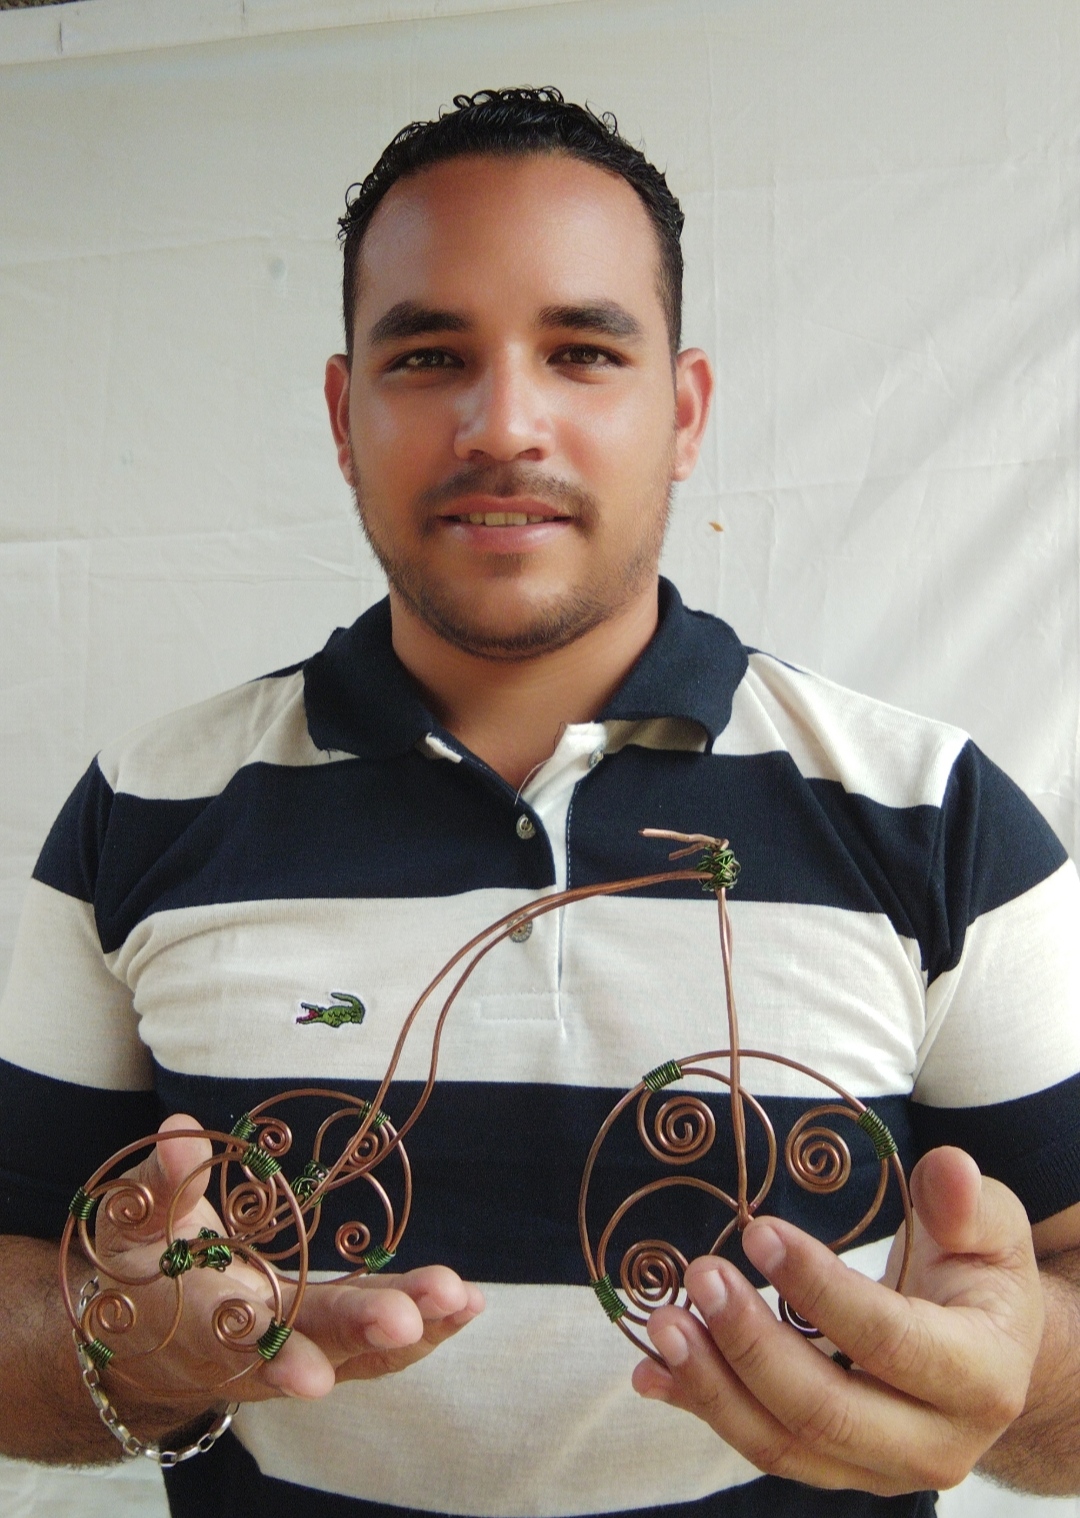
Buenos días amigos, espero se encuentren bien, el día de hoy quiero compartir con ustedes un hermoso trisiclo echo con alambre de cobre este trisiclo fue un poco difícil ya que no tengo las herramientas completas pero a pesar de lo difícil que fue hacerlo me siento muy contengo con el resultado, espero que a ustedes también le guste 🚲.
Good morning friends, I hope you are well, today I want to share with you a beautiful tricycle made with copper wire this tricycle was a bit difficult since I don't have the complete tools but despite how difficult it was to do it I feel very happy with the result, I hope you like it too 🚲.
What do we need.
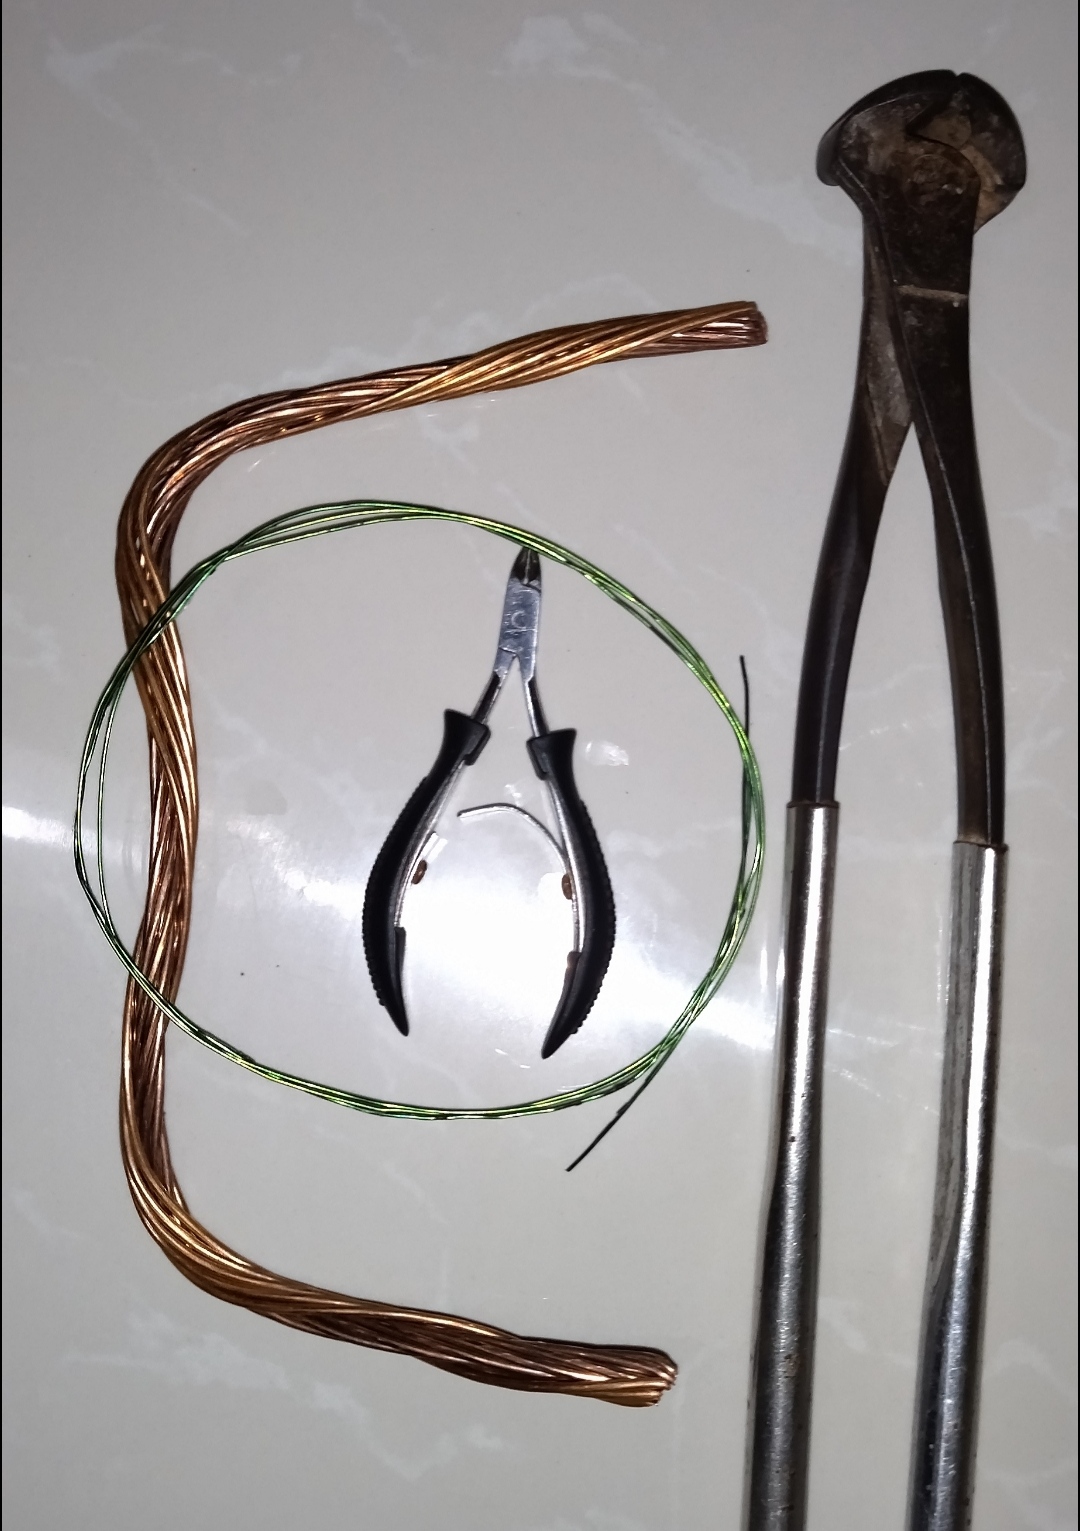
- alambre de cobre
- tenaza
- copper wire
- tenase
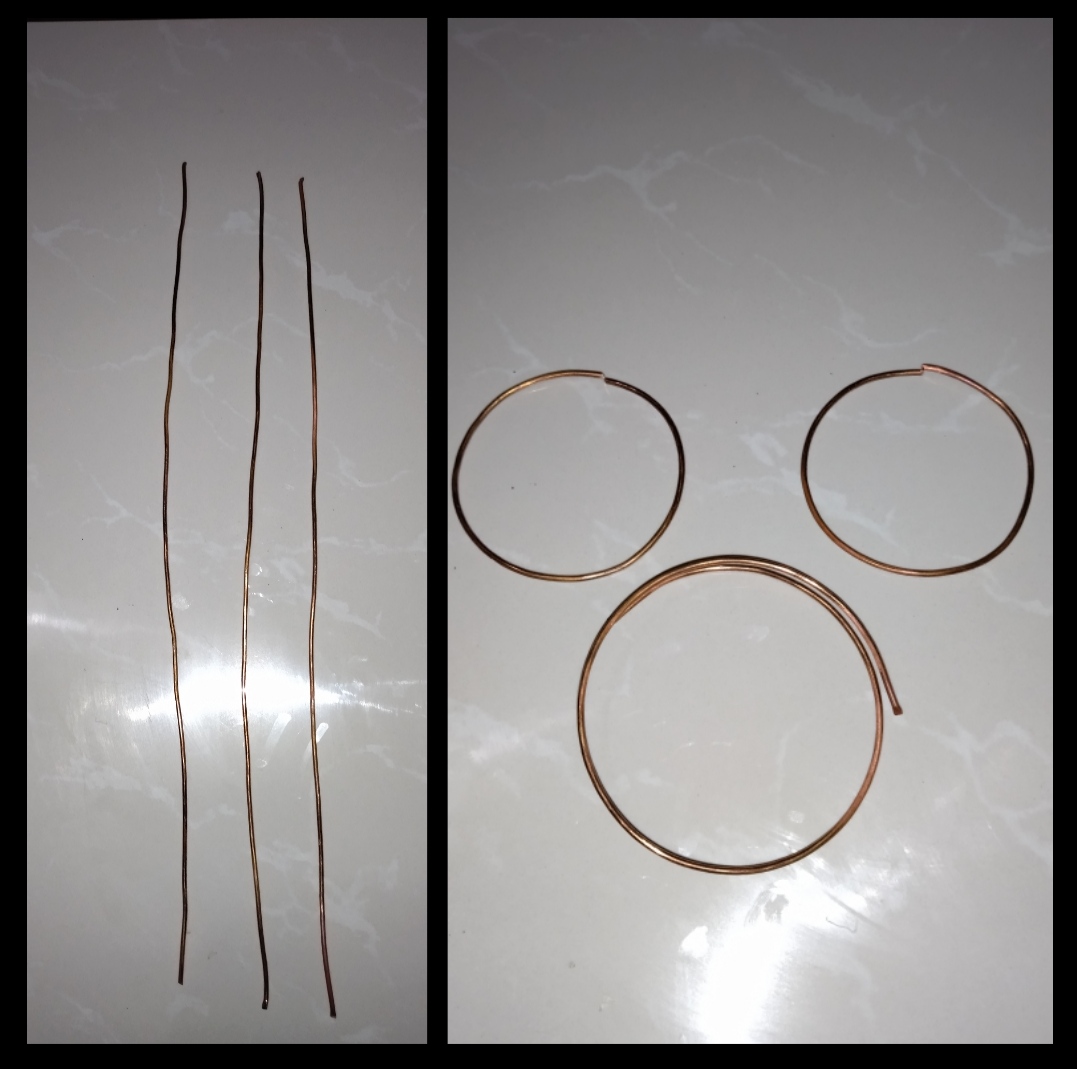
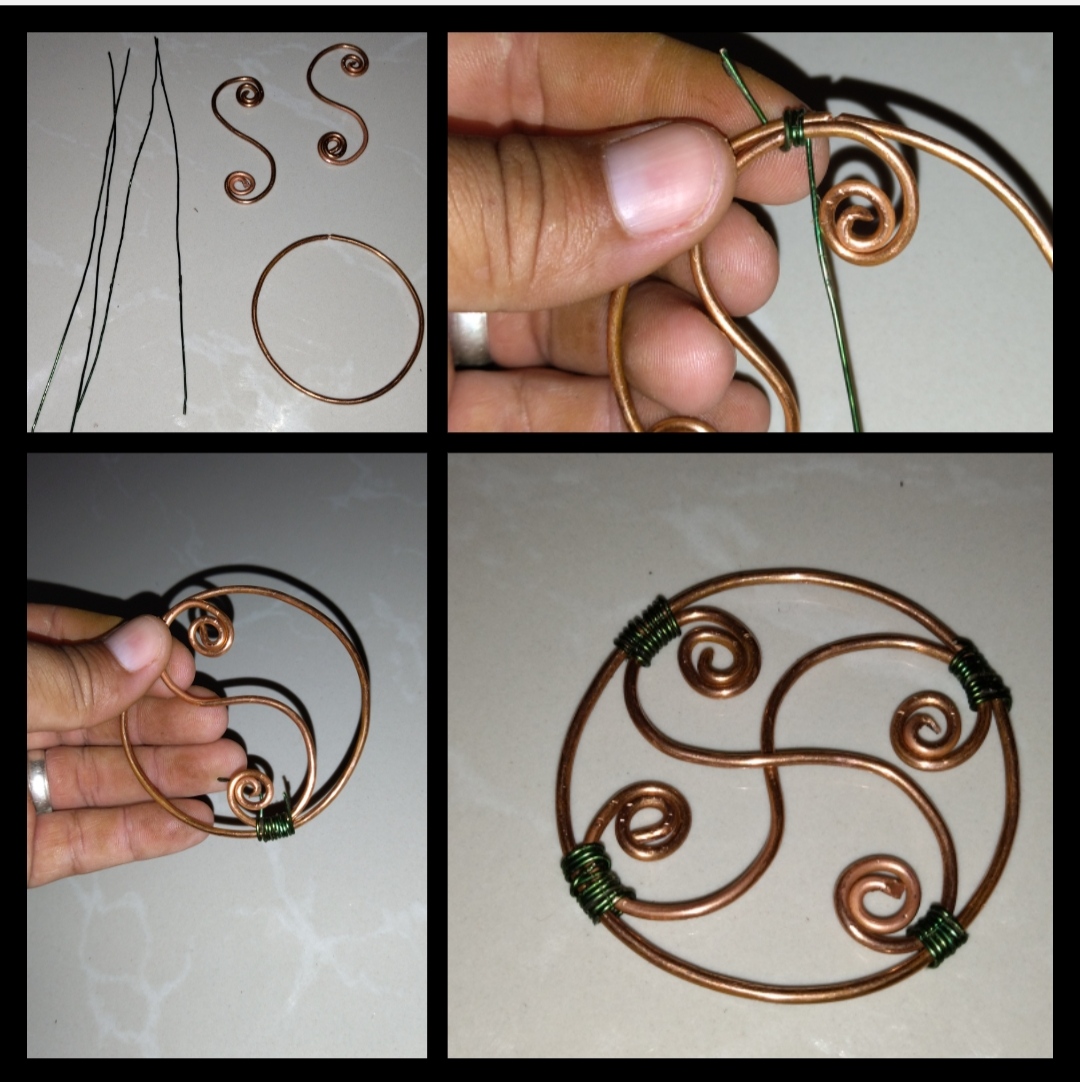
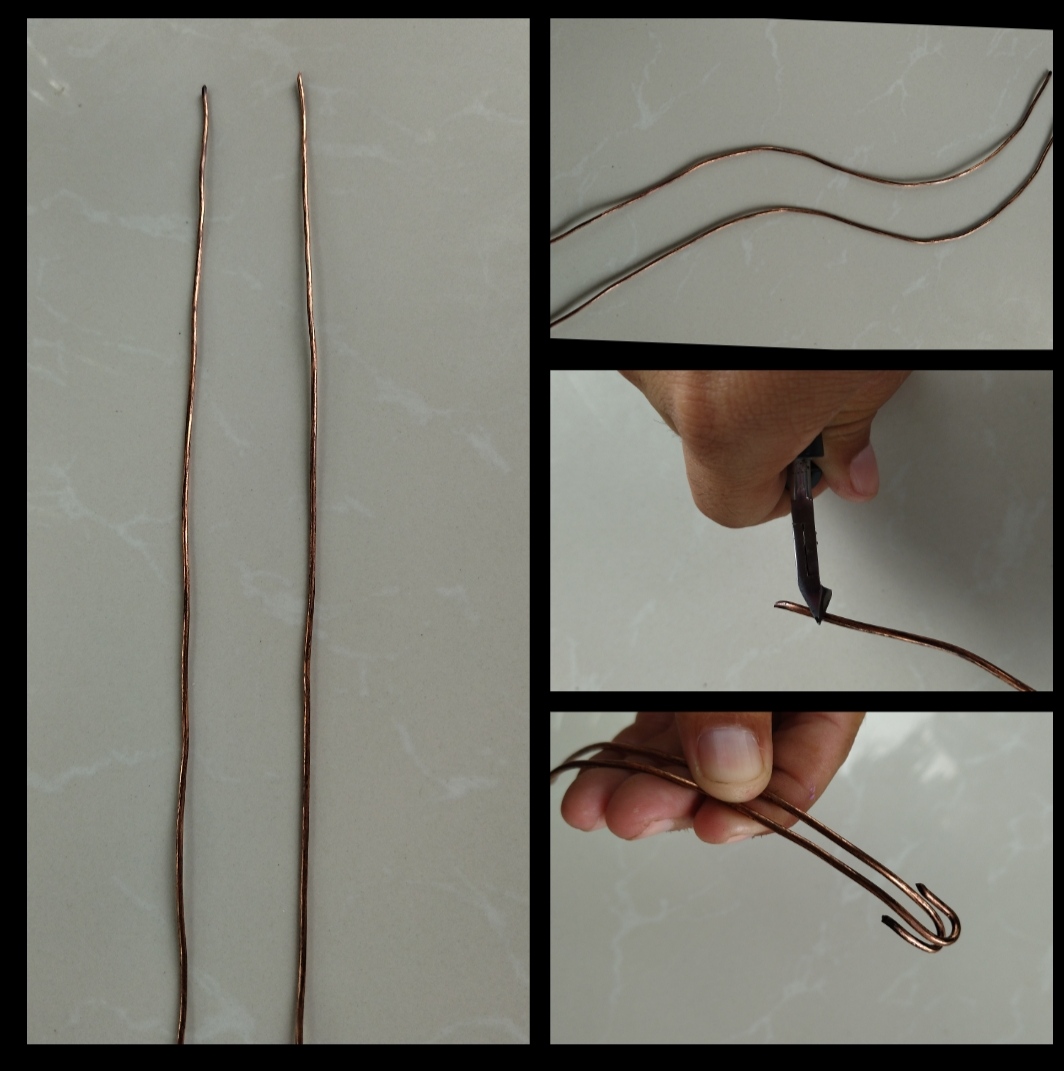
Paso 1:En este primer paso cortaremos tres pedazo de alambre de cobre y aremos tres redondo uno más grande que los otros dos, los podemos hacer poniendo el cobre al rededor de una botella o normal con nuestras manos pero para que nos quede más redondo utilizen una botella.
Step 1: In this first step we will cut three pieces of copper wire and we are three round, one larger than the other two, we can make them by putting the copper around a bottle or normal with our hands but so that it remains rounder uses a bottle.
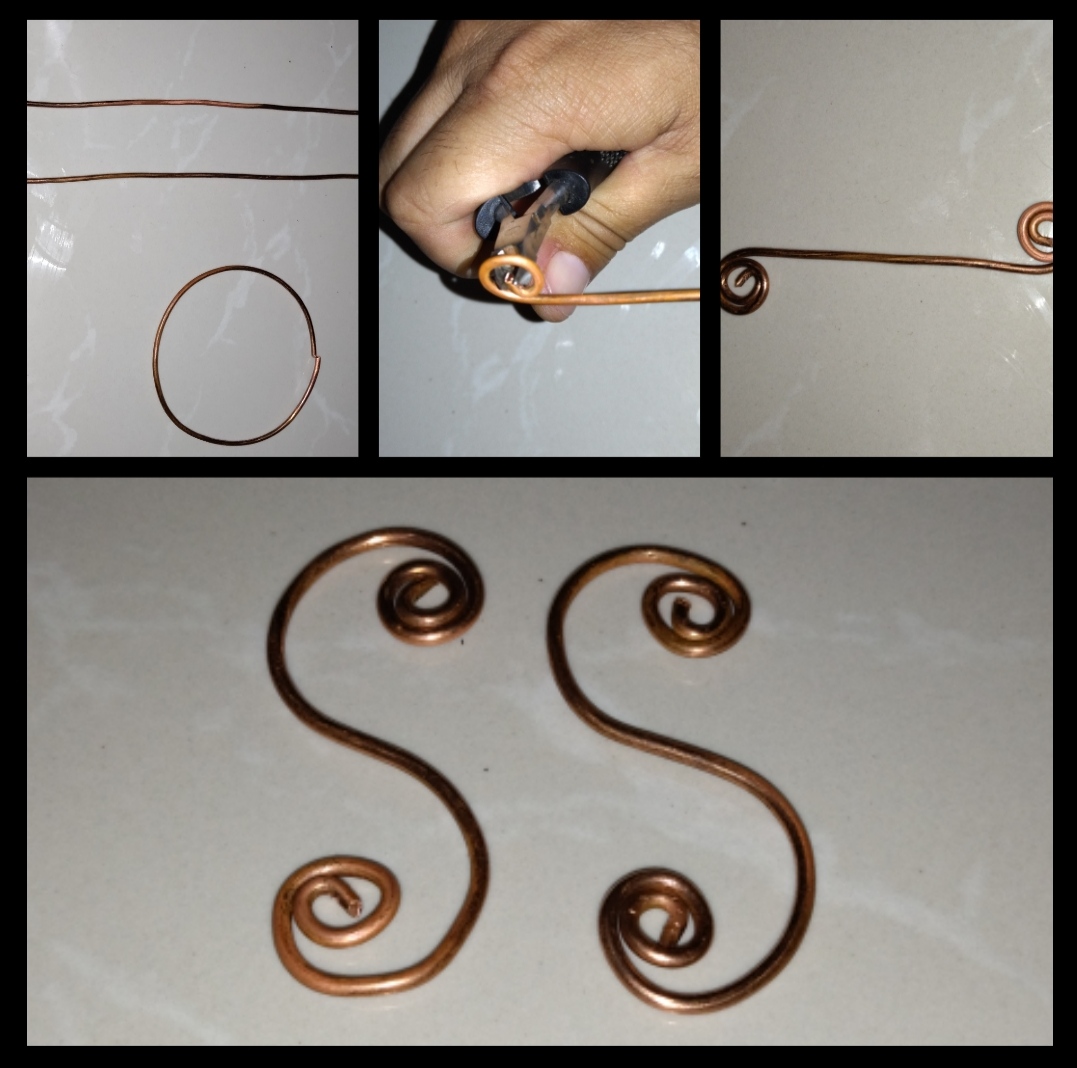
Paso 2: Para armar una rueda cortaremos dos pedazo de cobre y le daremos vueltas en las puntas y le daremos forma de ese (S) a nuestro alambre debemos medir las ese con el redondo tienen que quedar dentro del redondo.
Step 2: To assemble a wheel we will cut two pieces of copper and we will turn them around the ends and we will give the shape of that (S) to our wire we must measure the that with the round one they have to be inside the round.
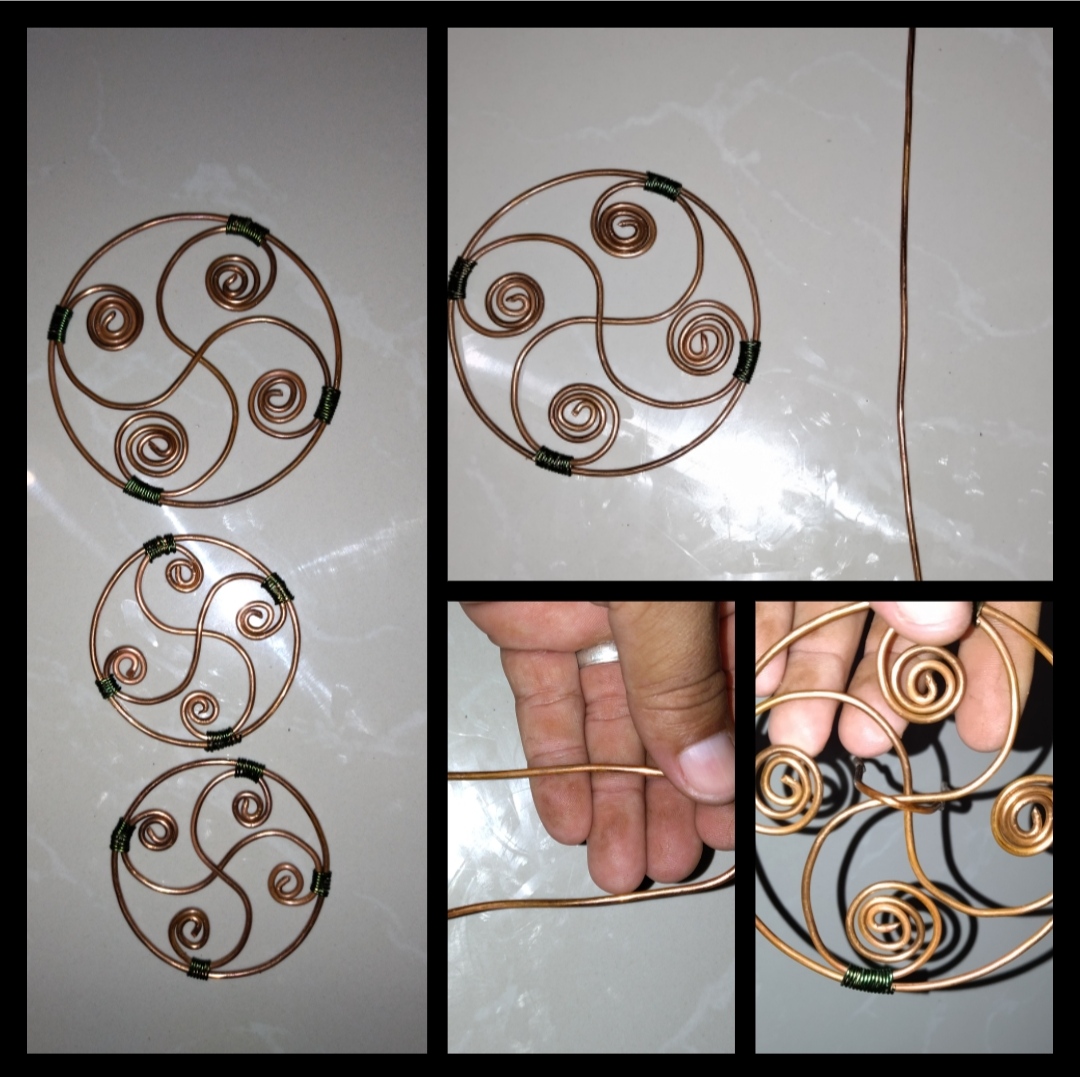
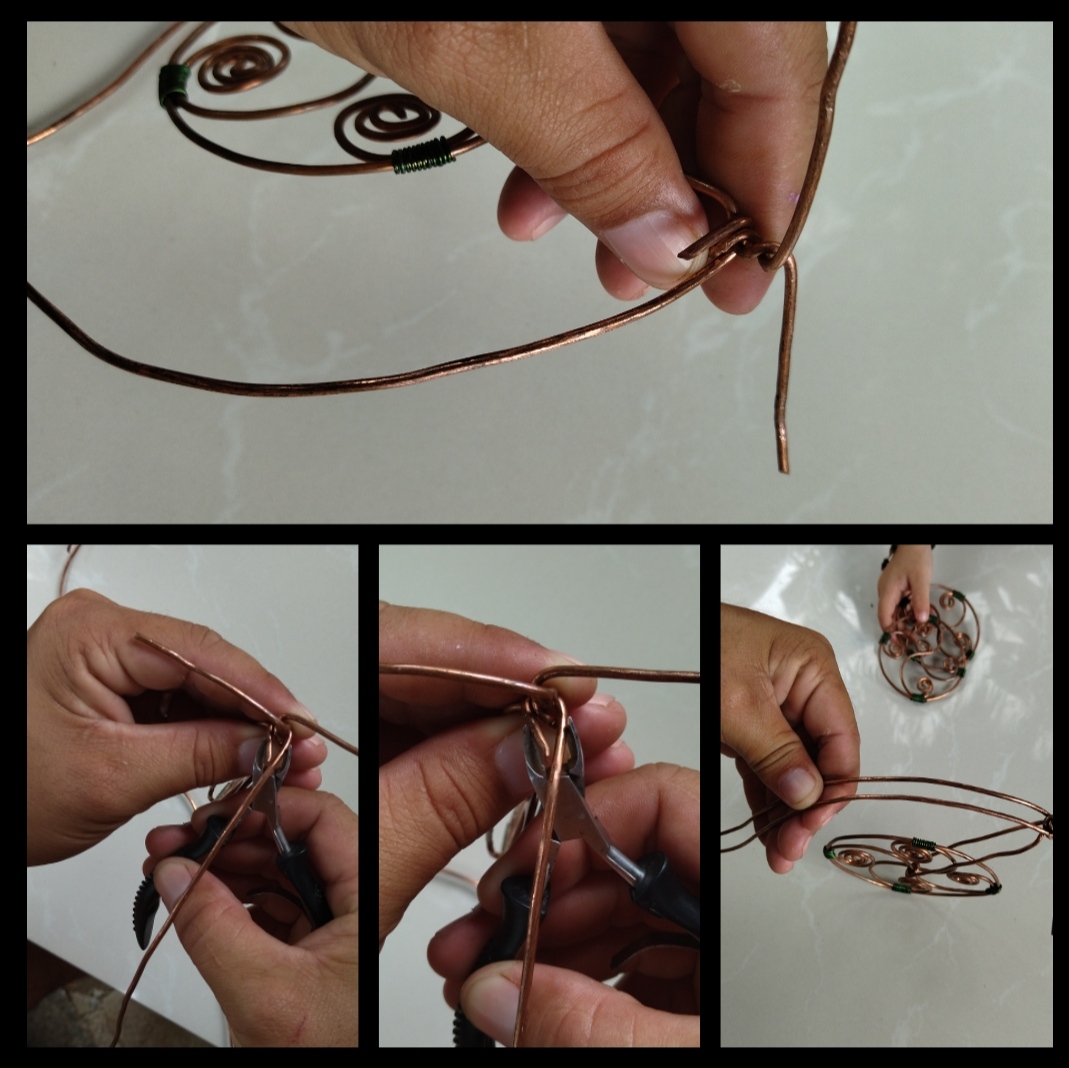
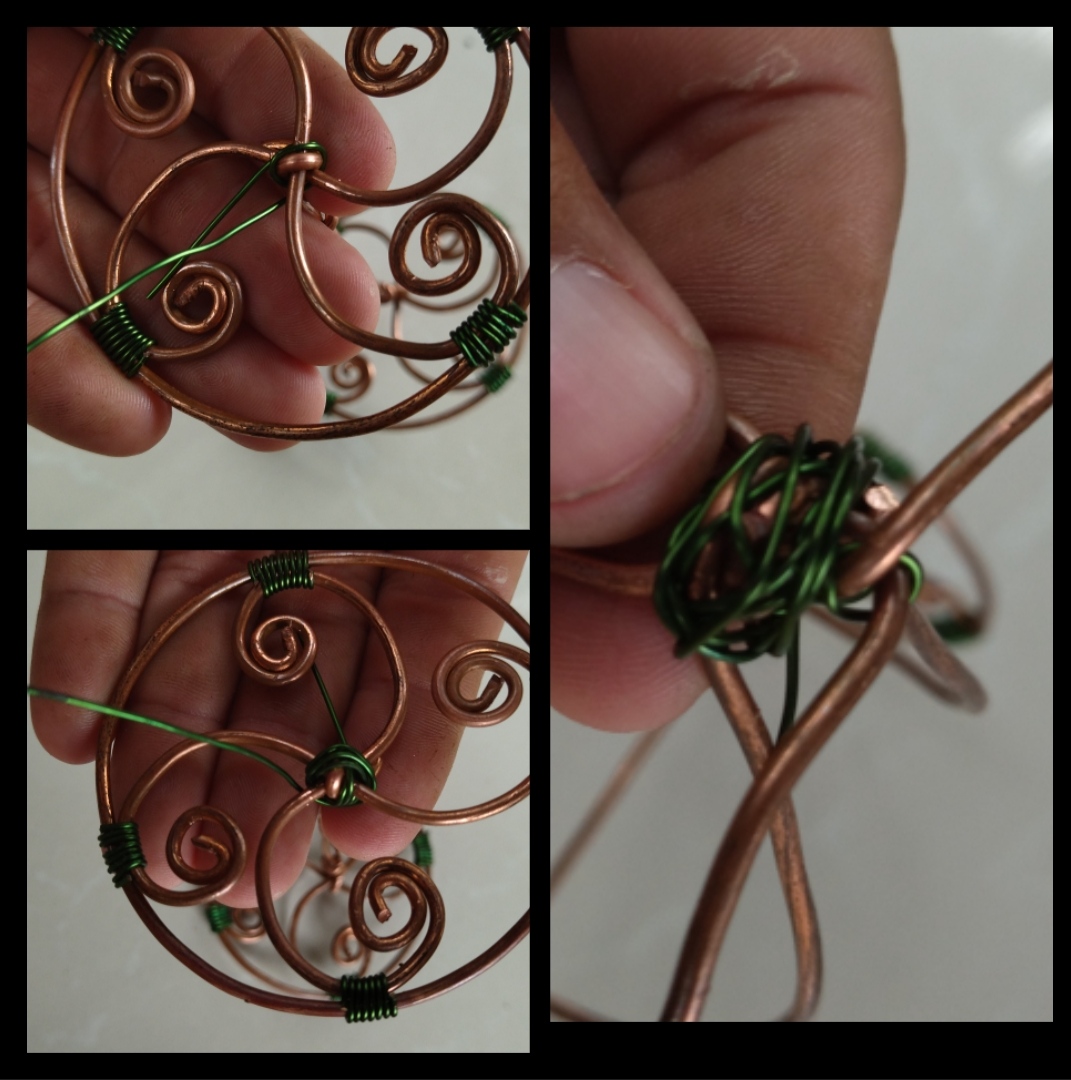
Paso 3: Ya teniendo las piezas armaremos nuestra rueda, tomaremos un trozo de alambre verde y le daremos vuelta uniendo nuestras ese con el redondo de esta manera tratemos de apretar bien el alambre ara que no quede flojo aremos con las otras dos ruedas.
Step 3: Now that we have the pieces, we will assemble our wheel, we will take a piece of green wire and we will turn it, joining our that with the round one, in this way, we will try to tighten the wire well so that it is not loose, we will do it with the other two wheels .
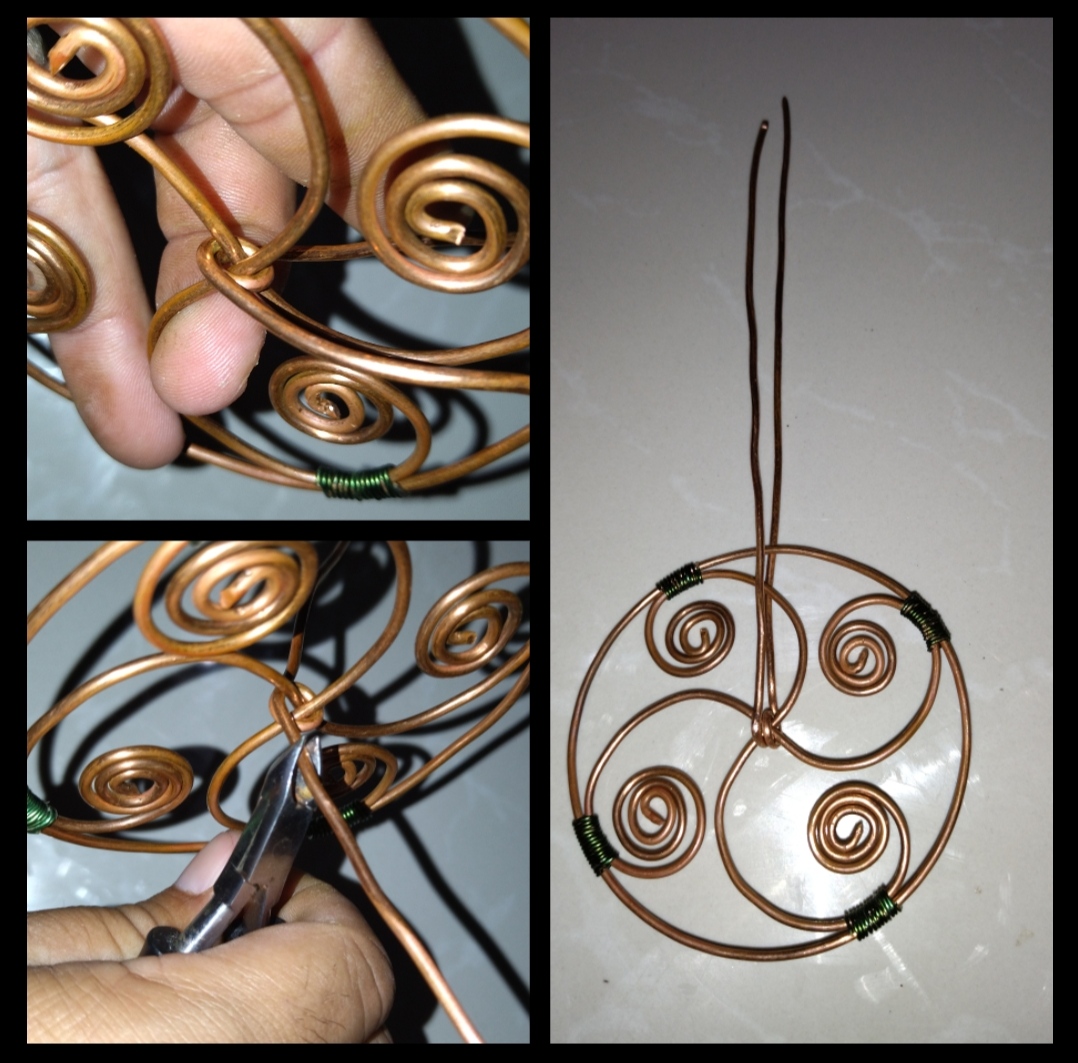
Paso 4:Teniendo todas las ruedas listas tomaremos un pedazo de alambre lo doblaremos a la mitad pasaremos por el medio de la rueda más grande le daremos una vuelta para que no nos quede suelto después doblaremos hacia arriba para hacer la orquídea del triciclo luego doblaremos nuevamente a la mitad y entorcharemos para poder entorchar sujetamos con la tenaza después abriremos las dos puntas y así tendremos el volante.
Step 4: Having all the wheels ready, we will take a piece of wire, we will bend it in half, we will go through the middle of the largest wheel, we will give it a turn so that it does not remain loose, then we will bend it upwards to make the orchid of the tricycle then we will fold again in half and we will twist to be able to twist we hold with the pliers then we will open the two ends and thus we will have the steering wheel.
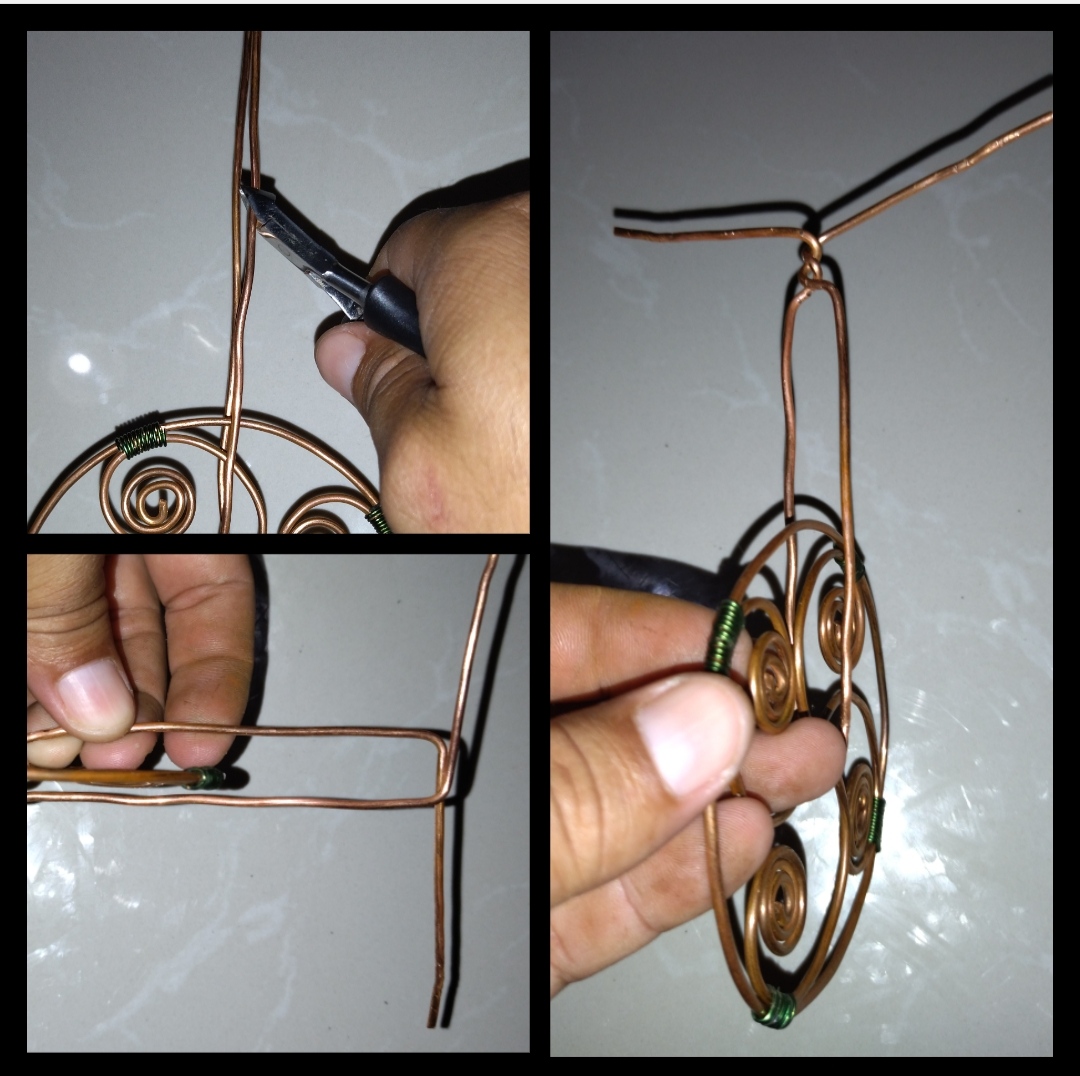
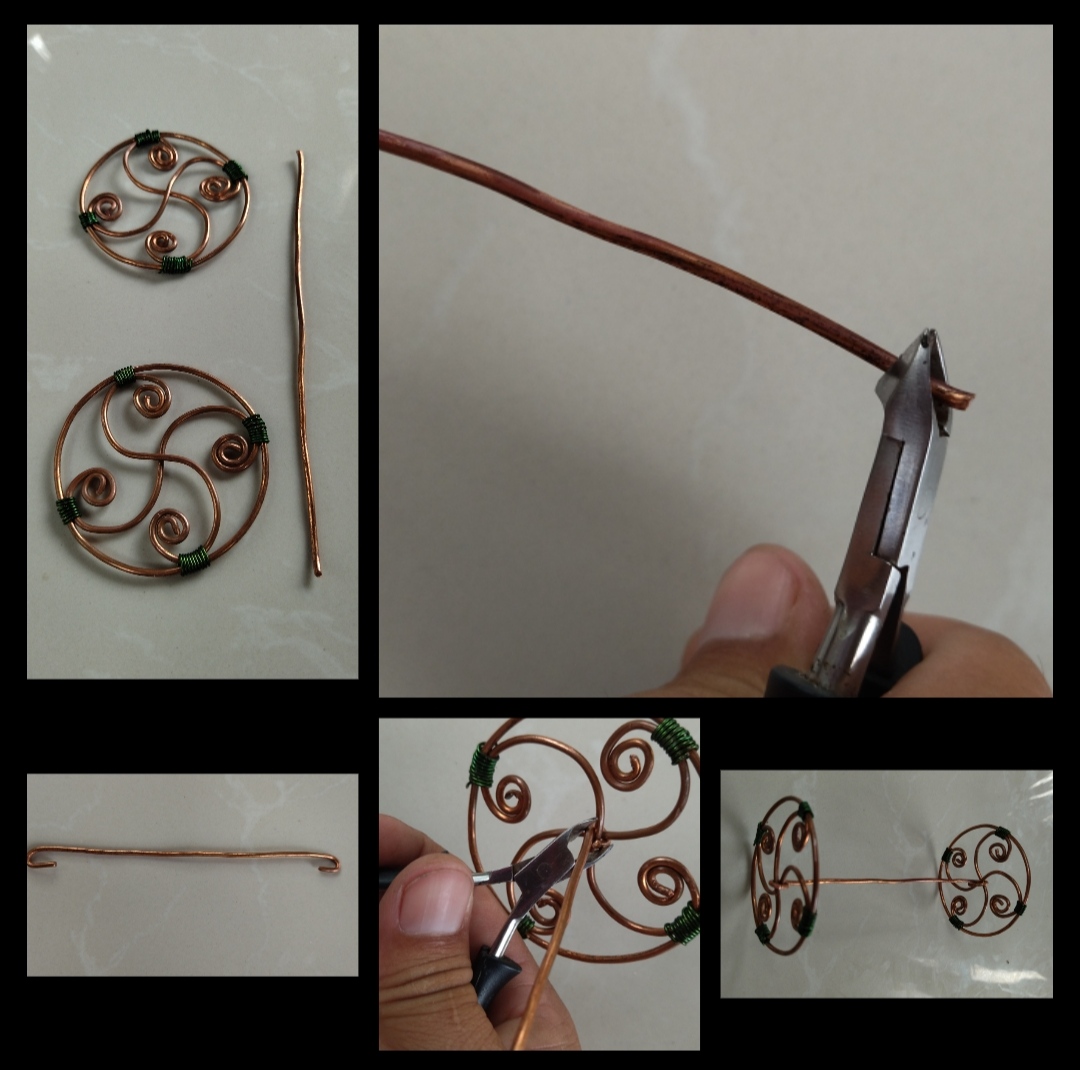
Paso 5: lista la parte de adelante tomaremos dos trozo de alambre y le daremos forma de ese (S) y doblaremos las puntas, enganchamos en la parte entorchada de adelante de nuestro trisiclo apretamos muy bien con nuestra tenaza para que no se suelte, ya está tomando un poco de forma .
Step 5: when the front part is ready, we will take two pieces of wire and we will give it the shape of that (S) and we will bend the ends, we hook it on the front twisted part of our tricycle, we press very well with our pliers so that it does not let go, it's already taking a bit of shape .
Paso 6: Cortaremos un trozo de alambre y doblaremos las puntas, uniremos las dos ruedas pequeñas para hacer la parte de atrás de nuestro trisiclo de igual manera apretamos muy bien para que no se suelte o se desarmen.
Step 6: We will cut a piece of wire and we will bend the ends, we will join the two small wheels to make the back of our tricycle in the same way, we will tighten very well so that it does not come loose or disarm.
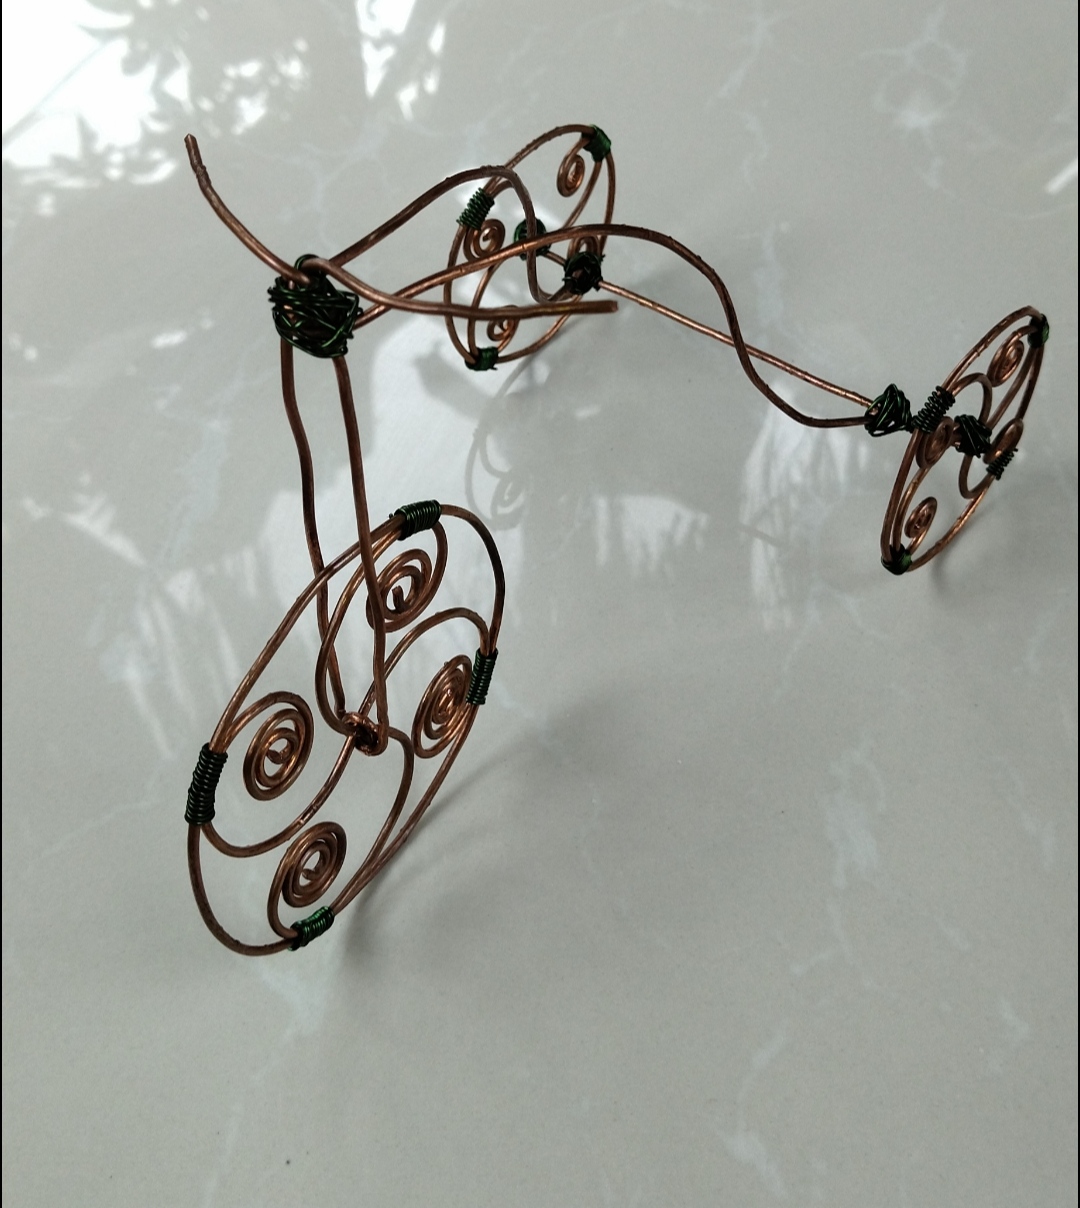
Paso 7: teniendo nuestras dos parte tomaremos la parte de adelante y los dos alambre que tenemos le doblaremos la punta y enganchamos a la parte de atrás de esta forma uniremos las dos parte .
Step 7: having our two parts, we will take the front part and the two wires that we have, we will bend the tip and hook it to the back part, in this way we will join the two parts.
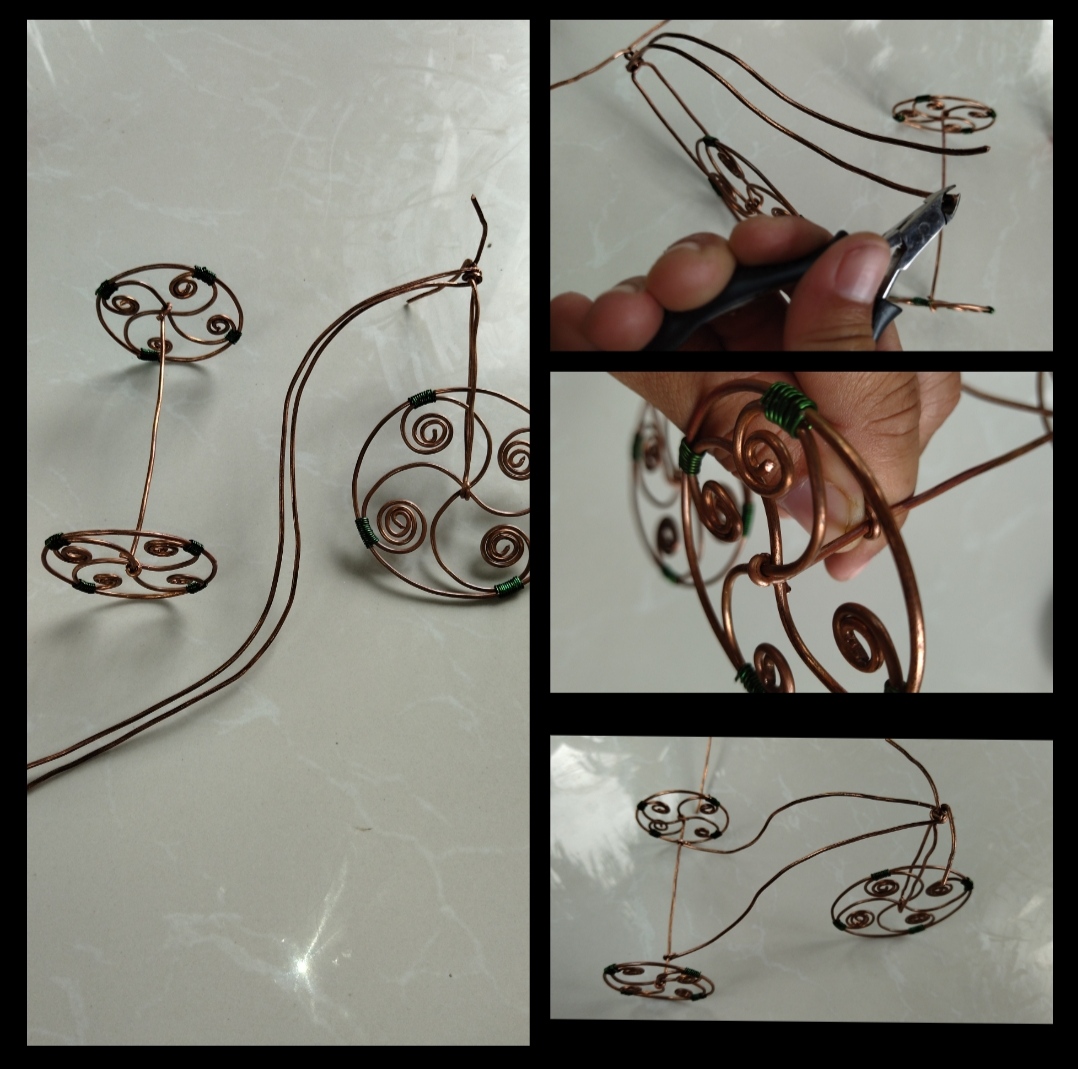
Paso 8:Ya teniendo todo unido con nuestro alambre verde amarramos todos las parte que unimos las ruedas traseras, las dos puntas que doblamos para unir las dos parte y la parte de adentro de esta manera nos aseguramos que no se desarme .
Step 8: Once we have everything together with our green wire, we tie all the parts that we join the rear wheels, the two ends that we bend to join the two parts and the inside part in this way we make sure that it does not come apart.
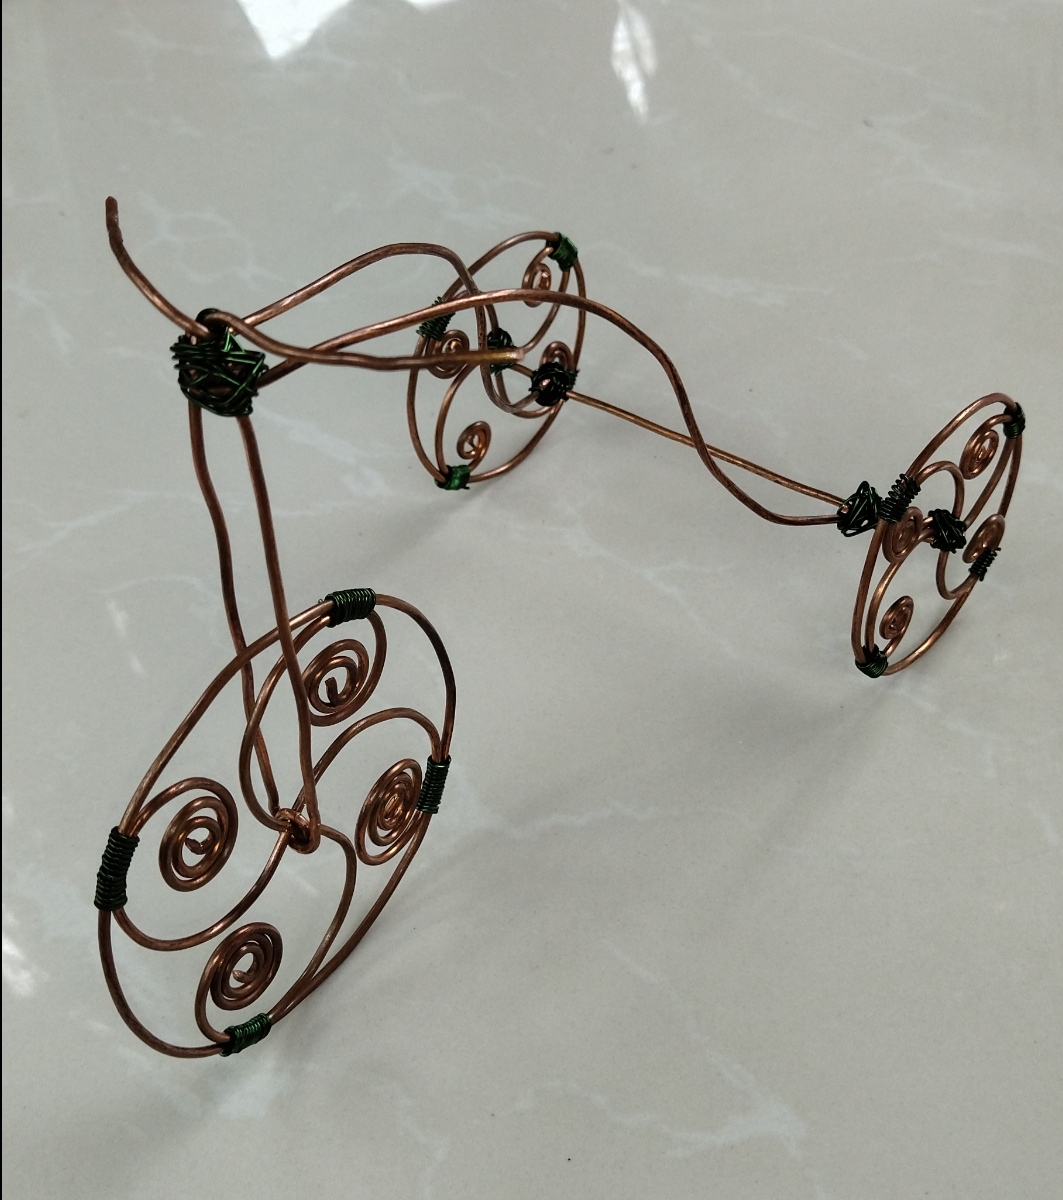
lista nuestro trisiclo, espero que a las damas les guste, fue un gusto compartir con ustedes .
list our tricycle, I hope the ladies like it, it was a pleasure to share it with you.
Todas las Fotos son de mi autoría y fueron tomadas con mi Celular Redmi 9T
All Photos are my authorship and were taken with my Redmi 9T Cellphone
Congratulations @alexanderflx! You have completed the following achievement on the Hive blockchain and have been rewarded with new badge(s):
Your next target is to reach 900 upvotes.
You can view your badges on your board and compare yourself to others in the Ranking
If you no longer want to receive notifications, reply to this comment with the word
STOPCheck out the last post from @hivebuzz:
Support the HiveBuzz project. Vote for our proposal!
Que cosa tan bella y delicada. Saludos amigo.