Hello my dear friends!.😊
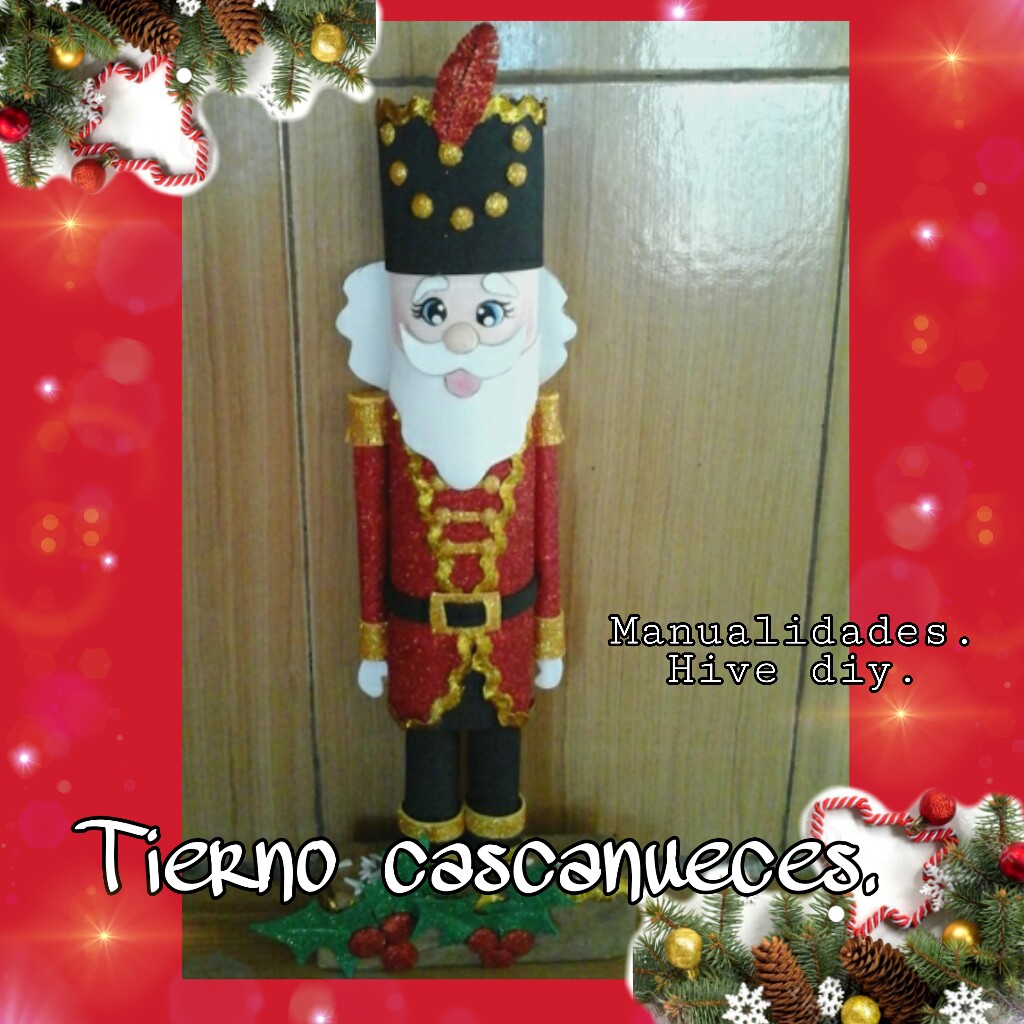

¡Tengan una excelente y bendecida noche. Siempre dando gracias a Dios por su infinita misericordia y darme la oportunidad de volver a compartir con ustedes, una linda manualidad navideña. Como ya sabemos estamos en vísperas de una época muy linda del año, época donde todos compartimos hermoso momentos en compañía de familiares y amigos. Siempre es grato cuando llega esa época y en nuestro hogar se respira ese ambiente navideño. Para lograrlo todos decoramos cada rincón de nuestra casa con esos lindos detalles navideños que a todos alegra. Es por eso, que en esta oportunidad les mostraré mi proyecto navideño de esta noche. Se trata de la elaboración de un tierno cascanueces de foami y cartulina, muy fácil de hacer y con materiales sencillos, para que ustedes también puedan hacerlo para decorar sus casas, de esta manera darle la bienvenida a la navidad. No te pierdas el procedimiento y verán que es muy fácil de hacer. ¡Comencemos!
Have a great and blessed night. Always thanking God for his infinite mercy and giving me the opportunity to share with you again, a beautiful Christmas craft. As we already know, we are on the eve of a very beautiful time of year, a time where we all share beautiful moments in the company of family and friends. It is always nice when that moment arrives and our home breathes that Christmas atmosphere. To achieve this, we all decorate every corner of our house with those beautiful Christmas details that bring joy to everyone. Therefore, on this occasion, tonight I will show you my Christmas project. It is about making a tender foam and cardboard nutcracker, very easy to make and with simple materials, so that you can also do it to decorate your houses, thus welcoming Christmas. Don't miss the procedure and you will see that it is very easy to do. Let's get started!
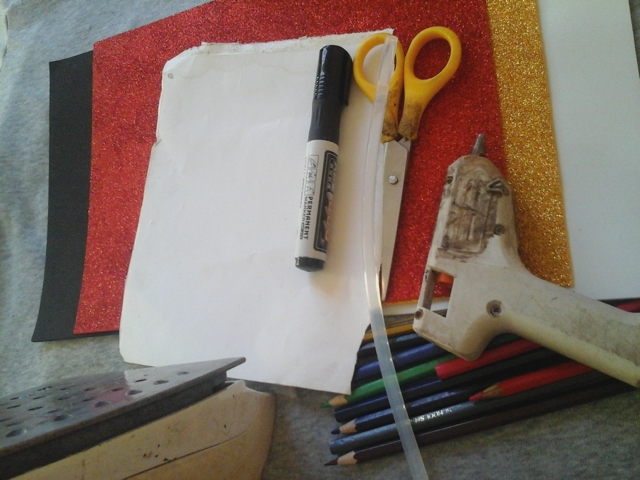
Materiales.
- Foami (Negro, rojo, blanco, dorado y verde)
- Tijera.
- Crayones.
- Una regla.
- Pistola y barra de silicona.
- Plancha de ropa.
- Un marcador negro.
- Cinta encaje dorada.
Materials.
- Foami (Black, red, white, gold and green)
- Scissors.
- Crayons.
- A rule.
- Silicone gun and bar.
- Clothes iron.
- A black marker.
- Golden lace ribbon.
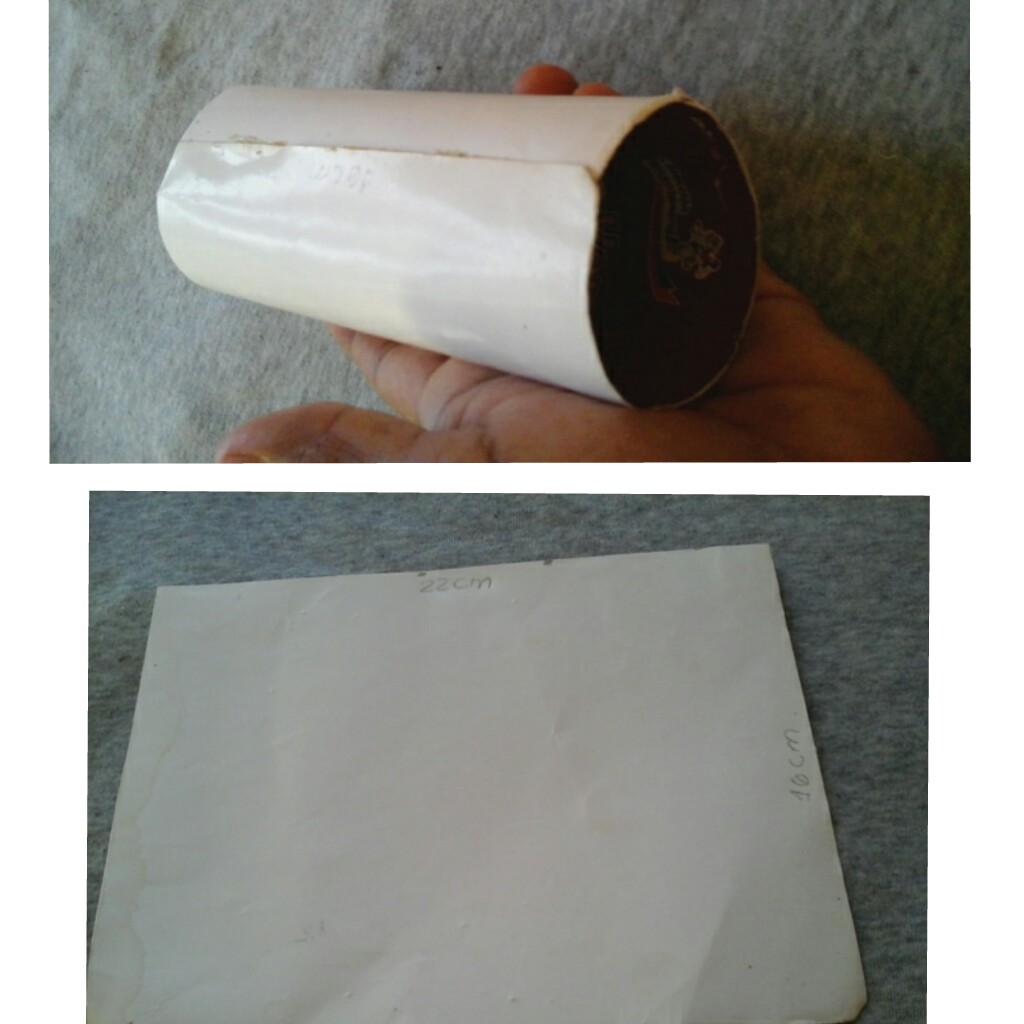
Paso 1.
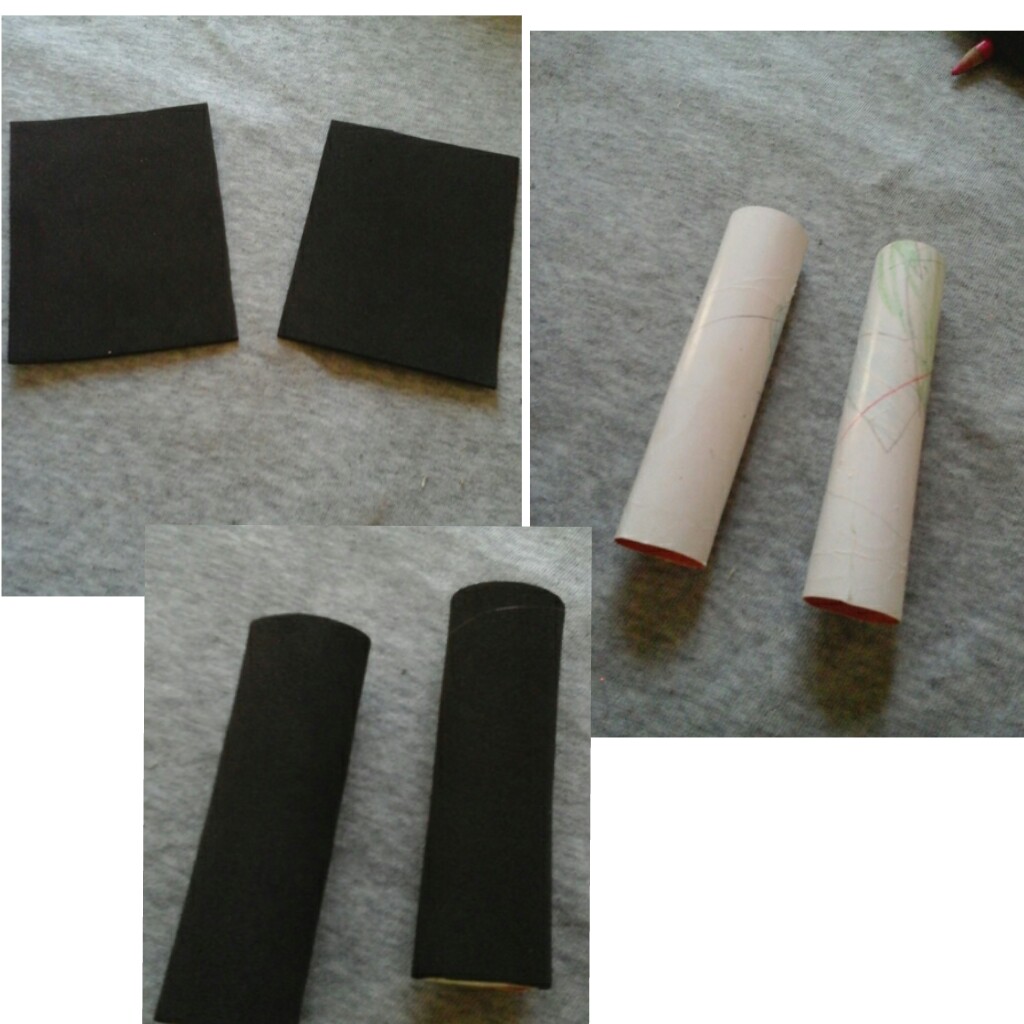
Mis queridos amigos creativos, comencemos a elaborar este tierno cascanueces. Iniciaremos con el cuerpo, para eso tomamos el cartón, envase de plástico, rollos de papel higiénico o cartulina en este caso. Medimos 22cm x 16cm, recortamos y doblamos en forma de cilindro y pegamos con silicon.
Step 1.
My dear creative friends, let's start making this cute nutcracker. We will start with the body, for that we take cardboard, plastic packaging, toilet paper rolls or cardboard in this case. We measure 22cm x 16cm, we cut and fold it into a cylinder and glue it with silicone.
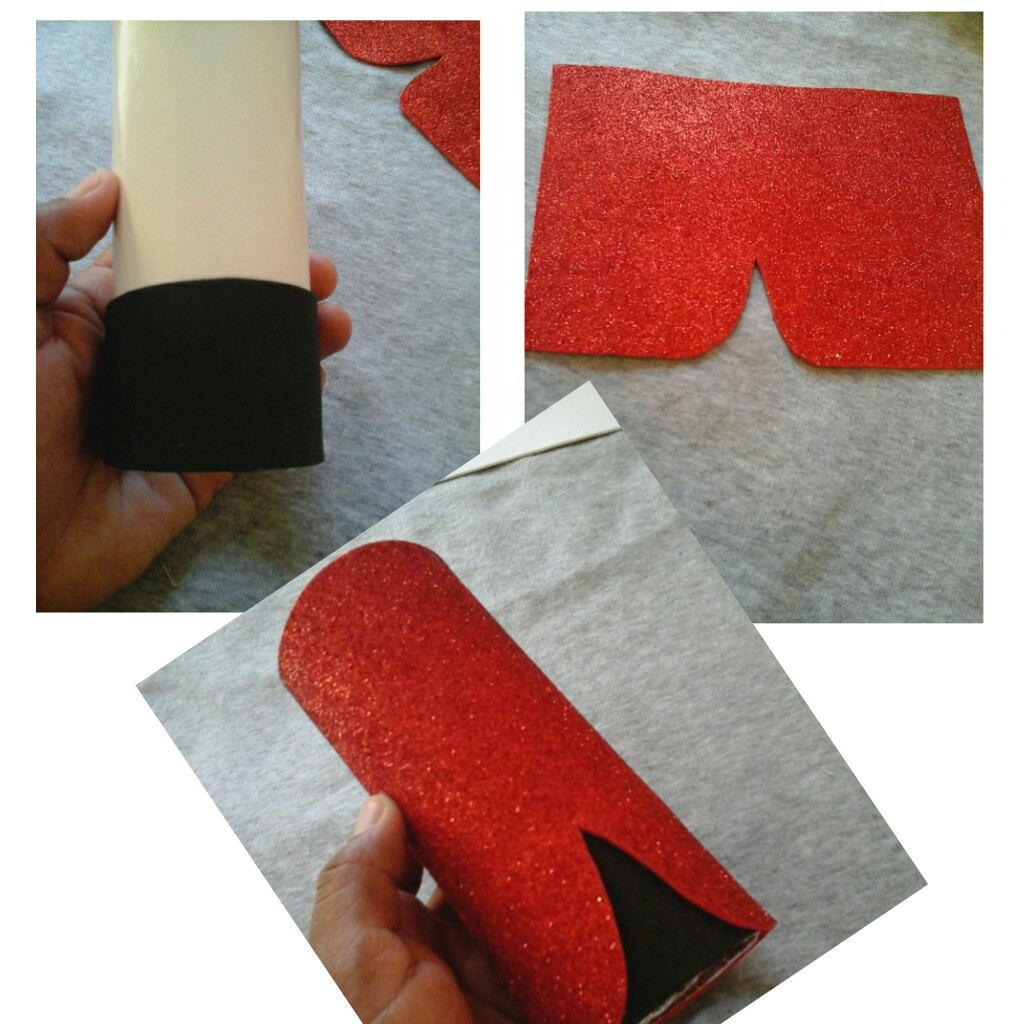
Paso 2.
Pegamos un rectángulo de foami negro en la parte inferor del cilindro. Ahora vamos a recortar un trozo de foami rojo con las mismas medidas de la cartulina para que al pegar cubra muy bien. En el medio del foami hacemos un corte en forma de V, y pegamos alrededor del cilindro.
Step 2.
We glue a black foam rectangle to the bottom of the cylinder. Now we are going to cut out a piece of red foam with the same measurements as the cardboard so that it covers very well when glued. In the middle of the foam we make a V-shaped cut, and glue it around the cylinder.
Paso 3.
Para hacer las piernas recortamos unos rectángulos en foami y cartulina, estos miden aproximadamente 8cm x 12cm. Damos forma de finos cilindros a cada trozo de cartulina y terminamos cubriendolos con foami negro.
Step 3.
To make the legs we cut out some rectangles in foam and cardboard, these measure approximately 8cm x 12cm. We shape each piece of cardboard into thin cylinders and finish by covering them with black foam.
Paso 4.
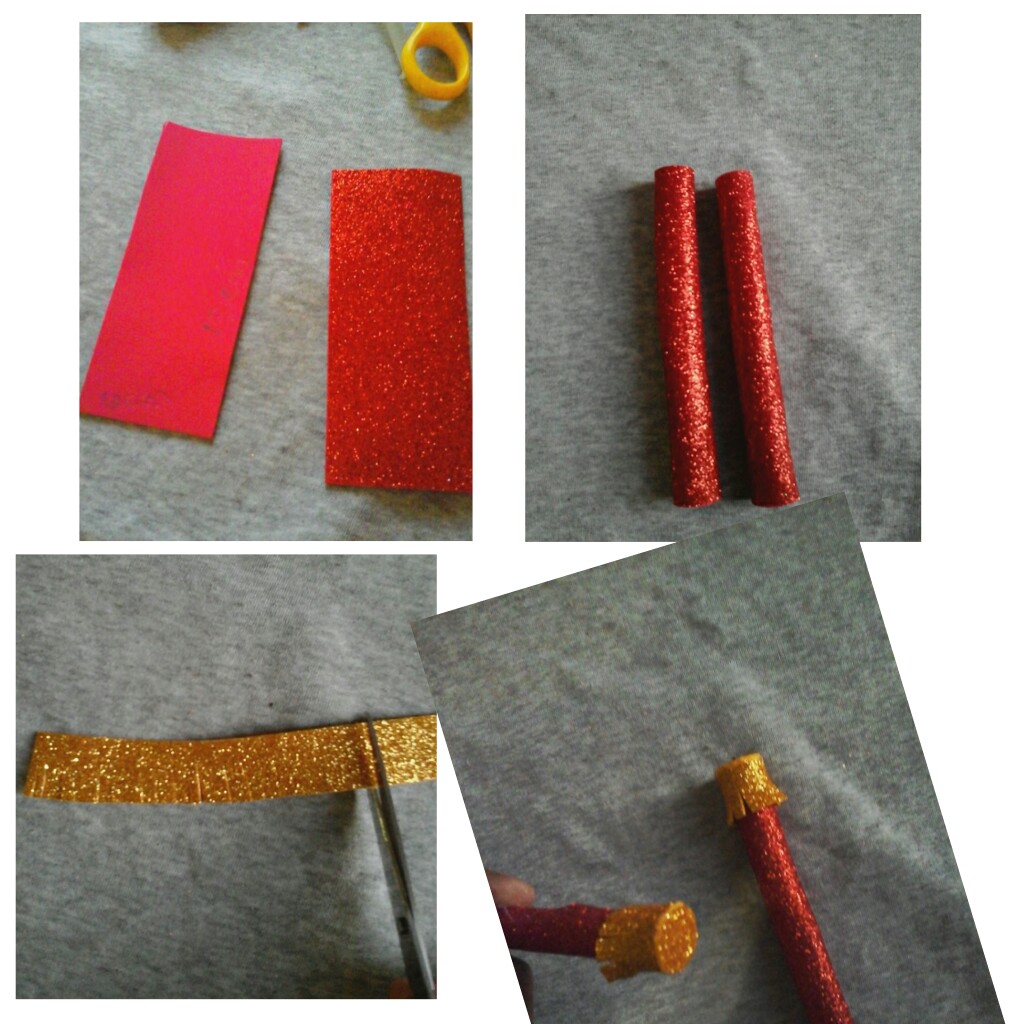
Para hacer los brazos, recortamos un par de rectángulos de foami rojo de 6cm x 13cm, formamos unos tubitos y pegamos con silicon. Para decorar la parte de los hombros, recortamos tiras de foami dorado y con la tijera hacemos cortes verticales, pegamos estas alrededor de cada tubo y colocamos una tapa del mismo foami.
Step 4.
To make the arms, we cut out a couple of 6cm x 13cm red foam rectangles, formed some tubes and glued them with silicone. To decorate the shoulder part, we cut out strips of golden foam and with the scissors we make vertical cuts, we glue these around each tube and place a cover of the same foam.
Paso 5.
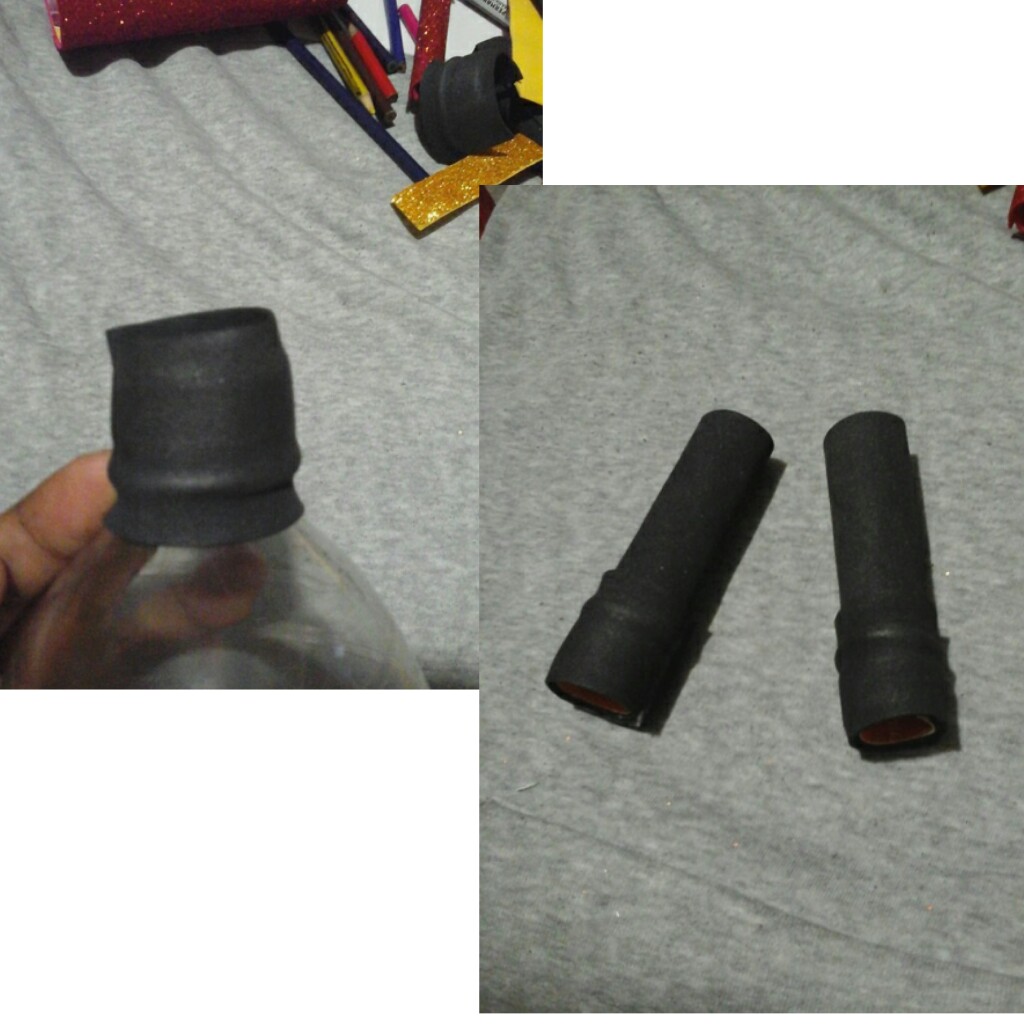
Vamos hacer los zapatos, recortamos unos pequeños trozos de foami color negro, colocamos sobre la plancha para calentar un poco y así poder darle forma. Colocamos el foami sobre una botella con tapa para darle esa forma al foami. Finalmente pegamos a las piernas.
Step 5.
Let's make the shoes, we cut out some small pieces of black foam, place them on the iron to heat up a little so we can shape them. We place the foami on a bottle with a lid to give the foami that shape. Finally we glue the legs.
Paso 6.
Para hacer la cabeza recortamos un rectángulo de cartulina del mismo ancho del cuerpo, pero no tan largo. Introducimos y pegamos al cuerpo, cubrimos con foami color carne, en este caso coloqué blanco y con un crayon color piel pinte la cara. Para terminar, hacemos el gorro con foami negro y colocamos accesesorios. Para la cara recortamos algunas piezas como barba, bigote, boca y pegamos. Los ojos los he pintado con marcador negro y crayon de color azul y blanco.
Step 6.
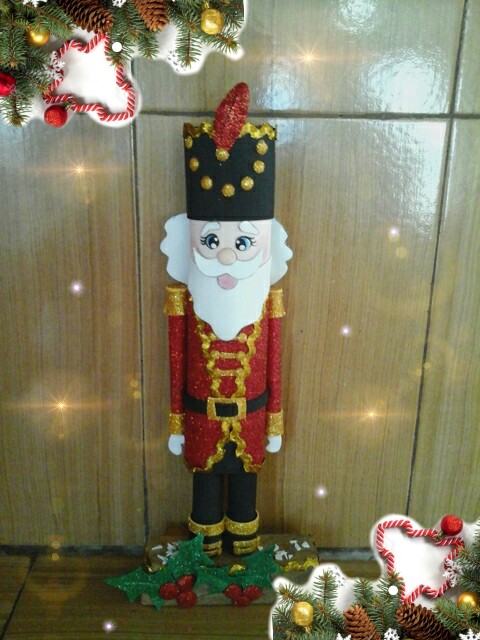
To make the head, we cut out a cardboard rectangle the same width as the body, but not as long. We introduce and glue to the body, we cover with flesh-colored foam, in this case I placed white and with a flesh-colored crayon I painted the face. To finish, we make the hat with black foam and place accessories. For the face we cut out some pieces such as beard, mustache, mouth and glue. I have painted the eyes with black marker and blue and white crayon.
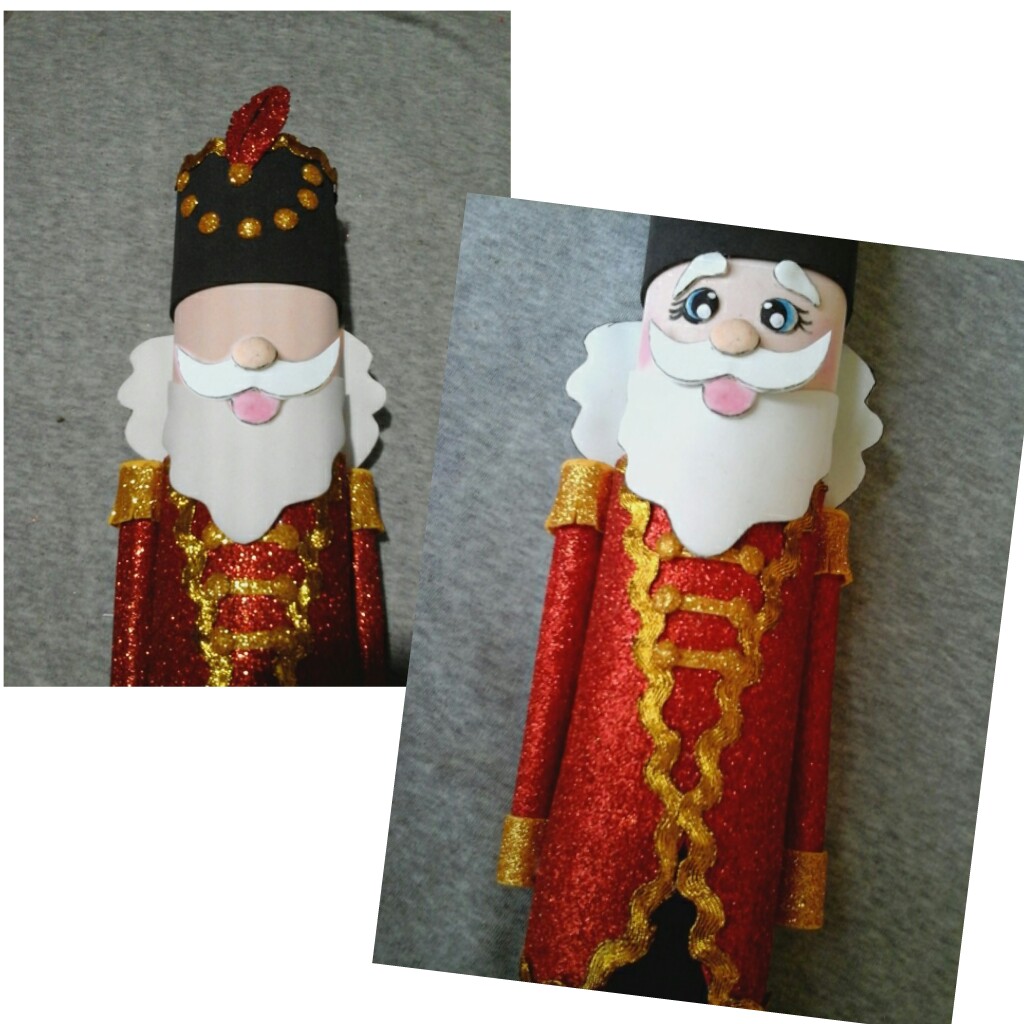

Este es el resultado final, espero que les guste y se animen hacer uno para decorar sus hogares y recibir la navidad con mucha alegría.
This is the final result, I hope you like it and are encouraged to make one to decorate your homes and receive Christmas with great joy.
Esto ha sido todo por hoy, agradecida con todos ustedes, por apoyar este proyecto. Espero volver a compartír una nueva idea para festejar éstas navidades. Que tengan una linda y bendecida noche, cuidense mucho hasta la próxima.
This has been all for today, grateful to all of you for supporting this project. I hope to share again a new idea to celebrate this Christmas. Have a nice and blessed night, take care of yourselves until next time.
Todo el contenido es de mi autoría.
Traductor Google.com.
Las fotos fueron capturadas por mi tablet Samsung Galaxy y editadas por Picsart.
Banner de portada y demás fueron elaborados por mi editor picsart.
All content is my authorship.
Google.com Translator.
The photos were captured by my Samsung Galaxy tablet and edited by Picsart.
Cover banner and others were made by my picsart editor.
Muchas gracias por el apoyo😊
Me encanta este cascanueces, esta bellisimo este adorno esta perfecto para colocarlo en mi mesa de la sala, voy a intentar hacerlo 😊 Saludos
Feliz día!! Que bueno que te haya gustado, gracias por el apoyo, saludos.
Está precioso ese cascanueces!
😁Muchas gracias, bendiciones.
Uy el cascanueces, yo lo veia en la pelicula de Barbie y de ahi lo conoci jeje impresionante lo que se puede hacer con foami 😲 lo pondria como guardian de los regalitos asi nadie se tienta de abrirlos antes de las 12 jaja
My bonito ❤️
Jajaa! Es buena idea. Gracias por comentar, saludos y bendiciones.
Que hermoso!
gracias por compartir tan bonito y delicado trabajo.
Muchas gracias, siempre es un placer.