
🇺🇸
Hello HIVE family, taking advantage of the season of love and friendship I have brought a new tutorial where you can learn how to make a special gift box for Valentine's Day. This box model is super useful for any special date, besides saving costs, and well as you know everything that is made with our own hands always has more sentimental value. I hope you can join me and enjoy my content of the day.
🇪🇸
Hola familia de HIVE, aprovechando la temporada del amor y la amista he traído un nuevo tutorial donde podrán aprender como hacer una caja especial de regalo para el día de San Valentín. Este modelo de caja es súper útil para cualquier fecha especial, además de ahorrarnos gastos, y bueno como saben todo lo que es hecho con nuestras propias manos siempre tiene mas valor sentimental. Espero que puedan acompañarme y disfrutar de mi contenido del día.
-- Materials --
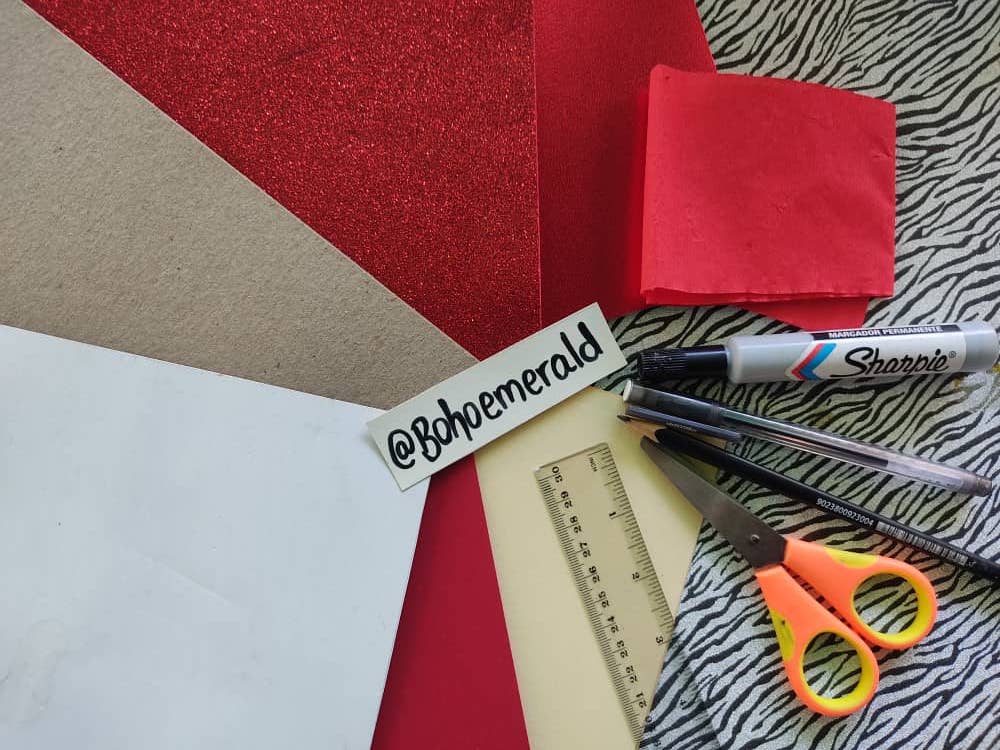
To make this Valentine's Day gift box, we will use a graphite pencil, cardboard sheets, ruler, marker, scissors, cold silicone, red foamy.
-- Materiales --
Para realizar esta caja de regalo para San Valentín, usaremos un lápiz de grafito, láminas de cartón, regla, marcador, tijera, silicon frio, foamy rojo.
-- Step by step --
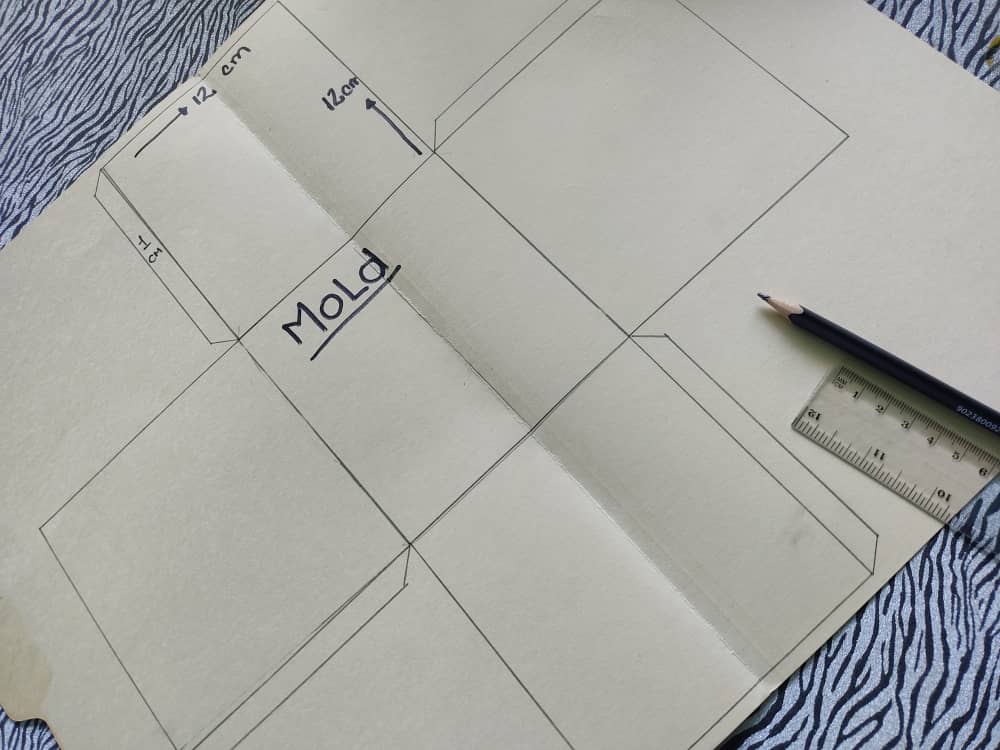
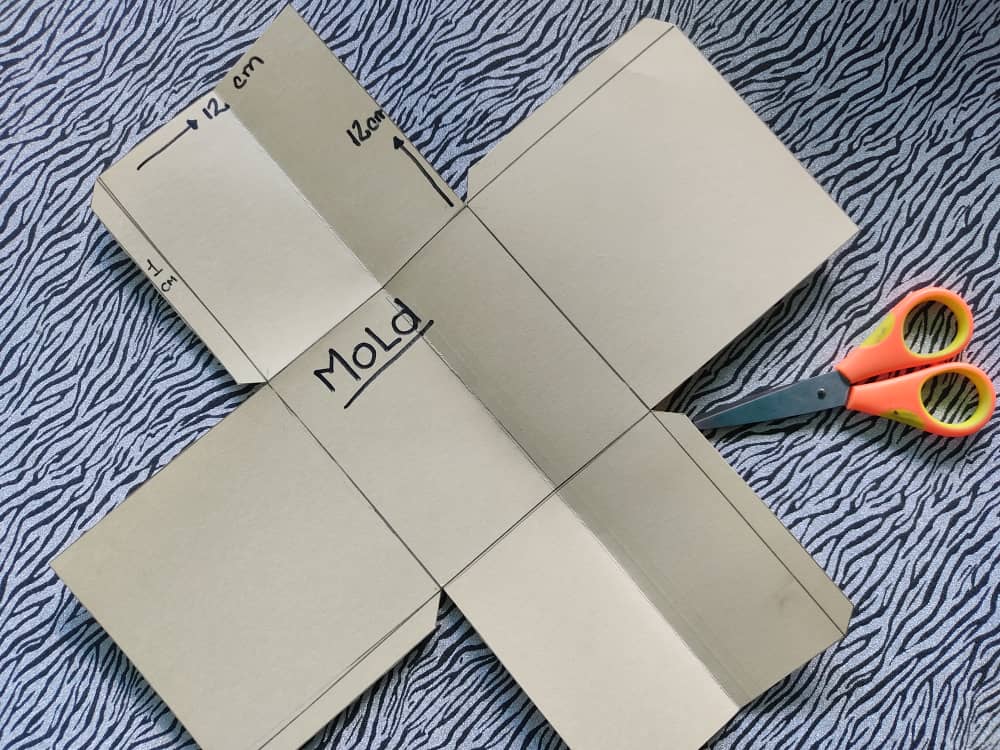
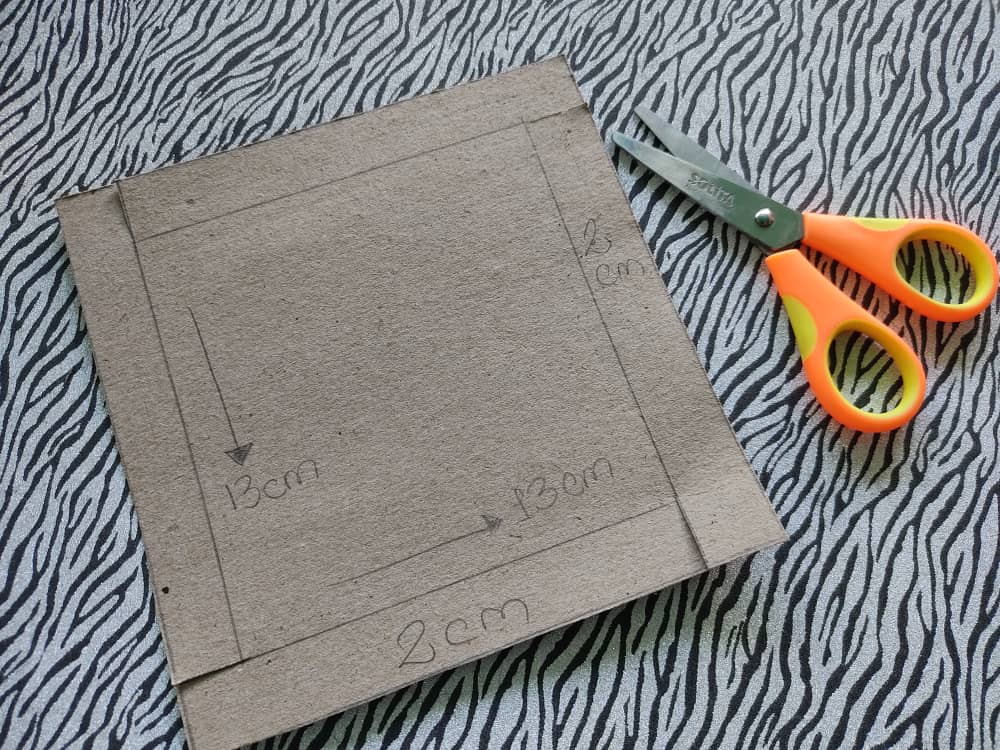
First of all, I had to have a mold or guide with perfect measurements, and for this I drew on a sheet of cardboard a mold design and then cut it out without exceeding the measurements. Obviously, I used this same mold for the box, but the idea is to transfer it to the material of choice for this box.
-- Paso a paso --
En primer lugar, debía tener un molde o guía con medidas perfectas, y para esto dibuje en una lámina de cartón un diseño de molde y luego lo recorte sin sobrepasar las medidas. Obviamente, utilicé este mismo molde para la caja, pero la idea es que luego sea transferido al material de preferencia para esta caja.
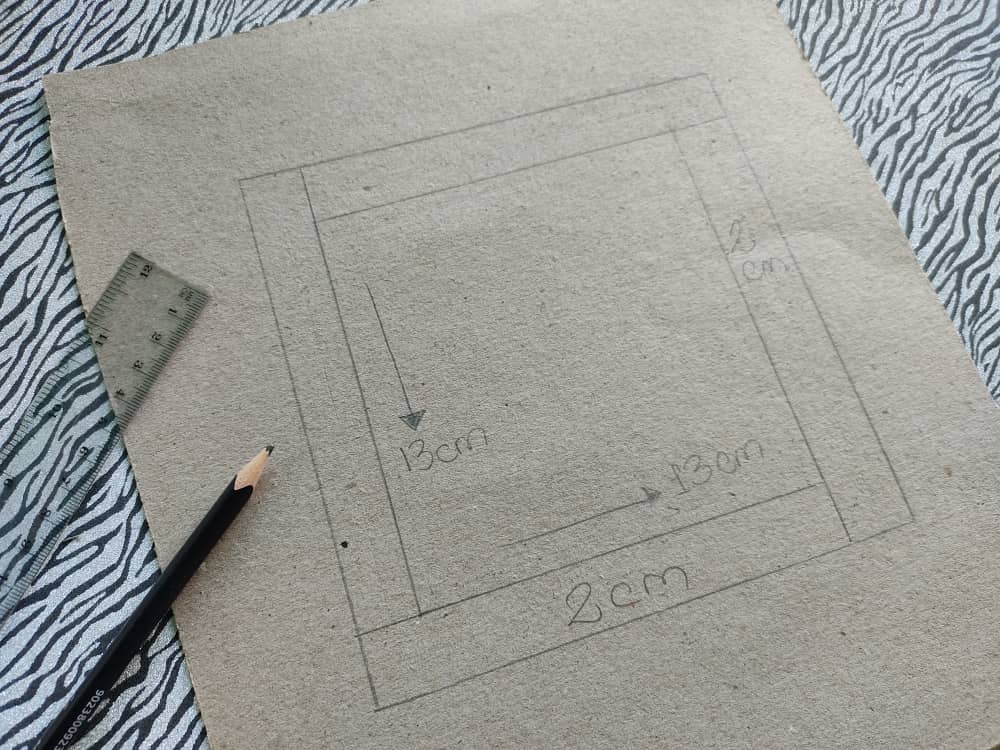
Once I had the body of the box ready, I proceeded to draw a mold for the lid on another sheet of cardboard, and then cut it out very carefully so as not to eat the measurements.
Al tener el cuerpo de la caja listo, procedí a dibujar un molde para la tapa en otra lámina de cartón, y luego lo recorte con mucho cuidado para no comerme las medidas.
With the body and lid ready, I marked the folds with the tip of the ruler, obviously I had to use a little force and be careful when sharpening so as not to break the cardboard. Keep watching.
Con el cuerpo y la tapa lista, marque los dobleces con la punta de la regla, obviamente debí usar un poco de fuerza y con cuidado a la hora de afincar para no romper el cartón. Sigan viendo.
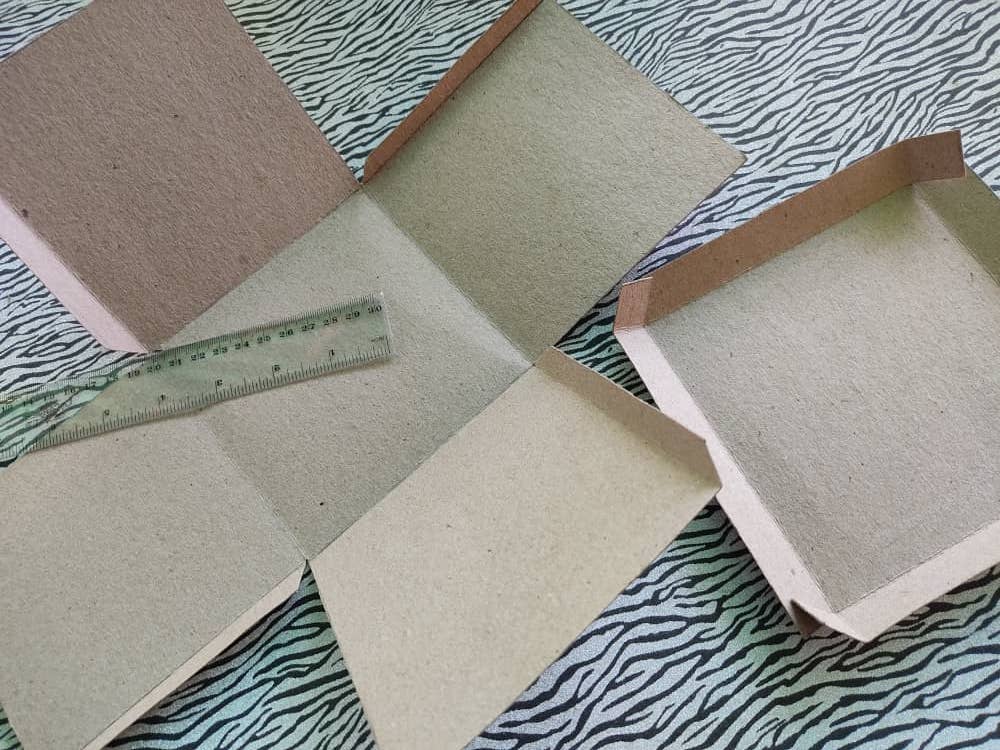
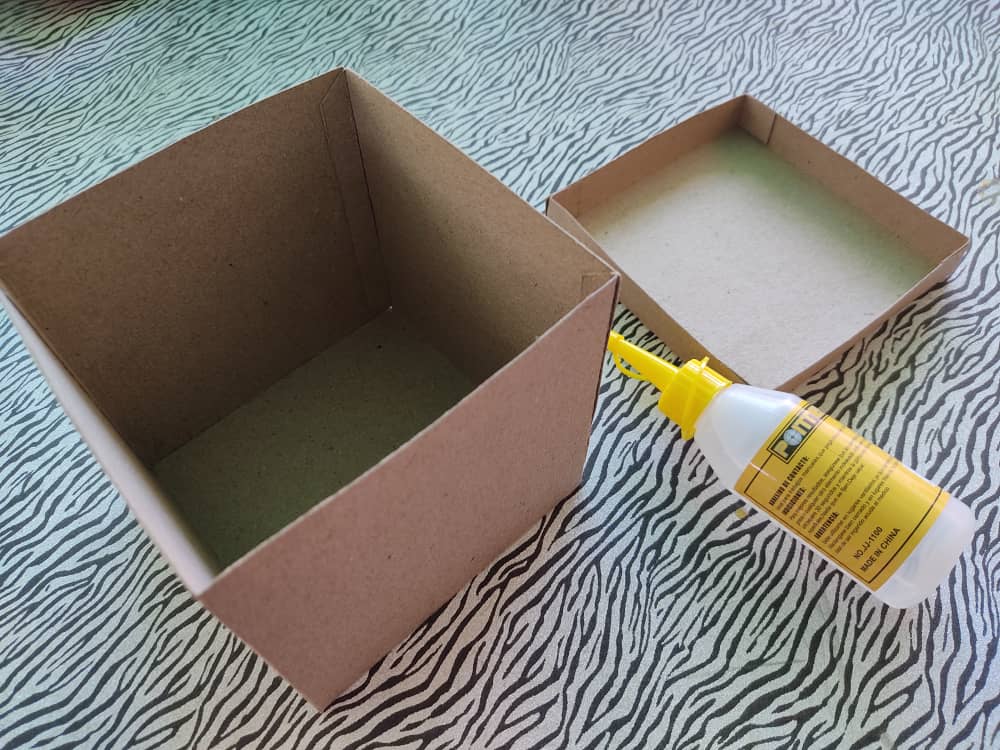
With the cold silicone, I assembled the box and the lid by gluing each end and joining the tabs or flaps with the inside of the body, and I did the same with the lid.
Con el silicon frío, arme la caja y la tapa pegando cada extremo y uniendo las pestañas o aletas con la parte interior de cuerpo, y lo mismo hice con la tapa.
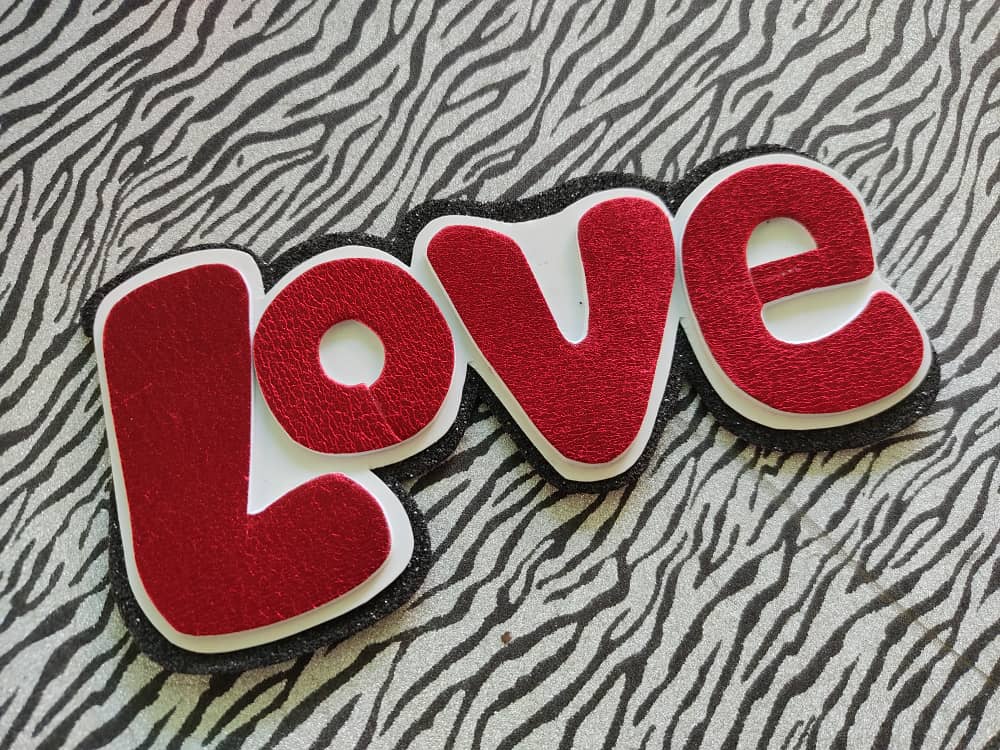
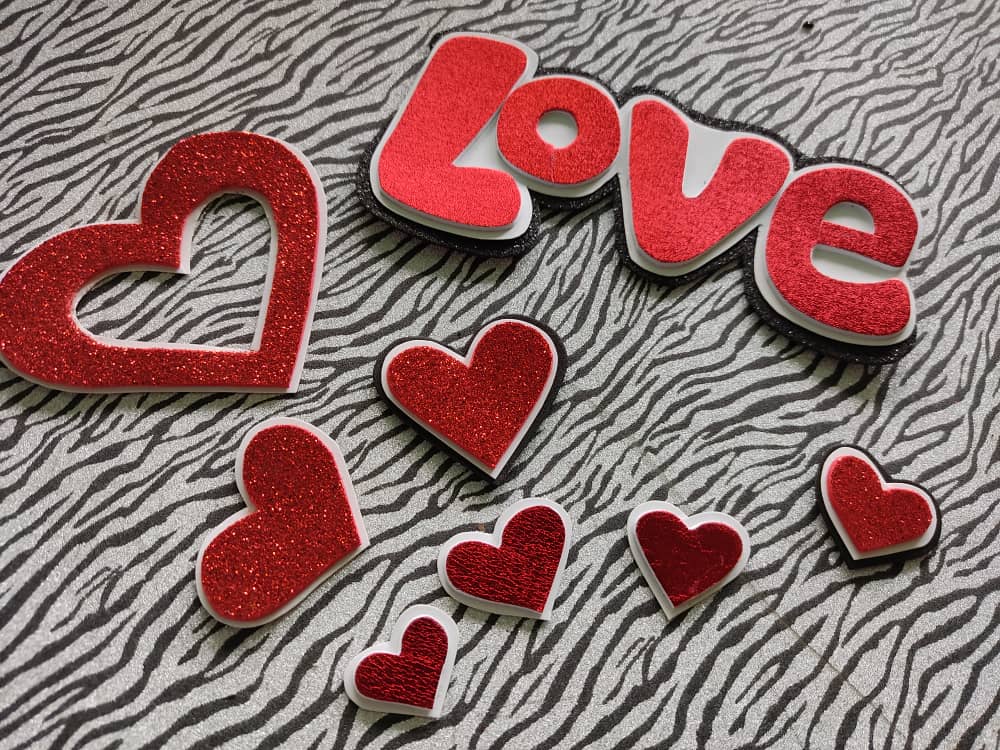
From this step I was in charge of making details for the decoration of this box and give it a beautiful touch, I started with the word "LOVE" on a nice metallic foamy "always mark the letters on the back of the foamy is ideal, so we avoid damaging it". Then, I cut out each letter and glued them on a white base and in sequence to form the word "LOVE" and immediately glued the white base on another black base and cut out the silhouette to form a border that gave an elegant touch to the decoration.
A partir de este paso me encargué de realizar detalles para la decoración de esta caja y darle un hermoso toque, comencé con la palabra “LOVE” sobre en un lindo foamy metalizado "siempre marcar las letras por la parte trasera del foamy es lo ideal, así evitamos que se dañe". Después, recorte cada letra y las pegue sobre una base blanca y en secuencia para formar la palabra “LOVE” e inmediatamente pegue la base blanco sobre otra base negra y recorte la silueta para formar un borde que le dio un toque elegante a la decoración.
I continued with more details for decoration and in the same frosted and metallic red foamy, I designed and cut out some cute hearts of different shapes, and did the same procedure, glued each figure on a white base and then on a black base and cut out again.
Continúe con mas detalles para decoración y en un mismo foamy rojo escarchado y metalizado, diseñe y recorte unos lindos corazones de distintas formas, e hice el mismo procedimiento, pegue cada figura sobre una base blanca y luego en una base negra y volví a recortar.
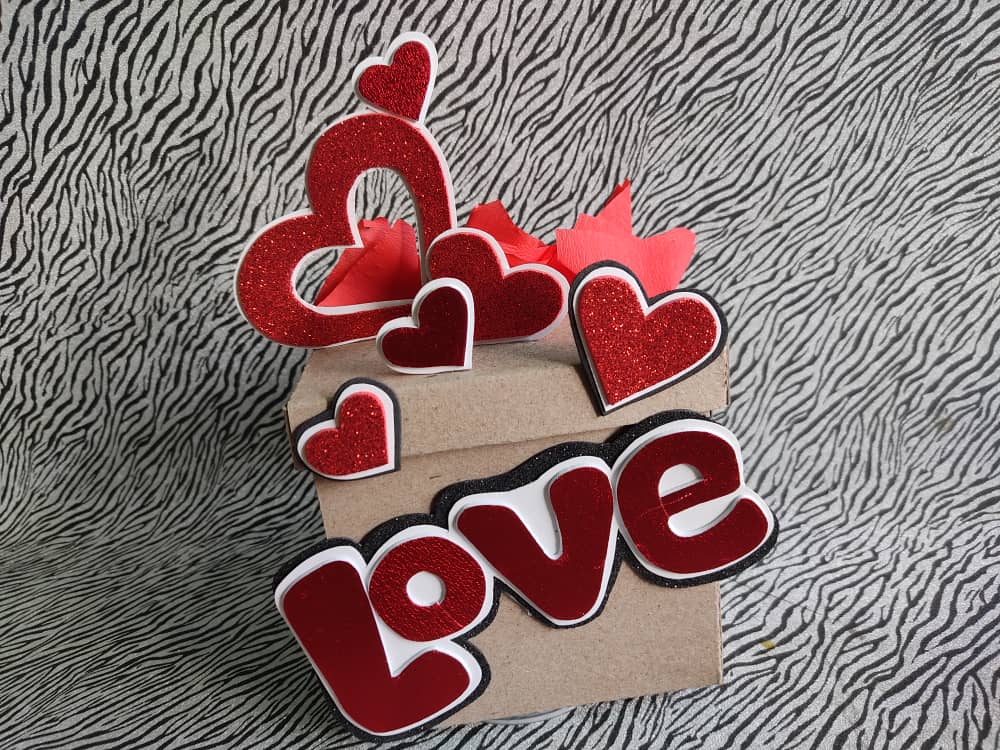
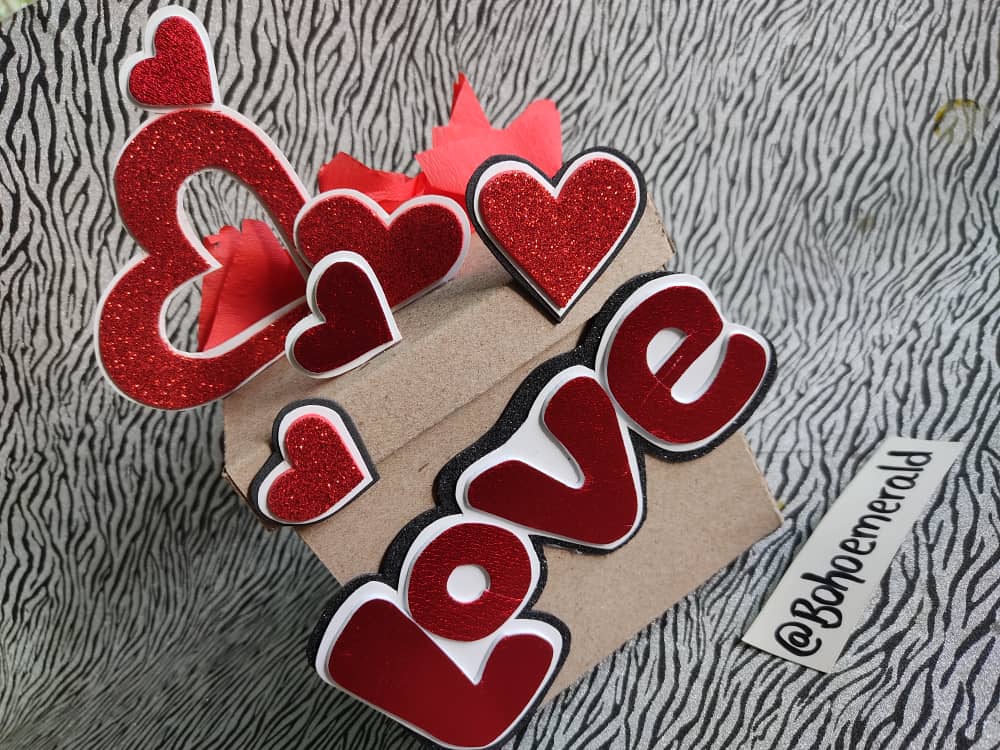
I finished my beautiful box by decorating it and gluing all the details I did before, on the body we glued the word "Love" and on the lid I glued some pieces of crepe paper and the beautiful hearts on it, placed in the way we like the most.
Termine mi cajita hermosa decorándola y pegando todos los detalles que hecho antes, en el cuerpo pegamos la palabra “Love” y en la tapa pegue unos trozos de papel crepé y los hermosos corazones sobre esta, ubicados de la manera que más nos guste.
Making crafts like this is a lot of fun, especially to see the final result of what we put so much effort and love into. And even better if they are done in the company of the little ones of the house and even in pairs. I hope you liked this Valentine's Day gift box.
Hacer manualidades como esta es algo muy divertido, sobre todo ver el resultado final de aquello a que le pusimos tanto esfuerzo y amor. Y mejor aún si se hacen en compañía de los mas pequeños de la casa e incluso en parejas. Espero que les haya gustado esta Caja de regalo para San Valentín.
Thank you very much for coming to join me in this new adventure, I hope you can get to know me a little more, and that you invite me to be part of your groups of friends.
Muchas gracias por venir a acompañarme en esta nueva aventura, espero que puedan conocerme un poco mas, y que me inviten a formar parte de sus grupos de amigos.
This post was shared and voted inside the discord by the curators team of discovery-it
Join our community! hive-193212
Discovery-it is also a Witness, vote for us here
Delegate to us for passive income. Check our 80% fee-back Program
The rewards earned on this comment will go directly to the person sharing the post on Twitter as long as they are registered with @poshtoken. Sign up at https://hiveposh.com.
Congratulations @bohoemerald! You have completed the following achievement on the Hive blockchain and have been rewarded with new badge(s):
Your next target is to reach 100 replies.
You can view your badges on your board and compare yourself to others in the Ranking
If you no longer want to receive notifications, reply to this comment with the word
STOPCheck out the last post from @hivebuzz:
Support the HiveBuzz project. Vote for our proposal!
Que hermosa cajita ideal para regalar este 14 de febrero, excelente paso a paso @bohoemerald gracias por compartir un gran
!discovery 25
Para ti. 💯💡☺️
Your content has been voted as a part of Encouragement program. Keep up the good work!
Use Ecency daily to boost your growth on platform!
Support Ecency
Vote for new Proposal
Delegate HP and earn more
Thank you for sharing this amazing post on HIVE!
Your content got selected by our fellow curator @stevenson7 & you just received a little thank you via an upvote from our non-profit curation initiative!
You will be featured in one of our recurring curation compilations and on our pinterest boards! Both are aiming to offer you a stage to widen your audience within and outside of the DIY scene of hive.
Join the official DIYHub community on HIVE and show us more of your amazing work and feel free to connect with us and other DIYers via our discord server: https://discord.gg/mY5uCfQ !
If you want to support our goal to motivate other DIY/art/music/homesteading/... creators just delegate to us and earn 100% of your curation rewards!
Stay creative & hive on!