
Hello HIVERS greetings!
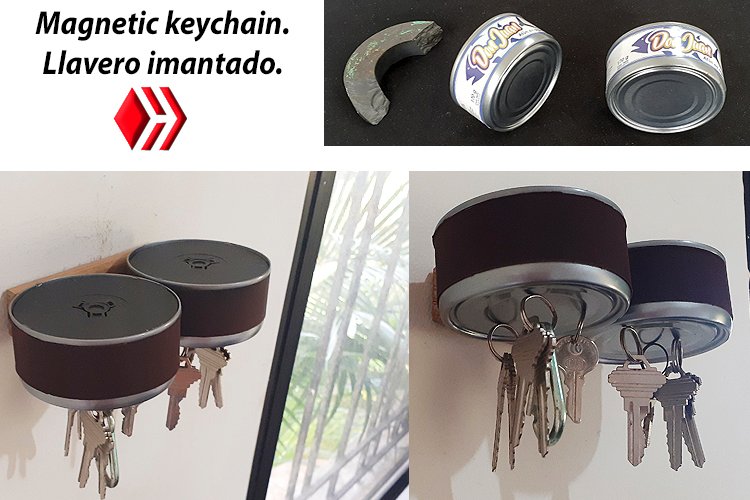
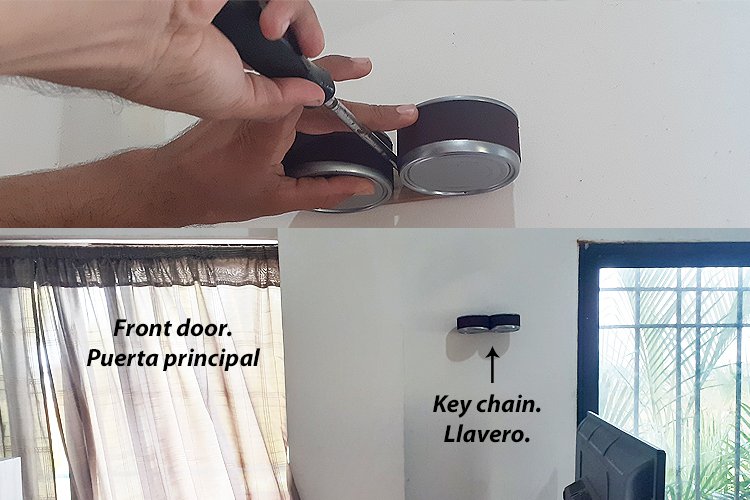
How are you? How are they? These days I was about to show you my new keychain created from recycled material since I have an ordinary keychain, but I use it as a coat rack and it is super uncomfortable when taking out the keys.
I decided to create my own keychain, not an ordinary one, but rather that it occurred to me to use 2 cans of tuna and a piece of magnet, and make a magnetized keychain.
My wife and I are delighted we have a couple of days using it and it is super practical to glue and detach the keys easily and effectively, I hope you like the idea.
Here I show you the step by step;
Materials:
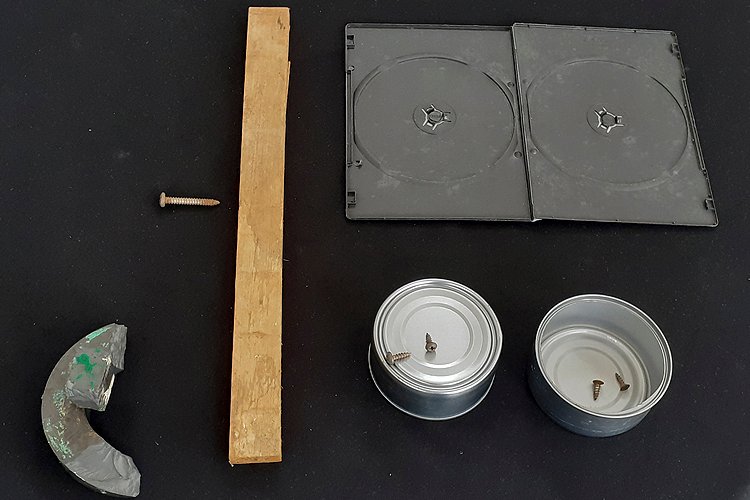
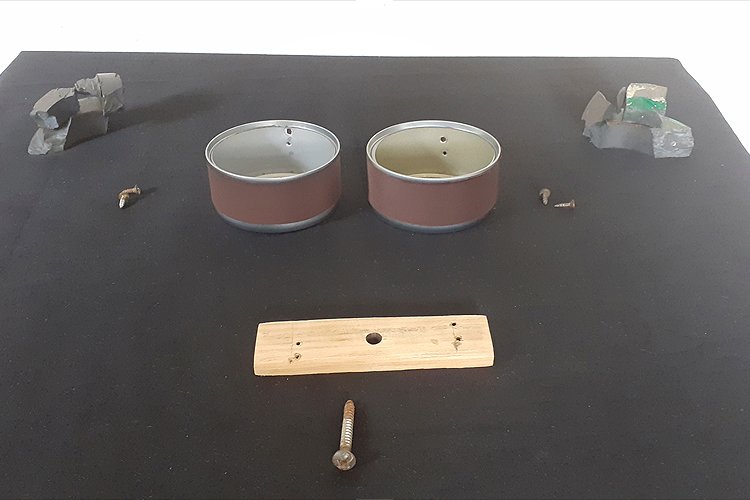
• 2 cans.
• Magnet.
• Wooden board to join the cans (You can use any other element you have available).
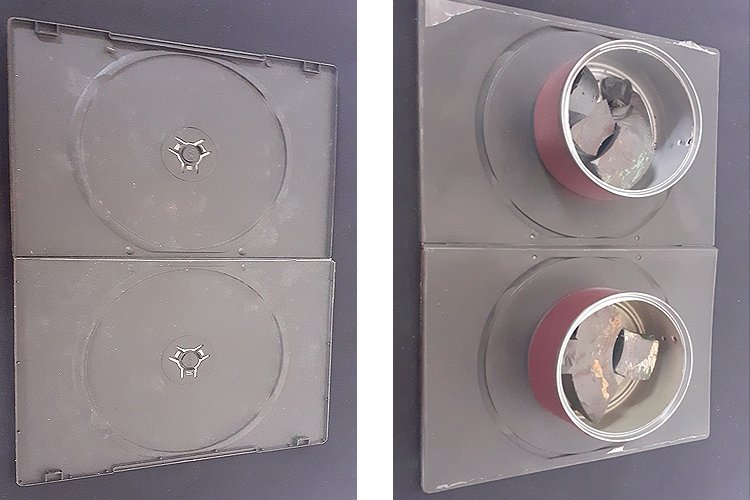
• CD cartridge. (Use whatever material you have available to make the top caps that are easy to cut.)
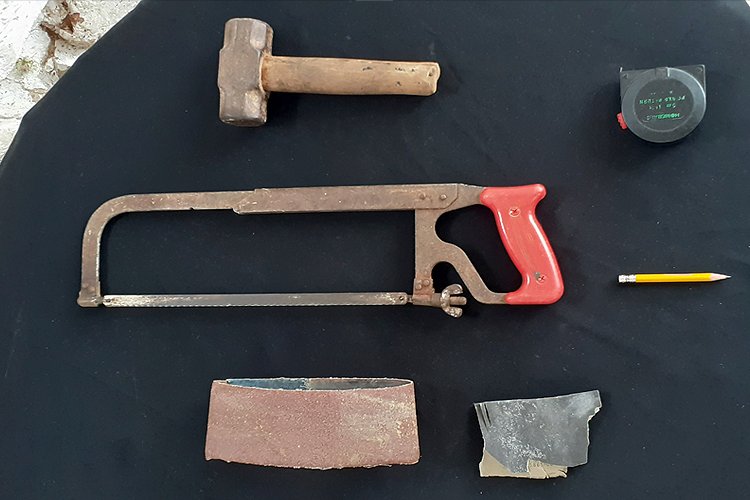
Tools:
• Hammer (To break the magnet into small pieces).
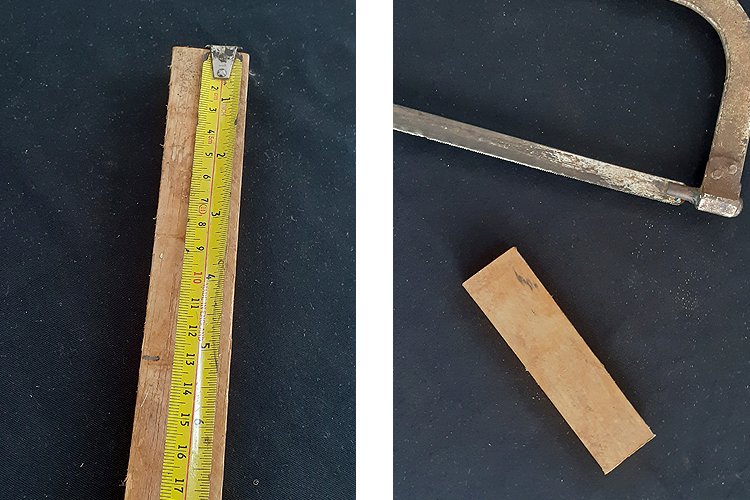
• Segueta (To cut 13cm of wood).
• Coarse and fine sandpaper to give a smoother finish to the wood.
¡Hola HIVERS saludos!
¿Cómo se encuentran? En estos días estaba por mostrarles mi nuevo llavero creado a partir de material reciclado ya que tengo un llavero común y corriente, pero lo uso como perchero y es súper incomodo en el momento de sacar las llaves.
Decidí crear mi propio llavero, no uno ordinario, si no que se me ocurrió usar 2 latas de atún y un pedazo de imán, y hacer un llavero imantado.
Mi esposa y yo estamos encantados tenemos un par de días usándolo y es súper practico pegar y despegar las llaves de manera fácil y efectiva, espero les guste la idea.
Aquí les muestro el paso a paso;
Materiales:
• 2 latas.
• Imán.
• Tablita de madera para unir las latas (Puede utilizar cualquier otro elemento que tenga disponible).
• Cartucho de cd. (Use el material que tenga disponible para hacer las tapas superiores que sea fácil de cortar).
Herramientas:
• Martillo (Para romper el imán en pedazos pequeños).
• Segueta (Para cortar 13cm de madera).
• Lija gruesa y fina para darle un acabado más suave a la madera.
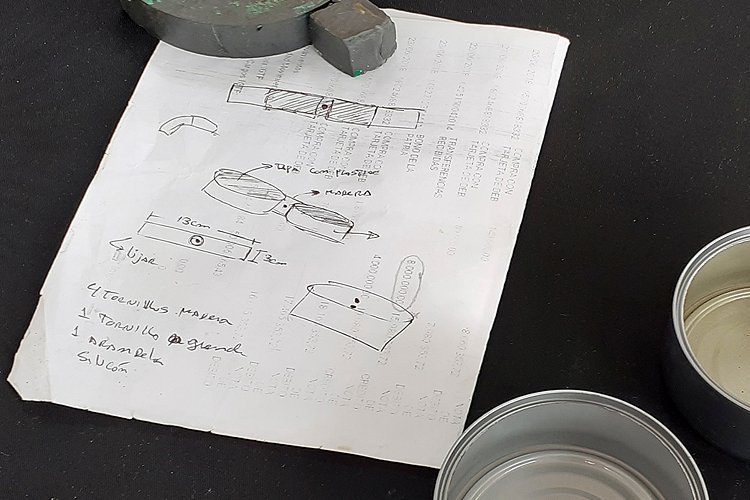
Step 1
• With all the materials and tools at hand, we put our idea on a sheet and design to our liking how our keychain will be.
Paso 1
• Con todos los materiales y herramientas a mano, plasmamos nuestra idea en una hoja y diseñamos a nuestro gusto como va a quedar nuestro llavero.
Step 2
• we cut 13cm in length from a small board to join the two cans.
Paso 2
• cortamos 13cm de longitud de una tablita para unir las dos latas.
Step 3
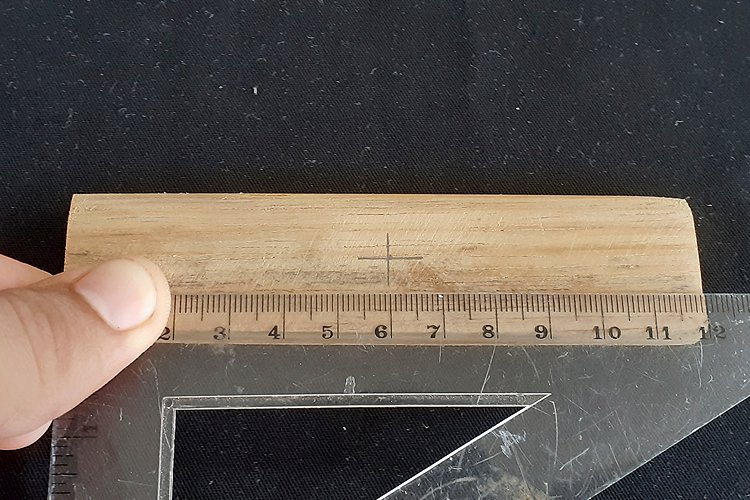
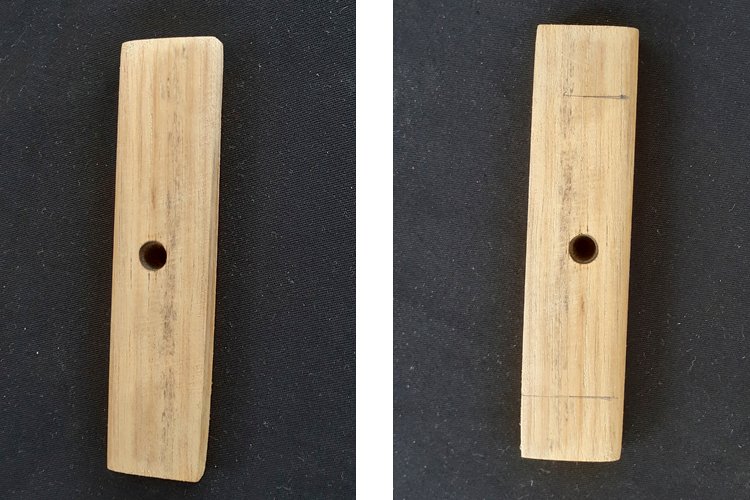
• Sand down to a smoother and cleaner finish using coarse and fine sandpaper.
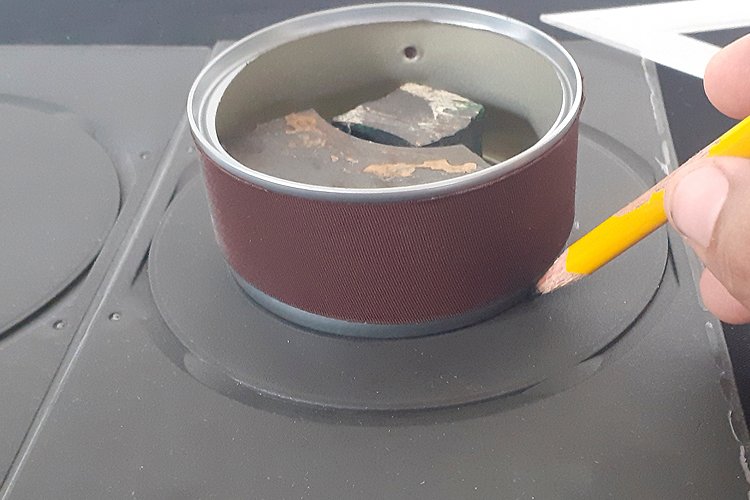
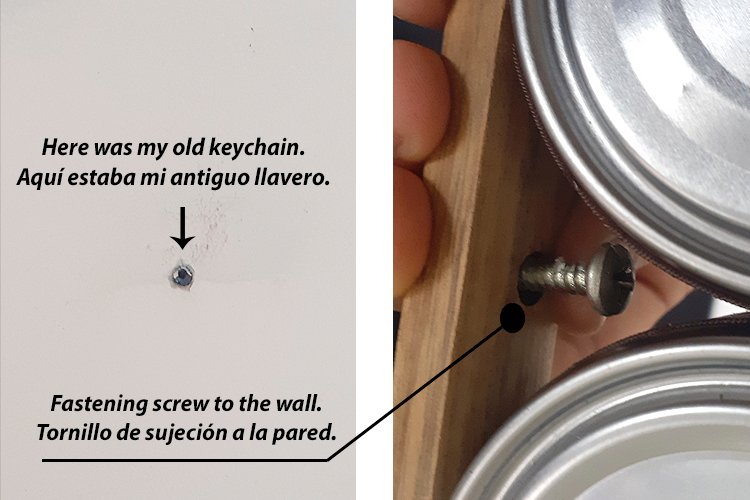
• We mark half of the wood here we are going to drill so that the screw that will stick it to the wall can pass.
Paso 3
• Lijamos hasta dejar un acabado más suave y limpio usando lija gruesa y fina.
• Marcamos la mitad de la madera aquí vamos a perforar para que pueda pasar el tornillo que lo pegara a la pared.


Step 4
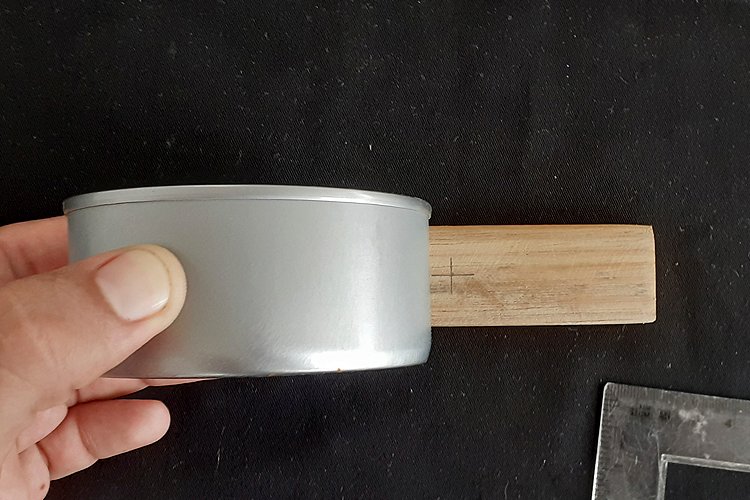
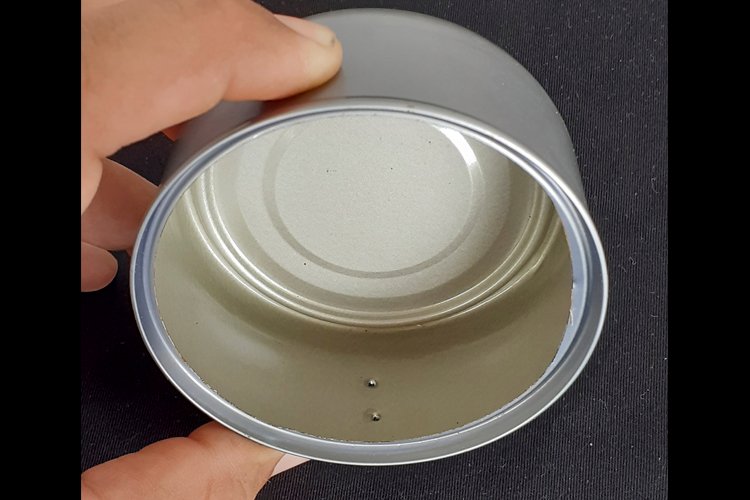
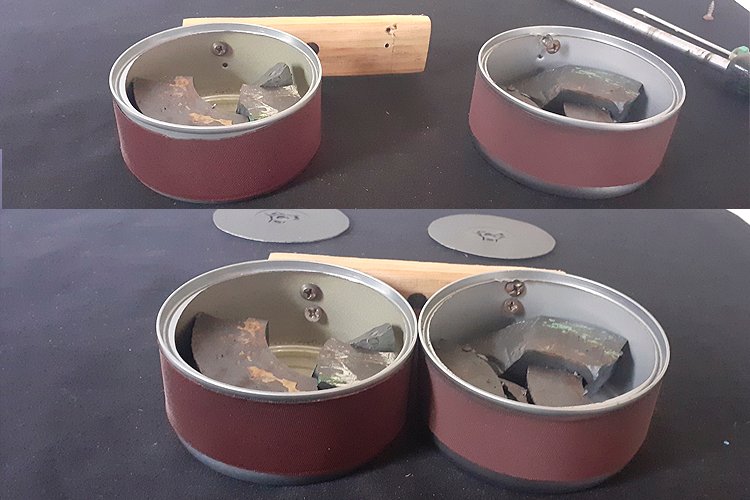
• We mark the points on the cans to fix the wood to them.
Paso 4
• Marcamos los puntos en las latas para fijar la madera a las mismas.

Step 5
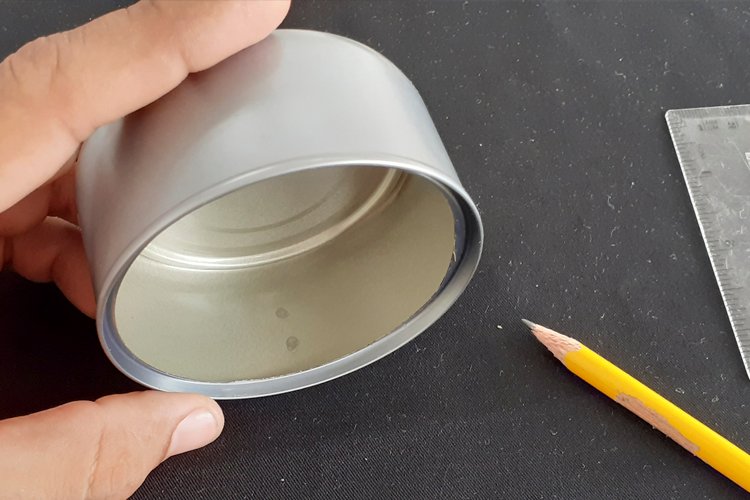
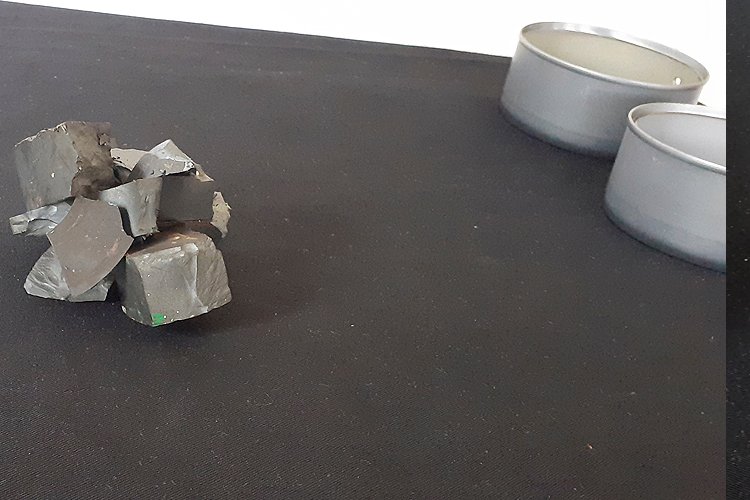
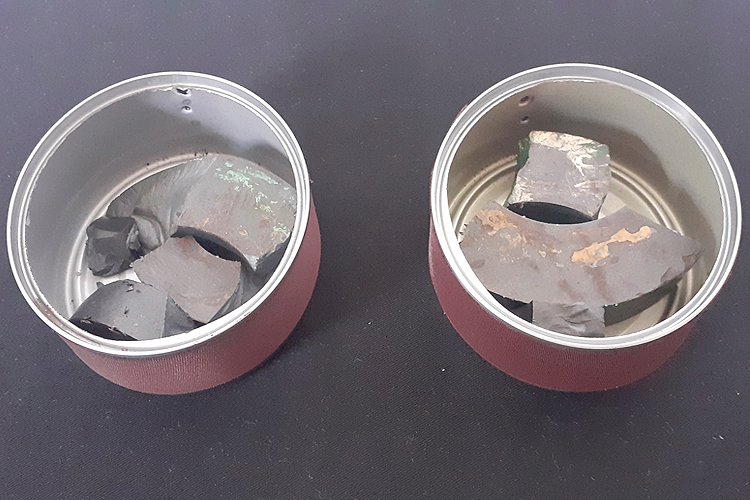
• If the magnet is very large, break it into small pieces with a hammer so that they fit inside the can.
Paso 5
• el imán si es muy grande lo rompen con un martillo en fragmentos pequeños para que se acomoden dentro de la lata.
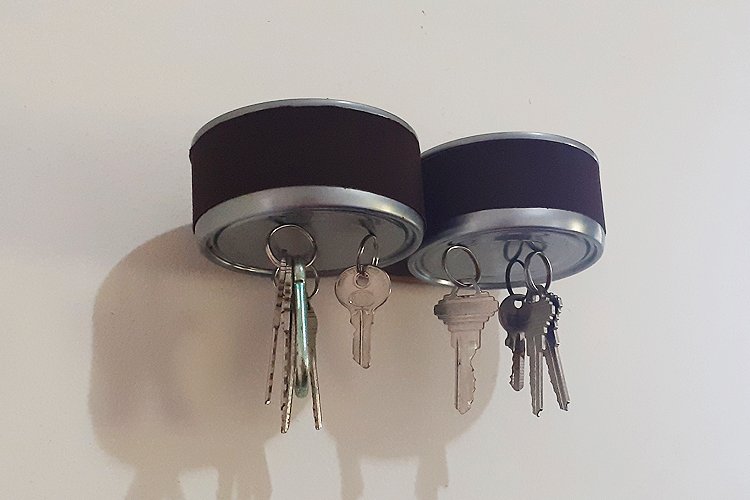
Step 6
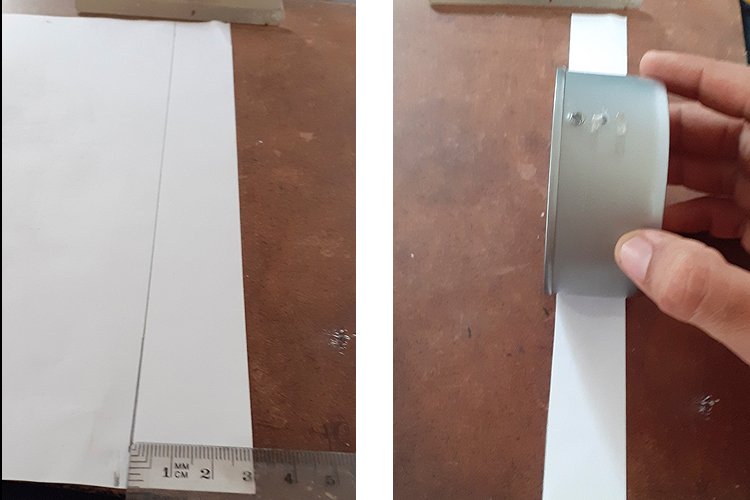
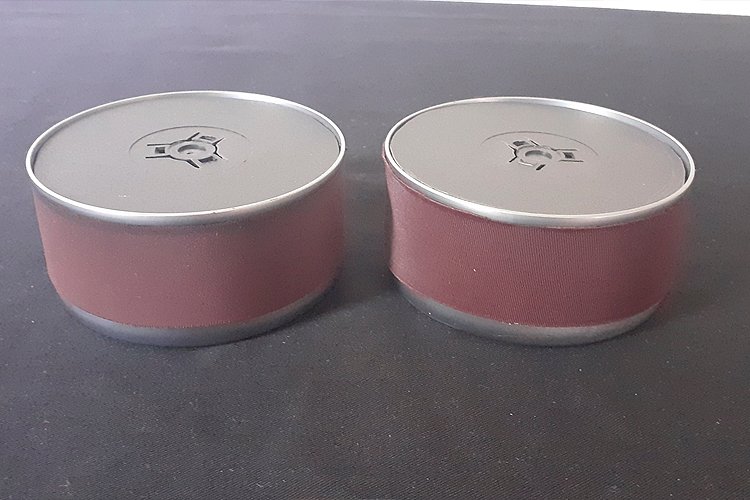
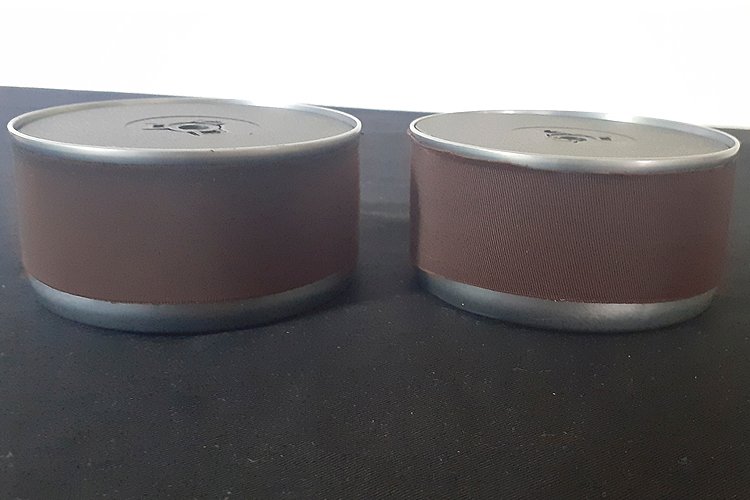
• For the outside of the cans, put brown elastic fabric to match the furniture.
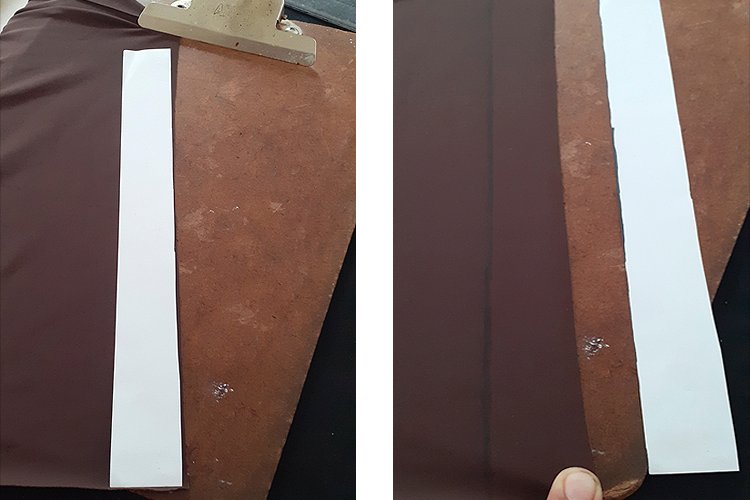
• Cut a strip of paper the thickness of the can to use as a pattern on the fabric.
• Cut the fabric, sew the ends and place them on the cans.
Paso 6
• para el exterior de las latas le coloque tela elástica de color marrón para que hiciera juego con los muebles.
• Corte una tira de papel del grosor de la lata para utilizarlo como patrón sobre la tela.
• Corte la tela, coci sus extremos y se los coloque sobre las latas.


Step 7
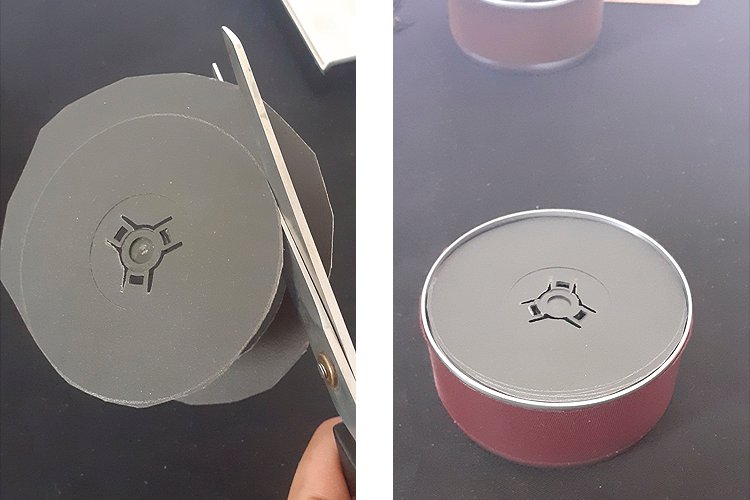
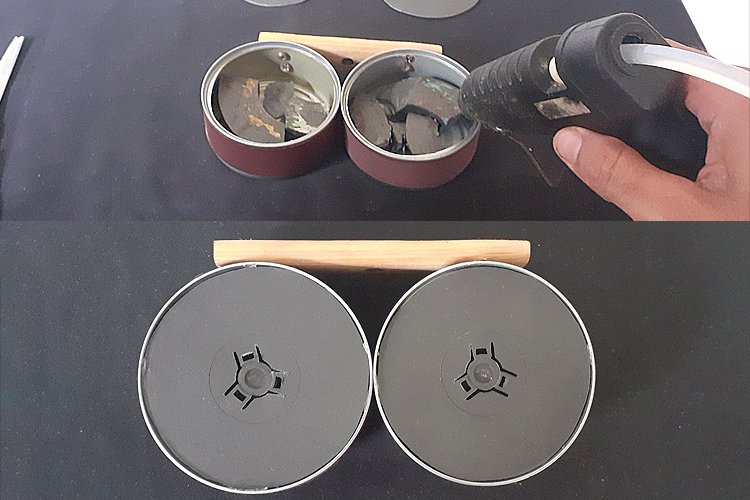
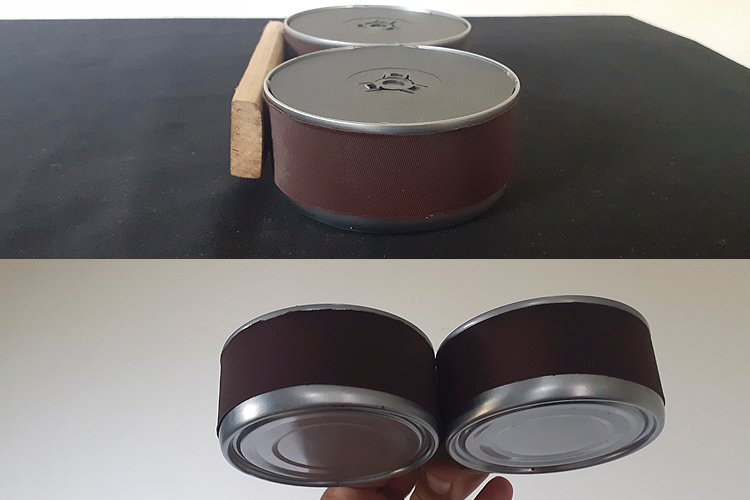
• With the holes made and ready to assemble, we proceed to place the magnets inside the cans.
• We make the upper covers and glue them with silicone.
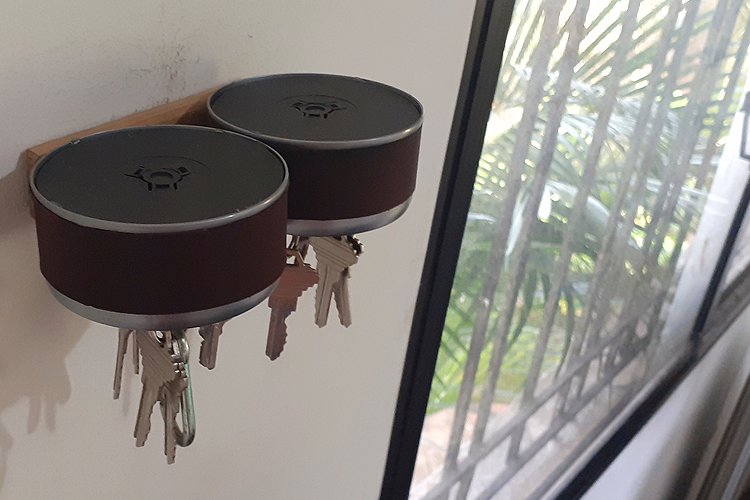
• We join all the parts (wood and cans).
• And we proceed to screw the wood into the wall. (or if you want you can use silicone).
Paso 7
• Con los hoyos hechos y listo para armar, procedemos a colocar los imanes dentro de las latas.
• Fabricamos las tapas superiores y las pegamos con silicón.
• Unimos todas las partes (madera y latas).
• Y procedemos a atornillar la madera en la pared. (o si lo desea puede usar silicón).

Well my friends this was my post I hope you enjoy it. Until the next post, greetings!
Bueno mis amigos este fue mi post espero lo disfruten. ¡Hasta el próximo post saludos!

Me encanta tus propuestas prácticas, versátiles, innovadoras y sobre todo de buen gusto amigo @carlossteele gracias por compartir.
Me alegra que les guste y gracias a ustedes. 👍🏼
Felicitaciones carlos, esa idea quedo fantástica, sigue así.
Hola, muchas gracias amiga @janettbrito. Me alegro le haya gustado. Saludos.
Chamo esto me cae como anillo al dedo jajajaja... Fantástico invento!! No se me hubiera ocurrido jamás. Gracias por compartir esta idea... Éxitos!
¡Genial Bro me alegra mucho que te te haya gustado espero le saques provecho que lo disfrutes!
Congratulations @carlossteele! You have completed the following achievement on the Hive blockchain and have been rewarded with new badge(s) :
Your next target is to reach 1500 upvotes.
You can view your badges on your board and compare yourself to others in the Ranking
If you no longer want to receive notifications, reply to this comment with the word
STOPCheck out the last post from @hivebuzz:
Support the HiveBuzz project. Vote for our proposal!