Portada en polish app.
¿Sabes lo que es un Pin para tortas?, es un aplique decorativo para tortas, en este caso de cartulina, pero que puede ser de acrílico u otro material, que a diferencia de los modelos que sólo son cortes con algún motivo o diseño en especial, este tiene un palito pegado horizontalmente en la parte trasera para que se adhiera bien al glaseado de la torta. Esto es funcional porque el pin se usa en la parte frontal del ponqué.
Para este Pin de Minnie Mouse, Tenía la silueta de la famosa ratoncita y el lazo guardados, solo les hice un borde de 1,5 cm a la cabeza de Minnie y al lacito, luego las separé, teniendo un total de 4 piezas.
Do you know what a cake pin is ?, it is a decorative applique for cakes, in this case made of cardboard, but it can be made of acrylic or other material, and unlike the models that are only cut with a special motif or design, this one has a stick glued horizontally on the back so that it adheres well to the icing of the cake. This is functional because the pin is used on the front of the cake.
For this Minnie Mouse pin, I had the silhouette of the famous mouse and the bow saved, I only made a 1.5 cm border to Minnie's head and the bow, then I separated them, having a total of 4 pieces.
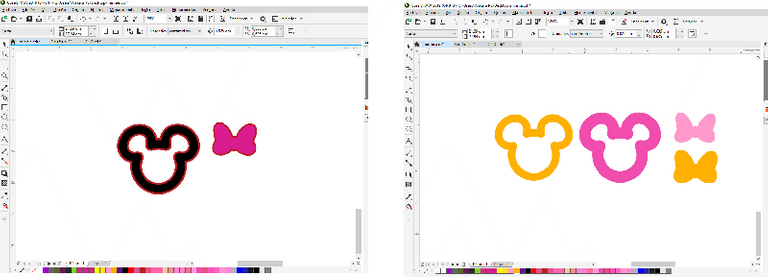
Es importante saber que para cortar con plotter, hay que utilizar un programa vectorial, yo uso corel Draw X9,y al exportar, debe hacerse en un formato como Svg, pdf o el que permita leer las líneas de corte el programa que usa el plotter.
Puedes realizarlo con tijeras imprimiendo los moldes, marcándolos en la cartulina y cortando con cuidado y paciencia para que quede prolijo.
It is important to know that to cut with a plotter, you must use a vector program, I use Corel Draw X9, and when exporting, it must be done in a format such as Svg, pdf or the one that allows to read the cutting lines the program that uses the plotter.
You can do it with scissors by printing the molds, marking them on the cardboard and cutting with care and patience so that it is neat.
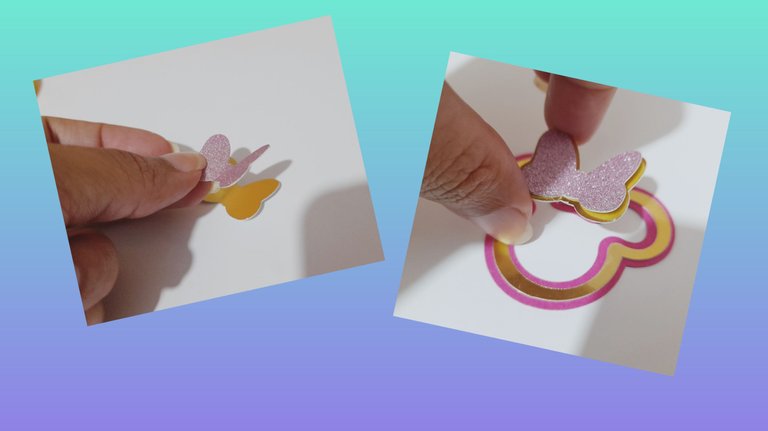
Primero corté la Silueta de la cabeza más delgada en cartulina dorada. Lo retire con delicadeza del tapete para luego cortar la segunda silueta, mas gruesa de color rosado.
First I cut the thinner head silhouette out of gold cardstock. I gently removed it from the mat and then cut out the second, thicker pink silhouette.
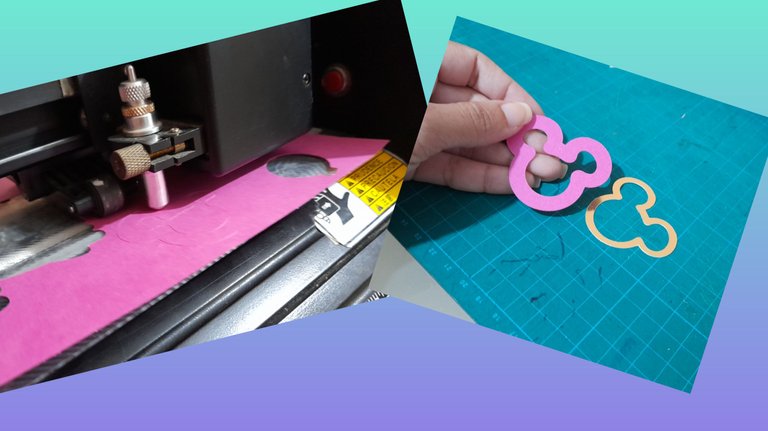
Una ver cortadas ambas partes se pegan centradas una con respecto a la otra, dejando arriba la parte más delgada (dorada).
Once both parts are cut, they are glued centered with respect to each other, leaving the thinner (golden) part on top.
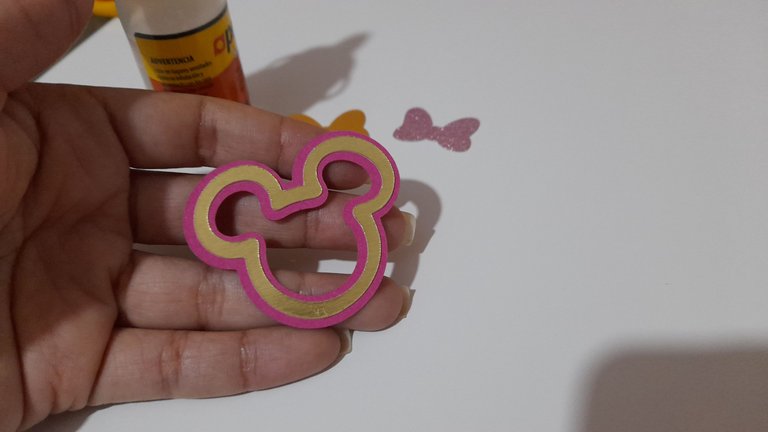
Para cortar el lazo, primero corté en el plotter la base que sería color dorado y luego configuré el plotter para hacer más presión en el corte, ya que la cartulina escarchada es más gruesa. Usé un color rosa claro para que contraste un poquito con el rosado de la silueta de la cabeza de Minnie que era un tono más fucsia.
To cut the bow, I first cut the gold base on the plotter and then I set the plotter to make more pressure on the cut, since the frosted cardboard is thicker. I used a light pink color to contrast a little with the pink of Minnie's head silhouette, which was a more fuchsia tone.
Las pegué con un punto de silicon frío en el centro del lacito y doble delicadamente el lazo para darle un poquito de levantamiento y no se vea tan recto.
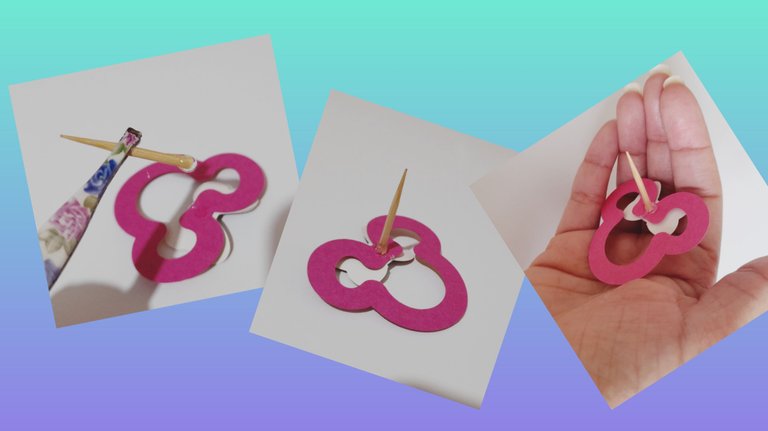
Ahora vamos a convertirlo en un Pin!
Sencillo!, para esto sólo debemos cortar la punta de un palillo de aprox 2 cm de largo. donde será colocado coloque un puntico de silicón frío y en la parte del palillo donde fue cortado una cantidad parecida a una gota pero sin pegar aún, es preferible esperar al menos 1 par de minutos ya que si lo colocamos inmediatamente se caerá el palito, esto porque el silicón está muy líquido aún, yo cuando lo coloqué le puse un soporte con un pedacito de cartulina que doblé para que lo aguantara mientras secara y listo!. Tenemos un pin para decorar la torta a los lados sin temor de que se despegue del glaseado.
I glued them with a dot of cold silicone in the center of the bow and gently folded the bow to give it a little lift so it doesn't look so straight.
Now let's turn it into a pin!
Simple, for this we only need to cut the tip of a stick about 2 cm long. where it will be placed place a dot of cold silicone and in the part of the stick where it was cut an amount similar to a drop but not yet glued, it is preferable to wait at least 1 couple of minutes because if we place it immediately the stick will fall, this because the silicone is still very liquid, when I placed it I put a support with a piece of cardboard that I folded to hold it while it dried and that's it! We have a pin to decorate the sides of the cake without fear that it will come off the icing.
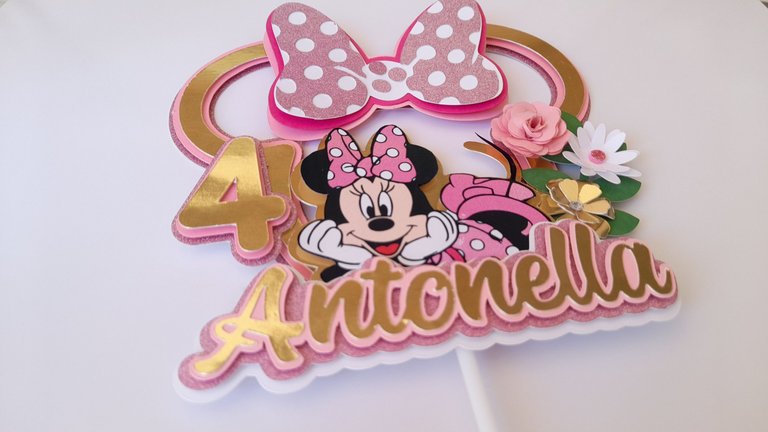
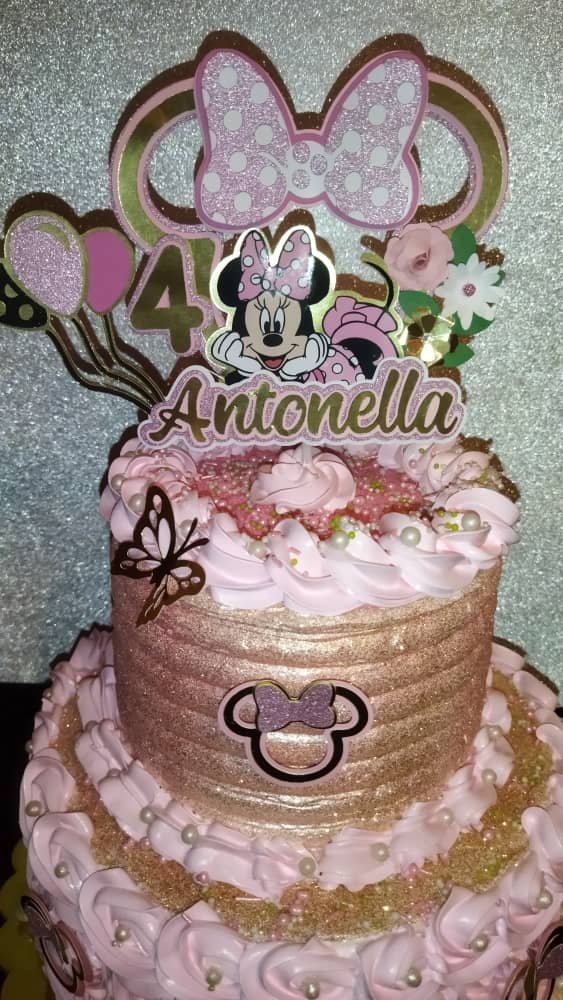
Quiero aprovechar de mostrarles el Topper principal que hice, lamentablemente no tomé foto del paso a paso pero les comparto como quedó, y luego la torta con el topper y los Pin de Minnie!
I want to take this opportunity to show you the main topper I made, unfortunately I didn't take a picture of the step by step but I'll share with you how it turned out, and then the cake with the topper and the Minnie pins!
Espero les haya gustado la técnica de agregar el palillo, siempre hay que advertir a los invitados que la torta tiene elementos dentro de ella que pueden representar peligro, se corre el riesgo de que se despegue por la humedad, por ello no sólo debemos comunicarlo si no también pegar bien los elementos y evitar un desagradable momento.
Saludos para todos!
I hope you liked the technique of adding the toothpick, we must always warn the guests that the cake has elements inside it that may represent a danger, there is a risk that it may come off due to humidity, so we must not only communicate it but also stick the elements well and avoid an unpleasant moment.
Greetings to all!
Fotos: Todas las fotos son de mi propiedad , tomadas desde mi teléfono Samsung A21s
Translated with www.DeepL.com/Translator
The rewards earned on this comment will go directly to the people( @corinadiaz ) sharing the post on Twitter as long as they are registered with @poshtoken. Sign up at https://hiveposh.com.
Muy bien explicado todo.. Tienes lindo arte en tus manos.
Felicitaciones por tan bonito post.
Gracias 😘
Congratulations, your post has been upvoted by @dsc-r2cornell, which is a curating account for @R2cornell's Discord Community. We can also be found on our hive community & peakd as well as on my Discord Server
Felicitaciones, su publication ha sido votado por @dsc-r2cornell. También puedo ser encontrado en nuestra comunidad de colmena y Peakd así como en mi servidor de discordia
¡Felicidades! Esta publicación obtuvo upvote y fue compartido por @la-colmena, un proyecto de Curación Manual para la comunidad hispana de Hive que cuenta con el respaldo de @curie.
Si te gusta el trabajo que hacemos, te invitamos a darle tu voto a este comentario y a votar como testigo por Curie.
Si quieres saber más sobre nuestro proyecto, acompáñanos en Discord: La Colmena.
Congratulations @corinadiaz! You have completed the following achievement on the Hive blockchain and have been rewarded with new badge(s):
Your next target is to reach 30000 upvotes.
You can view your badges on your board and compare yourself to others in the Ranking
If you no longer want to receive notifications, reply to this comment with the word
STOPCheck out the last post from @hivebuzz:
Support the HiveBuzz project. Vote for our proposal!
Thank you for sharing this amazing post on HIVE!
Your content got selected by our fellow curator @rezoanulvibes & you just received a little thank you via an upvote from our non-profit curation initiative!
You will be featured in one of our recurring curation compilations and on our pinterest boards! Both are aiming to offer you a stage to widen your audience within and outside of the DIY scene of hive.
Join the official DIYHub community on HIVE and show us more of your amazing work and feel free to connect with us and other DIYers via our discord server: https://discord.gg/mY5uCfQ !
If you want to support our goal to motivate other DIY/art/music/homesteading/... creators just delegate to us and earn 100% of your curation rewards!
Stay creative & hive on!
Sabes? Nunca me he puesto en esa tarea de hacerles pin a las tortas de mis hijos. Con el dibujo en papel de arroz he resuelto. Ahora voy a tomar tu idea para hacerles los de ellos. Cumplen en febrero y abril, asi que tengo tiempo para el ensayo y error
Es una nota! Una amiga pone a su niño a que haga dibujos del motivo de su cumpleaños, y se los acomoda para decorar la torta!, los hace sentir orgullosos 🙃 le quedan finos!!!!