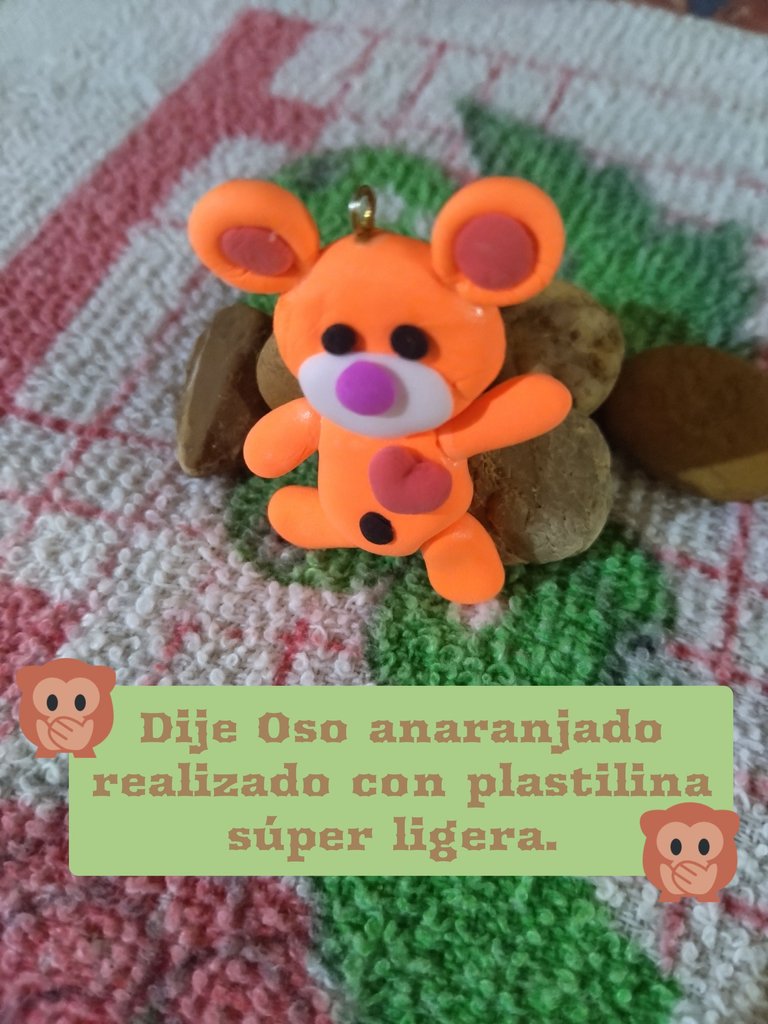
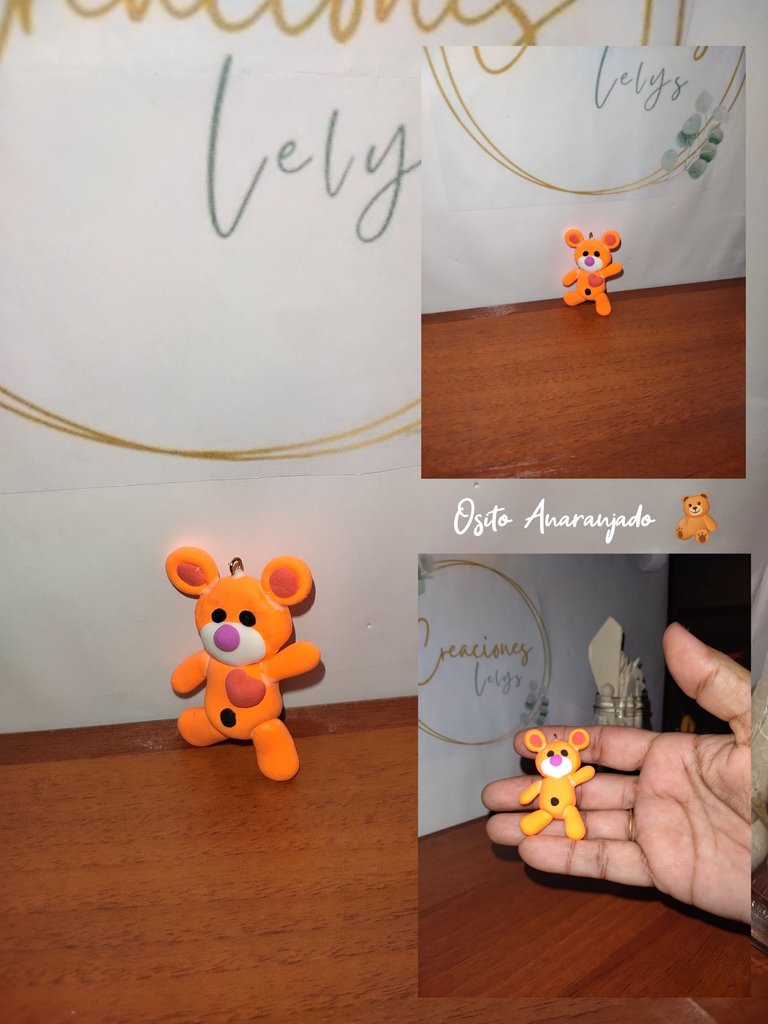
Oso anaranjado realizado con plastilina súper ligera. Probando un nuevo insumo en mis creaciones.
Hola a todos por aquí, deseo de todo corazón que se sientan muy bien. Yo obligatoriamente he tenido que disminuir mis horas de trabajo manual para poder cumplir con el tratamiento y que se mejore mi mano. Es la primera vez que un dolor de mano perdura por tanto tiempo. Sin embargo estoy tratando de realizar manualidades que no ameriten de gran esfuerzo. La que les traigo el día de hoy es la primera de varias que estoy por presentarles.
Este ha sido el primer modelo o figura que realicé con un nuevo insumo que recientemente adquirí. Me está gustando trabajarlo, aunque no domino aún la técnica de moldeado. Después que realicé este osito me animé con uno más pequeño, el cual podrán volver a ver aquí, disfruté mucho haciendo las dos creaciones 🙋
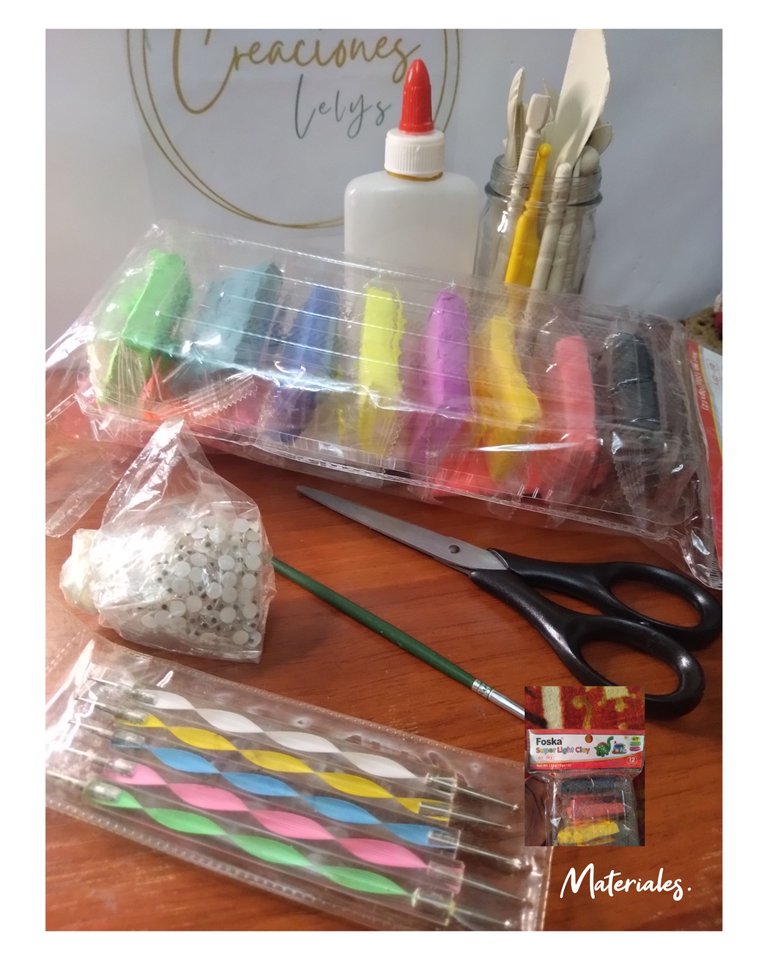
Materiales.
🍄 Para realizar este osito anaranjado usé los siguientes materiales: Plastilina súper ligera, Made un China. Pegamento blanco. Tijeras. Estecas. Pincel.
Procedimiento.
🍄 Lo primero que realicé fue el amasado de la plastilina anaranjada. Con ella elaboré la cabeza, el cuerpo y las extremidades del osito.
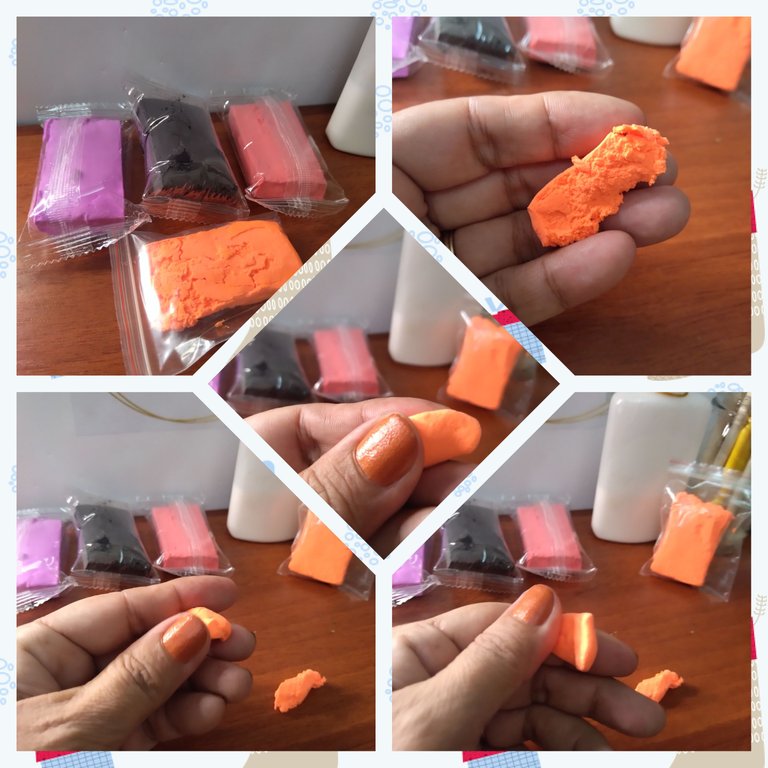
🍄 Toda esta creación empezó tipo ensayo y error. Al principio había sentido áspera la plastilina, pero luego esta se fue suavizando de tal manera que me provocó hacer muchísimas cosas con ella. No es necesario humedecer las manos, solo basta tenerlas limpias y secas. Para que tengan más o menos una idea, la sentí como una goma espuma derretida. Muy elástica y blanda.
A medida que fui elaborando las formas me sentí más en confianza. Así hice la cara del osito. También el cuerpo y las orejas. Trabajé muy desordenado realmente. Me sentí como niña con juguete nuevo queriendo conocer y jugar con todos a la vez. Además no había usado las estecas que también compré hace unos meses atrás. TENGO MUCHO POR APRENDER sobre este tema todavía.
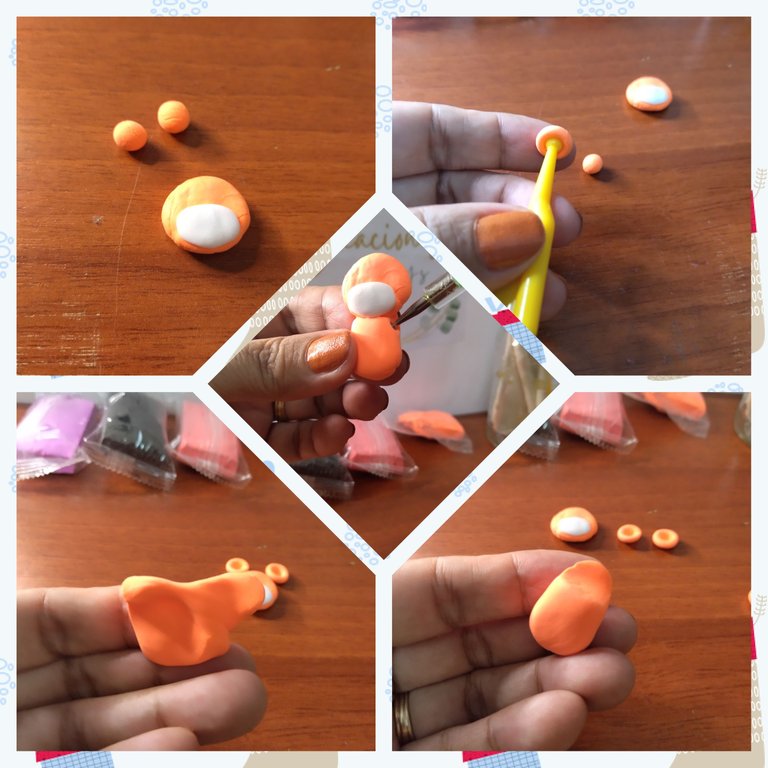
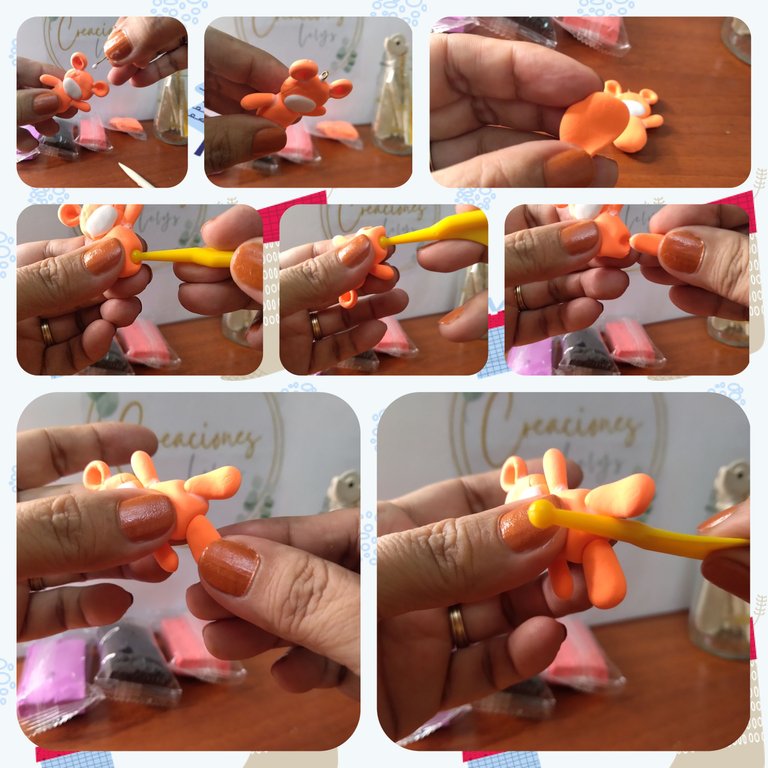
🍄 El pedacito de plastilina anaranjada lo dividí en varios trocitos pequeños, con cada uno realicé una parte del osito; los brazos, cabeza, piernas y cuerpo. A todas las partes le fui dando forma con la yema de los dedos y con las herramientas que tenía a la mano. Primero las hice bolitas, luego las aplané y fui dando la forma requerida. Para unir cada pieza en su lugar usé pegamento blanco. ES IMPORTANTE estar seguro al momento de fijar cada pieza porque se pega instantáneamente.
La plastilina blanca está súper suave, la más suave de todas con la que trabajé el osito. Hacer figuras pequeñas 😊 siempre me ha emocionado. Pienso que si soy capaz de hacerlas de este tamaño sería pan comido hacerlas grandes.
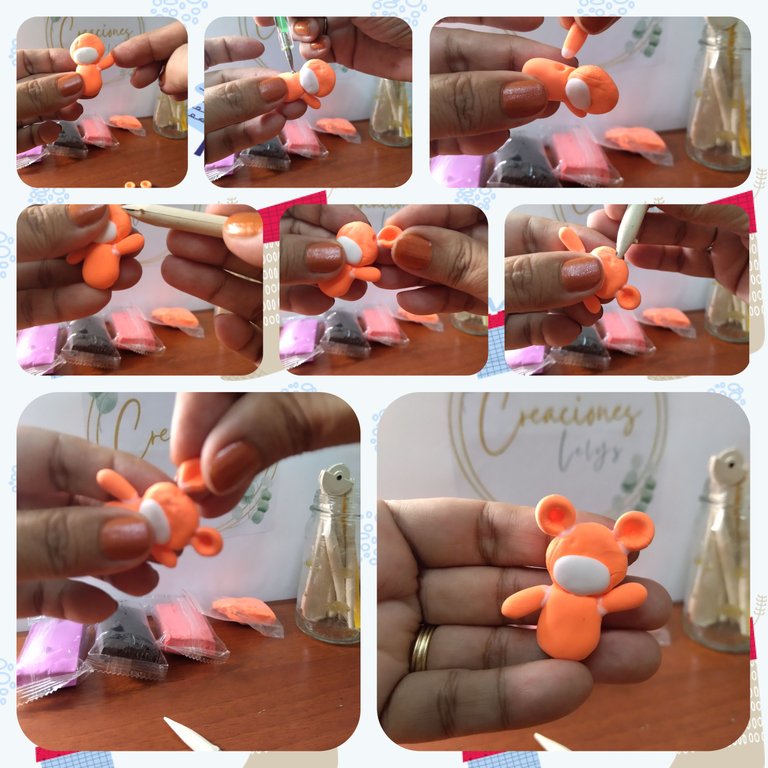
🍄 Con sumo cuidado fui pegando cada pieza en su lugar. Tenía en mi mente la imagen de un 🐻 oso sencillo y fácil de hacer. Lo hice anaranjado porque este paquete de plastilina solo trae doce 🌈 colores, no tiene marrón, así que elegí hacerlo anaranjado para que así se viera más llamativo. Sí se pueden mezclar las plastilinas y obtener otros colores, pero para ese momento no quise hacerlo.
🍄 Para que cada pieza estuviera más segura en su sitio realicé previamente una hundidura en la base o cuerpo. Me ayudé con las estecas para lograr acomodar cada una. Al ver que ya se estaba pareciendo a un 🐻 me emocioné mucho. Hay que trabajar con mucho cuidado, pero una vez fijas es difícil que se despeguen las partes.
🍄 Tenía pensado colocarle ojos móviles, pero no me gustó mucho la apariencia, así que tomé un poquito de plastilina negra e hice dos pelotitas, las coloqué sobre el espacio de su cara cerca de la naricita morada.
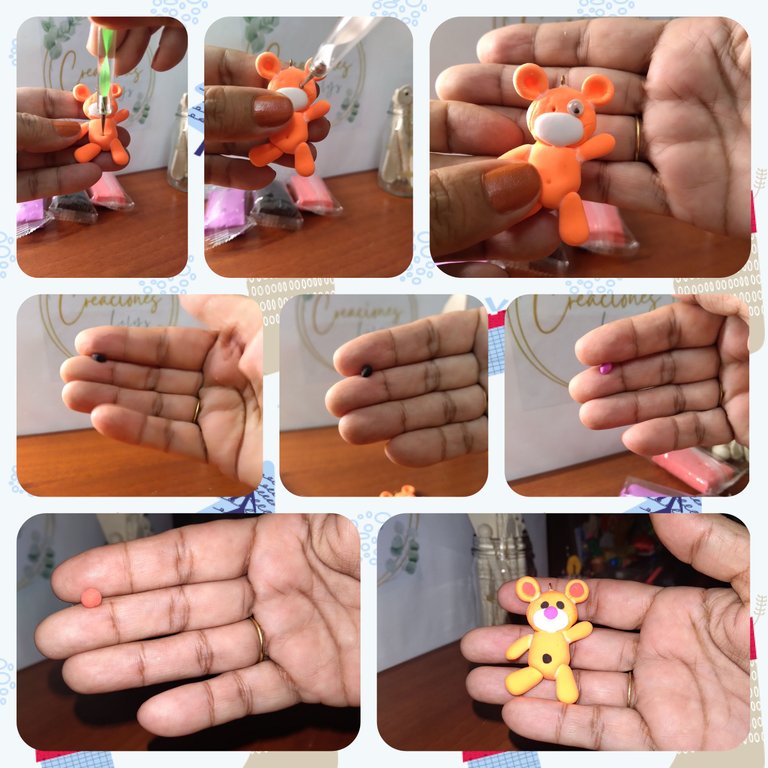
🍄 Como pueden ver también le puse un ombligo 😃 No sabía que uso podía darle por lo que agarré un alfiler de bisutería y lo atravesé con un poquito de pegamento sobre la cabeza del oso. Me serviría como dije al menos. Después de todo sí pude moldear algo con este nuevo producto. ¿Cómo lo ven? ¿Les gustó?
Todas las fotos son de mi propiedad. Edité con Polish. Usé el traductor de Deelp. Muchas gracias por tu apoyo. Bendiciones 🙏.
English.
Orange bear made with super light plasticine. Trying a new input in my creations.
Hello to everyone around here, I hope you all feel very well. I have had to reduce my hours of manual work to be able to comply with the treatment and that my hand gets better. It is the first time that a hand pain has lasted for so long. However, I am trying to make crafts that do not require a great effort. The one I bring you today is the first of several that I am about to present to you.
This has been the first model or figure that I made with a new input that I recently acquired. I'm enjoying working with it, although I haven't mastered the molding technique yet. After I made this teddy bear I decided to make a smaller one, which you can see again here, I really enjoyed making both creations 🙋
Materials.
🍄 To make this orange teddy bear I used the following materials: super light plasticine, Made un China. White glue. Scissors. Scissors. Brush.
Procedure.
🍄 The first thing I did was to knead the orange plasticine. With it I elaborated the head, the body and the extremities of the teddy bear.
🍄 All this creation started with trial and error. At the beginning I had felt the plasticine rough, but then it got softer and softer so that it made me do lots and lots of things with it. It is not necessary to wet your hands, just keep them clean and dry. To give you more or less an idea, it felt like melted foam rubber. Very elastic and soft.
As I worked out the shapes I felt more confident. That's how I made the face of the bear. Also the body and the ears. I worked very messy really. I felt like a child with a new toy wanting to meet and play with all of them at once. Plus I hadn't used the stecas that I also bought a few months ago. I HAVE A LOT TO LEARN about this topic yet.
🍄 The little piece of orange plasticine I divided it into several small pieces, with each one I made a part of the bear; the arms, head, legs and body. I shaped all the parts with my fingertips and with the tools I had at hand. First I made little balls, then I flattened them and gave them the required shape. To attach each piece in its place I used white glue. It is IMPORTANT to be sure when attaching each piece because it sticks instantly.
The white plasticine is super soft, the softest of all with which I worked the teddy bear. Making small figures 😊 has always excited me. I think if I am able to make them this size it would be a piece of cake to make them big.
🍄 I carefully glued each piece in place. I had in my mind the image of a simple and easy to make 🐻 bear. I made it orange because this package of play dough only comes in twelve 🌈 colors, there is no brown, so I chose to make it orange to make it look more eye-catching. Yes you can mix the play dough and get other colors, but for that moment I didn't want to do that.
🍄 So that each piece would be more secure in its place, I previously made a hollow in the base or body. I helped myself with the stecas to accommodate each one. When I saw that it was already looking like a 🐻 I was very excited. You have to work very carefully, but once fixed it is difficult to get the parts unstuck.
🍄 I had planned to put moving eyes, but I didn't really like the look, so I took a little bit of black plasticine and made two little balls, I placed them on the space of his face near the purple nose.
🍄 As you can see I also put a belly button 😃 I didn't know what use I could put it to so I grabbed a costume jewelry pin and stuck it through with a little bit of glue on the bear's head. It would serve me well as I said at least. After all, I was able to mold something with this new product. How do you see it, did you like it?
All photos are my property. I edited with Polish. I used Deelp translator. Thank you very much for your support. Blessing nes 🙏.
Buen día, te ha quedado genial amiga...es realmente hermoso, gracias por compartir ☺️
Hola 👋 muchas gracias a ti por pasar por aquí. Un abrazo 🤗
Super hermoso te quedó Lelys, tierno y parece fácil de hacer! Me encanta, es gracioso!
Trabajaste alguna vez la arcilla sin horno?
Buenos días!
Hola 👋 buenos días. Gracias 😌
Trabajé una arcilla hace un tiempo, hice algunas figuras y macetas.
También yo pero fue hace algunos años, se me daba bien jaja
Ay qué bueno. Yo sigo aprendiendo, no tengo mucha habilidad para moldear, pero me gusta mucho hacer figuras.
Yo lo hacía cuando estaba en Argentina y por diversión, me gustaba mucho trabajar la arcilla, el agua... se seca al aire y eso es lo mejor, después podía pintar lo que hice y barnizarlo, era genial.
Siiii. Me encantaría tener mucho material y tiempo para hacer más manualidades. Algunas son muy relajantes.
Ahora por tema de espacio, no puedo hacerlo pero es muy relajante!
Ay que recuerdos me has traido cuando amaba jugar con plastilina, aunque yo hacia atrocidades con ella pero bueno jaja luego juntaba todos los colores y creaba esa masa gris horrible 😂😂
Esta precioso el osito, es muy tierno ❤️ ojala tu mano mejore lo mas pronto posible, te deseo lo mejor 🌹
Hola. Igualmente yo. Después que hacía la masa me arrepentía 😂
Muchas gracias por apreciar está labor. Aprecio tu visita.
Que hermoso y tierno, me encanta 😍, felicidades un muy hermoso trabajo.
Hola @emmaris 👋 muchas gracias. Me alegra saber que te gustó este osito ☺️
Muchas gracias por el apoyo 😊
Increíblemente bello, está muy cuchi
Muchas gracias 😊
Que trabajo tan bien ejecutado te felicito y que Dios te bendiga
Hola amiga. Muchas gracias 😊
Congratulations, your post has been upvoted by @dsc-r2cornell, which is the curating account for @R2cornell's Discord Community.
Enhorabuena, su "post" ha sido "up-voted" por @dsc-r2cornell, que es la "cuenta curating" de la Comunidad de la Discordia de @R2cornell.
Thanks You 👋