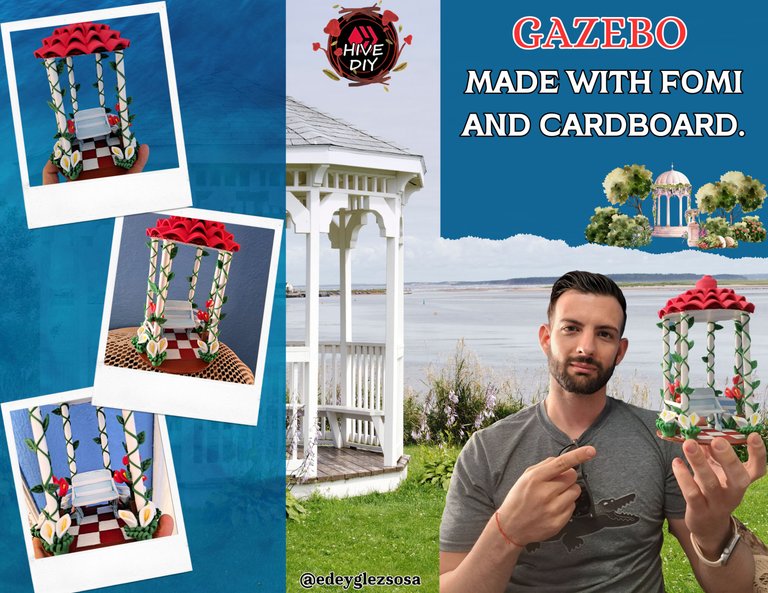
Hello friends creators, today I bring you a craft that comes with some tips and a curious anecdote. It turns out that there is a colonial style structure which is known in different ways both inside and outside the country. The structure I am referring to is the "Gazebo" also known as "Glorieta". If you still don't know what building I'm talking about, let me tell you that it is found in many parks around the world and is a very popular place to celebrate weddings.
The problem is that in much of America and the Spanish-speaking world the traffic circle is a road structure that in my country is called a rotunda. I know that this happens with many things that are known by another name, but how could I imagine that this difference would cause debate among my relatives. In the end we came to an agreement which is that everyone will call it what they want anyway, not that it will change anything.
But let's focus and start with the tutorial.
Spanish Version Here
Hola amigos creadores, el día de hoy les traigo una manualidad que viene acompañada con algunos consejos y una curiosa anécdota. Resulta ser que hay una estructura de estilo colonial a la cual se le conoce de distintas formas tanto dentro y fuera del país. La estructura a la cual estoy haciendo referencia es el “Gazebo” también conocido como “Glorieta”. Si todavía no sabes de qué edificación estoy hablando, déjame decirte que se encuentra en numerosos parques de todo el mundo y es un lugar muy popular para celebrar bodas.
El problema es que en gran parte de América y el mundo hispanohablante la glorieta es una estructura vial que en mi país se le llama rotonda. Yo sé que esto pasa con muchísimas cosas a las cuales se les conoce por otro nombre, pero como iba a imaginar que esta diferencia causaría debate entre mis familiares. Al final llegamos a un acuerdo el cual consiste en que cada cual lo llamará como quiera de todas formas no es que eso vaya a cambiar algo.
Pero bueno centrémonos y comencemos con el tutorial.
 |
 |
 |
 |
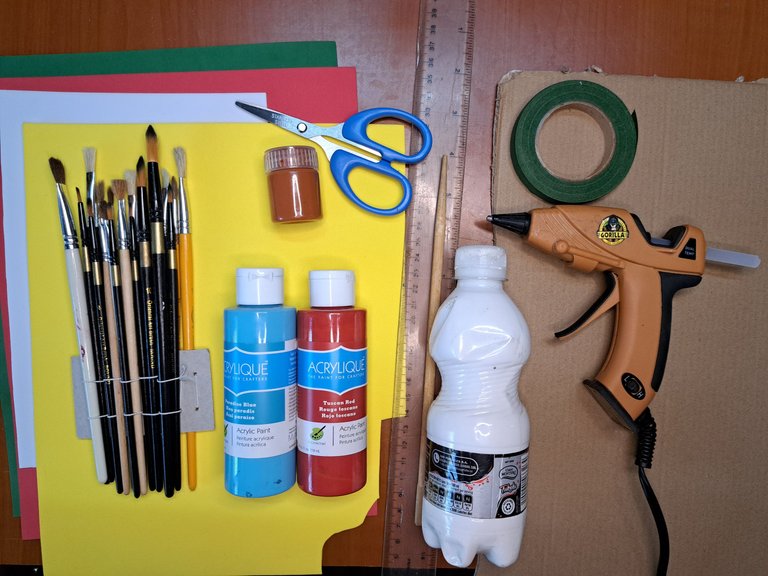
✂️ Materials // Materiales ✂️
| ✔️ Fomi yellow, white, red and green | ✔️ Fomi amarillo, blanco, rojo y verde |
| ✔️ Cardboard | ✔️ Cartón |
| ✔️ Ruler and black marker | ✔️ Regla y marcador negro |
| ✔️ Scissors | ✔️ Tijeras |
| ✔️ Hot silicone | ✔️ Silicona caliente |
| ✔️ Paintbrushes | ✔️ Pinceles |
| ✔️ White, blue, red and brown acrylic paint | ✔️ Pintura acrílica blanca, azul roja y café |
| ✔️ Floral tape | ✔️ Cinta floral |
| ✔️ Chopstick or skewer stick | ✔️ Palillo chino o de brocheta |
📋 Step by step // Paso a paso 📋
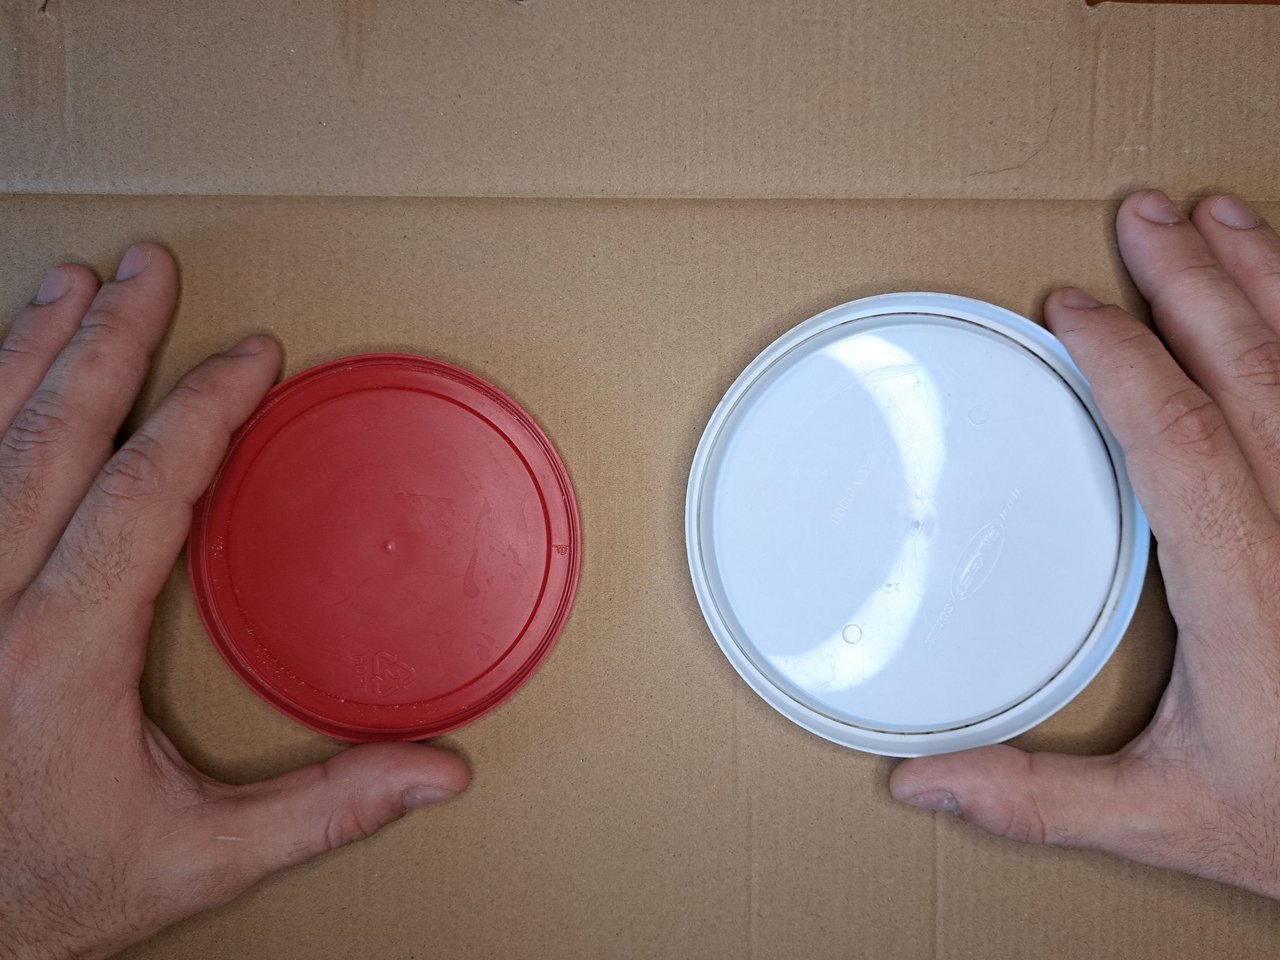
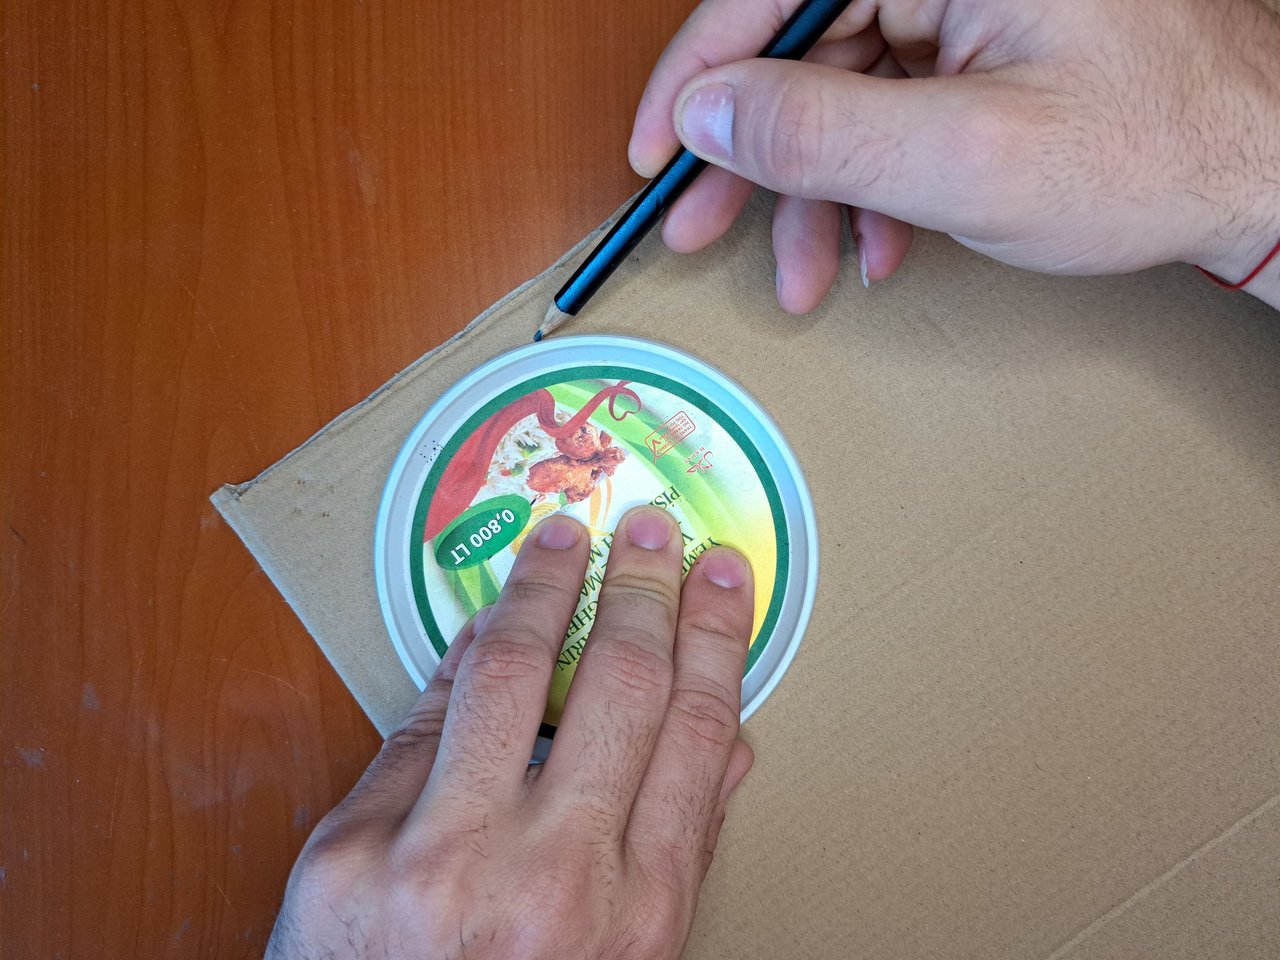
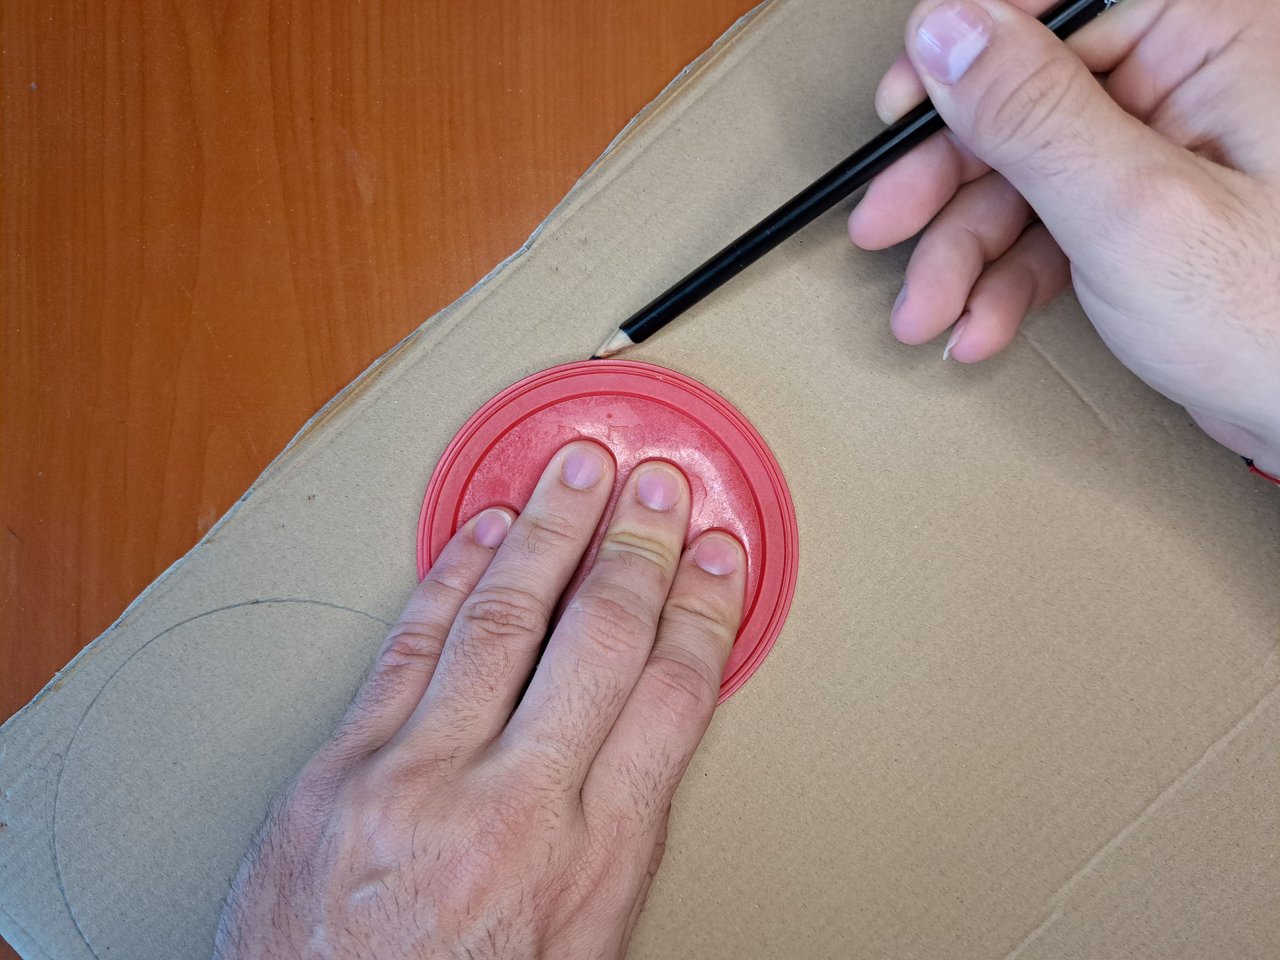
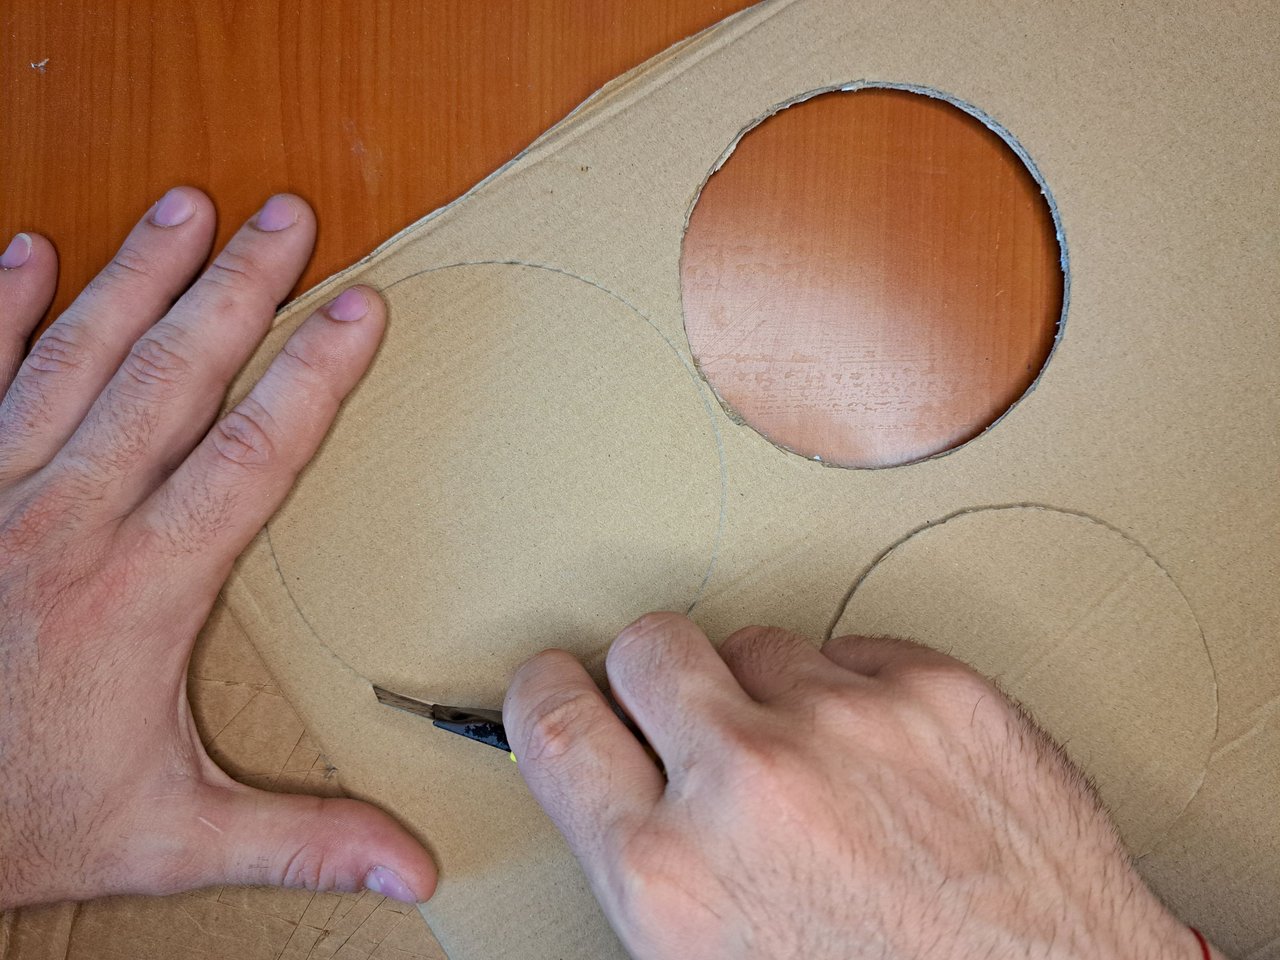
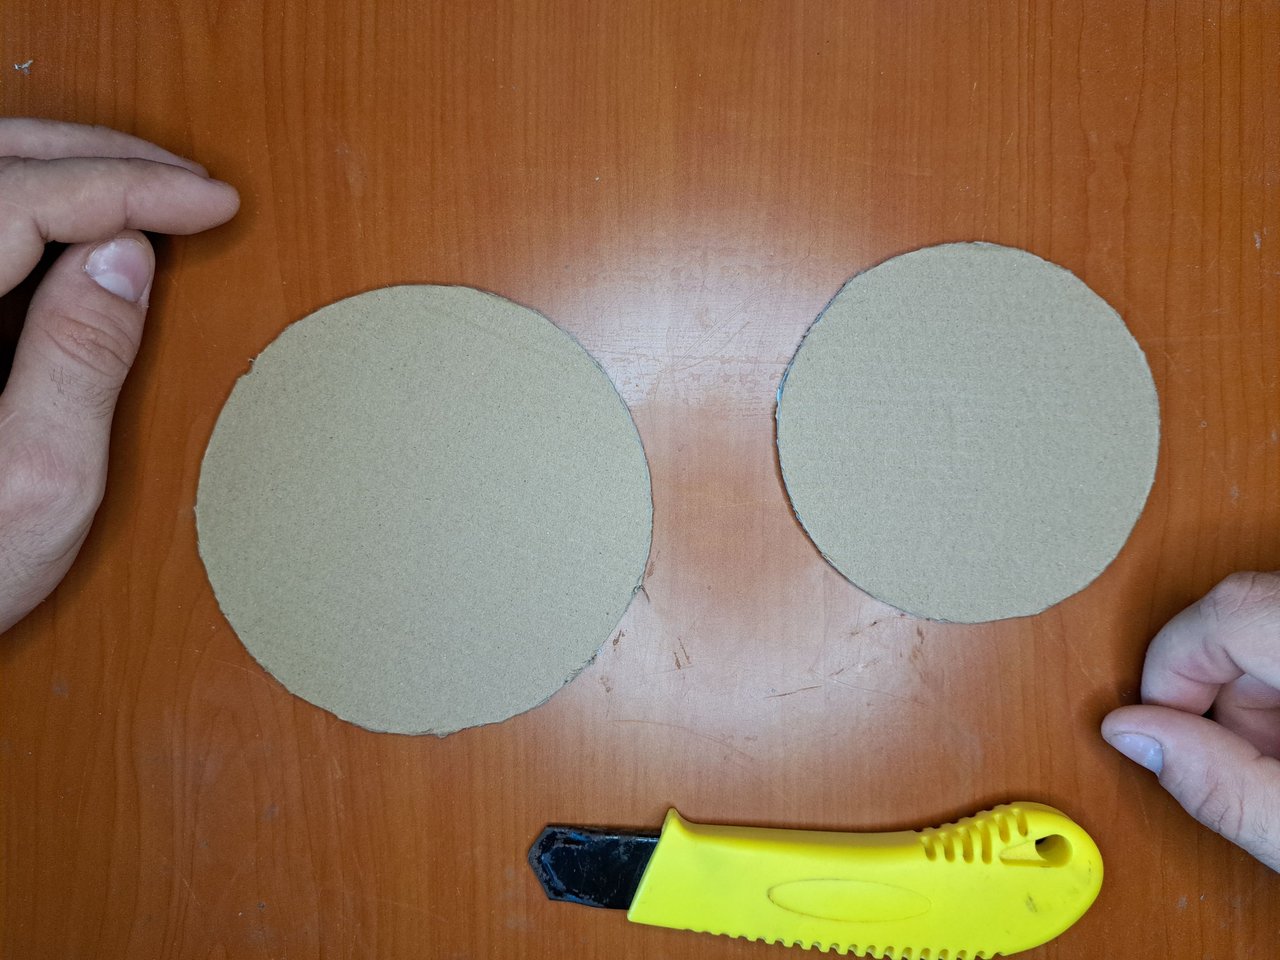
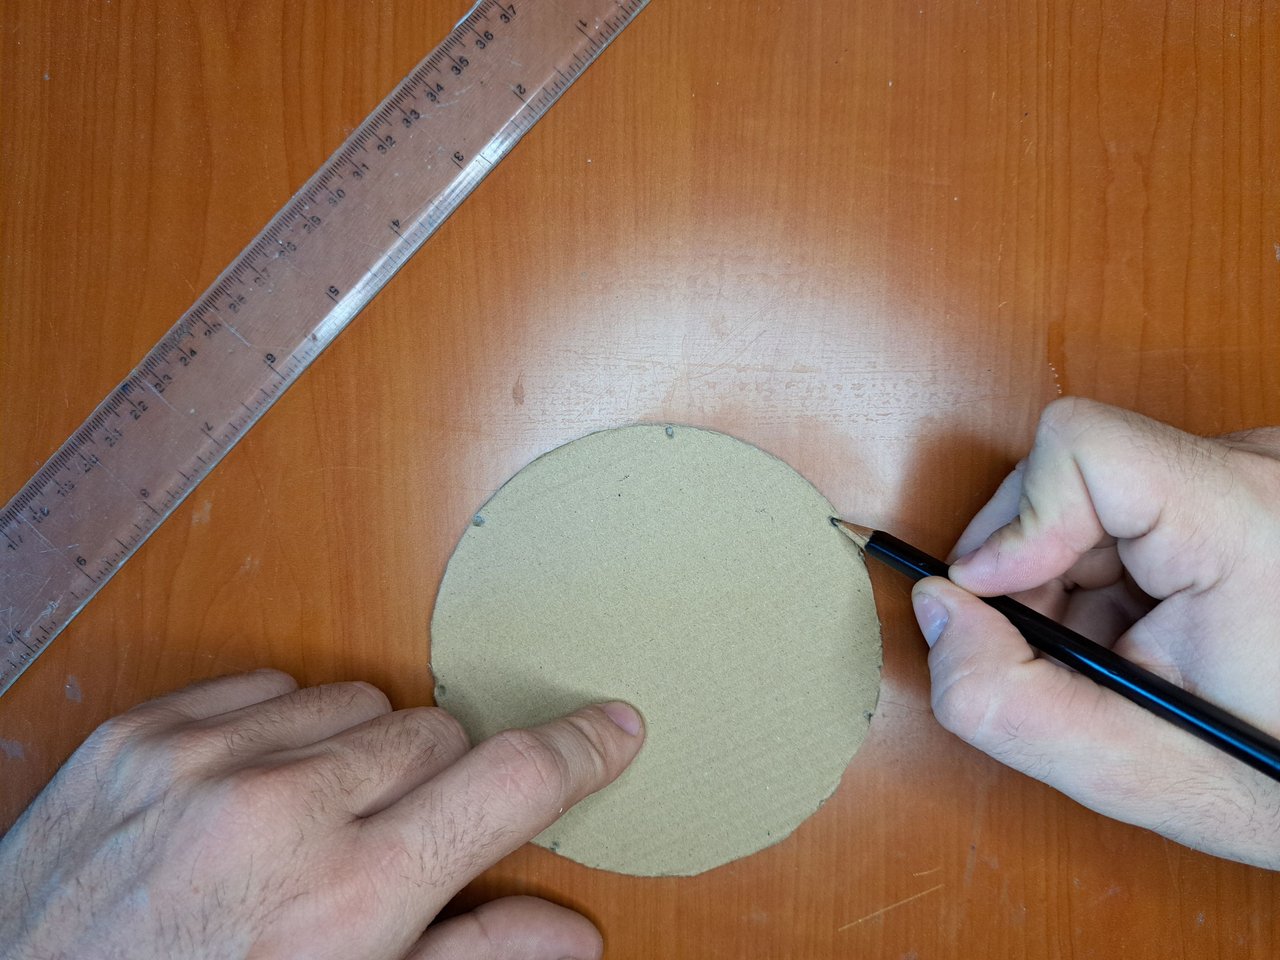
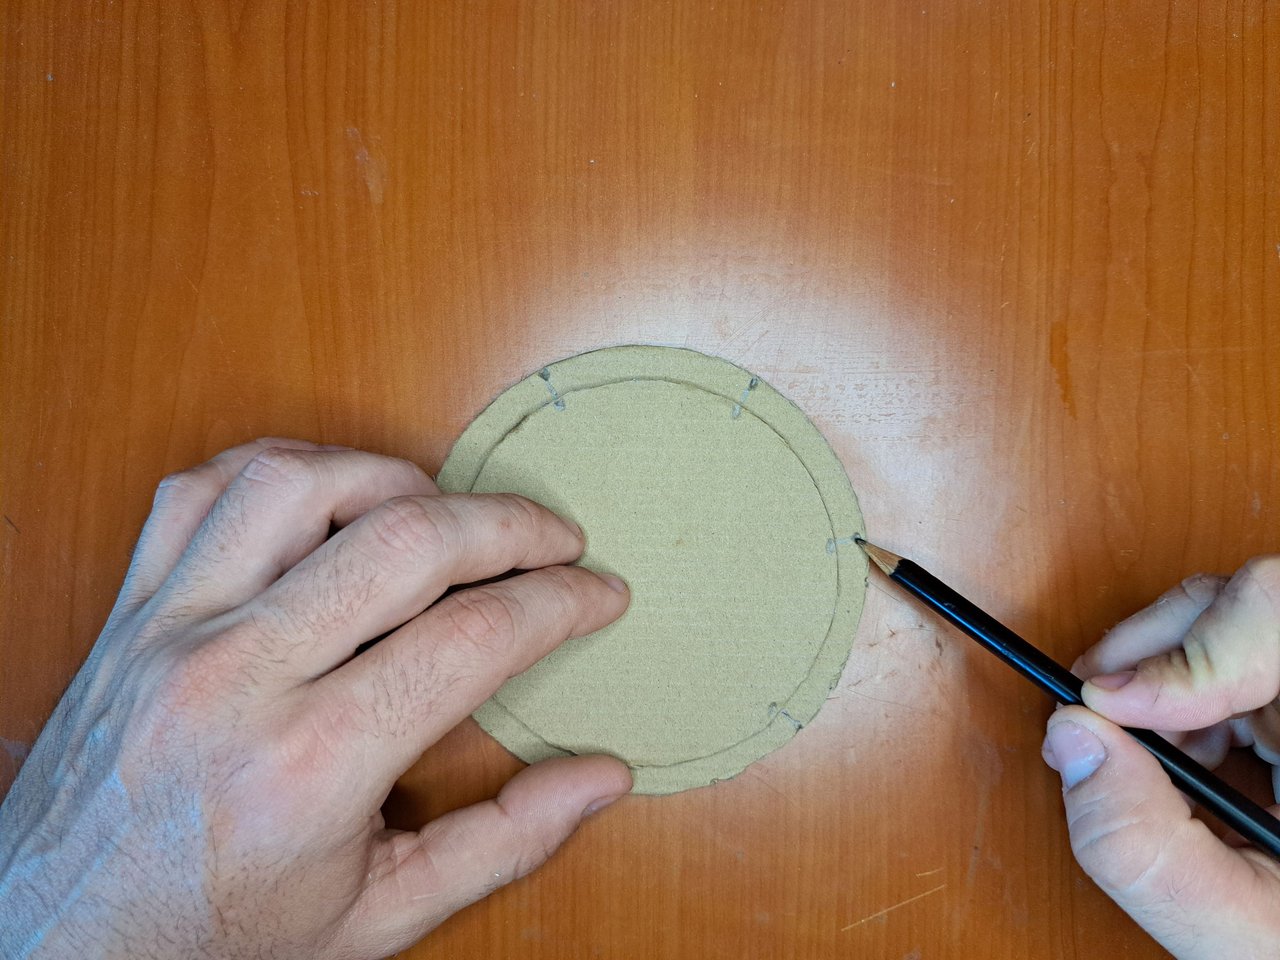
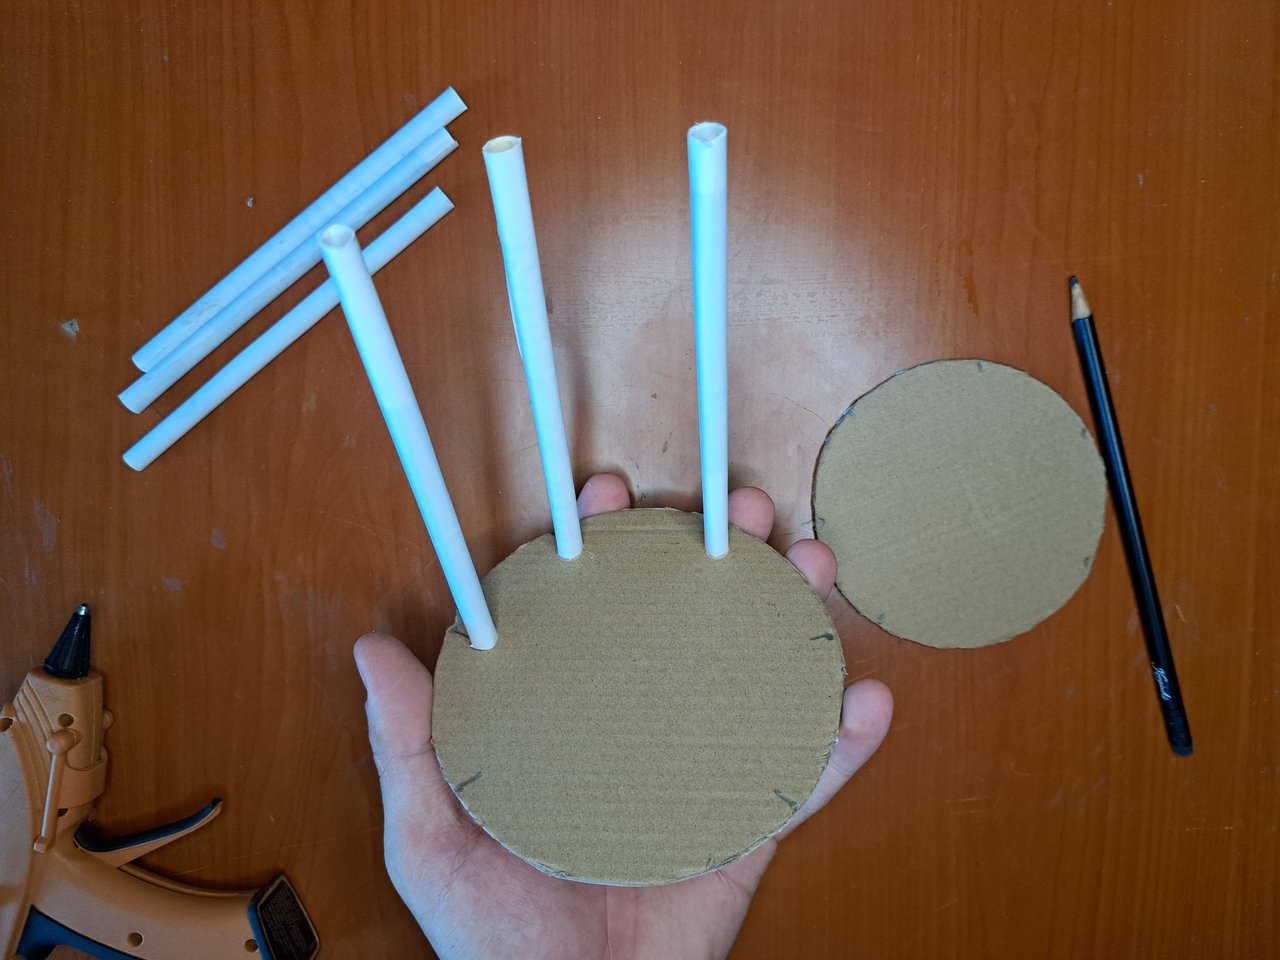
1️⃣ To begin with, we will create the base pieces of the structure. To do this we will mark and cut out two circles in cardboard. You can use a compass or, as in my case, you can use two lids from two containers.
Spanish Version Here
1️⃣ Para empezar crearemos las piezas base de la estructura. Para ello marcaremos y recortaremos dos circunferencias en cartón. Se puede utilizar un compás o como en mi caso pueden utilizar dos tapas de dos recipientes.
 |
 |
 |
 |
 |
 |
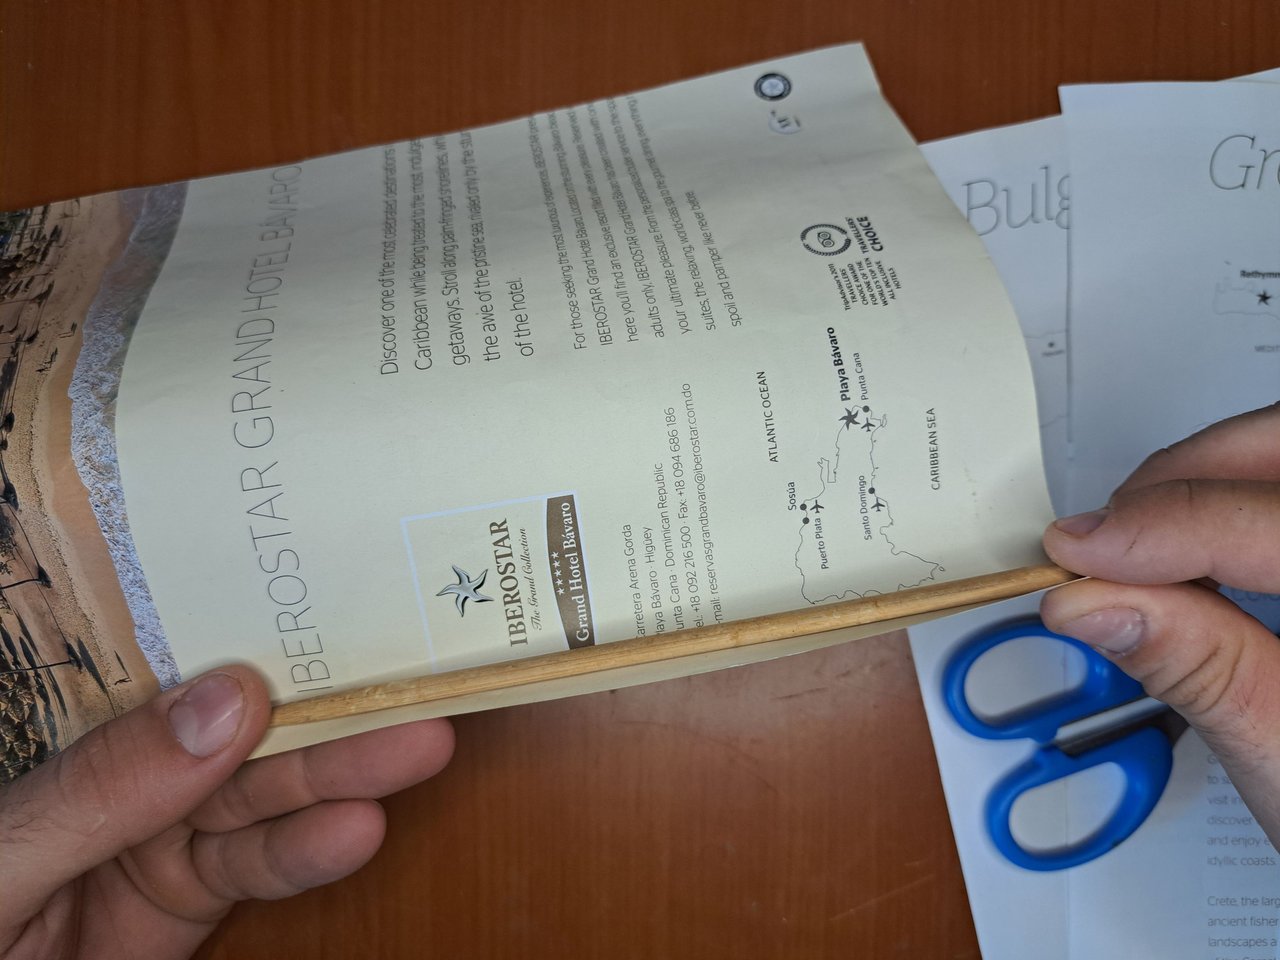
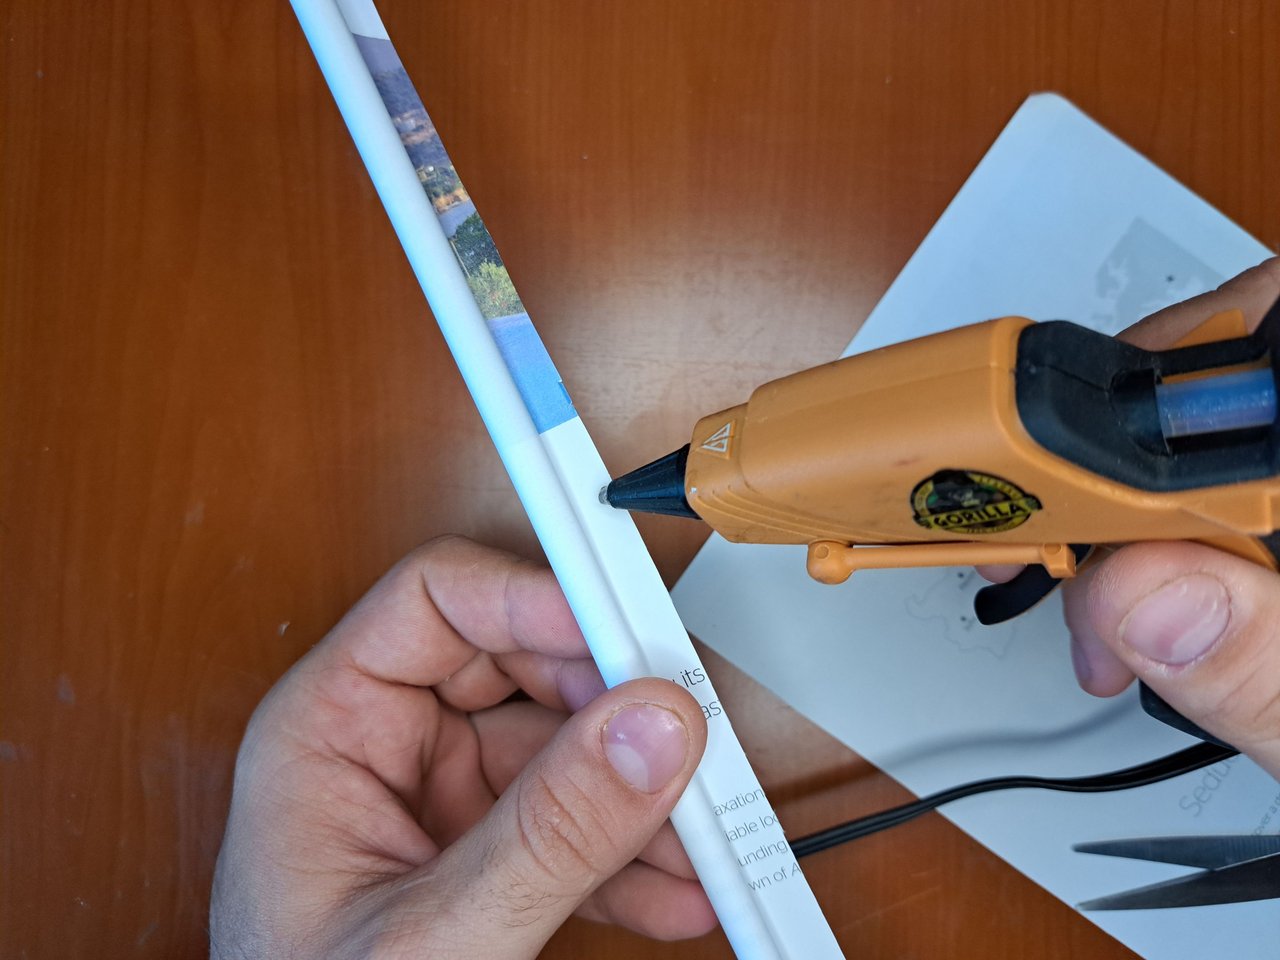
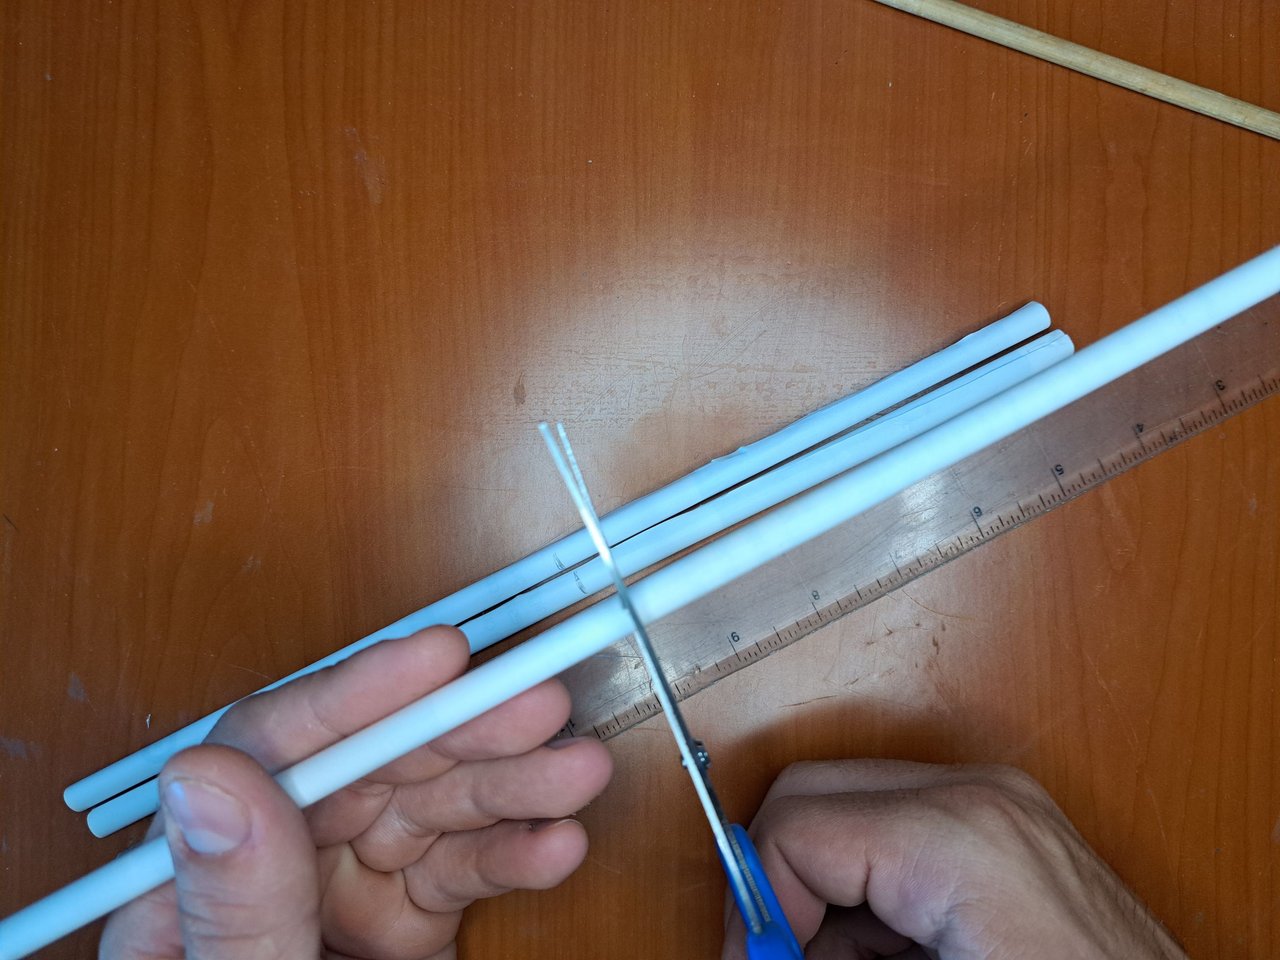
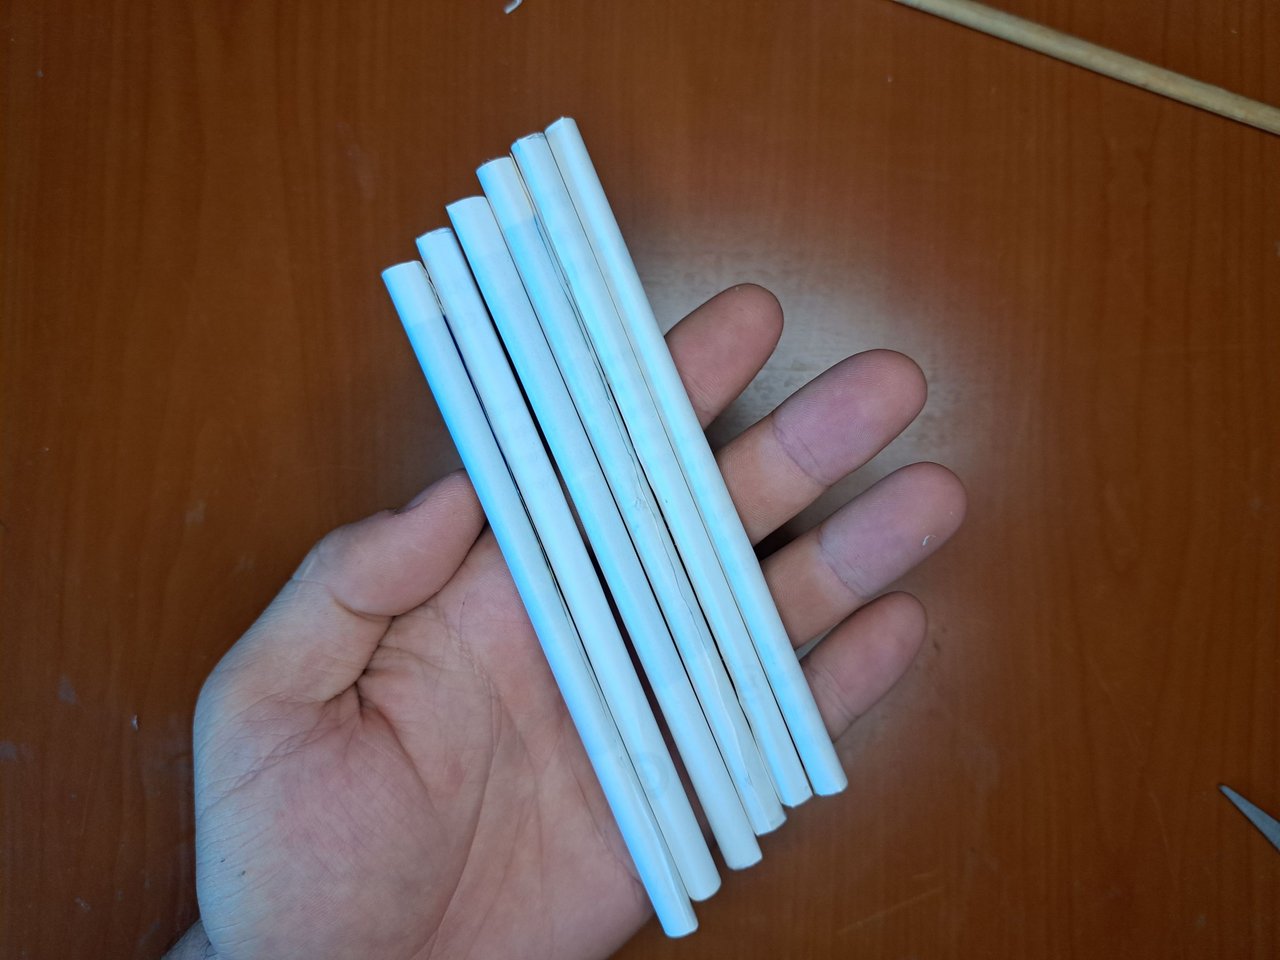
2️⃣ After cutting out the circumferences, we will move on to making the pedestals. To make the pedestals, wrap magazine paper around a chopstick and then glue the outer end to form thin 30 cm tubes. Cut each tube in half to obtain 6 pedestals of 15 cm each. The paper used in the pedestals can be of any type, although I recommend using magazine paper, which is stronger.
Spanish Version Here
2️⃣ Luego de recortar las circunferencias pasaremos a confeccionar los pedestales. Para hacer los pedestales debemos envolver hojas de revista alrededor de un palillo chino para luego pegar el extremo exterior y así formar unos tubos finos de 30 cm. cada tubo lo cortaremos por la mitad para obtener los 6 pedestales de 15 cm cada uno. El papel utilizado en los pedestales puede ser de cualquier tipo aunque aconsejo usar papel de revista que es más fuerte.
 |
 |
 |
 |
 |
 |
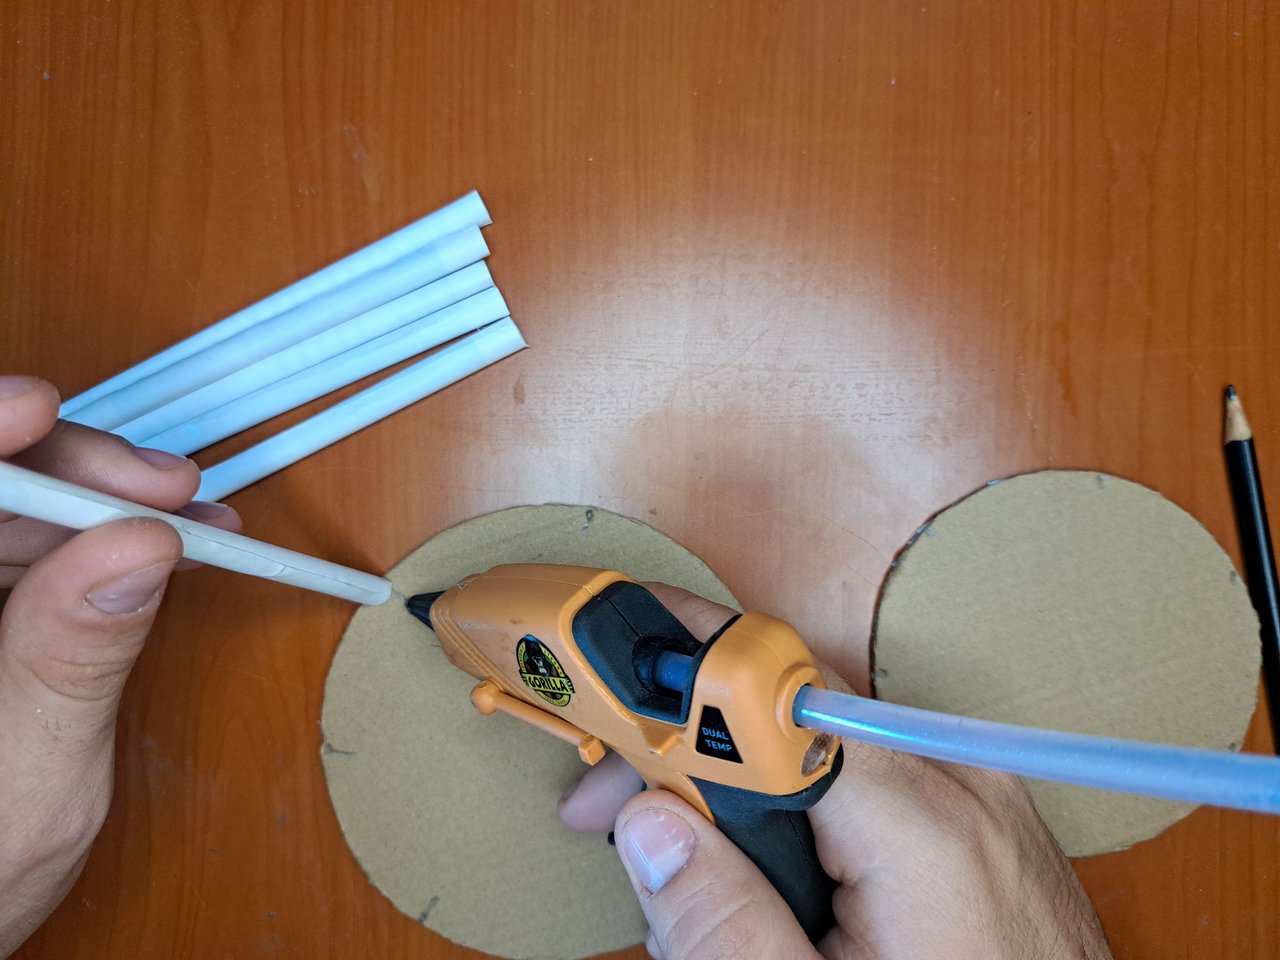
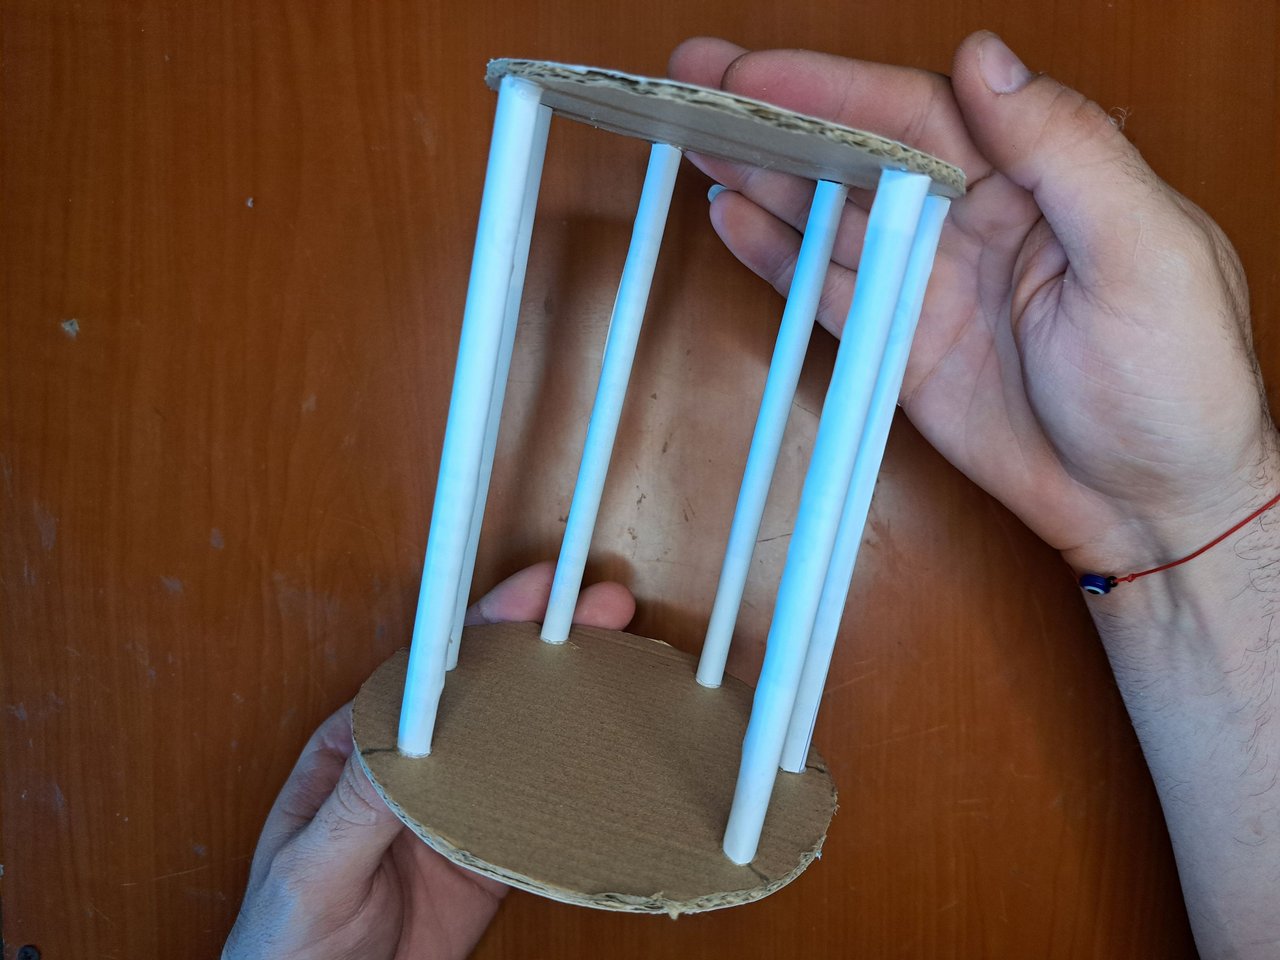
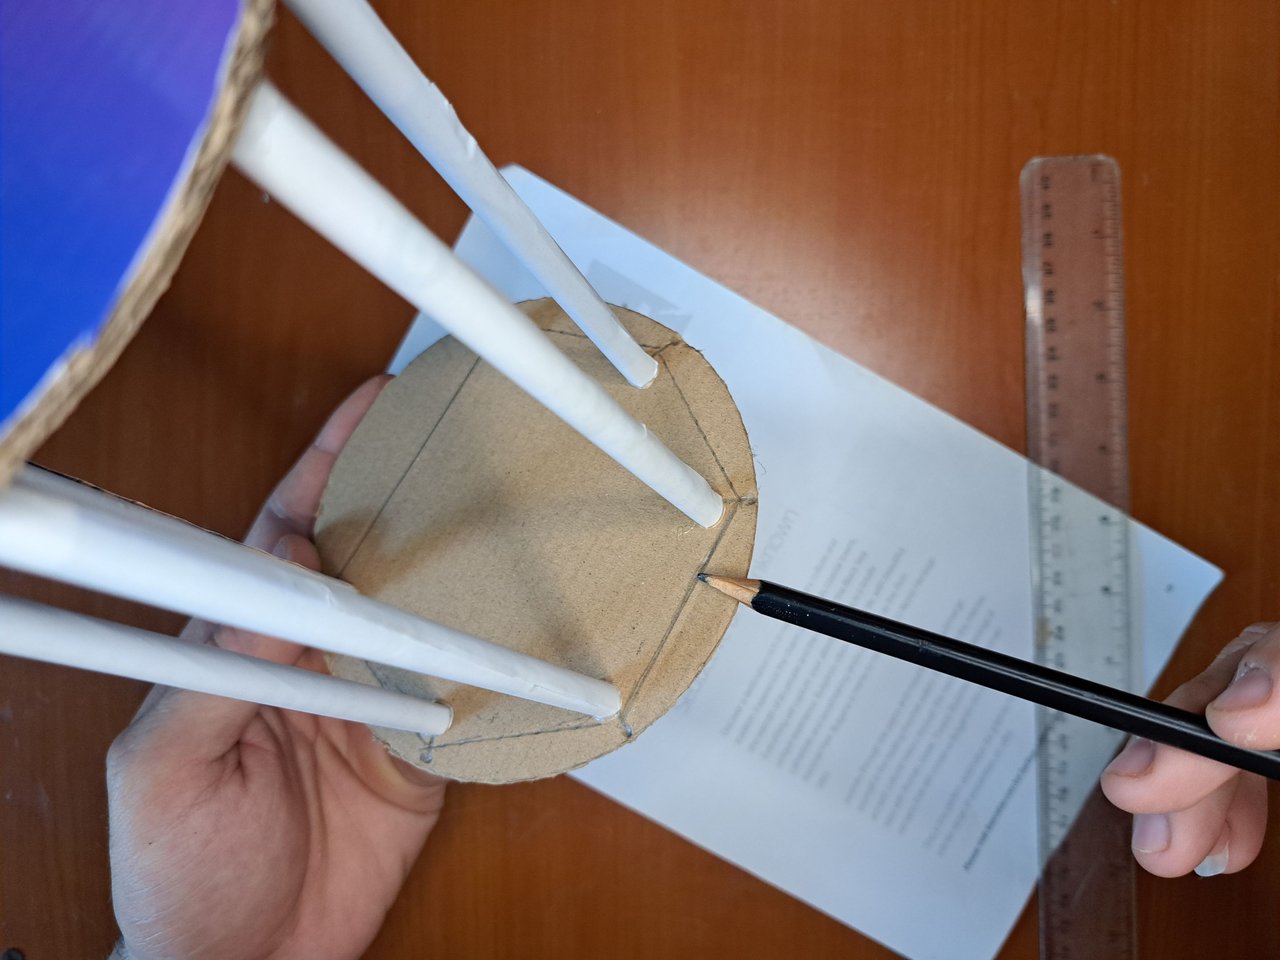
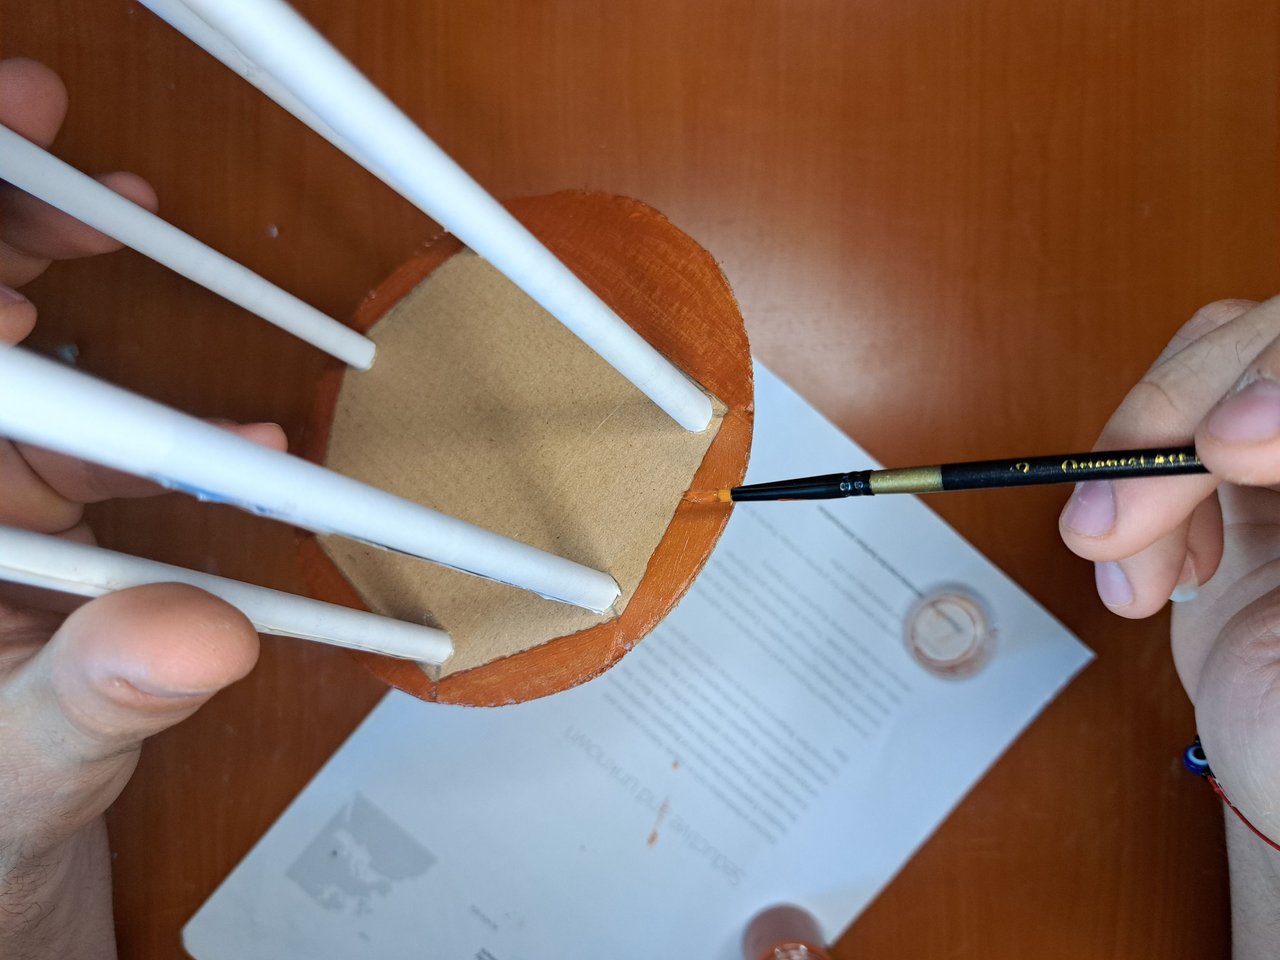
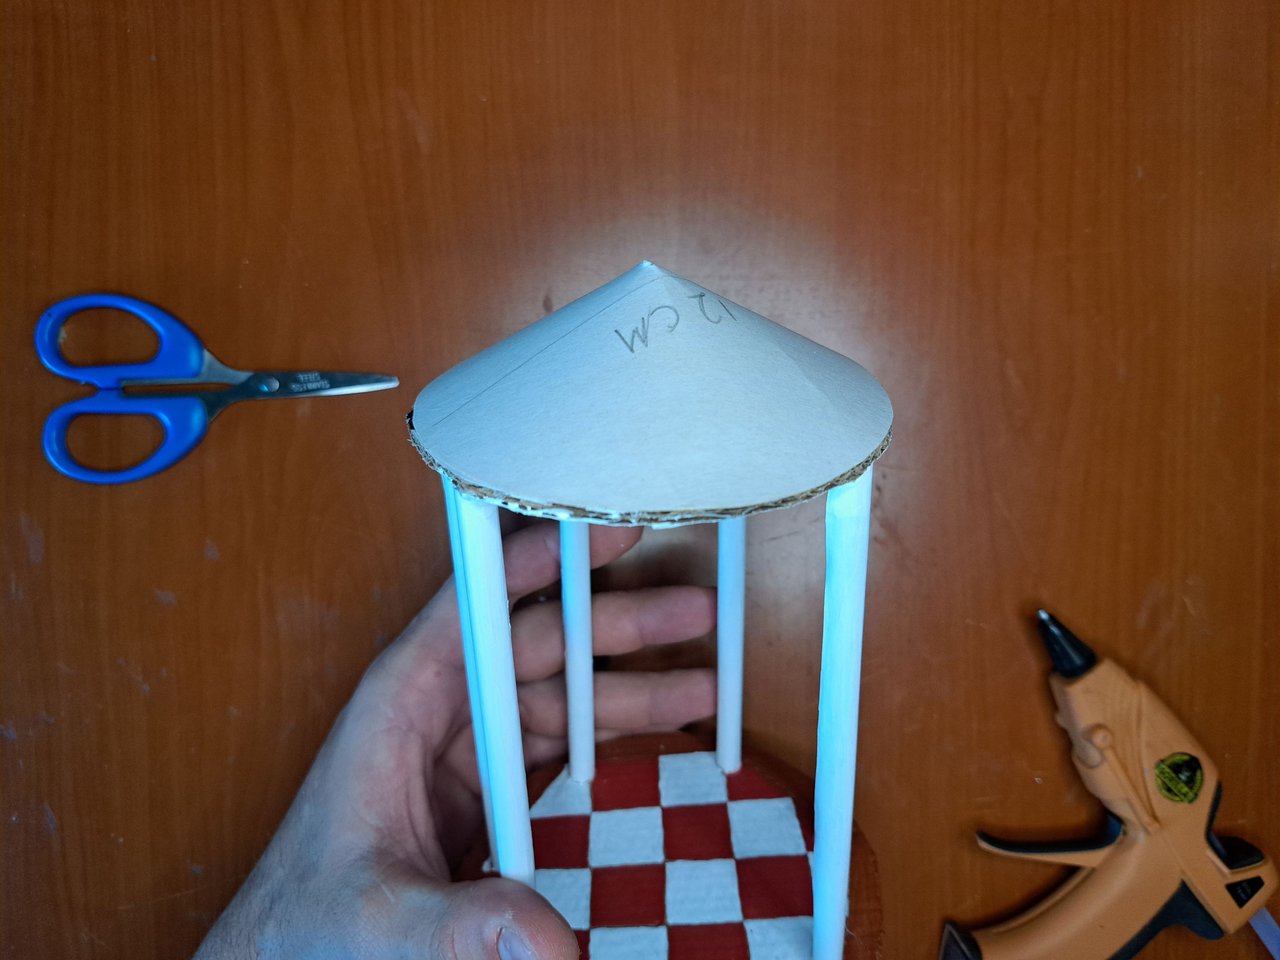
3️⃣ To assemble the main structure we must mark the location of the pedestals on the circumference of the large cardboard. The spaces between each cardboard will be 6 cm and so we will make one of the spaces exceed that measure, so it will be the entrance to the gazebo. After gluing the pedestals to the base, glue the circular roof support on top.
Spanish Version Here
3️⃣ Para ensamblar la estructura principal debemos marcar la ubicación de los pedestales en la circunferencia de cartón grande. Los espacios entre cada cartón serán de 6 cm y así lograremos que uno de los espacios exceda dicha medida, por lo cual será la entrada al gazebo. Luego de pegar los pedestales a la base, pegaos encima el soporte circular del techo.
 |
 |
 |
 |
 |
 |
 |
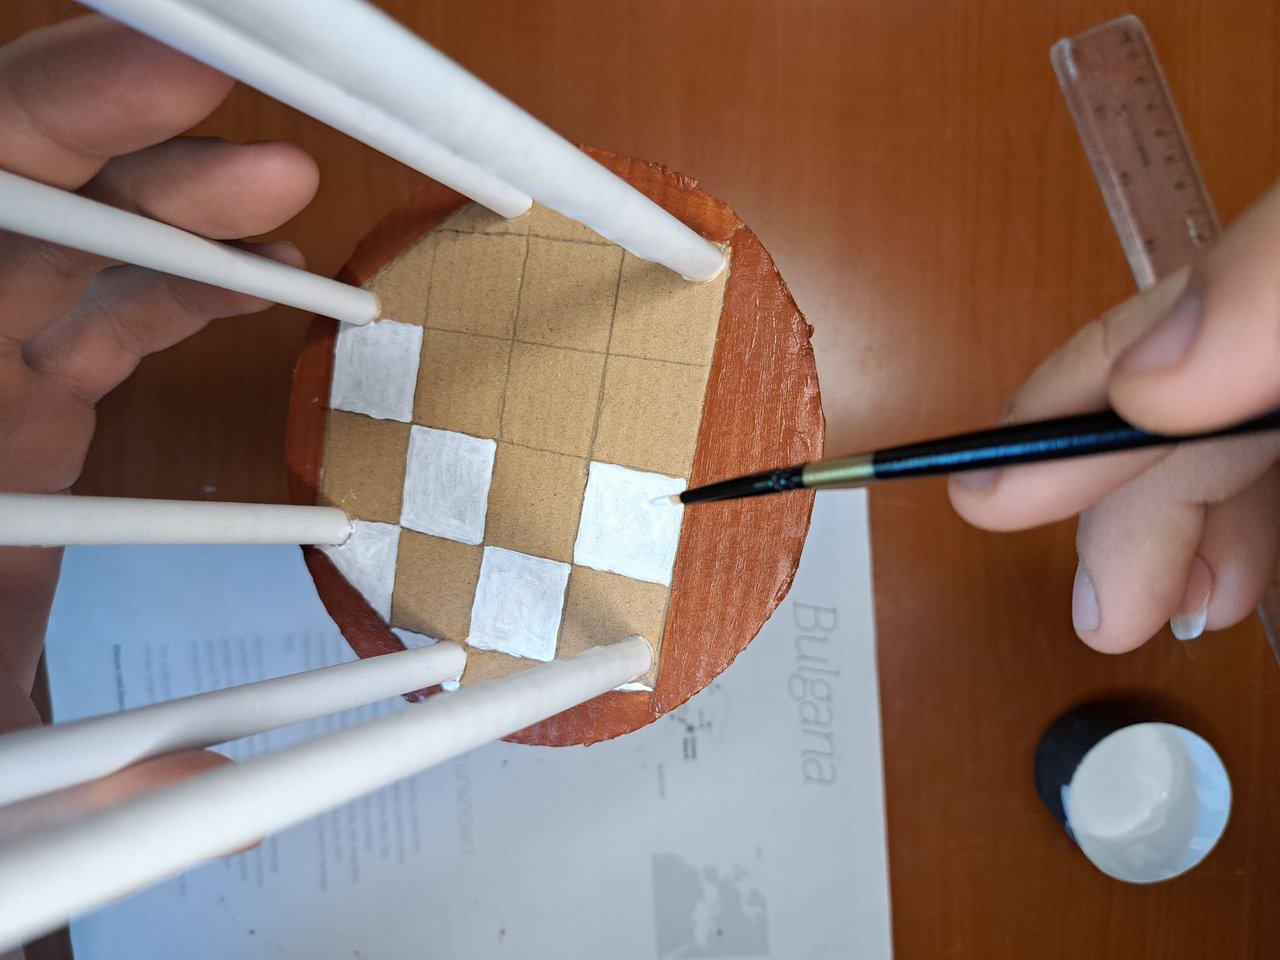
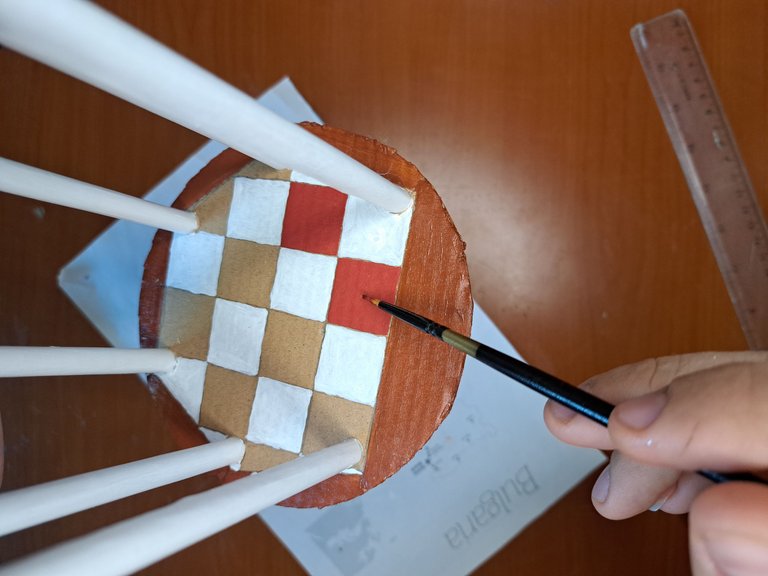
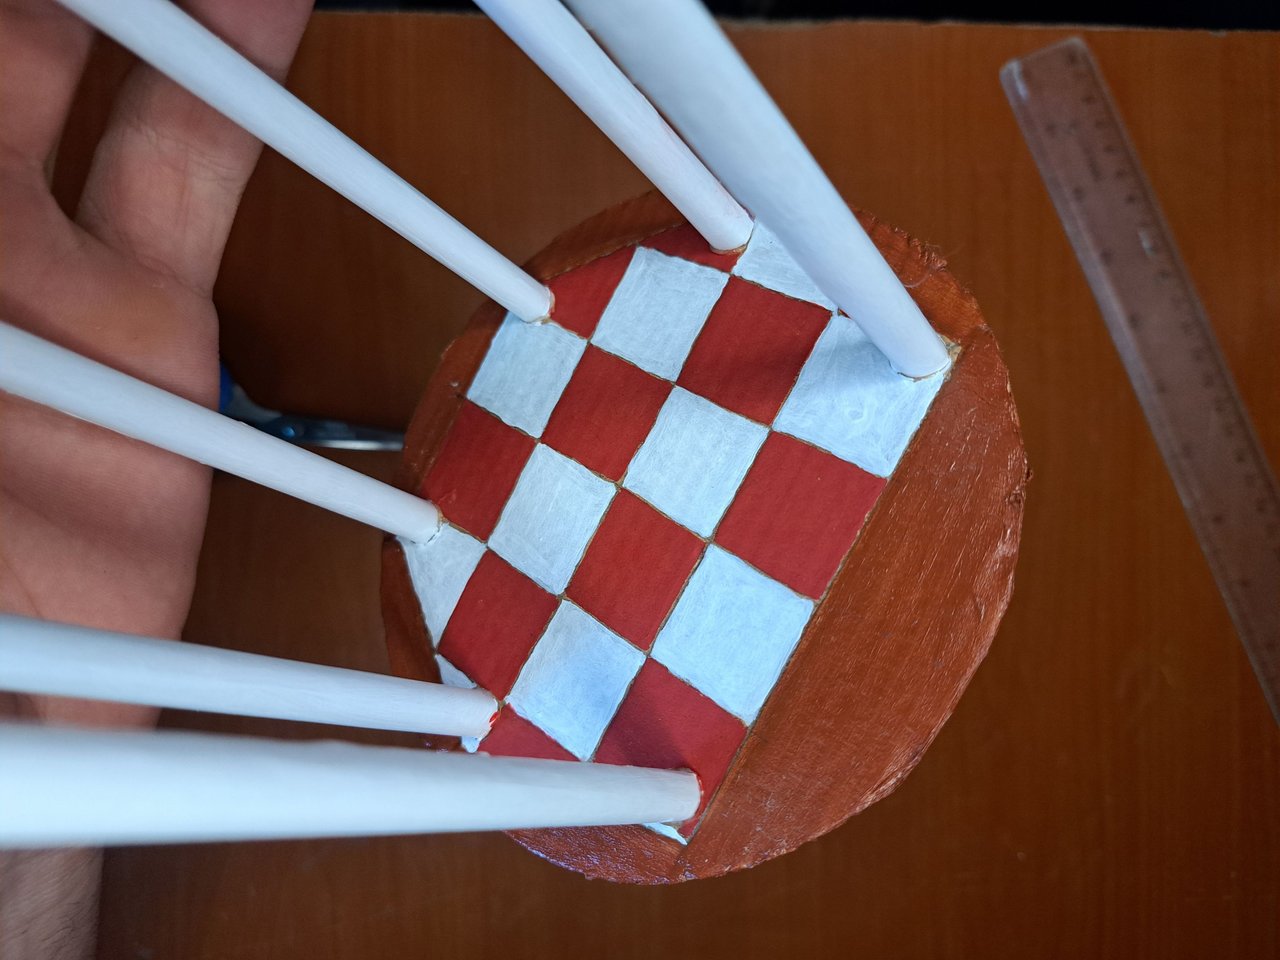
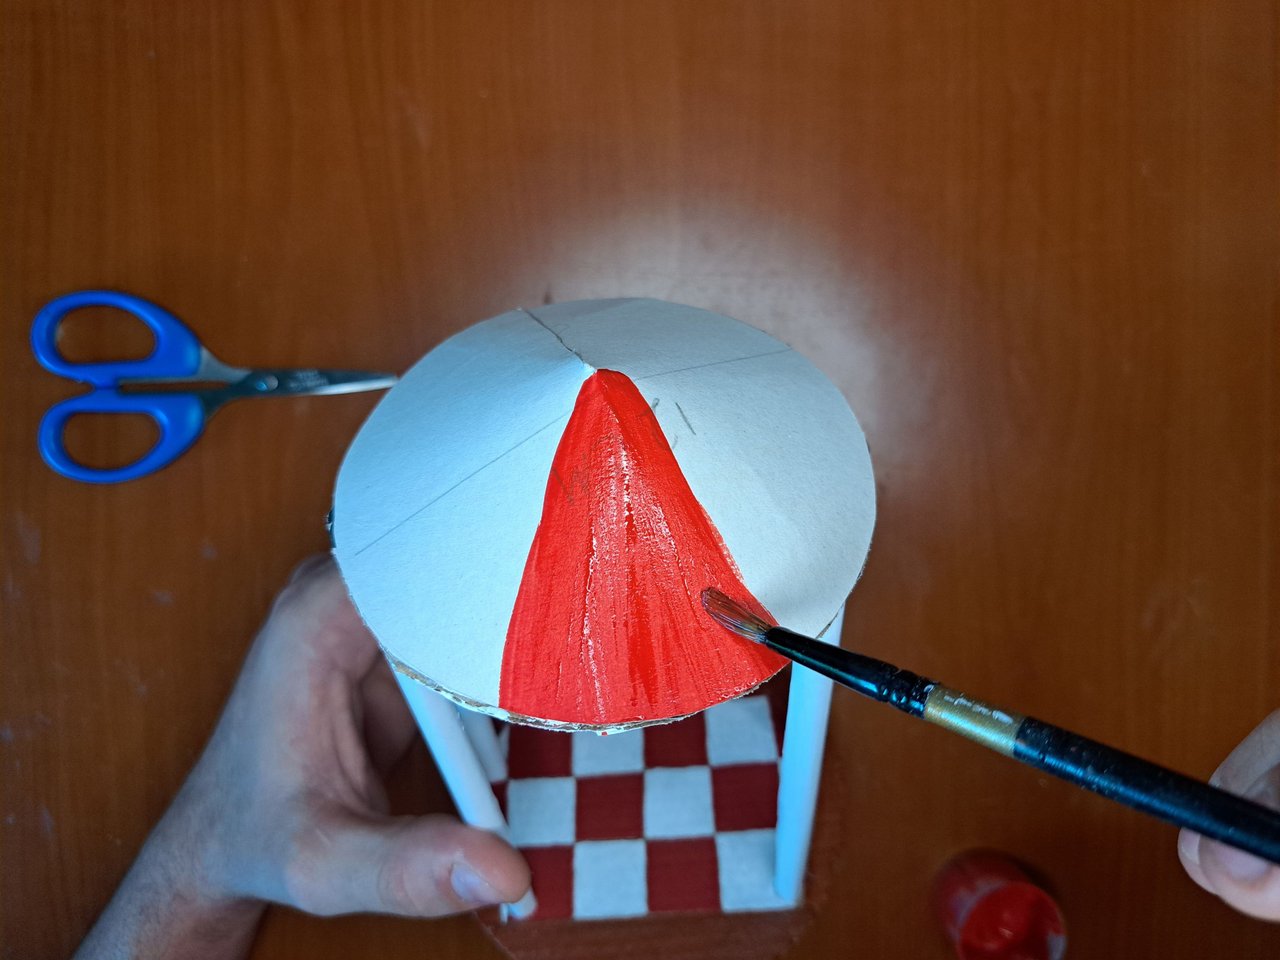
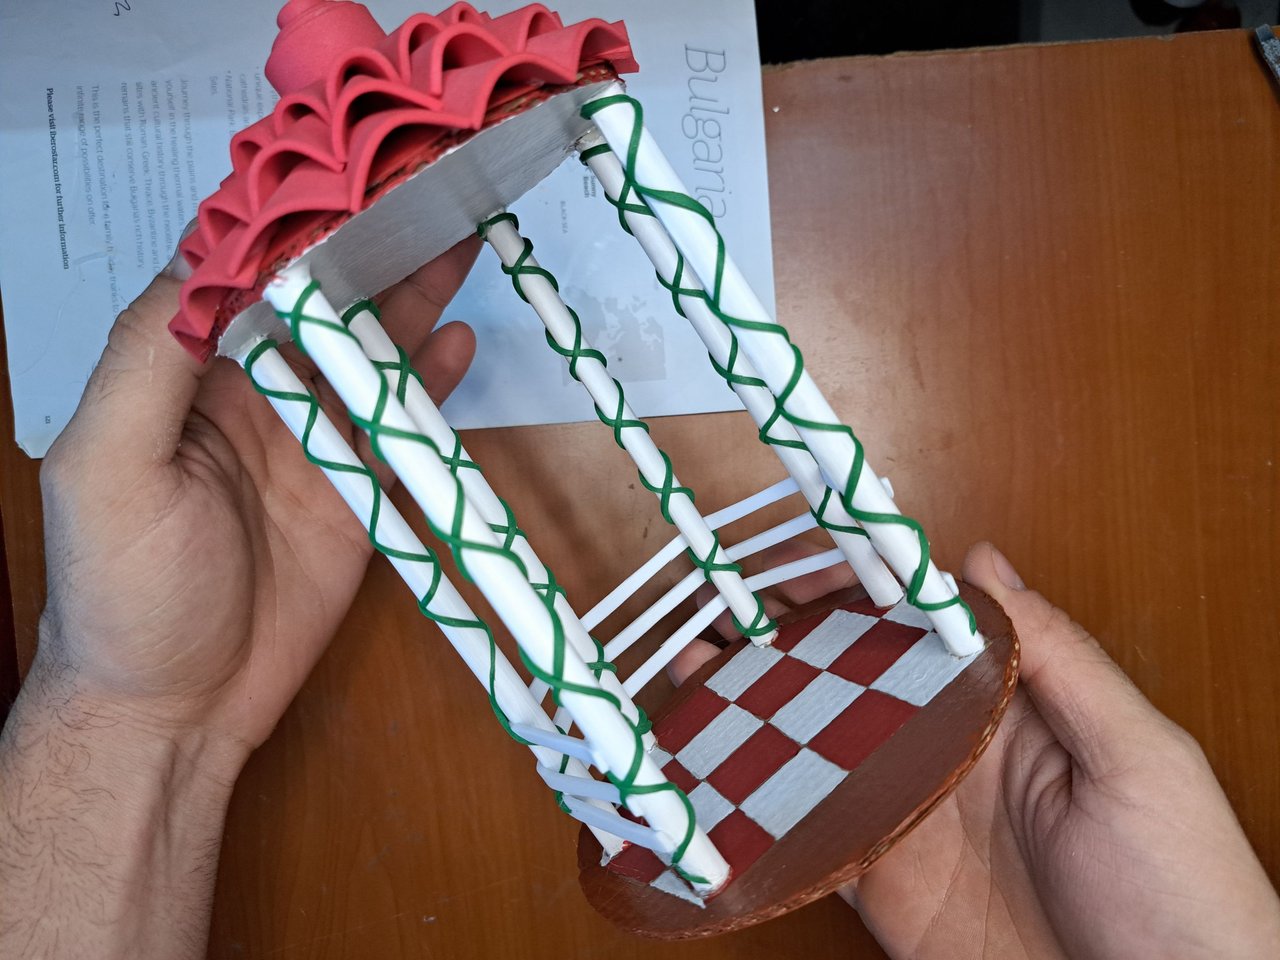
4️⃣ When the structure is well glued we will draw lines that join each of the pedestals on the outside. Then we draw a checkered design in the interior area as if it were a chessboard. We paint the outside in brown and the inside squares in white and red, alternately. In addition, we also painted the pedestals and the lower part of the ceiling support white.
Spanish Version Here
4️⃣ Cuando la estructura esté bien pegado trazaremos líneas que unan cada uno de los pedestales por la parte exterior. Luego dibujamos un diseño de cuadros en el área interior como si de un tablero de ajedrez se tratase. Pintamos el exterior de color café y los cuadros interiores de color blanco y rojo intercaladamente. Adicionalmente, pintamos también de blanco los pedestales y la parte inferior del soporte del techo.
 |
 |
 |
 |
 |
 |
 |
 |
 |
 |
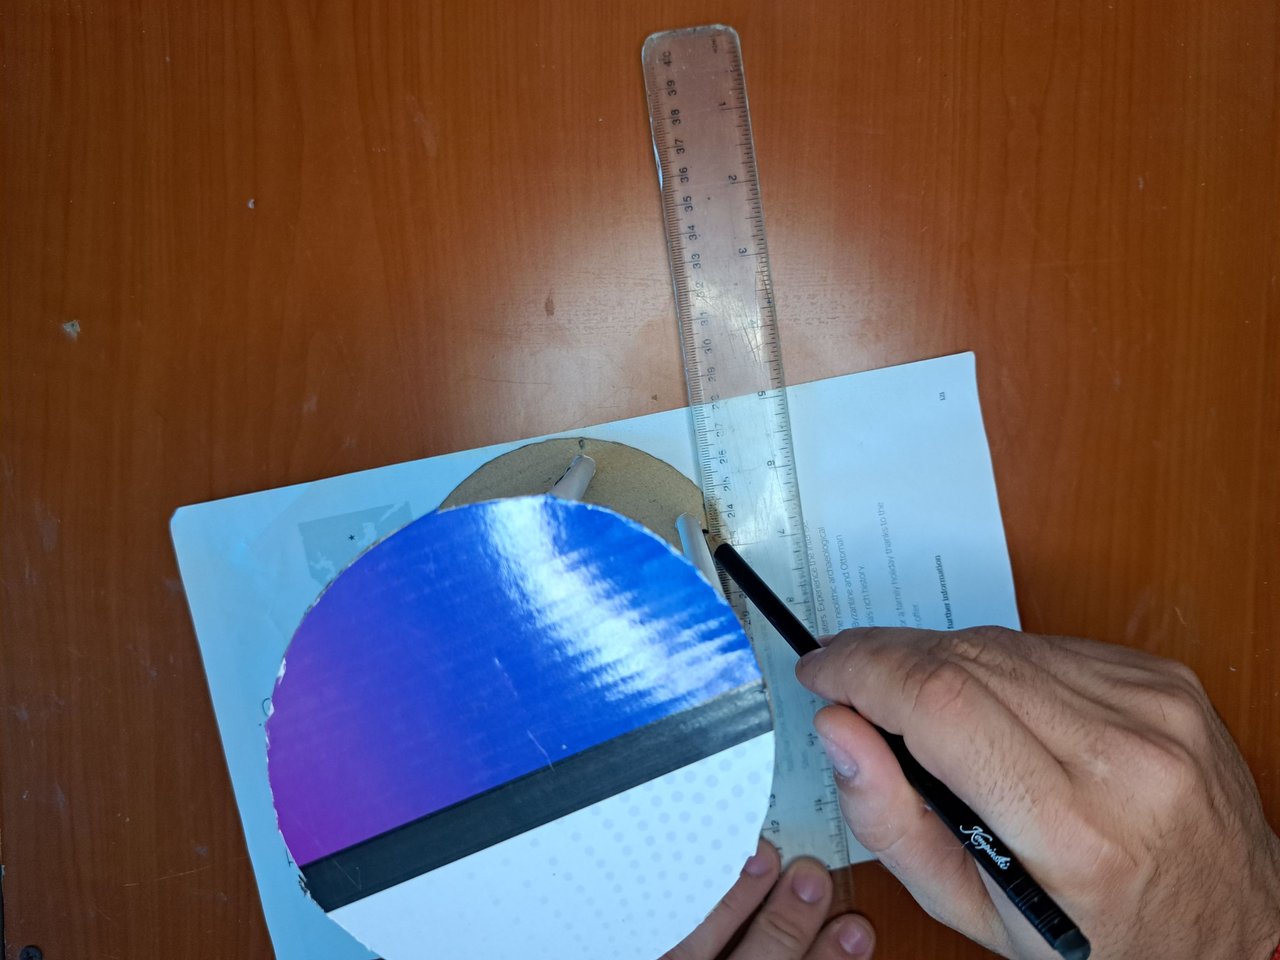
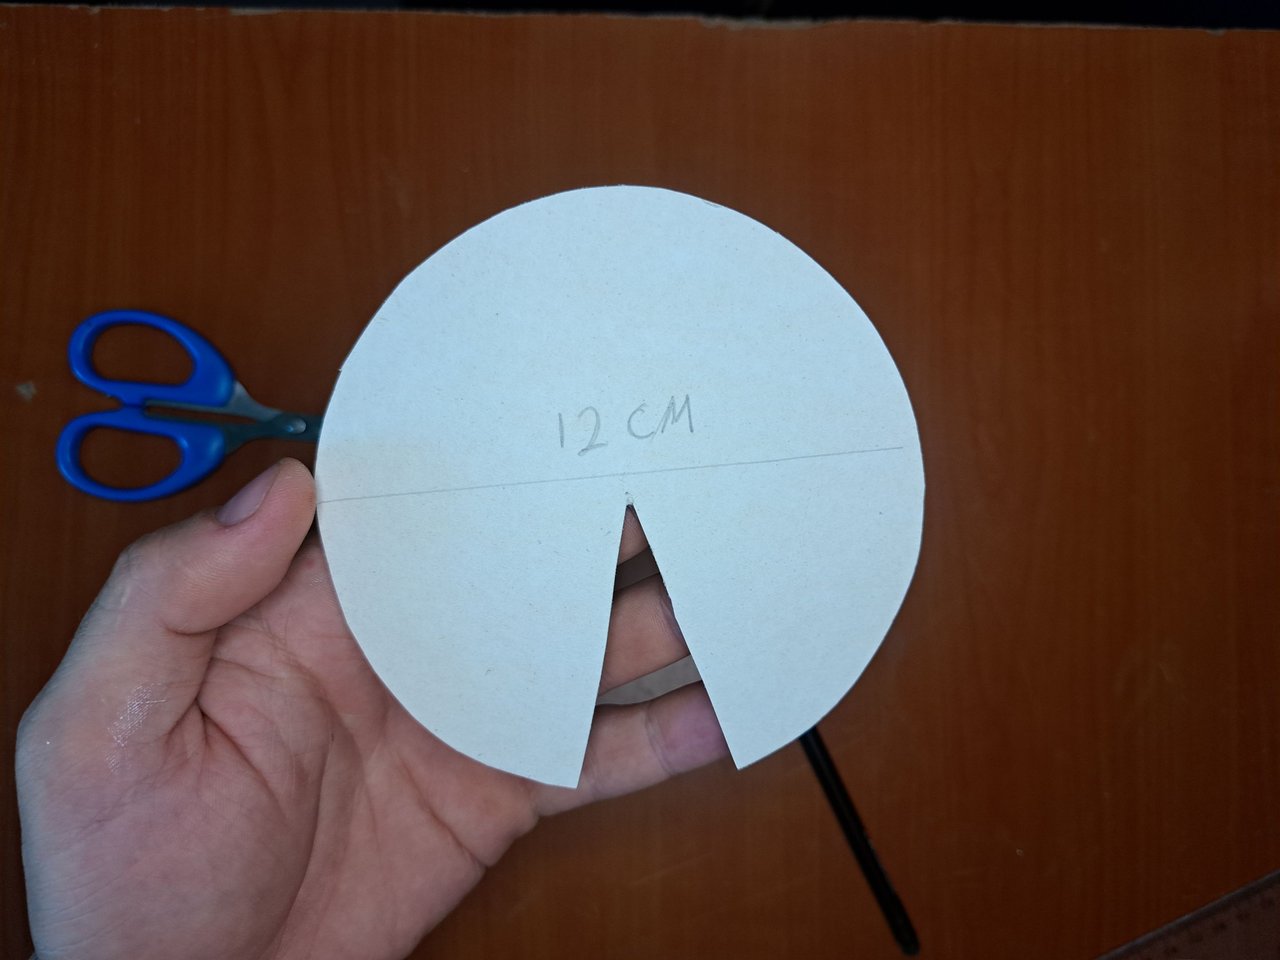
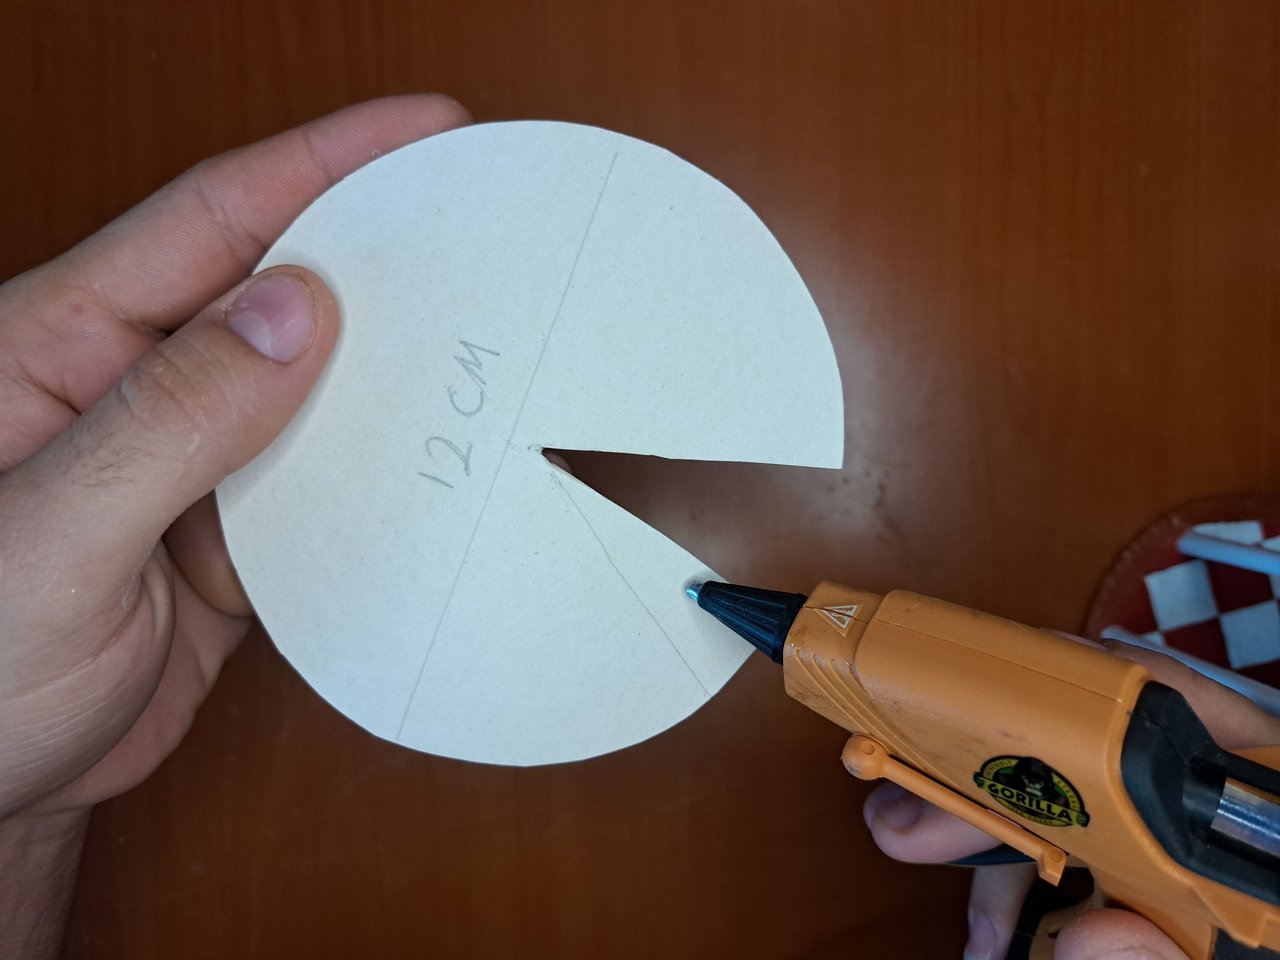
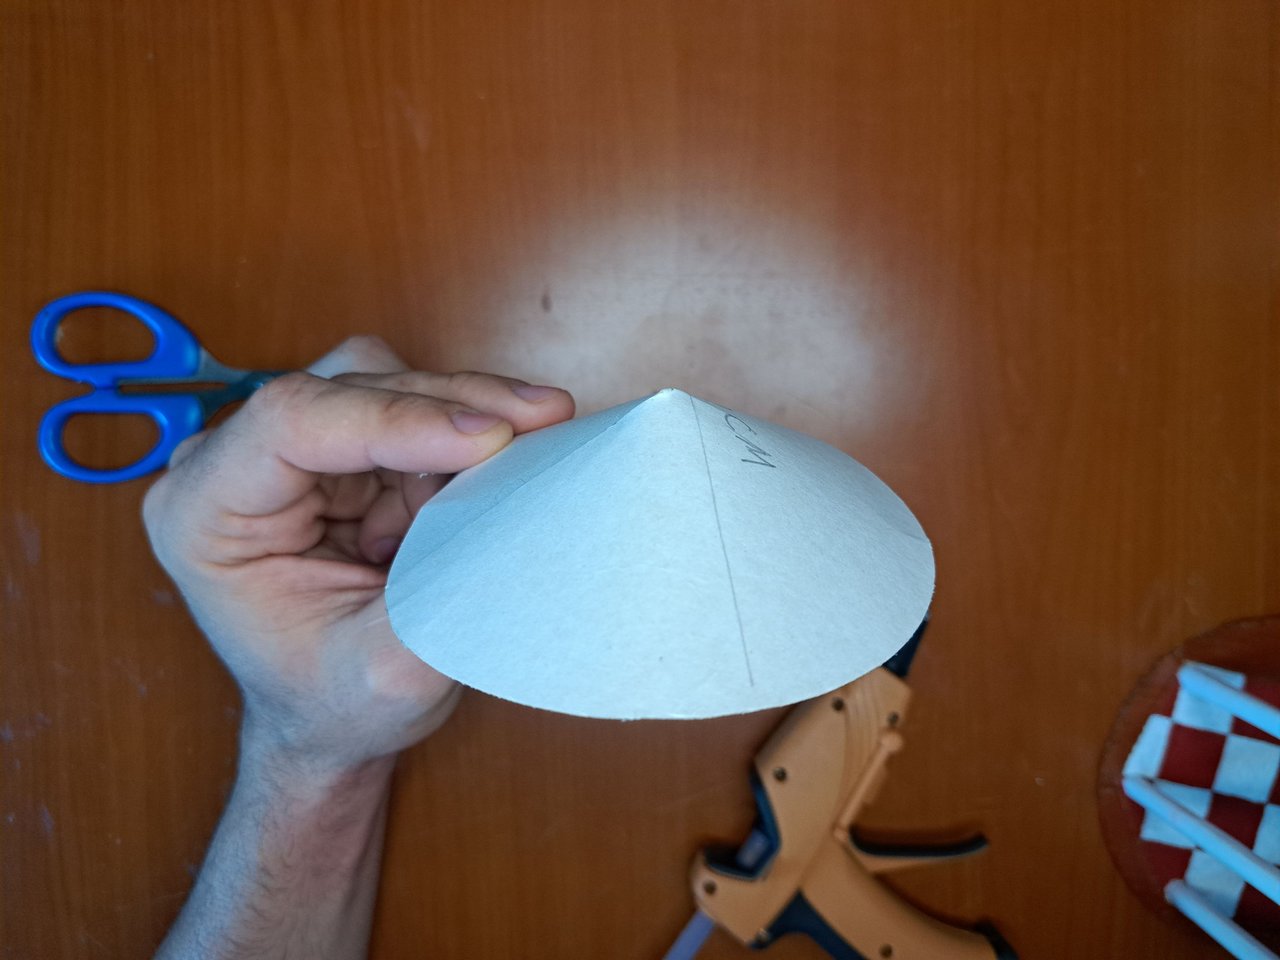
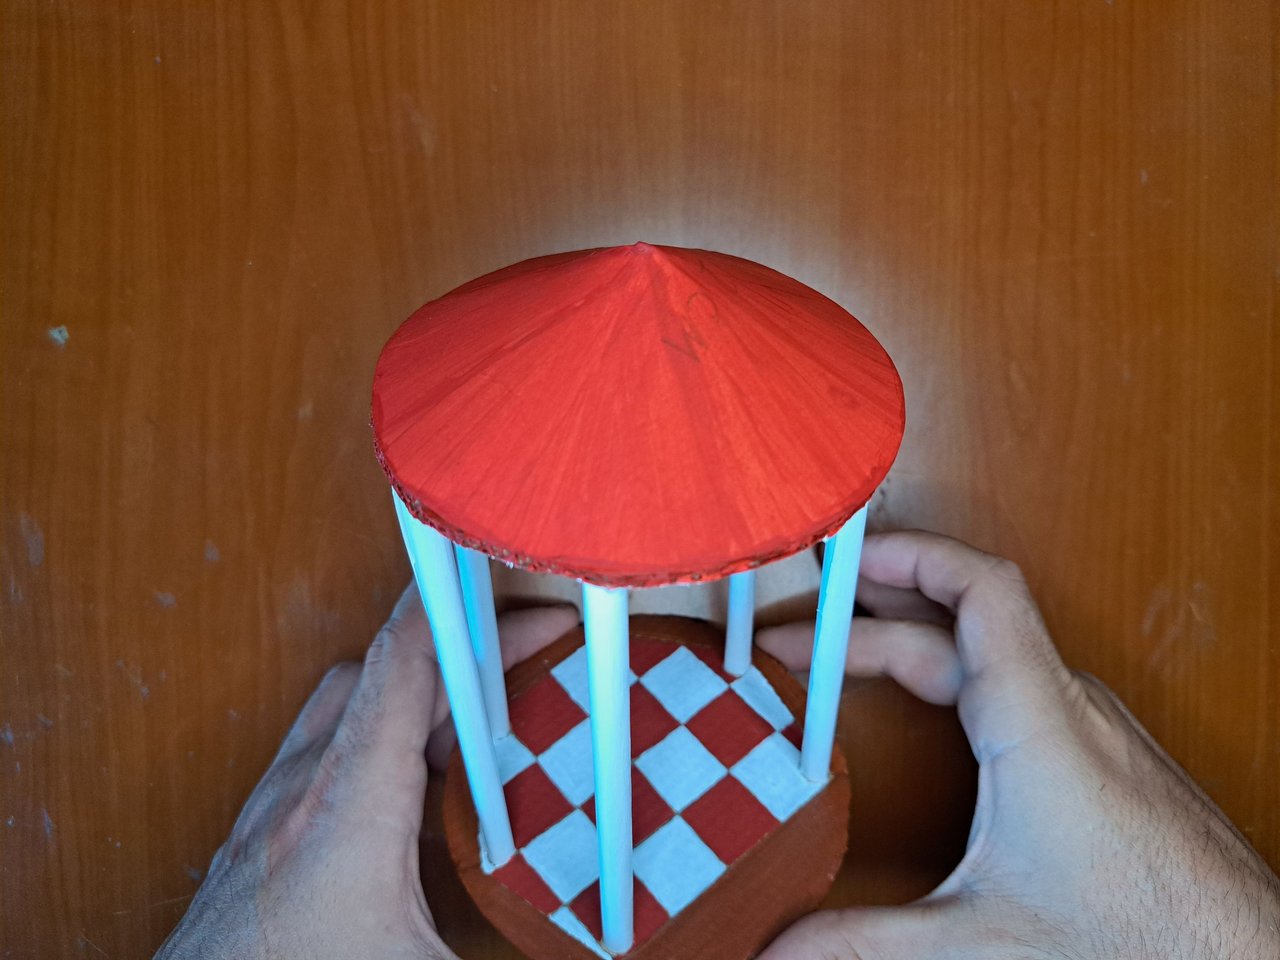
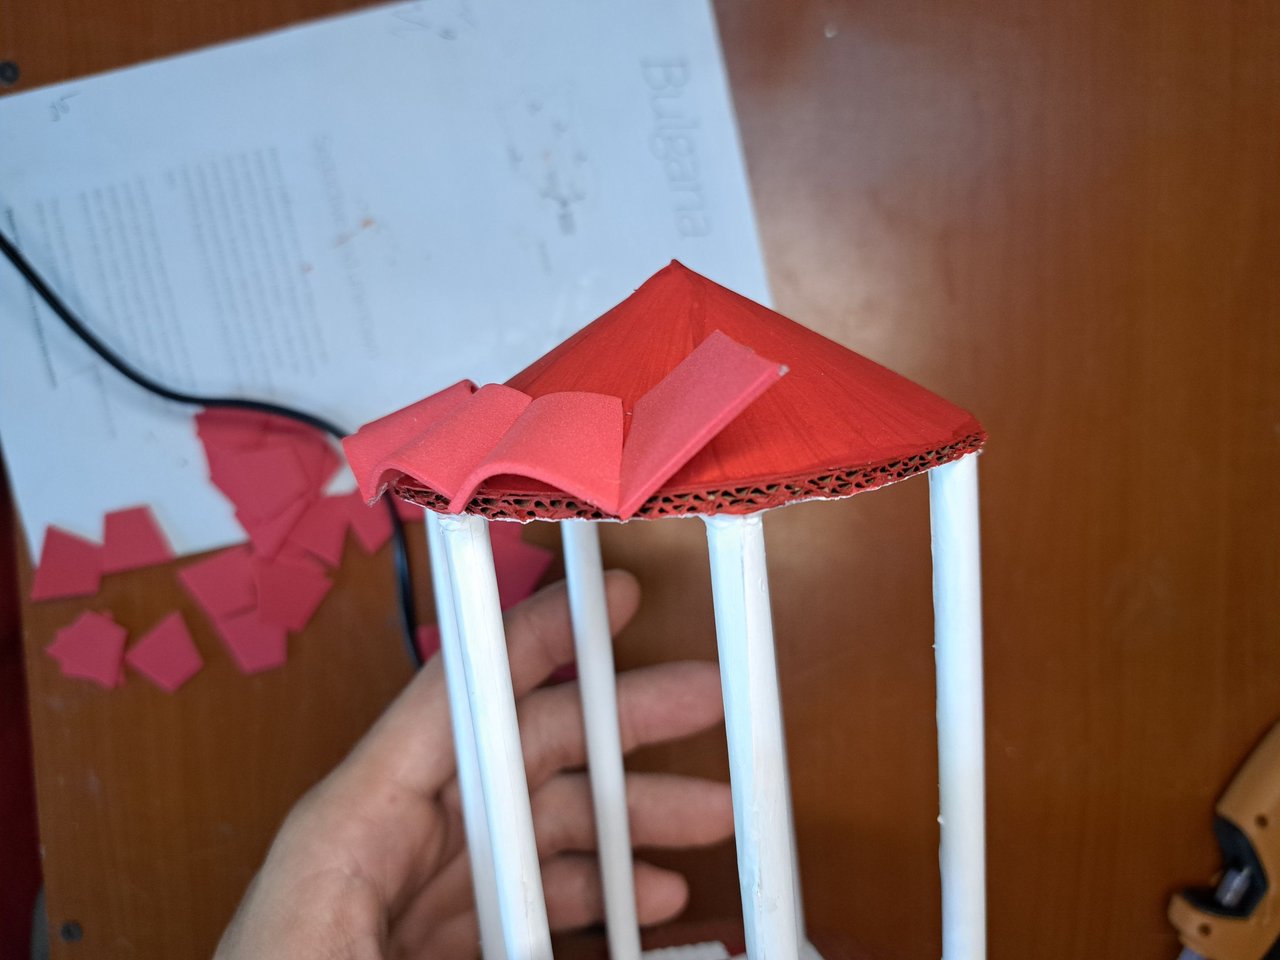
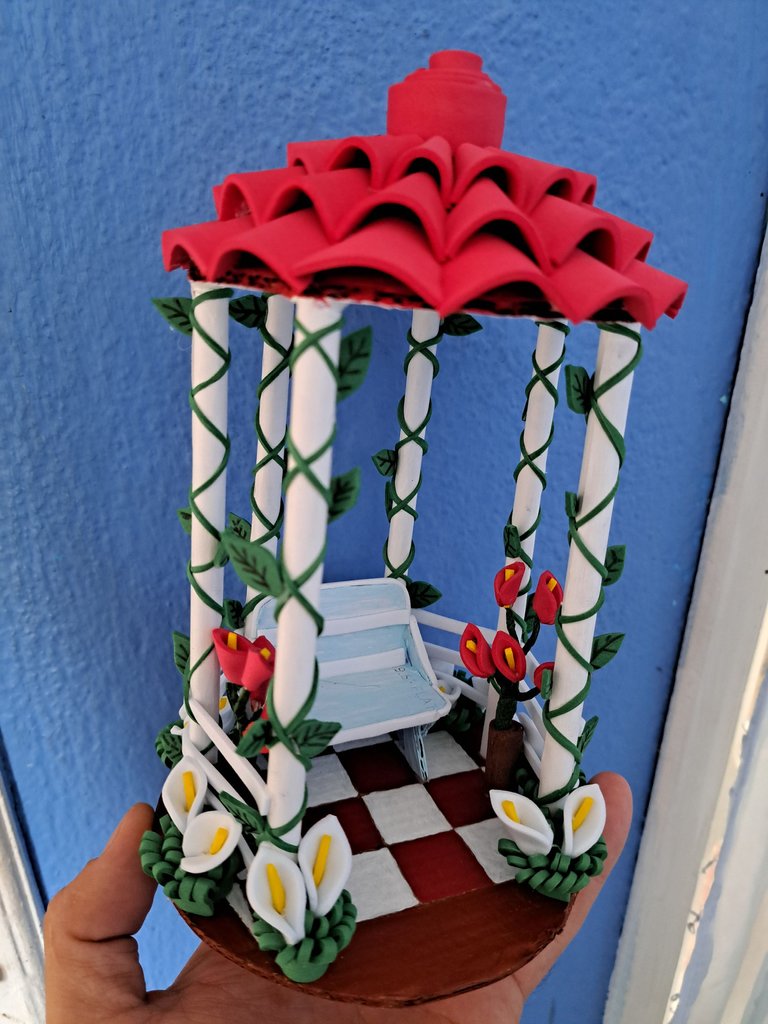
5️⃣ On a piece of thinner cardboard or cardboard we draw a circumference of 12 cm in diameter. After cutting it out, we extract a triangular piece and it will look like PAC-MAN. Then we glue the edges of the triangular space and create a cone of low height. We glue the cone to the top of the structure and then paint it red.
Spanish Version Here
5️⃣ En una pieza de cartón más fino o de cartulina dibujamos una circunferencia de 12 cm de diámetro. Luego de recortarla le extraeremos una pieza triangular y quedaría como si fuese PAC-MAN. A continuación pegamos los bordes del espacio triangular y creamos un cono de baja altura. El cono lo pegamos en la parte superior de la estructura para luego pintarlo de rojo.
 |
 |
 |
 |
 |
 |
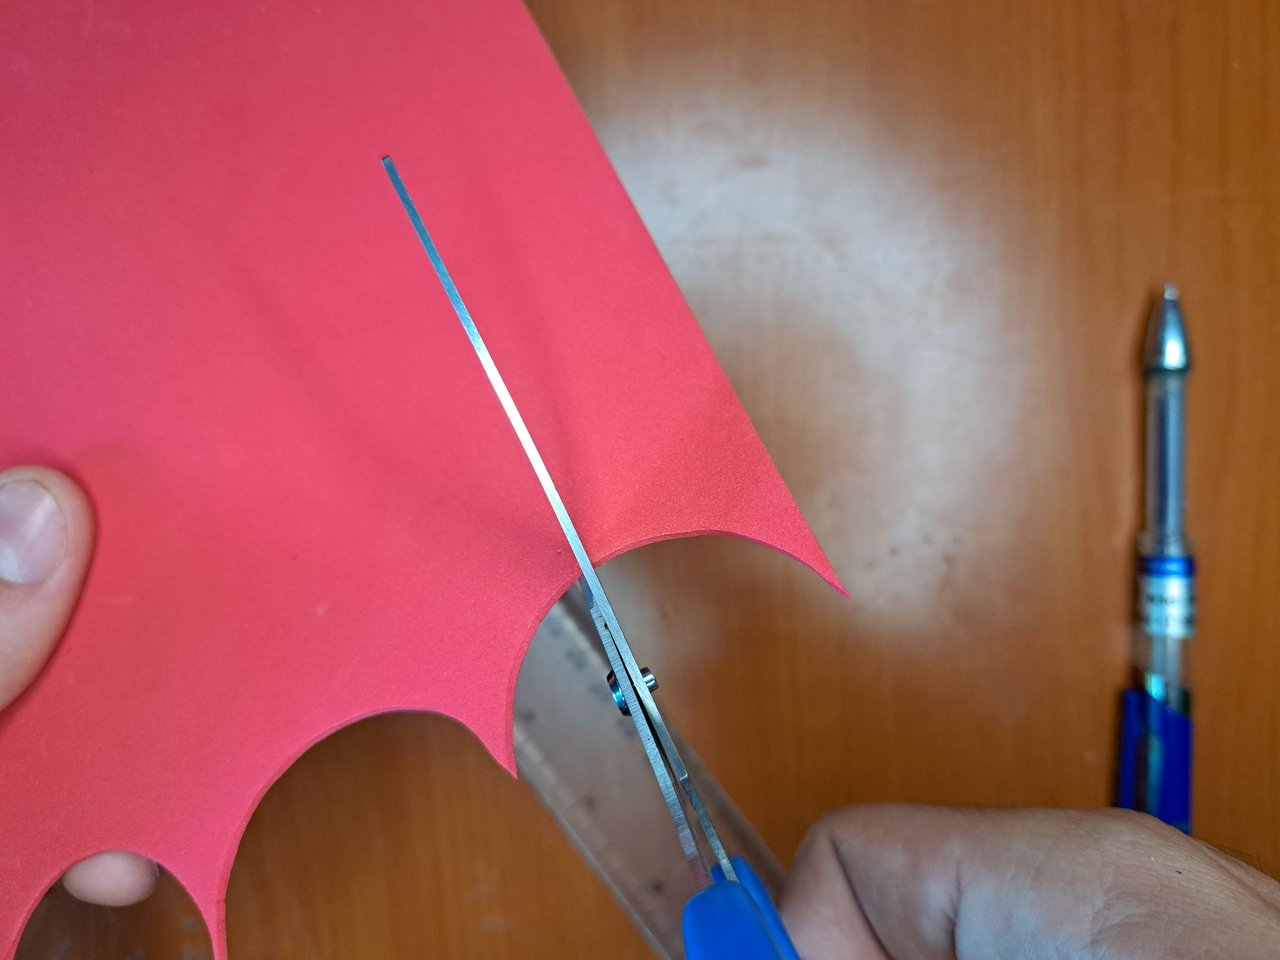
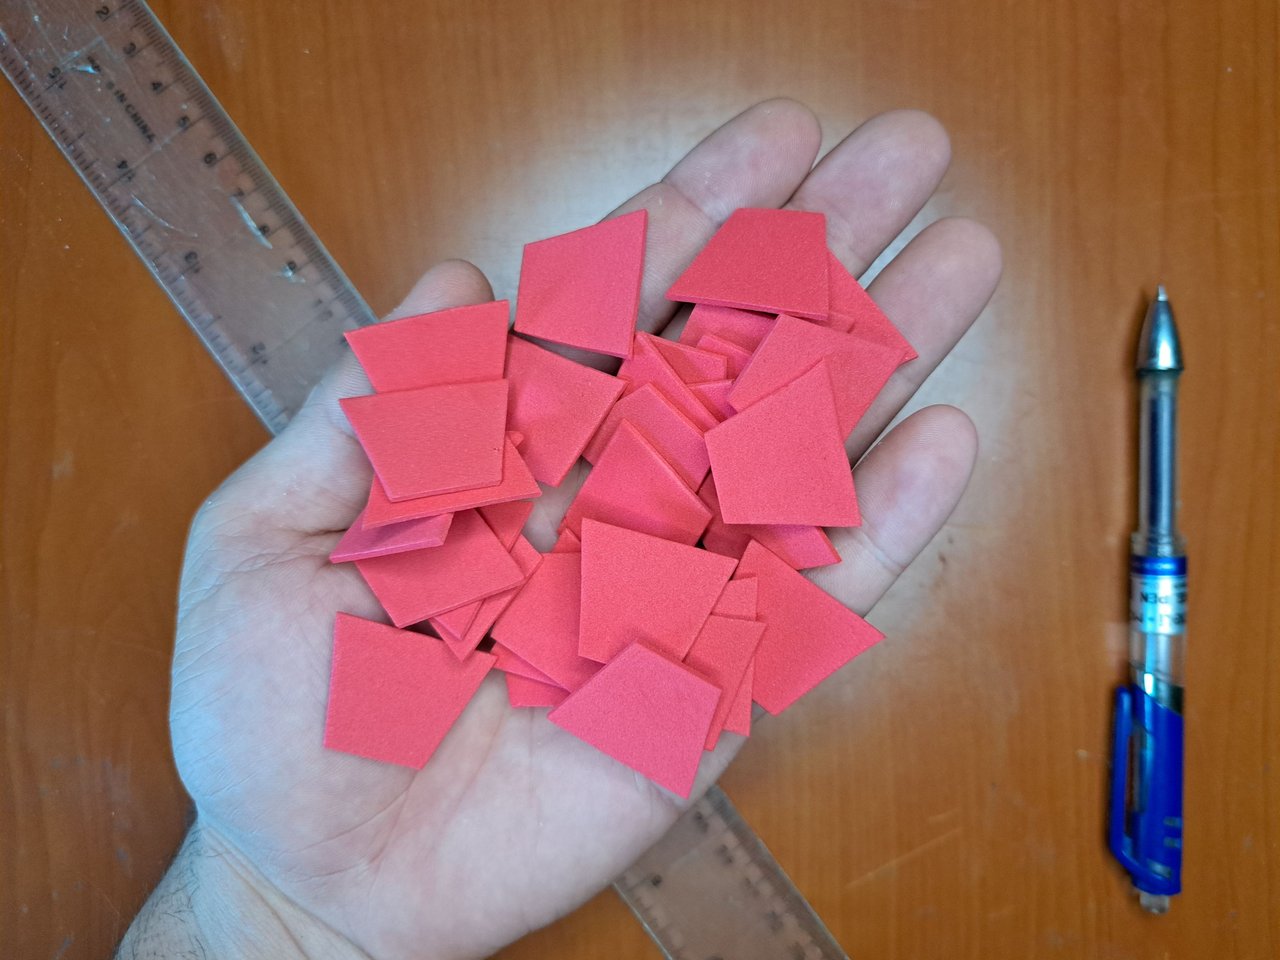
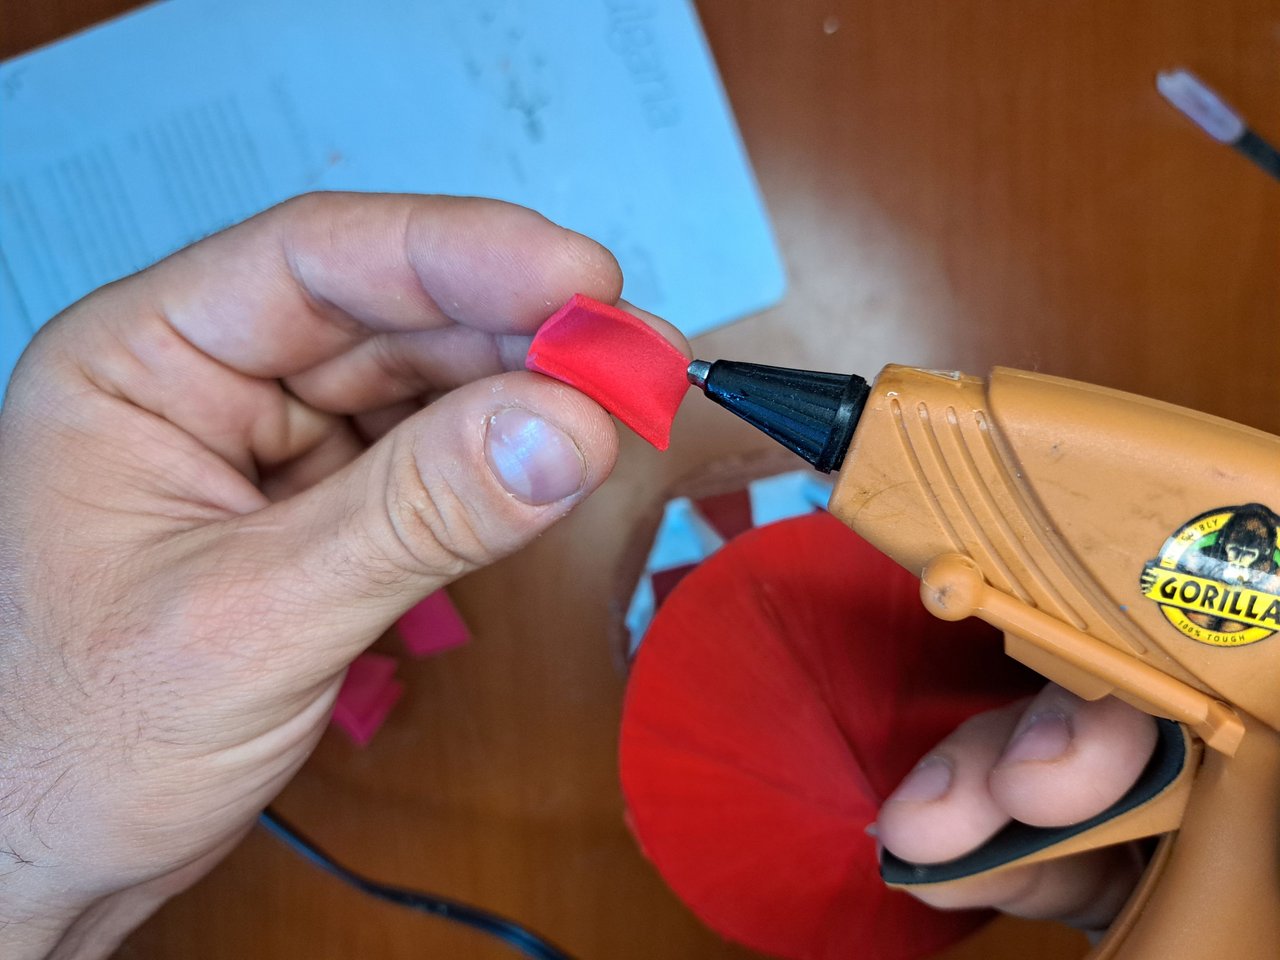
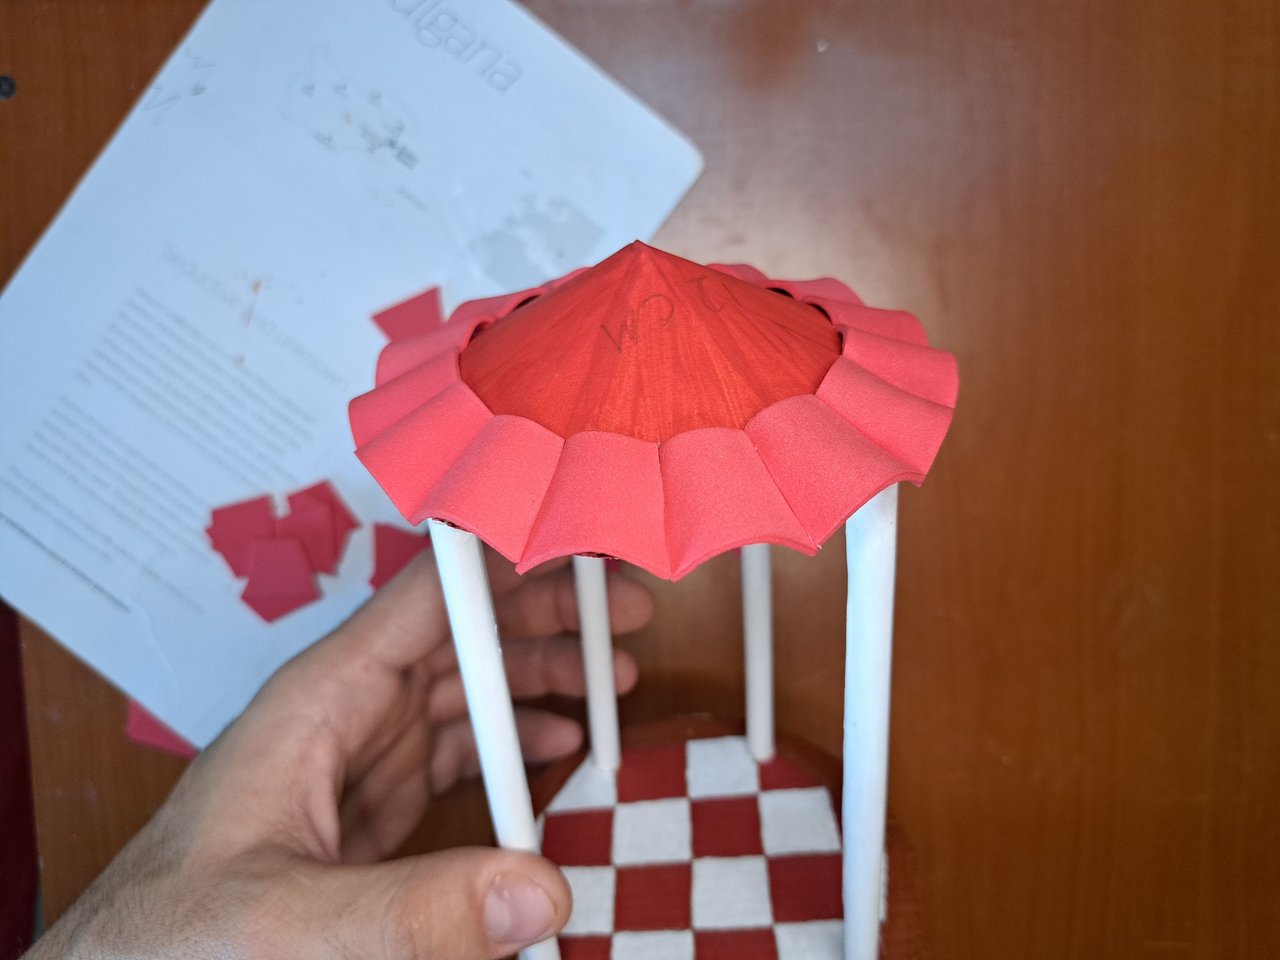
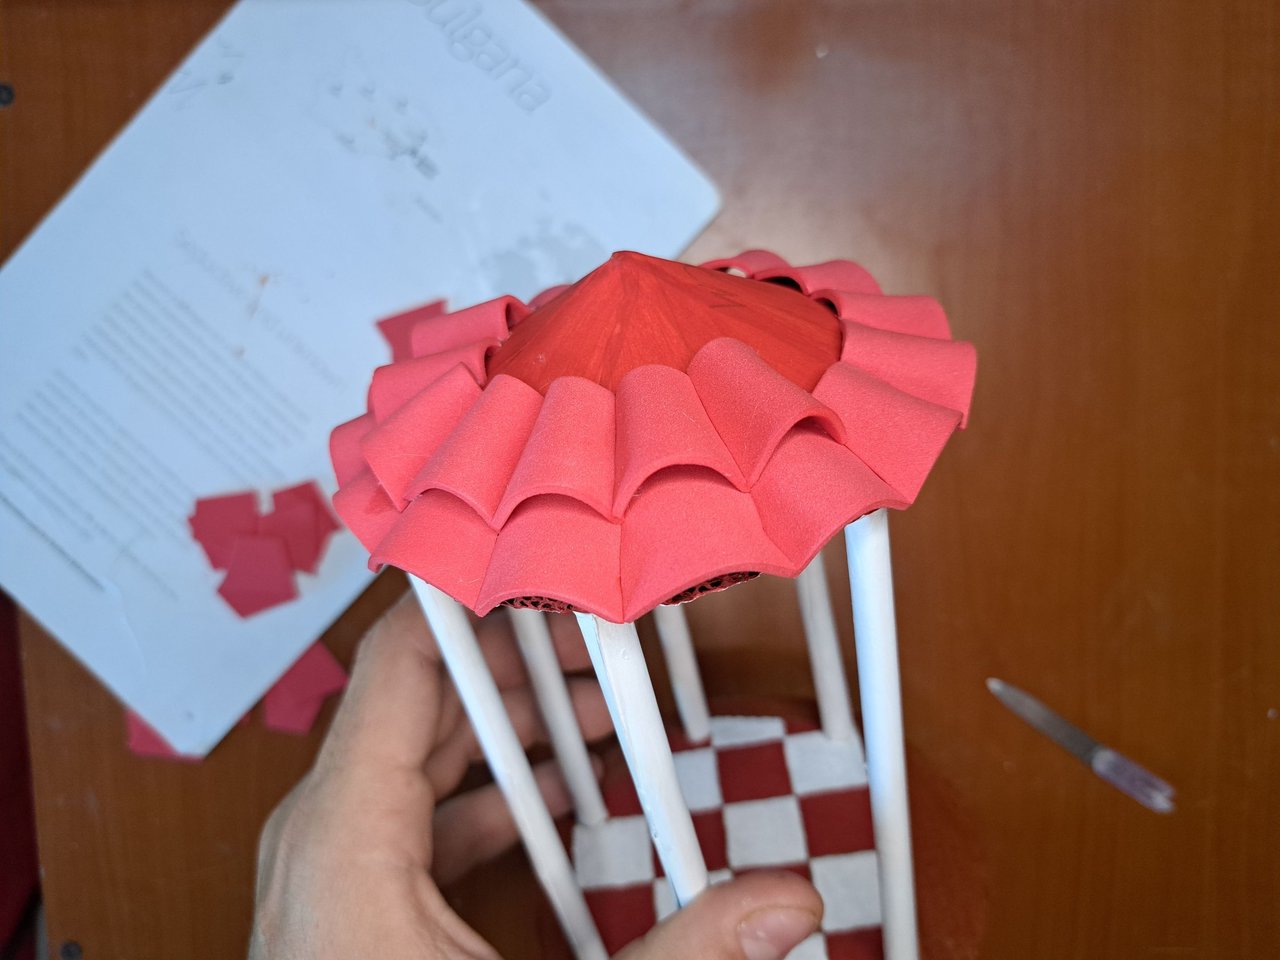
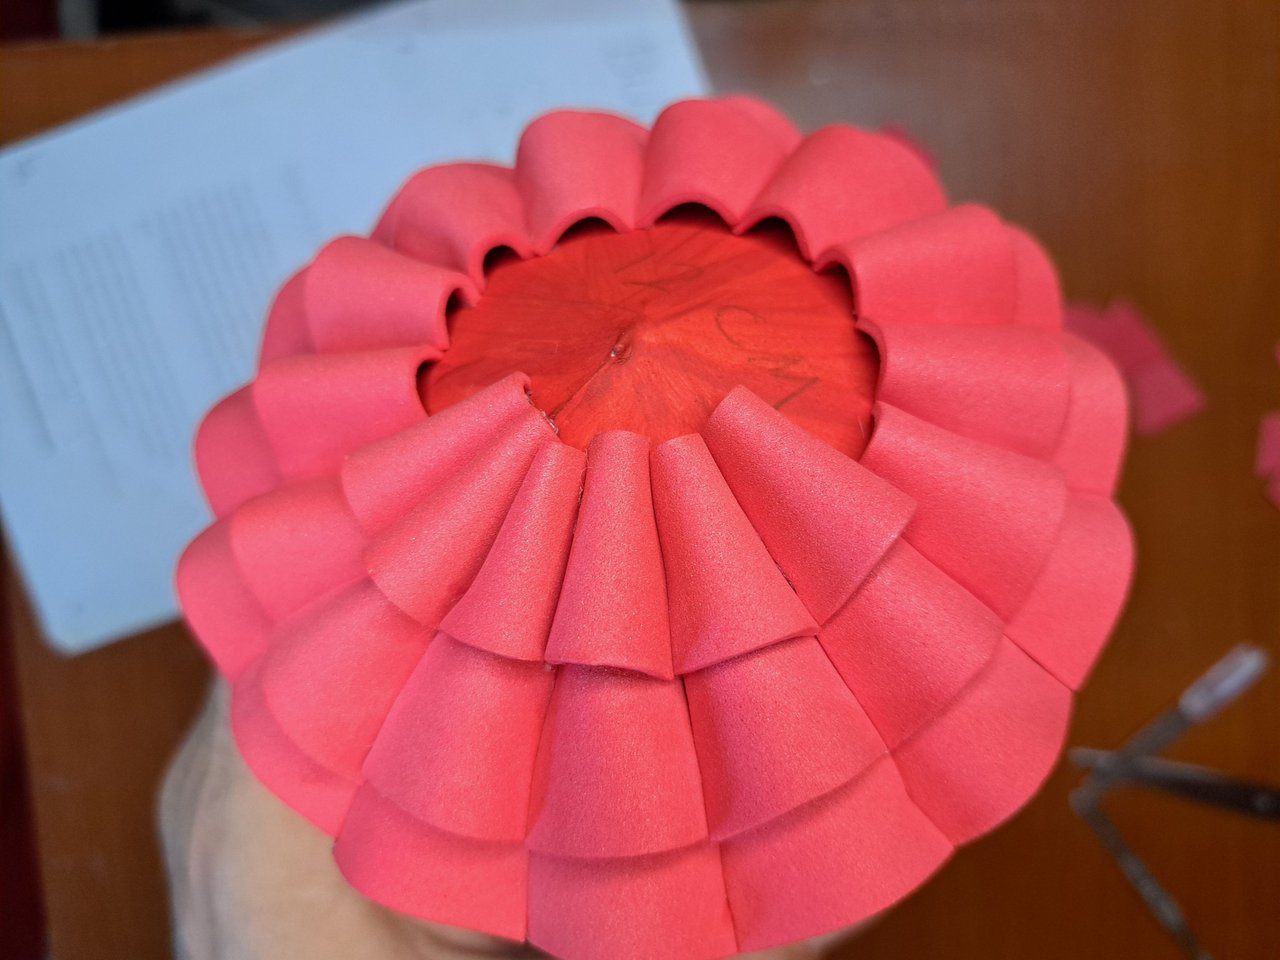
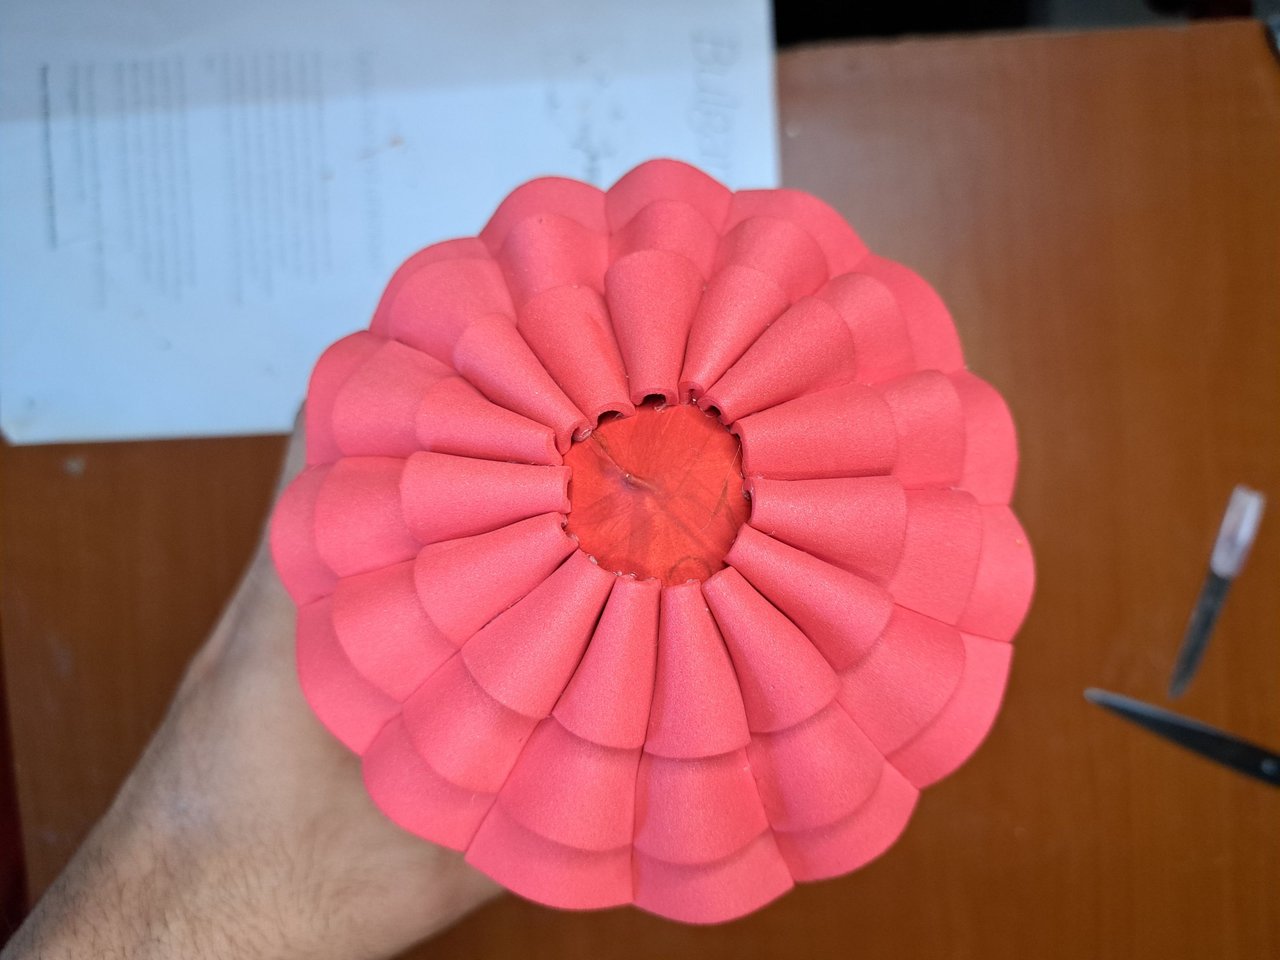
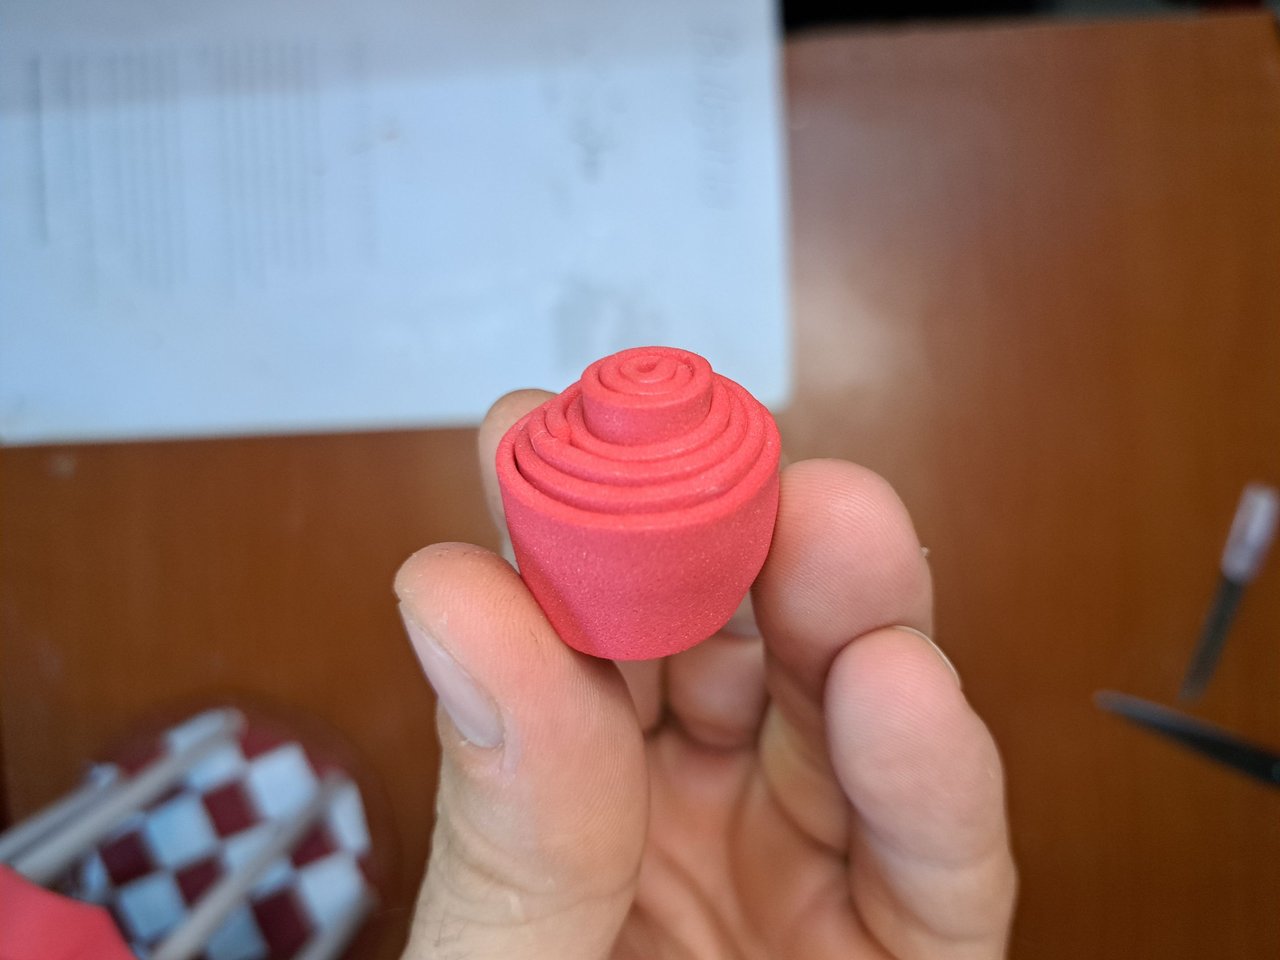
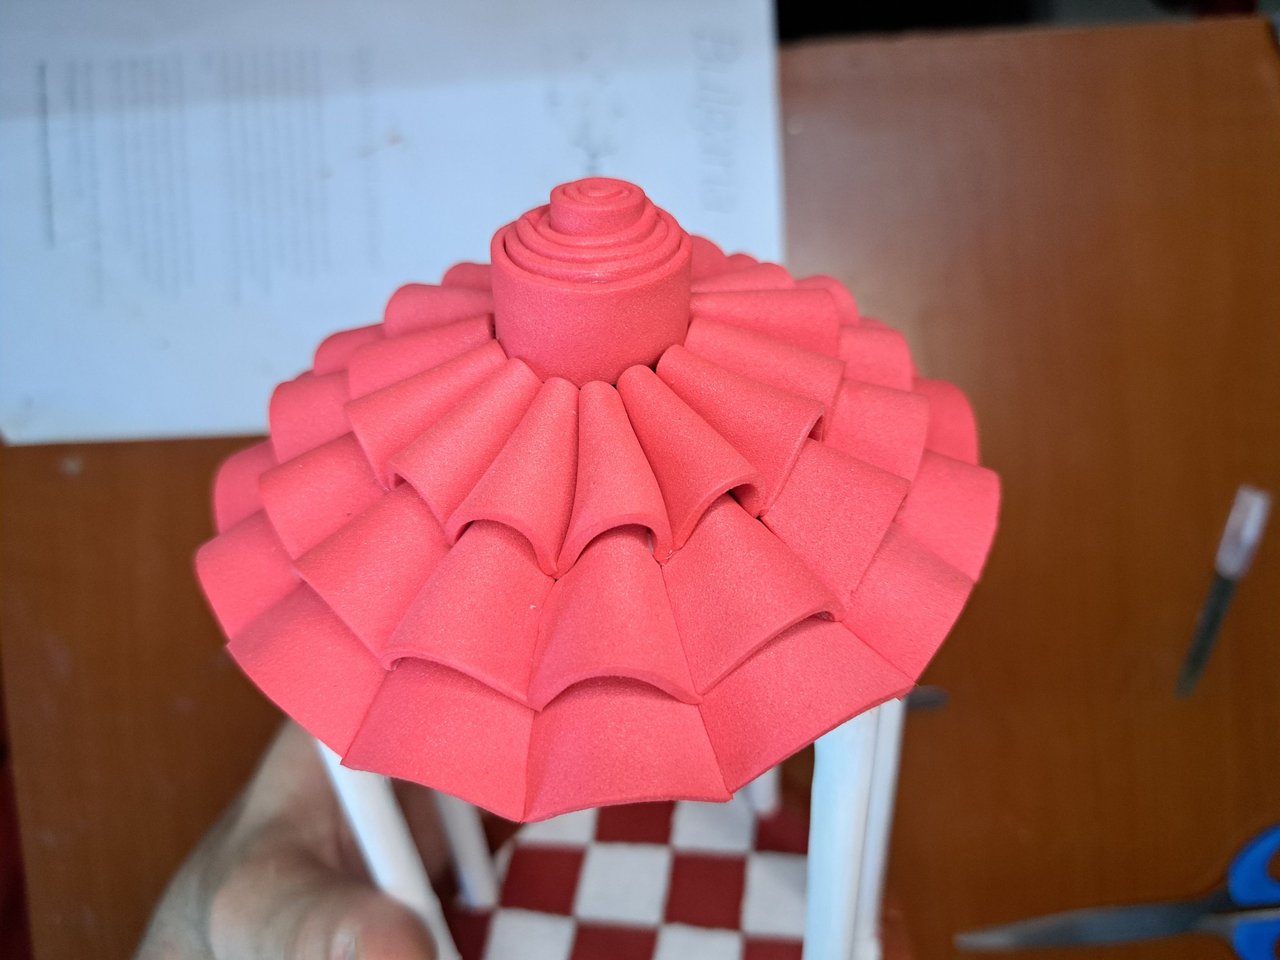
6️⃣ Continuing with the creation of the roof, we mark and cut small trapezoidal pieces in a sheet of red fomi. These pieces will be glued in a curved shape along the outer edge of the roof. There would be three layers of red fomi tiles. At the end of the third layer we would have a free space which we will cover with a piece of red fomi rolled in a spiral shape.
Spanish Version Here
6️⃣ Continuando con la creación del techo marcamos y recortamos pequeñas piezas trapezoidales en una lámina de fomi rojo. Estas piezas la iremos pegando en forma curva por todo el borde exterior del techo. Serían tres capas de tejas de fomi rojo. Al terminar la tercera capa tendríamos un espacio libre el cual cubriremos con una pieza de fomi rojo enrollado en forma de espiral.
 |
 |
 |
 |
 |
 |
 |
 |
 |
 |
 |
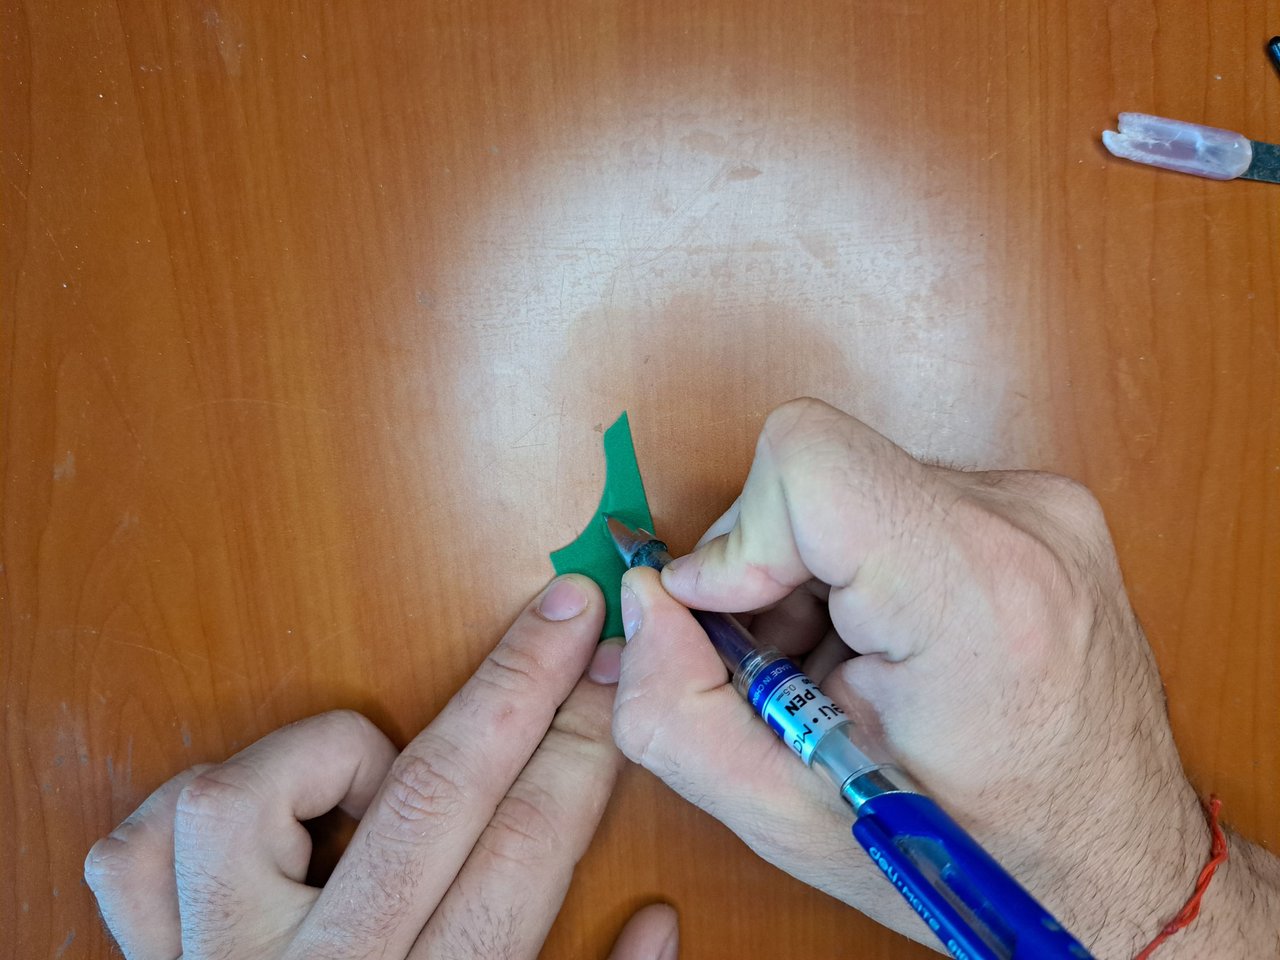
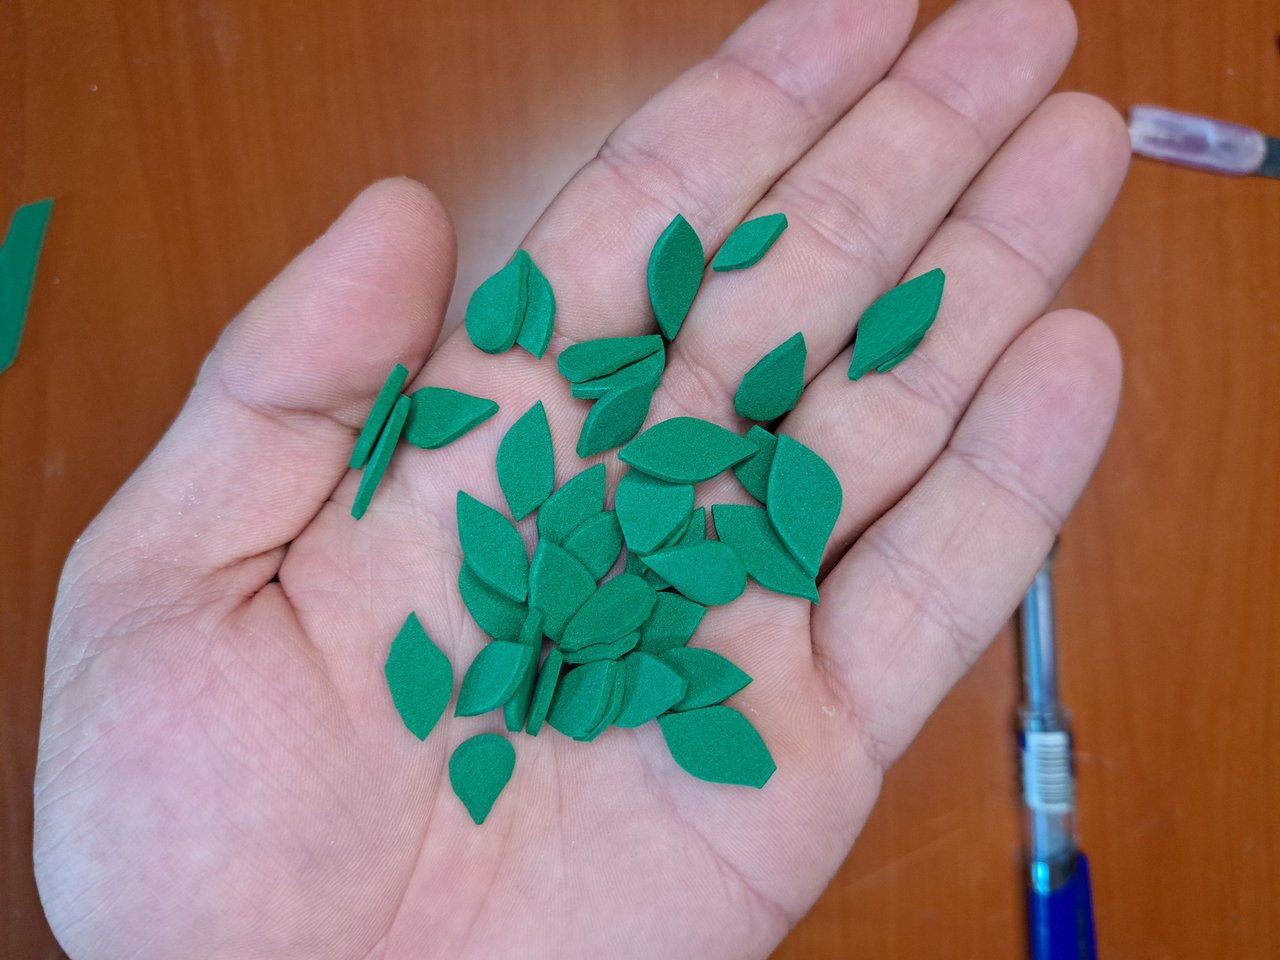
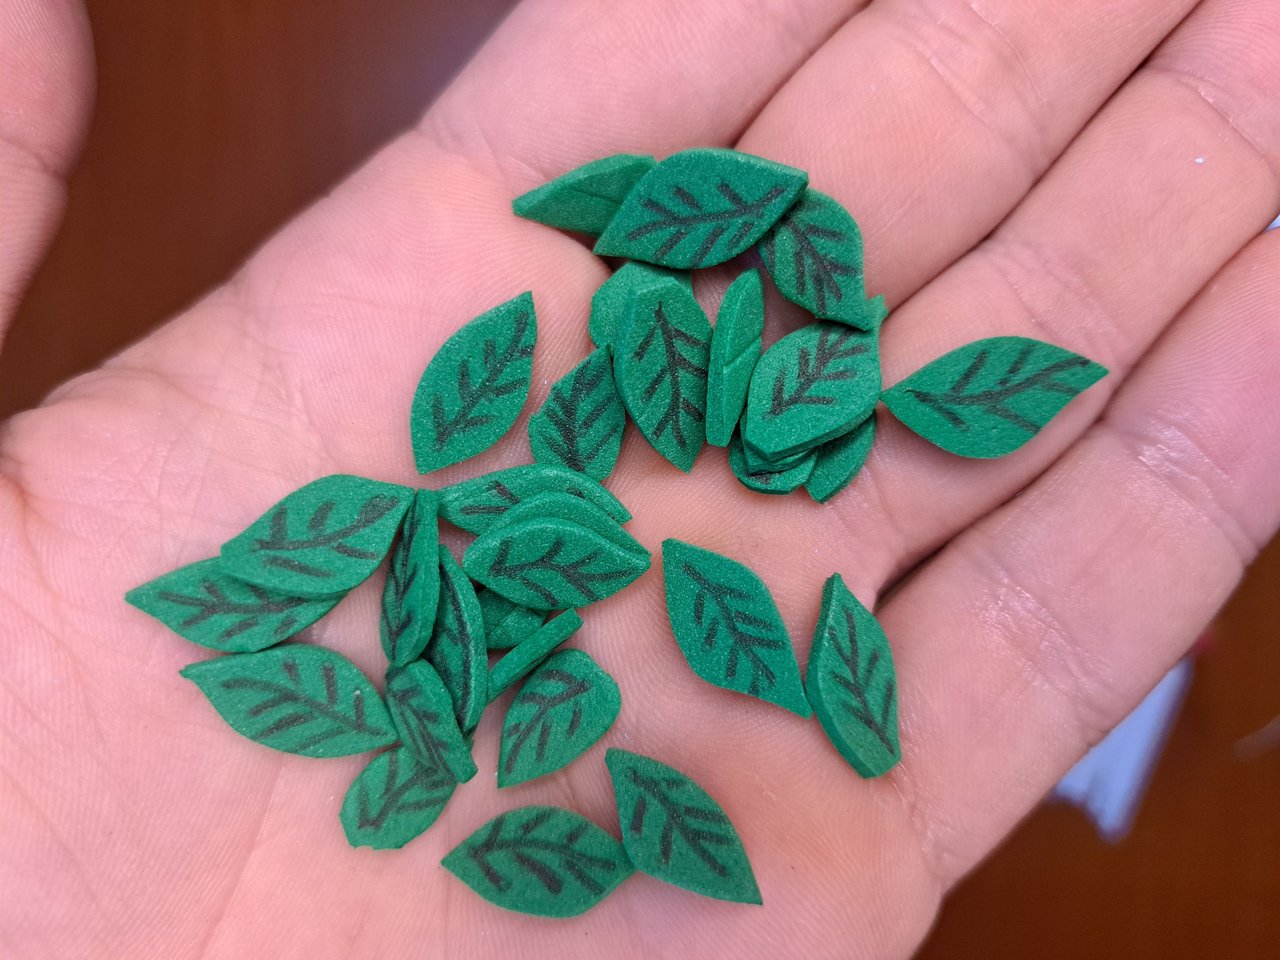
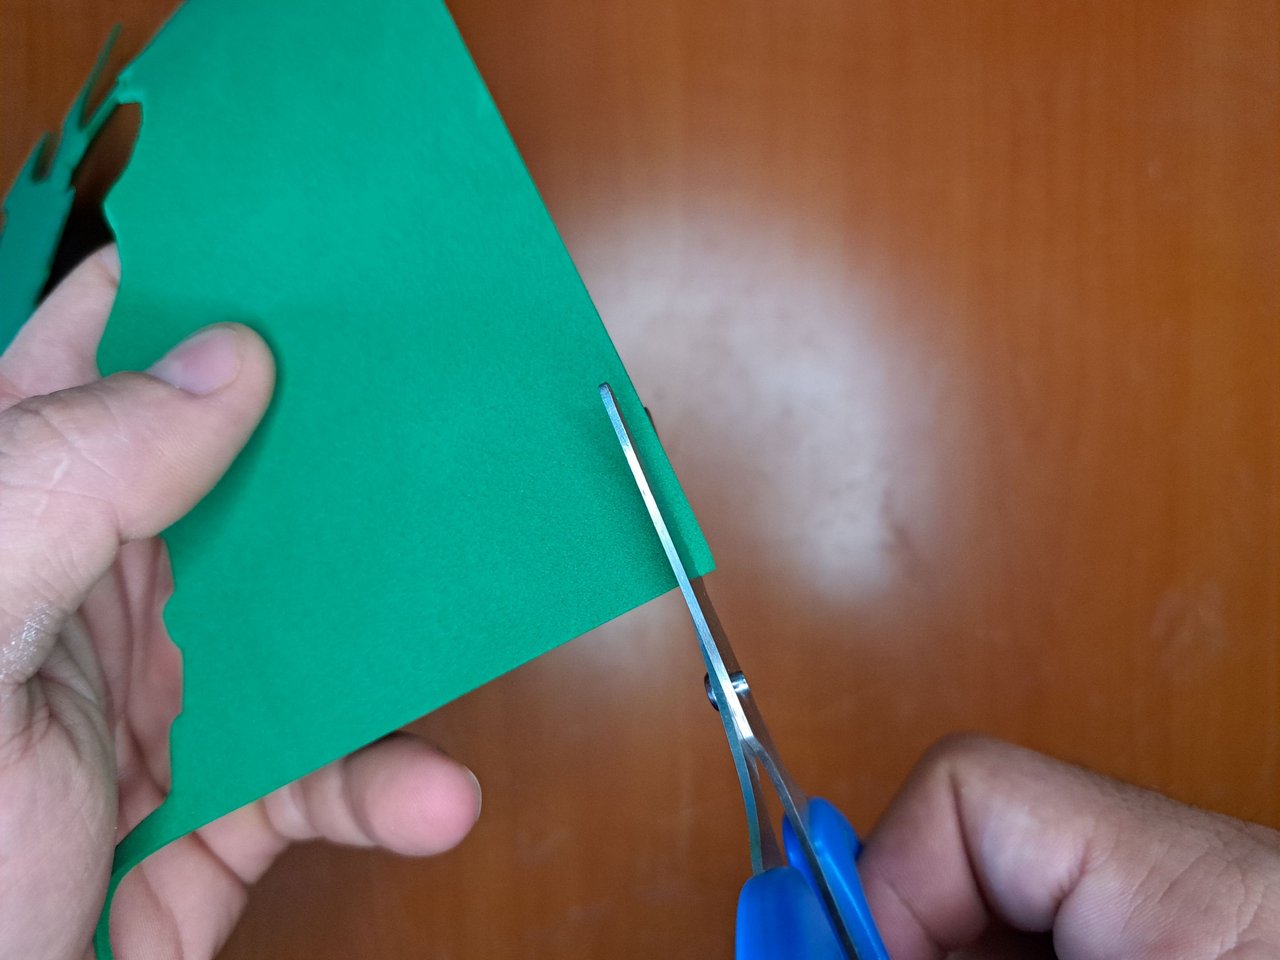
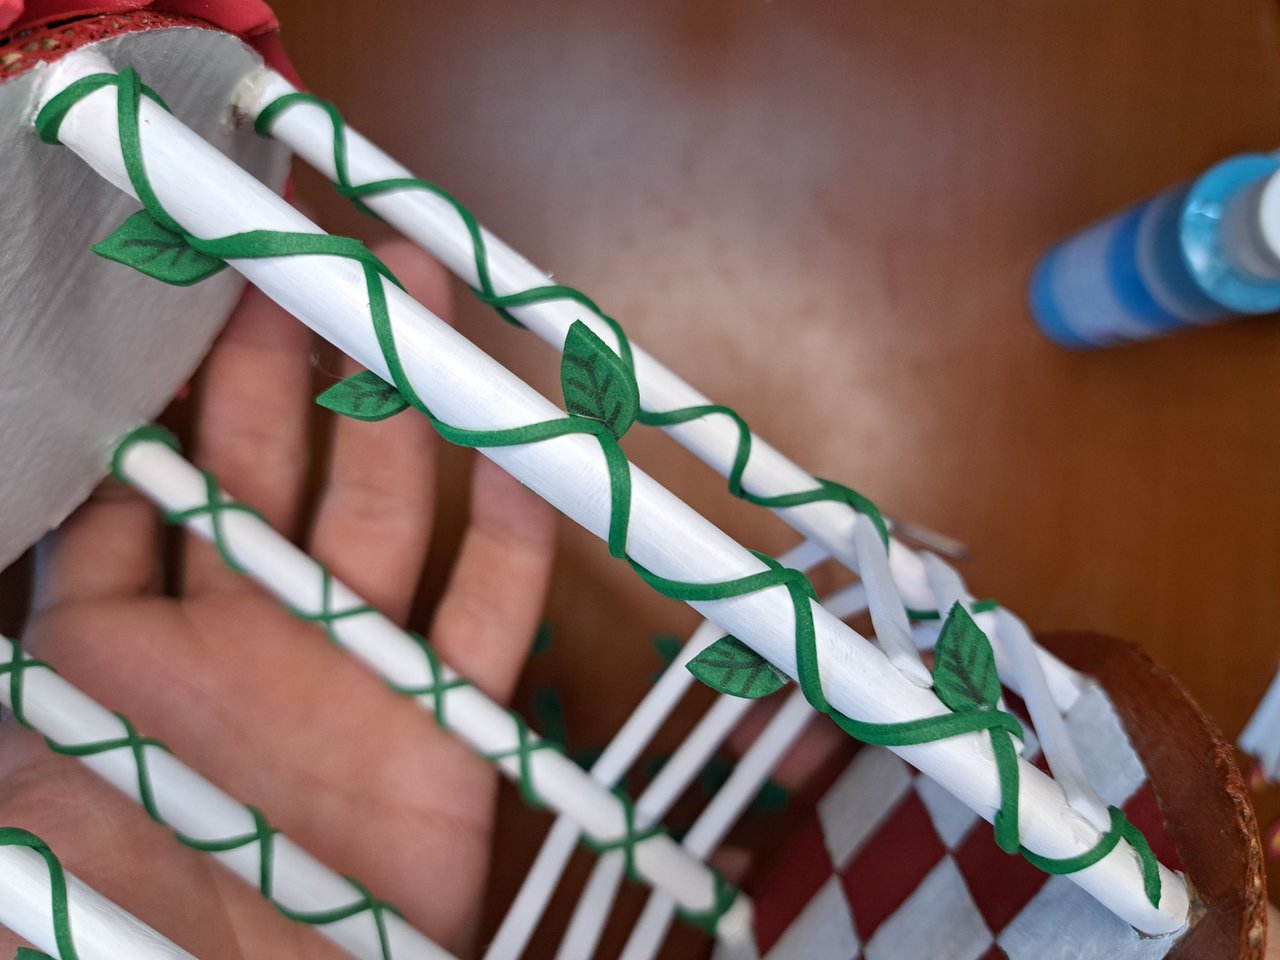
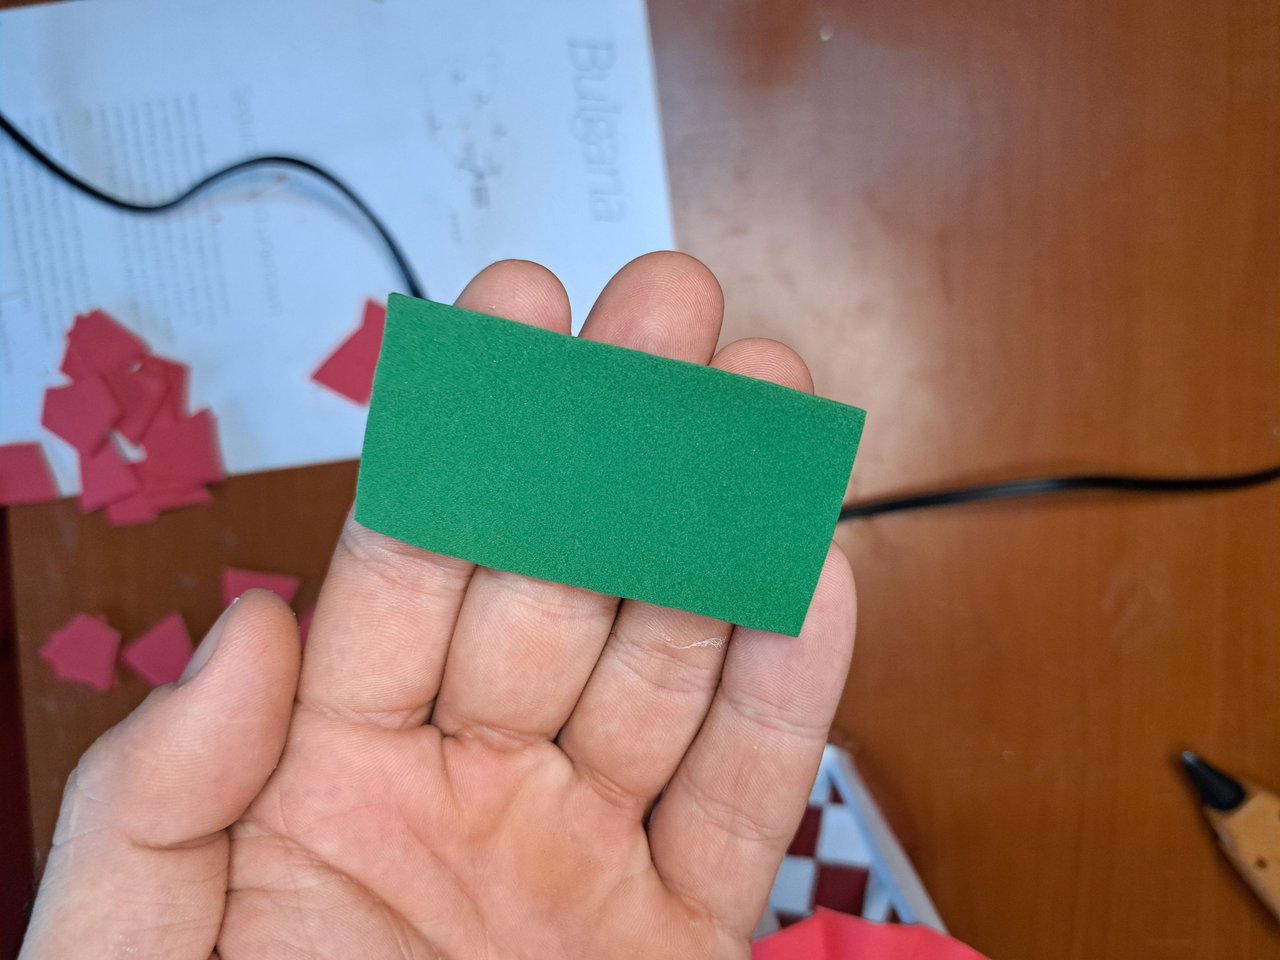
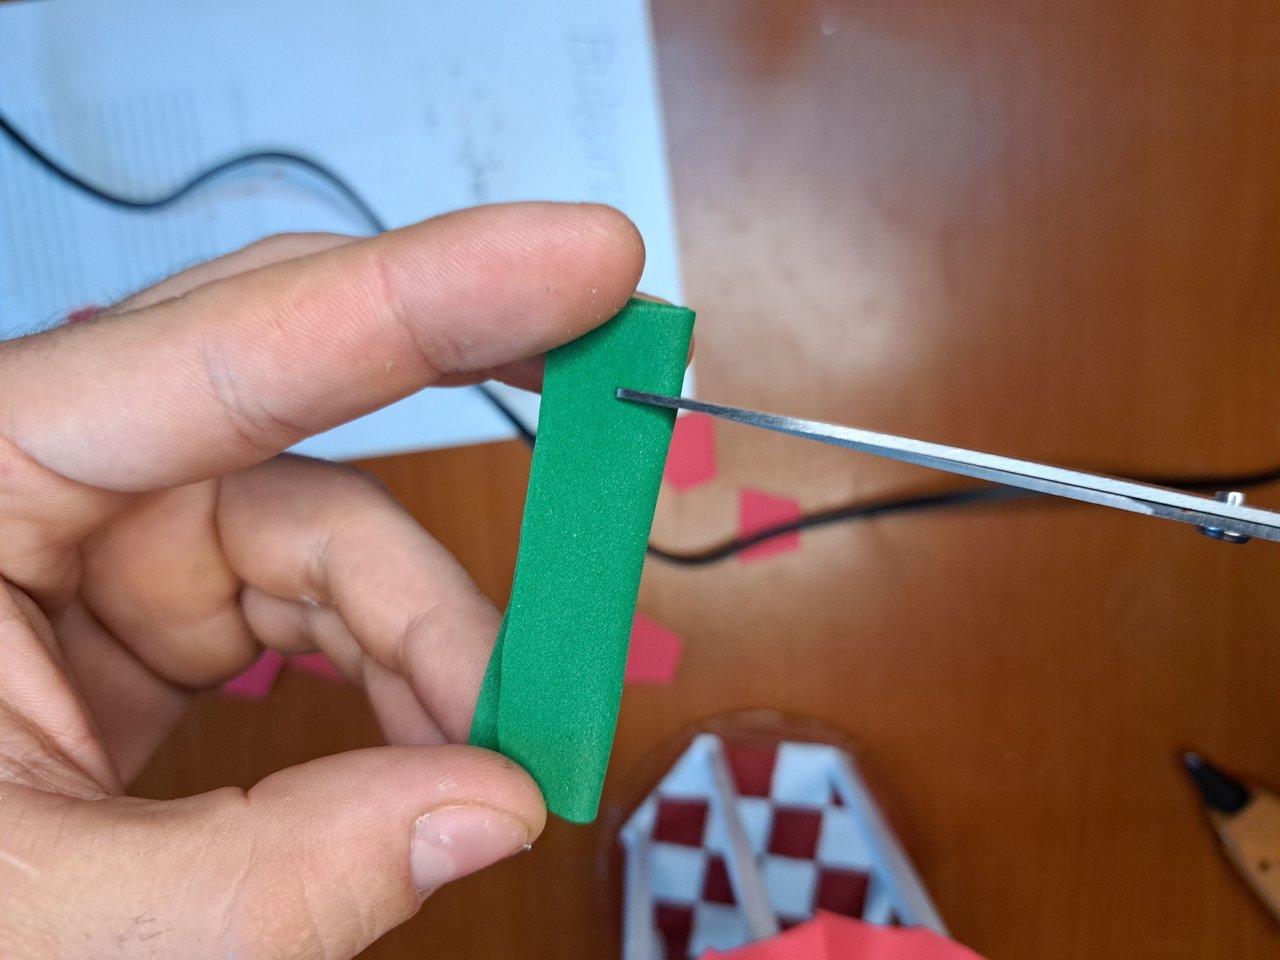
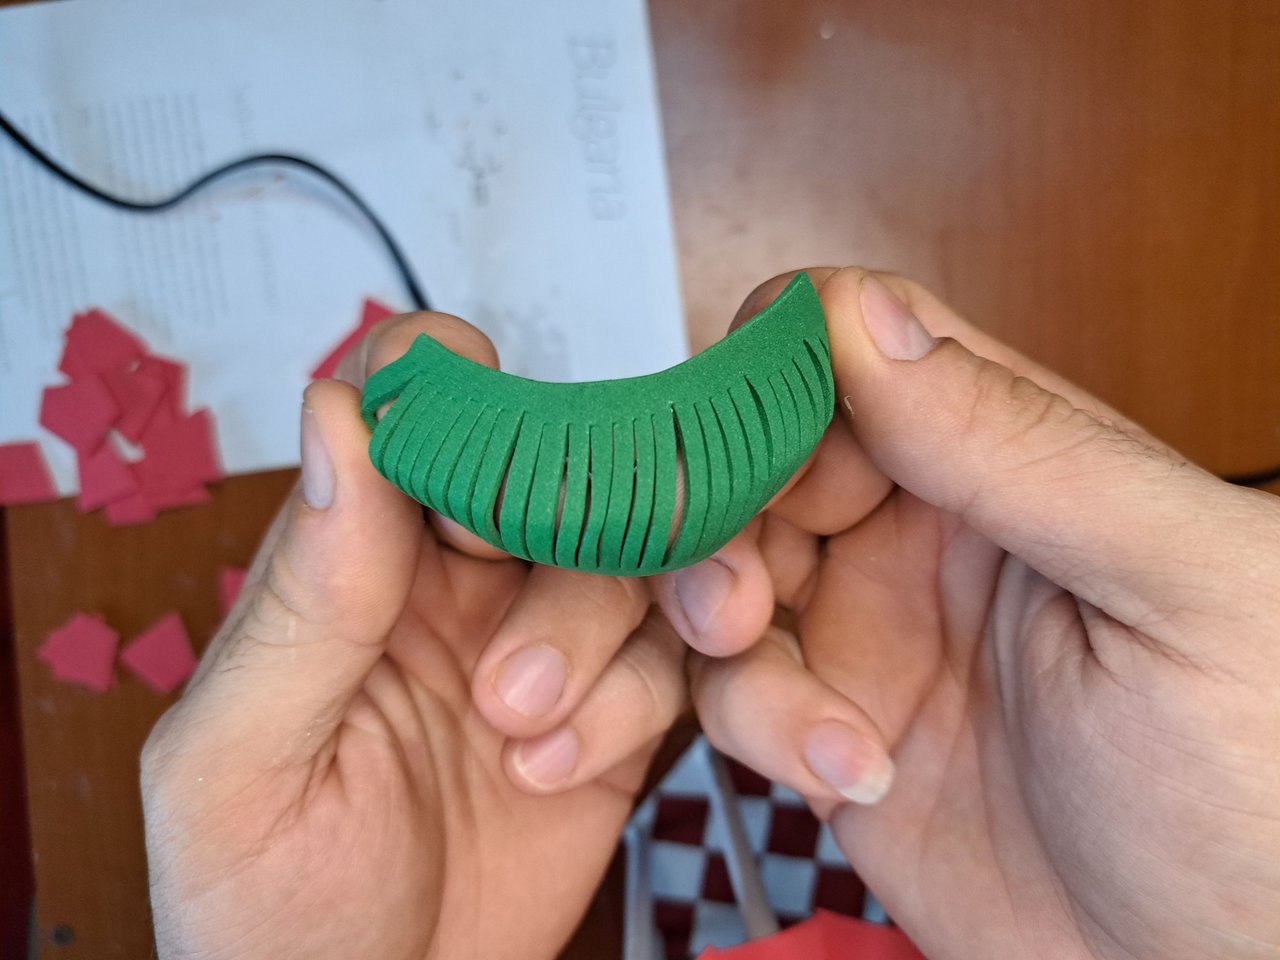
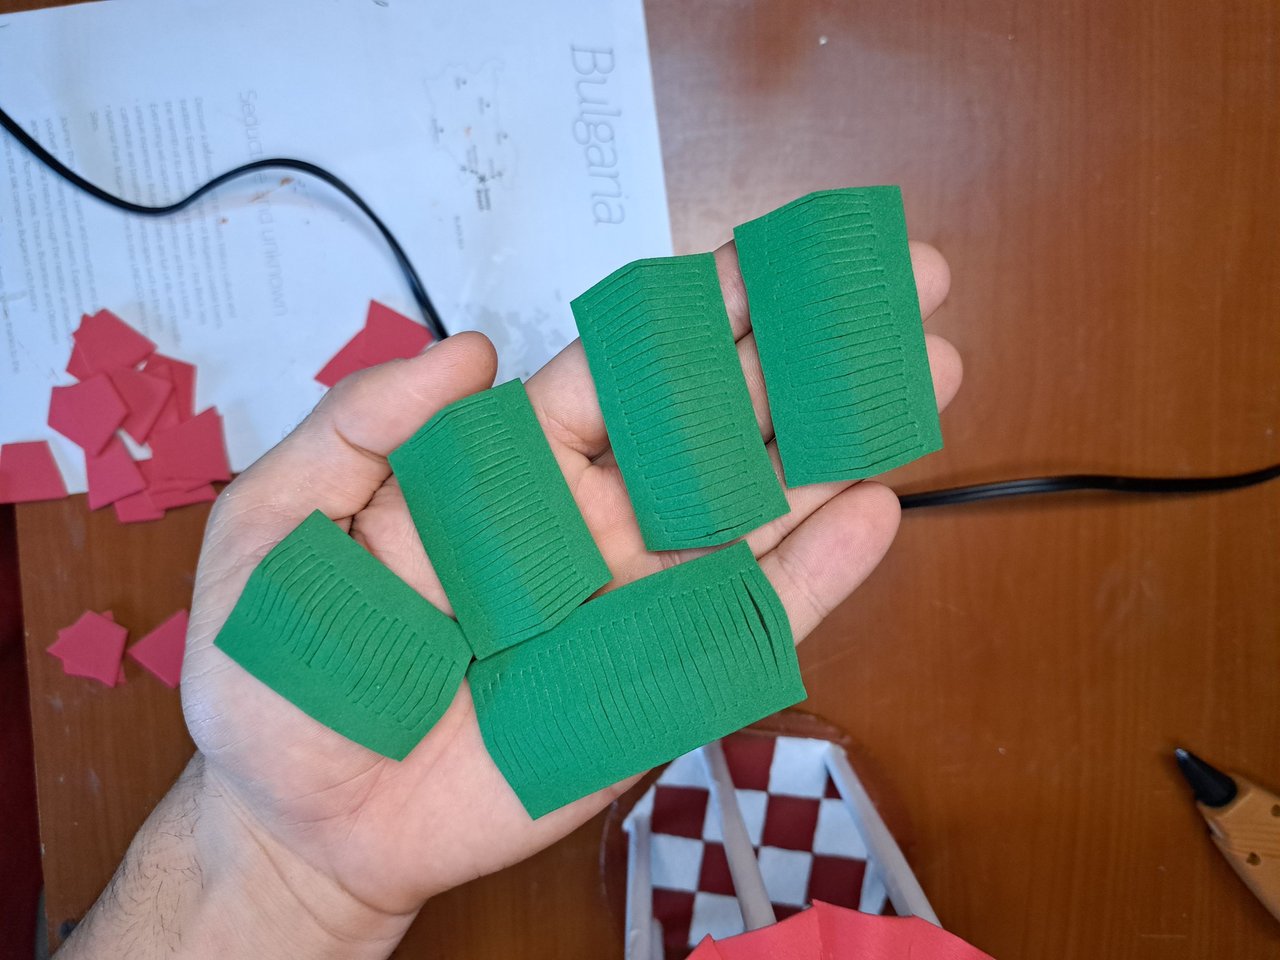
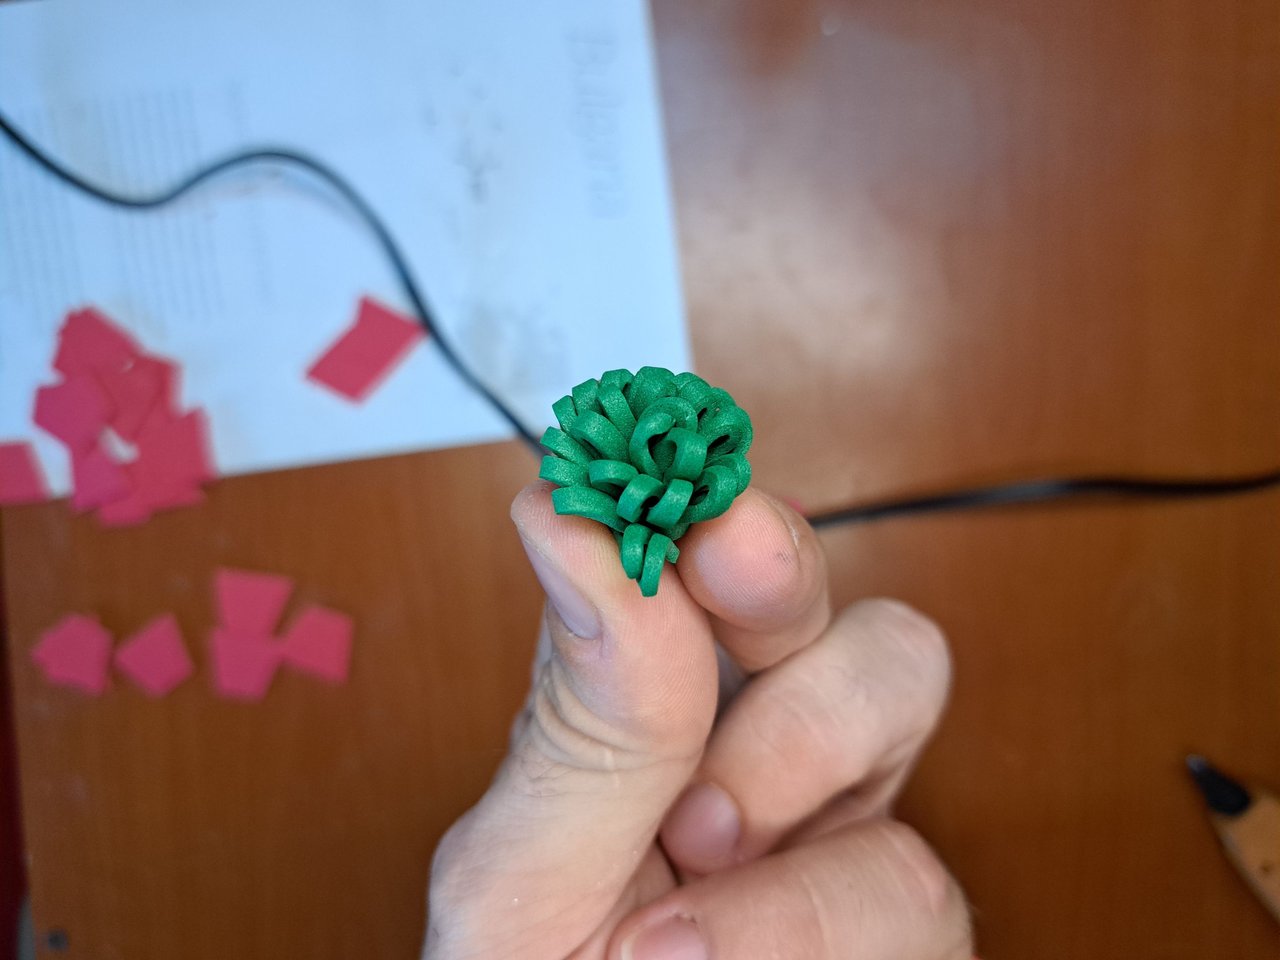
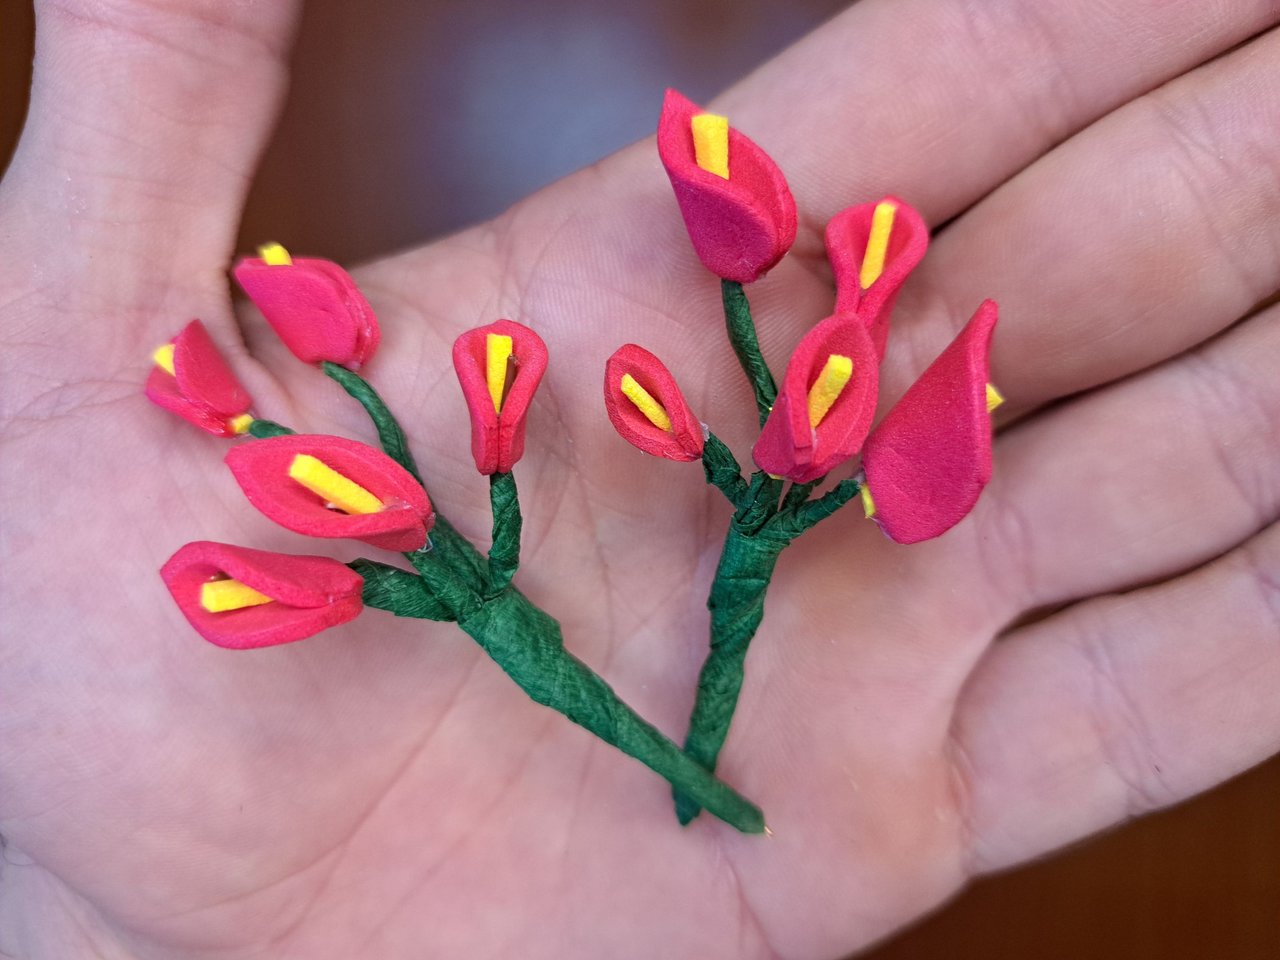
7️⃣ Next, we will mark and cut out the silhouette of small leaves on a green fomi sheet and draw their foliage. We will also cut thin strips of green fomi, which we will roll around each one of the pedestals to later glue the leaves to them.
Spanish Version Here
7️⃣ Seguidamente en una lámina de fomi verde marcaremos y recortaremos la silueta de pequeñas hojas a la cuales les dibujaremos su lámina foliar. También recortaremos finas tiras de fomi verde, las cuales enrollaremos alrededor de cada uno de los pedestales para posteriormente pegarles las hojas.
 |
 |
 |
 |
 |
 |
 |
 |
 |  |  |
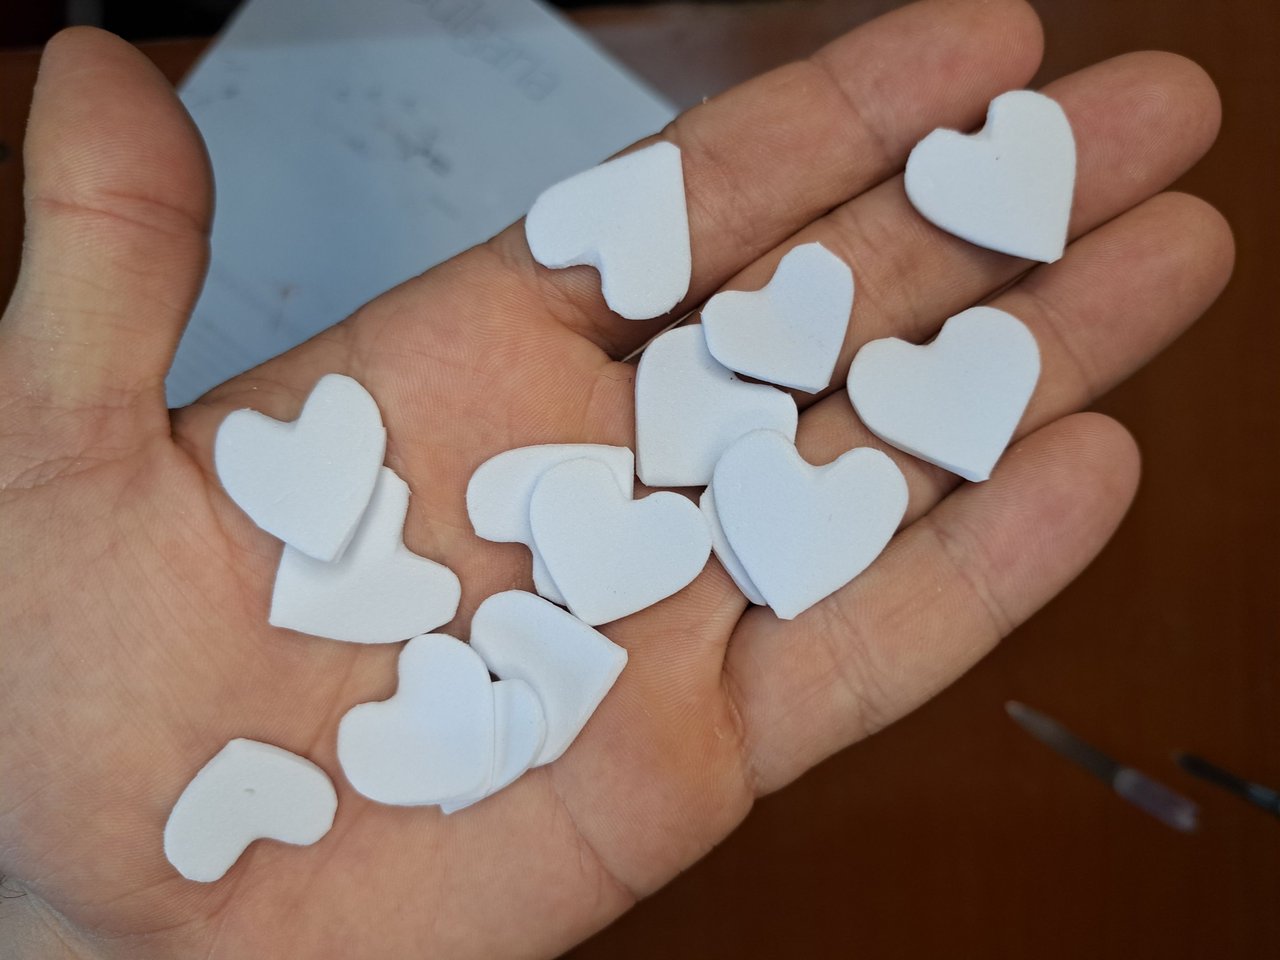
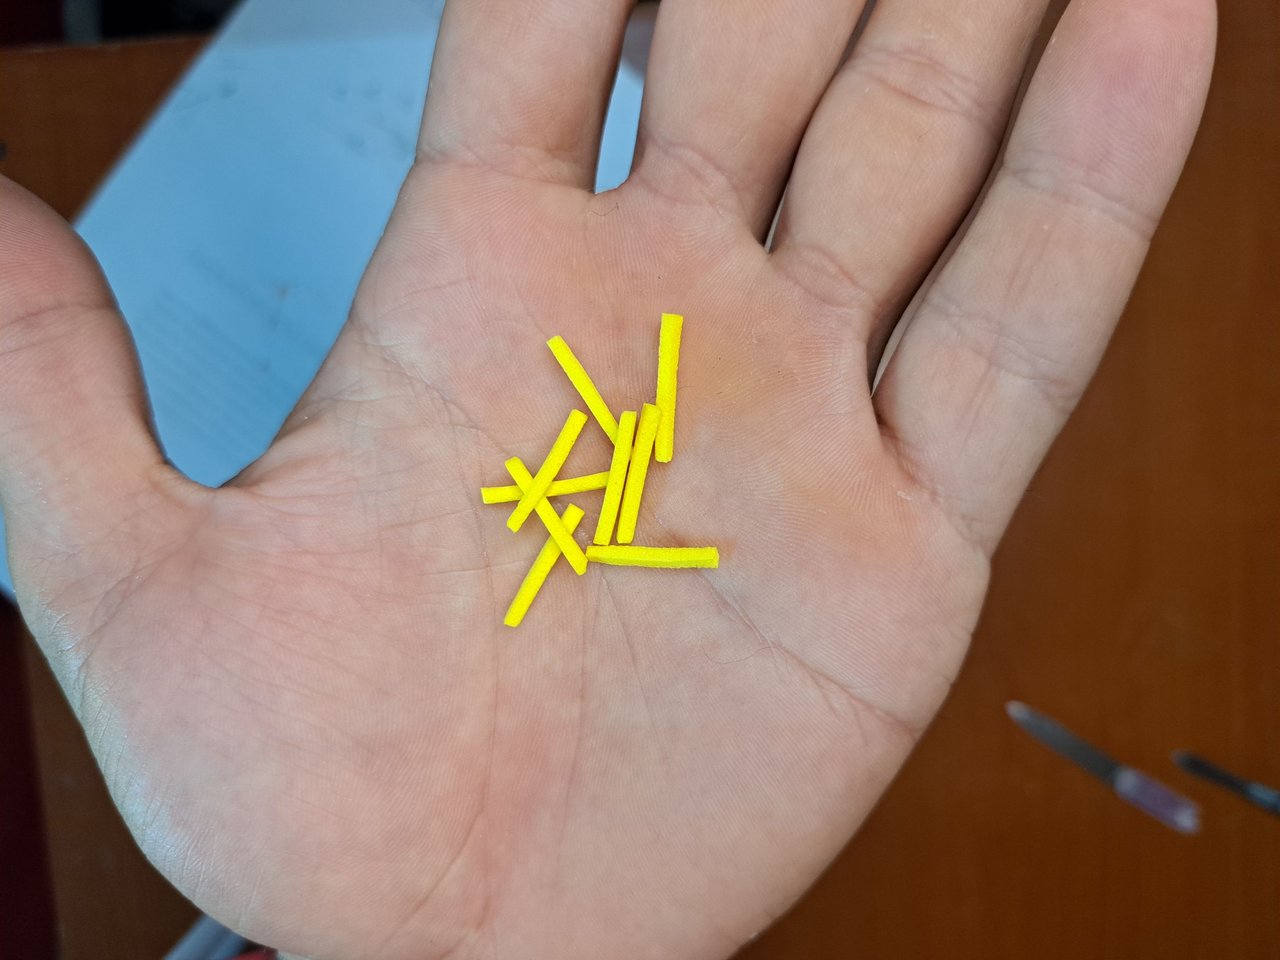
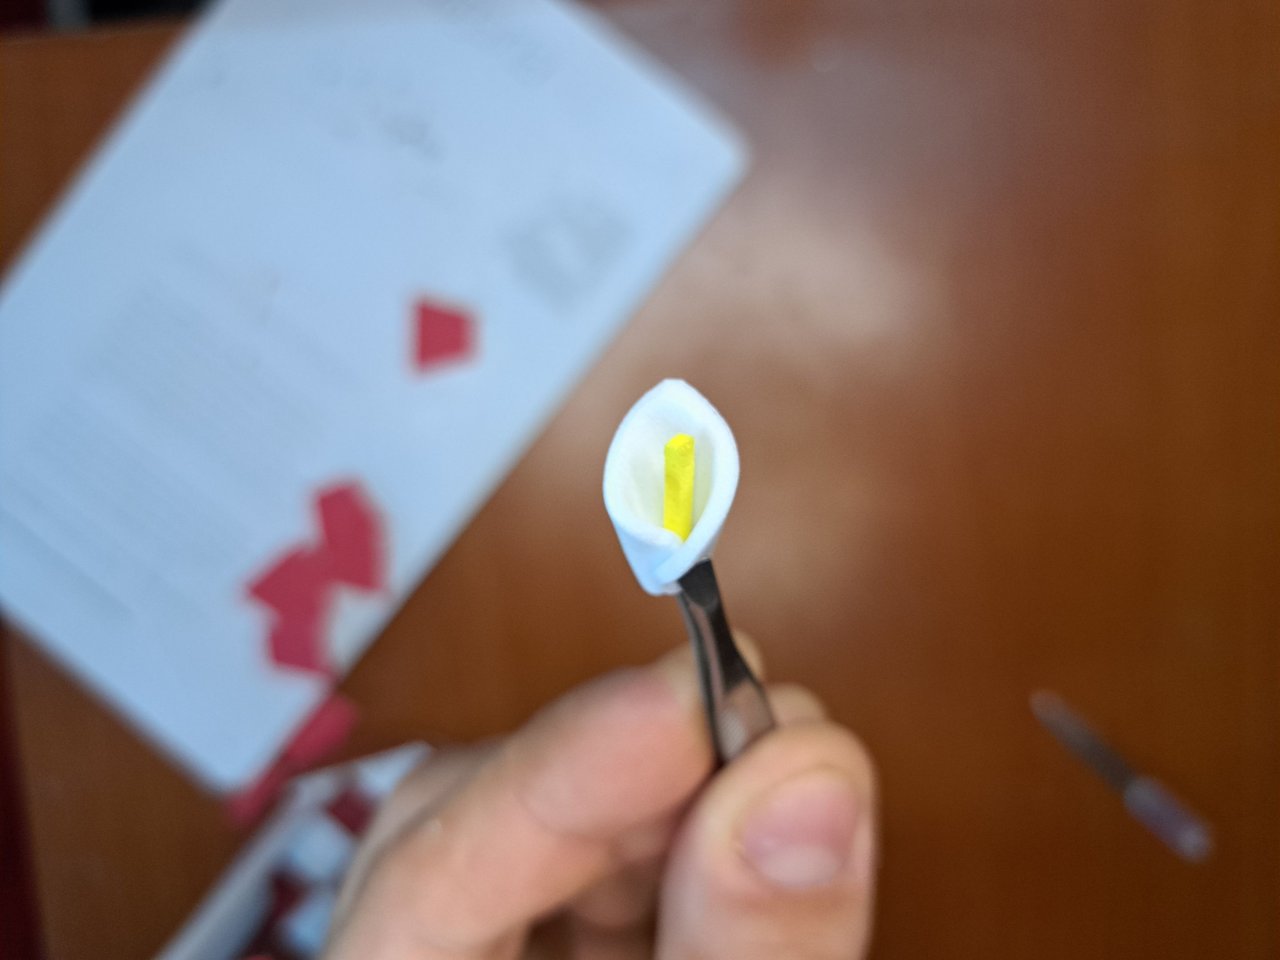
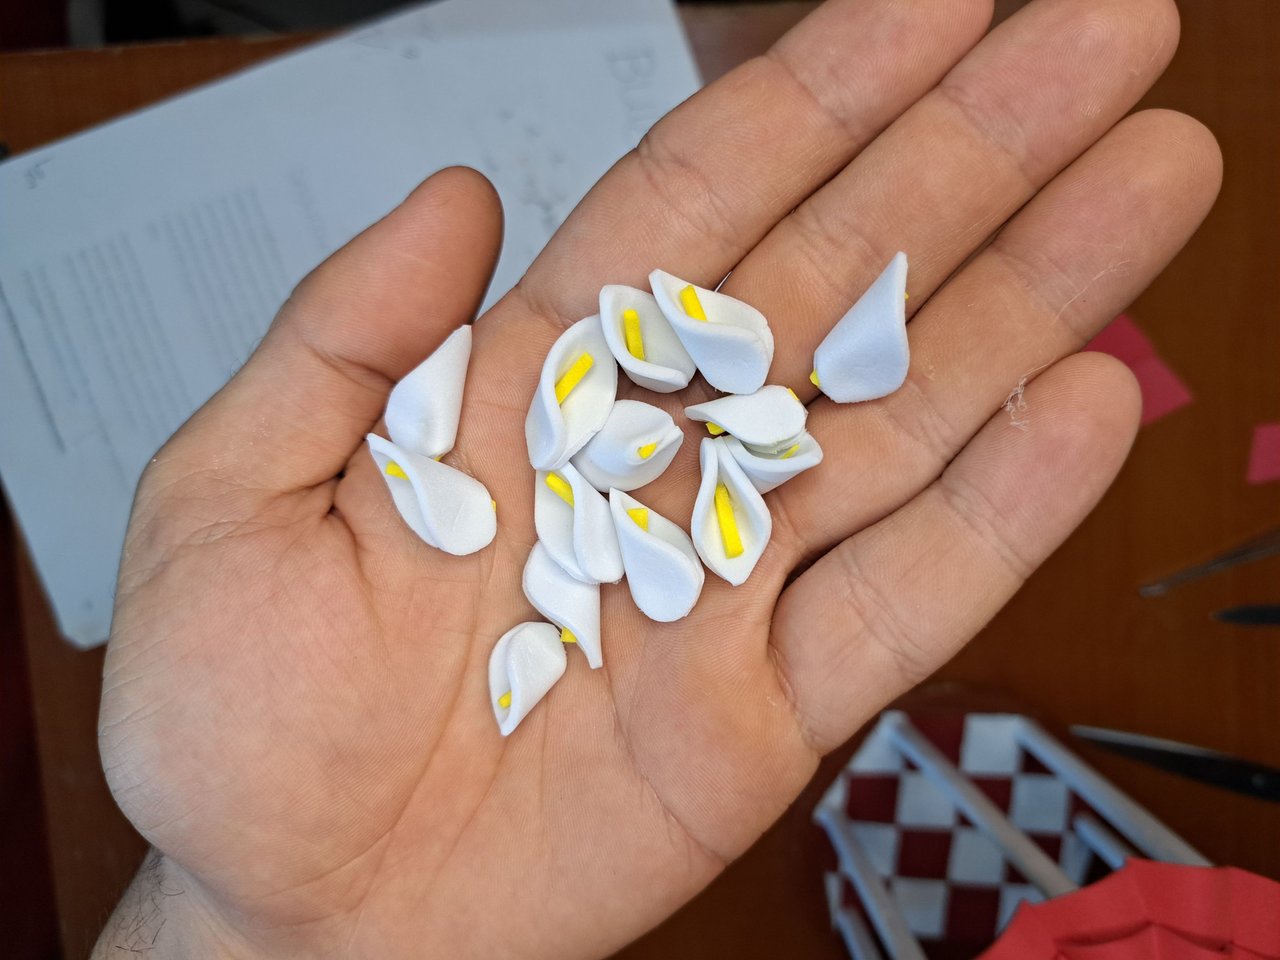
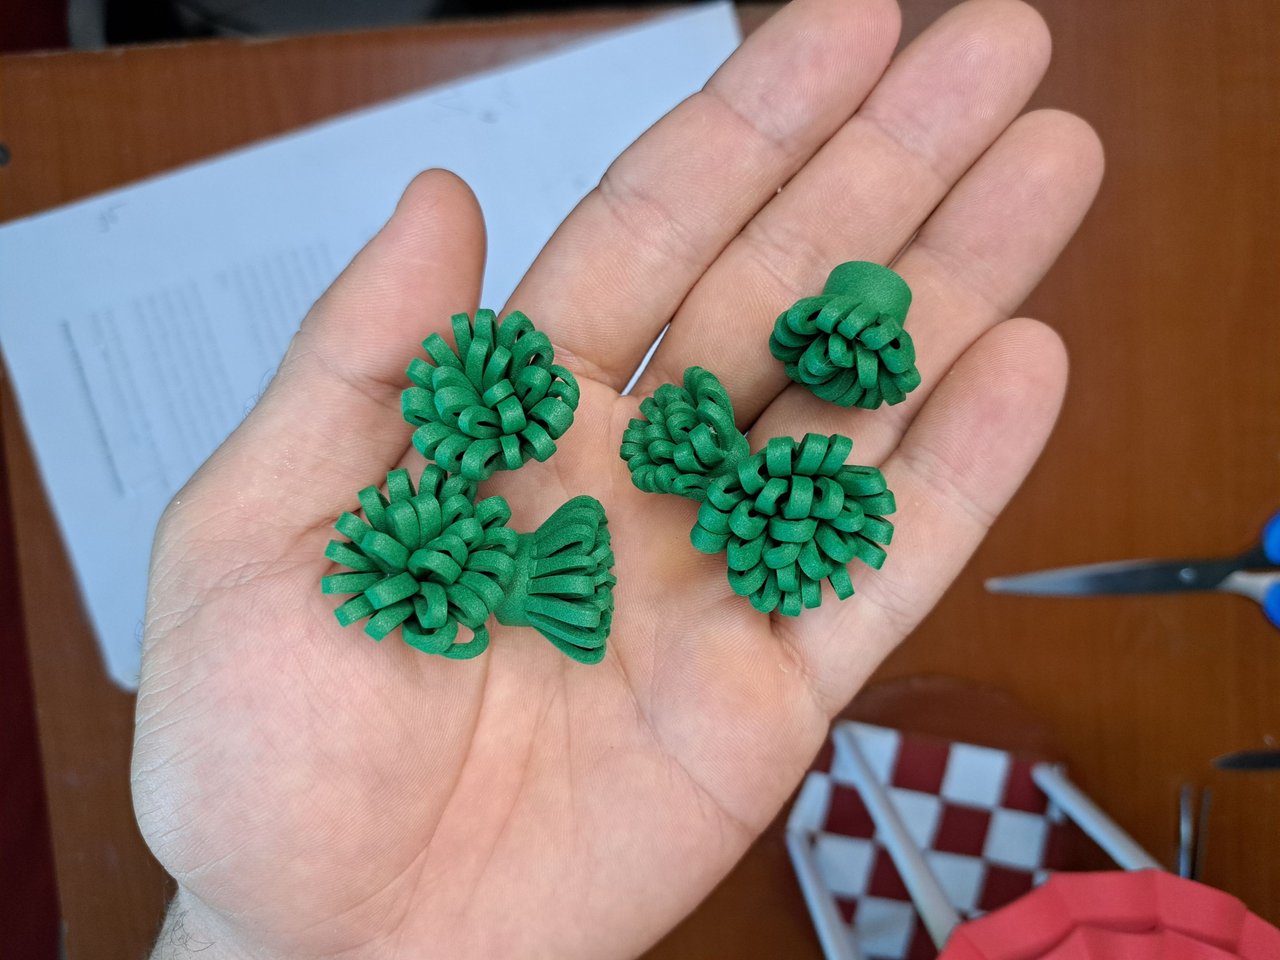
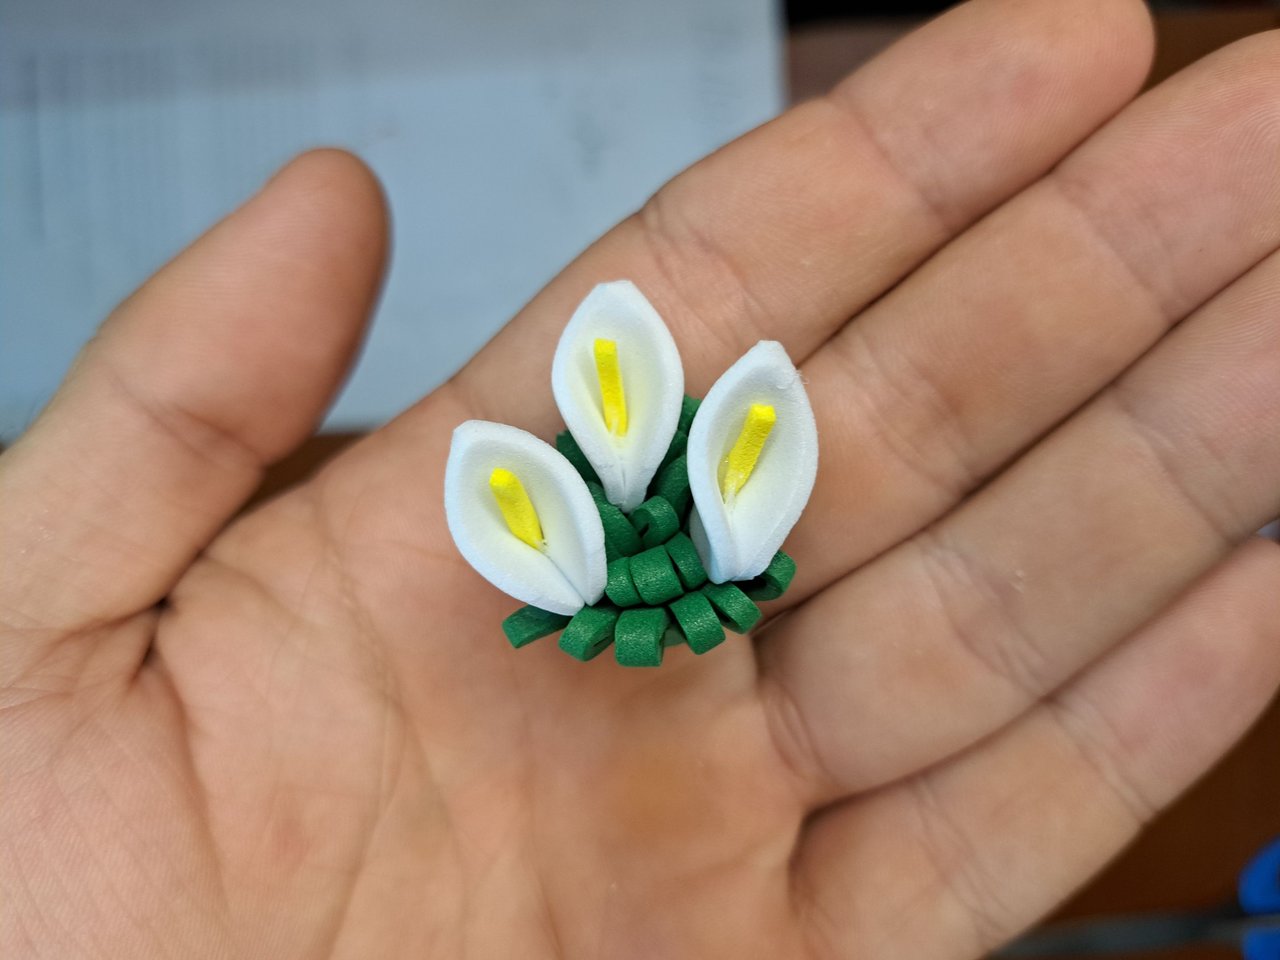
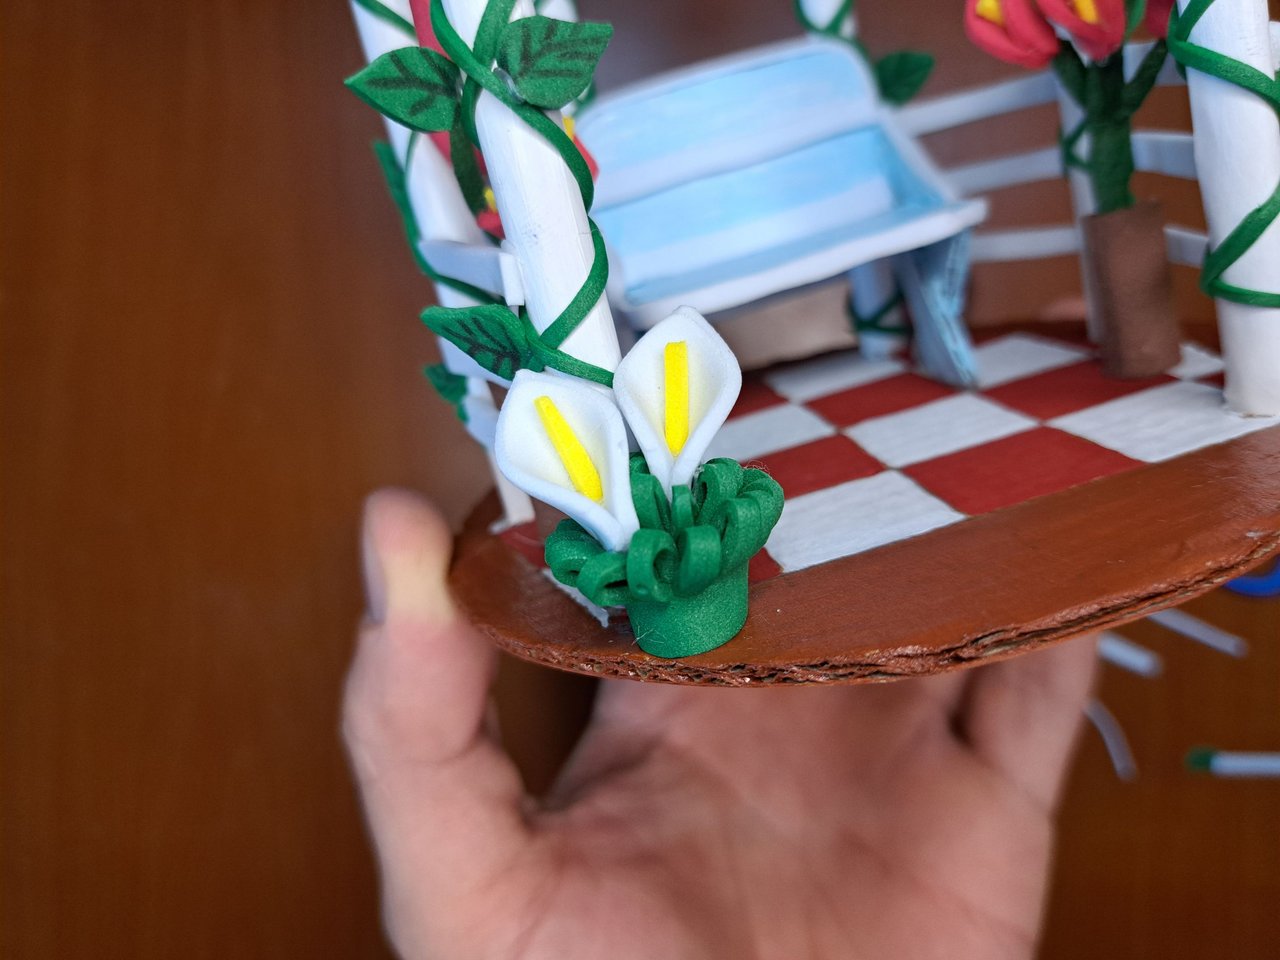
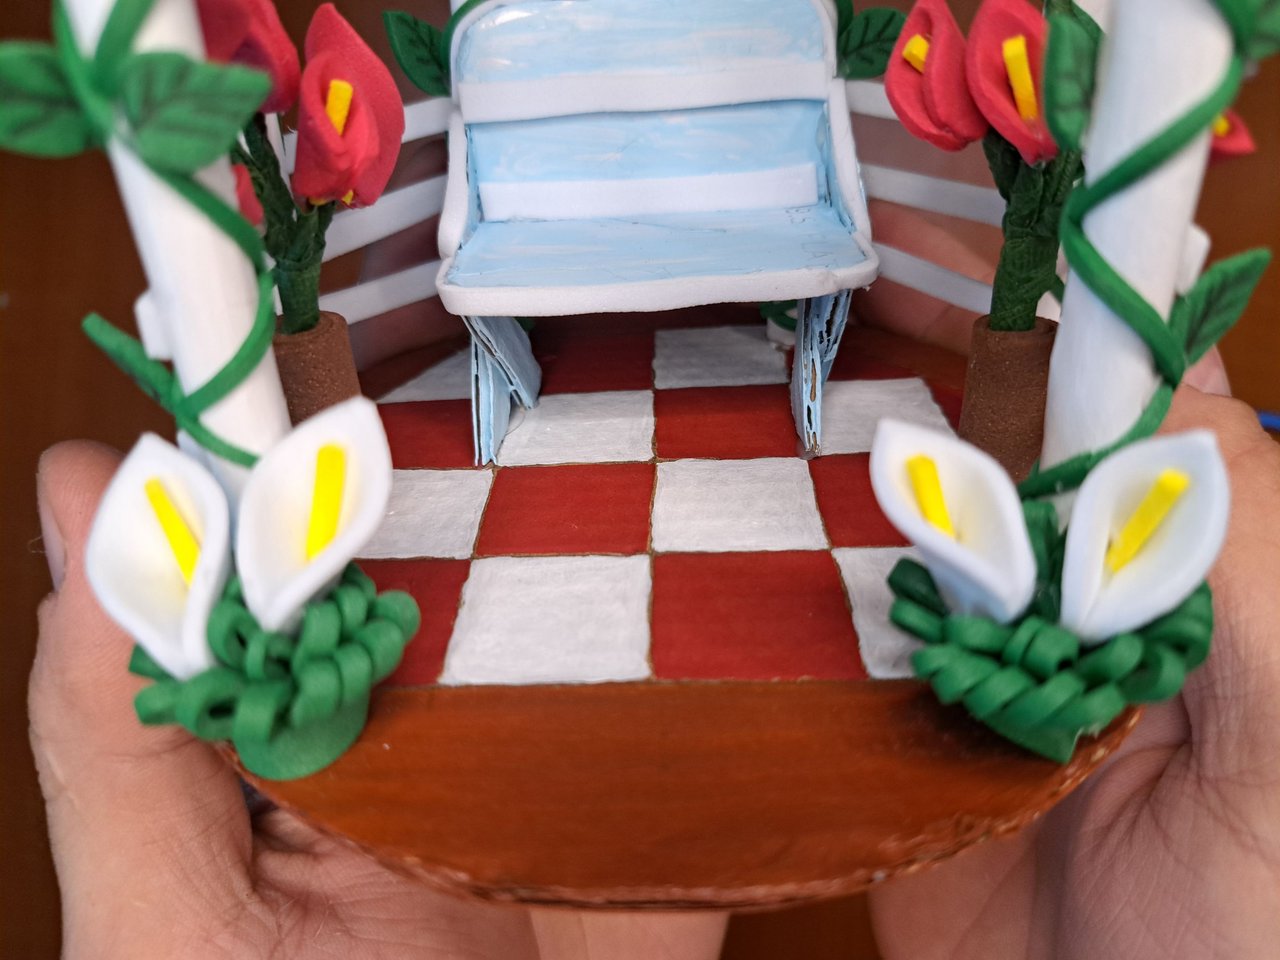
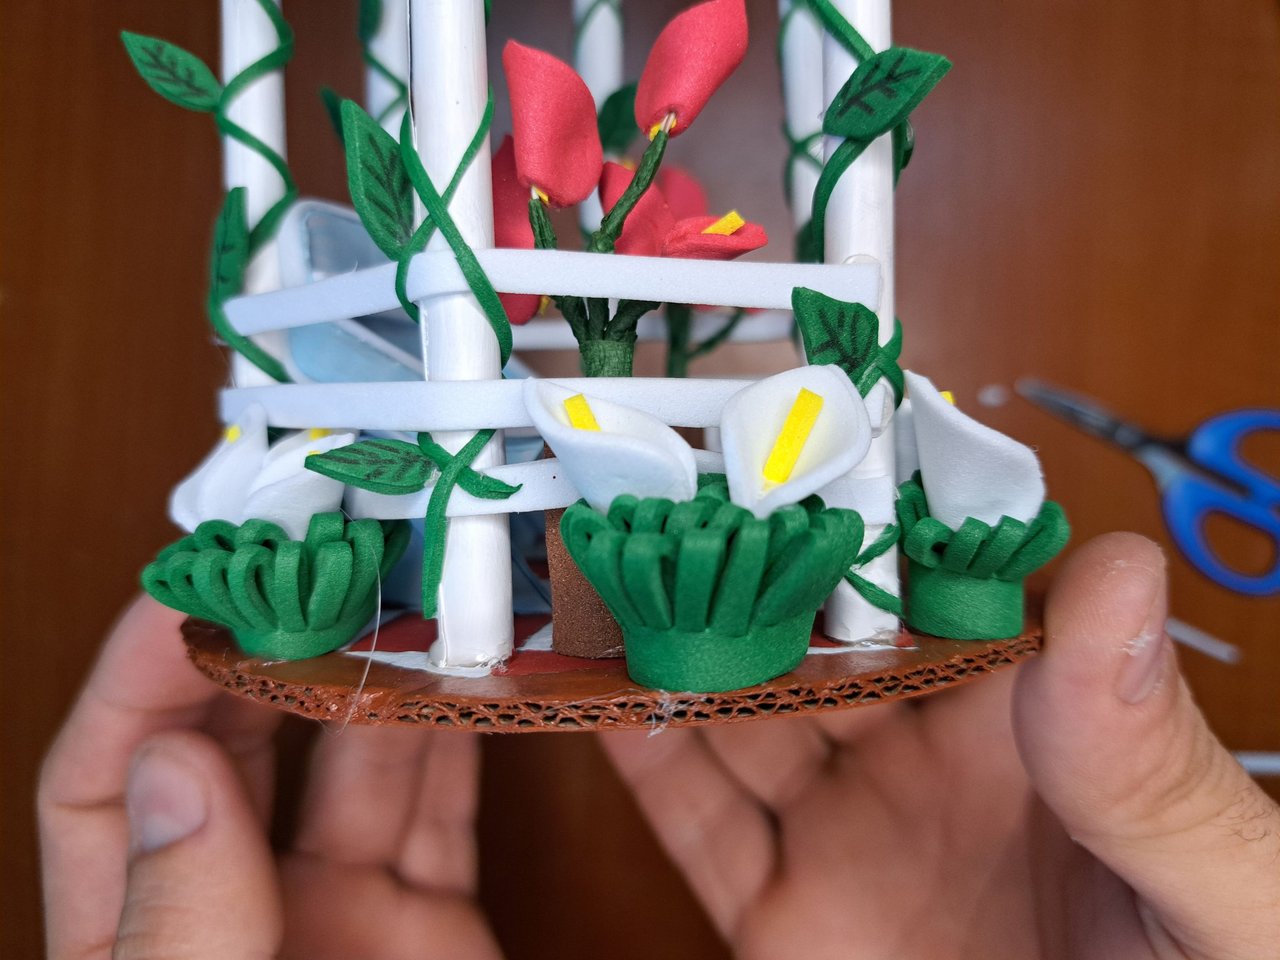
8️⃣ Cut small hearts out of white fomi and roll them around thin strips of yellow fomi to form small spatophyllum flowers. Next, we fold a rectangular piece of green fomi and after making small cuts along the edge, we roll it up and glue it. All that remains is to glue the white flowers on top of the green pompoms and we would have the first 6 plants.
Spanish Version Here
8️⃣ En fomi blanco recortaremos pequeños corazones, los cuales enrollaremos alrededor de unas finas tiras de fomi amarillo para formar pequeñas flores de espatofilio. Seguidamente, doblamos una pieza rectangular de fomi verde y luego de hacerle pequeños cortes por el borde la enrollamos y pegamos. Solo queda pegar las flores blancas encima de los pompones verdes y tendríamos las 6 primeras plantas.
 |  |  |  |
 |
 |
 |
 |
 |
 |
 |
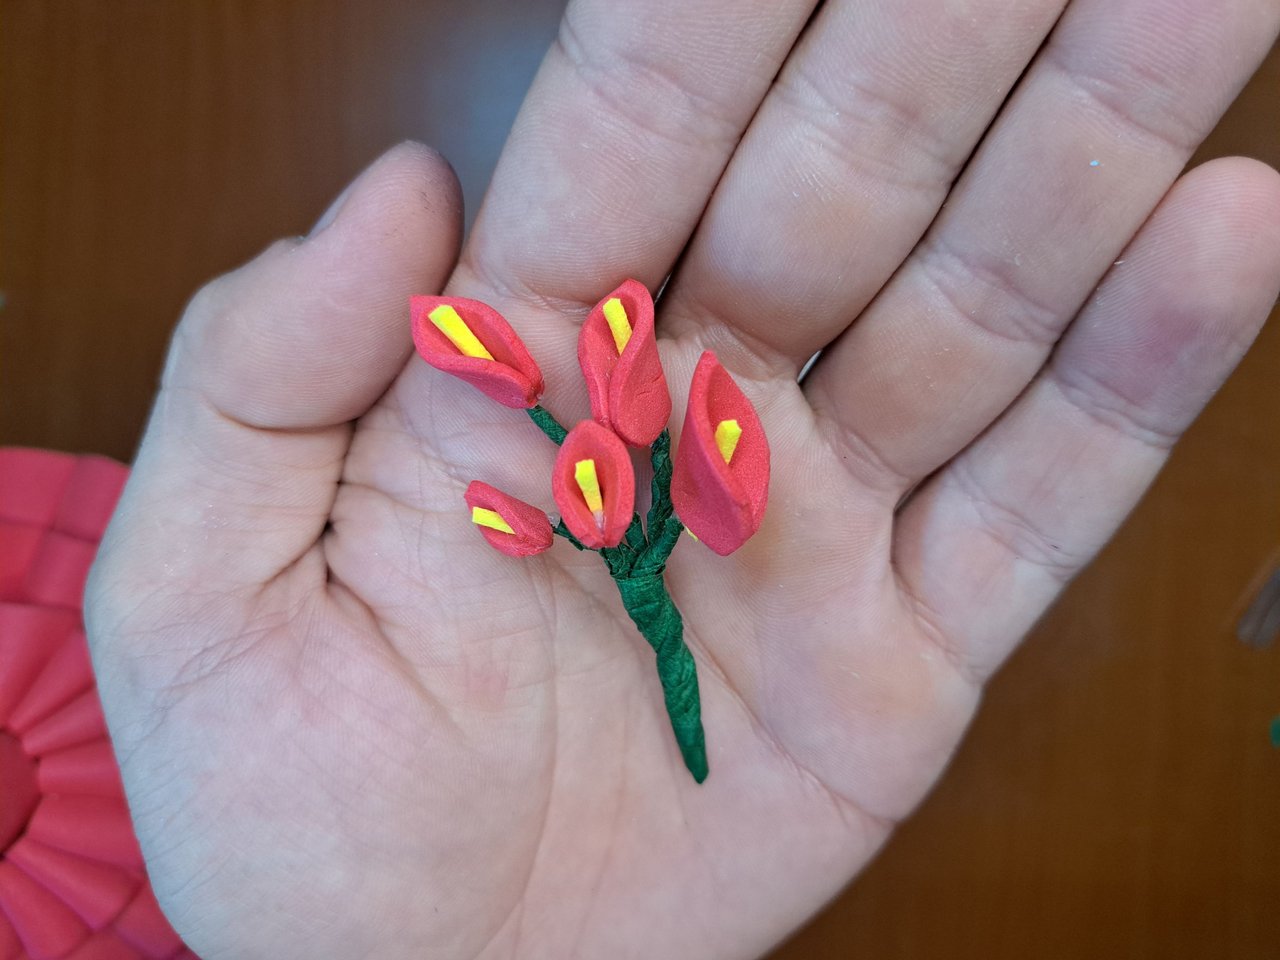
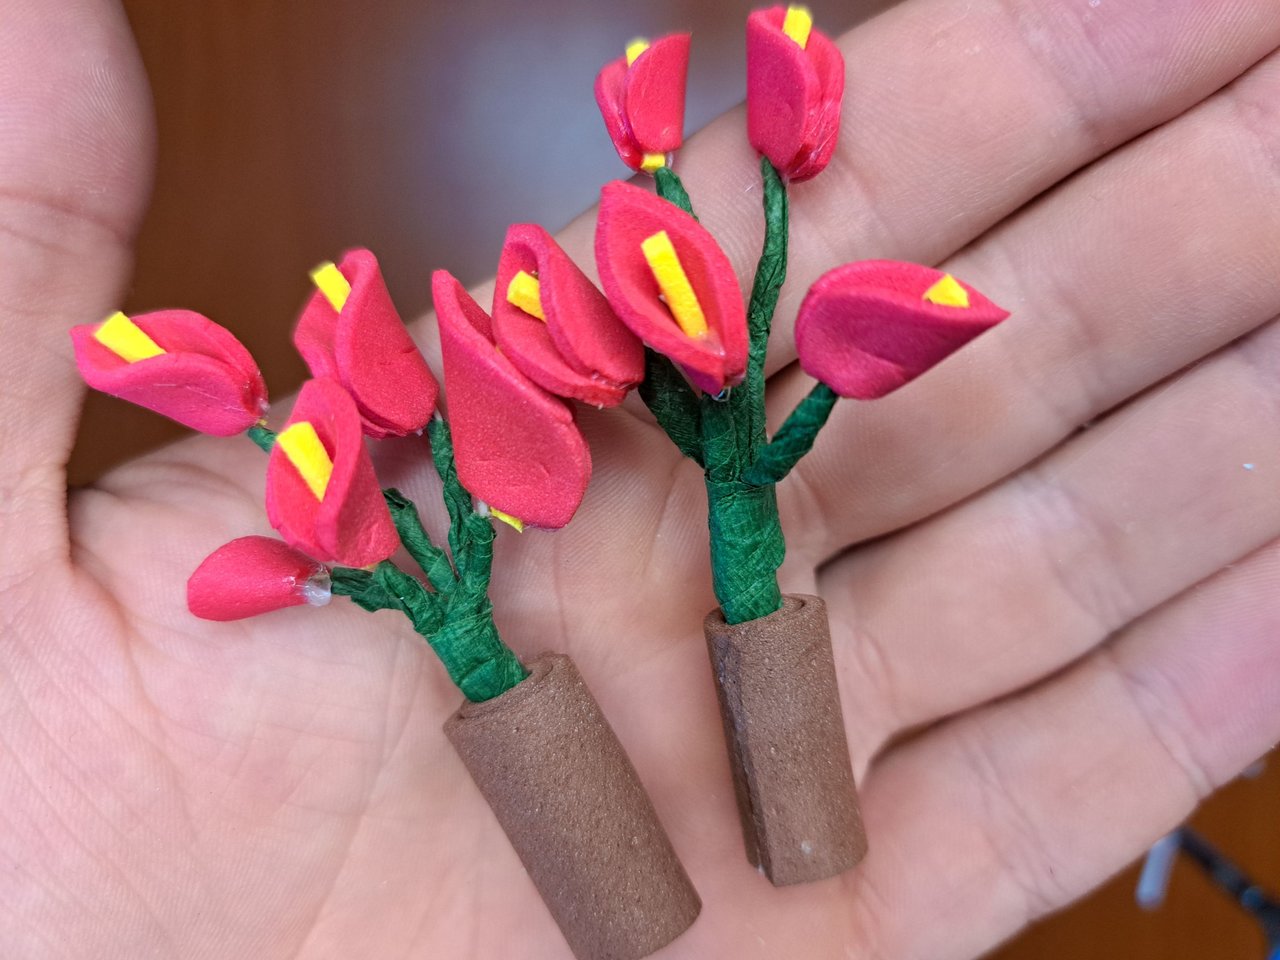
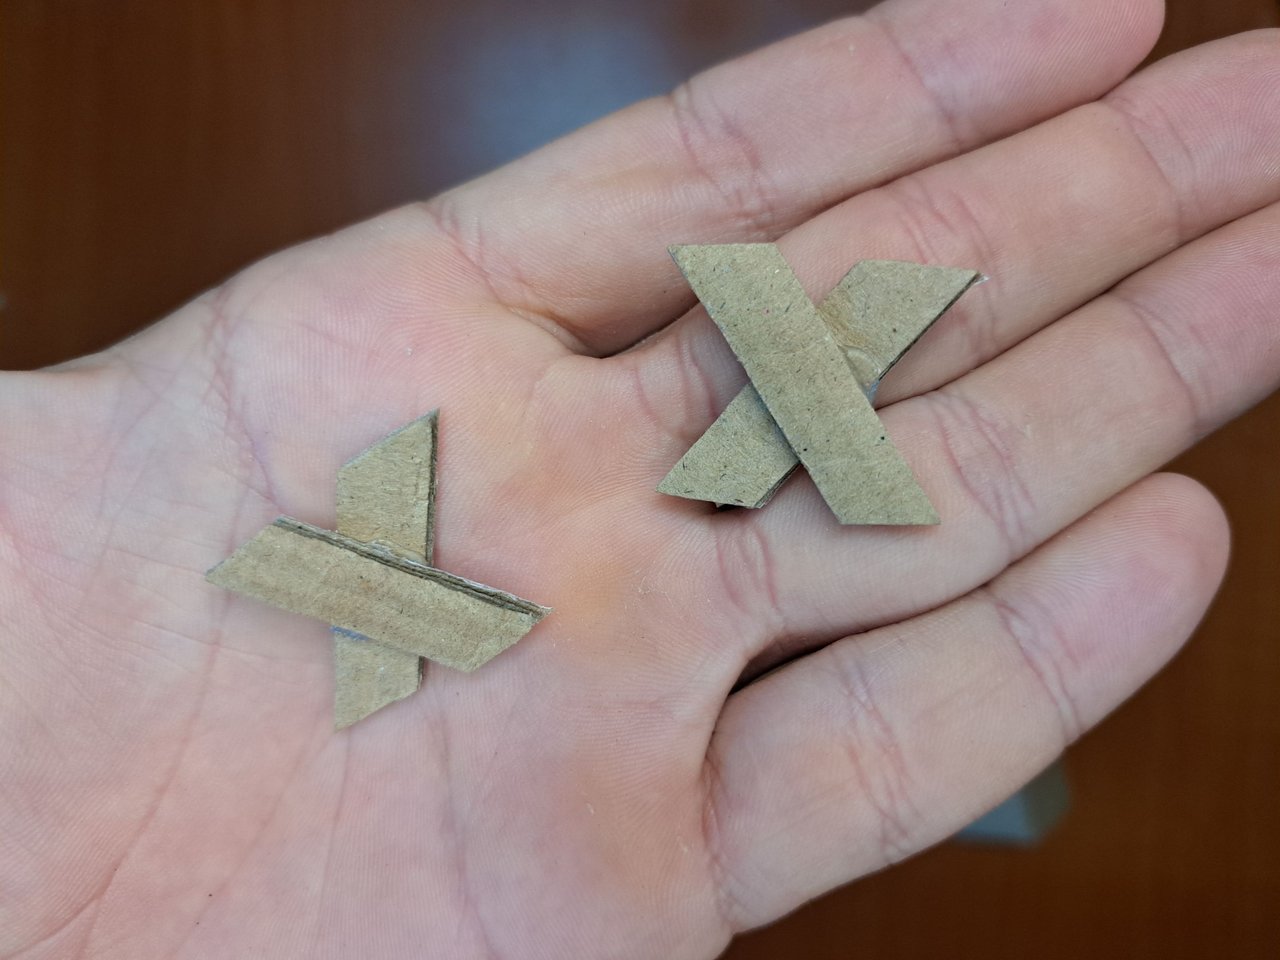
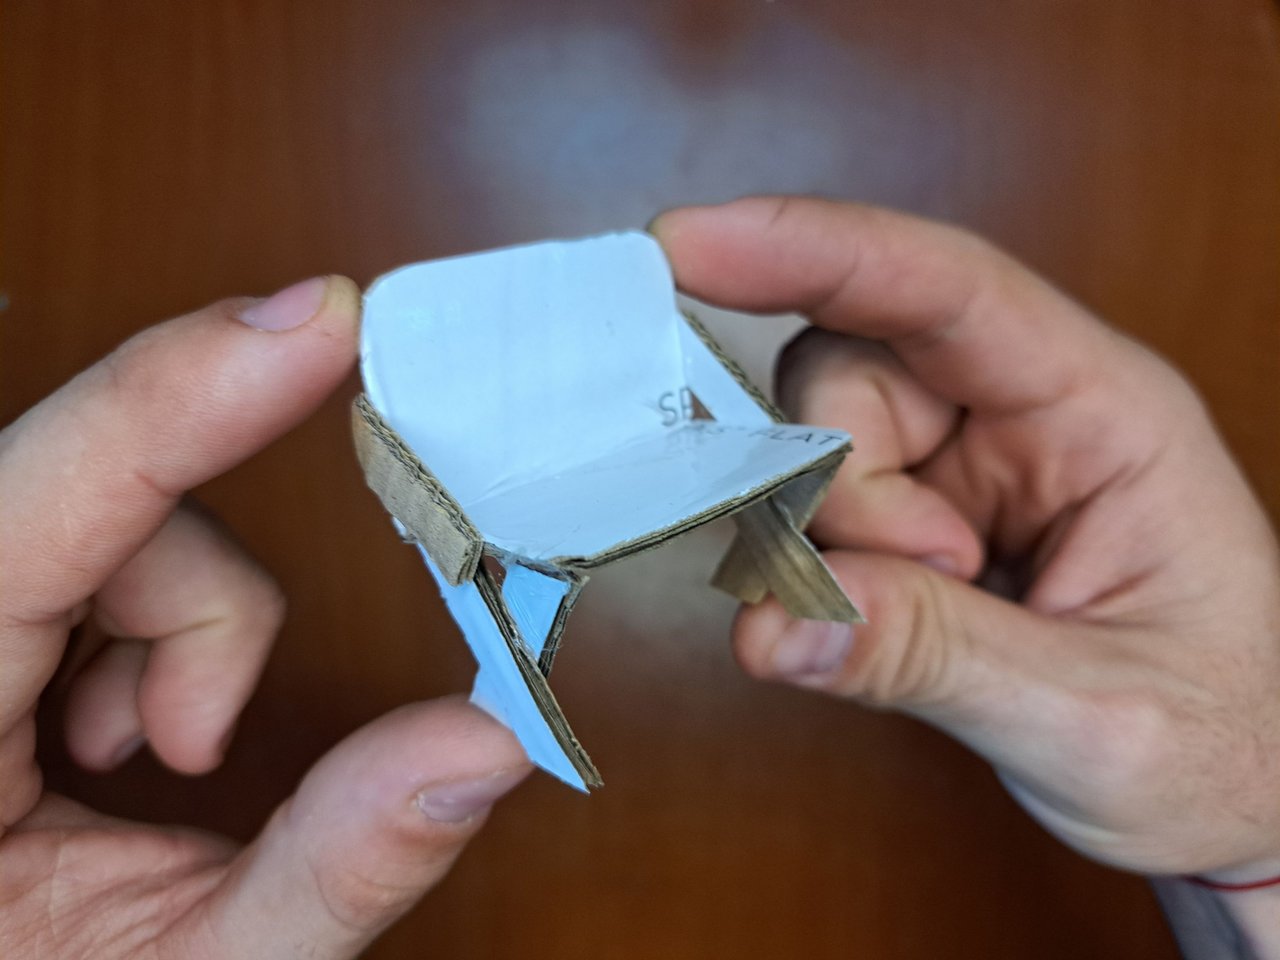
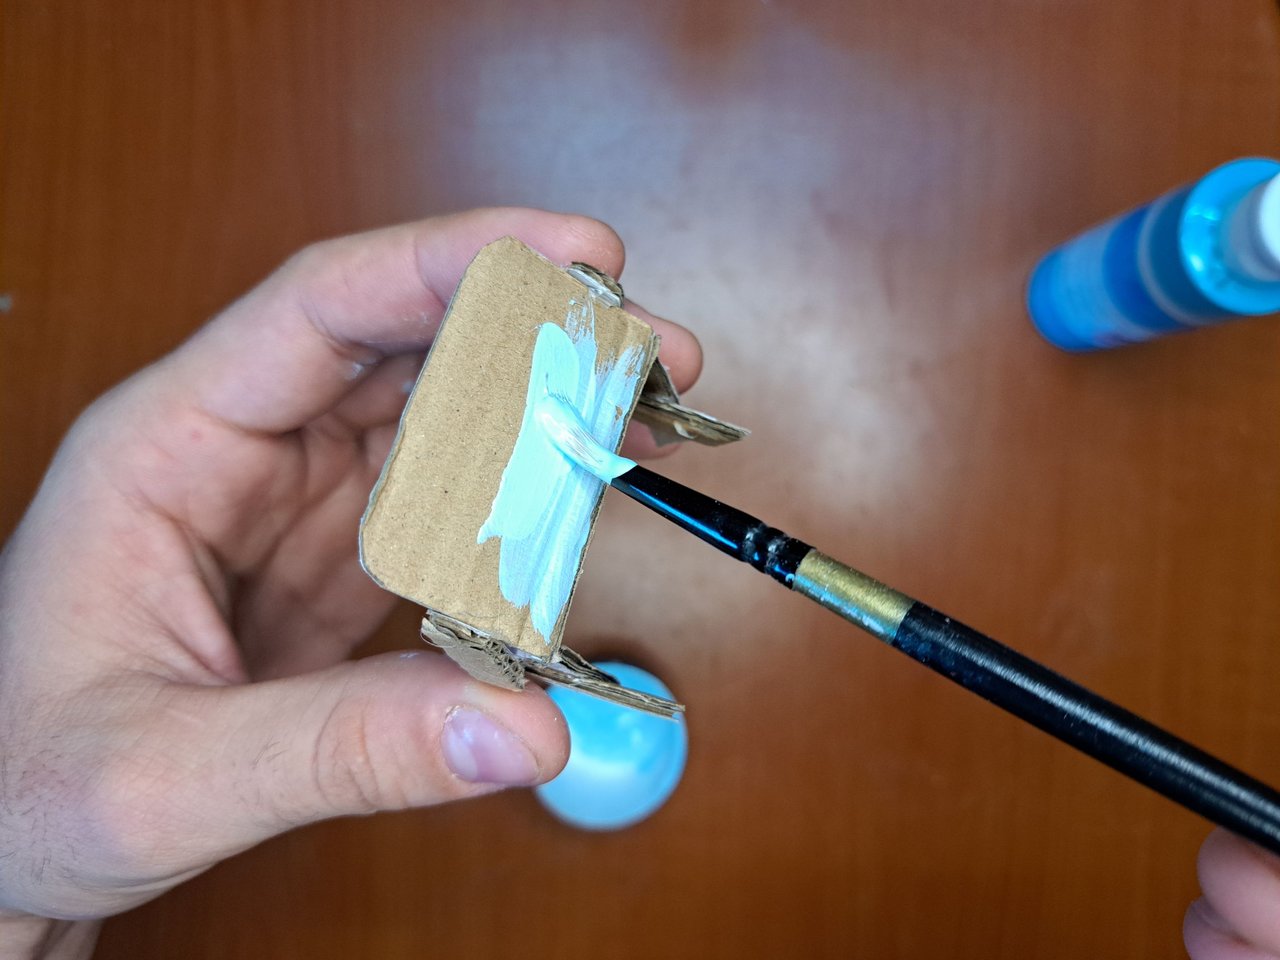
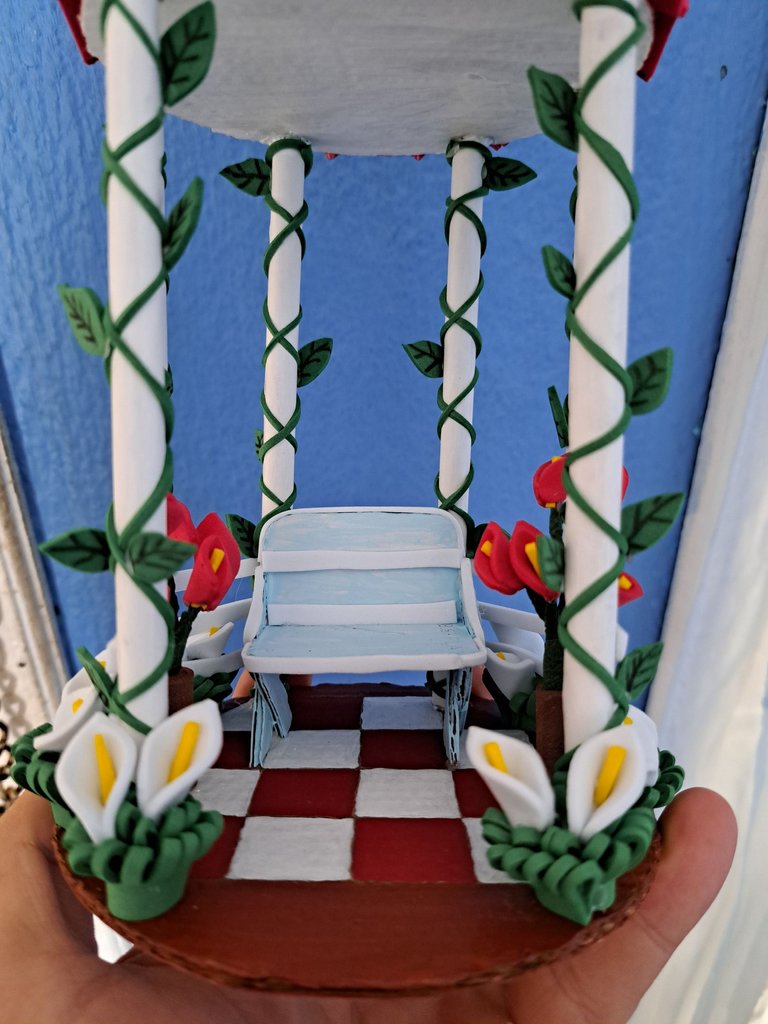
9️⃣ Following the same principle of the white spathophyllum we will make two more plants but with a red variant. The only difference is that the stems will be made with wire wrapped in floral tape to which we will roll up some brown fomi at the base simulating a flowerpot. Additionally with some pieces of cardboard we will make a small stool which we will paint light blue and on the edges we will glue thin strips of white fomi to hide the imperfections of the cardboard.
Spanish Version Here
9️⃣ Siguiendo el mismo principio del espatofilio blanco haremos dos plantas más pero con una variante roja. La única diferencia es que los talos estarán hechos con alambre envuelto en cinta floral a la cual se le enrollara fomi de color café en la base simulando una maceta. Adicionalmente con algunas piezas de cartón haremos un pequeño banquillo el cual pintaremos de azul celeste y en los bordes le pegaremos finas tiras de fomi blanco para ocultar las imperfecciones del cartón.
 |
 |
 |
 |
 |
 |
 |
 |
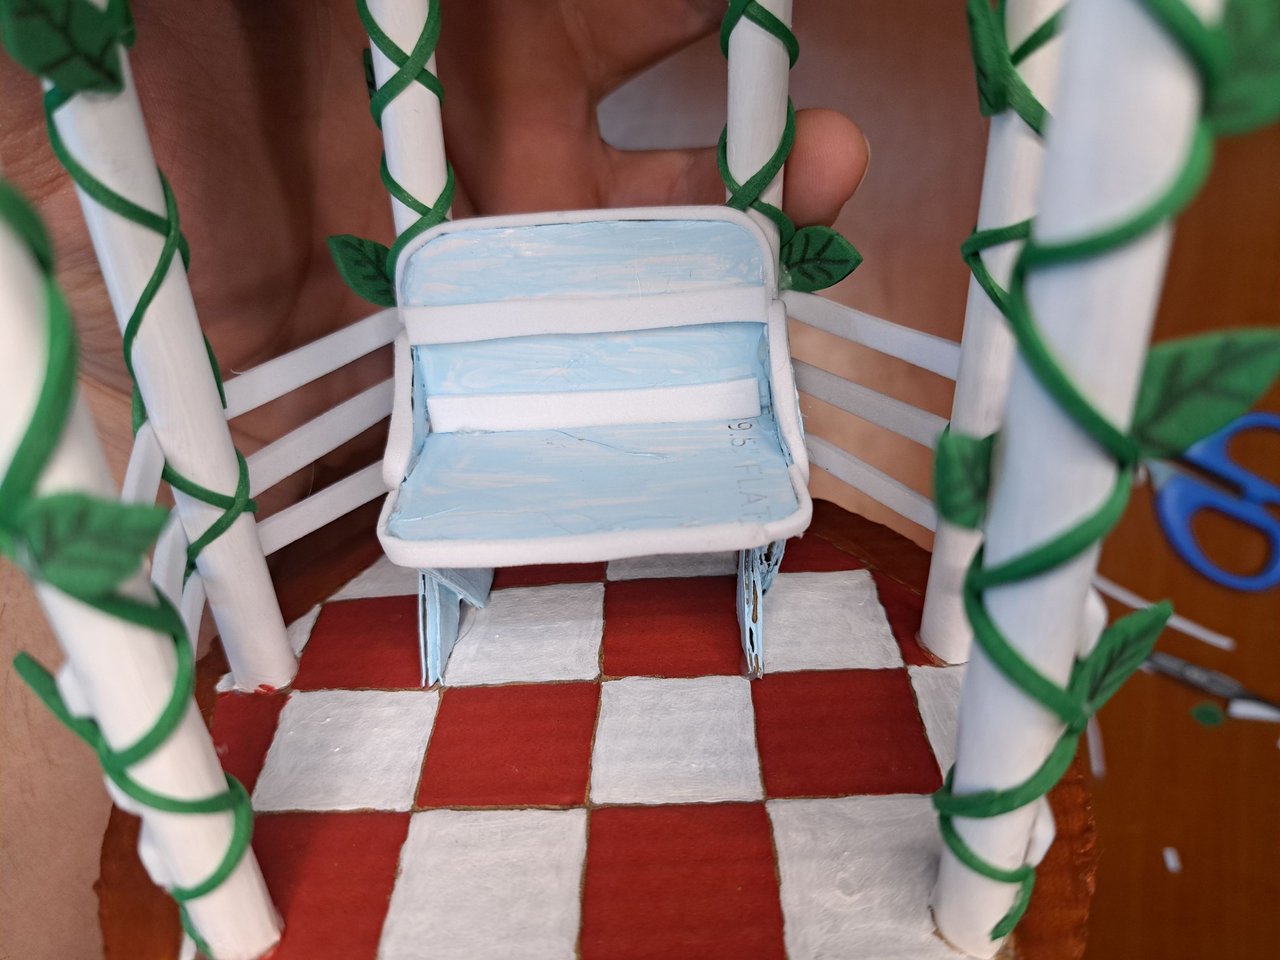
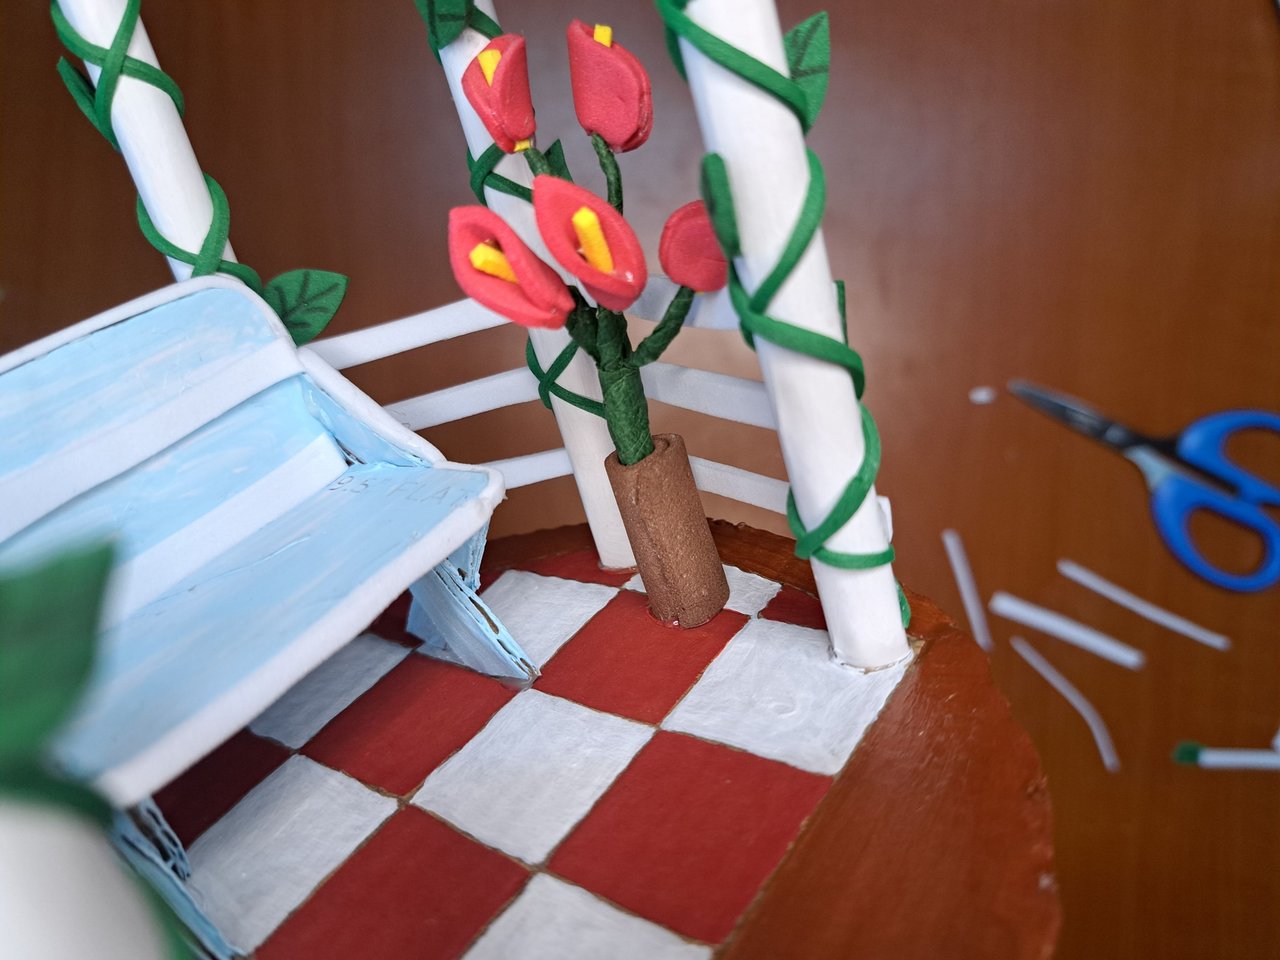
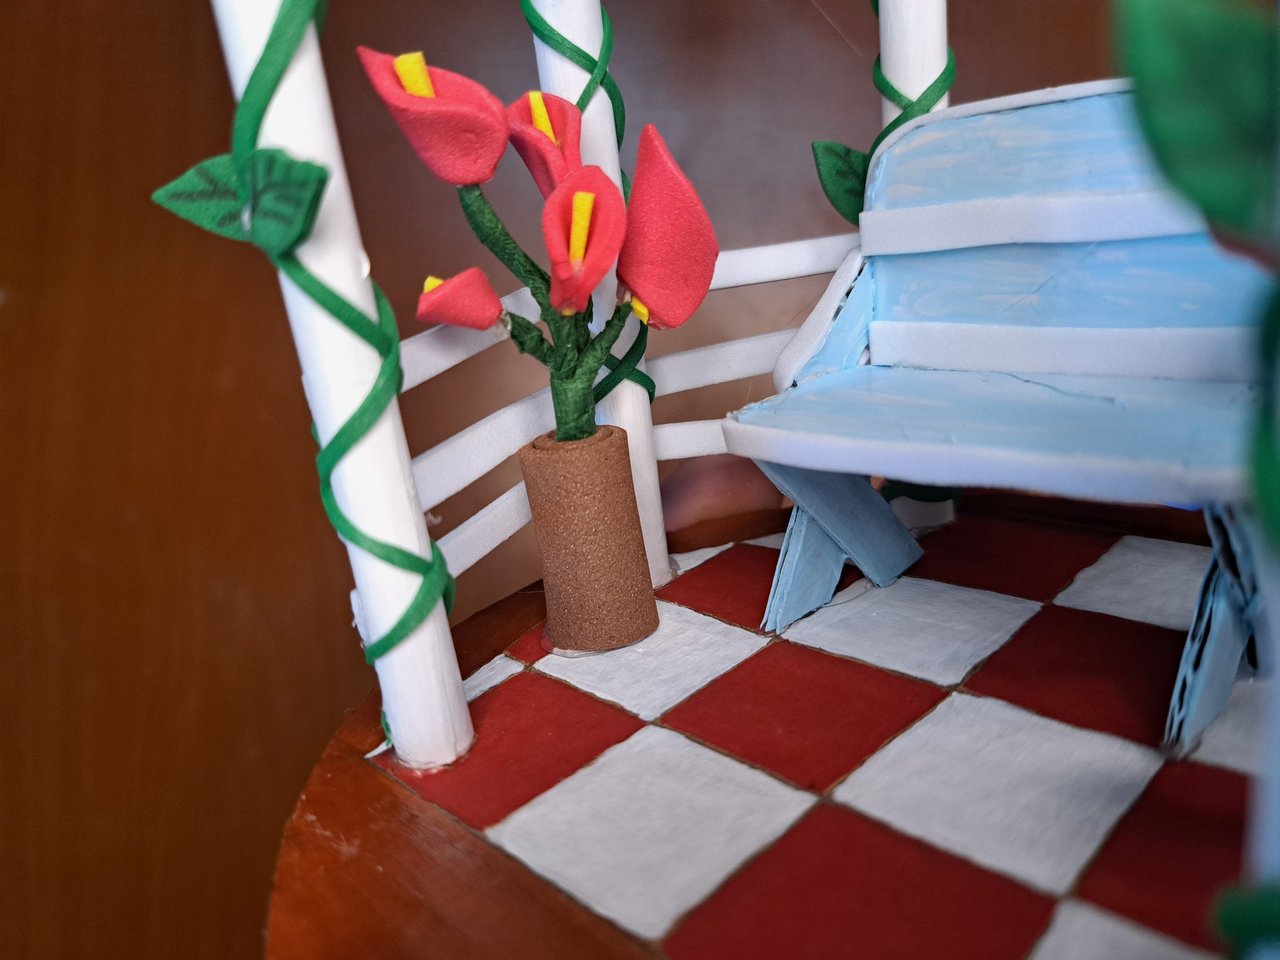
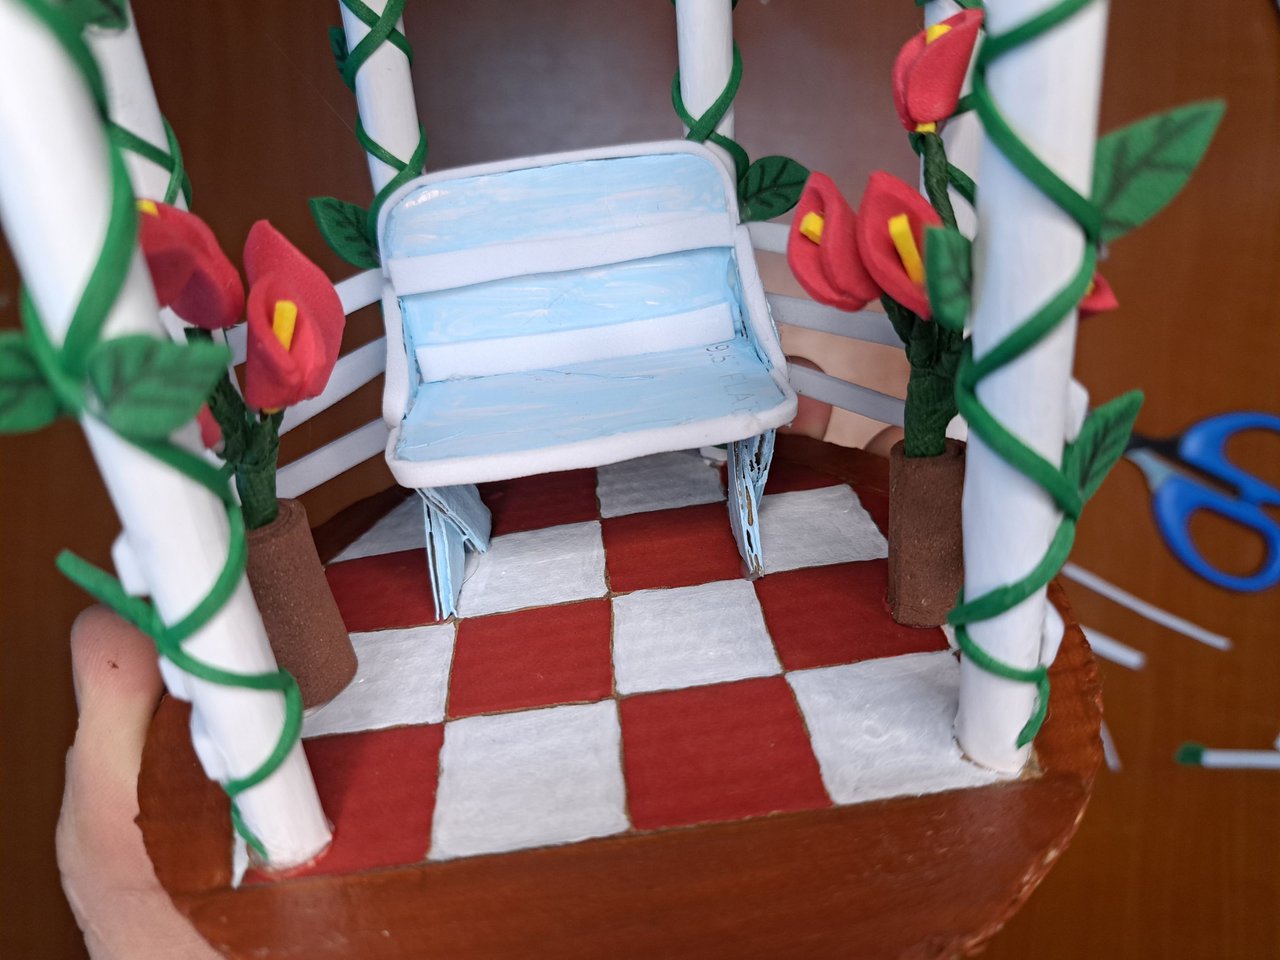
🔟 Everything is ready for the last step, which is to place and glue everything inside the gazebo. The first thing we will glue will be the bench which will go in the center of the structure, but glued to the back. Around it we will place the red flowers and all around the front edge we will place the white flowers.
Spanish Version Here
🔟 Ya todo está listo para el último paso, el cual consiste en ubicar y pegar todo dentro del gazebo. Lo primero que pegaremos será el banquillo el cual irá en el centro de la estructura, pero pegado a ala parte de atrás. Alrededor colocaremos las flores rojas y por todo el borde delantero irán las flores blancas.
 |
 |
 |
 |
 |
 |
 |
 |
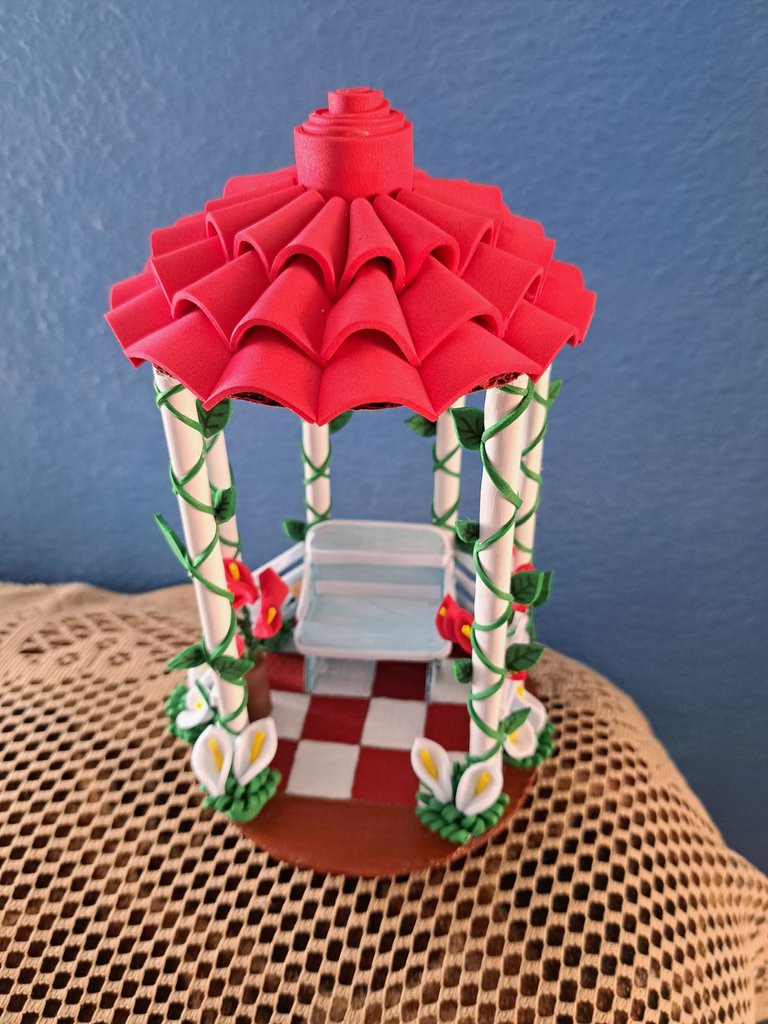
And so concludes this tutorial in which I show you how to make a gazebo or gazebo. Let me know below what you thought and how they call this structure in your country. I for my part say goodbye until very soon but not before inviting @elbuhito to come by the gazebo and sit for a while to rest and enjoy.
Spanish Version Here
Y así concluye este tutorial en el cual les enseñe como confeccionar un gazebo o glorieta. Coméntame aquí debajo que te pareció y como es que laman a esta estructura en tu país. Yo por mi parte me despido hasta dentro de muy pronto no sin antes invitar a @elbuhito a que se pase por el gazebo y se siente un rato a descansar y disfrutar.
⚜️ Final Result // Resultado Final ⚜️
 |
 |
 |
 |

Thank you very much for reading my post. If you liked it, please leave a comment and consider following me so you don't miss my next posts. I'd love to know your opinion and your thoughts about the topic I discussed in this post, see you in the next one!
Spanish Version Here
Muchas gracias por leer mi post. Si te gustó, por favor deja un comentario y considera seguirme para no perderte mis próximas publicaciones. Me encantaría saber tu opinión y tus ideas sobre el tema que traté en este post. ¡Nos vemos en el próximo!
Cover page created in Canva
Translated by DeepL


Bellísimo. No recuerdo haber visto uno de estos en mi ciudad, pero sería hermoso estar allí sentada y hacerme muchas fotos.
Tu creación quedó estupenda. Los colores me encantan y toda la explicación del proceso se comprende perfectamente.
Muchas gracias por compartir ☺️
Aunque algunos pueden haber sido construidos recientemente lo normal es encontrarlos en ciudades fundadas cuando la colonización. Y si, de verdad que es un lugar donde se puede pasar un buen rato.
That's so cool!
Thanks 🤗
Aqui le decimos Glorieta jaja en mi barrio no hay muchas, bueno, en realidad no hay jaja pero en la Capital esta lleno y son realmente hermosas y muy pintorezcas, sobre todo las que estan rodeadas de plantas y flores 🌼🍁 son una estructura realmente bella, no importa como se les llame, siguen siendo hermosas ❤️
Tus creaciones siguen deslumbrando, otra hermosa e impecable manualidad, me encanto, esta realmente decorativa e ideal para que Buhito se siente a respirar aire fresco y deje de pensar en maldades jajaja Muchas gracias por etiquetarme y por la invitacion a Buhito para que se siente alli, que bonito detalle ❤️ 🦉 Buhito acepta la invitacion, y hasta me lo estoy imaginando ahi sentado, que lindura de glorieta 😍
Saludos emplumados, gracias por pensar en este pequeño emplumado con esta bella creacion jeje 🦉
Me alegra saber que a Buhito le gustó la glorieta. Gracias por tus palabras 🫂
Quedó muy bonito 😍 saludos
Muchas gracias 🤗
So artistic. Infact, thanks to know the name of it , which I was unaware of. You really need great patience to do this. The colour combination is also good.
When I have to make small pieces, it's a little difficult, but what gave me the most work was the roof.
Anyway it was too good
Me encantó, quedó preciosa. Muy creativo 😍
Muy bonito!!!😍😍😍
Que impresionante trabajo!!! Cada detalle me encantó. Gracias por compartir cada paso tan detallado.
Felicidades, saludos!!!
Muchas gracias por tus palabras 🫂
Creo que no he visto nunca una de estas estructuras en persona, en mi ciudad no recuerdo que haya ninguna. Pero al verlas en películas siempre me pareció que eran muy bonitas y esta miniatura que hiciste quedó muy hermosa. De verdad tienes un gran talento para las manualidades ✨
Si en la ciudad donde vives no hay una fuerte influencia colonial no creo que veas muchas. También me han contado que en algunos países retiraron algunas de las estructuras de este tipo
Es lo curioso, que sí hay bastante influencia colonial pero por alguna razón no hay, o al menos ya no están
Ya ahí si que no tengo idea de cual pueda ser la razón 🤷