
Saludos queridos amigos, cómo están?
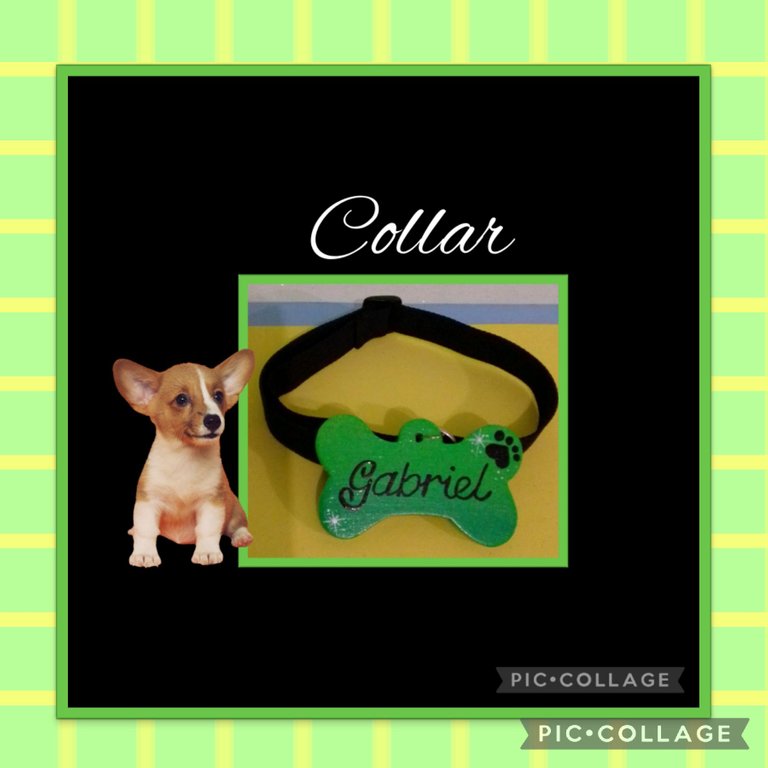
Hoy les mostraré como hacerles un collar personalizado.
A los que me conocen o han leído mis publicaciones anteriores saben que la mía la perdí hace poco y este collar lo hice hace un mes atrás para el perrito de una amiga, pero de verdad no había tenido el valor de publicarlo porque siempre yo hacía muchas cosas para ella y esto me la hace recordar mucho y me da dolor no tenerla conmigo pero, creo que hablando de ella, me ayuda.
Entonces hoy decidí armar mi tutorial y compartirlo con ustedes.
Vas a necesitar:
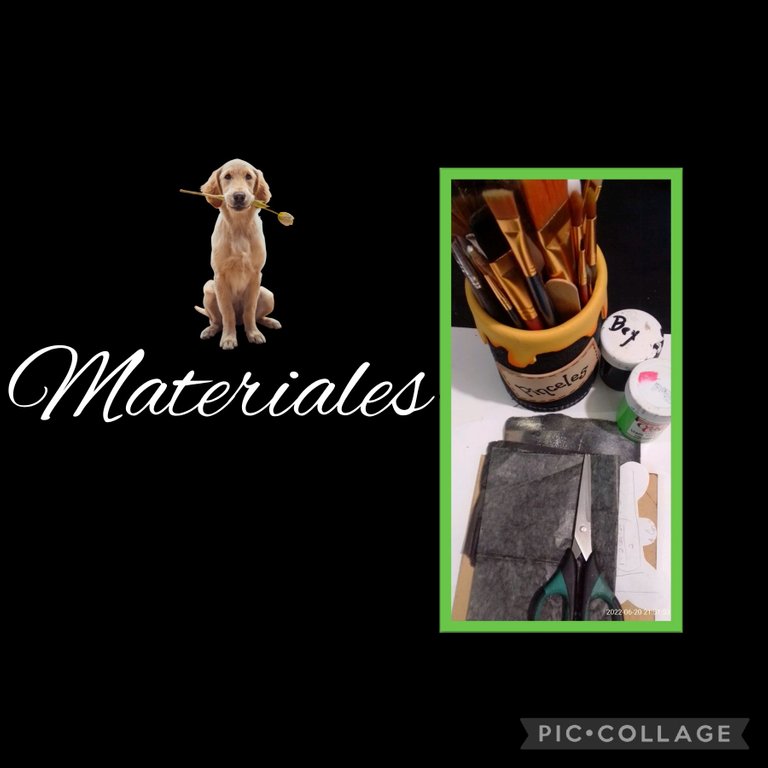
| Mdf de 5mm | Reata negra | Separador |
|---|---|---|
| Argolla de metal grande | Argolla pequeña | Pintura |
| Pinceles | Brillo para madera | Lija |
| Lápiz | Papel carbón | Dibujo o impresión |
| Taladro | Caladora | Maquina de coser |
Comencemos:
Paso 1:
Marcar y recortar
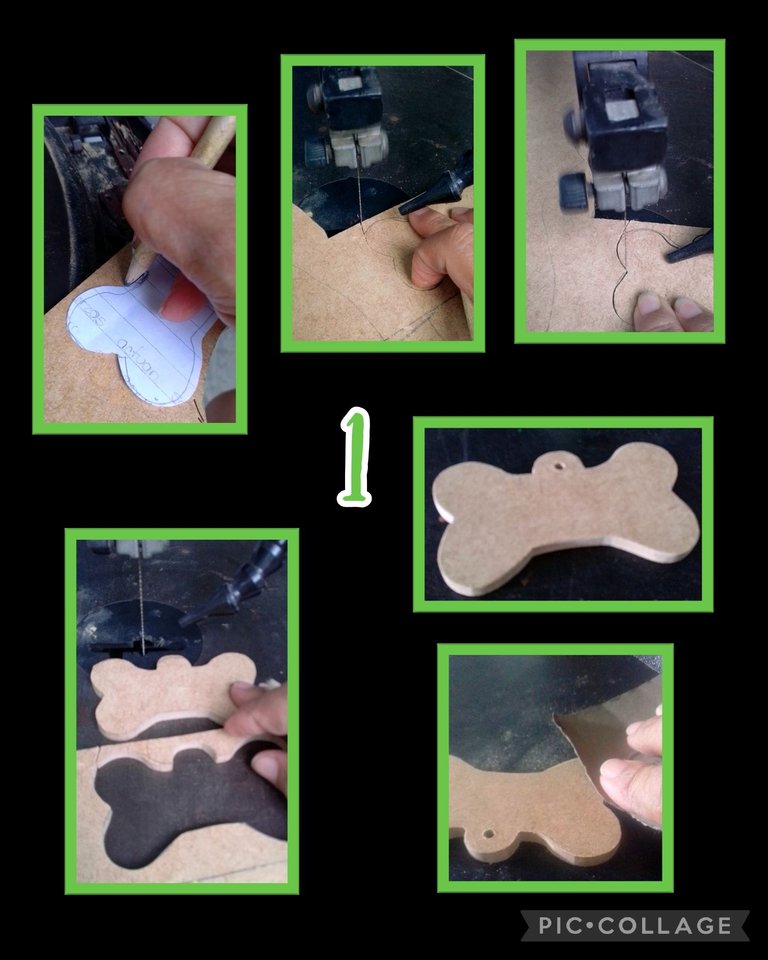
- Lo primero será recortar la forma del hueso en un papel o cartulina, luego con el lápiz marca todo el contorno de la figura y comienza a recortar con la caladora.
- Aparte con un taladro perfora un orificio en el centro, luego lija todo el borde para quitar imperfecciones del corte.
Paso 2:
Pintar el hueso.
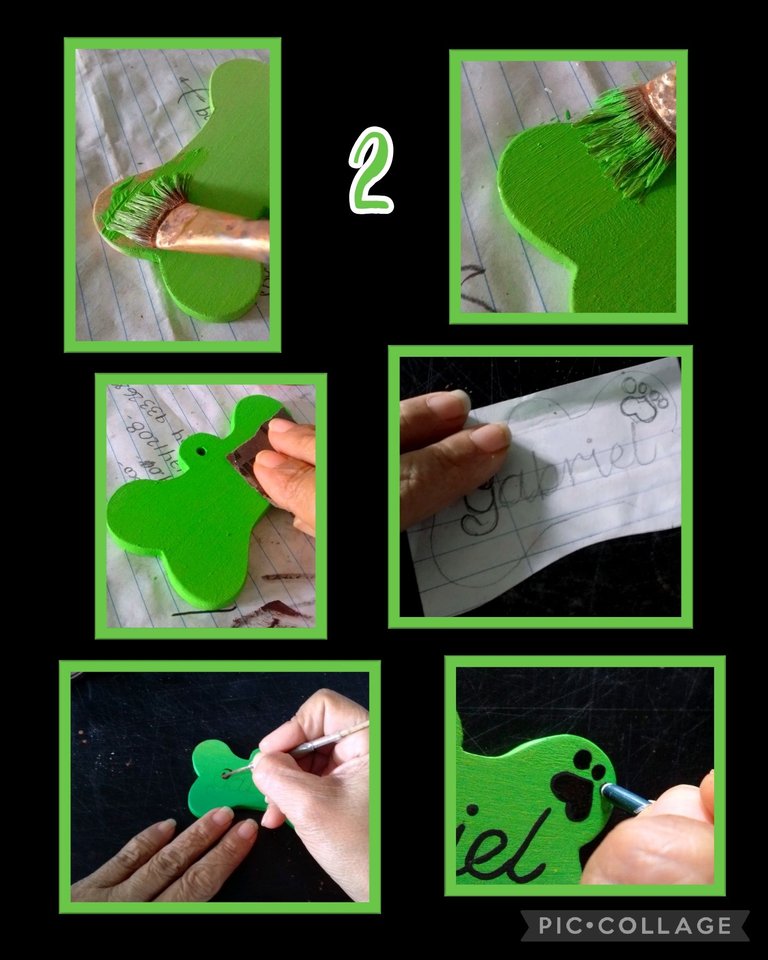
- Comienza a aplicar una capa de pintura verde y deja secar, luego pinta el otro lado igual, deja secar y aplica otra capa de pintura por ambos lados.
- Entre capa y capa de pintura, lija la pieza para quitar grumos y dejar lisa la pieza.
- Aparte dibuja en el molde el nombre de tu mascota, luego coloca la pieza y sobre ella monta el papel carbón y el molde para remarcar y transferir el nombre.
- Con un pincel delinea el nombre con pintura negra y pinta también una huellita.
Paso 3:
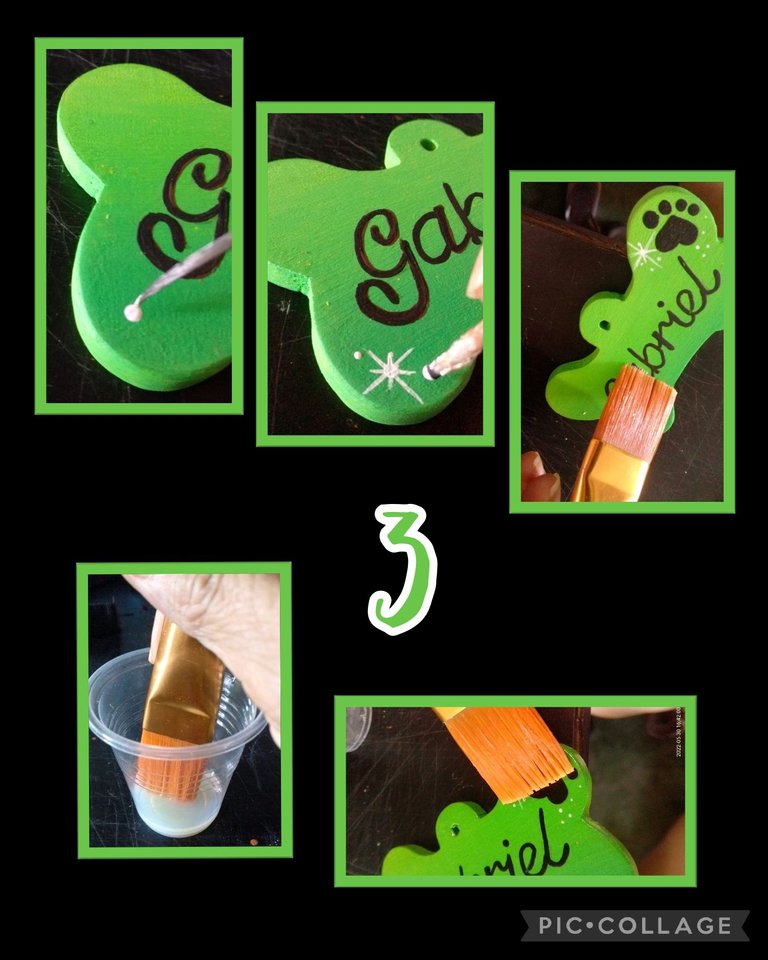
- Ahora con pintura blanca, haz estrellita y decora con puntitos blancos y deja secar.
- Humedece el pincel en el brillo para madera y aplica una capa por toda la pieza.
Paso 4:
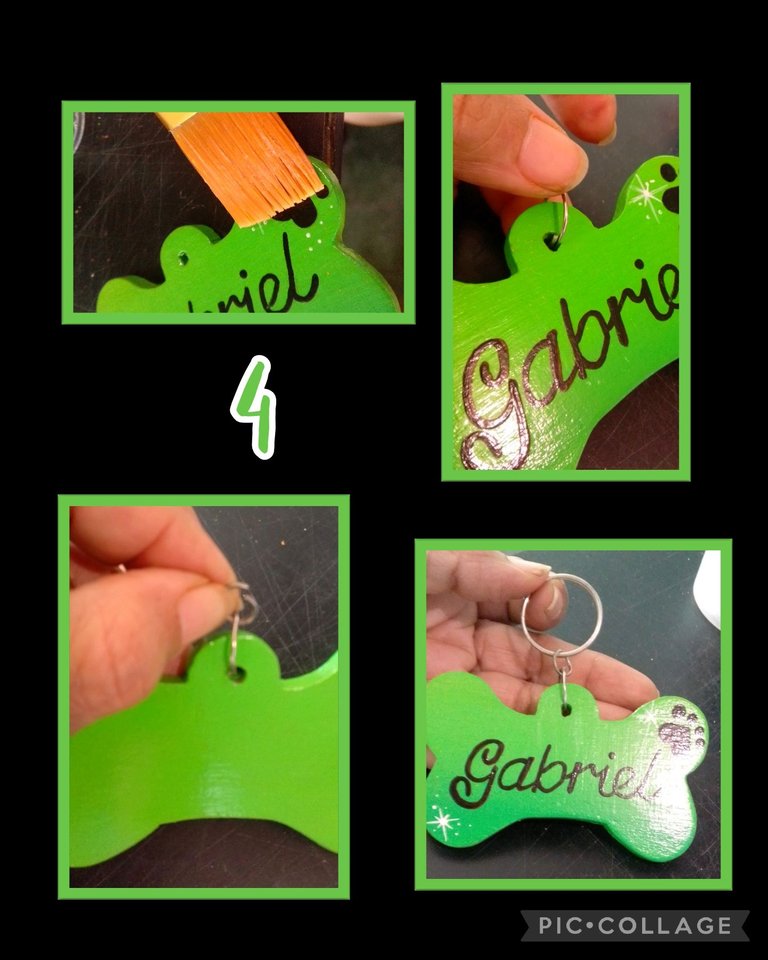
- Después que seque la primera capa de brillo, aplica nuevamente otra capa de brillo y deja secar.
- Ahora abre una de las argollas pequeñas e inserta en el orificio y cierra, luego inserta la otra pequeña y por último la grande.
Paso 5:
Coser la correa.

- Inserta un extremo de la correa en el separador y pasa una costura para dejar pegado el separador, aparte dobla la punta del otro extremo de la correa y cose.
- Ahora introduce la punta de la correa que no tiene el separador por el centro de la argolla y luego mete por el otro extremo del separador y ajusta al tamaño deseado.
- Y así de fácil queda listo este lindo collar para que tu mascota lo luzca.
En verdad es muy sencillo pero, es una forma muy linda de identificar a tu perrito o perrita.
Entonces aquí te dejo este paso a paso, esperando sea útil y de tu agrado.
Quiere, cuida, protege y consiente a tu mascota, de verdad son seres extraordinarios que sólo saben ser fieles y te entregan su amor incondicional.

Saludos, bendiciones y muchas gracias a todos por el apoyo.
English:
Greetings dear friends, how are you?
Today I will show you how to make them a personalized collar.
Those of you who know me or have read my previous posts know that I lost mine recently and I made this necklace a month ago for a friend's puppy, but the truth is that I didn't dare to publish it because I always made many things for her and this makes me remember her a lot and it hurts me not having her with me but, I think that talking about her, helps me.
So today I decided to put together my tutorial and share it with you.
You will need:
| 5mm MDF | Black batten | Separator |
|---|---|---|
| Large metal ring | Small metal ring | Paint |
| Brushes | Wood polish | Sandpaper |
| Pencil | Charcoal paper | Drawing or print |
| Drill | Jig saw | Sewing machine |
Let's get started:
Step 1:
Marking and cutting out
- The first thing to do is to cut out the shape of the bone on a piece of paper or cardboard, then with the pencil mark all the outline of the figure and start cutting it out with the cutter.
- Then drill a hole in the center with a drill, then sand the entire edge to remove imperfections from the cut.
Step 2:
Paint the bone.
- Start applying a coat of green paint and let it dry, then paint the other side the same, let it dry and apply another coat of paint on both sides.
- Between coats of paint, sand the piece to remove lumps and leave the piece smooth.
- Draw the name of your pet on the mold, then place the piece and mount the carbon paper and the mold on it to highlight and transfer the name.
- With a paintbrush outline the name with black paint and also paint a little hole.
Step 3:
- Now with white paint, make a little star and decorate with white dots and let dry.
- Dampen the brush in the wood gloss and apply a coat all over the piece.
Paso 4:
- After the first coat of glitter dries, apply another coat of glitter and let it dry.
- Now open one of the small rings and insert it into the hole and close, then insert the other small one and finally the big one.
Step 5:
Stitch the strap.
- Insert one end of the strap into the spacer and stitch a seam to leave the spacer attached, then fold the end of the other end of the strap over and stitch.
- Now insert the end of the strap that does not have the separator through the center of the ring and then insert the other end of the separator and adjust to the desired size.
- And just like that, this cute collar is ready for your pet to wear.
It is really very simple but it is a very nice way to identify your dog or doggy.
So here I leave you this step by step, hoping it will be useful and to your liking.
Love, care, protect and pamper your pet, they are truly extraordinary beings that only know how to be faithful and give you their unconditional love.
Greetings, blessings and thank you all very much for the support.
Hola amiga. Te quedo espectacular. Lastima que yo no puedo hacerlo para mi peluda ya que como es una gatita ella tiende a oler, y morder lo que le coloco en el cuello, se lo puede comer la chiquita ociosa esta jajaja.. Tuve que mandarle a hacer uno especial, que al morderlo no se dañara ni pudiera causarle a ella algún daño al tragar.
Te felicito, excelente idea, quedo muy lindo y delicado.
Saludos.
Hola amiga, cómo estás?
Muchas gracias, jajajaja...si ellos son más curiosos.
De nuevo muchas gracias por comentar y dejarme tu experiencia..
Saludos.