

[Esp]
Saludos comunidad DIY
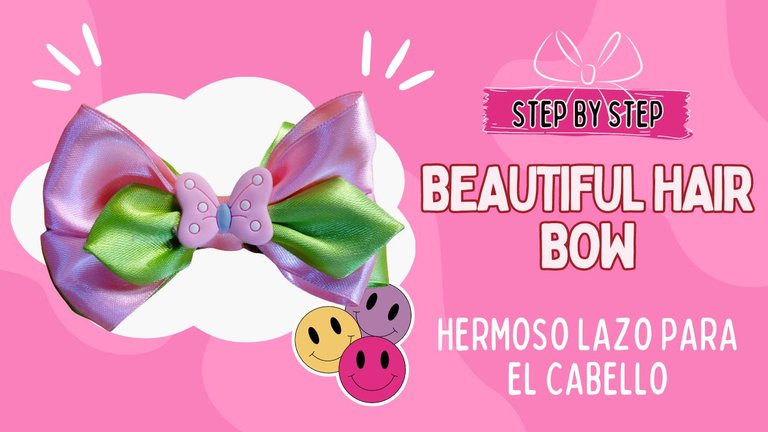
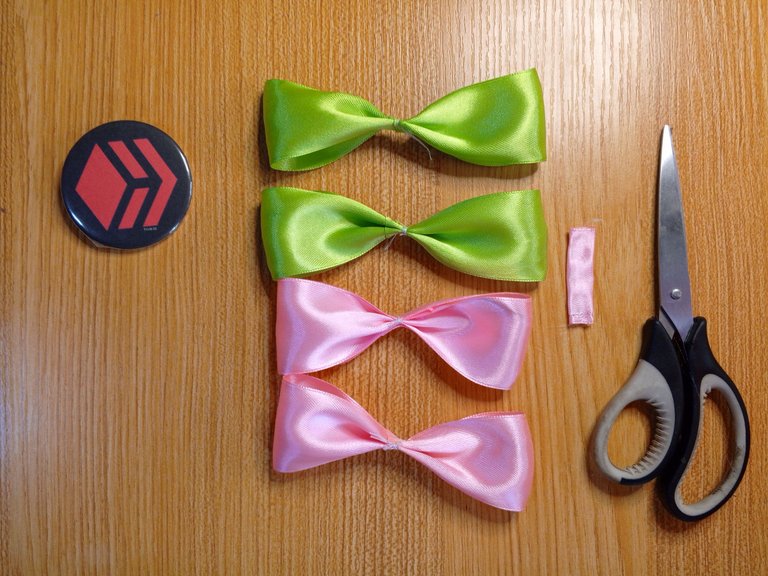
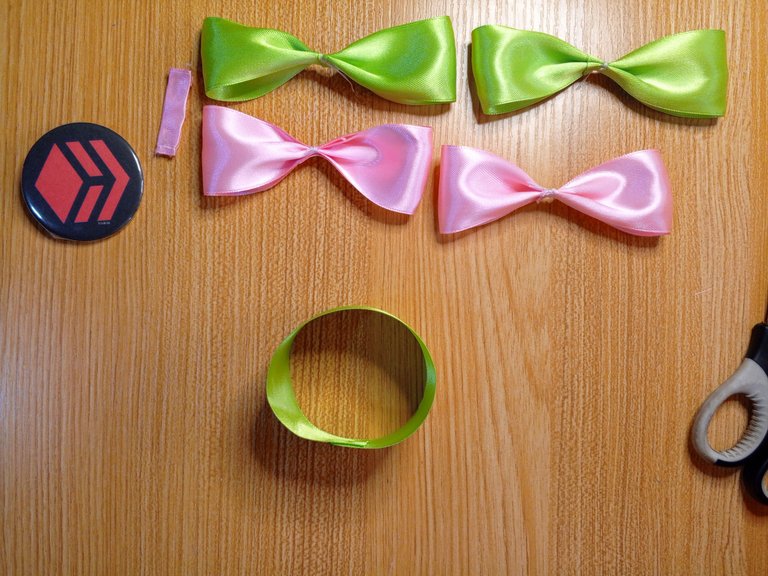
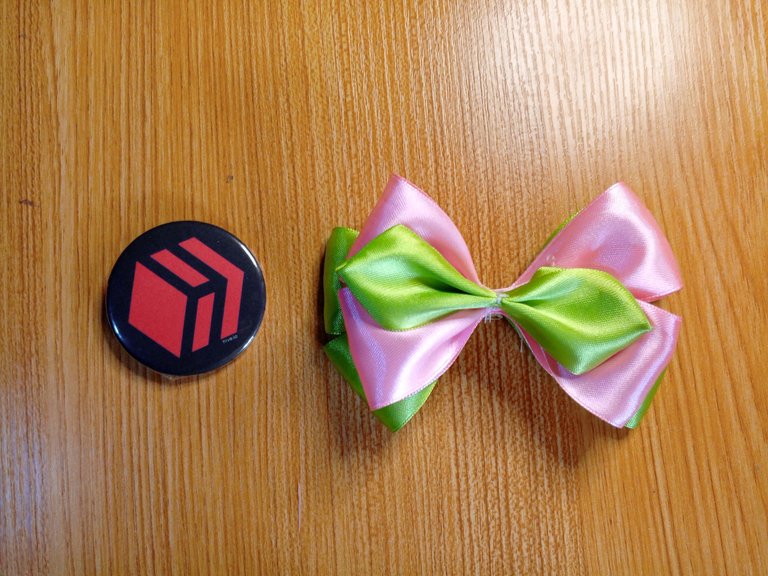
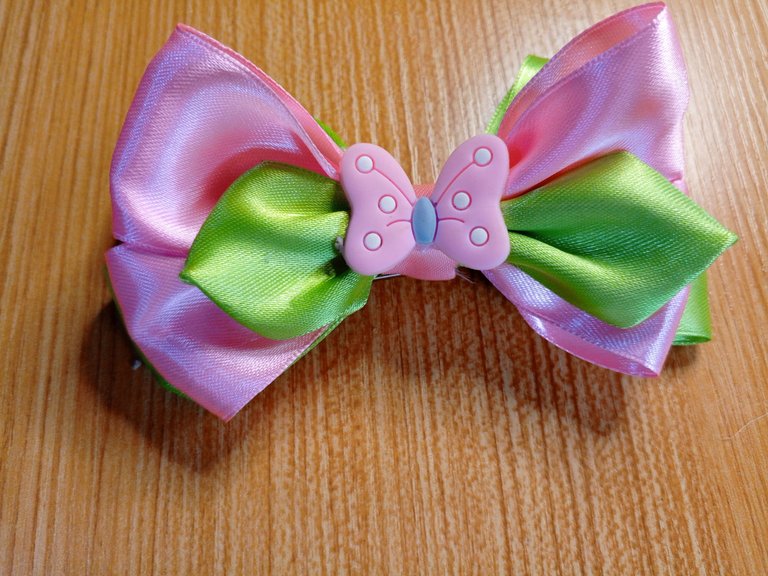
Hoy os presento otra idea de lazos para el cabello, esta si está dirigida a las princesas de la casa, las niñas. utilicé apliques y muy pocos materiales. Es fácil de hacer y viene siento parte del proyecto que he estado mostrando como ideas de emprendimiento.
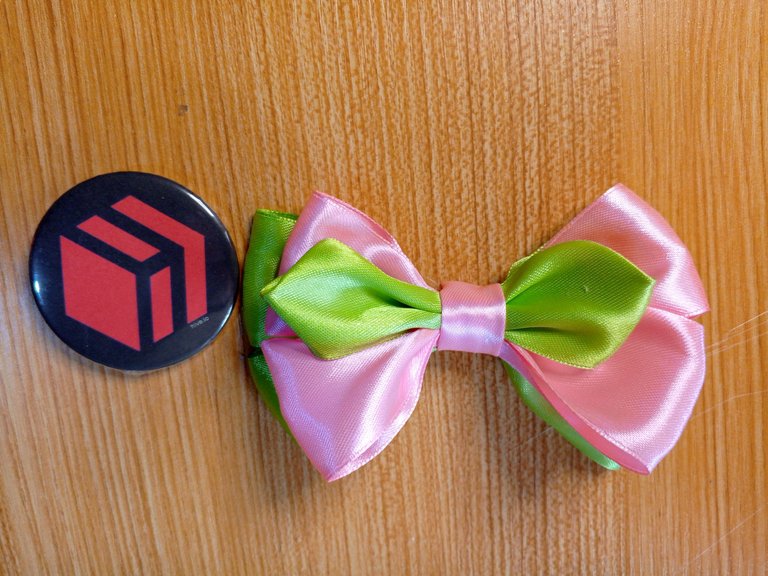
He estado trabajando con material reciclado, de cosas que me van quedando de otros proyectos. La decoración queda a gustó, de hecho sin ella también lucen lindos, no dudé en colocármelo en el cabello para tomarle una fotografía.
A veces quisiera tener el cabello largo, luego el calor es abrazador y se me pasa la idea, ya no la quiero ¡Jajajaja!
Algunas recomendaciones que daré en base a vivencias:
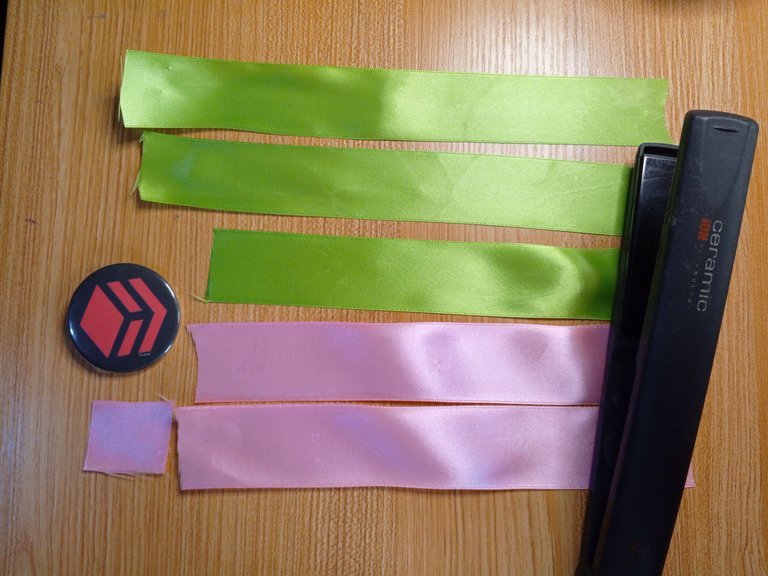
La cinta de raso estaba arrugada por el tiempo que tenía guardada, como hay que cuidar la presentación, lo recomendable es plancharla, he usado mi plancha de cabello para planchar la cinta y quedó estupendo.
Cuida las proporciones, a pesar que medí los tamaños de las cintas al cortar, cuando las cosí quedaron del mismo tamaño, en la presentación se pierden.
Espero les guste, este es un proyecto que estoy disfrutando mucho hacer.
Gracias a los chicos de @hivearte por el obsequio del logo de Hive, lo amé, es el logo que acompaña mi proyecto
English version
Greetings DIY community
Today I present you another hair bows idea, this one is aimed at the princesses of the house, the girls. I used appliques and very few materials. It is easy to make and comes I feel part of the project that I have been showing as entrepreneurship ideas.
I have been working with recycled material, from things I have left over from other projects. The decoration looks nice, in fact without it they also look nice, I didn't hesitate to put it in my hair to take a picture.
Sometimes I would like to have long hair, but then the heat embraces me and I forget the idea, I don't want it anymore hahaha!
Some recommendations I will give based on my experiences:
-The satin ribbon was wrinkled because of the time it had been stored, as you have to take care of the presentation, it is advisable to iron it, I used my hair iron to iron the ribbon and it looked great.
-Take care of the proportions, although I measured the sizes of the ribbons when I cut them, when I sewed them they were the same size, in the presentation they get lost.
I hope you like it, this is a project that I am really enjoying doing.
Thanks to the guys at @hivearte for the giveaway of the Hive logo, I loved it, it's the logo that goes with my project.
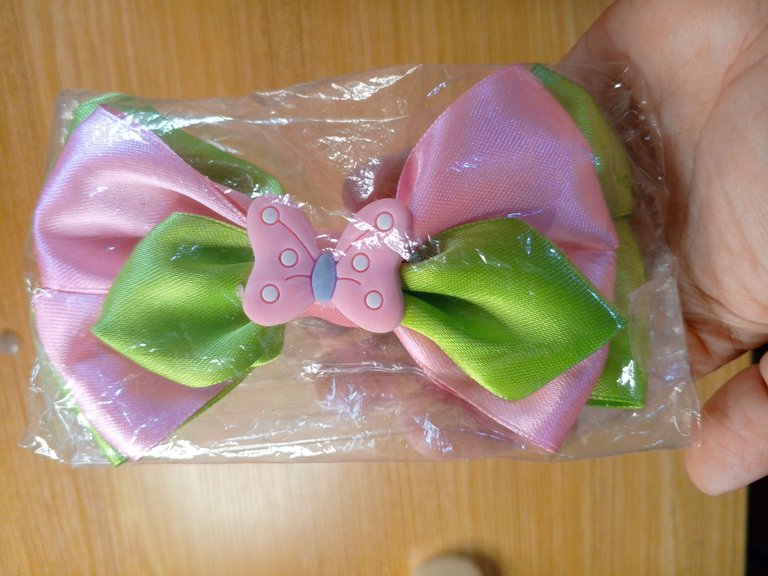
Empaquetado listo para la venta
Packaged ready for sale
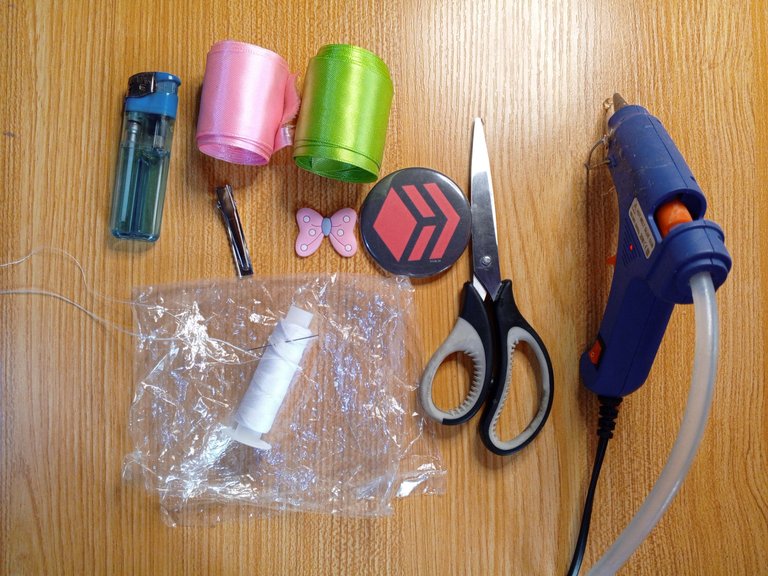
Materials / Materiales
| Spanish | English |
|---|---|
| 1/2 metro de Cinta de raso de #9 colores varios | 1/2 meter of satin ribbon #9 various colors |
| Tijera, pistola de silicón caliente | Scissors, hot silicone gun |
| Accesorios para decoración al gusto | Accessories for decoration as desired |
| aguja, hilo de coser | needle, sewing thread |
| Yesquero | Tinder |
| Gancho caimán para cabello | Alligator hair clip |
Paso a paso / Step by Step
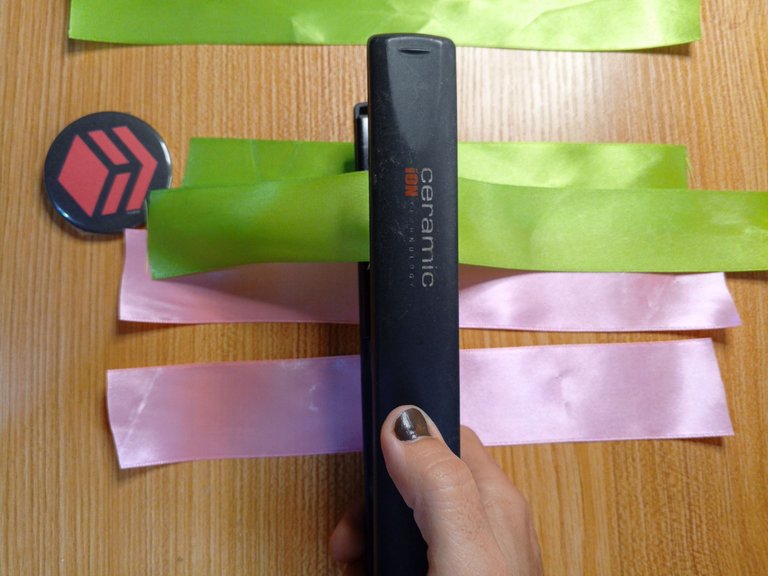
Step 1️⃣/ Paso 1️⃣
 |  |
[Esp]
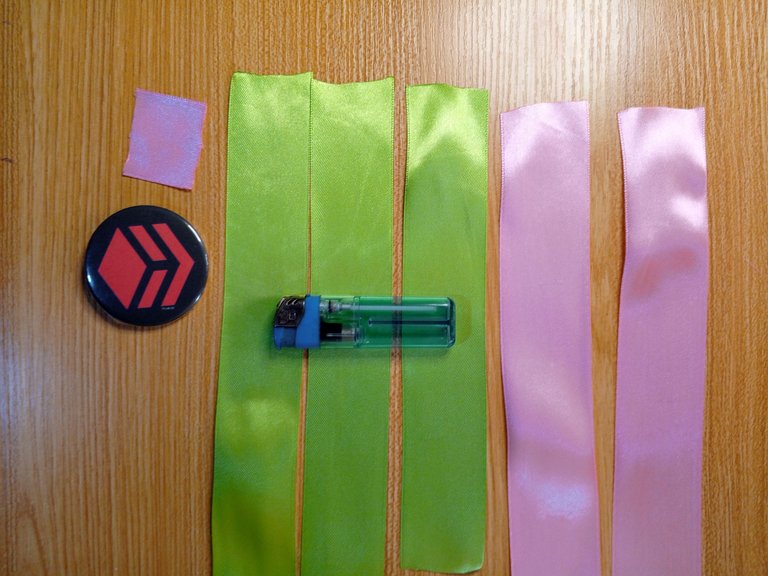
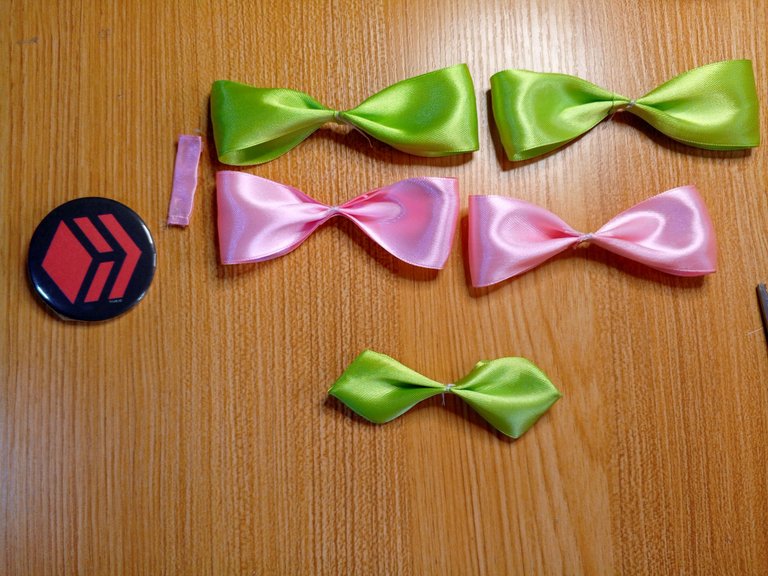
Corta la cinta del tamaño que desees del lazo, para ello necesitas, 2 piezas grandes iguales de cada color, esta es la pieza del fondo.
Una pieza más pequeña del mismo color.
Dos piezas más de cinta del otro color, esta debe ser más pequeña que la cinta que formará el lazo de la parte de atrás.
Un trozo de cinta para colocarlo en el medio uniendo todas las piezas.
Como ven la primera imagen, la cinta luce muy mal, muy arrugada, usé la plancha del cabello para resolver el problema, debes tener cuidado de la temperatura de la plancha, la cinta de raso es muy delicada.
En la última imagen puedes ver cómo quedó la cinta después de haberla planchado.
English version
Cut the ribbon to the desired size of the bow, for this you need, 2 equal large pieces of each color, this is the bottom piece.
One smaller piece of the same color.
Two more pieces of ribbon of the other color, this should be smaller than the ribbon that will form the bow on the back.
A piece of ribbon to place in the middle joining all the pieces.
As you can see in the first image, the ribbon looks very bad, very wrinkled, I used the hair iron to solve the problem, you must be careful with the temperature of the iron, the satin ribbon is very delicate.
In the last image you can see how the ribbon looks after ironing.
Step 2️⃣/ paso 2️⃣
 |  |
[Esp]
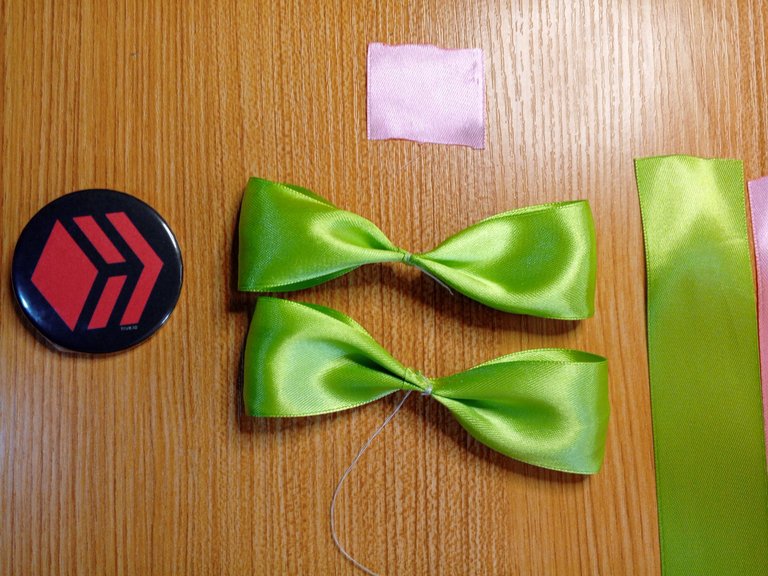
Para evitar que la cinta se deshilache, utiliza la llama del yesquero para sellar las puntas.
Toma las cintas más largas que serán la parte de atrás del lazo, realiza un lazo de cada una, dobla por el medio cose con aguja, es lo más recomendable.
Este procedimiento lo repetirás con las otras dos cintas para formar los otros dos lazos.
English version
To prevent the ribbon from fraying, use the tinder flame to seal the ends.
Take the longest ribbons that will be the back of the ribbon, make a loop of each one, fold in the middle and sew with a needle, it is recommended.
Repeat this procedure with the other two ribbons to form the other two loops.
Step 3️⃣/ paso 3️⃣
 |  | |
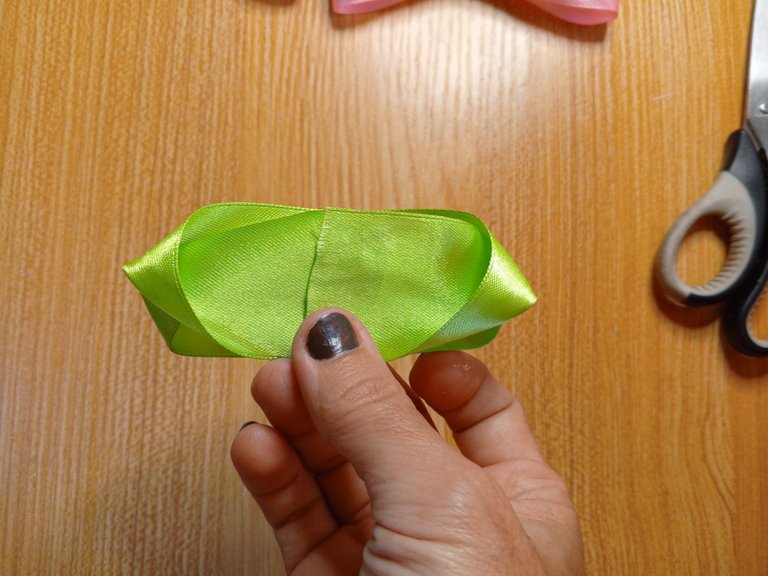 | 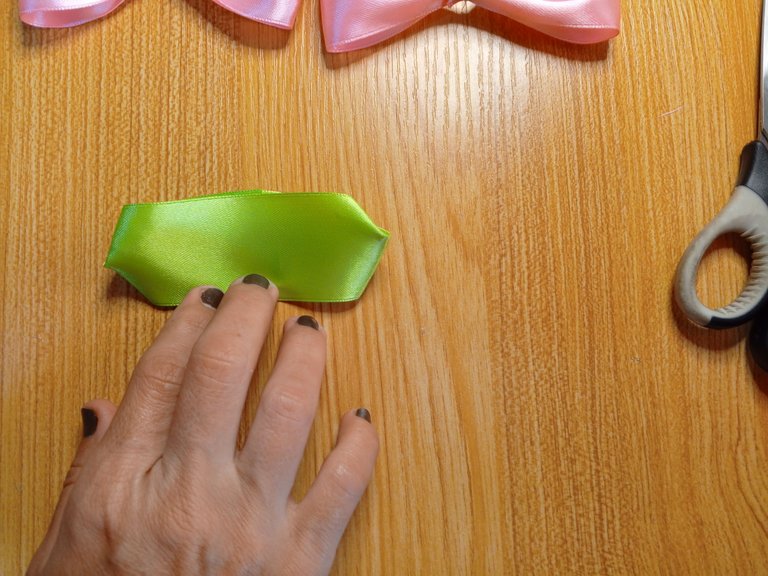 |
[Esp]
Toma la cinta más pequeña que será la pieza central que una todos los lazos, dobla por ambos extremos y pega.
Toma la cinta más pequeña, une por el centro formando un círculo.
Ahora toma la cinta y dobla hacia a dentro (imagen 3 y 4), cose por el centro.
English version
Take the smaller ribbon that will be the center piece that will join all the loops together, fold at both ends and glue.
Take the smaller ribbon, join in the center forming a circle.
Now take the ribbon and fold it inwards (image 3 and 4), sew through the center.
Step 4️⃣/ paso 4️⃣
 |  |  |
 |  |  |
[Esp]
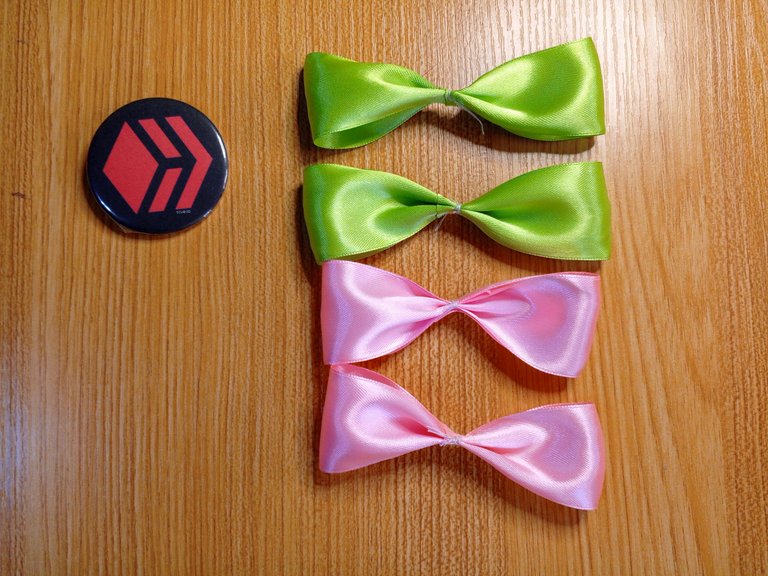
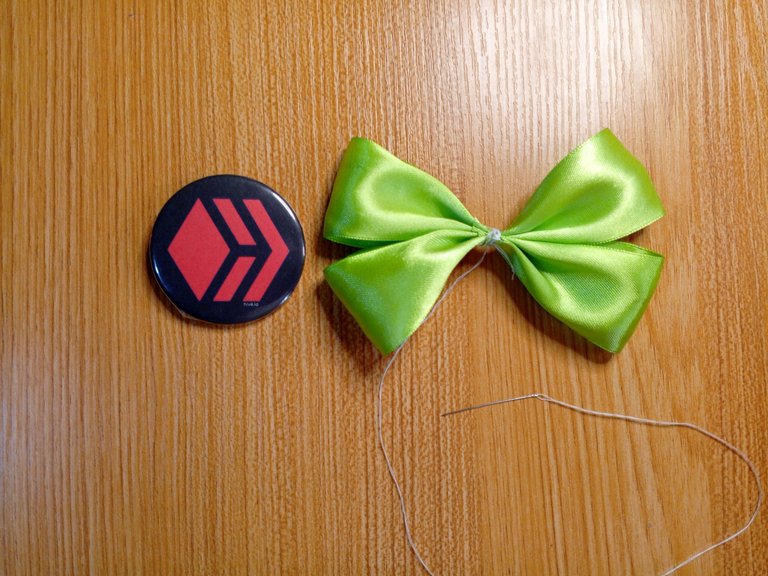
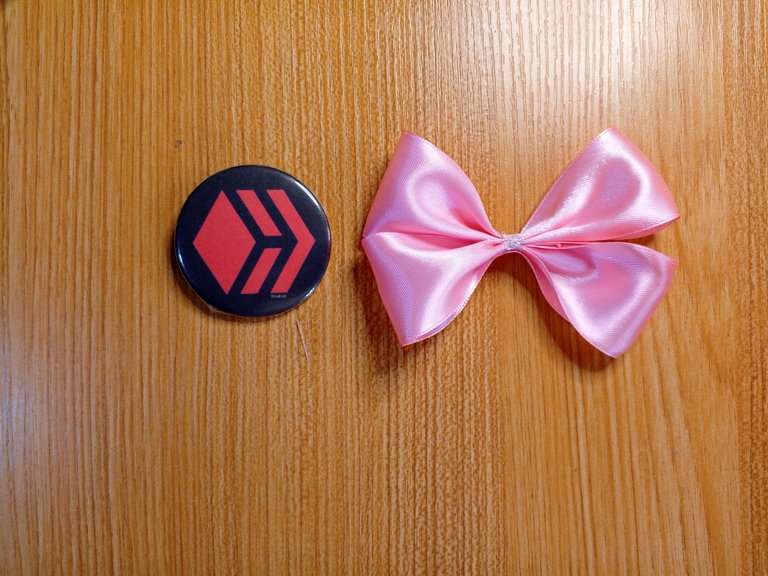
Toma los dos lazos de un mismo color (los lazos de la pieza del fondo) júntalos y cose por el medio, uniendo ambos.
Repite el procedimiento anterior con los otros dos lazos.
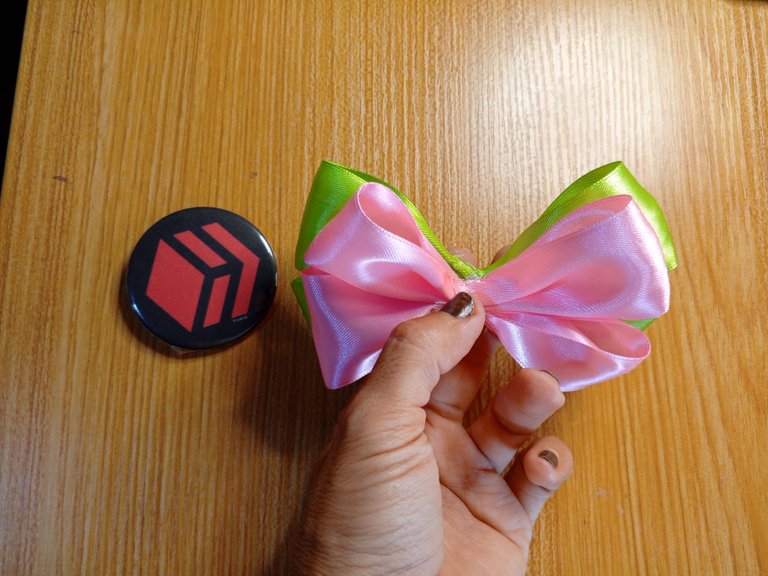
Ya realizado el lazo de 4 puntas procede a pegarlos uno sobre otro, el lazo más grande va en la parte de atrás.
Pega el lazo pequeño en el frente.
Usa la cinta del medio que hiciste el doblez y pégalo en el centro.
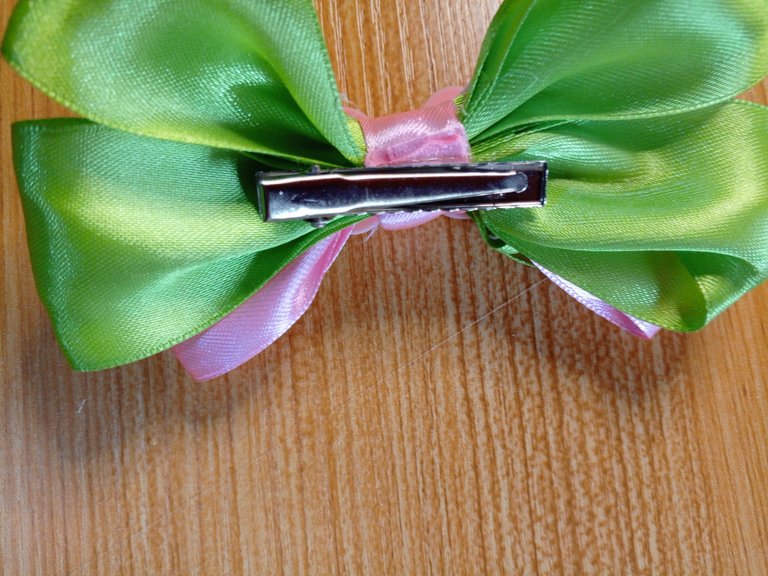
Pega el cancho caimán por la parte de atrás del lazo.
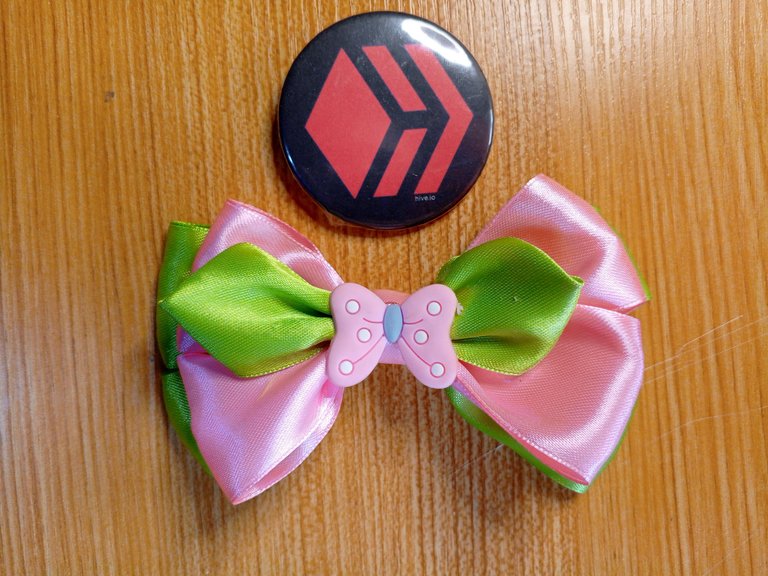
Pega la decoración en el centro del lazo.
Con ello terminamos el proyecto, en mi caso lo coloqué en una bolsa para cuidarlo del polvo y esté disponible para la venta o regalo.
Espero sea de su agrado este modelo de lazo. nos vemos en mi siguiente publicación.
English version
Take the two loops of the same color (the loops of the bottom piece), join them together and sew through the middle, joining them together.
Repeat the above procedure with the other two loops.
Once the four-pointed loop has been made, proceed to glue them one on top of the other, with the larger loop going on the back.
Glue the small loop on the front.
Use the middle ribbon that you made the fold and glue it in the center.
Glue the alligator hook to the back of the bow.
Glue the decoration in the center of the bow.
With this we finish the project, in my case I put it in a bag to protect it from dust and to be available for sale or as a gift.
I hope you like this bow model. See you in my next publication.
Créditos / Credits

👇Support the Hive DIY community as a witness 👇

![]() 👉
👉  👉
👉 ![]() 👉
👉 ![]() 👉
👉 
Here / Bríndame un café

Son muy bonitos tus lazos, para mis 4 nietas son excelentes. Que bien mi amiga, eres especialista en estas confecciones espectaculares. Te felicito. Me anticipo a tus continuas visitas a mis publicaciones.
Esta genial el lazo, pero eres una maestra mostrándolo en cada una de las imágenes, el contexto de la imagen y acompañado de ese botón, pues ni que hablar.
It is so beautiful and stylish. It shows your talent and creativity. Nice work! Keep it up!
our princess Abigail is going to love this hair bow
I love the things you make, especially that they are recycled materials. Beautiful what you do dear friend @equipodelta
and seeing the step by step makes us see that it is easy to do
Have a happy and prosperous week
Muchas gracias amiga, se ven súper faciles y bonitos esos lazos.☺️
Me encantan, de niña me encantaba usar esos adornos en el cabello, tenerlo largo y ponerme mucha bijou jaja con el tiempo empece a sentirme mas comoda con el cabello mas corto, aunque yo lo hago al reves, en verano me lo dejo mas largo para poder recogerlo y en invierno me podo toda jajajaja 😂
Son muy bellos y los colores que elegiste son muy agradables, muy buenos tips tambien 👌🦉 listos para que alguna bella princesa los luzca ❤️
Guau, qué belleza. Los colores y brillos de la tela resaltan muchísimo.