
For all readers wishing you a beautiful day and a nice weekend with many blessings.
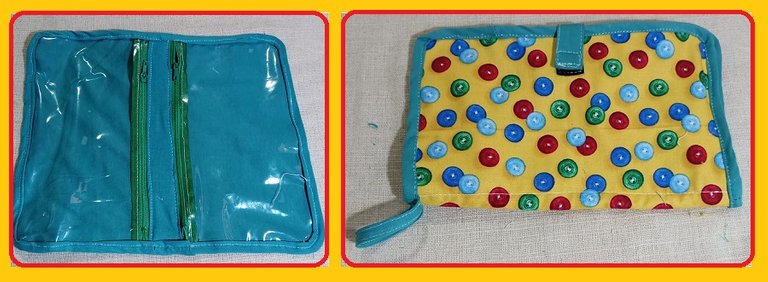
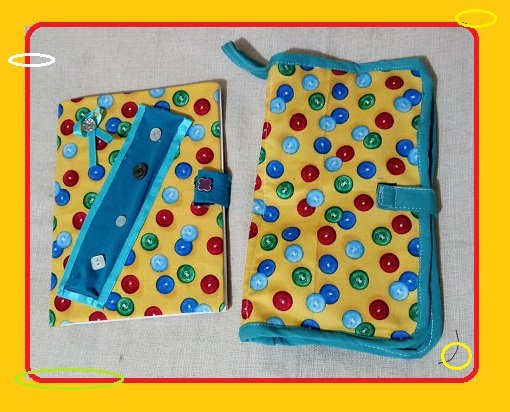
In my previous post I showed you how I covered a notebook for sewing, but this time I made a multipurpose case, with transparent plastic that goes inside, in order to quickly visualize what we keep.
It is to store scissors, tape measure, among others, and easy to have it all together. I made this case with the same fabric that has a button design and I really like it and it matches the notebook.
Now I show you my steps in this beautiful handicraft work, which I did with a lot of love and patience.
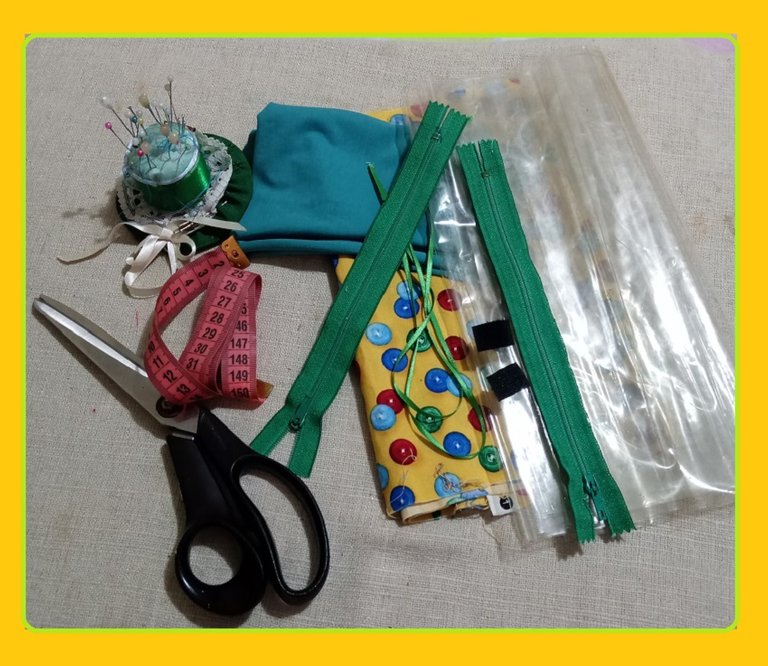
My materials:
♦️ Printed fabric.
♦️ Unicolor fabric.
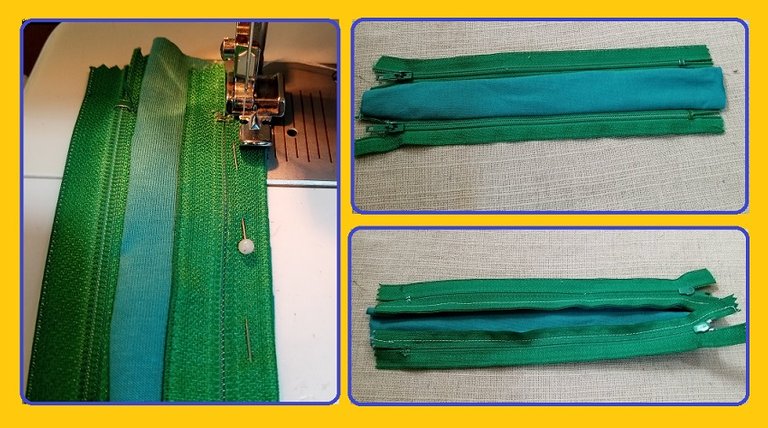
♦️ 2 closures 20 cm long.
♦️ Transparent plastic.
♦️ Thread, pins, scissors, tape measure, sewing machine.
First with the patterned fabric, I cut a rectangle 28cm wide by 23cm long, the same length cut into the green fabric. Then with the unicolor fabric I cut a strip that goes in the middle of 4cm by 28cm wide.
Now I cut the plastic of the same size of the unicolor fabric, or green.
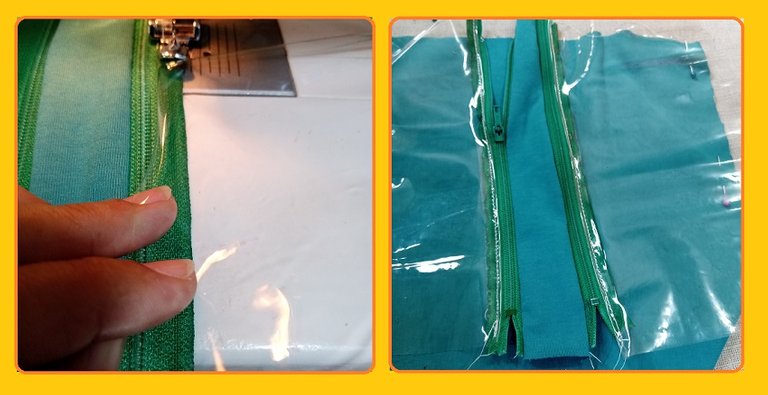
I start by sewing the closures, on the narrowest strip, one closure on each side. Then on the other side of the closure I sew the plastic, you have to sew very carefully trying not to stretch the plastic, since it deforms.
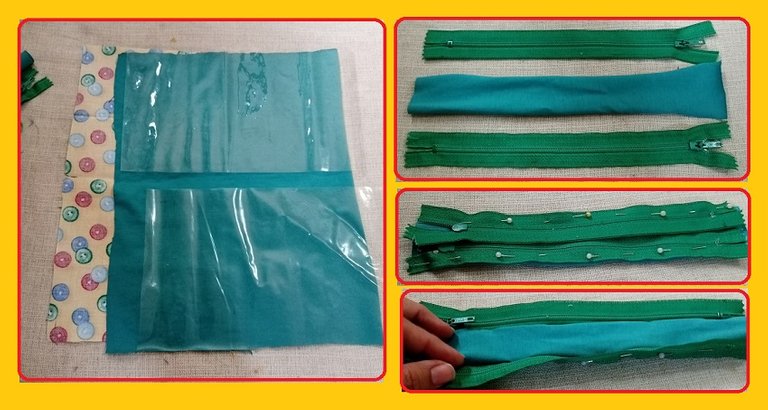
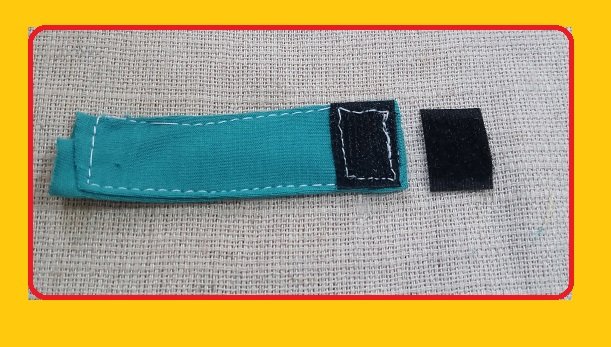
I make a small strip of the green fabric, 2cm wide by 4cm long and on one side I place the magic closure. I am going to sew this strip in the middle or center of one of the edges.
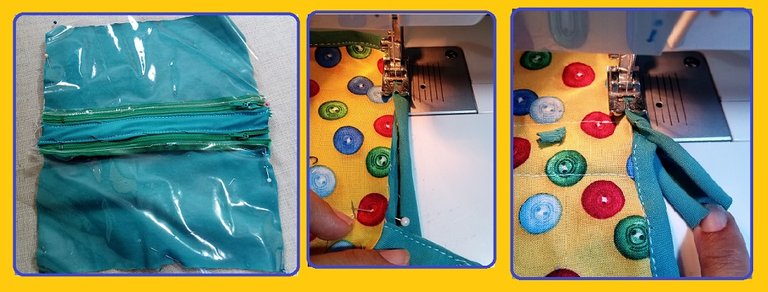
I put the two parts together, the plastic one and the other fabric underneath, then I sew around it, and in the center I also pass the seam on each side of the zipper.
I made a bias or encore that I'm going to place all around the case.
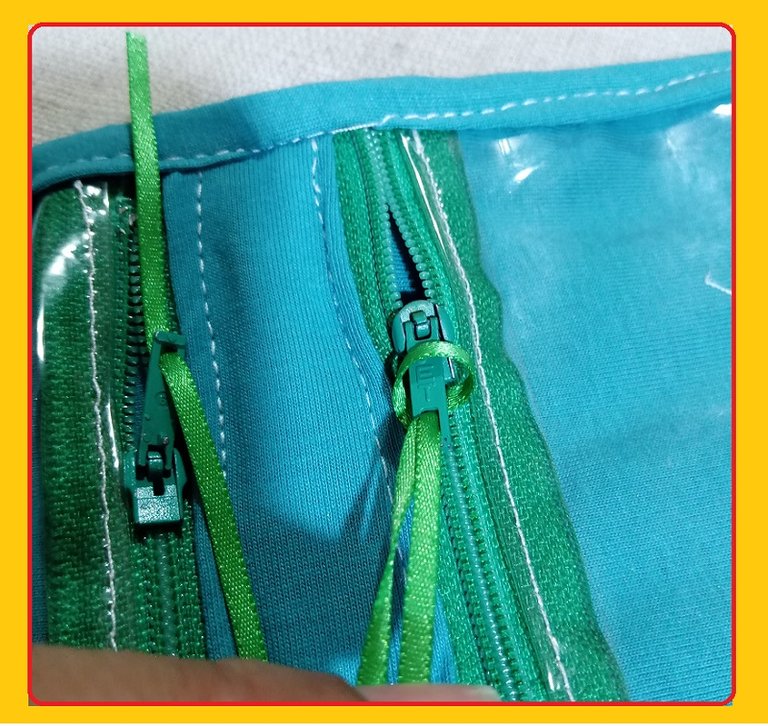
He put a small ribbon on each closure to make it easier to open and close.
I also sewed the other part of the magic closure on the other side before placing the plastic, taking into account the place where to sew it, so it closes.
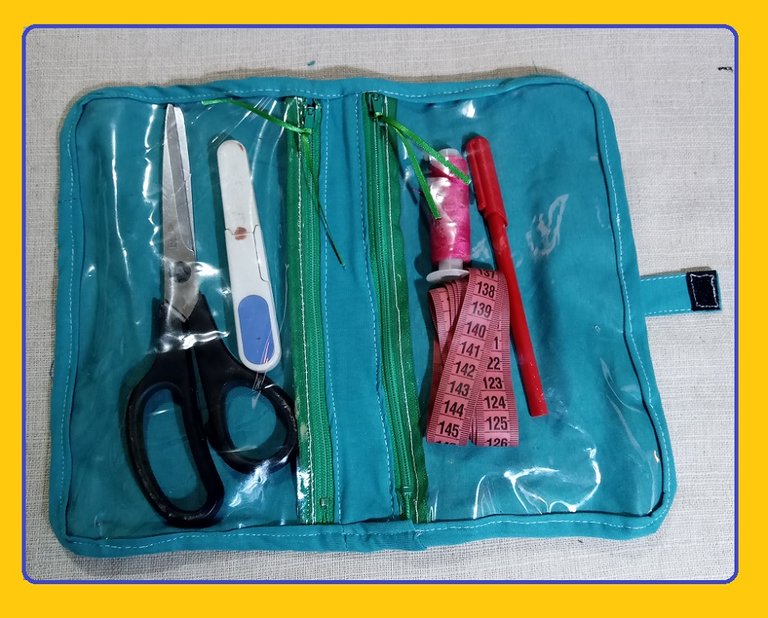
It is very easy to do it, having the desired measurements, and the plastic, when sewing it on the machine that remains under the fabric, that is, the plastic will be down and the fabric will be up from the needle, so it will not stretch.
Also take into account not to undo or spend too much sewing so that the plastic does not split.
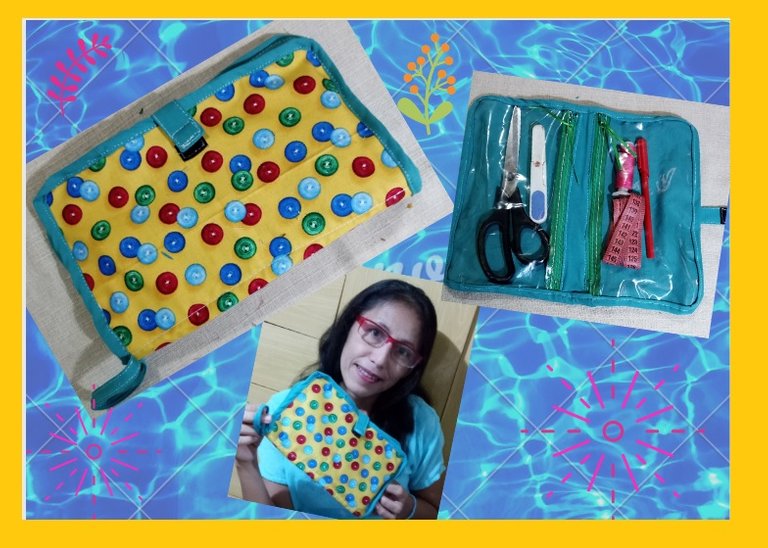
Thank you very much for reading my blog, I hope you liked this fabric design game, with its notebook and pencil case, such a pencil case is also ideal for children's school, or when we travel and we have to store anything, we simply open and we will see more easily what we keep. Until the next presentation dear readers, bye!

Para todos los lectores deseandoles un bello dia y lindo fin de semana con muchas bendiciones.
En mi publicación anterior les mostré como forré un cuaderno para costura, pero en esta oportunidad hice un estuche multiusos, con plastico transparente que va por dentro, con la finalidad de visualizar rápidamente lo que guardamos.
Es para guardar tijera, cinta métrica, entre otros, y fácil de tenerlo todo junto. Este estuche lo realicé con la misma tela que tiene un diseño de botones y me gusta mucho y hace juego con el cuaderno.
Ahora bien les enseño mis pasos realizados en este bello trabajo de manualidades, que hice con mucho cariño y paciencia.
Mis materiales:
♦️Tela estampada.
♦️Tela unicolor.
♦️2cierres de 20cm de largo.
♦️Plastico transparente.
♦️Hilo, alfileres, tijera, cinta métrica, maquina de coser.
Primero con la tela estampada, corto un rectangulo de 28cm de ancho, por 23cm de largo, de la misma medida corto en la tela verde. Luego con la tela unicolor la corto una tira que va en el medio de 4cm por 28cm de ancho.
Ahora corto el plastico del mismo tamaño de la tela unicolor, o verde.
Empiezo cosiendo los cierres, en la tira más angosta, un cierre de cada lado. Luego del otro lado del cierre le coso el plástico, hay que coser con mucho cuidado tratando de que el plastico no se estire, ya que se deforma.
Hago una pequeña tira de la tela verde, de 2cm de ancho por 4cm de largo y en un lado le coloco el cierre mágico. Esta tira la voy a coser en el medio o centro de una de las orillas.
Coloco las dos partes juntas, la del plastico y la otra tela debajo, luego coso a su alrededor, y en el centro tambien paso la costura en cada lado del cierre.
Hice un sesgo o bis que voy a colocar en todo alrededor del estuche.
En cada cierre le puso una pequeña cinta para que sea más fácil de abrir y cerrar.
Tambien le cosi del otro lado la otra parte del cierre mágico antes de colocar el plastico, tomando en cuenta el lugar donde coserlo, asi se cierra.
Es muy fácil realizarlo, teniendo las medidas deseadas, y el plastico, al coserlo en la maquina que quede debajo de la tela, es decir el plastico quedara hacia abajo y la tela hacia arriba de la aguja, así no se estirará.
Tambien tomar en cuenta de no descoser o pasar mucho la costura para que no se parte el plastico.

Muchas gracias por leer mi blog espero les haya gustado este juego del diseño de la tela, con su cuaderno y estuche, un estuche asi, tambien es ideal para la escuela de los niños, o cuando viajamos y tenemos que guardas cualquier cosa, simplemente abrimos y veremos con mayor facilidad lo que guardamos. Hasta la proxima presentacion queridos lectores, chau!

Las fotos son de mi autoria, con mi celular Tecno Spark go.
Traductor deepl.
Diseño canva.
The photos are my own, with my Tecno Spark go cell phone.
Translator deepl.
Canvas design.
¡Felicidades! Esta publicación obtuvo upvote y fue compartido por @la-colmena, un proyecto de Curación Manual para la comunidad hispana de Hive que cuenta con el respaldo de @curie.
Si te gusta el trabajo que hacemos, te invitamos a darle tu voto a este comentario y a votar como testigo por Curie.
Si quieres saber más sobre nuestro proyecto, acompáñanos en Discord: La Colmena.
Me encantó, muy útil, pienso que es todo uso. El material transparente que colocaste en la parte interna, es genial, esto nos ayuda a visualizar lo que guardamos dentros. Gracias por compartir.
Saludos, así es, inmediatamente ver lo que se guardo, sin buscar tanto, muchas gracias por el apoyo.
Hola @eylis que idea tan práctica. Los colores son geniales. Quedó muy bonito, ya se acerca el periodo escolar. Jajajaja
Congratulations @eylis! You have completed the following achievement on the Hive blockchain and have been rewarded with new badge(s):
Your next target is to reach 800 upvotes.
Your next target is to reach 300 comments.
You can view your badges on your board and compare yourself to others in the Ranking
If you no longer want to receive notifications, reply to this comment with the word
STOPCheck out the last post from @hivebuzz:
Support the HiveBuzz project. Vote for our proposal!
quedo muy bonito amiga are uno igual para mi bb
¡Guau, dos insignias seguidas, eso es increíble @canirove14! 🎉