English
Hello creative friends!
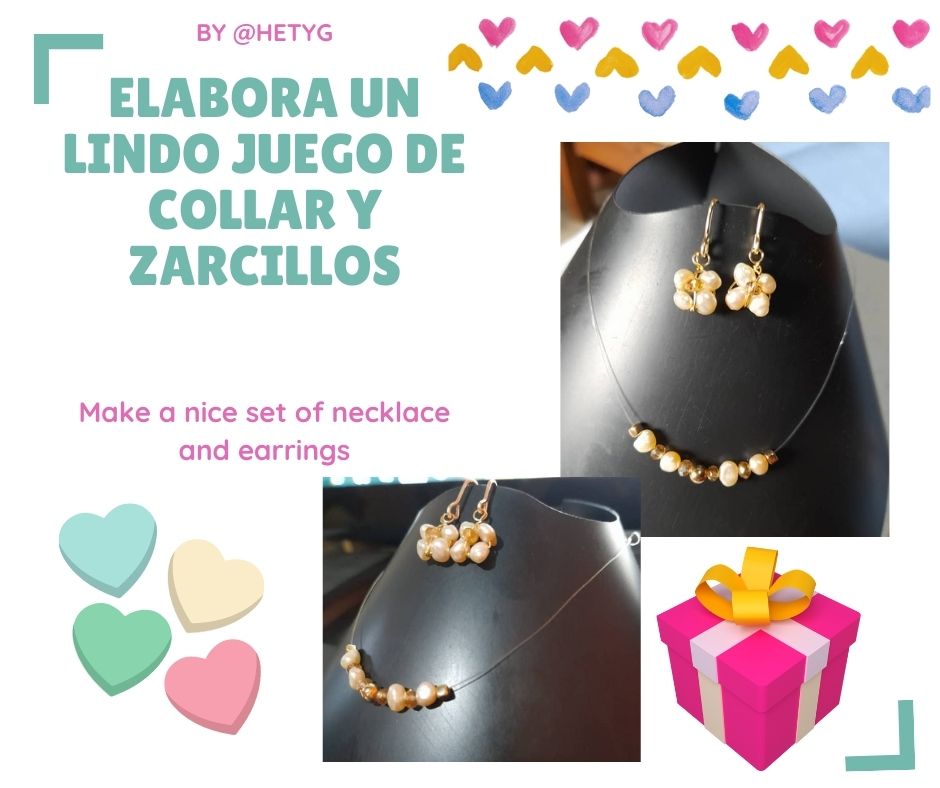
I'm here again to show you a delicate project I made to give to a friend for her birthday.
As she loves pearls I decided to make her something very delicate, with ivory tone cultured pearls, I also made some pretty earrings, which I hope she likes very much.
February is the month of love and friendship and I always like to have some details with my friends and close people, so I think this could be an excellent gift for this coming season.
Without further ado, let's start the step by step of this project.
Materials
For the necklace
- 40 cm of nylon thread
- 4 cultured pearls
- 2 knot caps
- 3 small crystals
- 2 small golden cubes
- 1 golden ball
- 2 knot covers
- 1 locking rod.
- Tinder
- Scissors
- Tweezers.
For the tendrils
- 8 cultured pearls
- 2 small crystals
- 2 sections of wire cal 24 of 10 cm each one.
- 2 bases for hook type tendrils.
Procedure
Insert the nylon through the hole in the knot-cover and knot the end.
Then, with the help of flat-nosed pliers, close the knot-cover.

Through the other end introduce a cube, a cultured pearl, a crystal, another pearl, a crystal and the ball, repeat this sequence.

Then introduce the end through the knot-cover, close it with pliers.
Later cut the remaining ends and burn with the tinder.
In this way the tender necklace type fantasmita is obtained.
To make the tendrils, proceed as follows:
introduce in the 10 cm section of wire 4 cultivated pearls.

Leave an end of about 2 cm, fix by winding the other end of the wire.

Once fixed, insert a crystal and roll it on the opposite side, when you have rolled it well, cut it with the tweezers.

With the round nose pliers roll up the end of 2 cm that you had left initially.

Now hang this small flower on the base for tendrils.

This is how the tender tendrils look like.
I hope you liked this project and that it will serve as a reference to make beautiful gifts.


Thanks for reading.
Photos by @hetyg
Translated with www.DeepL.com/Translator (free version)
Español
Hola amigos creativos!
Estoy de nuevo por aquí para mostrarles un delicado proyecto que elaboré para obsequiarle a una amigo por su cumpleaños.
Como a ella le encantan las perlas decidí hacerle algo muy delicado, con perlas cultivadas en tono marfil, también elabore unos lindos zarcillos, que espero le gusten mucho.
Febrero es el mes del amor y de la amistad y siempre me gusta tener algunos detalles con mis amigas y personas cercanas, así que de igual manera pienso que este puede ser un excelente obsequio en esta temporada que se avecina.
Sin mas que decir iniciemos el paso a paso de este proyecto.
Materiales
Para el collar
- 40 cm de hilo de nylon
- 4 perlas cultivadas
- 2 tapa nudos
- 3 cristales pequeños
- 2 cubos dorados pequeños
- 1 balin dorado
- 2 tapa nudos
- 1 trancadero.
- Yesquero
- Tijera
- Pinzas.
Para los zarcillos
- 8 perlas cultivadas
- 2 cristales pequeños
- 2 secciones de alambre cal 24 de 10 cm c/u
- 2 bases para zarcillos tipo anzuelo.
Procedimiento
Introducir el nylon por el agujero del tapa-nudo y anudar el extremo.
Seguidamente con ayuda de pinza de punta plana, cerrar el tapa-nudo.

Por el otro extremo introducir un cubo, una perla cultivada, un cristal, otra perla,un cristal y el balin, repetir esta secuencia.

Luego introducir el extremo por el tapa-nudo, cerrar el mismo con pinza, lo que sigue es colocar las argollas y el trancadero.
Posteriormente cortar los extremos sobrantes y quemar con el yesquero.

De esta manera se obtiene el tierno collar tipo fantasmita.
Para elaborar los zarcillos se procede de la siguiente manera:
Introduce en la sección de alambre de 10 cm 4 perlas cultivadas.

Deja un extremo como de 2 cm aproximadamente, fija enrollando el otro extremo del alambre.

Una vez fijado introduce un cristal y enrolla del lado contrario, cuando hayas enrollado bien corta con la pinza.

Con la pinza de punta redondo enrolla el extremo de 2 cm que habías dejado inicialmente.

Ahora cuelga esta pequeña flor en la base para zarcillos.

De esta manera quedan los tiernos zarcillos.
Espero les haya gustado este proyecto y les sirva de referencia para elaborar hermosos detalles para regalar.


Gracias por leerme.
Fotos de @hetyg

The rewards earned on this comment will go directly to the person sharing the post on Twitter as long as they are registered with @poshtoken. Sign up at https://hiveposh.com.
Thank you for sharing this amazing post on HIVE!
Your content got selected by our fellow curator @rezoanulvibes & you just received a little thank you via an upvote from our non-profit curation initiative!
You will be featured in one of our recurring curation compilations and on our pinterest boards! Both are aiming to offer you a stage to widen your audience within and outside of the DIY scene of hive.
Join the official DIYHub community on HIVE and show us more of your amazing work and feel free to connect with us and other DIYers via our discord server: https://discord.gg/mY5uCfQ !
If you want to support our goal to motivate other DIY/art/music/homesteading/... creators just delegate to us and earn 100% of your curation rewards!
Stay creative & hive on!
Gracias por el apoyo! Saludos!
¡Felicitaciones!
1. Invierte en el PROYECTO ENTROPÍA y recibe ganancias semanalmente. Entra aquí para más información.
3. Suscríbete a nuestra COMUNIDAD, apoya al trail de @Entropia y así podrás ganar recompensas de curación de forma automática. Entra aquí para más información sobre nuestro trail.
4. Creación de cuentas nuevas de Hive aquí.
5. Visita nuestro canal de Youtube.
Atentamente
El equipo de curación del PROYECTO ENTROPÍA