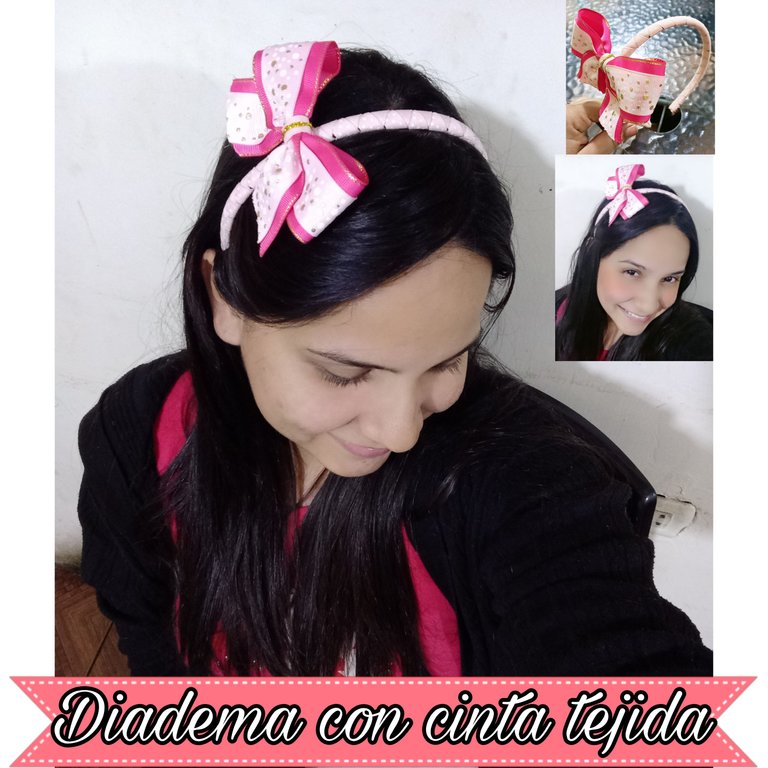
Hola, hola mi linda familia de artesanos, es un gusto saludarlos; hace varios días no publicaba por aquí por motivos laborales, pero estoy de vuelta para compartir con todos ustedes la elaboración de una Hermosa Diadema Plástica con Tejido de Cinta. Es una buena idea para que nuestras niñas luzcan hermosas; también para emprender u obsequiar. Aquí les muestro cómo lo hice.
Hello, hello my beautiful family of artisans, it is a pleasure to greet you; I have not posted here for several days for work reasons, but I am back to share with all of you the elaboration of a beautiful plastic headband with ribbon weaving. It is a good idea for our girls to look beautiful; also to undertake or to give as a gift. Here I show you how I made it.

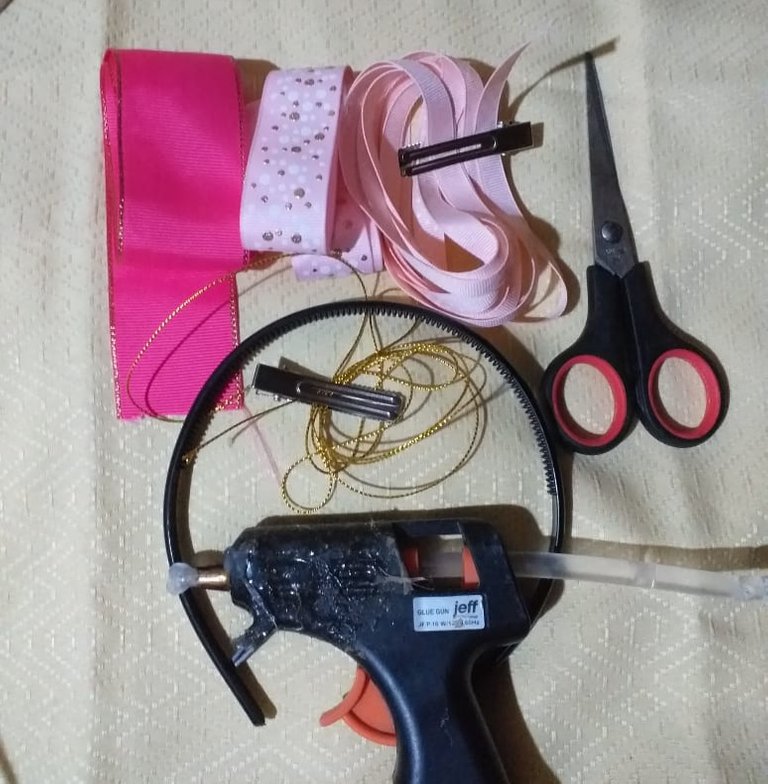
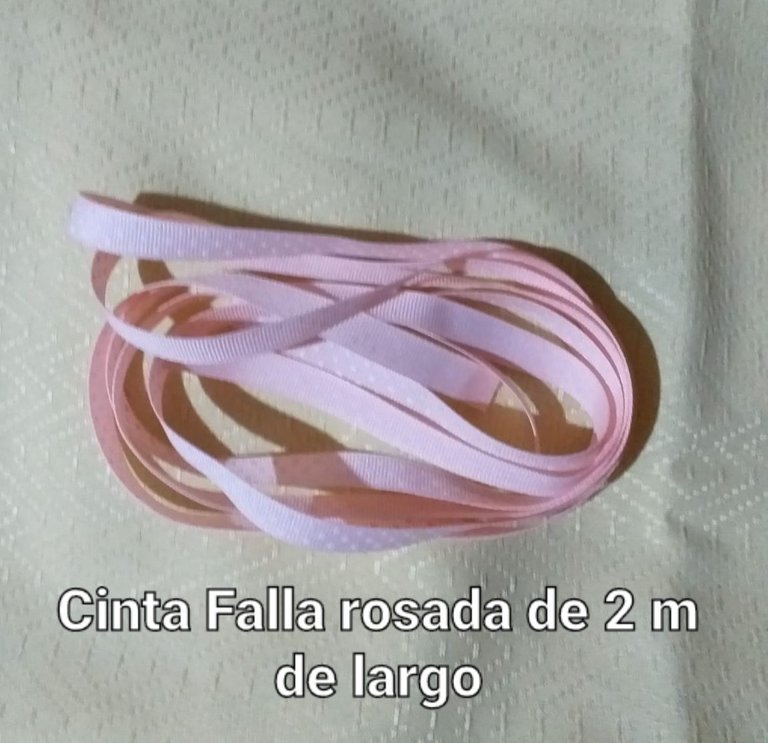
- 2 m de cinta falla de 1cm de ancho, rosada con puntos blancos.
- 37cm de cinta falla fucsia de 3cm de ancho.
- 37cm de cinta falla rosada con lunares blancos y dorados de 2cm de ancho.
- Cintillo o diadema plástica.
- Hilo de bordar dorado.
- Pistola de silicón caliente.
- Tijeras.
- Hilo y aguja.
- 2 m of 1 cm wide pink ribbon, pink with white dots.
- 37cm fuchsia ribbon 3cm wide.
- 37cm of pink falla ribbon with white and gold polka dots, 2cm wide.
- Plastic headband.
- Gold embroidery thread.
- Hot silicone gun.
- Scissors.
- Thread and needle.

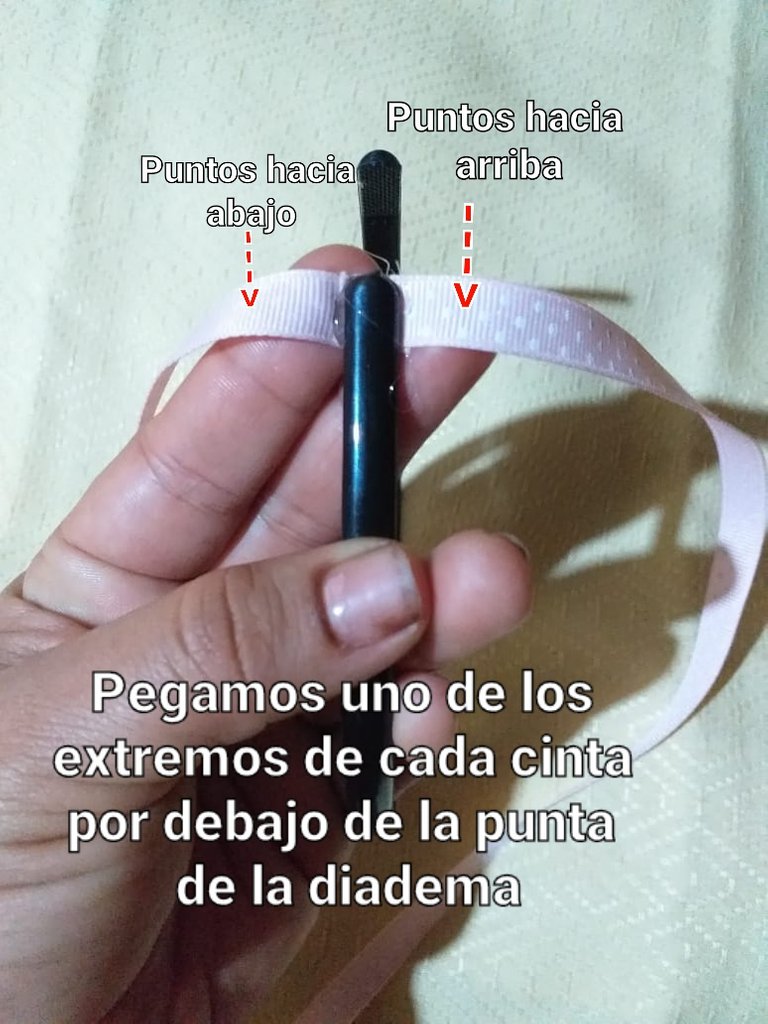
Comenzaremos cortando nuestra cinta rosada de 2 m de largo y 1cm de ancho por la mitad y pegaremos uno de sus extremos de cada una en la punta de la diadema, una con los puntos hacia arriba y otra con los puntos hacia abajo.
We will start by cutting our 2m long and 1cm wide pink ribbon in half and glue one end of each to the tip of the headband, one with the dots facing up and the other with the dots facing down.
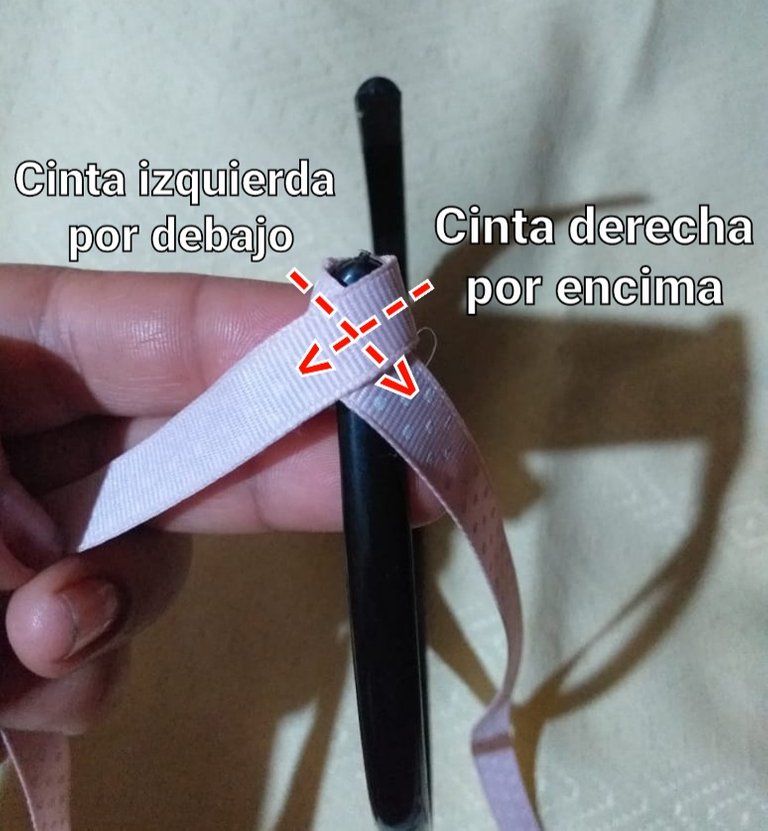
Luego empezaremos el tejido, cruzando por encima de la diadema las dos cintas, la izquierda por debajo y la derecha por encima de ella.
Then we will start the weaving, crossing over the headband the two ribbons, the left one underneath and the right one over it.
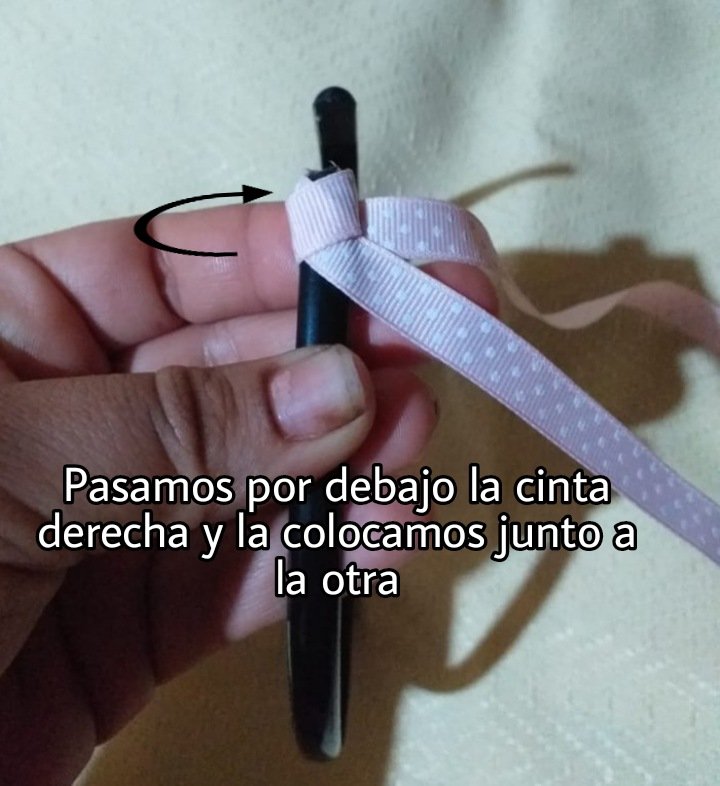
Después de haber cruzado las cintas, colocaremos ambas de un mismo lado, es decir, la cinta derecha la pasamos por debajo de la diadema y la colocamos junto a la otra.
After having crossed the ribbons, we will place both on the same side, that is to say, the right ribbon we pass it under the headband and place it next to the other one.
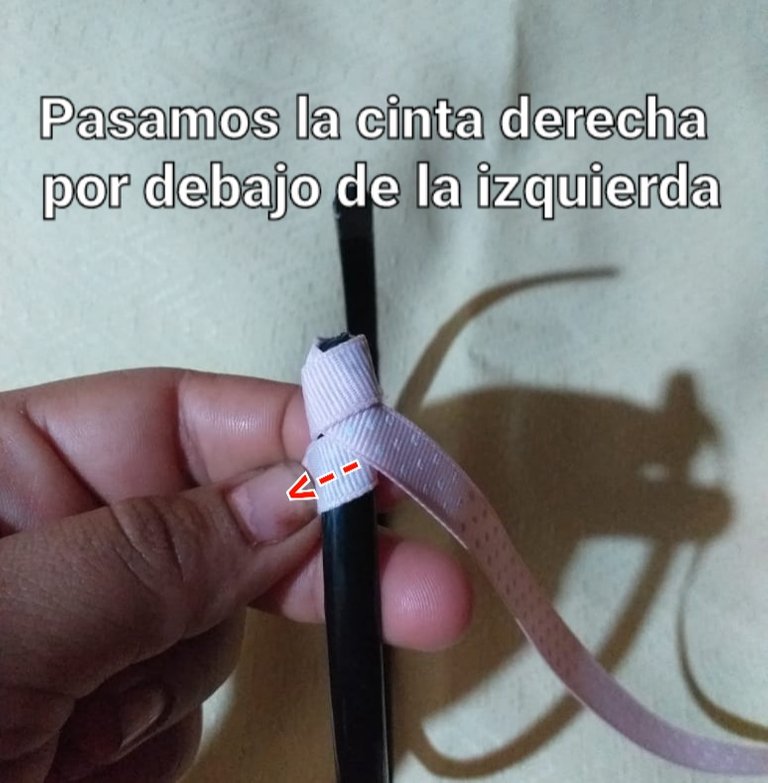
Posteriormente pasaremos la misma cinta derecha, por debajo de la cinta izquierda y la izquierda por debajo de la diadema, para llevarla hacia donde está la derecha.
Then pass the same right ribbon under the left ribbon and the left ribbon under the headband, to bring it to where the right ribbon is.
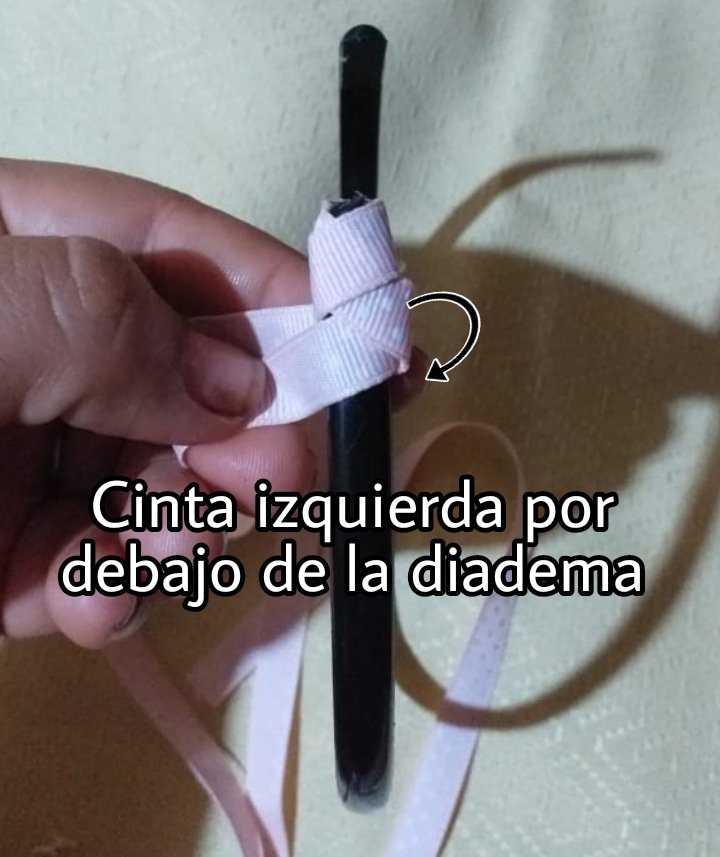
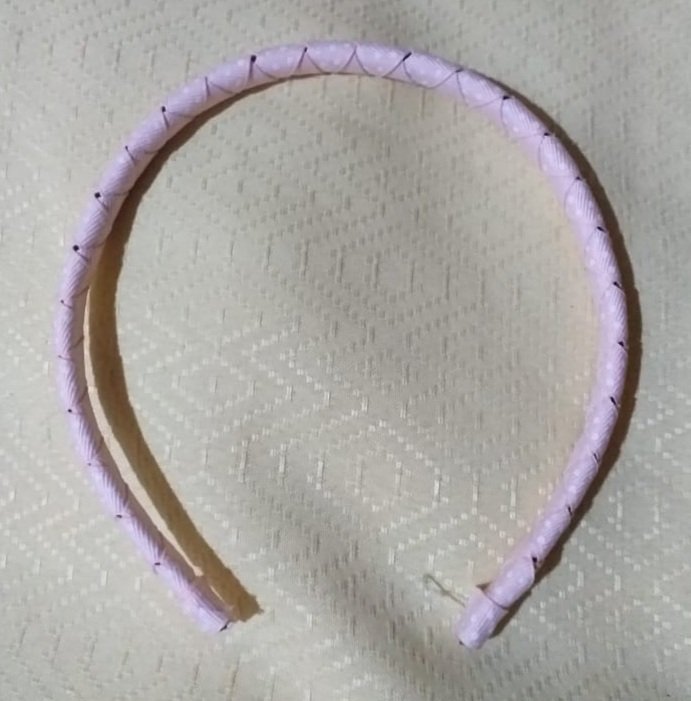
Repetimos el mismo procedimiento hasta terminar de forrar todo la diadema.
Repeat the same procedure until the headband is completely covered.
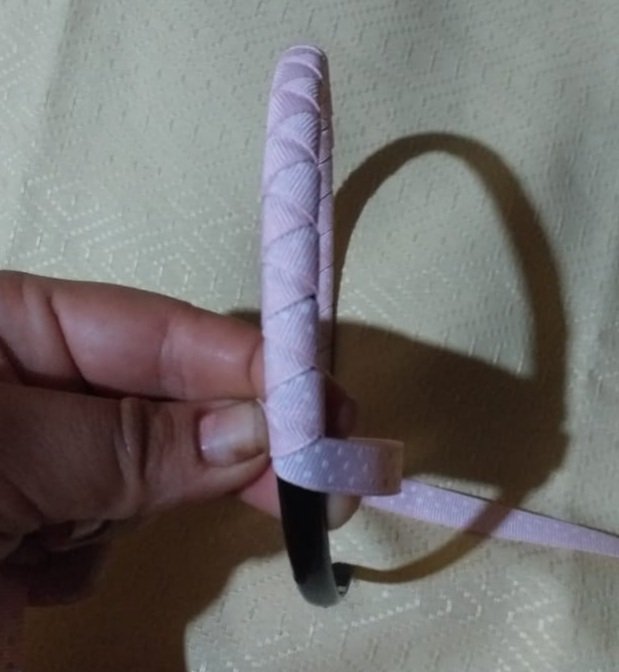

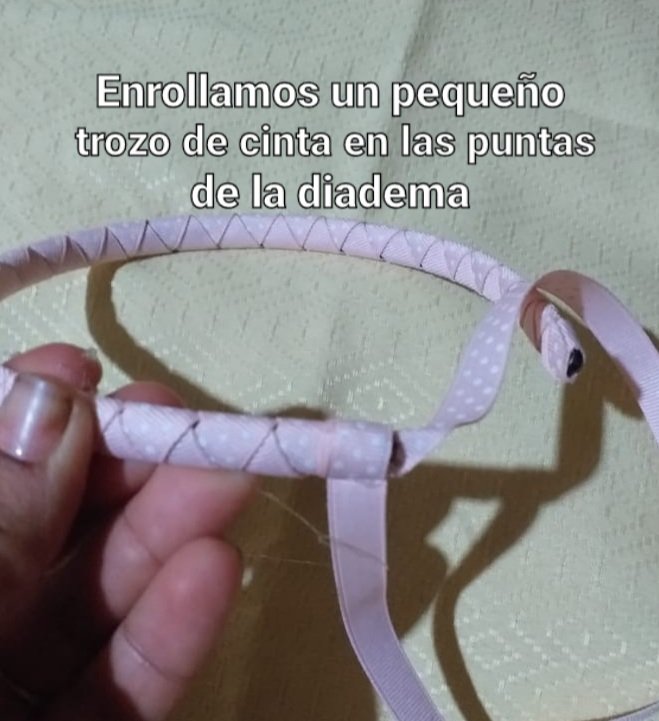
Enreollaremos un pequeño trozo de cinta en cada punta de de los extremos de la diadema.
Wrap a small piece of ribbon around each end of the headband.
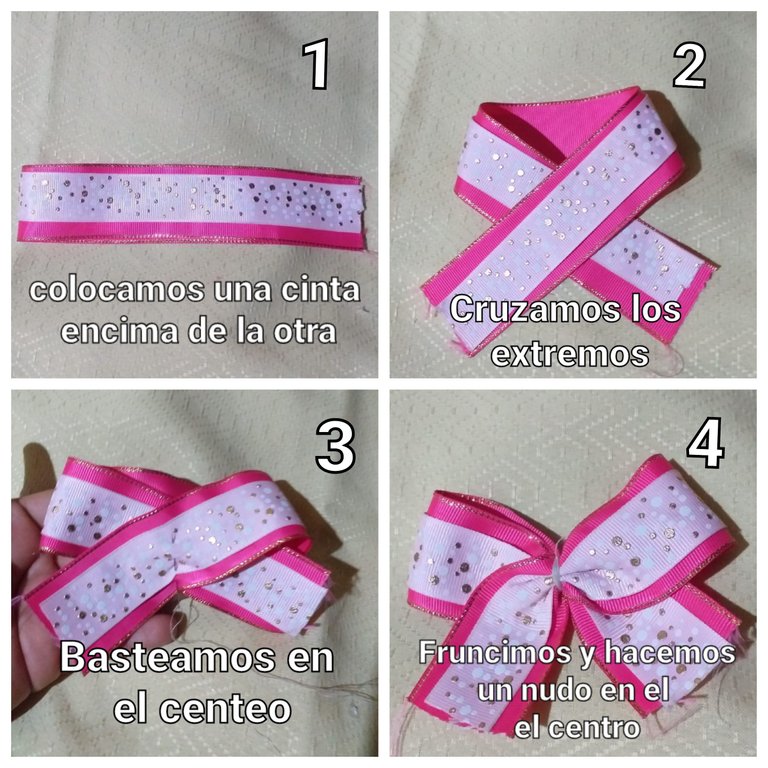
Una vez terminado de tejer la cinta en la diadema, procedemos a realizar un lazo con las cintas falla fucsia y rosada, para esto colocaremos la cinta rosada encima de la fucsia, cruzamos sus extremos y basteamos por el centro y fruncimos.
Once we have finished weaving the ribbon in the headband, we proceed to make a loop with the pink and fuchsia ribbons. To do this, we place the pink ribbon on top of the fuchsia ribbon, cross its ends and baste in the center and gather it.
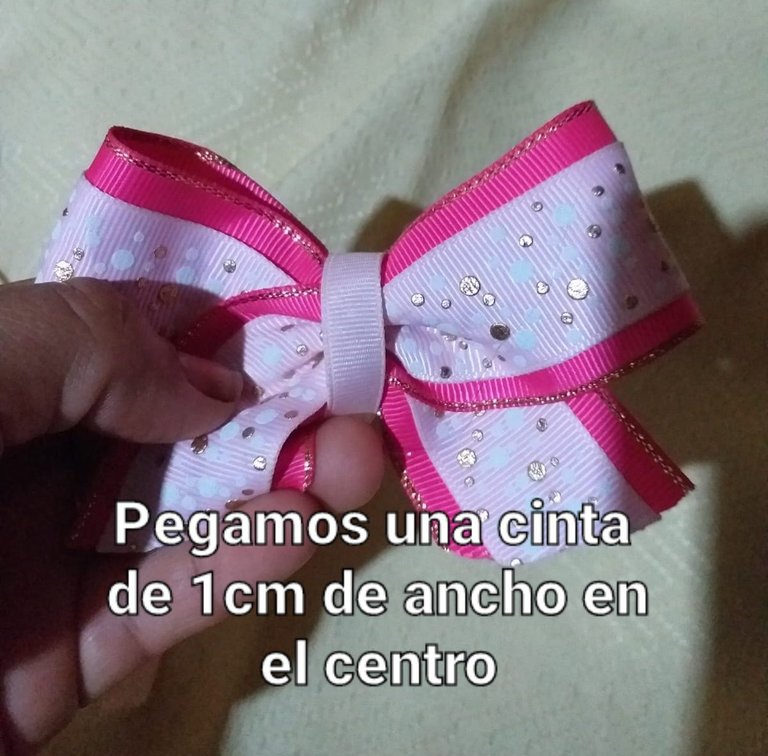
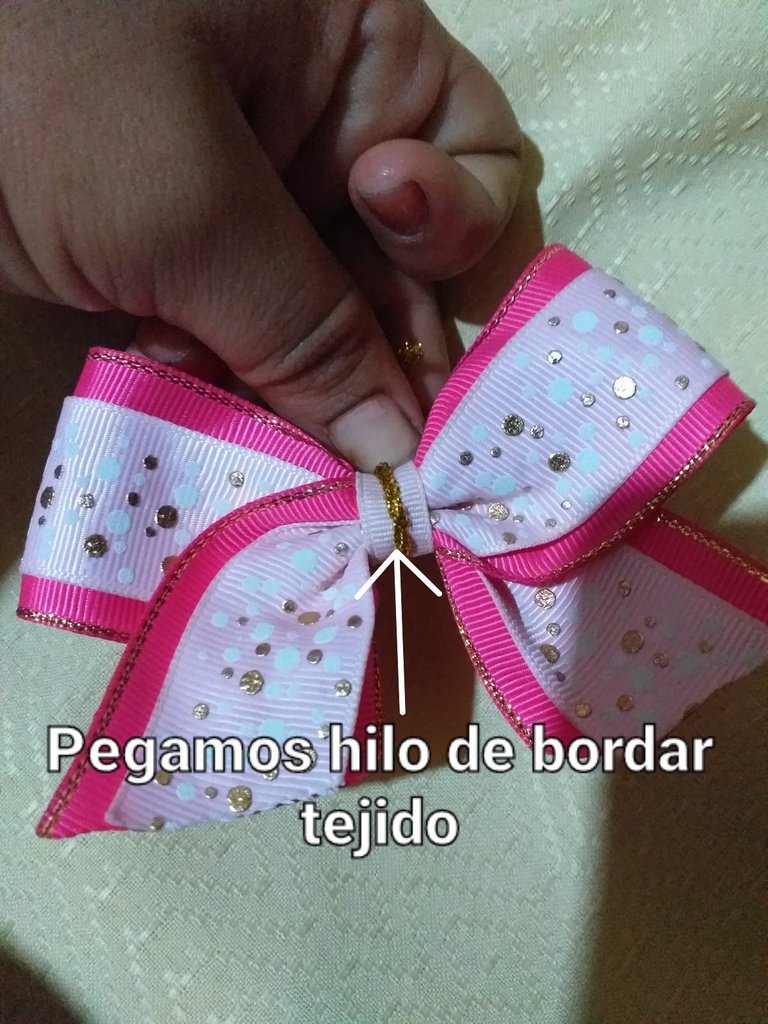
Pegamos una cinta rosada de 1cm de ancho por el centro del lazo y por encima de esta pegaremos pegaremos Hilo de bordar dorado tejido.
We glue a 1cm wide pink ribbon through the center of the bow and on top of this we will glue woven golden embroidery thread.
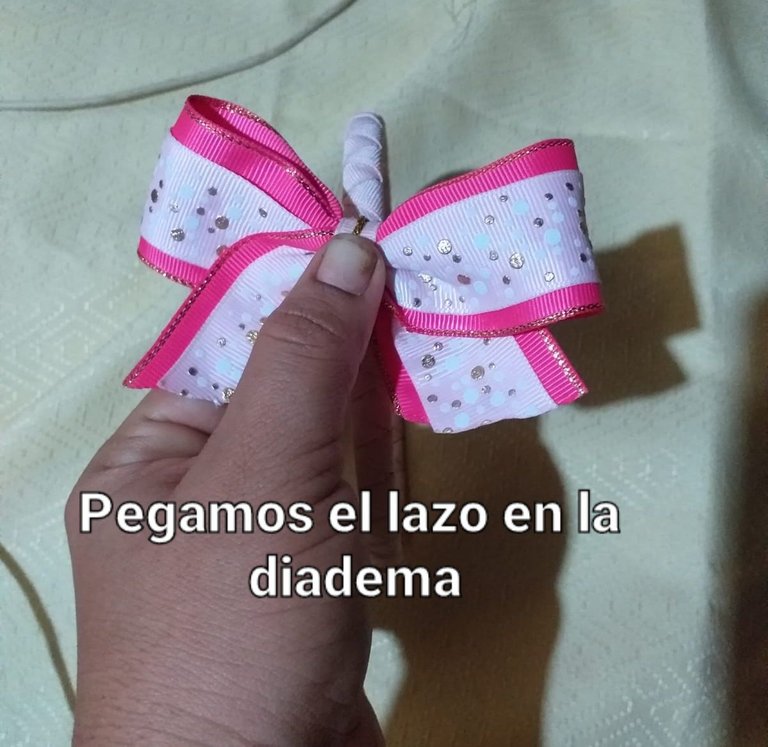
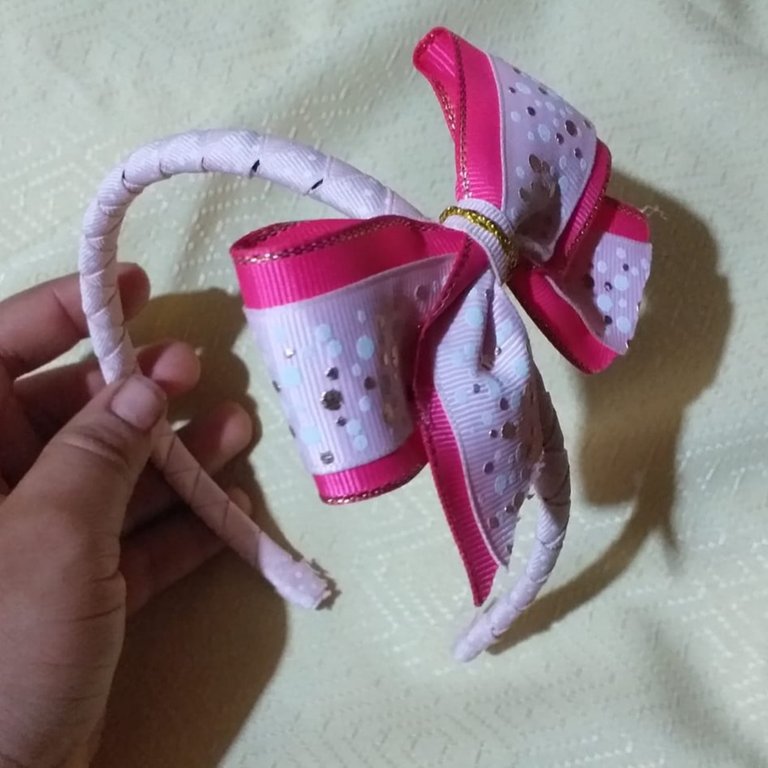
Finalizamos pegando el lazo en un costado de la diadema.
We finish by gluing the ribbon on one side of the headband.
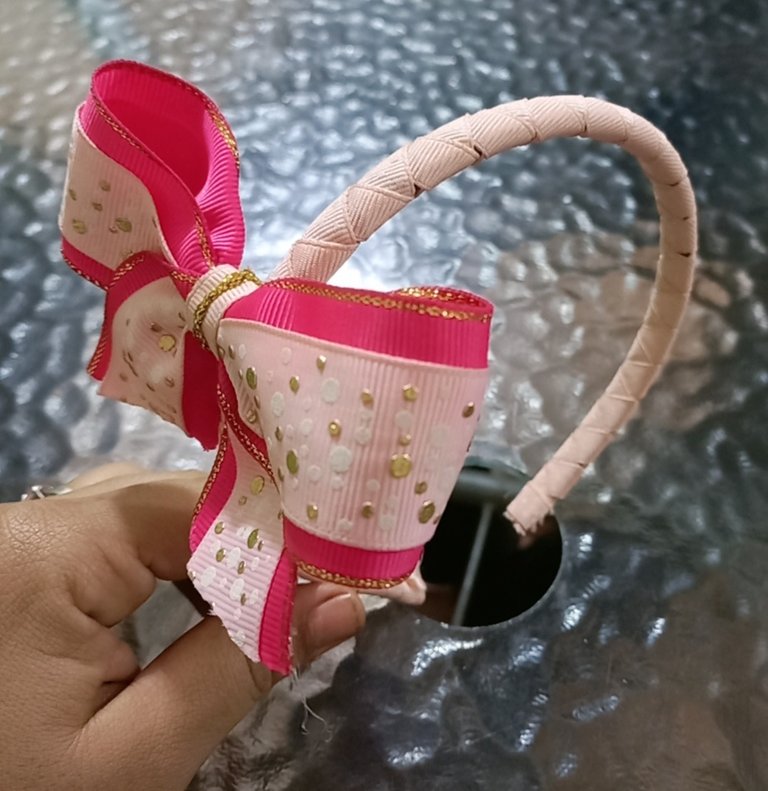
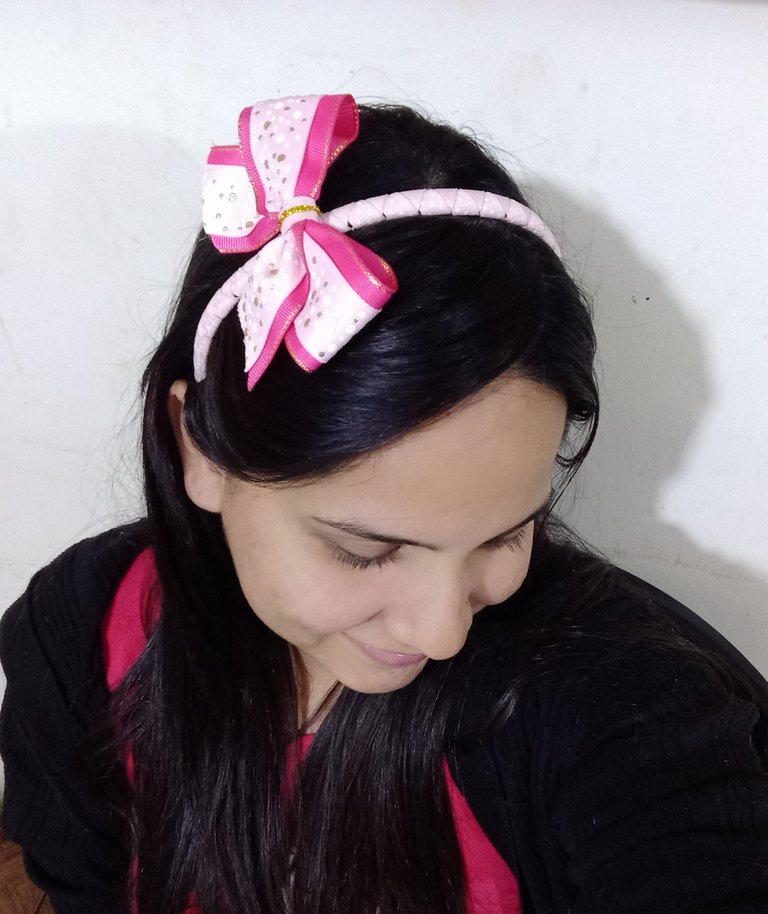
¡Veamos el resultado!
Let's see the result!

Espero les haya gustado éste tutorial y sea de gran utilidad para ustedes mis queridos amigos. Será hasta otra oportunidad. BENDICIONES 😊 🙏🏻🤗.
I hope you liked this tutorial and that it will be of great use to you my dear friends. It will be until another opportunity. BLESSINGS 😊 🙏🏻🤗.
Me encanto tu Diseño.
Felicidades.
Está precioso
Gracias querida @jorgelissanchez. Saludos y Bendiciones 😊 🙏🏻
Muy bello!!!🥰
Hola, gracias ... que tenga un bonito día 😊
Quedo muy linda de verdad. Voy a ver si lo intento con unos cintillos viejos que tengo por ahi, asi les doy una segunda vida, jaja saludos ♥
Gracias amiga por tu comentario; me parece muy buena idea la de reutilizar los cintillos y darle una segunda vida, un poco más moderna. Que tengas un lindo día.
Greetings... Beautiful headband, this type of accessory is used a lot today, more than anything in girls.
Gracias por el comentario amiga. Tiene mucha razón, éste modelo de diadema se está llevando mucho, creo que sería un buen emprendimiento. Saludos y bendiciones 🖐🏻😊