Español
Celebrar la vida recordando personajes infantiles del pasado.
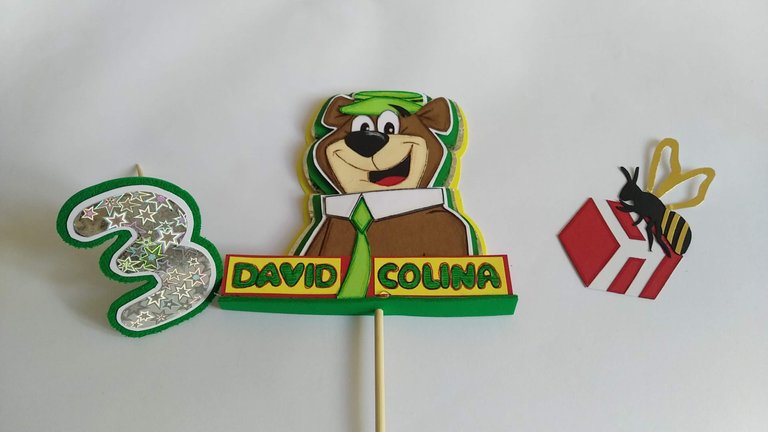
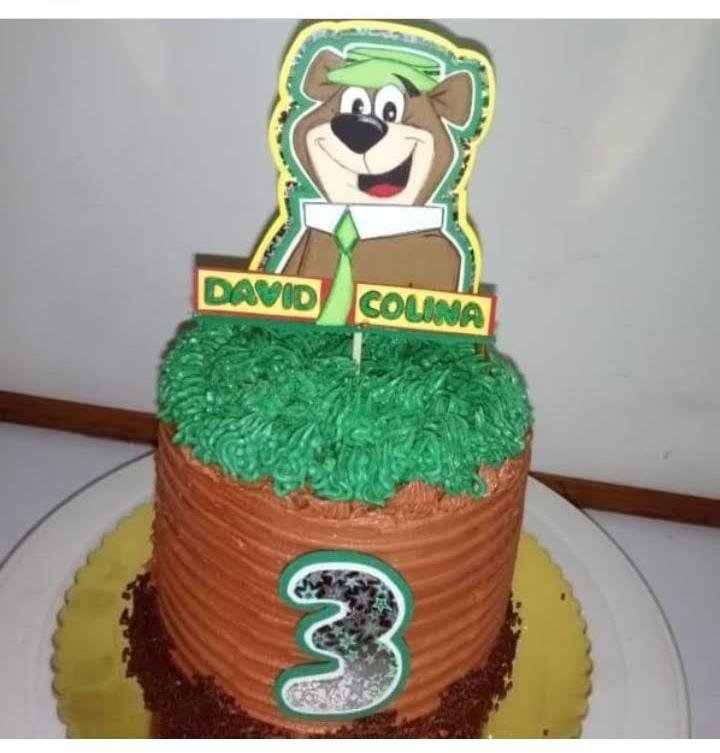
Siguiendo con el amor a los pasteles, hoy quiero mostrarles un pequeño topper realizado para un pastel de 22 cm de diámetro, pastel por supuesto realizado por la mejor pastelera, Mayda.
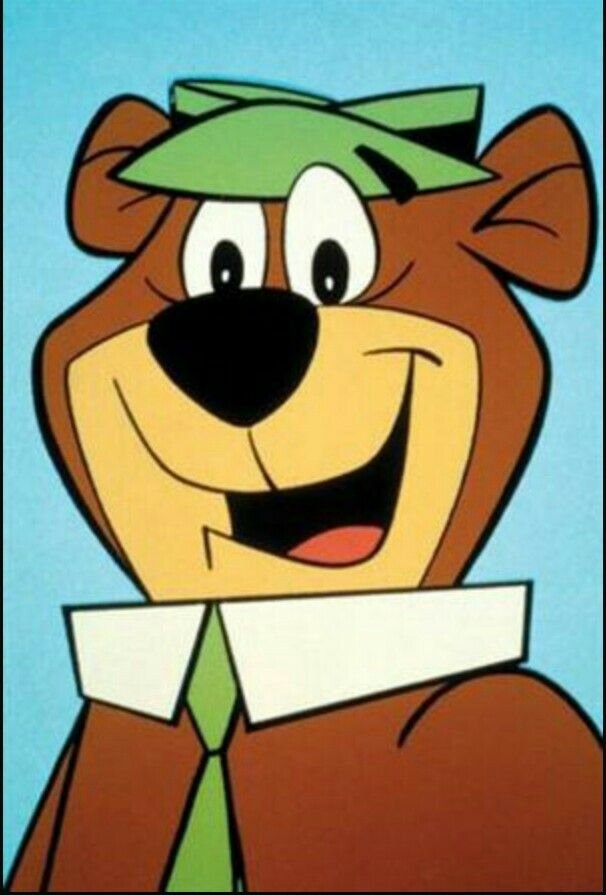
Esta decoración resulto muy especial porque crecí viendo estos cortos animados y me sorprendí mucho al saber que aún sigue siendo un personaje querido para muchas personas, después de tantas generaciones. El Oso Yogui nos enseñó la importancia del humor y la confianza en uno mismo, además que nos invitó a disfrutar de la naturaleza y la comida.
Espero este topper, para aquellos que disfrutamos de sus historietas, pueda traerles buenos momentos, lleno de alegrías y olor a infancia. Sin más, y esperando disfruten del trabajo realizado les dejo los materiales utilizados, el proceso y las imágenes del trabajo.
- Hoja blanca
- Lápiz.
- Cartulina de Colores: Marrón, verde claro, blanca, negra, crema, roja, amarilla, verde oscura.
- Cartulina plateada holográfica.
- Foami plano (cualquier color, es para hacer las capas).
- Foami verde texturizado.
- Marcadores de Colores.
- Color blanco.
- Lápiz.
- Cutter.
- Tijera
- Palitos de madera.
- Silicón frío.
- Silicón Caliente.
English
Celebrate life remembering children's characters from the past.
Continuing with the love of cakes, today I want to show you a small topper made for a cake of 22 cm in diameter, cake of course made by the best baker, Mayda.
This decoration turned out to be very special because I grew up watching these animated shorts and I was very surprised to know that it is still a beloved character for many people, after so many generations. Yogi Bear taught us the importance of humor and self-confidence and invited us to enjoy nature and food.
I hope this topper, for those of us who enjoy his comics, can bring you good moments, full of joy and the smell of childhood. Without further ado, and hoping you enjoy the work done, I leave you the materials used, the process and the images of the work.
- White sheet of paper
- Pencil.
- Colored cardboard: brown, light green, white, black, cream, red, yellow, dark green.
- Holographic silver cardboard.
- Flat Foami (any color, it is to make the layers).
- Textured green Foami.
- Color markers.
- White color.
- Pencil.
- Cutter.
- Scissors
- Wooden sticks.
- Cold silicone.
- Hot Silicone.
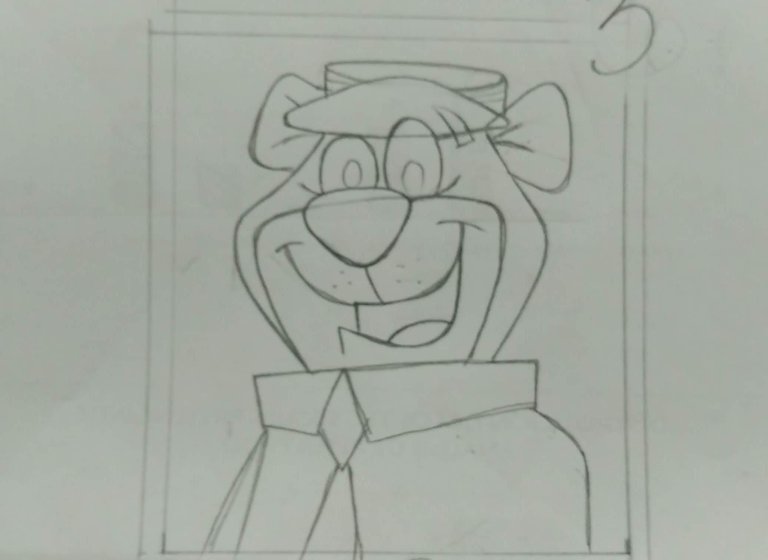
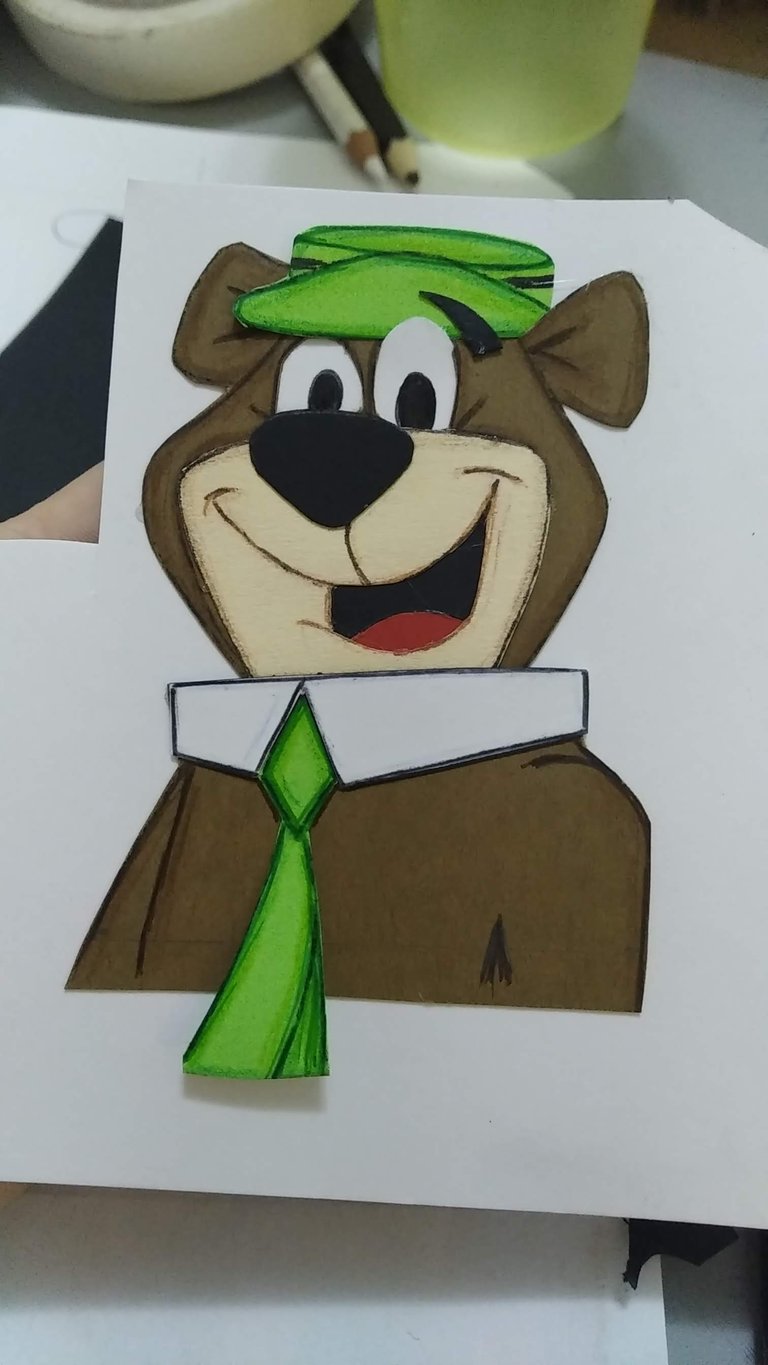
1.- Diseñar el modelo de Yogui a crear. Debe ajustarse al diámetro del pastel para que no quede ni muy grande ni muy pequeño. Por eso siempre es importante trabajar en conjunto con la pastelera.
1.- Design the Yogi model to be created. It should fit the diameter of the cake so that it is neither too big nor too small.
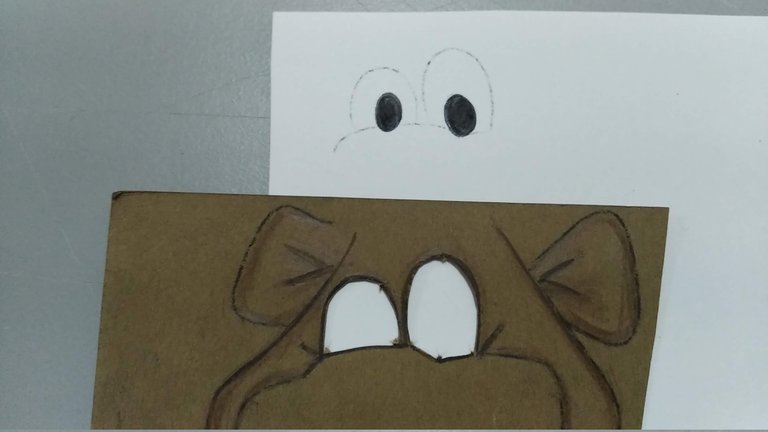
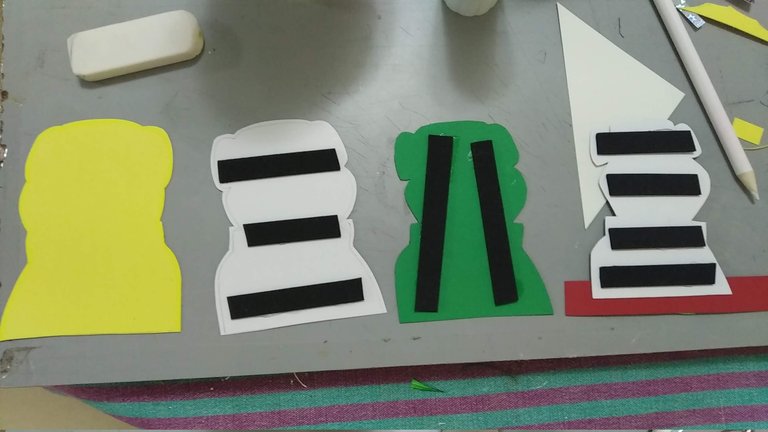
2.- Marcar cada una de las partes del diseño en las cartulinas de colores que correspondan.
2.- Mark each part of the design on the corresponding colored cards.
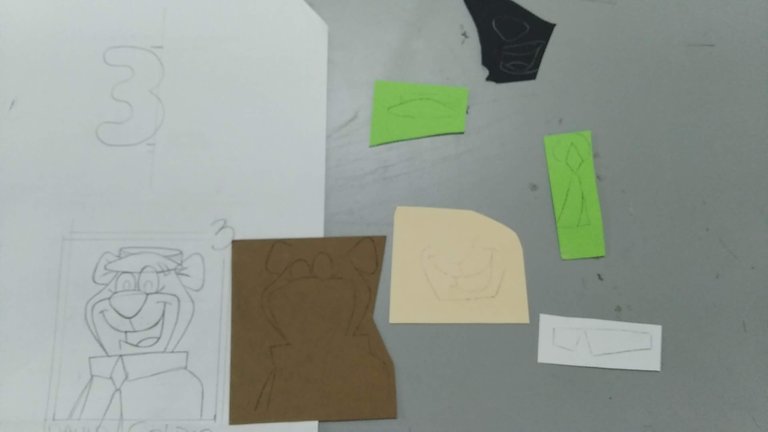
3.- A cada pieza aplicar marcadores de colores por sus bordes para darle profundidad y hacerlas resaltar.
3.- Apply colored markers along the edges of each piece to give it depth and make it stand out.

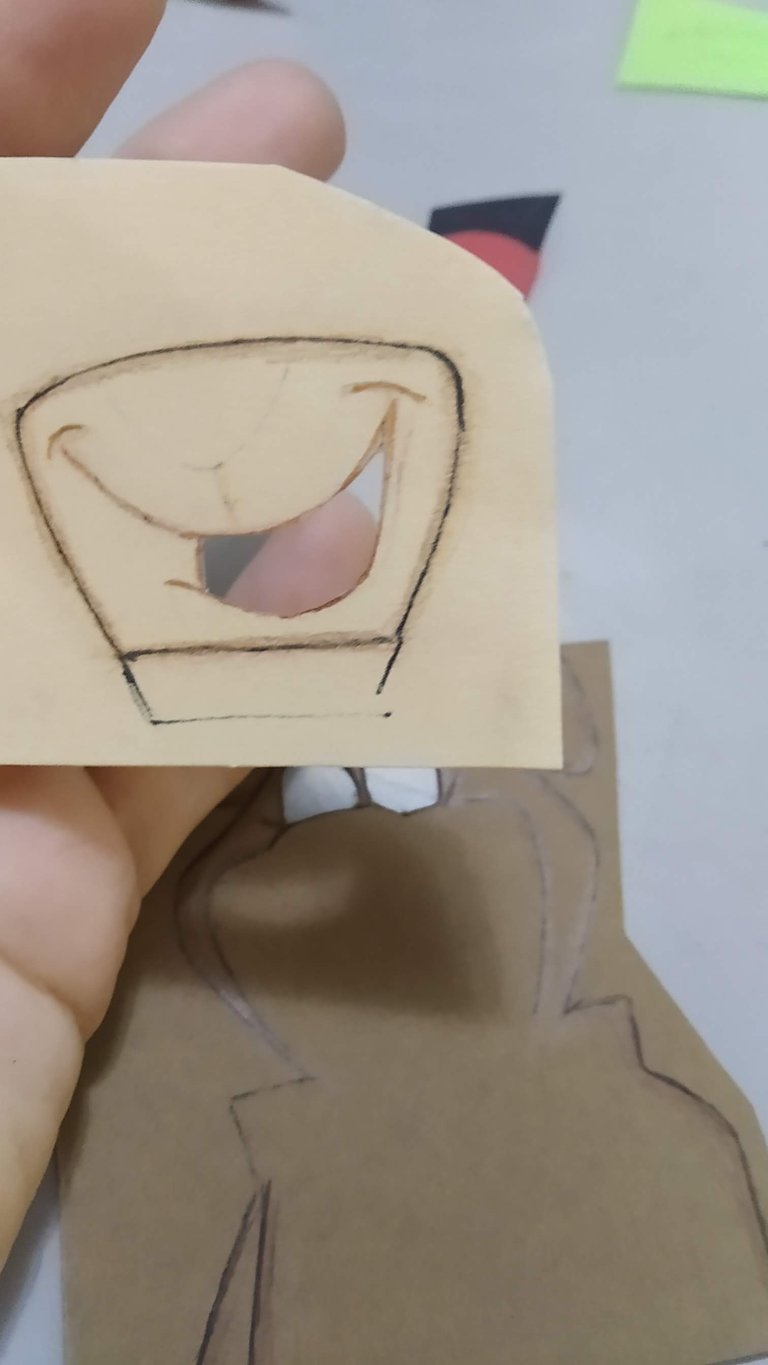
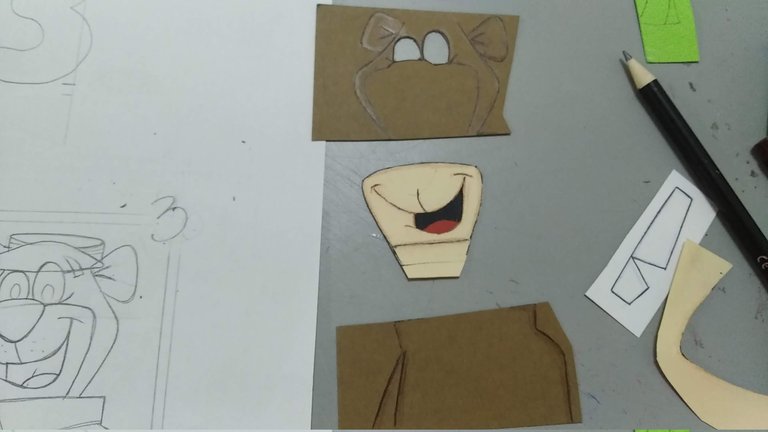
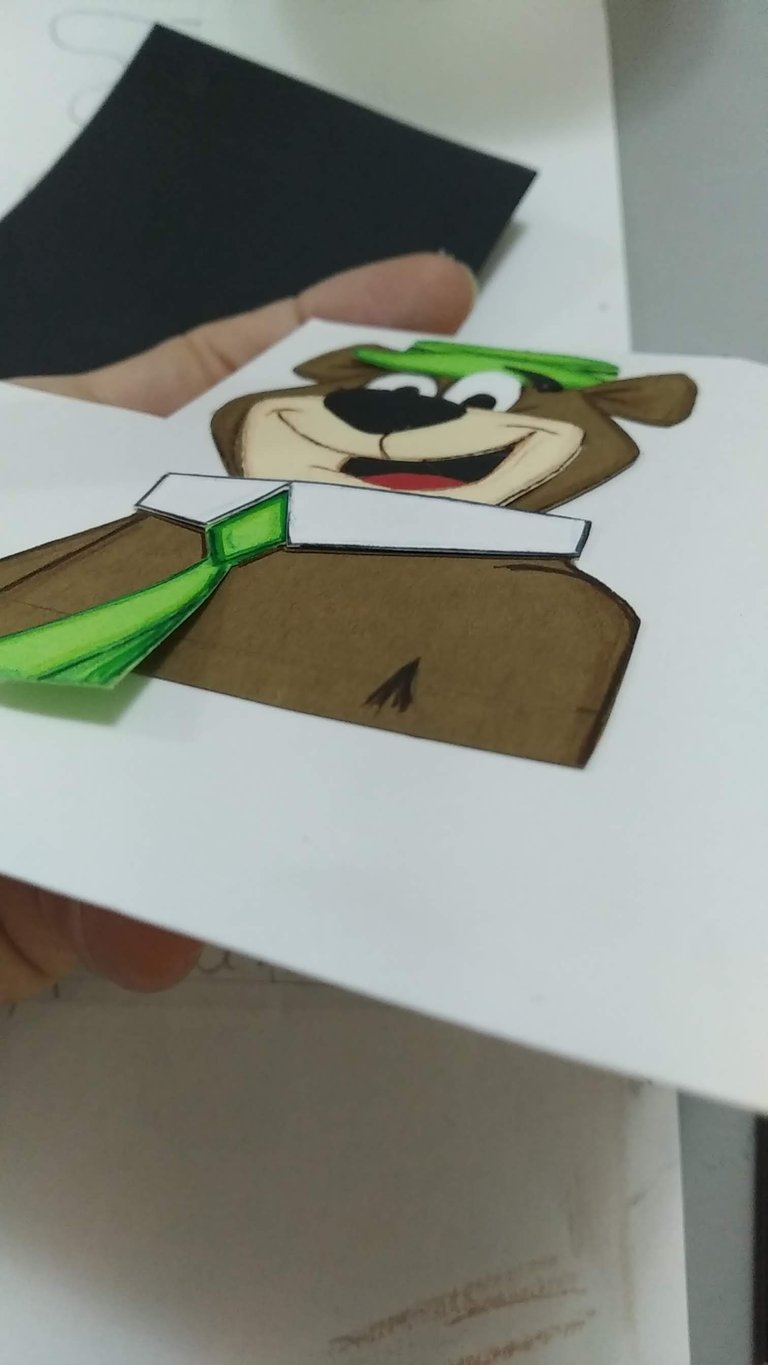
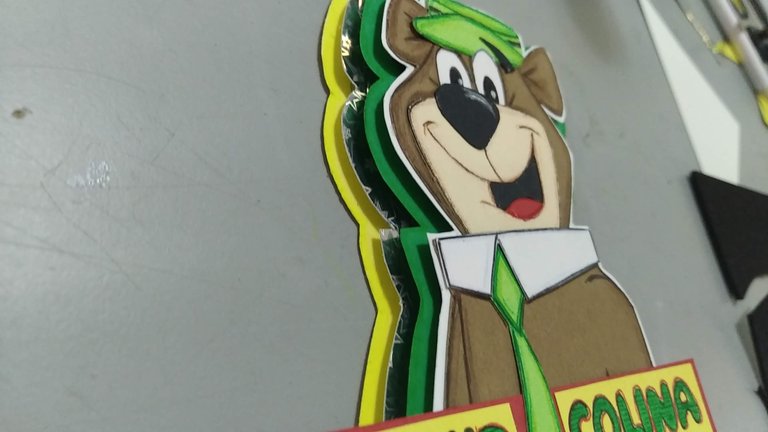
4.- Recortar las piezas, y siguiendo el patrón establecido, ensamblar (unir) las piezas para formar el personaje. Es importante señalar que en determinadas piezas habrá que dejar pequeños áreas para poder pegar las mismas.
4.- Cut out the pieces, and following the established pattern, assemble (join) the pieces to form the character. It is important to note that in certain pieces it will be necessary to leave small areas to glue them together.
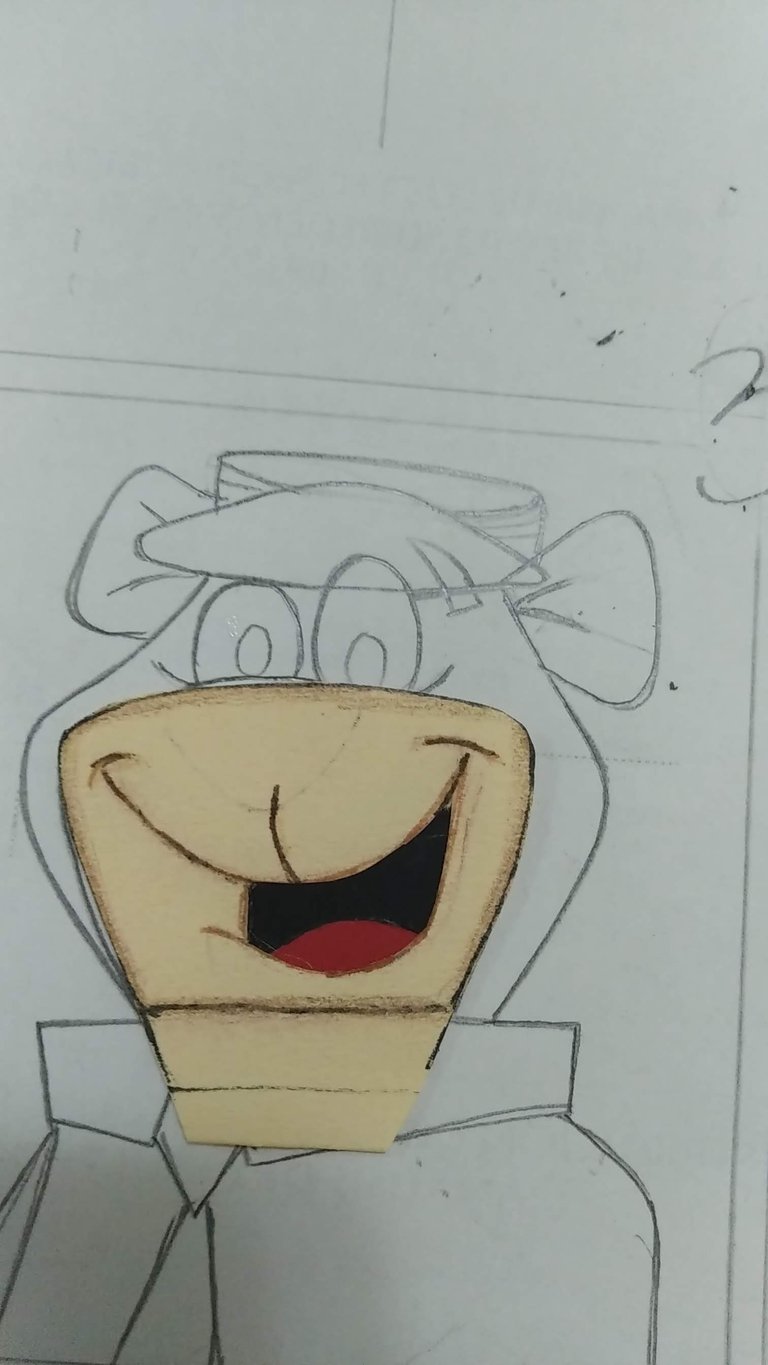
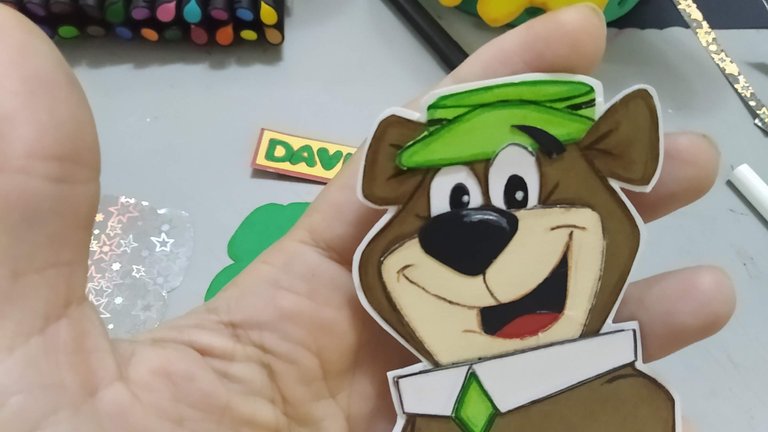
5.- Una vez ensambladas las piezas, pegar sobre cartulina blanca y recortar dejando un pequeño borde que sobresalga.
5.- Once the pieces are assembled, glue them on white cardboard and cut them out leaving a small border that sticks out.
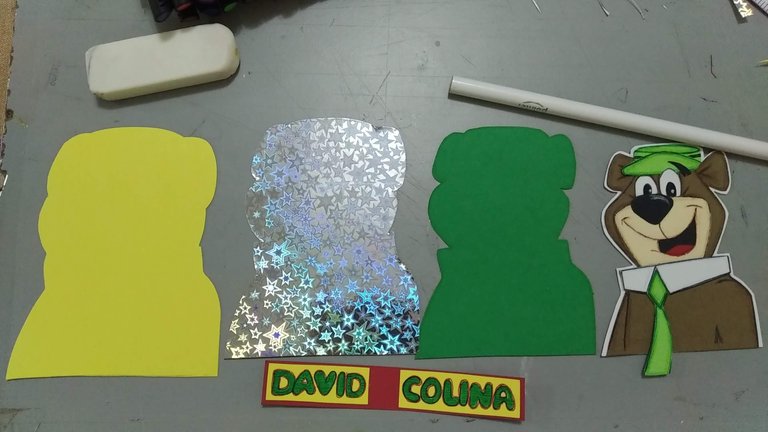
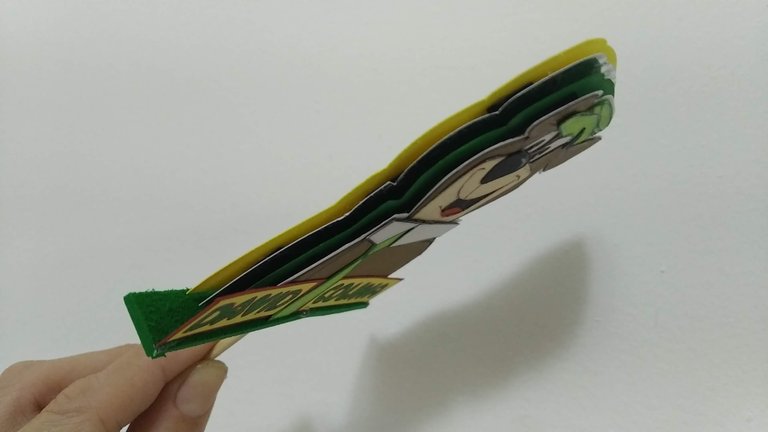
6.- Siguiendo el patrón anterior de la cartulina blanca, marcar la silueta en la cartulina verde oscuro y luego recortar dejando un pequeño borde adicional de separación. Luego tomando la silueta verde, marcar la forma en la cartulina holográfica recortando y dejando un pequeño borde adicional . Por último, tomando la silueta holográfica, marcar sobre la cartulina amarilla y recortar dejando un pequeño borde adicional. Nota: los bordes adicionales son los que le darán el efecto en capas.
6.- Following the previous pattern on the white cardstock, mark the silhouette on the dark green cardstock and then cut out leaving a small additional border for separation. Then taking the green silhouette, mark the shape on the holographic cardboard by cutting out and leaving a small additional border. Finally, taking the holographic silhouette, mark on the yellow cardstock and cut out leaving a small additional border. Note: the additional borders are what will give the layered effect.
7.- A las tres (3) primeras capas (blanca, verde y holográfica) en la parte posterior aplicarle pequeños tiras de foami plano para dar el relieve entre capa y capa. Pegar aplicando silicón frío cuidando de no exceder.
7.- To the first three (3) layers (white, green and holographic) on the back apply small strips of flat foami to give the relief between layers. Glue by applying cold silicone taking care not to overdo it.
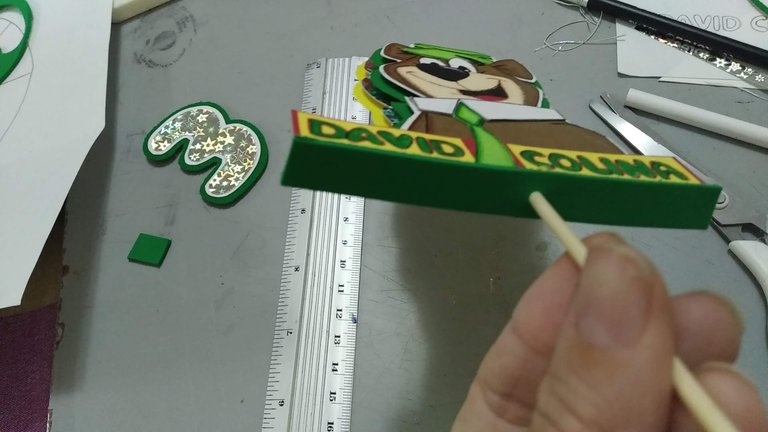
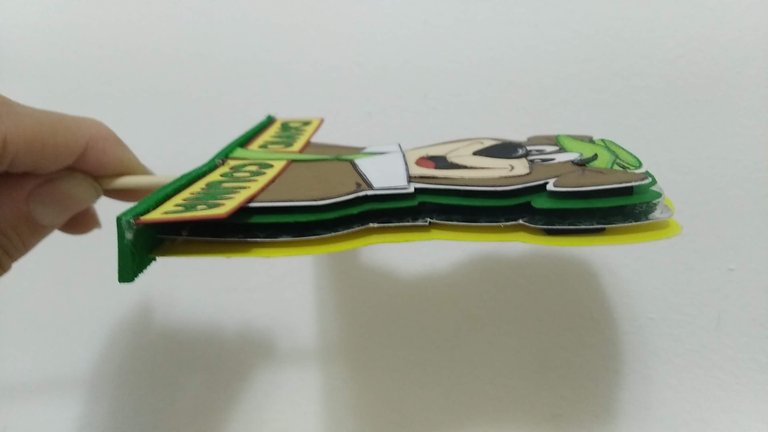
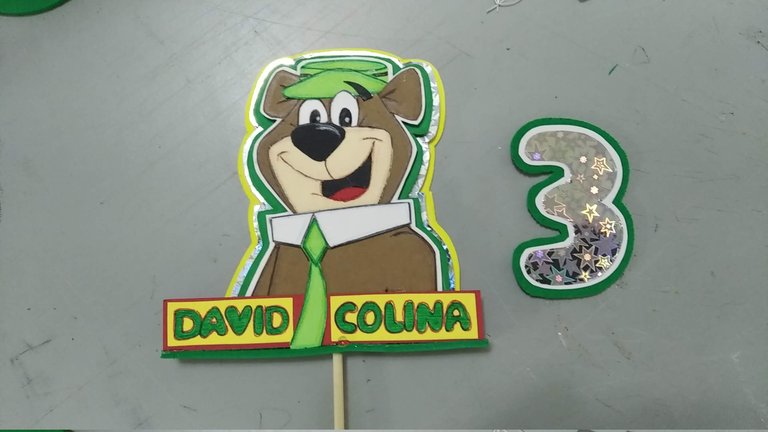
8.- Una vez secas las tiras de foami en la parte posterior, pegar las capas entre si. Comenzar de abajo hacia arriba para así tener mejor manejo de las piezas. Pegar aplicando silicón frío cuidando de no exceder. En este caso yo le puse el nombre del niño, pero es opcional.
8.- Once the foami strips are dry on the back, glue the layers together. Start from the bottom up to have a better handling of the pieces. Glue by applying cold silicone, taking care not to overlap. In this case I put the child's name, but it is optional.
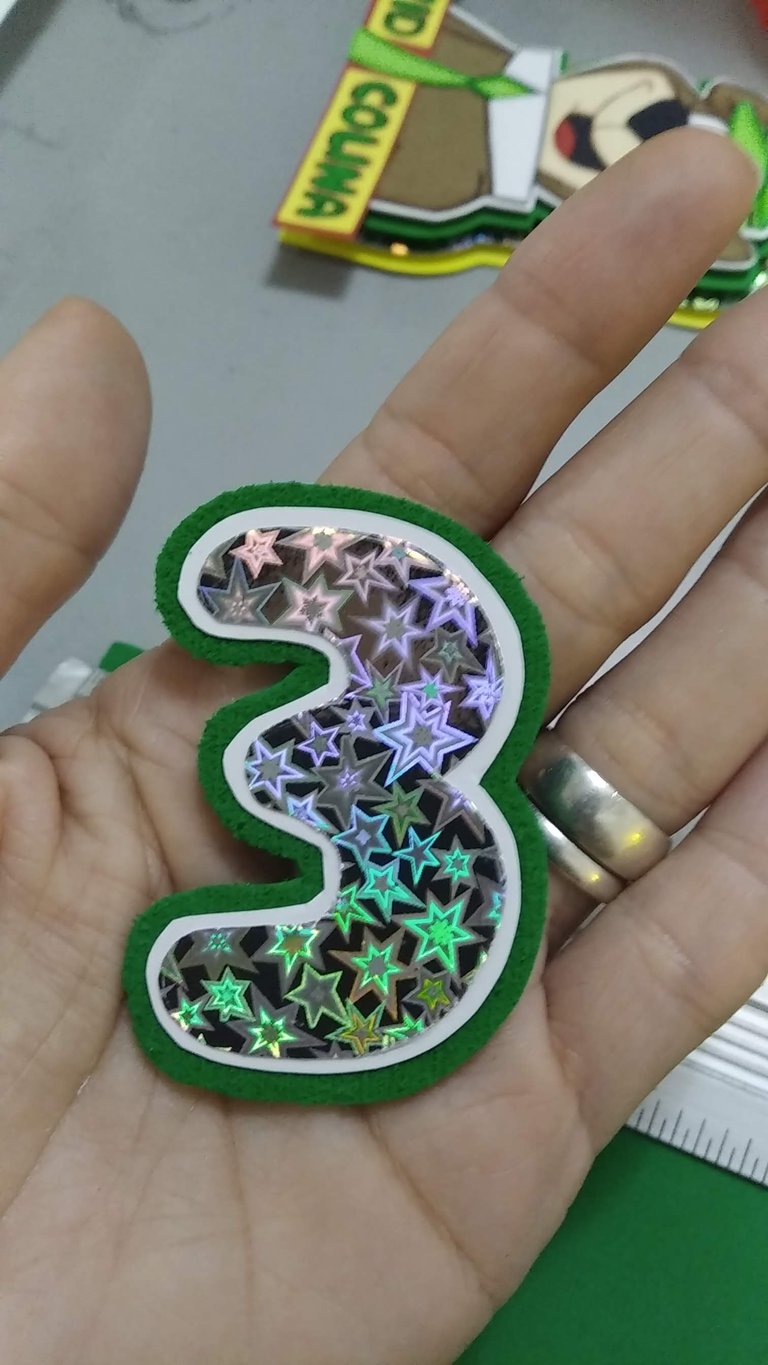
9.- Marcar y recortar el número 3 (edad del cumpleañero) y pegar sobre cartulina blanca y luego sobre foami texturizado verde.
9.- Mark and cut out the number 3 (birthday boy's age) and glue on white cardboard and then on green textured foami.
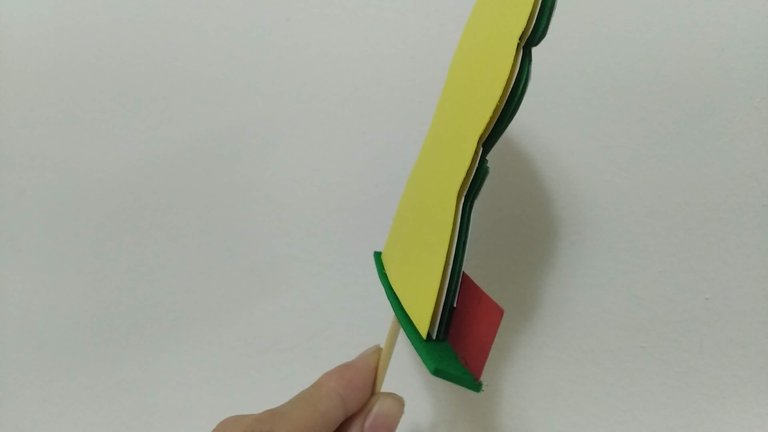
10.- Al personaje en capas, pegar el palito de madera (parte inferior) y cubrir la base con un pequeño trozo de foami texturizado.
10,- To the layered character, glue the wooden stick (bottom) and cover the base with a small piece of textured foami.
11.- Al numero 3 pegarle el palito de madera de manera frontal para poder poner de frente en la base del pastel.
11.- To number 3 glue the wooden stick in a frontal way to be able to put it in front on the base of the cake.
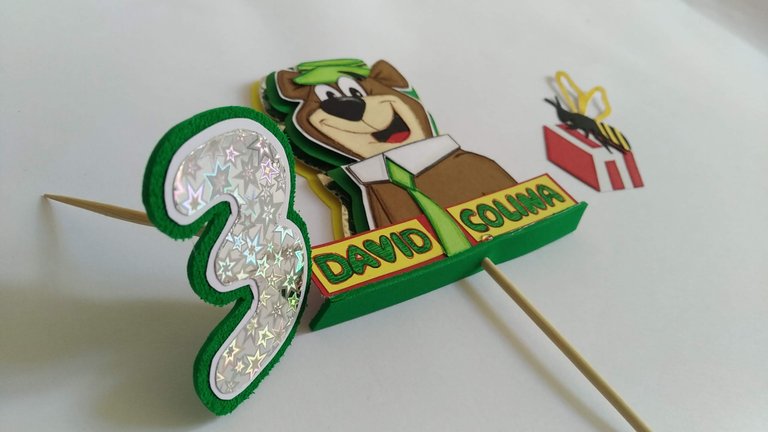
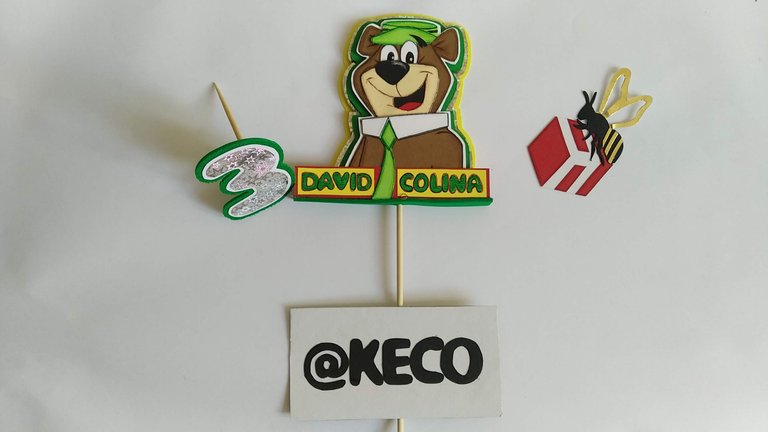
12.- Terminar la pieza, dando los toques finales que se considere necesario y sobre todo siéntase orgulloso por el trabajo realizado. Disfruten de las fotos finales.
12.- Finish the piece, giving the final touches that you consider necessary and above all feel proud of the work done. Enjoy the final photos.

Espero les haya gustado y sobre todo se entusiasmen a crear algo parecido para sorprender a familiares y amigos.
I hope you liked it and, above all, I hope you get excited to create something similar to surprise your family and friends.
Fuente
Para la traducción de esta publicación, utilicé el traductor DEEPL en su versión gratuita.
For the translation of this publication, I used the free version of the translator DEEPL in its free version.
SALUDOS / REGARDS
Todas las Fotos fueron tomadas con mi teléfono Redmi 7A.
Contenido original de @keco (fotos y texto) - Todos los derechos reservados Publicado en HIVE así como en mi instagram : http://instagram.com/carton_pintura_algo_mas
All Photos were taken with my Redmi 7A phone.
Original content from @keco (photos and text) - All rights reserved Posted on HIVE as well as on my instagram: http://instagram.com/carton_pintura_algo_mas
Que hermoso Topper amiga!
Definitivamente que recordar es vivir, y ver el oso Yogui me trae muchos recuerdos!
Saludos amiga!
Gracias @hetyg por tomar parte de tu valioso tiempo para comentar. Sin duda recordar es vivir, me alegra te haya gustado.
Saludos, bendiciones y éxitos.
¡Feliz dia de San valentin @keco 😀
Espero la estes pasando super chevere 🤗
MALOMI TV 💟
Gracias @malomi feliz día para ti también... me alegra verte por mis comentarios después de tanto tiempo.
Un fuerte abrazo.
Saludos, bendiciones y éxitos.
jajaja Un abrazo para ti tambien @keco
Espero estes chevere 💙 😁
Una idea genial, te quedó muy bien. Es un personaje que todavía conocen los niños de hoy. El tutorial está muy bien explicado. Gracias por compartir, estimada @keco. Que estés bien. Un fuerte abrazo desde Maracay.
Quedó muy bonito, me gustó ese relieve que obtuviste tras colocar varias capas. Buen trabajo.
Buen trabajo, se ven muy bien hechos, te felicito.
Congratulations @keco! You have completed the following achievement on the Hive blockchain and have been rewarded with new badge(s):
Your next target is to reach 9000 upvotes.
You can view your badges on your board and compare yourself to others in the Ranking
If you no longer want to receive notifications, reply to this comment with the word
STOPCheck out the last post from @hivebuzz:
Congratulations @keco! You received a personal badge!
Participate in the next Power Up month to get another one!
You can view your badges on your board and compare yourself to others in the Ranking
Check out the last post from @hivebuzz: